|
|
| Line 93: |
Line 93: |
| <br> | | <br> |
| While Jamie's 3-hit 5HP has some unique and interesting properties, there are a lot of downsides to this normal's design. The first 2 hits have finicky range and low damage, but are the only ones that hit when cancelled. In most combos it is strictly worse than 5LK, which has identical startup, longer range and higher cancel damage. The extra hitstun allows 5HP to cancel into 236MP or 214LP, but these are not important combo routes. From longer ranges where only the 3rd hit connects, 5HP is functionally a weak 12f non-cancellable poke; 5MK, 2MK, and 5HK are stronger in this context. | | While Jamie's 3-hit 5HP has some unique and interesting properties, there are a lot of downsides to this normal's design. The first 2 hits have finicky range and low damage, but are the only ones that hit when cancelled. In most combos it is strictly worse than 5LK, which has identical startup, longer range and higher cancel damage. The extra hitstun allows 5HP to cancel into 236MP or 214LP, but these are not important combo routes. From longer ranges where only the 3rd hit connects, 5HP is functionally a weak 12f non-cancellable poke; 5MK, 2MK, and 5HK are stronger in this context. |
| <br><br>
| | |
| The move is not entirely useless; when performed after Drive Rush, the extra frame advantage and multi-hit animation make it easy to confirm afterwards. The hits are also fast enough to break Drive Impact armor if done early enough, leading to a standing followup combo. In juggles where the last hit connects, it can be used to add free damage since it no longer requires a cancel. | | The move is not entirely useless; when performed after Drive Rush, the extra frame advantage and multi-hit animation make it easy to confirm afterwards. The hits are also fast enough to break Drive Impact armor if done early enough, leading to a standing followup combo. In juggles where the last hit connects, it can be used to add free damage since it no longer requires a cancel. |
| }} | | }} |
| Line 113: |
Line 113: |
| <br> | | <br> |
| Jamie's 5LK has properties more commonly seen in a 5LP; it can be chained into and has decent (but not exceptional) range, making it useful as combo filler or in some punishes. It has the unique ability to chain into itself infinitely on whiff, allowing Jamie to "dance" with the animation. Jamie shifts forward during the 5LK animation, so chaining out of it at the earliest timing will act as a sort of "kara-cancel" to keep him closer to the opponent. | | Jamie's 5LK has properties more commonly seen in a 5LP; it can be chained into and has decent (but not exceptional) range, making it useful as combo filler or in some punishes. It has the unique ability to chain into itself infinitely on whiff, allowing Jamie to "dance" with the animation. Jamie shifts forward during the 5LK animation, so chaining out of it at the earliest timing will act as a sort of "kara-cancel" to keep him closer to the opponent. |
| <br><br>
| | |
| 5LK can combo into LP or OD Freeflow Strikes, any Arrow Kick, or Super. Slower specials like Bakkai or Swagger Step (both of which are far stronger in Super cancels) require stronger combo routes. | | 5LK can combo into LP or OD Freeflow Strikes, any Arrow Kick, or Super. Slower specials like Bakkai or Swagger Step (both of which are far stronger in Super cancels) require stronger combo routes. |
| }} | | }} |
| Line 427: |
Line 427: |
| <br> | | <br> |
| Since 5LP loses much of its frame advantage at Drink Lv.1 and above, this Target Combo is the primary way to convert jab into damage. The MP ender can combo into 236LP/MP/PP, 214LP, 623K, or Super. The only safe enders after committing to the TC followup are 236PP and Lv.2 Super. If the opponent tries to punish the TC on block, Jamie can frame trap any non-invincible reversal with 236LP or the much safer 236PP. | | Since 5LP loses much of its frame advantage at Drink Lv.1 and above, this Target Combo is the primary way to convert jab into damage. The MP ender can combo into 236LP/MP/PP, 214LP, 623K, or Super. The only safe enders after committing to the TC followup are 236PP and Lv.2 Super. If the opponent tries to punish the TC on block, Jamie can frame trap any non-invincible reversal with 236LP or the much safer 236PP. |
| <br><br>
| | |
| The listed damage values include the standard 10%/20% scaling on LK and MP when starting a combo with 5LP; take this into consideration if calculating the combo damage when starting the combo with something else. | | The listed damage values include the standard 10%/20% scaling on LK and MP when starting a combo with 5LP; take this into consideration if calculating the combo damage when starting the combo with something else. |
| }} | | }} |
| Line 652: |
Line 652: |
| <br> | | <br> |
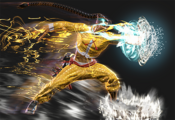
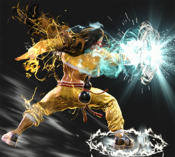
| Freeflow Strikes (or "Rekkas") are forward-moving strikes that can be confirmed into optional followups. Higher strength versions move farther but have slower startup, with the OD version gaining both speed and longer range. At Drink Lv.0 to Lv.3, each Rekka is a single hit, and only the first part of the sequence can cancel into Super. If well-spaced, the first meterless Freeflow Strike is often safe; the LP version is usually the best for this since it has less forward movement, but this can also cause it to whiff in max range cancels. The OD version is always safe. | | Freeflow Strikes (or "Rekkas") are forward-moving strikes that can be confirmed into optional followups. Higher strength versions move farther but have slower startup, with the OD version gaining both speed and longer range. At Drink Lv.0 to Lv.3, each Rekka is a single hit, and only the first part of the sequence can cancel into Super. If well-spaced, the first meterless Freeflow Strike is often safe; the LP version is usually the best for this since it has less forward movement, but this can also cause it to whiff in max range cancels. The OD version is always safe. |
| <br><br>
| | |
| When attempting to confirm into the 6P or 6K followups on hit, it's important to note that the followup speed depends on the strength of the first Rekka. Delaying the confirm too long, especially on HP Rekka, can cause the followup to come out without comboing. The 6K followup is slightly slower than 6P, which also makes the confirm slightly stricter. OD Rekka cancelled into Lv.2 Super is a great option on hit or block, leading to great combos or block pressure from a mid-range poke. | | When attempting to confirm into the 6P or 6K followups on hit, it's important to note that the followup speed depends on the strength of the first Rekka. Delaying the confirm too long, especially on HP Rekka, can cause the followup to come out without comboing. The 6K followup is slightly slower than 6P, which also makes the confirm slightly stricter. OD Rekka cancelled into Lv.2 Super is a great option on hit or block, leading to great combos or block pressure from a mid-range poke. |
| <br><br>
| | |
| This move and its followups can be used in juggles, but they can be very inconsistent depending on the screen position and opponent's juggle height; OD Rekkas are the most consistent overall, and the corner makes things easier as well. | | This move and its followups can be used in juggles, but they can be very inconsistent depending on the screen position and opponent's juggle height; OD Rekkas are the most consistent overall, and the corner makes things easier as well. |
| }} | | }} |
| Line 711: |
Line 711: |
| <br> | | <br> |
| The Punch followups are the preferred route for damage, juggles, and oki; they can be performed on hit, block, or whiff. The LP, MP, and OD Rekka starters require a manual delay to create a blockstring gap, while HP Rekka can automatically frame trap with a 3f gap at the fastest timing. While risky, this frame trap can be used against an opponent that tries to punish your first Rekka on block. On hit, stopping after the first 6P puts Jamie at a slight disadvantage; an unaware opponent may be caught off guard with a quick throw reset, but attempting this is sacrificing guaranteed damage and a knockdown. | | The Punch followups are the preferred route for damage, juggles, and oki; they can be performed on hit, block, or whiff. The LP, MP, and OD Rekka starters require a manual delay to create a blockstring gap, while HP Rekka can automatically frame trap with a 3f gap at the fastest timing. While risky, this frame trap can be used against an opponent that tries to punish your first Rekka on block. On hit, stopping after the first 6P puts Jamie at a slight disadvantage; an unaware opponent may be caught off guard with a quick throw reset, but attempting this is sacrificing guaranteed damage and a knockdown. |
| <br><br>
| | |
| The cancel reaction window applies to the 6P hit only and does not include the first 236P hit. In the startup column, [] refers to the total startup time for 236P~6P when the first Rekka whiffs, which can be useful for certain long-range punishes. | | The cancel reaction window applies to the 6P hit only and does not include the first 236P hit. In the startup column, [] refers to the total startup time for 236P~6P when the first Rekka whiffs, which can be useful for certain long-range punishes. |
| }} | | }} |
| Line 739: |
Line 739: |
| <br> | | <br> |
| The Punch followups are the preferred route for damage, juggles, and oki; they can be performed on hit, block, or whiff. Like the initial Rekka, this followup is 2 hits when at max Drink Level. All strengths of Rekka lead to the same 2-7f gap between hits on block, which can be used to frame trap the opponent. However, this frame gap is not very useful for two reasons: the initial Rekka is safe (meaning the opponent is less likely to hit a button while attempting a punish), and a Counterhit does not give Jamie the bonus frame advantage when both hits of the followup connect. | | The Punch followups are the preferred route for damage, juggles, and oki; they can be performed on hit, block, or whiff. Like the initial Rekka, this followup is 2 hits when at max Drink Level. All strengths of Rekka lead to the same 2-7f gap between hits on block, which can be used to frame trap the opponent. However, this frame gap is not very useful for two reasons: the initial Rekka is safe (meaning the opponent is less likely to hit a button while attempting a punish), and a Counterhit does not give Jamie the bonus frame advantage when both hits of the followup connect. |
| <br><br>
| | |
| The cancel reaction window applies to the 6P hit only and does not include the first 236P hit. In the startup column, [] refers to the total startup time for 236P~6P when the first Rekka whiffs, which can be useful for certain long-range punishes. | | The cancel reaction window applies to the 6P hit only and does not include the first 236P hit. In the startup column, [] refers to the total startup time for 236P~6P when the first Rekka whiffs, which can be useful for certain long-range punishes. |
| }} | | }} |
| Line 765: |
Line 765: |
| <br> | | <br> |
| The final 6P followup completes the Punch sequence. It can be done on hit, block, or whiff and has juggle potential. This sequence gets no oki midscreen if the opponent back rises, but it has good corner carry and is Jamie's most consistent combo ender. Like the first 6P followup, there is a blockstring gap between the final 2 hits that varies based on the button timing, but this is a very unsafe gimmick for beating the opponent's attempted Rekka punish. | | The final 6P followup completes the Punch sequence. It can be done on hit, block, or whiff and has juggle potential. This sequence gets no oki midscreen if the opponent back rises, but it has good corner carry and is Jamie's most consistent combo ender. Like the first 6P followup, there is a blockstring gap between the final 2 hits that varies based on the button timing, but this is a very unsafe gimmick for beating the opponent's attempted Rekka punish. |
| <br><br>
| | |
| In the startup column, [] refers to the total startup time for 236P~6P~6P when the first 2 hits of Rekka whiff at the fastest speed. In the Damage column, the first value lists the unscaled damage; () refers to the damage at 80% scaling, which is what would normally occur when starting a combo with the first Rekka. | | In the startup column, [] refers to the total startup time for 236P~6P~6P when the first 2 hits of Rekka whiff at the fastest speed. In the Damage column, the first value lists the unscaled damage; () refers to the damage at 80% scaling, which is what would normally occur when starting a combo with the first Rekka. |
| }} | | }} |
| Line 916: |
Line 916: |
| <br> | | <br> |
| Swagger Step is a forward lunging palm attack that can be made safe if well-spaced. It has juggle potential and can combo on the ground, though the slow startup limits the cancel routes that are actually useful. Since Rekka can only cancel the first hit into Super, Swagger Step is the better move for high damage Super cancels. Note that the Super confirm window is quite lenient, but becomes more strict when spaced to hit on later active frames (17f window at minimum). At Drink Lv.4, Jamie gains an additional followup for extra damage. | | Swagger Step is a forward lunging palm attack that can be made safe if well-spaced. It has juggle potential and can combo on the ground, though the slow startup limits the cancel routes that are actually useful. Since Rekka can only cancel the first hit into Super, Swagger Step is the better move for high damage Super cancels. Note that the Super confirm window is quite lenient, but becomes more strict when spaced to hit on later active frames (17f window at minimum). At Drink Lv.4, Jamie gains an additional followup for extra damage. |
| <br><br>
| | |
| Grounded cancel routes: (CH = +2 Counterhit, PC = +4 Punish Counter) | | Grounded cancel routes: (CH = +2 Counterhit, PC = +4 Punish Counter) |
| * 214HP: CH 5HK, CH 2HP | | * 214HP: CH 5HK, CH 2HP |
| Line 966: |
Line 966: |
| <br> | | <br> |
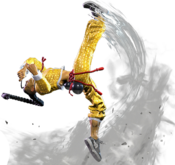
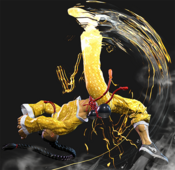
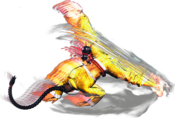
| Jamie's most consistent anti-air and OD reversal. He kicks upward before falling back away from the opponent. On hit, this transitions into a leaping followup attack that is fully invincible during the animation. On whiff or block, Jamie does not perform the extra hit, instead standing up from his grounded position. This recovery animation can cause some attempted punishes to whiff at longer ranges, but there is plenty of time to walk or dash forward, or to use a slow ranged punish starter. | | Jamie's most consistent anti-air and OD reversal. He kicks upward before falling back away from the opponent. On hit, this transitions into a leaping followup attack that is fully invincible during the animation. On whiff or block, Jamie does not perform the extra hit, instead standing up from his grounded position. This recovery animation can cause some attempted punishes to whiff at longer ranges, but there is plenty of time to walk or dash forward, or to use a slow ranged punish starter. |
| <br><br>
| | |
| Arrow Kick works well in juggles, but in grounded combos it can be finicky near max range. It also has no ability to Super cancel, so its damage potential in punishes is limited. It gives Jamie great oki on hit and the followup animation provides some nice corner carry as well. | | Arrow Kick works well in juggles, but in grounded combos it can be finicky near max range. It also has no ability to Super cancel, so its damage potential in punishes is limited. It gives Jamie great oki on hit and the followup animation provides some nice corner carry as well. |
| }} | | }} |
| Line 1,017: |
Line 1,017: |
| <br> | | <br> |
| Jamie drops to the ground and begins break dancing, slowly advancing toward the opponent. The slow startup limits this move's combo utility, though it can work in juggles when the situation arises. The high damage makes this great for super cancelling, and with 2 bars the OD version can be made safe on block with an eternity to hitconfirm. | | Jamie drops to the ground and begins break dancing, slowly advancing toward the opponent. The slow startup limits this move's combo utility, though it can work in juggles when the situation arises. The high damage makes this great for super cancelling, and with 2 bars the OD version can be made safe on block with an eternity to hitconfirm. |
| <br><br>
| | |
| Bakkai is ostensibly Jamie's "anti-projectile" move, though in practice it can be difficult to use like this. OD Bakkai is fairly reliable at mid-range against shoto fireballs, and HK Bakkai has the reach if your reactions are on point. LK and MK are harder to use because they travel a shorter distance during startup. And against strong projectiles like Guile's Sonic Boom, this move can only be done as a pure prediction, at which point you might as well just do random Drive Impact instead. | | Bakkai is ostensibly Jamie's "anti-projectile" move, though in practice it can be difficult to use like this. OD Bakkai is fairly reliable at mid-range against shoto fireballs, and HK Bakkai has the reach if your reactions are on point. LK and MK are harder to use because they travel a shorter distance during startup. And against strong projectiles like Guile's Sonic Boom, this move can only be done as a pure prediction, at which point you might as well just do random Drive Impact instead. |
| <br><br>
| | |
| Grounded cancel routes: (CH = +2 Counterhit, PC = +4 Punish Counter) | | Grounded cancel routes: (CH = +2 Counterhit, PC = +4 Punish Counter) |
| * 236HK: 2HP, PC 5HK | | * 236HK: 2HP, PC 5HK |
| Line 1,043: |
Line 1,043: |
| <br> | | <br> |
| Tenshin is a command grab reminiscent Yun, Yang, and Fei Long's similar grab from previous games, though it does not switch sides during the animation. It's a huge boost to Jamie's close range mixup game. He is not point blank after the grab, but is close enough to combo into moves like 5MP or 5HP. While Tenshin can hit as a Counterhit or Punish Counter, this has no effect on frame advantage (OD Tenshin does extra damage on Punish Counter only). | | Tenshin is a command grab reminiscent Yun, Yang, and Fei Long's similar grab from previous games, though it does not switch sides during the animation. It's a huge boost to Jamie's close range mixup game. He is not point blank after the grab, but is close enough to combo into moves like 5MP or 5HP. While Tenshin can hit as a Counterhit or Punish Counter, this has no effect on frame advantage (OD Tenshin does extra damage on Punish Counter only). |
| <br><br>
| | |
| The first attack following Tenshin is unscaled, but any following attacks have a 40% scaling penalty applied (100-60-50-40...). There is also an interesting situation after Punish Counter 214PP's tumbling Wall Splat. Jamie can combo into Tenshin after this, in which case the throw is scaled by 20% and any followups immediately skip to the 40% scaling penalty. | | The first attack following Tenshin is unscaled, but any following attacks have a 40% scaling penalty applied (100-60-50-40...). There is also an interesting situation after Punish Counter 214PP's tumbling Wall Splat. Jamie can combo into Tenshin after this, in which case the throw is scaled by 20% and any followups immediately skip to the 40% scaling penalty. |
| <br><br>
| | |
| Sometimes, Jamie will say a naughty word when he whiffs the grab. Be careful when playing Jamie with small children nearby. | | Sometimes, Jamie will say a naughty word when he whiffs the grab. Be careful when playing Jamie with small children nearby. |
| }} | | }} |


