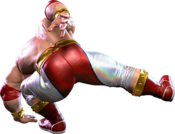
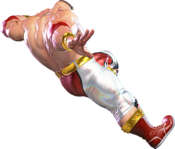
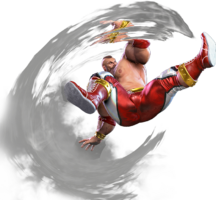
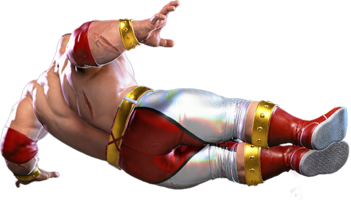
(→22MK) |
No edit summary |
||
| Line 38: | Line 38: | ||
| info = | | info = | ||
{{AttackDataCargo-SF6/Query|zangief_5hp}} | {{AttackDataCargo-SF6/Query|zangief_5hp}} | ||
Can be charged by holding HP during startup. Charging 5HP adds armor to the startup starting from frame 4. Charging can extend the startup by up to 16 additional frames (32f startup total). Fully charged 5HP deals 400 extra damage, knocks down on hit, and is +3 on block. Charged 5HP can be released early, but will lose its armored status and not gain the extra properties. | |||
Can be useful as a pseudo-Drive Impact to blow through fireballs, single pokes, and even Drive Impacts. | |||
}} | }} | ||
| Line 287: | Line 289: | ||
| info = | | info = | ||
{{AttackDataCargo-SF6/Query|zangief_3hk}} | {{AttackDataCargo-SF6/Query|zangief_3hk}} | ||
* | * Knocks an opponent back far. | ||
* If wallsplash, then combo opportunities. | * If wallsplash, then combo opportunities. | ||
* Looks like it gets airbourne enough to avoid low moves. | * Looks like it gets airbourne enough to avoid low moves. | ||
| Line 553: | Line 555: | ||
{{AttackDataCargo-SF6/Query|zangief_j360hk}} | {{AttackDataCargo-SF6/Query|zangief_j360hk}} | ||
{{AttackDataCargo-SF6/Query|zangief_j360kk}} | {{AttackDataCargo-SF6/Query|zangief_j360kk}} | ||
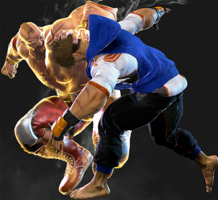
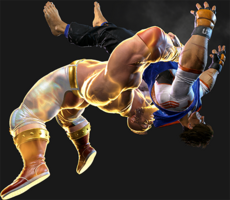
Aerial command grab. Fast startup allows it to be used as an air-to-air. Can be tiger knee'd to perform very low off the ground. | |||
OD Version has slightly improved range and can be juggled into from other moves. Notably, j.8HP combos into OD Borscht. | |||
}} | }} | ||
| Line 568: | Line 572: | ||
{{AttackDataCargo-SF6/Query|zangief_63214k_close}} | {{AttackDataCargo-SF6/Query|zangief_63214k_close}} | ||
{{AttackDataCargo-SF6/Query|zangief_63214kk_close}} | {{AttackDataCargo-SF6/Query|zangief_63214kk_close}} | ||
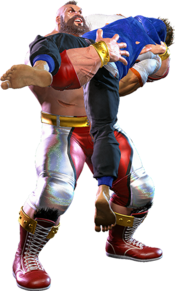
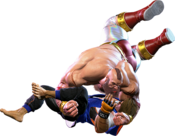
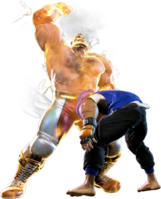
Slower startup than SPD and lower damage if it connects. In exchange, keeps Zangief close enough after the knockdown to Drive Rush in for oki. Non-OD versions are identical. | |||
}} | }} | ||
| Line 574: | Line 578: | ||
{{MoveDataCargo | {{MoveDataCargo | ||
| title = Siberian Express | | title = Siberian Express | ||
| subtitle = | | subtitle = Running Bear Grab | ||
| input = 63214K (Far) | | input = 63214K (Far) | ||
| images = | | images = | ||
| Line 585: | Line 589: | ||
{{AttackDataCargo-SF6/Query|zangief_63214hk_far}} | {{AttackDataCargo-SF6/Query|zangief_63214hk_far}} | ||
{{AttackDataCargo-SF6/Query|zangief_63214kk_far}} | {{AttackDataCargo-SF6/Query|zangief_63214kk_far}} | ||
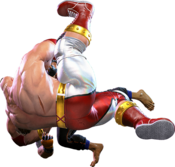
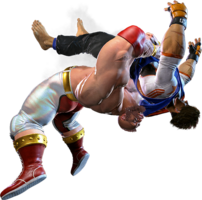
Zangief lunges forward and grabs the opponent. Has slow startup, but canceling certain normals into Siberian Express may surprise people. | |||
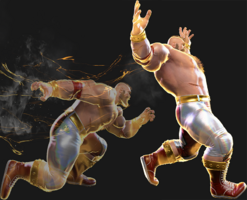
If done from very far away, Zangief will first raise his hands into the air, then charge forward. The "very far" version of Siberian Express has armor to cover the much longer startup and dash, but is otherwise mostly identical. | |||
}} | }} | ||
| Line 597: | Line 603: | ||
| info = | | info = | ||
{{AttackDataCargo-SF6/Query|zangief_22hk}} | {{AttackDataCargo-SF6/Query|zangief_22hk}} | ||
Counters certain kick attacks. | |||
}} | }} | ||
| Line 609: | Line 615: | ||
{{MoveDataCargoImage|imageHeight=200px|zangief_236236k|caption=''"I AM THE PROTECTOR OF RUSSIAN SKIES!"''}} | {{MoveDataCargoImage|imageHeight=200px|zangief_236236k|caption=''"I AM THE PROTECTOR OF RUSSIAN SKIES!"''}} | ||
| info = | | info = | ||
{{AttackDataCargo-SF6/Query|zangief_236236k}} | {{AttackDataCargo-SF6/Query|zangief_236236k}} | ||
Anti-air command grab super. Can juggle into from certain moves. | |||
}} | }} | ||
| Line 625: | Line 630: | ||
| info = | | info = | ||
{{AttackDataCargo-SF6/Query|zangief_236236p}} | {{AttackDataCargo-SF6/Query|zangief_236236p}} | ||
{{AttackDataCargo-SF6/Query|zangief_236236p_hold}} | {{AttackDataCargo-SF6/Query|zangief_236236p_hold}} | ||
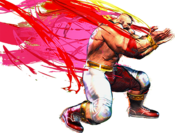
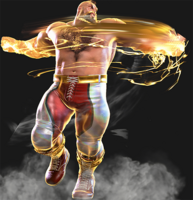
Zangief spins and creates a whirlwind that pulls opponents close on hit. Can be used to punish fireballs, Drive Impacts, or certain slower moves on reaction. Slow startup makes it easy to bait when used as a reversal. | |||
If Cyclone Lariat hits, Zangief has access to a few different follow-ups. | |||
*If no input is made, Zangief will slam the opponent behind him, side-switching and causing a knockdown. | |||
*If Left or Right is held, Zangief will perform a different ender that deals slightly less damage, but allows him to control which side the opponent ends up on. | |||
*If a punch button is held, Zangief will repeatedly spin in place, then eventually launch the opponent. This deals much less up-front damage than the other enders, but allows Zangief to combo afterwards with normals, Drive Rush, Level 1 Super, or OD Borscht. | |||
}} | }} | ||
| Line 640: | Line 651: | ||
{{AttackDataCargo-SF6/Query|zangief_720+p}} | {{AttackDataCargo-SF6/Query|zangief_720+p}} | ||
{{AttackDataCargo-SF6/Query|zangief_720+p(ca)}} | {{AttackDataCargo-SF6/Query|zangief_720+p(ca)}} | ||
*Long range, same as LP SPD. | |||
*Invincible startup makes it a scary reversal. | |||
}} | }} | ||
Revision as of 17:06, 7 June 2023
| Pre-release information
This page is under construction based on pre-release data. Join the SF6 Resource Hub for info on editing. |
Introduction
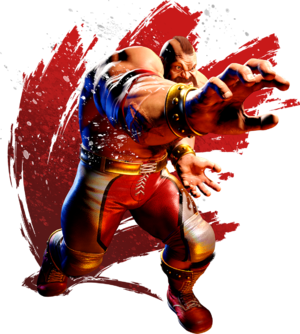
A colossal wrestler nicknamed the Red Cyclone. Zangief is dedicated to physical improvement and instructing his students.
Zangief is the original big-body grappler character, and acts as a lumbering monster who utilizes his size and long reach to intimidate the opponent into sitting still, before opening them back up with one of his many command grabs.
Zangief's plan is very simple: Play the throw game. Gief's huge size allows him to poke at longer distances than most of the cast, making it difficult for them to respond to his advance without surrendering space or committing to a high-risk option. 5MP, 5HP, 5LP, and 5MK can wear down the opponent while he looks for an opening. When the opportunity arises, Zangief lurches forward and grabs his opponent with the signature Screw Piledriver. This command grab has completely absurd range, is incredibly fast, and deals monstrous damage on hit. SPD has the potential to instantly turn the tide of a match and sets up the remainder of the Zangief's gameplan.
From here, Zangief continues to approach his opponent, moving between safer options and risker options to capitalize on the mistakes of his opponents. Zangief has dozens of ways to set up tick throws and punish poor decision making. He also has a bunch of unique tools for hard reads, like Siberian Express. Additionally, Zangief's signature Lariat allows him to become projectile invulnerable for a while, giving him the ability to punish fireballs thrown from too close. Coupled with his solid pokes, Zangief's tools make him a midrange menace who is well-equipped to muscle his opponent to the corner, where his offense becomes all the more terrifying.
While Zangief's offense is effective, he is notably not a vortex-style character like some other famous grapplers. Every time Gief uses Screw Piledriver, he sends the opponent nearly fullscreen and must take a big risk to keep the momentum going. Zangief is notably weak to keepaway, and in general must play very patiently. There are many strong zoners on the SF6 roster, which can make his life quite difficult. Even still, a good Zangief player is more than capable of overcoming his bad matchups compared to previous games. Choosing to stick with the Red Cyclone will let you live the wrestler power fantasy of your dreams while terrifying your opponents into submission.
| Pick if you like: | Avoid if you dislike: |
|---|---|
|
|
Classic & Modern Versions Comparison
| Missing Normals |
|
|---|---|
| Missing Command Normals |
|
| Shortcut-Only Specials |
|
| Assist Combos |
|
| Miscellaneous Changes |
|
Zangief loses access to some of his best neutral tools with Modern, 5MK and 2MK, both very valuable pokes with huge range while being relatively safe against Drive Impact. He also loses 5HK which typically grants high-damage Punish Counter combos like PC 5HK, 3MP > SA1 or PC 5HK, 3MP, OD Borscht Dynamite. 3HK, which is a situationally useful low/throw invincible option, is also gone.
Generally, Modern Zangief has lost a lot of his important long-range kicks for the sake of his inputs being made considerably easier for his rewarding specials. One-button inputs have made his anti-air with SA1 and Borscht Dynamite (360K), which are very rare to see, much more consistent and common. SA3 can be done without a jump and can be more easily mashed through the opponent's blockstrings, allowing him to use it in more situations at the cost of some of its insane damage. H Screw Piledriver can be done more easily without the fear of accidentally missing, though the Classic input is required to perform the longer range Light/Medium SPD. OD Screw Piledriver with its Modern input is a much bigger threat, allowing Zangief to walk up and scoop the opponent with ease, potentially even in whiff punish scenarios.
As a character with notoriously difficult inputs, Modern can curb some of the frustrations of playing Zangief normally, while also creating new ones due to the removal of important tools.
| Zangief | |
|---|---|
| Vitals | |
| Life Points | 11000 |
| Ground Movement | |
| Forward Walk Speed | 0.0364 |
| Backward Walk Speed | 0.025 |
| Forward Dash Speed | 22 |
| Backward Dash Speed | 25 |
| Forward Dash Distance | 1.007 |
| Backward Dash Distance | 0.712 |
| Drive Rush Min. Distance (Throw) | 0.327 |
| Drive Rush Min. Distance (Block) | 1.455 |
| Drive Rush Max Distance | 3.040 |
| Jumping | |
| Jump Speed | 5+38+3 |
| Jump Apex | 2.115 |
| Forward Jump Distance | 1.725 |
| Backward Jump Distance | 1.406 |
| Throws | |
| Throw Range | 1.02 |
| Throw Hurtbox | 0.49 |
| Frame Data Glossary - SF6 | |
|---|---|
| Hitbox Images |
🟥 (Red): Attack hitbox
🟩 (Green): Vulnerable hurtbox that can be hit by strikes/projectiles
🟦 (Blue): Vulnerable throw hurtbox
|
| Active |
How many frames a move remains active (can hurt opponents) for. For projectiles with a maximum active period, a value may be listed in [brackets], but this number is not factored into the move's total frame count.
|
| Cancel |
Available options for canceling one move into another move.
|
| Cancel Hitconfirm Windows |
Hitconfirm reaction windows into Special Moves, Target Combos, and Super Arts.
|
| Damage |
Attack damage on hit. Multi-hit moves may have the damage listed for individual hits as X,Y (or sometimes X*Y). Sometimes a move's damage changes depending on which active frame connects, or on cinematic vs. non-cinematic hits; in this case, multiple values may be listed, and it will be clarified in the move description.
|
| Damage Scaling |
Some moves cause additional damage scaling in combos. Refer to Game Data page for a more detailed breakdown. Scaling Types:
|
| Drive Rush Cancel Advantage |
Refers to the frame advantage when canceling a normal, command normal, or Target Combo into Drive Rush on hit or block (abbreviated as DRC for Drive Rush Cancel). This is calculated at the moment a follow-up attack can be input, not at the moment the character can block or perform movement options. An attack that with DRC +8 on Hit can link into an 8-frame attack, and DRC +4 on Block can create a true blockstring into a 4-frame attack. Note that any DRC on Block worse than +4 cannot form a true blockstring, allowing the opponent to interrupt with an invincible reversal. Most light normals are slightly negative after a DRC on block, meaning the opponent can mash their fastest normal to guarantee a counter-hit (though this requires fast reactions). The attacking character could punish this with Light > DRC into an immediate invincible attack, but this would be an incredibly expensive and high-risk gambit.
|
| Forced Knockdown |
Most airborne command normals, special moves, and Super Arts put the user in a "Forced Knockdown" state. While in this state, an air knockdown will occur when being hit by any attack, even if it would otherwise cause an air reset. As an example, Ryu's 2HP causes an air reset when used as an anti-air. Against a move like Cammy's Hooligan Combination, however, the 2HP puts her into an air knockdown state. This allows Ryu to successfully cancel 2HP into Shoryuken for a juggle, similar to how a Drive Impact wall splat works. Taking advantage of Forced Knockdown juggles is important for dealing with moves like Ken's Dragonlash, Dhalsim's Air Teleport, or Kimberly's 6HK~Hop sequence. Moves that already cause an air knockdown, like most j.MP air-to-airs, will not display the "Forced Knockdown" message.
|
| Guard |
Refers to the direction an attack must be blocked. L is for Low attacks (must be blocked crouching), H is for High attacks/overheads (must be blocked standing), LH is for attacks that can be blocked crouching or standing. T is for Throw attacks which cannot be blocked.
|
| Juggles |
When a character is put into an Air Knockdown state, it is often possible to follow up with a Juggle attack before they hit the ground. In the simplest terms, there are 2 main juggle states:
The following is a more detailed overview of the SF6 juggle system:
Juggle Start (JS): When starting a juggle, the opponent's JC will be set to this value. May be different vs. standing and airborne opponents.
Juggle Increase (JI): When opponent is already in a juggle state, attacks will increase the opponent's JC by this amount.
Juggle Limit (JL): Property of an attack hitbox that determines whether it connects on a juggled opponent. The JL must be ≥ the opponent's JC to hit successfully.
An example to tie everything together:
Drive Rush notes:
More recently, the official definitions used by Capcom are slightly different than these community-designated terms. When reading official patch notes, the following terms are used instead:
|
| On Hit/Block |
These are frame advantage values when the attack hits or is blocked. If the number is positive, then the move will recover before the defender can act again. If the number is negative, the defender will be able to act before the attacker and maybe even punish. KD refers to knockdown on hit, and the listed KD Advantage refers to how many frames the attacker can act before the defender finishes their wakeup animation.
|
| Recovery |
How many frames it takes for a move to finish after the active frames have finished. For projectiles, recovery is considered to begin after the first active frame.
|
| Startup |
How many frames it takes before the move becomes 'active' or have a hit box. The last startup frame and the first active frame are the same frame, meaning all values are written as Startup + 1.
|
| IASA / Actionable Recovery |
Some moves play out an extended recovery animation when no other button/direction is input (for crouching moves, it applies when holding any down direction). These are often referred to as "actionable recovery" frames; in some games, the term IASA (Interruptible As Soon As) refers to the frame that Actionable Recovery begins. Letting the Actionable Recovery frames play out can change the character's position, potentially setting up spacing traps by recovering farther away. For example, Manon 5HP will recover much farther away from the opponent if no input is performed immediately after her recovery; holding back or down-back to block will keep her much closer to the opponent.
|
Normals
Standing Normals
5LP
| Startup | Active | Recovery | Cancel | Damage | Guard | On Hit | On Block |
|---|---|---|---|---|---|---|---|
| 7(4) | 3 | 9 | Chn Sp SA | 400 | LH | +4 | +2 |
- Chains into 5LP/2LP/2LK
5MP
| Startup | Active | Recovery | Cancel | Damage | Guard | On Hit | On Block |
|---|---|---|---|---|---|---|---|
| 9 | 4 | 17 | TC | 700 | LH | +2 | -2 |
- Only combos into its TC follow-up on Counter Hit, Punish Counter, or when used after Drive Rush.
5HP
| Startup | Active | Recovery | Cancel | Damage | Guard | On Hit | On Block |
|---|---|---|---|---|---|---|---|
| (6~22)+10 | 3 | 22(24) | - | 1000 | LH | +3 | -3 |
Can be charged by holding HP during startup. Charging 5HP adds armor to the startup starting from frame 4. Charging can extend the startup by up to 16 additional frames (32f startup total). Fully charged 5HP deals 400 extra damage, knocks down on hit, and is +3 on block. Charged 5HP can be released early, but will lose its armored status and not gain the extra properties.
Can be useful as a pseudo-Drive Impact to blow through fireballs, single pokes, and even Drive Impacts.
5LK
| Startup | Active | Recovery | Cancel | Damage | Guard | On Hit | On Block |
|---|---|---|---|---|---|---|---|
| 7 | 2 | 17 | Sp SA | 400 | LH | -2 | -4 |
5MK
| Startup | Active | Recovery | Cancel | Damage | Guard | On Hit | On Block |
|---|---|---|---|---|---|---|---|
| 10 | 4 | 19 | - | 900 | LH | +1 | -4 |
5HK
| Startup | Active | Recovery | Cancel | Damage | Guard | On Hit | On Block |
|---|---|---|---|---|---|---|---|
| 13 | 4 | 21 | - | 1000 | LH | +3 | +1 |
Crouching Normals
2LP
| Startup | Active | Recovery | Cancel | Damage | Guard | On Hit | On Block |
|---|---|---|---|---|---|---|---|
| 6(3) | 2 | 8 | Chn Sp SA | 300 | LH | +6 | +1 |
- Chains into 5LP/2LP/2LK
2MP
| Startup | Active | Recovery | Cancel | Damage | Guard | On Hit | On Block |
|---|---|---|---|---|---|---|---|
| 8 | 3 | 16 | Sp SA | 700 | LH | +3 | -1 |
- Poor range, but can combo into sa2.
2HP
| Startup | Active | Recovery | Cancel | Damage | Guard | On Hit | On Block |
|---|---|---|---|---|---|---|---|
| 11 | 9 | 35 | - | 1000 | LH | KD +20 | -20 |
- Works well as a basic anti-air, but struggles with crossups.
2LK
| Startup | Active | Recovery | Cancel | Damage | Guard | On Hit | On Block |
|---|---|---|---|---|---|---|---|
| 4(3) | 3 | 12 | Chn | 250 | L | 0 | -3 |
- Self cancellable and chains into 5LP/2LP/2LK.
- Fastest grounded normal.
- Bad on block.
2MK
| Startup | Active | Recovery | Cancel | Damage | Guard | On Hit | On Block |
|---|---|---|---|---|---|---|---|
| 9 | 3 | 18 | - | 700 | L | +3 | -2 |
- Strong frame-trap after blocked lights.
- Very vulnerable to DI and parry.
2HK
| Startup | Active | Recovery | Cancel | Damage | Guard | On Hit | On Block |
|---|---|---|---|---|---|---|---|
| 12 | 3 | 27 | - | 1000 | L | KD +36 | -13 |
- Incredible range.
- Good damage.
- Very vulnerable to DI and parry.
Jumping Normals
j.LP
| Startup | Active | Recovery | Cancel | Damage | Guard | On Hit | On Block |
|---|---|---|---|---|---|---|---|
| 5 | 7 | 3 land | - | 300 | H | +11 | +8 |
j.MP
| Startup | Active | Recovery | Cancel | Damage | Guard | On Hit | On Block |
|---|---|---|---|---|---|---|---|
| 8 | 5 | 3 land | - | 700 | H | +10(+14) | +7(+11) |
- Puts airborne opponents into a limited juggle state on Counter Hit / Punish Counter
j.HP
| Startup | Active | Recovery | Cancel | Damage | Guard | On Hit | On Block |
|---|---|---|---|---|---|---|---|
| 9 | 6 | 3 land | - | 800 | H | +15(+21) | +7(+13) |
- Spikes down airborne opponents on hit.
j.LK
| Startup | Active | Recovery | Cancel | Damage | Guard | On Hit | On Block |
|---|---|---|---|---|---|---|---|
| 5 | 10 | 3 land | - | 300 | H | +2(+11) | -1(+8) |
j.MK
| Startup | Active | Recovery | Cancel | Damage | Guard | On Hit | On Block |
|---|---|---|---|---|---|---|---|
| 8 | 8 | 3 land | - | 500 | H | +6(+14) | +3(+11) |
j.HK
Command Normals
3MP
| Startup | Active | Recovery | Cancel | Damage | Guard | On Hit | On Block |
|---|---|---|---|---|---|---|---|
| 7 | 3 | 21 | Sp SA | 800 | LH | -1 | -3 |
- It forces stand. Meaning you can always combo into lariat next.
- Lauches the opponent into the air when hitting an airbourne opponent. It can be cancelled into sa1.
6MK
| Startup | Active | Recovery | Cancel | Damage | Guard | On Hit | On Block |
|---|---|---|---|---|---|---|---|
| 14 | 7 | 13 | - | 700 | LH | +1(+7) | -4(+2) |
- If this hits at max range, it is +8, allowing for combos.
- At medium range, it is still between +2 - +5
- Bad recovery.
6HP
| Startup | Active | Recovery | Cancel | Damage | Guard | On Hit | On Block |
|---|---|---|---|---|---|---|---|
| 14 | 5 | 15(17) | Sp SA | 1000 | LH | +8 | +4 |
6HK
| Startup | Active | Recovery | Cancel | Damage | Guard | On Hit | On Block |
|---|---|---|---|---|---|---|---|
| 22(24) | 7(5) | 25 | - | 1300 | H | KD +28(+30) | -9(-5) |
- Can be used to punish shoryuken at the peak of its height, into various air juggle combos.
- Otherwise, very unsafe. Has no fireball avoidance.
3HK
| Startup | Active | Recovery | Cancel | Damage | Guard | On Hit | On Block |
|---|---|---|---|---|---|---|---|
| 16 | 4 | 40 | - | 1000 | LH | KD +21 | -18 |
- Knocks an opponent back far.
- If wallsplash, then combo opportunities.
- Looks like it gets airbourne enough to avoid low moves.
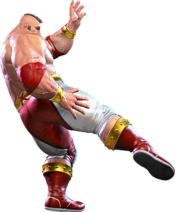
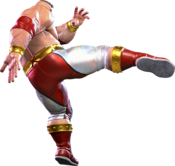
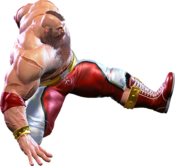
22MK
| Startup | Active | Recovery | Cancel | Damage | Guard | On Hit | On Block |
|---|---|---|---|---|---|---|---|
| 9 | 3 | 17 | TC | 500 | L | +4 | -3 |
- First hit is +4/8, great to keep your turn going.
- Moves Zangief forward quickly.
j.2HP
| Startup | Active | Recovery | Cancel | Damage | Guard | On Hit | On Block |
|---|---|---|---|---|---|---|---|
| 9 | 9 | 8 land | - | 800 | H | +14(+18) | +10(+14) |
j.8HP
| Startup | Active | Recovery | Cancel | Damage | Guard | On Hit | On Block |
|---|---|---|---|---|---|---|---|
| 8 | 4 | 3 land | Sp | 900 | H | +18(+21) | +13(+16) |
Target Combos
5MP~MP~MP
| Startup | Active | Recovery | Cancel | Damage | Guard | On Hit | On Block |
|---|---|---|---|---|---|---|---|
| 9 | 4 | 20 | TC | 600 | LH | +2 | -6 |
- Only combos from 5MP on Counter Hit, Punish Counter, or when used after Drive Rush.
- Works fine as a frame trap starter for SPD and 720, both normally and DR.
| Startup | Active | Recovery | Cancel | Damage | Guard | On Hit | On Block |
|---|---|---|---|---|---|---|---|
| 15 | 3 | 32 | - | 900 | LH | KD +27 | -17 |
22MK~MK~MK
| Startup | Active | Recovery | Cancel | Damage | Guard | On Hit | On Block |
|---|---|---|---|---|---|---|---|
| 9 | 3 | 19 | Sp SA TC | 500 | L | -3 | -4 |
- Only combos into the third hit of the TC on Counter Hit.
| Startup | Active | Recovery | Cancel | Damage | Guard | On Hit | On Block |
|---|---|---|---|---|---|---|---|
| 10 | 3 | 24 | Sp SA | 700 | L | -2 | -10 |
Throws
Neutral Throw (5LPLK)
| Startup | Active | Recovery | Cancel | Damage | Guard | On Hit | On Block |
|---|---|---|---|---|---|---|---|
| 5 | 3 | 23 | - | 1200,600 (2040,600) | T | KD +22(+0) | - |
- Input can be held for an additonal hit (+600 additional damage)
- Punish Counter:
Forward Throw (6LPLK)
| Startup | Active | Recovery | Cancel | Damage | Guard | On Hit | On Block |
|---|---|---|---|---|---|---|---|
| 5 | 3 | 23 | - | 1500 (2550) | T | KD +10 | - |
- Punish Counter:
Back Throw (4LPLK)
| Startup | Active | Recovery | Cancel | Damage | Guard | On Hit | On Block |
|---|---|---|---|---|---|---|---|
| 5 | 3 | 23 | - | 1400 (2380) | T | KD +8 | - |
- Side switches
- Punish Counter:
Neutral Crouch Throw (2LPLK)
| Startup | Active | Recovery | Cancel | Damage | Guard | On Hit | On Block |
|---|---|---|---|---|---|---|---|
| 5 | 3 | 23 | - | 1500 (2550) | T | KD +14 | - |
- Side switches
- Punish Counter:
Forward Crouch Throw (3LPLK)
| Startup | Active | Recovery | Cancel | Damage | Guard | On Hit | On Block |
|---|---|---|---|---|---|---|---|
| 5 | 3 | 23 | - | 1200 (2040) | T | KD +28 | - |
- Punish Counter:
Back Crouch Throw (1LPLK)
| Startup | Active | Recovery | Cancel | Damage | Guard | On Hit | On Block |
|---|---|---|---|---|---|---|---|
| 5 | 3 | 23 | - | 1500 (2550) | T | KD +9 | - |
- Side switches
- Punish Counter:
Drive System
Drive Impact (HPHK)
| Startup | Active | Recovery | Cancel | Damage | Guard | On Hit | On Block |
|---|---|---|---|---|---|---|---|
| 26 | 2 | 35 | - | 800 | LH | KD +35 / Wall Splat KD +65 | -3 / Wall Splat HKD +72 |
See Drive Impact
When cancelled from a normal, these are the important blockstring gaps; a gap of N will trade with an N-frame startup attack; [] = Burnout
- -
- Note: gaps of 8f or less cannot be escaped by jumping
Drive Reversal (6HPHK)
| Startup | Active | Recovery | Cancel | Damage | Guard | On Hit | On Block |
|---|---|---|---|---|---|---|---|
| 20 | 3 | 26(31) | - | 500 recoverable | LH | KD +23 | -6 |
See Drive Reversal
- Full Invuln: 1-22f; Armor Break
Drive Parry (MPMK)
| Startup | Active | Recovery | Cancel | Damage | Guard | On Hit | On Block |
|---|---|---|---|---|---|---|---|
| 1 | 12 or until released | 33(1)(11) | - | - | - | - | - |
See Drive Parry
- Perfect Parry has only 1f recovery, and disables the opponent from canceling their attack
- Perfect Parry vs. projectiles puts you into a fixed 11f recovery
Drive Rush (66)
No results
See Drive Rush. Frame data shown in (parentheses) refers to the version used after Parry.
- Notable Drive Rush cancel combo routes:
- Notable Drive Rush cancel blockstring gaps:
Special Moves
Double Lariat (PP)
| Startup | Active | Recovery | Cancel | Damage | Guard | On Hit | On Block |
|---|---|---|---|---|---|---|---|
| 15 | 2(3)2(4)2(8)2(6)2 | 27 | SA3 | 1400 | LH | KD +27(+56) | -12(-41) |
- Projectile invincible on frames 6-45
- Can hold forward or back to move around slightly during the Lariat.
- Connects only once on hit, but four times on block, though all hits but the first whiff vs crouching opponents.
| Startup | Active | Recovery | Cancel | Damage | Guard | On Hit | On Block |
|---|---|---|---|---|---|---|---|
| 12 | 2(2)2(3)2(6)2(4)2 | 26 | SA2 SA3 (1st) | 700,1000 (1700) | LH | KD +38(+57) | -11(-30) |
- Projectile invincible on frames 1-36
- Can hold forward or back to move around slightly during the Lariat.
- Connects only twice on hit, but five times on block, though all hits but the first two whiff vs crouching opponents.
Screw Piledriver (360+P)
| Startup | Active | Recovery | Cancel | Damage | Guard | On Hit | On Block |
|---|---|---|---|---|---|---|---|
| 5 | 3 | 54 | - | 2500 (2875) | T | HKD +30 | - |
| Startup | Active | Recovery | Cancel | Damage | Guard | On Hit | On Block |
|---|---|---|---|---|---|---|---|
| 5 | 3 | 54 | - | 2900 (3335) | T | HKD +28 | - |
| Startup | Active | Recovery | Cancel | Damage | Guard | On Hit | On Block |
|---|---|---|---|---|---|---|---|
| 5 | 3 | 54 | - | 3300 (3795) | T | HKD +28 | - |
| Startup | Active | Recovery | Cancel | Damage | Guard | On Hit | On Block |
|---|---|---|---|---|---|---|---|
| 5 | 3 | 54 | - | 3400 (3910) | T | HKD +28 | - |
Borscht Dynamite (j.360+K)
No results
No results No results
| Startup | Active | Recovery | Cancel | Damage | Guard | On Hit | On Block |
|---|---|---|---|---|---|---|---|
| 4 | 3 | 21(36)+16 land | - | 3000 (3375) | T | HKD +19 | - |
Aerial command grab. Fast startup allows it to be used as an air-to-air. Can be tiger knee'd to perform very low off the ground.
OD Version has slightly improved range and can be juggled into from other moves. Notably, j.8HP combos into OD Borscht.
Russian Suplex (63214K Close)
| Startup | Active | Recovery | Cancel | Damage | Guard | On Hit | On Block |
|---|---|---|---|---|---|---|---|
| 10 | 2 | 50 | - | 2900 (3335) | T | HKD +26 | - |
| Startup | Active | Recovery | Cancel | Damage | Guard | On Hit | On Block |
|---|---|---|---|---|---|---|---|
| 10 | 2 | 50 | - | 3200 (3680) | T | HKD +27 | - |
Slower startup than SPD and lower damage if it connects. In exchange, keeps Zangief close enough after the knockdown to Drive Rush in for oki. Non-OD versions are identical.
Siberian Express (63214K Far)
No results
No results No results
| Startup | Active | Recovery | Cancel | Damage | Guard | On Hit | On Block |
|---|---|---|---|---|---|---|---|
| 54(81) | 2 | 40 | - | 3000 (3450) | T | HKD +29 | - |
Zangief lunges forward and grabs the opponent. Has slow startup, but canceling certain normals into Siberian Express may surprise people.
If done from very far away, Zangief will first raise his hands into the air, then charge forward. The "very far" version of Siberian Express has armor to cover the much longer startup and dash, but is otherwise mostly identical.
Tundra Storm (22HK)
Super Arts
Level 1 Super (236236K)
| Startup | Active | Recovery | Cancel | Damage | Guard | On Hit | On Block |
|---|---|---|---|---|---|---|---|
| 11 | 7 | 13+47 land | - | 3500 | T | HKD +29 | - |
Anti-air command grab super. Can juggle into from certain moves.
Level 2 Super (236236P)
| Startup | Active | Recovery | Cancel | Damage | Guard | On Hit | On Block |
|---|---|---|---|---|---|---|---|
| 18 | 102 | 52 | - | 3160(3060) | LH | HKD +5(+1) | -35 |
No results Zangief spins and creates a whirlwind that pulls opponents close on hit. Can be used to punish fireballs, Drive Impacts, or certain slower moves on reaction. Slow startup makes it easy to bait when used as a reversal.
If Cyclone Lariat hits, Zangief has access to a few different follow-ups.
- If no input is made, Zangief will slam the opponent behind him, side-switching and causing a knockdown.
- If Left or Right is held, Zangief will perform a different ender that deals slightly less damage, but allows him to control which side the opponent ends up on.
- If a punch button is held, Zangief will repeatedly spin in place, then eventually launch the opponent. This deals much less up-front damage than the other enders, but allows Zangief to combo afterwards with normals, Drive Rush, Level 1 Super, or OD Borscht.
Level 3 Super (720+P)
| Startup | Active | Recovery | Cancel | Damage | Guard | On Hit | On Block |
|---|---|---|---|---|---|---|---|
| 6+0 | 2 | 116 | - | 4800 | T | HKD +26 | - |
| Startup | Active | Recovery | Cancel | Damage | Guard | On Hit | On Block |
|---|---|---|---|---|---|---|---|
| 6+0 | 2 | 116 | - | 5300 | T | HKD +26 | - |
- Long range, same as LP SPD.
- Invincible startup makes it a scary reversal.
Taunts
Neutral Taunt (5PPPKKK)
| Startup | Active | Recovery | Cancel | Damage | Guard | On Hit | On Block |
|---|---|---|---|---|---|---|---|
| 194 (total) | - | - | - | - | - | - | - |
Forward Taunt (6PPPKKK)
| Startup | Active | Recovery | Cancel | Damage | Guard | On Hit | On Block |
|---|---|---|---|---|---|---|---|
| 227 (total) | - | - | - | - | - | - | - |
Back Taunt (4PPPKKK)
| Startup | Active | Recovery | Cancel | Damage | Guard | On Hit | On Block |
|---|---|---|---|---|---|---|---|
| 202 (total) | - | - | - | - | - | - | - |
Down Taunt (2PPPKKK)
| Startup | Active | Recovery | Cancel | Damage | Guard | On Hit | On Block |
|---|---|---|---|---|---|---|---|
| 210 (total) | - | - | - | - | - | - | - |
