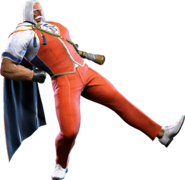
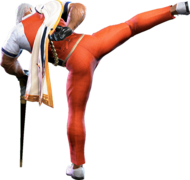
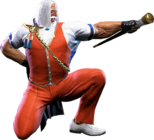
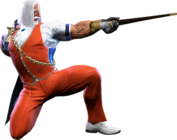
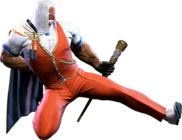
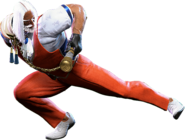
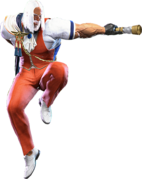
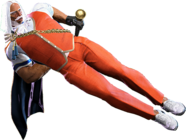
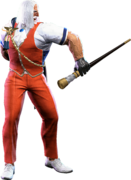
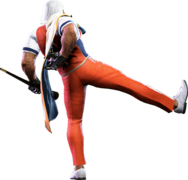
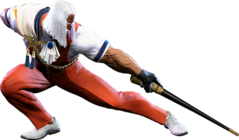
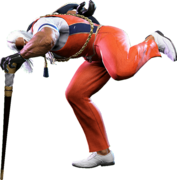
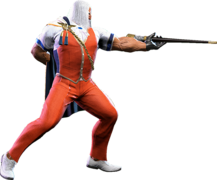
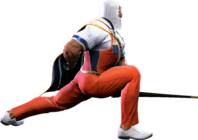
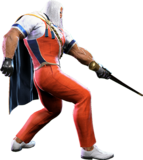
(→Taunts) |
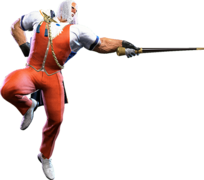
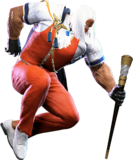
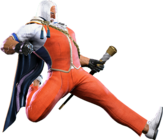
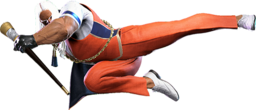
(Air normals and some punish counter infos) |
||
| Line 40: | Line 40: | ||
| info = | | info = | ||
{{AttackDataCargo-SF6/Query|jp_5hp}} | {{AttackDataCargo-SF6/Query|jp_5hp}} | ||
*Punish Counter: +25 | |||
JP's longest range cancelable normal along with 6HK, it can work as a commital but safe on block poke in neutral, thanks to its heavy blockstun allowing you to frametrap into Triglav, wich is safe on block. Be careful about it not whiffing. | JP's longest range cancelable normal along with 6HK, it can work as a commital but safe on block poke in neutral, thanks to its heavy blockstun allowing you to frametrap into Triglav, wich is safe on block. Be careful about it not whiffing. | ||
On hit, its heavy hitstun also allows combos into Light Torbalan on hit. It also has juggle potential, and see uses in some of JP's launch combos. | |||
Its high frame advantage on punish counter makes it a good punish starter for very unsafe attacks. | |||
}} | }} | ||
| Line 81: | Line 85: | ||
Your best combo starter as it links into 2MP, or goes into the 5HP target combo if you're too far away. Fast enough to work after jump-ins or Drive Impact crumples. | Your best combo starter as it links into 2MP, or goes into the 5HP target combo if you're too far away. Fast enough to work after jump-ins or Drive Impact crumples. | ||
On block, this is JP's only plus on block normal, allowing you to frametrap with 2LP or 5LK. | On block, this is JP's only plus on block normal, allowing you to frametrap with 2LP or 5LK. | ||
It can also work as an anti-air for distant jumps that might make 2HP whiff. | |||
}} | }} | ||
| Line 158: | Line 164: | ||
| info = | | info = | ||
{{AttackDataCargo-SF6/Query|jp_2hk}} | {{AttackDataCargo-SF6/Query|jp_2hk}} | ||
*Counterhit/Punish Counter: +48 HKD | |||
JP's sweep is generally safe if you use it at max range, and on hit leaves you plus after forward dash | JP's sweep is generally safe if you use it at max range, and on hit leaves you plus after forward dash | ||
}} | }} | ||
| Line 171: | Line 179: | ||
| info = | | info = | ||
{{AttackDataCargo-SF6/Query|jp_jlp}} | {{AttackDataCargo-SF6/Query|jp_jlp}} | ||
JP's fastest air attack alongside air throw if you're not sure your other air-to-airs will be fast enough. | |||
}} | }} | ||
| Line 183: | Line 192: | ||
{{AttackDataCargo-SF6/Query|jp_jmp}} | {{AttackDataCargo-SF6/Query|jp_jmp}} | ||
Whiffs on crouchers | Whiffs on crouchers | ||
His longuest air-to-air, useful for distant jumps but terrible as an air-to-ground. | |||
}} | }} | ||
| Line 194: | Line 205: | ||
| info = | | info = | ||
{{AttackDataCargo-SF6/Query|jp_jhp}} | {{AttackDataCargo-SF6/Query|jp_jhp}} | ||
Slams the opponent on Counterhit/Punish Counter. | |||
}} | }} | ||
| Line 219: | Line 231: | ||
| info = | | info = | ||
{{AttackDataCargo-SF6/Query|jp_jmk}} | {{AttackDataCargo-SF6/Query|jp_jmk}} | ||
Knocks down on air hit. | |||
}} | }} | ||
| Line 230: | Line 243: | ||
| info = | | info = | ||
{{AttackDataCargo-SF6/Query|jp_jhk}} | {{AttackDataCargo-SF6/Query|jp_jhk}} | ||
JP's best air normal. Works for jump-ins, air to airs, covering yourself during a back jump, etc. | |||
}} | }} | ||
| Line 254: | Line 268: | ||
| info = | | info = | ||
{{AttackDataCargo-SF6/Query|jp_6mk}} | {{AttackDataCargo-SF6/Query|jp_6mk}} | ||
Safe on block overhead. Can be linked out of on counter-hit or with Drive Rush. | Safe on block overhead. Can be linked out of on counter-hit or with Drive Rush. | ||
You can also use Amnesia's bomb or Departure's followup to combo off it. | |||
}} | }} | ||
| Line 358: | Line 374: | ||
| info = | | info = | ||
{{AttackDataCargo-SF6/Query|jp_jlplk}} | {{AttackDataCargo-SF6/Query|jp_jlplk}} | ||
* Side switches | |||
Can work as a backup anti-air | Can work as a backup anti-air | ||
}} | }} | ||
Revision as of 10:42, 6 June 2023
| Pre-release information
This page is under construction based on pre-release data. Join the SF6 Resource Hub for info on editing. |
Introduction
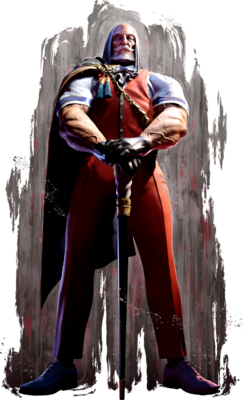
Head of an international NGO responsible for many successful investment projects, and the man behind Nayshall's present prosperity. Has a beloved cat named Cybele.
The elegant ex-Shadaloo financier saunters onto the battlefield as a slow but powerful zoner. Unlike other zoners who focus on firing off quick projectiles or pestering opponents with fast and long-ranged normals, JP chooses instead to bury his opposition in a barrage of psychic power. JP wants his opponents sitting still, for it is when they feel there is no hope of escape that he can set them up for a devious mixup situation.
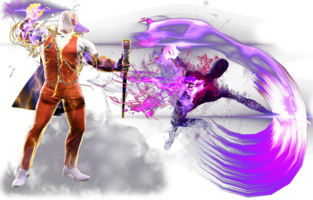
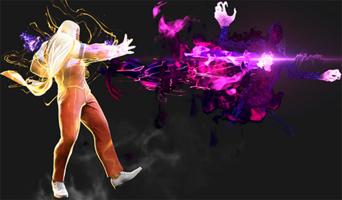
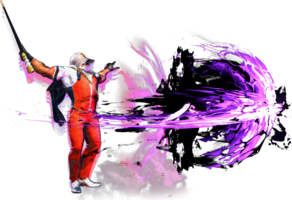
JP's central special moves are Torbalan and Triglav. The former is a slow but large projectile that can be fired along three different lanes of movement, and the latter is a nearly instant spike attack that can come out at nearly any part of the screen. While Torbalan is slow, it has a ton of uses and can even mix up your opponents as one variant is a low and another is an overhead. Triglav meanwhile acts as both a detterent and anti-air, catching people trying to move towards JP and sniping out poor air approaches. With these two special moves, JP forces his opponents back towards the corner and continues to bury them in full-screen pressure. Once an opponent has eaten a combo or chooses to sit still for long enough, JP can deploy his signature Departure, a portal that will either shoot out a tracking spike or act as a teleport point for JP to warp to at any time.
While JP's zoning is strong, any good opponent will eventually get past it. Once they are within striking distance, JP likes to use his midrange pokes to bat opponents backwards. 5HP is a great callout tool that can be special canceled, while his 2HP is a solid anti-air and his 2MK is a fantastic poke. Any good hit JP gets can be instantly canceled into a Drive Rush combo that sends your opponent to the opposite end of the screen and allows him to resume his zoning. Opponents who make overly-deliberate plays can be hit with JP's counter Amnesia, which deals no damage but leaves opponents stuck to a timed bomb.
JP has an extremely large mixup toolbox. His throw game is very strong and has high reward, but he can also perform powerful high/low mixups if he has Depature set up above you. His level 2 super is an incredible mixup tool that can be used to create airtight mixups, resets, and even full-on unblockables to melt your health bar. JP has mixups everywhere- he has mixups in his Target Combos, he has mixups in his pressure sequences, and he even has mixups in his zoning! JP has access to Embrace, a fullscreen projectile command grab that gives JP excellent pressure opportunity on hit, looks just like Torbalan, and does high damage.
It's important to stress that all this offensive power comes at a steep cost, that being JP's movement. Unlike other zoners who don't necessarily sacrifice movement for their zoning prowess, JP has terrible movement stats and must rely on Drive Rush for any considerable mobility. In addition, JP's zoning specials are very slow and open him up to punish opportunities on an incorrect play that other zoners might be safe from. JP also has a notable deadzone within the midrange, where his pokes are either fast, but too stubby, or long, but too slow. His tall standing hurtbox and wide frame also make him vulnerable to mixups at a greater extent than other members of the cast, and while he does have Amnesia to bail him out of bad scenarios, that too carries immense risk. In general, JP is great for players who love to keep their opponents at a constant disadvantage and can manage to get around his slower movement. If you love overwhelming offensive might without having to get your hands too dirty, then there's no better pick than this master of Psycho Power.
| Pick if you like: | Avoid if you dislike: |
|---|---|
|
|
Classic & Modern Versions Comparison
| Missing Normals |
|
|---|---|
| Missing Command Normals |
|
| Shortcut-Only Specials |
|
| Assist Combos |
|
| Miscellaneous Changes |
|
| JP | |
|---|---|
| Vitals | |
| Life Points | 10000 |
| Ground Movement | |
| Forward Walk Speed | 0.037 |
| Backward Walk Speed | 0.025 |
| Forward Dash Speed | 22 |
| Backward Dash Speed | 23 |
| Forward Dash Distance | 1.454 |
| Backward Dash Distance | 1.003 |
| Drive Rush Min. Distance (Throw) | 0.525 |
| Drive Rush Min. Distance (Block) | 1.857 |
| Drive Rush Max Distance | 3.628 |
| Jumping | |
| Jump Speed | 4+38+3 |
| Jump Apex | 2.115 |
| Forward Jump Distance | 1.90 |
| Backward Jump Distance | 1.52 |
| Throws | |
| Throw Range | 0.8 |
| Throw Hurtbox | 0.33 |
| Frame Data Glossary - SF6 | |
|---|---|
| Hitbox Images |
🟥 (Red): Attack hitbox
🟩 (Green): Vulnerable hurtbox that can be hit by strikes/projectiles
🟦 (Blue): Vulnerable throw hurtbox
|
| Active |
How many frames a move remains active (can hurt opponents) for. For projectiles with a maximum active period, a value may be listed in [brackets], but this number is not factored into the move's total frame count.
|
| Cancel |
Available options for canceling one move into another move.
|
| Cancel Hitconfirm Windows |
Hitconfirm reaction windows into Special Moves, Target Combos, and Super Arts.
|
| Damage |
Attack damage on hit. Multi-hit moves may have the damage listed for individual hits as X,Y (or sometimes X*Y). Sometimes a move's damage changes depending on which active frame connects, or on cinematic vs. non-cinematic hits; in this case, multiple values may be listed, and it will be clarified in the move description.
|
| Damage Scaling |
Some moves cause additional damage scaling in combos. Refer to Game Data page for a more detailed breakdown. Scaling Types:
|
| Drive Rush Cancel Advantage |
Refers to the frame advantage when canceling a normal, command normal, or Target Combo into Drive Rush on hit or block (abbreviated as DRC for Drive Rush Cancel). This is calculated at the moment a follow-up attack can be input, not at the moment the character can block or perform movement options. An attack that with DRC +8 on Hit can link into an 8-frame attack, and DRC +4 on Block can create a true blockstring into a 4-frame attack. Note that any DRC on Block worse than +4 cannot form a true blockstring, allowing the opponent to interrupt with an invincible reversal. Most light normals are slightly negative after a DRC on block, meaning the opponent can mash their fastest normal to guarantee a counter-hit (though this requires fast reactions). The attacking character could punish this with Light > DRC into an immediate invincible attack, but this would be an incredibly expensive and high-risk gambit.
|
| Forced Knockdown |
Most airborne command normals, special moves, and Super Arts put the user in a "Forced Knockdown" state. While in this state, an air knockdown will occur when being hit by any attack, even if it would otherwise cause an air reset. As an example, Ryu's 2HP causes an air reset when used as an anti-air. Against a move like Cammy's Hooligan Combination, however, the 2HP puts her into an air knockdown state. This allows Ryu to successfully cancel 2HP into Shoryuken for a juggle, similar to how a Drive Impact wall splat works. Taking advantage of Forced Knockdown juggles is important for dealing with moves like Ken's Dragonlash, Dhalsim's Air Teleport, or Kimberly's 6HK~Hop sequence. Moves that already cause an air knockdown, like most j.MP air-to-airs, will not display the "Forced Knockdown" message.
|
| Guard |
Refers to the direction an attack must be blocked. L is for Low attacks (must be blocked crouching), H is for High attacks/overheads (must be blocked standing), LH is for attacks that can be blocked crouching or standing. T is for Throw attacks which cannot be blocked.
|
| Juggles |
When a character is put into an Air Knockdown state, it is often possible to follow up with a Juggle attack before they hit the ground. In the simplest terms, there are 2 main juggle states:
The following is a more detailed overview of the SF6 juggle system:
Juggle Start (JS): When starting a juggle, the opponent's JC will be set to this value. May be different vs. standing and airborne opponents.
Juggle Increase (JI): When opponent is already in a juggle state, attacks will increase the opponent's JC by this amount.
Juggle Limit (JL): Property of an attack hitbox that determines whether it connects on a juggled opponent. The JL must be ≥ the opponent's JC to hit successfully.
An example to tie everything together:
Drive Rush notes:
More recently, the official definitions used by Capcom are slightly different than these community-designated terms. When reading official patch notes, the following terms are used instead:
|
| On Hit/Block |
These are frame advantage values when the attack hits or is blocked. If the number is positive, then the move will recover before the defender can act again. If the number is negative, the defender will be able to act before the attacker and maybe even punish. KD refers to knockdown on hit, and the listed KD Advantage refers to how many frames the attacker can act before the defender finishes their wakeup animation.
|
| Recovery |
How many frames it takes for a move to finish after the active frames have finished. For projectiles, recovery is considered to begin after the first active frame.
|
| Startup |
How many frames it takes before the move becomes 'active' or have a hit box. The last startup frame and the first active frame are the same frame, meaning all values are written as Startup + 1.
|
| IASA / Actionable Recovery |
Some moves play out an extended recovery animation when no other button/direction is input (for crouching moves, it applies when holding any down direction). These are often referred to as "actionable recovery" frames; in some games, the term IASA (Interruptible As Soon As) refers to the frame that Actionable Recovery begins. Letting the Actionable Recovery frames play out can change the character's position, potentially setting up spacing traps by recovering farther away. For example, Manon 5HP will recover much farther away from the opponent if no input is performed immediately after her recovery; holding back or down-back to block will keep her much closer to the opponent.
|
Normals
Standing Normals
5LP
| Startup | Active | Recovery | Cancel | Damage | Guard | On Hit | On Block |
|---|---|---|---|---|---|---|---|
| 6 | 3 | 10 | Chn Sp SA | 300 | LH | +4 | -2 |
- Chains into 5LP/2LP/2LK
JP's farthest reaching light normal but also his slowest.
5MP
| Startup | Active | Recovery | Cancel | Damage | Guard | On Hit | On Block |
|---|---|---|---|---|---|---|---|
| 12 | 3 | 21 | - | 700 | LH | +1 | -6 |
Long range poke that reaches farther than most of JP's buttons, but has no reward on hit, even on Punish Counter.
5HP
| Startup | Active | Recovery | Cancel | Damage | Guard | On Hit | On Block |
|---|---|---|---|---|---|---|---|
| 12 | 2 | 22 | Sp SA | 800 | LH | +3 | -3 |
- Punish Counter: +25
JP's longest range cancelable normal along with 6HK, it can work as a commital but safe on block poke in neutral, thanks to its heavy blockstun allowing you to frametrap into Triglav, wich is safe on block. Be careful about it not whiffing. On hit, its heavy hitstun also allows combos into Light Torbalan on hit. It also has juggle potential, and see uses in some of JP's launch combos.
Its high frame advantage on punish counter makes it a good punish starter for very unsafe attacks.
5LK
| Startup | Active | Recovery | Cancel | Damage | Guard | On Hit | On Block |
|---|---|---|---|---|---|---|---|
| 5 | 3 | 11 | Sp SA | 300 | LH | +3 | -2 |
Can't be chained into, and has less range than 5LP.
5MK
| Startup | Active | Recovery | Cancel | Damage | Guard | On Hit | On Block |
|---|---|---|---|---|---|---|---|
| 8 | 3 | 19 | Sp SA | 600 | LH | +3 | -3 |
A middle ground between 2MP and 5HP. Less commital that 5HP, making it better for buffering in neutral, but not as fast as 2MP. Has the same enders as 2MP.
5HK
| Startup | Active | Recovery | Cancel | Damage | Guard | On Hit | On Block |
|---|---|---|---|---|---|---|---|
| 12 | 4 | 17 | TC | 800 | LH | +7 | +2 |
Whiffs on crouchers at max range. Your best combo starter as it links into 2MP, or goes into the 5HP target combo if you're too far away. Fast enough to work after jump-ins or Drive Impact crumples. On block, this is JP's only plus on block normal, allowing you to frametrap with 2LP or 5LK.
It can also work as an anti-air for distant jumps that might make 2HP whiff.
Crouching Normals
2LP
| Startup | Active | Recovery | Cancel | Damage | Guard | On Hit | On Block |
|---|---|---|---|---|---|---|---|
| 4 | 2 | 11 | Chn Sp SA | 300 | LH | +4 | -1 |
- Chains into 5LP/2LP/2LK
JP's fastest attack, making it good for contesting the opponent's blockstrings. Can combo into LP Striborg.
2MP
| Startup | Active | Recovery | Cancel | Damage | Guard | On Hit | On Block |
|---|---|---|---|---|---|---|---|
| 7 | 4 | 14 | Sp SA | 600 | LH | +6 | -2 |
As a poke, 2MP has less range than your other mediums, but is faster and has less total frames, making it less commital.
Its also an important combo tool for JP, as it can link from 5HK and then cancel into MP Striborg.
2HP
| Startup | Active | Recovery | Cancel | Damage | Guard | On Hit | On Block |
|---|---|---|---|---|---|---|---|
| 9 | 6 | 20 | Sp SA | 800 | LH | +1 | -6 |
Good anti-air, and causes an aerial reset when used in juggles.
2LK
| Startup | Active | Recovery | Cancel | Damage | Guard | On Hit | On Block |
|---|---|---|---|---|---|---|---|
| 6 | 2 | 10 | Chn | 200 | L | +2 | -2 |
- Chains into 5LP/2LP/2LK
2MK
| Startup | Active | Recovery | Cancel | Damage | Guard | On Hit | On Block |
|---|---|---|---|---|---|---|---|
| 9 | 3 | 17 | - | 700 | L | +3 | -3 |
Not cancelable, but has more range than JP's other mediums (except 5MP), and also moves him forward, making it better as a poke or for some punishes.
2HK
| Startup | Active | Recovery | Cancel | Damage | Guard | On Hit | On Block |
|---|---|---|---|---|---|---|---|
| 10 | 3 | 21 | - | 900 | L | HKD +27 | -6 |
- Counterhit/Punish Counter: +48 HKD
JP's sweep is generally safe if you use it at max range, and on hit leaves you plus after forward dash
Jumping Normals
j.LP
| Startup | Active | Recovery | Cancel | Damage | Guard | On Hit | On Block |
|---|---|---|---|---|---|---|---|
| 5 | 10 | 3 land | - | 300 | H | +8(+9) | +4(+5) |
JP's fastest air attack alongside air throw if you're not sure your other air-to-airs will be fast enough.
j.MP
| Startup | Active | Recovery | Cancel | Damage | Guard | On Hit | On Block |
|---|---|---|---|---|---|---|---|
| 12 | 3 | 3 land | - | 700 | H | +12(+13) | +8(+9) |
Whiffs on crouchers
His longuest air-to-air, useful for distant jumps but terrible as an air-to-ground.
j.HP
| Startup | Active | Recovery | Cancel | Damage | Guard | On Hit | On Block |
|---|---|---|---|---|---|---|---|
| 9 | 5 | 3 land | - | 800 | H | +9(+15) | +5(+11) |
Slams the opponent on Counterhit/Punish Counter.
j.LK
| Startup | Active | Recovery | Cancel | Damage | Guard | On Hit | On Block |
|---|---|---|---|---|---|---|---|
| 6 | 8 | 3 land | - | 300 | H | +4(+10) | +1(+7) |
Can cross-up
Works as an instant overhead on standing opponents
j.MK
| Startup | Active | Recovery | Cancel | Damage | Guard | On Hit | On Block |
|---|---|---|---|---|---|---|---|
| 7 | 6 | 3 land | - | 600 | H | +9(+13) | +5(+9) |
Knocks down on air hit.
j.HK
Command Normals
4MP
| Startup | Active | Recovery | Cancel | Damage | Guard | On Hit | On Block |
|---|---|---|---|---|---|---|---|
| 8 | 3 | 16 | Sp SA TC | 500 | LH | +5 | -1 |
Short range strike that confirms into a target combo with 5MP. Situational punish starter when 5HK would be too slow as canceling the target combo is stronger than canceling 2MP.
6MK
| Startup | Active | Recovery | Cancel | Damage | Guard | On Hit | On Block |
|---|---|---|---|---|---|---|---|
| 22 | 2 | 19 | - | 700 | H | +3 | -3 |
Safe on block overhead. Can be linked out of on counter-hit or with Drive Rush.
You can also use Amnesia's bomb or Departure's followup to combo off it.
3HP
| Startup | Active | Recovery | Cancel | Damage | Guard | On Hit | On Block |
|---|---|---|---|---|---|---|---|
| 16 | 3 | 31 | - | 900 | L | HKD +17 | -14 |
Long-range sweep with the cane. Has more range than 2HK, but is slower, way more unsafe, and doesn't give oki on forward dash unlike his regular sweep.
6HK
Target Combos
4MP~MP
| Startup | Active | Recovery | Cancel | Damage | Guard | On Hit | On Block |
|---|---|---|---|---|---|---|---|
| 10 | 3 | 20 | Sp SA | 500 | LH | +3 | -6 |
Special-cancelable target combo. Works with the same enders as 2MP.
5HK~HP~HP/HK
| Startup | Active | Recovery | Cancel | Damage | Guard | On Hit | On Block |
|---|---|---|---|---|---|---|---|
| 20 | 3 | 20 | Sp SA TC | 500 | LH | +3 | -3 |
A target combo that does everything you could ask it to. It is safe on block, cancels, and has mixups attached to it.
Canceling into MP Stribog frametraps everything that's isn't invincible but is unsafe on block, while canceling into Triglav trades with 4 frame attacks but leaves you so plus that you will have the time to setup Departure and still be advantageous.
If the opponents decides to block/parry the followup, you can cancel into Embrace to surprise them.
Finally, as the target combo is only -3, you can end it with no followup to bait DPs and Drive Impacts.
| Startup | Active | Recovery | Cancel | Damage | Guard | On Hit | On Block |
|---|---|---|---|---|---|---|---|
| 21 | 3 | 22 | - | 1000 | H | +3 | -4 |
Overhead followup. Loses to mash.
| Startup | Active | Recovery | Cancel | Damage | Guard | On Hit | On Block |
|---|---|---|---|---|---|---|---|
| 21 | 3 | 22 | - | 1000 | L | +3 | -4 |
Low followup. Loses to mash.
Throws
Forward Throw (LPLK)
| Startup | Active | Recovery | Cancel | Damage | Guard | On Hit | On Block |
|---|---|---|---|---|---|---|---|
| 5 | 3 | 23 | - | 1200 (2040) | T | KD +24 | - |
- Has access to corner throw loops without walking or dashing; throw must be manually timed
JP can combo out of his throw if Departure's automatic followup triggers right after the throw's hit. For this to work, you have to throw the opponent immediatly after setting up Departure.
Back Throw (4LPLK)
| Startup | Active | Recovery | Cancel | Damage | Guard | On Hit | On Block |
|---|---|---|---|---|---|---|---|
| 5 | 3 | 23 | - | 1200 (2040) | T | KD +36 | - |
- Side switches
Departure can also hit your opponent during the throw's animation, but you will have no combo and it will do 400 less damage as the back throw's damage come from the hit when your opponent hit the floor.
Air Throw (LPLK Air)
| Startup | Active | Recovery | Cancel | Damage | Guard | On Hit | On Block |
|---|---|---|---|---|---|---|---|
| 5 | 3 | 3 land | - | 1200 (2040) | T | KD +32 | - |
- Side switches
Can work as a backup anti-air
Drive System
Drive Impact (HPHK)
| Startup | Active | Recovery | Cancel | Damage | Guard | On Hit | On Block |
|---|---|---|---|---|---|---|---|
| 26 | 2 | 35 | - | 800 | LH | KD +35 / Wall Splat KD +65 | -3 / Wall Splat HKD +72 |
See Drive Impact
When cancelled from a normal, these are the important blockstring gaps; a gap of N will trade with an N-frame startup attack; [] = Burnout
- -
- Note: gaps of 8f or less cannot be escaped by jumping
Drive Reversal (6HPHK)
| Startup | Active | Recovery | Cancel | Damage | Guard | On Hit | On Block |
|---|---|---|---|---|---|---|---|
| 20 | 3 | 26(31) | - | 500 recoverable | LH | KD +23 | -6 |
See Drive Reversal
- Full Invuln: 1-22f; Armor Break
Drive Parry (MPMK)
| Startup | Active | Recovery | Cancel | Damage | Guard | On Hit | On Block |
|---|---|---|---|---|---|---|---|
| 1 | 12 or until released | 33(1)(11) | - | - | - | - | - |
See Drive Parry
- Perfect Parry has only 1f recovery, and disables the opponent from canceling their attack
- Perfect Parry vs. projectiles puts you into a fixed 11f recovery
Drive Rush (66)
No results
See Drive Rush. Frame data shown in (parentheses) refers to the version used after Parry.
- Notable Drive Rush cancel combo routes:
- Notable Drive Rush cancel blockstring gaps:
Special Moves
Triglav (22P)
| Startup | Active | Recovery | Cancel | Damage | Guard | On Hit | On Block |
|---|---|---|---|---|---|---|---|
| 22 | 10 | 24 | SA3 | 800 | LH | KD +44 | -2 |
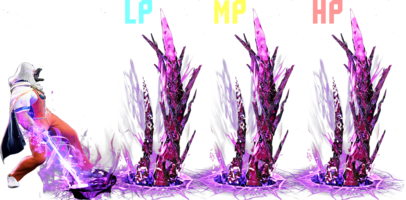
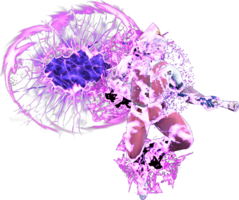
JP summons a spike from the ground, with the button used determining the location.
Useful for zoning, as it will ignore your opponent's fireball and strike them directly, at the price that you will trade with their fireball instead of nullifying them, wich can be a viable tactic if you have life lead. The spikes don't count as projectiles, allowing them to strike projectile-invulnerable attacks.
Also works as a full-screen check against character that might try to use the distance for setups (like Ryu's Denjin Charge).
On hit, they launch the opponent into a juggle state. On regular hit, you can only land 2HP or level 1 in the corner. But on a high air connect, you can land a second spike anywhere on screen. You can also use the long knockdown time to safely setup Departure.
| Startup | Active | Recovery | Cancel | Damage | Guard | On Hit | On Block |
|---|---|---|---|---|---|---|---|
| 20 | 10,10 | 14 | SA2 SA3 | 500x2 | LH | KD +53(+50) | +3 |
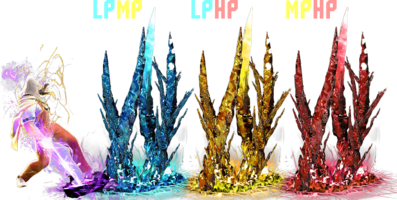
JP summons two spikes. The button combination determines the location, with LP+MP using the LP location, LP+HP using the MP location and MP+HP using the HP location.
Hits two time, useful for single-hit armored moves that might beat regular Triglav, and is also plus on block allowing for pressure reset if you cancel it from a heavy normal or the 4MP target combo. On hit, the juggle state is a little more limited as you can't land 2HP anymore but can still juggle level 1.
Stribog (236P)
| Startup | Active | Recovery | Cancel | Damage | Guard | On Hit | On Block |
|---|---|---|---|---|---|---|---|
| 16 | 3,3 | 28 | SA3 | 300,700 | LH | KD +38 | -10 |
| Startup | Active | Recovery | Cancel | Damage | Guard | On Hit | On Block |
|---|---|---|---|---|---|---|---|
| 20 | 3(1)3 | 27 | SA3 | 400,800 | LH | KD +42 | -8 |
| Startup | Active | Recovery | Cancel | Damage | Guard | On Hit | On Block |
|---|---|---|---|---|---|---|---|
| 28 | 3(9)3 | 19 | SA3 | 300,500 | LH | KD +67(+87) | +4 |
| Startup | Active | Recovery | Cancel | Damage | Guard | On Hit | On Block |
|---|---|---|---|---|---|---|---|
| 19 | 3(6)3 | 22 | SA2 SA3 (1st) | 600,400 | LH | KD +56(+72) | +2 |
Departure (214P)
No results
No results No results
| Startup | Active | Recovery | Cancel | Damage | Guard | On Hit | On Block |
|---|---|---|---|---|---|---|---|
| 40+70 | [10(20)10] | 40 total | - | 500x2 | LH | KD ~ | - |
Departure Followups (214P~214P)
| Startup | Active | Recovery | Cancel | Damage | Guard | On Hit | On Block |
|---|---|---|---|---|---|---|---|
| 6 | [20] | 16+3 land | - | - | - | - | - |
| Startup | Active | Recovery | Cancel | Damage | Guard | On Hit | On Block |
|---|---|---|---|---|---|---|---|
| 19(21) | [10] | 21 | - | 800 | LH | KD +58(+60) | +9(+11) |
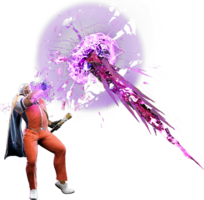
LP and MP will teleport while HP will trigger the spike to attack with the closest spike to trigger first.
For the OD version LP will teleport to the closest portal with MP teleport to the farther one
Torbalan (236K)
| Startup | Active | Recovery | Cancel | Damage | Guard | On Hit | On Block |
|---|---|---|---|---|---|---|---|
| 14+8 | 6 | 50 total | SA3 | 800 | LH | KD +42~ | -6~ |
| Startup | Active | Recovery | Cancel | Damage | Guard | On Hit | On Block |
|---|---|---|---|---|---|---|---|
| 14+12 | 6 | 50 total | SA3 | 1000 | H | +6~ | -8~ |
| Startup | Active | Recovery | Cancel | Damage | Guard | On Hit | On Block |
|---|---|---|---|---|---|---|---|
| 14+12 | 6 | 50 total | SA3 | 1000 | L | +6~ | -8~ |
| Startup | Active | Recovery | Cancel | Damage | Guard | On Hit | On Block |
|---|---|---|---|---|---|---|---|
| 22 | 6(14)6 | 50 total | SA2 SA3 (1st) | 400x2 | LH | KD +66~ | +25~ |
Embrace (214K)
No results
No results No results
| Startup | Active | Recovery | Cancel | Damage | Guard | On Hit | On Block |
|---|---|---|---|---|---|---|---|
| 26~ | 3 | 44 | - | 2600 (2990) | T | HKD +18 | - |
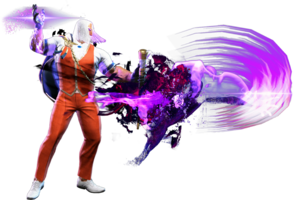
JP summons a clone that will go full screen and grab a grounded opponent. This move is unable to be performed while Departure is active
Amnesia (22K)
| Startup | Active | Recovery | Cancel | Damage | Guard | On Hit | On Block |
|---|---|---|---|---|---|---|---|
| 3 | 18 | 35(17) | - | - | - | - | - |
| Startup | Active | Recovery | Cancel | Damage | Guard | On Hit | On Block |
|---|---|---|---|---|---|---|---|
| 1 | 20 | 35(17) | - | - | - | - | - |
| Startup | Active | Recovery | Cancel | Damage | Guard | On Hit | On Block |
|---|---|---|---|---|---|---|---|
| 59 | 10 | - | - | 800 | LH | KD ~ | - |
| Startup | Active | Recovery | Cancel | Damage | Guard | On Hit | On Block |
|---|---|---|---|---|---|---|---|
| 59 | 10(32)10 | - | - | 600x2 | LH | KD ~ | - |
On successful parry will leave behind a bomb that is stuck to the opponent and will explode after a set amount of time.
After successful parry the opponent will continue the active and recovery remaining which makes moves with long recovery ideal to parry.
Super Arts
Level 1 Super (236236P)
| Startup | Active | Recovery | Cancel | Damage | Guard | On Hit | On Block |
|---|---|---|---|---|---|---|---|
| 8 | 14,1~ | 62 | - | 400,1600 (2000) | LH | KD +22(+32) | -33(-23) |
Level 2 Super (214214P)
Level 3 Super (236236K)
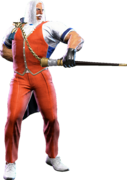
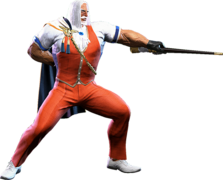
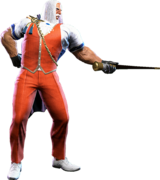
Taunts
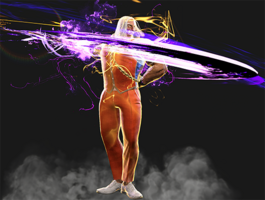
Neutral Taunt (5PPPKKK)
| Startup | Active | Recovery | Cancel | Damage | Guard | On Hit | On Block |
|---|---|---|---|---|---|---|---|
| 220 (total) | - | - | - | - | - | - | - |
Forward Taunt (6PPPKKK)
| Startup | Active | Recovery | Cancel | Damage | Guard | On Hit | On Block |
|---|---|---|---|---|---|---|---|
| 395 (total) | - | - | - | - | - | - | - |
Back Taunt (4PPPKKK)
| Startup | Active | Recovery | Cancel | Damage | Guard | On Hit | On Block |
|---|---|---|---|---|---|---|---|
| 202 (total) | - | - | - | - | - | - | - |
