No edit summary |
|||
| Line 1: | Line 1: | ||
== Drive Gauge == | |||
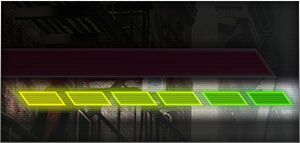
Both players start each round with 6 bars of Drive Gauge, which can be spent on various offensive, defensive, and movement techniques. When the gauge is not full, it automatically regenerates over time. Drive Gauge management is fundamental to the game's strategy; players with better management will have a huge advantage over those who manage it poorly. It allows for playstyles from slow and conservative to reckless gambling, making the Drive system a vehicle for player self-expression. | |||
[[File:SF6_Drive_Gauge.jpg|300px|center|thumb|''Note: When reading frame data, 1 Bar = 10,000 Drive meter; in most cases, a simple decimal is used instead (e.g. 1.7 Drive).'']] | |||
[[File:SF6_Drive_Gauge.jpg| | |||
Spending meter on Drive moves is not the only way for the gauge to decrease. Blocking attacks will cause some Drive meter to be chipped away. The weakest attacks can chip around 5% of a Drive bar, while some can drain a full bar on their own. This weakens passive, defensive playstyles significantly; defensive-minded players will have to focus more on their positioning, and using techniques like Drive Parry to mitigate this disadvantage. Some attacks like Drive Impact, Super Arts, and any Punish Counter also drain the Drive Gauge when they hit. | |||
{| class="wikitable" | {| class="wikitable" | ||
|+ Drive | |+ Drive System | ||
|- | |- | ||
! Drive Move !! Drive Cost | ! Drive Move !! Drive Gauge Cost | ||
|- | |- | ||
| [[#Drive_Impact|Drive Impact]]|| {{drive sf6}} | | [[#Drive_Impact|Drive Impact]]|| {{drive sf6}} | ||
|- | |- | ||
| [[#Drive_Parry|Drive Parry]]|| {{ | | [[#Drive_Parry|Drive Parry]]|| {{drivehalf sf6}} (Hold) | ||
|- | |- | ||
| [[#Drive_Rush|Drive Rush (from Parry)]]|| {{drivehalf sf6}} | | [[#Drive_Rush|Drive Rush (from Parry)]]|| {{drivehalf sf6}} | ||
| Line 30: | Line 24: | ||
| [[#Drive_Reversal|Drive Reversal]]|| {{drive sf6}}{{drive sf6}} | | [[#Drive_Reversal|Drive Reversal]]|| {{drive sf6}}{{drive sf6}} | ||
|} | |} | ||
It's important to note that any Drive action can be performed, even if only a pixel of the Drive Gauge remains. This is great for securing a KO at the end of a round, since the Burnout penalty does not carry over into the following round. | |||
{| class="wikitable" | {| class="wikitable" | ||
! Increases Drive Gauge !! Decreases Drive Gauge | ! Increases Drive Gauge !! Decreases Drive Gauge | ||
|- | |- | ||
| Attacking opponent<br>(Hit | | Attacking opponent<br>(Hit/Block) || Blocking attacks | ||
|- | |- | ||
| Passive | | Passive Regen over time || Getting hit by Super, Drive Impact, or Punish Counter<br>(Super cinematic also stops passive regeneration) | ||
|- | |- | ||
| Successful Drive Parry<br>(especially useful vs. Supers) || Using Drive actions | | Successful Drive Parry<br>(especially useful vs. Supers) || Using Drive actions | ||
|- | |||
| Walking Forward<br>(stacks with passive regen) || | |||
|} | |} | ||
<br><br> | <br><br> | ||
| Line 70: | Line 58: | ||
<br><br> | <br><br> | ||
=== Drive Impact === | === Drive Impact (DI) === | ||
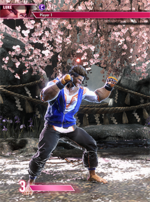
[[File:SF6_drive_impact.jpg|thumb|200px|Luke performs a Drive Impact]] | [[File:SF6_drive_impact.jpg|thumb|200px|Luke performs a Drive Impact]] | ||
'''Costs 1 Drive Stock.''' Input {{hp sf6}}+{{hk sf6}} (HP+HK) to perform. | '''Costs 1 Drive Stock.''' Input {{hp sf6}}+{{hk sf6}} (HP+HK) to perform. | ||
| Line 112: | Line 100: | ||
If two Drive Impacts clash simultaneously, they will bounce off each other and reset to neutral. As a side note, Drive moves take priority over special moves (but not Super Arts), so something like Ryu's 236+HP+HK would result in Drive Impact rather than Hadoken. | If two Drive Impacts clash simultaneously, they will bounce off each other and reset to neutral. As a side note, Drive moves take priority over special moves (but not Super Arts), so something like Ryu's 236+HP+HK would result in Drive Impact rather than Hadoken. | ||
<br><br> | |||
=== Drive Reversal (DRev) === | |||
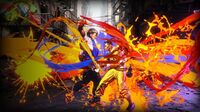
[[File:SF6_drive_reversal.jpg|thumb|250px|"Perform a counterattack while blocking an opponent’s attack. The damage is low but can help you out of tight situations when you’re being pressured." - ''Capcom.'']] | |||
<br> | |||
'''Costs 2 Drive Stocks.''' Press {{f}}+{{hp sf6}}+{{hk sf6}} (6HPHK) during blockstun to perform. Similar to Alpha Counter or V-Reversal from previous Street Fighter games. They are fully invincible from frames 1-22, and deal a small amount of recoverable damage. Drive Reversals break armor, so it can be used against buttons cancelled into Drive Impact (although it's usually better to attempt your own Drive Impact in the blockstring gap; if it was a true blockstring, then the Drive Impact wouldn't give the opponent a followup combo anyway). | |||
All Drive Reversals are punishable at -8 on block, and are slow enough that quick attacks will recover before the Drive Reversal connects. Drive Reversal immediately ends the blockstun of the opponent's attack, so inputting earlier increases the chance of successfully punishing the opponent's move. The blockstun of a successful Parry can also be cancelled with Drive Reversal, and this is the only way to use it against Drive Impact. It is impossible to win a round with the damage from Drive Reversal. | |||
<br><br> | <br><br> | ||
| Line 156: | Line 153: | ||
<br><br> | <br><br> | ||
=== | === Drive Rush (DR) === | ||
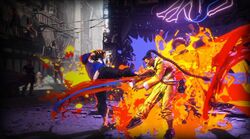
[[File:SF6_drive_rush.jpg|thumb|250px|"Perform a quick rush forward from a Drive Parry or a cancelable normal attack. Drive Rush from a parry costs 1 Drive Stock, while Drive Rush from a normal attack costs 3 Drive Stocks." - ''Capcom.'']] | [[File:SF6_drive_rush.jpg|thumb|250px|"Perform a quick rush forward from a Drive Parry or a cancelable normal attack. Drive Rush from a parry costs 1 Drive Stock, while Drive Rush from a normal attack costs 3 Drive Stocks." - ''Capcom.'']] | ||
'''Costs 1 Drive Stock after a Parry or 3 stocks to cancel from a normal attack.''' Tap {{f}}{{f}} (66) to perform. The cancelled version acts like a special move, so it only works from special cancellable normals. | '''Costs 1 Drive Stock after a Parry or 3 stocks to cancel from a normal attack.''' Tap {{f}}{{f}} (66) to perform. The cancelled version acts like a special move, so it only works from special cancellable normals. | ||
| Line 181: | Line 168: | ||
<br><br> | <br><br> | ||
=== | === Overdrive (OD) === | ||
[[File: | [[File:SF6_drive_overdrive.jpg|thumb|250px|Luke performs an Overdrive Sand Blaster]] | ||
'''Costs 2 Drive Stocks.''' Press two Punches or Kicks while inputting a special move to perform the Overdrive Art (OD) version.<br> | |||
'''Costs 2 Drive Stocks.''' Press | Acts similarly to EX Special Moves from previous titles. Just like before, input the special move with 2 punches or 2 kicks to perform an enhanced special at the cost of 2 Drive stocks. OD specials can now combo into Super Arts since they are no longer tied to the same meter. | ||
* OD moves generally have benefits like extra damage, faster startup, lower recovery, and may even have invincibility | |||
* OD moves often put the opponent in a juggle state, or have higher juggle potential themselves | |||
* OD moves can be performed with less than 2 Drive stocks, but the player is immediately put into [[Street_Fighter_6/Gauges#burnout|Burnout]] state | |||
<br><br> | <br><br> | ||
== Advanced Drive Info == | |||
=== Passive Drive Regeneration === | |||
The Drive meter automatically restores itself over time, but the rate it which it regenerates can change based on several factors. Recall that 1 Drive bar is 10,000 units of Drive meter, and that 1 frame equals 1/60 of a second.<br> | The Drive meter automatically restores itself over time, but the rate it which it regenerates can change based on several factors. Recall that 1 Drive bar is 10,000 units of Drive meter, and that 1 frame equals 1/60 of a second.<br> | ||
| Line 219: | Line 207: | ||
<br> | <br> | ||
=== | === Drive Regeneration in Burnout === | ||
The gray Burnout meter is functionally the same as the Drive gauge, except that it must be fully restored (60,000 Drive) in order to be usable again.<br> | The gray Burnout meter is functionally the same as the Drive gauge, except that it must be fully restored (60,000 Drive) in order to be usable again.<br> | ||
There are some key differences in how Drive meter is restored during Burnout: | There are some key differences in how Drive meter is restored during Burnout: | ||
| Line 236: | Line 224: | ||
<br><br> | <br><br> | ||
=== Drive Regeneration Cooldown === | |||
Certain actions will stop the automatic regeneration of Drive meter for a certain period of time (with the exception of Forward Walk regeneration): | Certain actions will stop the automatic regeneration of Drive meter for a certain period of time (with the exception of Forward Walk regeneration): | ||
* '''Blocking Attacks:''' 90f from start of blockstun (does not apply during Burnout) | * '''Blocking Attacks:''' 90f from start of blockstun (does not apply during Burnout) | ||
| Line 251: | Line 239: | ||
<br><br> | <br><br> | ||
== Super | == Super Gauge == | ||
Super | The Super Gauge is only used to perform Super Arts. Characters gain Super meter when an attack connects on hit or block; unlike in many previous games, no meter is built for whiffing an attack. Both players start the match with an empty Super Gauge, and can build up to 3 bars total. The Super meter carries over between rounds, so there is more to consider when deciding whether or not to spend meter to finish a round. | ||
As a general rule, Super Gauge build on hit/block works as follows: | |||
{| class="wikitable" | |||
! !! on Hit !! on Block | |||
|- | |||
! Attacker || (Base) || 50% | |||
|- | |||
! Defender || 70% || 25% | |||
|} | |||
The amount of Super Gauge built from an attack is not affected by Counterhit or Punish Counter status, and is also not subject to combo scaling. Drive Impact, Drive Reversal, and Super Arts do not build additional Super Gauge for the attacker or defender, although any followup combo can still build meter. | |||
<br><br> | |||
=== Super Art === | === Super Art === | ||
A Super Art is essentially a more powerful type of Special move, requiring Super meter and a more complex input. In addition to damage, Supers often have improved properties like armor break, invincibility, juggle potential. Some Level 2 Super Arts are not attacks, but a powerup like Juri's Feng Shui Engine; this is known as an "install" Super. Install Supers turn the meter into a timer that ticks down until empty, at which point the character returns to normal. When a character is under 25% health, their Level 3 Super turns into a "Critical Art", which deals a bit more damage and may change the knockdown advantage/spacing afterwards. | |||
* | Cancelling an attack into a Super Art works differently than other moves: | ||
* | * Lv. 1 Super can be cancelled from Normals only. | ||
* | * Lv. 2 Super can be cancelled from Normals and OD Specials. | ||
* Lv. 3 Super/CA can be cancelled from Normals and Specials. | |||
** Not all Normals | ** ''Not all Normals and Specials are cancellable into Super Arts; refer to the "cancel" column in the move's frame data.'' | ||
Super Arts are an important tool for Drive Gauge management; they can drain the opponent's Drive Gauge and prevent passive regeneration, while using the time to allow your own gauge to passively recover. You can stall for time to prevent Burnout, or ensure the opponent enters Burnout after they overextend in their Drive Gauge usage. During Burnout, invincible Supers are the primary way to avoid being stunned by corner Drive Impact blockstrings, which would otherwise be unavoidable after blocking a cancellable heavy normal. | |||
{| class="wikitable" | |||
|+ Super Art - Drive Gauge drain | |||
|- | |||
! Lv.1 Super !! Lv.2 Super !! Lv.3 Super !! Critical Art | |||
|- | |||
| 0.5 Bar || 1 Bar || 1.5 Bar || 2 Bar | |||
|} | |||
''Note: this can vary somewhat, especially for non-cinematic variations of Supers'' | |||
[[Category: Street Fighter 6]] | [[Category: Street Fighter 6]] | ||
{{Navbox-SF6}} | {{Navbox-SF6}} | ||
Revision as of 20:54, 11 May 2023
Drive Gauge
Both players start each round with 6 bars of Drive Gauge, which can be spent on various offensive, defensive, and movement techniques. When the gauge is not full, it automatically regenerates over time. Drive Gauge management is fundamental to the game's strategy; players with better management will have a huge advantage over those who manage it poorly. It allows for playstyles from slow and conservative to reckless gambling, making the Drive system a vehicle for player self-expression.
Spending meter on Drive moves is not the only way for the gauge to decrease. Blocking attacks will cause some Drive meter to be chipped away. The weakest attacks can chip around 5% of a Drive bar, while some can drain a full bar on their own. This weakens passive, defensive playstyles significantly; defensive-minded players will have to focus more on their positioning, and using techniques like Drive Parry to mitigate this disadvantage. Some attacks like Drive Impact, Super Arts, and any Punish Counter also drain the Drive Gauge when they hit.
| Drive Move | Drive Gauge Cost |
|---|---|
| Drive Impact | |
| Drive Parry | |
| Drive Rush (from Parry) | |
| Drive Rush (cancel) | |
| Overdrive Specials | |
| Drive Reversal |
It's important to note that any Drive action can be performed, even if only a pixel of the Drive Gauge remains. This is great for securing a KO at the end of a round, since the Burnout penalty does not carry over into the following round.
| Increases Drive Gauge | Decreases Drive Gauge |
|---|---|
| Attacking opponent (Hit/Block) |
Blocking attacks |
| Passive Regen over time | Getting hit by Super, Drive Impact, or Punish Counter (Super cinematic also stops passive regeneration) |
| Successful Drive Parry (especially useful vs. Supers) |
Using Drive actions |
| Walking Forward (stacks with passive regen) |
Burnout
Burnout state happens when the player's Drive gauge becomes fully depleted. Burnout gives the player several negative effects:
- All blocked attacks have 4 additional frames of blockstun
- This allows for much stronger pressure sequences; many more attacks become safe on block
- Hitstun is not affected, so combo routes remain unchanged on burned out opponents
- Blocking special moves or supers results in Chip Damage; can lose the round to Chip K.O.
- Corner Drive Impact wall splat causes Stun on hit or block
- Can no longer use any Drive options until gauge is fully replenished
Being in Burnout creates situations that are extremely difficult to escape, like looping corner sequences that are plus on block. If a cornered player is stunned by Drive impact while in Burnout, their Drive Gauge will be fully replenished after recovering from stun. The usual methods of building Drive Gauge also help decrease the Burnout recovery time. While it may be tempting to play passively while in Burnout, it may actually be more effective to mount a strong offense, as you still gain Drive meter from hitting the opponent. Playing an aggressive, offensive style can also make it harder for the opponent to push you back into the corner, where Burnout becomes much more dangerous.
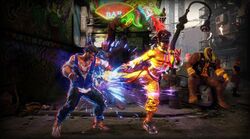
Drive Impact (DI)
Costs 1 Drive Stock. Input ![]() +
+![]() (HP+HK) to perform.
(HP+HK) to perform.
Drive Impact has 26 frames of startup, with 2 hits of armor (from 1-25f), which allows it to absorb and counter the opponent's attacks. If Drive Impact hits as a Punish Counter (or even if the armor is triggered but is too slow to be a true Punish), the opponent will be left in a crumple state. When used predictively, it can counter ranged pokes and projectiles. If blocked midscreen, the opponent is pushed back extremely far, which can help to get yourself out of the corner. This blockstun cannot be countered with Drive Reversal unless the Drive Impact is parried.
Wall Splat: occurs if Drive Impact connects near the corner on hit or block, allowing a guaranteed followup combo.
- Only occurs when performed raw (will not splat if it hits in a combo or an airtight blockstring)
- If a button is cancelled into Drive Impact, a blockstring gap of 8f or less cannot be escaped by jumping
- Opponent is put into a unique free juggle state where followup attacks will also juggle freely
- example: Normal xx Special or a full Target Combo can fully juggle, even when it's normally impossible
- Airborne opponents will splat higher up along the wall, which can affect the followup juggle possibilities
- Combo damage scaling after Wall Splat:
- On Hit: next hit starts at 80% damage scaling, then continue to decrease by 10% per hit as usual (as though Drive Impact was 2 hits)
- On Block: a 20% damage scaling penalty is applied to each hit, but the Drive Impact itself does not count as part of the combo (e.g. 80 -> 80 -> 64 -> 56 -> 48)
Dizzy: occurs when Drive Impact connects on a cornered opponent while in Burnout state. Like Wall Splat, this works on hit or block. The opponent is left vulnerable to a huge punish combo, and may also allow time for actions such as Ryu charging Denjin, Kimberly reloading a spraycan, Juri gaining Fuha stocks, etc.
- Also works if the Drive Impact itself puts the opponent into Burnout
- Like Wall Splat, does not work if Drive Impact connects in a combo or airtight blockstring
- "LOCK" will appear on the screen if a true blockstring into Drive Impact occurs; the opponent will bounce away like a blocked midscreen Drive Impact
- Because burned out opponents have no Drive options, their only counter to Drive Impact cancels is usually a reversal Super Art
- Combos on dizzy opponents begin at 80% damage scaling, then continue to decrease by 10% per hit as usual
| on Block | on Hit | on Counterhit | on Crumple/Punish Counter |
|---|---|---|---|
| 0.5 Bar | 1 Bar | 1.2 Bars | 1.5 Bars |
Drive Impact does have a few downsides:
- Can be broken by Armor Break moves such as Super Arts or Drive Reversal, or by quick chained attacks
- A common tactic is to use a poke cancelled into Fireball, then cancel into Lv. 3 Super on reaction to beat Drive Impact
- Against projectiles, there are 6 frames of armor hit-freeze that slow down your Drive Impact without affect the opponent's recovery
- This makes it difficult or impossible to use on reaction to fireballs unless they have very long recovery
- Multi-hit OD fireballs have hit-freeze on each hit, making it even harder to blow through them
- You take recoverable damage when absorbing an attack, which will KO if you don't have enough HP to survive
- The opponent can react with their own Drive Impact, which hits as a Punish Counter
If two Drive Impacts clash simultaneously, they will bounce off each other and reset to neutral. As a side note, Drive moves take priority over special moves (but not Super Arts), so something like Ryu's 236+HP+HK would result in Drive Impact rather than Hadoken.
Drive Reversal (DRev)
Costs 2 Drive Stocks. Press ![]() +
+![]() +
+![]() (6HPHK) during blockstun to perform. Similar to Alpha Counter or V-Reversal from previous Street Fighter games. They are fully invincible from frames 1-22, and deal a small amount of recoverable damage. Drive Reversals break armor, so it can be used against buttons cancelled into Drive Impact (although it's usually better to attempt your own Drive Impact in the blockstring gap; if it was a true blockstring, then the Drive Impact wouldn't give the opponent a followup combo anyway).
(6HPHK) during blockstun to perform. Similar to Alpha Counter or V-Reversal from previous Street Fighter games. They are fully invincible from frames 1-22, and deal a small amount of recoverable damage. Drive Reversals break armor, so it can be used against buttons cancelled into Drive Impact (although it's usually better to attempt your own Drive Impact in the blockstring gap; if it was a true blockstring, then the Drive Impact wouldn't give the opponent a followup combo anyway).
All Drive Reversals are punishable at -8 on block, and are slow enough that quick attacks will recover before the Drive Reversal connects. Drive Reversal immediately ends the blockstun of the opponent's attack, so inputting earlier increases the chance of successfully punishing the opponent's move. The blockstun of a successful Parry can also be cancelled with Drive Reversal, and this is the only way to use it against Drive Impact. It is impossible to win a round with the damage from Drive Reversal.
Drive Parry
Consumes ~1/2 Drive gauge upon activation, continues draining while held. Hold ![]() +
+![]() (MP+MK) to perform. Becomes a Perfect Parry if it successfully parries an attack within 2 frames of being input.
(MP+MK) to perform. Becomes a Perfect Parry if it successfully parries an attack within 2 frames of being input.
Regular Parry:
- Parries all strikes and projectiles (high and low) from frame 1
- Results in the same frame advantage as blocking the move, but with less pushback
- Can be cancelled into Drive Reversal like regular blockstun
- 8f parry window if buttons are tapped, longer if held
- Drains 50 Drive/frame when held (1 additional bar every 200f)
- Can block during recovery frames (must still block in the correct direction)
- Useful for blocking high/low or left/right mixups, but remains vulnerable to throws
- Getting thrown during Parry results in a Punish Counter (extra damage, Hard Knockdown, loses 1 extra Drive bar)
- Can cancel into Drive Rush from 3rd active frame onward
- Fastest Drive Rush input method is to tap forward, then forward + Parry
- Rewards 5000 Drive (1/2 bar) for successfully parrying non-Super projectiles (including multi-hit projectiles)
- Some exceptions exist, like Kimberly double Spraycan (10000 total) or Guile Sonic Break (2000 each)
- Rewards 10000 Drive (1 bar) for successfully parrying Normals, Specials (including multi-hit attacks), or Drive Reversal
- Target Combos or Rekka strings count as separate attacks, so parrying them builds 1 bar for each hit
- Rewards 20000 Drive (2 bars) for successfully parrying Super Arts or Drive Impact
- This makes it significantly better than blocking, unless the Parry activation would put you into Burnout
- The opponent will also gain some Drive meter when their attack is parried, the same as if it was blocked
Perfect Parry:
- Occurs on the first 2 active frames; Parry cannot be buffered by holding it down, must be timed properly
- Has only 1f of recovery, and prevents the opponent from cancelling their attack, making punishes mostly guaranteed
- The screen freezes upon a successful Perfect Parry, giving ample time to react with a strong punish
- Fully invincible for 6f after success, during which time you can cancel into anything except Drive moves
- A 50% damage scaling penalty is applied to any punish afterward, even if you delay the followup beyond the 6f cancel window
- Against projectiles, the screen does not freeze; puts you into 11f of fixed recovery
- During this 11f recovery, the character is Throw invincible, and any further strikes will automatically be parried
- Perfect Parrying projectiles allows you to hold the input for up to 13 frames without incurring the standard 29f of parry recovery
- Perfect Parrying a strike and projectile on the same frame will parry the strike, causing the screen freeze effect
- In general, Perfect Parry rewards you with the same amount of Drive meter as a regular Parry
- However, the invincibility period can cause some attack hits to whiff, while still only building partial Drive for the part that connected (e.g. Luke's charged Flash Knuckle)
Note: tapping Drive Parry for the minimum time technically costs slightly more than 1/2 Drive bar (unless cancelled into immediate Drive Rush); at 10,000 Drive per bar, the usual cost is 5,250. When done from a crouching state, this cost is increased to 5,300 (or 5,600 for Guile, Kimberly, and Luke). This difference is extremely minor, but could potentially be relevant if attempting a parry with exactly 1/2 a Drive bar remaining.
Drive Rush (DR)
Costs 1 Drive Stock after a Parry or 3 stocks to cancel from a normal attack. Tap ![]()
![]() (66) to perform. The cancelled version acts like a special move, so it only works from special cancellable normals.
(66) to perform. The cancelled version acts like a special move, so it only works from special cancellable normals.
Drive Rush adds +4 to the Hit or Block Advantage of any Normal or Command Normal that is input during the dash animation (but not to Special moves). This makes it great for block pressure, combo extensions, and safe mixups. The dash can be cancelled early by any attack, giving access to a strike/throw mixup. This prevents players from holding Parry or using Drive Impact as a universal defensive response. Normals from Drive Rush also generally have increased juggle potential and do not increase the opponent's juggle count, allowing for unique extended juggle sequences.
If Drive Rush is used mid-combo (whether cancelled or from raw Parry), an additional damage scaling penalty applies, and no additional Drive gauge will be built for the rest of the combo. This does not apply to combos that begin with a Drive Rush attack. Entering the cinematic of a Level 3 Super will also restart the passive regeneration of Drive meter.
The screen freezes for 10 frames during the startup of Drive Rush. This can help to provide a little extra time to decide what to do next, such as reacting to hit/block, or reacting to an opponent's jump or dash animation. At the same time, it makes it easier for the opponent to react to raw Drive Rush in neutral.
It takes a longer time (23-24f) before the Drive Rush can be cancelled with a directional input like crouch, block, or jump. This means that Drive Rush into Block is not a practical way to bait an opponent's response. These late directional input cancels have 2f recovery; as a result, inputting a crouching or command normal late in the Drive Rush animation requires precise timing to receive the +4 frame advantage. The direction and button must be input together within a 3f window.
Overdrive (OD)
Costs 2 Drive Stocks. Press two Punches or Kicks while inputting a special move to perform the Overdrive Art (OD) version.
Acts similarly to EX Special Moves from previous titles. Just like before, input the special move with 2 punches or 2 kicks to perform an enhanced special at the cost of 2 Drive stocks. OD specials can now combo into Super Arts since they are no longer tied to the same meter.
- OD moves generally have benefits like extra damage, faster startup, lower recovery, and may even have invincibility
- OD moves often put the opponent in a juggle state, or have higher juggle potential themselves
- OD moves can be performed with less than 2 Drive stocks, but the player is immediately put into Burnout state
Advanced Drive Info
Passive Drive Regeneration
The Drive meter automatically restores itself over time, but the rate it which it regenerates can change based on several factors. Recall that 1 Drive bar is 10,000 units of Drive meter, and that 1 frame equals 1/60 of a second.
40 Drive/frame (2400/second):
- Standard regeneration rate
+20 Drive/frame (+1200/second):
- Additional Drive meter while walking forward
- Stacks with Passive Regeneration, and even works while otherwise locked out of Drive Regeneration
- If starting at full Drive, can use Microwalk mid-combo strategically:
- Drive Rush Cancel x2 without Burnout, or Drive Rush Cancel x3
- OD Special x3 without Burnout, or OD Special x4
20 Drive/frame (1200/second):
- Being hit by non-Knockdown move (immediately upon entering Hitstun)
- Being Airborne
- Lying on ground (until the beginning of wakeup animation)
- Throw Tech hit freeze (back to normal as soon as the "Throw Escape" actually occurs)
10 Drive/frame (600/second):
- Being hit by a Knockdown move (immediately upon entering Hitstun)
- e.g. Throws, sweeps, KD special moves, air resets, air juggles
- example scenario: opponent will regenerate 20 Drive/frame during the first 2 hits of Jamie's 236P Rekka, but only 10/frame as soon as the 3rd Rekka connects
Drive Regeneration in Burnout
The gray Burnout meter is functionally the same as the Drive gauge, except that it must be fully restored (60,000 Drive) in order to be usable again.
There are some key differences in how Drive meter is restored during Burnout:
- Blocking attacks does not deplete your gauge, but instead builds the same amount of Drive that the opponent gains for connecting their attack.
- This includes blocking Super Arts; blocking a Super will increase your Burnout Drive gauge by 1/2 the usual Drive Damage amount
- Connecting with an attack on hit or block also increases your Drive gauge as usual, allowing you to recover from Burnout more quickly.
Passive Drive regeneration during Burnout works as follows:
50 Drive/frame (3000/second):
- Standard Burnout regeneration rate
- Walking Forward has no additional effect in Burnout
25 Drive/frame (1500/second):
- Being hit by non-Knockdown move (immediately upon entering Hitstun)
- Lying on ground (until the beginning of wakeup animation)
All other situations have the same regeneration rate as usual (including no Drive build during cinematic Level 3 Supers)
Drive Regeneration Cooldown
Certain actions will stop the automatic regeneration of Drive meter for a certain period of time (with the exception of Forward Walk regeneration):
- Blocking Attacks: 90f from start of blockstun (does not apply during Burnout)
- Multi-hit attacks reset the cooldown timer to 90f for each hit
- Being hit by Super Art: 90f from the end of attack hitstun
- Cinematic Supers are considered to be in hitstun until the cinematic has fully ended, greatly extending the Drive regeneration cooldown time
- Overdrive special, Drive Impact, Drive Reversal, Drive Rush Cancel: 120f, starting after the move's recovery
- Drive Rush Cancel also prevents any additional Drive build (passive or on hit) until the combo has finished
- Entering a cinematic Lv.3 Super/Critical Art allows the passive Drive Regeneration to resume
- Whiffed Drive Parry: 240f from the moment of Parry recovery (also applies to Parry~Drive Rush)
- For Chun-Li only, the cooldown is 120f (as of Beta 2 - may be an unintended bug)
- Successful Parry/Perfect Parry: 60f after parry freeze or parry blockstun
Super Gauge
The Super Gauge is only used to perform Super Arts. Characters gain Super meter when an attack connects on hit or block; unlike in many previous games, no meter is built for whiffing an attack. Both players start the match with an empty Super Gauge, and can build up to 3 bars total. The Super meter carries over between rounds, so there is more to consider when deciding whether or not to spend meter to finish a round.
As a general rule, Super Gauge build on hit/block works as follows:
| on Hit | on Block | |
|---|---|---|
| Attacker | (Base) | 50% |
| Defender | 70% | 25% |
The amount of Super Gauge built from an attack is not affected by Counterhit or Punish Counter status, and is also not subject to combo scaling. Drive Impact, Drive Reversal, and Super Arts do not build additional Super Gauge for the attacker or defender, although any followup combo can still build meter.
Super Art
A Super Art is essentially a more powerful type of Special move, requiring Super meter and a more complex input. In addition to damage, Supers often have improved properties like armor break, invincibility, juggle potential. Some Level 2 Super Arts are not attacks, but a powerup like Juri's Feng Shui Engine; this is known as an "install" Super. Install Supers turn the meter into a timer that ticks down until empty, at which point the character returns to normal. When a character is under 25% health, their Level 3 Super turns into a "Critical Art", which deals a bit more damage and may change the knockdown advantage/spacing afterwards.
Cancelling an attack into a Super Art works differently than other moves:
- Lv. 1 Super can be cancelled from Normals only.
- Lv. 2 Super can be cancelled from Normals and OD Specials.
- Lv. 3 Super/CA can be cancelled from Normals and Specials.
- Not all Normals and Specials are cancellable into Super Arts; refer to the "cancel" column in the move's frame data.
Super Arts are an important tool for Drive Gauge management; they can drain the opponent's Drive Gauge and prevent passive regeneration, while using the time to allow your own gauge to passively recover. You can stall for time to prevent Burnout, or ensure the opponent enters Burnout after they overextend in their Drive Gauge usage. During Burnout, invincible Supers are the primary way to avoid being stunned by corner Drive Impact blockstrings, which would otherwise be unavoidable after blocking a cancellable heavy normal.
| Lv.1 Super | Lv.2 Super | Lv.3 Super | Critical Art |
|---|---|---|---|
| 0.5 Bar | 1 Bar | 1.5 Bar | 2 Bar |
Note: this can vary somewhat, especially for non-cinematic variations of Supers
