No edit summary |
No edit summary |
||
| Line 34: | Line 34: | ||
|- | |- | ||
| Stun/Dizzy || [[File:SF6_icon_stun.png|x35px]] || Appears when '''Drive Impact''' connects on a cornered opponent during '''Burnout''' state, allowing for a free combo followup. | | Stun/Dizzy || [[File:SF6_icon_stun.png|x35px]] || Appears when '''Drive Impact''' connects on a cornered opponent during '''Burnout''' state, allowing for a free combo followup. | ||
|- | |||
| Armor Break || [[File:SF6_icon_armorbreak.png|x35px]] || Appears after breaking the opponent's armor, such as connecting Drive Reversal or 3 chained light normals vs. '''Drive Impact'''. | |||
|- | |- | ||
| Crush || [[File:SF6_icon_crush.png|x35px]] || Appears when '''Drive Impact''' is '''blocked''' near the corner for a Wall Splat. | | Crush || [[File:SF6_icon_crush.png|x35px]] || Appears when '''Drive Impact''' is '''blocked''' near the corner for a Wall Splat. | ||
Revision as of 07:00, 2 March 2023
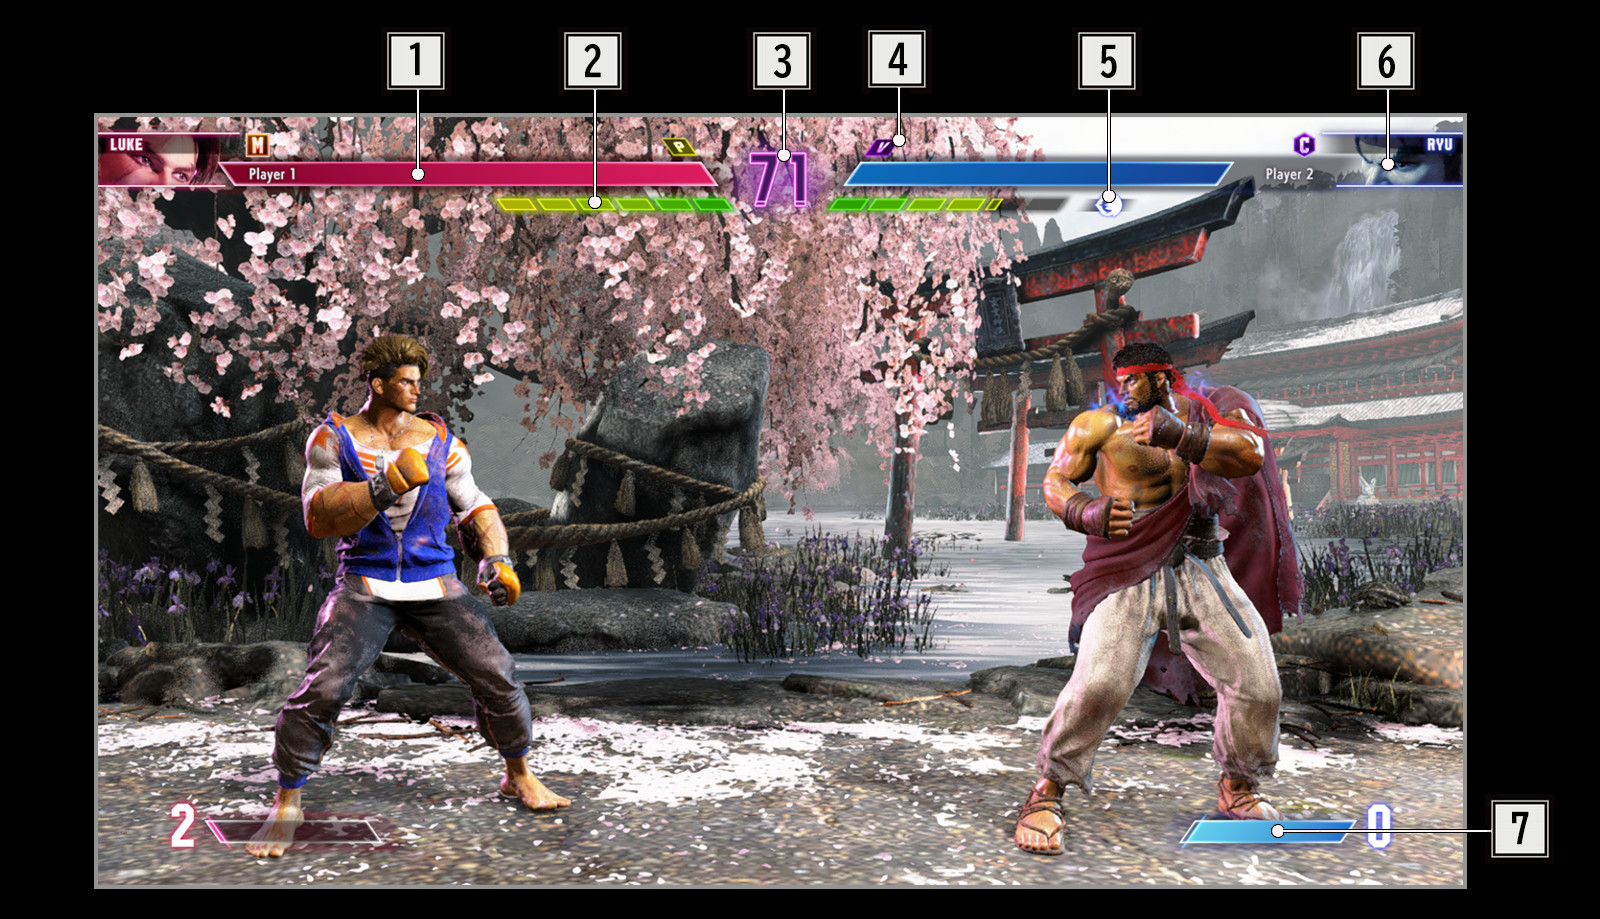
Battle HUD
1. Vitality Gauge: Indicates the health remaining for each character.
2. Drive Gauge: Drive gives you the ability to perform various actions in SF6. When this gauge is empty, it turns gray and begins slowly replenishing. The fighter will enter Burnout and will not be able to use Drive-related techniques until the gauge is fully replenished.
3. Timer: Indicates the time remaining in the round.
4. Round Count: Indicates the current round count. The type of icon indicates how the round was won.
5. Attribute Icon: Some characters have unique icons that indicate some property. Examples include Kimberly's Spray Can stock, Ryu's Denjin charge, and Juri's Fuha stock.
6. Character Icon: Indicates the character and control type (Classic/Modern/Dynamic) being used.
7. Super Art Gauge: Spend this gauge to perform a devastating Super Art. Every attack that lands will fill up the Super Art gauge, and you can fill it up to 3 stocks. Super Art gauge also carries over between rounds.
