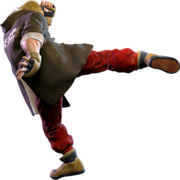
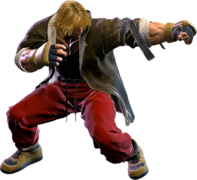
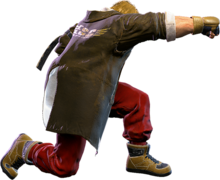
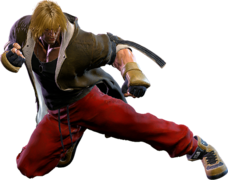
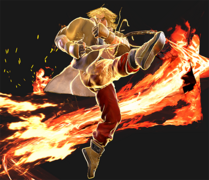
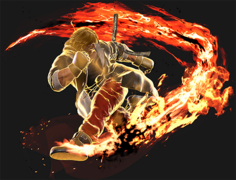
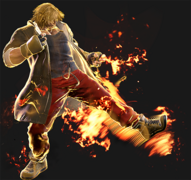
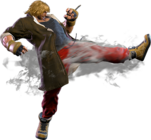
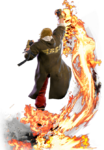
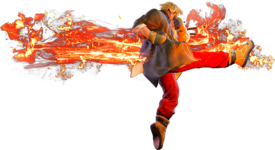
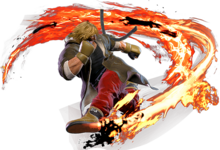
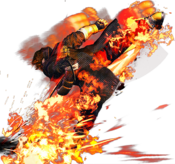
No edit summary |
|||
| Line 6: | Line 6: | ||
=====<font style="visibility:hidden; float:right">5LP</font>===== | =====<font style="visibility:hidden; float:right">5LP</font>===== | ||
{{MoveDataCargo | {{MoveDataCargo | ||
| title = | | title = Standing Light Punch | ||
| subtitle = | | subtitle = | ||
| input = | | input = 5LP | ||
| images = | | images = | ||
{{MoveDataCargoImage|imageHeight=180px|ken_5lp|caption=}} | {{MoveDataCargoImage|imageHeight=180px|ken_5lp|caption=}} | ||
| Line 19: | Line 19: | ||
=====<font style="visibility:hidden; float:right">5MP</font>===== | =====<font style="visibility:hidden; float:right">5MP</font>===== | ||
{{MoveDataCargo | {{MoveDataCargo | ||
| title = | | title = Standing Medium Punch | ||
| subtitle = | | subtitle = | ||
| input = | | input = 5MP | ||
| images = | | images = | ||
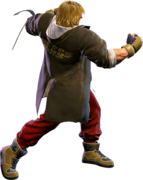
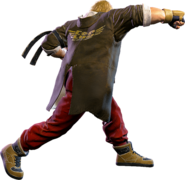
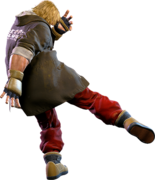
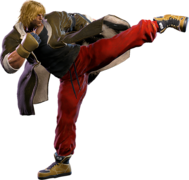
{{MoveDataCargoImage|imageHeight=180px|ken_5mp|caption= The Chin buster}} | {{MoveDataCargoImage|imageHeight=180px|ken_5mp|caption= The Chin buster}} | ||
| Line 30: | Line 30: | ||
=====<font style="visibility:hidden; float:right">5HP</font>===== | =====<font style="visibility:hidden; float:right">5HP</font>===== | ||
{{MoveDataCargo | {{MoveDataCargo | ||
| title = | | title = Standing Heavy Punch | ||
| subtitle = | | subtitle = | ||
| input = | | input = 5HP | ||
| images = | | images = | ||
{{MoveDataCargoImage|imageHeight=180px|ken_5hp|caption=}} | {{MoveDataCargoImage|imageHeight=180px|ken_5hp|caption=}} | ||
| Line 42: | Line 42: | ||
=====<font style="visibility:hidden; float:right">5LK</font>===== | =====<font style="visibility:hidden; float:right">5LK</font>===== | ||
{{MoveDataCargo | {{MoveDataCargo | ||
| title = | | title = Standing Light Kick | ||
| subtitle = | | subtitle = | ||
| input = | | input = 5LK | ||
| images = | | images = | ||
{{MoveDataCargoImage|imageHeight=180px|ken_5lk|caption=}} | {{MoveDataCargoImage|imageHeight=180px|ken_5lk|caption=}} | ||
| Line 54: | Line 54: | ||
=====<font style="visibility:hidden; float:right">5MK</font>===== | =====<font style="visibility:hidden; float:right">5MK</font>===== | ||
{{MoveDataCargo | {{MoveDataCargo | ||
| title = | | title = Standing Medium Kick | ||
| subtitle = | | subtitle = | ||
| input = | | input = 5MK | ||
| images = | | images = | ||
{{MoveDataCargoImage|imageHeight=180px|ken_5Mk|caption=}} | {{MoveDataCargoImage|imageHeight=180px|ken_5Mk|caption=}} | ||
| Line 67: | Line 67: | ||
=====<font style="visibility:hidden; float:right">5HK</font>===== | =====<font style="visibility:hidden; float:right">5HK</font>===== | ||
{{MoveDataCargo | {{MoveDataCargo | ||
| title = | | title = Standing Heavy Kick | ||
| subtitle = | | subtitle = | ||
| input = | | input = 5HK | ||
| images = | | images = | ||
{{MoveDataCargoImage|imageHeight=180px|ken_5Hk|caption=}} | {{MoveDataCargoImage|imageHeight=180px|ken_5Hk|caption=}} | ||
| Line 80: | Line 80: | ||
=====<font style="visibility:hidden; float:right">2LP</font>===== | =====<font style="visibility:hidden; float:right">2LP</font>===== | ||
{{MoveDataCargo | {{MoveDataCargo | ||
| title = | | title = Crouching Light Punch | ||
| subtitle = | | subtitle = | ||
| input = | | input = 2LP | ||
| images = | | images = | ||
{{MoveDataCargoImage|imageHeight=180px|ken_2lp|caption=}} | {{MoveDataCargoImage|imageHeight=180px|ken_2lp|caption=}} | ||
| Line 93: | Line 93: | ||
=====<font style="visibility:hidden; float:right">2MP</font>===== | =====<font style="visibility:hidden; float:right">2MP</font>===== | ||
{{MoveDataCargo | {{MoveDataCargo | ||
| title = | | title = Crouching Medium Punch | ||
| subtitle = | | subtitle = | ||
| input = | | input = 2MP | ||
| images = | | images = | ||
{{MoveDataCargoImage|imageHeight=180px|ken_2mp|caption=}} | {{MoveDataCargoImage|imageHeight=180px|ken_2mp|caption=}} | ||
| Line 104: | Line 104: | ||
=====<font style="visibility:hidden; float:right">2HP</font>===== | =====<font style="visibility:hidden; float:right">2HP</font>===== | ||
{{MoveDataCargo | {{MoveDataCargo | ||
| title = | | title = Crouching Heavy Punch | ||
| subtitle = | | subtitle = | ||
| input = | | input = 2HP | ||
| images = | | images = | ||
{{MoveDataCargoImage|imageHeight=180px|ken_2hp|caption=}} | {{MoveDataCargoImage|imageHeight=180px|ken_2hp|caption=}} | ||
| Line 117: | Line 117: | ||
=====<font style="visibility:hidden; float:right">2LK</font>===== | =====<font style="visibility:hidden; float:right">2LK</font>===== | ||
{{MoveDataCargo | {{MoveDataCargo | ||
| title = | | title = Crouching Light Kick | ||
| subtitle = | | subtitle = | ||
| input = | | input = 2LK | ||
| images = | | images = | ||
{{MoveDataCargoImage|imageHeight=180px|ken_2lk|caption=}} | {{MoveDataCargoImage|imageHeight=180px|ken_2lk|caption=}} | ||
| Line 129: | Line 129: | ||
=====<font style="visibility:hidden; float:right">2MK</font>===== | =====<font style="visibility:hidden; float:right">2MK</font>===== | ||
{{MoveDataCargo | {{MoveDataCargo | ||
| title = | | title = Crouching Medium Kick | ||
| subtitle = | | subtitle = | ||
| input = | | input = 2MK | ||
| images = | | images = | ||
{{MoveDataCargoImage|imageHeight=180px|ken_2mk|caption=}} | {{MoveDataCargoImage|imageHeight=180px|ken_2mk|caption=}} | ||
| Line 140: | Line 140: | ||
=====<font style="visibility:hidden; float:right">2HK</font>===== | =====<font style="visibility:hidden; float:right">2HK</font>===== | ||
{{MoveDataCargo | {{MoveDataCargo | ||
| title = | | title = Crouching Heavy Kick | ||
| subtitle = | | subtitle = | ||
| input = | | input = 2HK | ||
| images = | | images = | ||
{{MoveDataCargoImage|imageHeight=180px|ken_2hk|caption=}} | {{MoveDataCargoImage|imageHeight=180px|ken_2hk|caption=}} | ||
| Line 154: | Line 154: | ||
=====<font style="visibility:hidden; float:right">j.LP</font>===== | =====<font style="visibility:hidden; float:right">j.LP</font>===== | ||
{{MoveDataCargo | {{MoveDataCargo | ||
| title = | | title = Jumping Light Punch | ||
| subtitle = | | subtitle = | ||
| input = | | input = j.LP | ||
| images = | | images = | ||
{{MoveDataCargoImage|imageHeight=160px|ken_jlp|caption=}} | {{MoveDataCargoImage|imageHeight=160px|ken_jlp|caption=}} | ||
| Line 165: | Line 165: | ||
=====<font style="visibility:hidden; float:right">j.MP</font>===== | =====<font style="visibility:hidden; float:right">j.MP</font>===== | ||
{{MoveDataCargo | {{MoveDataCargo | ||
| title = | | title = Jumping Medium Punch | ||
| subtitle = | | subtitle = | ||
| input = | | input = j.MP | ||
| images = | | images = | ||
{{MoveDataCargoImage|imageHeight=180px|ken_jmp|caption=}} | {{MoveDataCargoImage|imageHeight=180px|ken_jmp|caption=}} | ||
| Line 178: | Line 178: | ||
=====<font style="visibility:hidden; float:right">j.HP</font>===== | =====<font style="visibility:hidden; float:right">j.HP</font>===== | ||
{{MoveDataCargo | {{MoveDataCargo | ||
| title = | | title = Jumping Heavy Punch | ||
| subtitle = | | subtitle = | ||
| input = | | input = j.HP | ||
| images = | | images = | ||
{{MoveDataCargoImage|imageHeight=180px|ken_jhp|caption=}} | {{MoveDataCargoImage|imageHeight=180px|ken_jhp|caption=}} | ||
| Line 191: | Line 191: | ||
=====<font style="visibility:hidden; float:right">j.LK</font>===== | =====<font style="visibility:hidden; float:right">j.LK</font>===== | ||
{{MoveDataCargo | {{MoveDataCargo | ||
| title = | | title = Jumping Light Kick | ||
| subtitle = | | subtitle = | ||
| input = | | input = j.LK | ||
| images = | | images = | ||
{{MoveDataCargoImage|imageHeight=170px|ken_jlk|caption=}} | {{MoveDataCargoImage|imageHeight=170px|ken_jlk|caption=}} | ||
| Line 203: | Line 203: | ||
=====<font style="visibility:hidden; float:right">j.MK</font>===== | =====<font style="visibility:hidden; float:right">j.MK</font>===== | ||
{{MoveDataCargo | {{MoveDataCargo | ||
| title = | | title = Jumping Medium Kick | ||
| subtitle = | | subtitle = | ||
| input = | | input = j.MK | ||
| images = | | images = | ||
{{MoveDataCargoImage|imageHeight=180px|ken_jmk|caption=}} | {{MoveDataCargoImage|imageHeight=180px|ken_jmk|caption=}} | ||
| Line 215: | Line 215: | ||
=====<font style="visibility:hidden; float:right">j.HK</font>===== | =====<font style="visibility:hidden; float:right">j.HK</font>===== | ||
{{MoveDataCargo | {{MoveDataCargo | ||
| title = | | title = Jumping Heavy Kick | ||
| subtitle = | | subtitle = | ||
| input = | | input = j.HK | ||
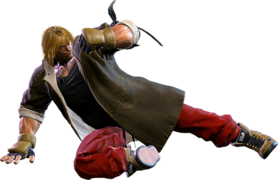
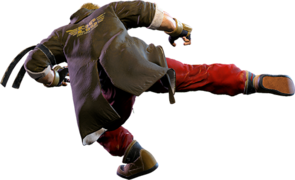
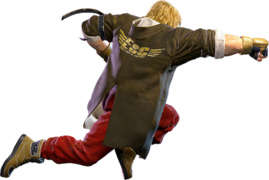
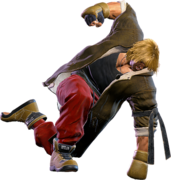
| images = | | images = | ||
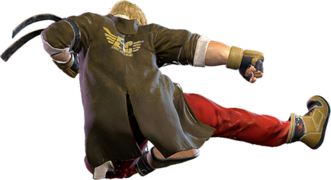
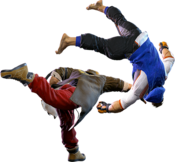
{{MoveDataCargoImage|imageHeight=180px|ken_jhk|caption=}} | {{MoveDataCargoImage|imageHeight=180px|ken_jhk|caption=}} | ||
| Line 226: | Line 226: | ||
=====<font style="visibility:hidden; float:right">nj.HK</font>===== | =====<font style="visibility:hidden; float:right">nj.HK</font>===== | ||
{{MoveDataCargo | {{MoveDataCargo | ||
| title = | | title = Neutral Jumping Heavy Kick | ||
| subtitle = | | subtitle = | ||
| input = | | input = nj.HK | ||
| images = | | images = | ||
{{MoveDataCargoImage|imageHeight=180px|ken_8jhk|caption=}} | {{MoveDataCargoImage|imageHeight=180px|ken_8jhk|caption=}} | ||
| Line 236: | Line 236: | ||
== Command Normals == | == Command Normals == | ||
Ken has no Command Normals | Ken has no Command Normals | ||
== Target Combos == | == Target Combos == | ||
=====<font style="visibility:hidden; float:right"> | =====<font style="visibility:hidden; float:right">5MP~HP</font>===== | ||
{{MoveDataCargo | {{MoveDataCargo | ||
| title = | | title = Chin Buster 2nd | ||
| subtitle = | | subtitle = | ||
| input = | | input = 5MP~HP | ||
| images = | | images = | ||
{{MoveDataCargoImage|imageHeight=180px|ken_mp_hp|caption=}} | {{MoveDataCargoImage|imageHeight=180px|ken_mp_hp|caption=}} | ||
| Line 252: | Line 251: | ||
}} | }} | ||
=====<font style="visibility:hidden; float:right">MK | =====<font style="visibility:hidden; float:right">5MK~MK~HK</font>===== | ||
{{MoveDataCargo | {{MoveDataCargo | ||
| title = | | title = Triple Flash Kicks | ||
| subtitle = | | subtitle = | ||
| input = | | input = 5MK~MK~HK | ||
| images = | | images = | ||
{{MoveDataCargoImage|imageHeight= | {{MoveDataCargoImage|imageHeight=140px|ken_mk_mk|caption=}} | ||
---- | |||
{{MoveDataCargoImage|imageHeight=140px|ken_mk_mk_hk|caption=}} | |||
| info = | | info = | ||
{{AttackDataCargo-SF6/Query|ken_mk_mk}} | {{AttackDataCargo-SF6/Query|ken_mk_mk}} | ||
* Strong buffer in neutral from far ranges | |||
{{AttackDataCargo-SF6/Query|ken_mk_mk_hk}} | {{AttackDataCargo-SF6/Query|ken_mk_mk_hk}} | ||
* | * Whiffs on crouching opponents | ||
}} | }} | ||
== Universal Mechanics == | == Universal Mechanics == | ||
=== Throws === | === Throws === | ||
=====<font style="visibility:hidden; float:right">Throw</font>===== | =====<font style="visibility:hidden; float:right">Forward Throw (LPLK)</font>===== | ||
{{MoveDataCargo | {{MoveDataCargo | ||
| title = Forward Throw | | title = Forward Throw | ||
| Line 288: | Line 280: | ||
}} | }} | ||
=====<font style="visibility:hidden; float:right">Back Throw</font>===== | =====<font style="visibility:hidden; float:right">Back Throw (4LPLK)</font>===== | ||
{{MoveDataCargo | {{MoveDataCargo | ||
| title = Back Throw | | title = Back Throw | ||
| Line 300: | Line 292: | ||
=== Drive Moves === | === Drive Moves === | ||
=====<font style="visibility:hidden; float:right">Drive Impact</font>===== | =====<font style="visibility:hidden; float:right">Drive Impact (HPHK)</font>===== | ||
{{MoveDataCargo | {{MoveDataCargo | ||
| title = Drive Impact | | title = Drive Impact | ||
| Line 312: | Line 304: | ||
}} | }} | ||
=====<font style="visibility:hidden; float:right">Drive Reversal</font>===== | =====<font style="visibility:hidden; float:right">Drive Reversal (6HPHK)</font>===== | ||
{{MoveDataCargo | {{MoveDataCargo | ||
| title = Drive Reversal | | title = Drive Reversal | ||
| Line 324: | Line 316: | ||
}} | }} | ||
=====<font style="visibility:hidden; float:right">Drive Parry</font>===== | =====<font style="visibility:hidden; float:right">Drive Parry (MPMK)</font>===== | ||
{{MoveDataCargo | {{MoveDataCargo | ||
| title = Drive Parry | | title = Drive Parry | ||
| Line 336: | Line 328: | ||
}} | }} | ||
=====<font style="visibility:hidden; float:right">Drive Rush</font>===== | =====<font style="visibility:hidden; float:right">Drive Rush (66)</font>===== | ||
{{MoveDataCargo | {{MoveDataCargo | ||
| title = Drive Rush | | title = Drive Rush | ||
| Line 349: | Line 341: | ||
=== Taunts === | === Taunts === | ||
=====<font style="visibility:hidden; float:right"> | =====<font style="visibility:hidden; float:right">Neutral Taunt (5PPPKKK)</font>===== | ||
{{MoveDataCargo | {{MoveDataCargo | ||
| title = Neutral Taunt | | title = Neutral Taunt | ||
| Line 359: | Line 351: | ||
{{AttackDataCargo-SF6/Query|Ken_5pppkkk}} | {{AttackDataCargo-SF6/Query|Ken_5pppkkk}} | ||
}} | }} | ||
=====<font style="visibility:hidden; float:right"> | =====<font style="visibility:hidden; float:right">Forward Taunt (6PPPKKK)</font>===== | ||
{{MoveDataCargo | {{MoveDataCargo | ||
| title = Forward Taunt | | title = Forward Taunt | ||
| Line 369: | Line 361: | ||
{{AttackDataCargo-SF6/Query|Ken_6pppkkk}} | {{AttackDataCargo-SF6/Query|Ken_6pppkkk}} | ||
}} | }} | ||
=====<font style="visibility:hidden; float:right"> | =====<font style="visibility:hidden; float:right">Back Taunt (4PPPKKK)</font>===== | ||
{{MoveDataCargo | {{MoveDataCargo | ||
| title = Back Taunt | | title = Back Taunt | ||
| Line 381: | Line 373: | ||
== Special Moves == | == Special Moves == | ||
=====<font style="visibility:hidden; float:right">Hadoken (236P)</font>===== | |||
=====<font style="visibility:hidden; float:right">236P</font>===== | |||
{{MoveDataCargo | {{MoveDataCargo | ||
| title = Hadoken | | title = Hadoken | ||
| Line 398: | Line 389: | ||
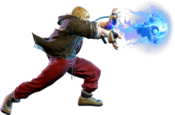
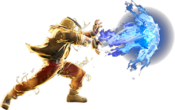
}} | }} | ||
=====<font style="visibility:hidden; float:right">623P</font>===== | =====<font style="visibility:hidden; float:right">Shoryuken (623P)</font>===== | ||
{{MoveDataCargo | {{MoveDataCargo | ||
| title = Shoryuken | | title = Shoryuken | ||
| Line 414: | Line 405: | ||
}} | }} | ||
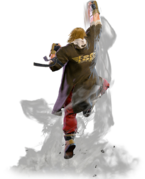
=====<font style="visibility:hidden; float:right">214K</font>===== | =====<font style="visibility:hidden; float:right">Tatsumaki Senpu-kyaku (214K)</font>===== | ||
{{MoveDataCargo | {{MoveDataCargo | ||
| title = Tatsumaki Senpu-kyaku | | title = Tatsumaki Senpu-kyaku | ||
| Line 432: | Line 423: | ||
}} | }} | ||
=====<font style="visibility:hidden; float:right">j.214K</font>===== | =====<font style="visibility:hidden; float:right">Aerial Tatsumaki Senpu-kyaku (j.214K)</font>===== | ||
{{MoveDataCargo | {{MoveDataCargo | ||
| title = Aerial Tatsumaki Senpu-kyaku | | title = Aerial Tatsumaki Senpu-kyaku | ||
| Line 449: | Line 440: | ||
}} | }} | ||
=====<font style="visibility:hidden; float:right">623K</font>===== | =====<font style="visibility:hidden; float:right">Dragonlash Kick (623K)</font>===== | ||
{{MoveDataCargo | {{MoveDataCargo | ||
| title = Dragonlash Kick | | title = Dragonlash Kick | ||
| Line 468: | Line 459: | ||
}} | }} | ||
=====<font style="visibility:hidden; float:right">236K</font>===== | =====<font style="visibility:hidden; float:right">Jinrai Kick (236K)</font>===== | ||
{{MoveDataCargo | {{MoveDataCargo | ||
| title = Jinrai Kick | | title = Jinrai Kick | ||
| Line 484: | Line 475: | ||
}} | }} | ||
=====<font style="visibility:hidden; float:right">236K | =====<font style="visibility:hidden; float:right">Kazekama Shin Kick (236K~6LK)</font>===== | ||
{{MoveDataCargo | {{MoveDataCargo | ||
| title = Kazekama Shin Kick | | title = Kazekama Shin Kick | ||
| subtitle = | | subtitle = | ||
| input = 236K | | input = 236K~6LK | ||
| images = | | images = | ||
{{MoveDataCargoImage|imageHeight=180px|ken_236k_6lk|caption=}} | {{MoveDataCargoImage|imageHeight=180px|ken_236k_6lk|caption=}} | ||
| Line 500: | Line 491: | ||
}} | }} | ||
=====<font style="visibility:hidden; float:right">236K | =====<font style="visibility:hidden; float:right">Gorai Axe Kick (236K~6MK)</font>===== | ||
{{MoveDataCargo | {{MoveDataCargo | ||
| title = Gorai Axe Kick | | title = Gorai Axe Kick | ||
| subtitle = | | subtitle = | ||
| input = 236K | | input = 236K~6MK | ||
| images = | | images = | ||
{{MoveDataCargoImage|imageHeight=180px|ken_236k_6mk|caption=}} | {{MoveDataCargoImage|imageHeight=180px|ken_236k_6mk|caption=}} | ||
| Line 517: | Line 508: | ||
}} | }} | ||
=====<font style="visibility:hidden; float:right">236K | =====<font style="visibility:hidden; float:right">Senka Snap Kick (236K~6HK)</font>===== | ||
{{MoveDataCargo | {{MoveDataCargo | ||
| title = Senka Snap Kick | | title = Senka Snap Kick | ||
| subtitle = | | subtitle = | ||
| input = 236K | | input = 236K~6HK | ||
| images = | | images = | ||
{{MoveDataCargoImage|imageHeight=180px|ken_236k_6hk|caption=}} | {{MoveDataCargoImage|imageHeight=180px|ken_236k_6hk|caption=}} | ||
| Line 531: | Line 522: | ||
}} | }} | ||
=====<font style="visibility:hidden; float:right">236KK | =====<font style="visibility:hidden; float:right">Kasai Thrust Kick (236KK~6K~6K)</font>===== | ||
{{MoveDataCargo | {{MoveDataCargo | ||
| title = Kasai Thrust Kick | | title = Kasai Thrust Kick | ||
| subtitle = | | subtitle = | ||
| input = 236KK | | input = 236KK~6K~6K | ||
| images = | | images = | ||
{{MoveDataCargoImage|imageHeight=140px|ken_236kk_6lk_6k|caption=}} | {{MoveDataCargoImage|imageHeight=140px|ken_236kk_6lk_6k|caption=}} | ||
| Line 567: | Line 558: | ||
}} | }} | ||
=====<font style="visibility:hidden; float:right">KK | =====<font style="visibility:hidden; float:right">Run Normal Followups (KK~K)</font>===== | ||
{{MoveDataCargo | {{MoveDataCargo | ||
| title = Run Normal Followups | | title = Run Normal Followups | ||
| subtitle = | | subtitle = | ||
| input = KK | | input = KK~K | ||
| images = | | images = | ||
{{MoveDataCargoImage|imageHeight=140px|ken_kk_lk|caption=}} | {{MoveDataCargoImage|imageHeight=140px|ken_kk_lk|caption=}} | ||
| Line 590: | Line 581: | ||
}} | }} | ||
=====<font style="visibility:hidden; float:right">KK | =====<font style="visibility:hidden; float:right">Run Special Followups (KK~Special)</font>===== | ||
{{MoveDataCargo | {{MoveDataCargo | ||
| title = Run Special Followups | | title = Run Special Followups | ||
| subtitle = | | subtitle = | ||
| input = KK | | input = KK~Special | ||
| images = | | images = | ||
{{MoveDataCargoImage|imageHeight=150px|ken_kk_623p|caption=}} | {{MoveDataCargoImage|imageHeight=150px|ken_kk_623p|caption=}} | ||
| Line 618: | Line 609: | ||
== Super Arts == | == Super Arts == | ||
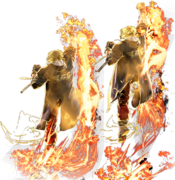
=====<font style="visibility:hidden; float:right">Level 1 Super (214214K)</font>===== | |||
=====<font style="visibility:hidden; float:right">214214K</font>===== | |||
{{MoveDataCargo | {{MoveDataCargo | ||
| title = Dragonlash Flame | | title = Dragonlash Flame | ||
| Line 631: | Line 621: | ||
}} | }} | ||
=====<font style="visibility:hidden; float:right">236236K</font>===== | =====<font style="visibility:hidden; float:right">Level 2 Super (236236K)</font>===== | ||
{{MoveDataCargo | {{MoveDataCargo | ||
| title = Shippu Jinrai-kyaku | | title = Shippu Jinrai-kyaku | ||
| Line 643: | Line 633: | ||
}} | }} | ||
=====<font style="visibility:hidden; float:right">236236P</font>===== | =====<font style="visibility:hidden; float:right">Level 3 Super (236236P)</font>===== | ||
{{MoveDataCargo | {{MoveDataCargo | ||
| title = Shinryu Reppa | | title = Shinryu Reppa | ||
Revision as of 20:09, 7 January 2023
| Pre-release information
This page is under construction based on pre-release data. Join the SF6 Resource Hub for info on editing. |
Introduction
Former US National Fighting Champ, and ex-VP of the Masters Foundation. Accusations of orchestrating a criminal plot have forced Ken to abandon his family and business and go into hiding.
The original shotoclone, Ken is very similar to his old training partner Ryu. Both characters have fairly similar movesets, but Ken carves out a path all his own. With emphasis on aggression and close-range combat, Ken acts as a more offense focused alternative to the Shoto playstyle.
Ken shares the iconic Hadoken and Shoryuken with Ryu, but there's about where their kits begin to diverge. Ken's signature special is his command sprint Quick Dash, which can be used both as a pressure tool and to empower his other specials. If certain specials are used out of Quick Dash, they gain enhanced properties rivalling that of Overdrive moves. In particular, while his normal Tatsumaki is a decent combo ender, Dash Tatsumaki gives incredible corner carry off of any clean hit. Each of these enhanced specials act as different combo enders or extenders, and each one gives something valuable to Ken's kit, whether that be corner carry, strong okizeme, or even sideswapping mid-combo.
Excellent corner carry is a running theme in Ken's kit. While he pokes with 5MK, 2MK and 5HP, Ken looks for a clean hit to Drive Rush. After a confirm, Ken can carry you all the way to the corner and set you up for some truly nasty corner pressure. Any successful hit leads into powerful corner combos that deal great damage and give good okizeme, allowing him to loop pressure continuously. The Jinrai Series of kicks acts as great rekka pressure options in this scenario, and even come with built-in mixup tools. All of this adds up to Ken being a neutral and offense monster, capable of easily tagging the opponent and dragging them into the corner off of any successful opening.
While Ken may seem like an offensive rushdown monster at first, what keeps him in check is the considerably bad block advantage on many of his moves. Each version of Jinrai Kicks and Dragon Lash are either punishable on block or interruptible, causing his offense to be based on making the opponent unsure of when to press. Smart players will quickly learn not to press until something punishable comes out, which can force Ken to play reactively and wait for the opponent to give him an opening.
Due to the stubby range of Ken's 5MP, he may sometimes struggle confirming into his important combos—but with smart use of Run and Drive Rush, he is able to get great confirms from very far away. Learning his Run combos to capitalize on openings can also be somewhat tricky. But overall, Ken is another great character to learn Street Fighter with. If you like aggression, strong confirms, combo expression, and enjoy kicking so hard you set things on fire, you really can't go wrong with Ken.
| Pick if you like: | Avoid if you dislike: |
|---|---|
|
|
Classic & Modern Versions Comparison
| Missing Normals |
|
|---|---|
| Missing Command Normals |
|
| Shortcut-Only Specials |
|
| Assist Combos |
|
| Miscellaneous Changes |
|
| Ken | |
|---|---|
| Vitals | |
| Life Points | 10000 |
| Ground Movement | |
| Forward Walk Speed | 0.047 |
| Backward Walk Speed | 0.032 |
| Forward Dash Speed | 19 |
| Backward Dash Speed | 23 |
| Forward Dash Distance | 1.322 |
| Backward Dash Distance | 0.923 |
| Drive Rush Min. Distance (Throw) | 0.745 |
| Drive Rush Min. Distance (Block) | 2.449 |
| Drive Rush Max Distance | 3.590 |
| Jumping | |
| Jump Speed | 4+38+3 |
| Jump Apex | 2.115 |
| Forward Jump Distance | 1.90 |
| Backward Jump Distance | 1.52 |
| Throws | |
| Throw Range | 0.8 |
| Throw Hurtbox | 0.33 |
Normals
Standing Normals
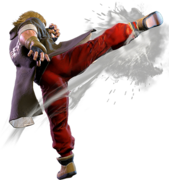
5LP
| Startup | Active | Recovery | Cancel | Damage | Guard | On Hit | On Block |
|---|---|---|---|---|---|---|---|
| 4 | 3 | 7 | Chn Sp SA | 300 | LH | +4 | -1 |
- Standard 4 Frame jab.
- Chains into Stand LP/Crouch LP/Crouch LK
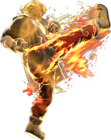
5MP
| Startup | Active | Recovery | Cancel | Damage | Guard | On Hit | On Block |
|---|---|---|---|---|---|---|---|
| 5 | 4 | 14 | Sp SA TC | 600 | LH | +4 | -2 |
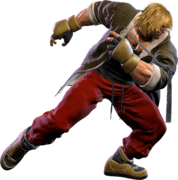
5HP
| Startup | Active | Recovery | Cancel | Damage | Guard | On Hit | On Block |
|---|---|---|---|---|---|---|---|
| 10 | 5 | 17 | Sp SA | 800 | LH | +3 | -2 |
- Great poke, confirmable into specials on hit.
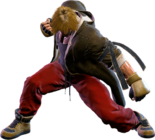
5LK
| Startup | Active | Recovery | Cancel | Damage | Guard | On Hit | On Block |
|---|---|---|---|---|---|---|---|
| 5 | 2 | 12 | Sp SA | 300 | LH | 0 | -2 |
- Great range, makes it a great punish tool
5MK
| Startup | Active | Recovery | Cancel | Damage | Guard | On Hit | On Block |
|---|---|---|---|---|---|---|---|
| 8 | 3 | 20 | TC | 600 | LH | +3 | -5 |
- Whiffs on Crouchers at far ranges.
- Confirmable into the target combo follow up
5HK
| Startup | Active | Recovery | Cancel | Damage | Guard | On Hit | On Block |
|---|---|---|---|---|---|---|---|
| 12 | 2 | 23(25) | - | 800 | LH | +1 | -5 |
- Causes a Spinning State on Punish Counter allowing for follow ups.
Crouching Normals
2LP
| Startup | Active | Recovery | Cancel | Damage | Guard | On Hit | On Block |
|---|---|---|---|---|---|---|---|
| 4 | 2 | 9 | Chn Sp SA | 300 | LH | +5 | -1 |
- Being +5 on hit allows Ken to link into his 5MP>HP Target Combo for a solid conversion.
- Chains into Crouch LP/Crouch LK/Stand LP
2MP
| Startup | Active | Recovery | Cancel | Damage | Guard | On Hit | On Block |
|---|---|---|---|---|---|---|---|
| 6 | 3 | 14(16) | Sp SA | 700 | LH | +3 | 0 |
2HP
| Startup | Active | Recovery | Cancel | Damage | Guard | On Hit | On Block |
|---|---|---|---|---|---|---|---|
| 8 | 4 | 24 | Sp SA | 800 | LH | +3 | -10 |
- Good anti air, moves ken forward.
- Only move that combos into HK Jinrai on regular hit.
2LK
| Startup | Active | Recovery | Cancel | Damage | Guard | On Hit | On Block |
|---|---|---|---|---|---|---|---|
| 5 | 3 | 10 | Chn | 200 | L | +1 | -3 |
- Chains into Stand LP and Crouch LP
2MK
| Startup | Active | Recovery | Cancel | Damage | Guard | On Hit | On Block |
|---|---|---|---|---|---|---|---|
| 7 | 3 | 19 | Sp SA | 500 | L | -2 | -6 |
2HK
| Startup | Active | Recovery | Cancel | Damage | Guard | On Hit | On Block |
|---|---|---|---|---|---|---|---|
| 8 | 3 | 24(27) | - | 900 | L | KD +40 | -10 |
- Causes a Hard Knockdown on regular hit
- Causes a longer Hard Knockdown on Counter/Punish Counter
Jumping Normals
j.LP
| Startup | Active | Recovery | Cancel | Damage | Guard | On Hit | On Block |
|---|---|---|---|---|---|---|---|
| 5 | 7 | 3 land | - | 300 | H | +9 | +5 |
j.MP
| Startup | Active | Recovery | Cancel | Damage | Guard | On Hit | On Block |
|---|---|---|---|---|---|---|---|
| 6 | 4 | 3 land | Sp | 700 | H | +9(+11) | +5(+7) |
- Ken's only jumping normal that grants hard knockdown when used as an air to air
- Ken's only cancellable jumping normal
j.HP
| Startup | Active | Recovery | Cancel | Damage | Guard | On Hit | On Block |
|---|---|---|---|---|---|---|---|
| 9 | 6 | 3 land | - | 800 | H | +7(+15) | +3(+11) |
- Causes a spiked knockdown on Counter/Punish Counter. Not a Hard Knockdown
- Hits extremely deep
j.LK
| Startup | Active | Recovery | Cancel | Damage | Guard | On Hit | On Block |
|---|---|---|---|---|---|---|---|
| 6 | 6 | 3 land | - | 300 | H | +5(+10) | +1(+6) |
- Can hit Cross-Up
j.MK
| Startup | Active | Recovery | Cancel | Damage | Guard | On Hit | On Block |
|---|---|---|---|---|---|---|---|
| 7 | 6 | 3 land | - | 500 | H | +9(+13) | +5(+9) |
- Can hit Cross-Up
j.HK
| Startup | Active | Recovery | Cancel | Damage | Guard | On Hit | On Block |
|---|---|---|---|---|---|---|---|
| 10 | 7 | 3 land | - | 800 | H | +11(+15) | +7(+11) |
nj.HK
Command Normals
Ken has no Command Normals
Target Combos
5MP~HP
No results
- Target combo causes a juggle which can be converted into all of his run specials.
5MK~MK~HK
No results
- Strong buffer in neutral from far ranges
No results
- Whiffs on crouching opponents
Universal Mechanics
Throws
Forward Throw (LPLK)
| Startup | Active | Recovery | Cancel | Damage | Guard | On Hit | On Block |
|---|---|---|---|---|---|---|---|
| 5 | 3 | 23 | - | 1200 (2040) | T | KD +20 | - |
Back Throw (4LPLK)
| Startup | Active | Recovery | Cancel | Damage | Guard | On Hit | On Block |
|---|---|---|---|---|---|---|---|
| 5 | 3 | 23 | - | 1200 (2040) | T | KD +6 | - |
Drive Moves
Drive Impact (HPHK)
| Startup | Active | Recovery | Cancel | Damage | Guard | On Hit | On Block |
|---|---|---|---|---|---|---|---|
| 26 | 2 | 35 | - | 800 | LH | KD +35 / Wall Splat KD +65 | -3 / Wall Splat HKD +72 |
See Drive Impact.
Drive Reversal (6HPHK)
| Startup | Active | Recovery | Cancel | Damage | Guard | On Hit | On Block |
|---|---|---|---|---|---|---|---|
| 20 | 3 | 26(31) | - | 500 recoverable | LH | KD +23 | -6 |
See Drive Reversal.
Drive Parry (MPMK)
| Startup | Active | Recovery | Cancel | Damage | Guard | On Hit | On Block |
|---|---|---|---|---|---|---|---|
| 1 | 12 or until released | 33(1)(11) | - | - | - | - | - |
See Drive Parry. Perfect Parrying has only 1F of recovery and disables the opponent from canceling their attack. Perfect Parrying projectiles puts you into fixed 11 frames of recovery.
Drive Rush (66)
No results
See Drive Rush. Frame data shown in parentheses refers to the Drive Rush version used from a Parry.
Taunts
Neutral Taunt (5PPPKKK)
| Startup | Active | Recovery | Cancel | Damage | Guard | On Hit | On Block |
|---|---|---|---|---|---|---|---|
| 96 (total) | - | - | - | - | - | - | - |
Forward Taunt (6PPPKKK)
| Startup | Active | Recovery | Cancel | Damage | Guard | On Hit | On Block |
|---|---|---|---|---|---|---|---|
| 205 (total) | - | - | - | - | - | - | - |
Back Taunt (4PPPKKK)
Special Moves
Hadoken (236P)
| Startup | Active | Recovery | Cancel | Damage | Guard | On Hit | On Block |
|---|---|---|---|---|---|---|---|
| 16 | - | 33 | SA3 | 600 | LH | -1 | -7 |
| Startup | Active | Recovery | Cancel | Damage | Guard | On Hit | On Block |
|---|---|---|---|---|---|---|---|
| 14 | - | 35 | SA3 | 600 | LH | -3 | -9 |
| Startup | Active | Recovery | Cancel | Damage | Guard | On Hit | On Block |
|---|---|---|---|---|---|---|---|
| 12 | - | 37 | SA3 | 600 | LH | -5 | -11 |
| Startup | Active | Recovery | Cancel | Damage | Guard | On Hit | On Block |
|---|---|---|---|---|---|---|---|
| 12 | - | 28 | SA2 SA3 | 400x2 | LH | +2 | -2 |
Shoryuken (623P)
| Startup | Active | Recovery | Cancel | Damage | Guard | On Hit | On Block |
|---|---|---|---|---|---|---|---|
| 5 | 10 | 21+12 land | SA3 | 1100(800) | LH | KD +33 | -23 |
| Startup | Active | Recovery | Cancel | Damage | Guard | On Hit | On Block |
|---|---|---|---|---|---|---|---|
| 6 | 10 | 28+12 land | SA3 | 700,600 (1300) | LH | KD +33 | -28 |
| Startup | Active | Recovery | Cancel | Damage | Guard | On Hit | On Block |
|---|---|---|---|---|---|---|---|
| 7 | 10 | 35+15 land | SA3 | 800,300x2 (1400) | LH | KD +25 | -36(-38) |
| Startup | Active | Recovery | Cancel | Damage | Guard | On Hit | On Block |
|---|---|---|---|---|---|---|---|
| 6 | 10(14)10 | 35+15 land | - | 200x5,600 (1600) | LH | KD +22 | -40 |
Tatsumaki Senpu-kyaku (214K)
| Startup | Active | Recovery | Cancel | Damage | Guard | On Hit | On Block |
|---|---|---|---|---|---|---|---|
| 4 | 2(6)3 | 14+18 land | - | 300,400 (700) | LH | KD +46(+38) | -14 |
| Startup | Active | Recovery | Cancel | Damage | Guard | On Hit | On Block |
|---|---|---|---|---|---|---|---|
| 14 | 2(13)2 | 11+20 land | - | 450x2 (900) | LH | KD +44(+32) | -12 |
| Startup | Active | Recovery | Cancel | Damage | Guard | On Hit | On Block |
|---|---|---|---|---|---|---|---|
| 16 | 2(13)2(13)2 | 14+17 land | - | 300x2,400 (1000) | LH | KD +36 (-38 cr) | -12 (-42 cr) |
| Startup | Active | Recovery | Cancel | Damage | Guard | On Hit | On Block |
|---|---|---|---|---|---|---|---|
| 9 | 4(5)3(6)3(6)3(15)3 | 21+13 land | - | 300,200x3,800 (1700) | LH | KD +28 | -61 |
- 2nd hit of Heavy Tatsu whiffs on Crouching Opponents
Aerial Tatsumaki Senpu-kyaku (j.214K)
No results
No results No results
| Startup | Active | Recovery | Cancel | Damage | Guard | On Hit | On Block |
|---|---|---|---|---|---|---|---|
| 11 | 2(1)2(2)2(2)2(3)2 | 14(21) land | - | 900(700) each | LH | +5 (+10) Front 0 (+5) Back |
-5(0) |
- Instant Air EX Tatsu travels in nearly a straight line in air, acting as a great corner escape.
Dragonlash Kick (623K)
| Startup | Active | Recovery | Cancel | Damage | Guard | On Hit | On Block |
|---|---|---|---|---|---|---|---|
| 18(21) | 6 | 4+17 land | - | 1000(950) | LH | +2 | -4 |
| Startup | Active | Recovery | Cancel | Damage | Guard | On Hit | On Block |
|---|---|---|---|---|---|---|---|
| 23(25) | 5 | 5+20 land | - | 1100 | LH | +3(+4) | -8(-7) |
| Startup | Active | Recovery | Cancel | Damage | Guard | On Hit | On Block |
|---|---|---|---|---|---|---|---|
| 28(30) | 5 | 5+16 land | - | 1200 | LH | +3(+4) | +1(+2) |
| Startup | Active | Recovery | Cancel | Damage | Guard | On Hit | On Block |
|---|---|---|---|---|---|---|---|
| 9(19) | 2(7)6 | 3+21 land | - | 500,700 | LH | +1(+4) | -9(-6) |
- All non-EX Versions on Punish Counter cause a ground bounce allowing for follow ups.
- First 2 active frames of all Dragon Lash Kicks whiff on non-airborne opponents
- 3rd active frame of all Dragon Lash Kicks whiff on crouching opponents increasing the advantage and allowing for Dragon Lash Loops
Jinrai Kick (236K)
| Startup | Active | Recovery | Cancel | Damage | Guard | On Hit | On Block |
|---|---|---|---|---|---|---|---|
| 12 | 3 | 28 | SA3 | 500 | LH | +1 | -11 |
| Startup | Active | Recovery | Cancel | Damage | Guard | On Hit | On Block |
|---|---|---|---|---|---|---|---|
| 16 | 3 | 24 | SA3 | 600 | LH | +2 | -7 |
| Startup | Active | Recovery | Cancel | Damage | Guard | On Hit | On Block |
|---|---|---|---|---|---|---|---|
| 25 | 3 | 19 | SA3 | 700 | LH | KD +42 | -2 |
| Startup | Active | Recovery | Cancel | Damage | Guard | On Hit | On Block |
|---|---|---|---|---|---|---|---|
| 13 | 2 | 25 | SA2 SA3 | 600 | LH | -4 | -7 |
Kazekama Shin Kick (236K~6LK)
| Startup | Active | Recovery | Cancel | Damage | Guard | On Hit | On Block |
|---|---|---|---|---|---|---|---|
| 6 | 4 | 19 | SA3 | 500 | L | +3 | -5 |
| Startup | Active | Recovery | Cancel | Damage | Guard | On Hit | On Block |
|---|---|---|---|---|---|---|---|
| 6 | 3 | 20 | SA2 SA3 | 500 | L | +3 | -5 |
- Non-EX Frame Traps from Medium Kick Jinrai Kicks
Gorai Axe Kick (236K~6MK)
| Startup | Active | Recovery | Cancel | Damage | Guard | On Hit | On Block |
|---|---|---|---|---|---|---|---|
| 18 | 3 | 20 | SA3 | 1000 | H | +3 | -3 |
| Startup | Active | Recovery | Cancel | Damage | Guard | On Hit | On Block |
|---|---|---|---|---|---|---|---|
| 17 | 3 | 24 | SA2 SA3 | 1000 | H | -3 | -7 |
- EX Frame Traps after EX Jinrai on block
- From Non-EX On Hit and Block the overhead is interruptible even during burnout
Senka Snap Kick (236K~6HK)
| Startup | Active | Recovery | Cancel | Damage | Guard | On Hit | On Block |
|---|---|---|---|---|---|---|---|
| 10 | 3 | 25 | SA3 | 800 | LH | KD +33(+38) | -3 |
| Startup | Active | Recovery | Cancel | Damage | Guard | On Hit | On Block |
|---|---|---|---|---|---|---|---|
| 10 | 4 | 20 | SA2 SA3 | 800 | LH | KD +37 | -4 (-18) |
Kasai Thrust Kick (236KK~6K~6K)
| Startup | Active | Recovery | Cancel | Damage | Guard | On Hit | On Block |
|---|---|---|---|---|---|---|---|
| 15 | 3 | 29 | SA2 SA3 | 500(400) | LH | KD +31 | -12 |
- Can be input on hit/block/whiff
- 2f gap before final hit on block
| Startup | Active | Recovery | Cancel | Damage | Guard | On Hit | On Block |
|---|---|---|---|---|---|---|---|
| 11 | 3 | 29 | SA2 SA3 | 500(400) | LH | KD +34 | -12 |
- Can be input on hit/block/whiff
- True blockstring into final hit
| Startup | Active | Recovery | Cancel | Damage | Guard | On Hit | On Block |
|---|---|---|---|---|---|---|---|
| 15 | 3 | 37 | SA2 SA3 | 500(400) | LH | KD +42 | -20 |
- Can be input on hit/block/whiff
- 7f gap before final hit on stand block (20f gap if 2nd hit whiffs on crouching)
KK
| Startup | Active | Recovery | Cancel | Damage | Guard | On Hit | On Block |
|---|---|---|---|---|---|---|---|
| 11(45) | - | - | - | - | - | - | - |
- Followups can be input from 11-31f; 45f total animation if no followup is input
- Followups will not reverse direction if Ken crosses under the opponent
Run Normal Followups (KK~K)
| Startup | Active | Recovery | Cancel | Damage | Guard | On Hit | On Block |
|---|---|---|---|---|---|---|---|
| 11~ | - | 16 | - | - | - | - | - |
- Fastest Run~Stop time is 27f
| Startup | Active | Recovery | Cancel | Damage | Guard | On Hit | On Block |
|---|---|---|---|---|---|---|---|
| 11+18 | 3 | 20 | SA3 | 1000 | H | +3 | -3 |
- Cancellable into Level 3 Super (applies a 10% damage scaling penalty)
- Notably can't benefit from Drive Rush like other overheads
| Startup | Active | Recovery | Cancel | Damage | Guard | On Hit | On Block |
|---|---|---|---|---|---|---|---|
| 11+10 | 4 | 20 | SA | 800 | LH | +3 | -4 |
- Puts airborne opponents into limited juggle state (e.g. after MP~HP Target Combo)
- Cancellable into any Super
- Acts as a Normal move with no additional damage scaling when cancelled to Lv.3 Super
Run Special Followups (KK~Special)
| Startup | Active | Recovery | Cancel | Damage | Guard | On Hit | On Block |
|---|---|---|---|---|---|---|---|
| 11+8 | 11 | 33+15 land | SA3 | 500,450,250x3 (1700) | LH | KD +25 | -35(-36) |
- First 3 hits are cancellable into Level 3 Super; final hit whiffs vs. crouch block
- Decent option vs. projectiles due to its forward momentum and projectile invincibility
- Does not vary based on attack button strength
| Startup | Active | Recovery | Cancel | Damage | Guard | On Hit | On Block |
|---|---|---|---|---|---|---|---|
| 11+13 | [2(2)3(2)]x4,2(5)3 | 3+17 land | - | 200x4,400 (1200) | LH | +3 (KD +43) |
-9 |
- Backwards hitbox can Crossup if dashing under opponent (-9 on Hit)
- Pulls opponent toward Ken when this happens, allowing for multiple hits
- Does not vary based on attack button strength
| Startup | Active | Recovery | Cancel | Damage | Guard | On Hit | On Block |
|---|---|---|---|---|---|---|---|
| 11+9(20) | 4(5)6 | 9+15 land | - | 500,700 | LH | +2(+4) | -8(-6) |
- Properties are essentially the same as OD Dragonlash Kick, but with a shorter ground bounce
- 1st hit only connects vs. airborne, 2f better advantage vs. crouching, side switch after juggle
- Functional startup vs. standing opponents is 11+20f
- Does not vary based on attack button strength
Super Arts
Level 1 Super (214214K)
| Startup | Active | Recovery | Cancel | Damage | Guard | On Hit | On Block |
|---|---|---|---|---|---|---|---|
| 7 | 3 | 41 | - | 2000 | LH | KD +9 | -24 |
- Switches sides with the opponent.
Level 2 Super (236236K)
| Startup | Active | Recovery | Cancel | Damage | Guard | On Hit | On Block |
|---|---|---|---|---|---|---|---|
| 6 | 2(10)3(10)3(12)3(11)2 | 28 | - | 2800 | LH | KD +36 | -5 |
- Ken's infamous SA3 from Third Strike, a flurry of 5 kicks followed up by a tatsumaki ender on hit.
Level 3 Super (236236P)
| Startup | Active | Recovery | Cancel | Damage | Guard | On Hit | On Block |
|---|---|---|---|---|---|---|---|
| 7 | 3(1)6(16)13 | 30+25 land | - | 4000 (1800~2400) | LH | HKD +15 | -40(-43) |
| Startup | Active | Recovery | Cancel | Damage | Guard | On Hit | On Block |
|---|---|---|---|---|---|---|---|
| 7 | 3(1)6(16)13 | 30+25 land | - | 4500 (2000~2600) | LH | HKD +21 | -40(-43) |
- When used as an anti-air the non cinematic version does 2400 / 2600 (CA) damage.


