No edit summary |
|||
| Line 174: | Line 174: | ||
}} | }} | ||
== Target Combos == | |||
=====<font style="visibility:hidden; float:right">6HK>8</font>===== | =====<font style="visibility:hidden; float:right">6HK>8</font>===== | ||
{{MoveDataCargo | {{MoveDataCargo | ||
| Line 205: | Line 206: | ||
| info = | | info = | ||
{{AttackDataCargo-SF6/Query|kimberly_6hk_7}} | {{AttackDataCargo-SF6/Query|kimberly_6hk_7}} | ||
}} | |||
=====<font style="visibility:hidden; float:right">6HK>7</font>===== | |||
{{MoveDataCargo | |||
| title = 6HK>7 | |||
| subtitle = | |||
| input = Forward Heavy Kick > Backward Jump | |||
| images = | |||
{{MoveDataCargoImage|kimberly_6hk_7|caption=}} | |||
| info = | |||
{{AttackDataCargo-SF6/Query|kimberly_6hk_7}} | |||
}} | |||
=====<font style="visibility:hidden; float:right">LP>MP</font>===== | |||
{{MoveDataCargo | |||
| title = LP>MP | |||
| subtitle = | |||
| input = Light Punch > Medium Punch | |||
| images = | |||
{{MoveDataCargoImage|kimberly_lp_mp|caption=}} | |||
| info = | |||
{{AttackDataCargo-SF6/Query|kimberly_lp_mp}} | |||
}} | |||
=====<font style="visibility:hidden; float:right">LP>MP>HP</font>===== | |||
{{MoveDataCargo | |||
| title = LP>MP>HP | |||
| subtitle = | |||
| input = Light Punch > Medium Punch > Heavy Punch | |||
| images = | |||
{{MoveDataCargoImage|kimberly_lp_mp_hp|caption=}} | |||
| info = | |||
{{AttackDataCargo-SF6/Query|kimberly_lp_mp_hp}} | |||
}} | |||
=====<font style="visibility:hidden; float:right">LP>MP>HP>HK</font>===== | |||
{{MoveDataCargo | |||
| title = LP>MP>HP>HK | |||
| subtitle = | |||
| input = Light Punch > Medium Punch > Heavy Punch > Heavy Kick | |||
| images = | |||
{{MoveDataCargoImage|kimberly_lp_mp_hp_hk|caption=}} | |||
| info = | |||
{{AttackDataCargo-SF6/Query|kimberly_lp_mp_hp_hk}} | |||
}} | |||
=====<font style="visibility:hidden; float:right">LP>MP>2HP</font>===== | |||
{{MoveDataCargo | |||
| title = LP>MP>2HP | |||
| subtitle = | |||
| input = Light Punch > Medium Punch > Crouching Heavy Punch | |||
| images = | |||
{{MoveDataCargoImage|kimberly_lp_mp_2hp|caption=}} | |||
| info = | |||
{{AttackDataCargo-SF6/Query|kimberly_lp_mp_2hp}} | |||
}} | |||
=====<font style="visibility:hidden; float:right">LP>MP>2HP>HK</font>===== | |||
{{MoveDataCargo | |||
| title = LP>MP>2HP>HK | |||
| subtitle = | |||
| input = Light Punch > Medium Punch > Crouching Heavy Punch > Heavy Kick | |||
| images = | |||
{{MoveDataCargoImage|kimberly_lp_mp_2hp_hk|caption=}} | |||
| info = | |||
{{AttackDataCargo-SF6/Query|kimberly_lp_mp_2hp_hk}} | |||
}} | |||
=====<font style="visibility:hidden; float:right">LP>MP>2HP>2HK</font>===== | |||
{{MoveDataCargo | |||
| title = LP>MP>2HP>2HK | |||
| subtitle = | |||
| input = Light Punch > Medium Punch > Crouching Heavy Punch > Crouching Heavy Kick | |||
| images = | |||
{{MoveDataCargoImage|kimberly_lp_mp_2hp_2hk|caption=}} | |||
| info = | |||
{{AttackDataCargo-SF6/Query|kimberly_lp_mp_2hp_2hk}} | |||
}} | |||
=====<font style="visibility:hidden; float:right">MP>HP</font>===== | |||
{{MoveDataCargo | |||
| title = MP>HP | |||
| subtitle = | |||
| input = Medium Punch > Heavy Punch | |||
| images = | |||
{{MoveDataCargoImage|kimberly_mp_hp|caption=}} | |||
| info = | |||
{{AttackDataCargo-SF6/Query|kimberly_mp_hp}} | |||
}} | }} | ||
| Line 278: | Line 367: | ||
}} | }} | ||
== Special moves == | == Special moves == | ||
Revision as of 18:26, 8 October 2022
| Pre-release information
This page is under construction based on pre-release data. Join the SF6 Resource Hub for info on editing. |
Introduction
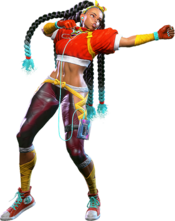
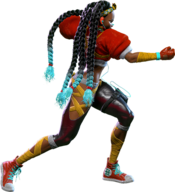
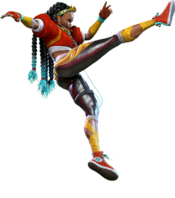
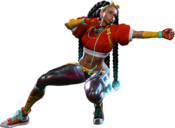
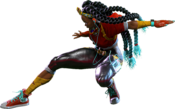
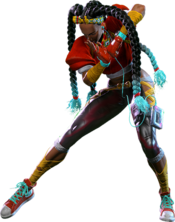
Uninvited student to Guy, the 39th successor to Bushinryu. Kimberly had an ordinary upbringing, but she's a genuine prodigy who graduated college early... and now wants to be a ninja. Loves '80s pop culture.
Kimberly is a fast, tricky character who uses her plethora of unique movement options and setplay to get in and keep the opponent guessing. Good Kimberly players use the many tools at her disposal to approach the opponent unpredictably and lock them down with a variety of unexpected attacks, pushing them to the corner where she can really put the pressure on.
On the movement and neutral fronts, Kimberly not only has a high walk speed, a far-reaching Drive Rush and Drive Impact, and good pokes with 5MK and 5LK, but she also has the classic Bushinryu Sprint special move, which has a variety of different options to approach the opponent on the ground like the Shadow Slicer slide or the Neck Hunter overhead. She can also use Hidden Variable, a teleport that lets her move in from the ground or air depending on whether she uses the Overdrive version or not. Shadow Slicer, Hidden Variable, and 3MK also give Kimberly ways to evade projectiles and get in on opponents who try to keep her out with them, while j.2MP lets her adjust her jump arc to bait anti-airs; on the ground, her 2HP and Bushin Senpukyaku serve as anti-airs, while the aerial version of Bushin Senpukyaku is a combo ender and juggle setup tool.
Where Kimberly especially shines, though, is the corner. Many of her combos give great corner carry, so once the opponent's stuck there, she can use Shuriken Bomb to set up powerful okizeme and keep the pressure going, which works exceptionally well with the likes of Sprint and its follow-ups, Hidden Variable, and plain old strike/throw mix to force the opponent to guess at what she's going to do next. All of the above is especially true once Kimberly lands her Lv. 3 Super Art, Bushin Ninjastar Cypher. Once it hits successfully, Kimberly gains a damage and movement speed buff for the rest of the match, bringing her damage in line with the rest of the cast and making it even harder to deal with her walkspeed and the advantages that it gives her.
However, Kimberly's mobility and tricks are counterbalanced by her defensive options. Because Overdrive Bushin Senpukyaku doesn't have full invulnerability, Kimberly has to rely on system mechanics, Bushin Beats (her Level 1 Super Art), or Bushin Ninjastar Cypher when she needs to defend or force herself out of a bad situation. The buff from Ninjastar Cypher is also significant enough that without it, Kimberly's combos are going to be more useful for corner carry than damage until or unless she lands it, and her light buttons don't normally lend to the types of combos which give great oki at midscreen. If you like high-speed grooves and a bag of ninja tricks, then get on the scene with Kimberly.
| Pick if you like: | Avoid if you dislike: |
|---|---|
|
|
Classic & Modern Versions Comparison
| Missing Normals |
|
|---|---|
| Missing Command Normals |
|
| Shortcut-Only Specials |
|
| Assist Combos |
|
| Miscellaneous Changes |
|
| Kimberly | |
|---|---|
| Vitals | |
| Life Points | 10000 |
| Ground Movement | |
| Forward Walk Speed | 0.0505 (0.0561) |
| Backward Walk Speed | 0.033 (0.0366) |
| Forward Dash Speed | 18 |
| Backward Dash Speed | 23 |
| Forward Dash Distance | 1.409 |
| Backward Dash Distance | 0.893 |
| Drive Rush Min. Distance (Throw) | 0.817 |
| Drive Rush Min. Distance (Block) | 2.479 |
| Drive Rush Max Distance | 3.565 |
| Jumping | |
| Jump Speed | 4+38+3 |
| Jump Apex | 2.115 |
| Forward Jump Distance | 1.90 |
| Backward Jump Distance | 1.52 |
| Throws | |
| Throw Range | 0.8 |
| Throw Hurtbox | 0.33 |
Normals
Standing Normals
5LP
| Startup | Active | Recovery | Cancel | Damage | Guard | On Hit | On Block |
|---|---|---|---|---|---|---|---|
| 5 | 2 | 8 | Chn Sp SA TC | 270 | LH | +5 | -2 |
5MP
| Startup | Active | Recovery | Cancel | Damage | Guard | On Hit | On Block |
|---|---|---|---|---|---|---|---|
| 6 | 3 | 18 | Sp SA TC | 540 | LH | +3 | -2 |
5HP
| Startup | Active | Recovery | Cancel | Damage | Guard | On Hit | On Block |
|---|---|---|---|---|---|---|---|
| 9 | 3 | 20 | Sp SA | 630 | LH | +3 | -4 |
5LK
| Startup | Active | Recovery | Cancel | Damage | Guard | On Hit | On Block |
|---|---|---|---|---|---|---|---|
| 5 | 3 | 11 | Sp SA | 270 | LH | +1 | -3 |
5MK
| Startup | Active | Recovery | Cancel | Damage | Guard | On Hit | On Block |
|---|---|---|---|---|---|---|---|
| 8 | 3 | 18 | Sp SA | 540 | LH | +1 | -4 |
5HK
| Startup | Active | Recovery | Cancel | Damage | Guard | On Hit | On Block |
|---|---|---|---|---|---|---|---|
| 12 | 4 | 17 | - | 630 | LH | +7 | +2 |
Crouching Normals
2LP
| Startup | Active | Recovery | Cancel | Damage | Guard | On Hit | On Block |
|---|---|---|---|---|---|---|---|
| 4 | 3 | 7 | Chn Sp SA | 270 | LH | +4 | -1 |
2MP
| Startup | Active | Recovery | Cancel | Damage | Guard | On Hit | On Block |
|---|---|---|---|---|---|---|---|
| 6 | 3 | 13 | Sp SA | 500 | LH | +7 | -1 |
2HP
| Startup | Active | Recovery | Cancel | Damage | Guard | On Hit | On Block |
|---|---|---|---|---|---|---|---|
| 8 | 6 | 17 | Sp SA | 720 | LH | +3 | -2 |
2LK
| Startup | Active | Recovery | Cancel | Damage | Guard | On Hit | On Block |
|---|---|---|---|---|---|---|---|
| 5 | 3 | 7 | Chn | 180 | L | +4 | -2 |
2MK
| Startup | Active | Recovery | Cancel | Damage | Guard | On Hit | On Block |
|---|---|---|---|---|---|---|---|
| 7 | 3 | 16 | - | 540 | L | +5 | +1 |
2HK
| Startup | Active | Recovery | Cancel | Damage | Guard | On Hit | On Block |
|---|---|---|---|---|---|---|---|
| 8 | 3 | 24 | - | 810 | L | HKD +31 | -10 |
Command Normals
3MK
| Startup | Active | Recovery | Cancel | Damage | Guard | On Hit | On Block |
|---|---|---|---|---|---|---|---|
| 11 | 10 | 16 | - | 450 | L | +1(+6) | -5(0) |
4HK
| Startup | Active | Recovery | Cancel | Damage | Guard | On Hit | On Block |
|---|---|---|---|---|---|---|---|
| 22 | 2 | 19 | - | 720 | H | +4 | -3 |
6HK
Target Combos
6HK>8
| Startup | Active | Recovery | Cancel | Damage | Guard | On Hit | On Block |
|---|---|---|---|---|---|---|---|
| 20 | - | 30+3 | - | - | - | -10(-9) | -22 |
6HK>9
| Startup | Active | Recovery | Cancel | Damage | Guard | On Hit | On Block |
|---|---|---|---|---|---|---|---|
| 20 | - | 30+3 | - | - | - | -10(-9) | -22 |
6HK>7
| Startup | Active | Recovery | Cancel | Damage | Guard | On Hit | On Block |
|---|---|---|---|---|---|---|---|
| 16 | - | 30+3 | - | - | - | -10(-9) | -22 |
6HK>7
| Startup | Active | Recovery | Cancel | Damage | Guard | On Hit | On Block |
|---|---|---|---|---|---|---|---|
| 16 | - | 30+3 | - | - | - | -10(-9) | -22 |
LP>MP
No results
LP>MP>HP
No results
LP>MP>HP>HK
No results
LP>MP>2HP
No results
LP>MP>2HP>HK
No results
LP>MP>2HP>2HK
No results
MP>HP
No results
Universal Mechanics
Throw
| Startup | Active | Recovery | Cancel | Damage | Guard | On Hit | On Block |
|---|---|---|---|---|---|---|---|
| 5 | 3 | 23 | - | 1082 (1838) | T | KD +17 | - |
Back Throw
| Startup | Active | Recovery | Cancel | Damage | Guard | On Hit | On Block |
|---|---|---|---|---|---|---|---|
| 5 | 3 | 23 | - | 1082 (1839) | T | KD +8 | - |
Drive Impact
| Startup | Active | Recovery | Cancel | Damage | Guard | On Hit | On Block |
|---|---|---|---|---|---|---|---|
| 26 | 2 | 35 | - | 720 | LH | KD +35 / Wall Splat KD +65 | -3 / Wall Splat HKD +72 |
See Drive Impact.
Drive Reversal
| Startup | Active | Recovery | Cancel | Damage | Guard | On Hit | On Block |
|---|---|---|---|---|---|---|---|
| 20 | 3 | 26(31) | - | 500 recoverable | LH | KD +23 | -6 |
See Drive Reversal.
Drive Rush
No results
See Drive Rush. Framedata shown in parentheses refers to the Drive Rush version used from a Parry.
Drive Parry
| Startup | Active | Recovery | Cancel | Damage | Guard | On Hit | On Block |
|---|---|---|---|---|---|---|---|
| 1 | 12 or until released | 33(1)(11) | - | - | - | - | - |
See Drive Parry. Perfect Parrying has only 1F of recovery and disables the opponent from canceling their attack. Perfect Parrying projectiles puts you into fixed 11 frames of recovery.

