| Line 148: | Line 148: | ||
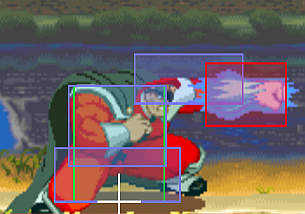
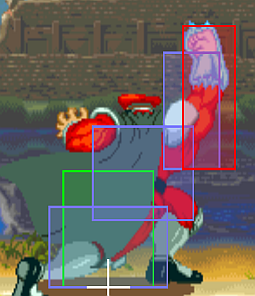
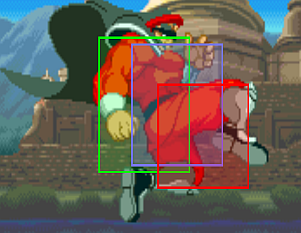
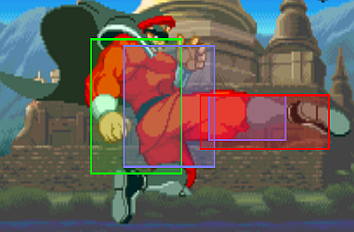
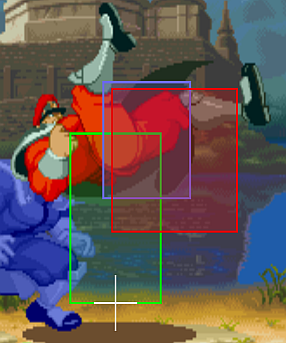
[[File:BisonPunchAC.png]] | [[File:BisonPunchAC.png]] | ||
NOTE* In the USA Revision 960430, Punch AC does not have a "guard" animation when activated, and therefore is "unblockable". Special thanks to Raf for this finding! | |||
| Line 155: | Line 158: | ||
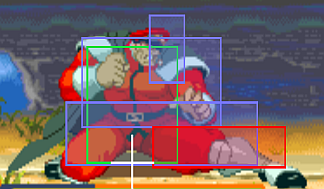
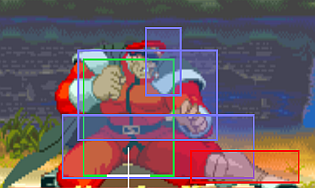
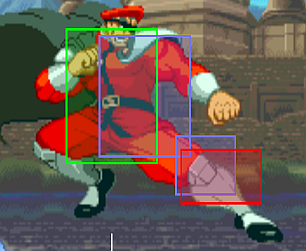
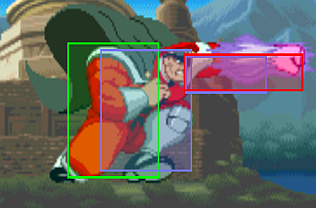
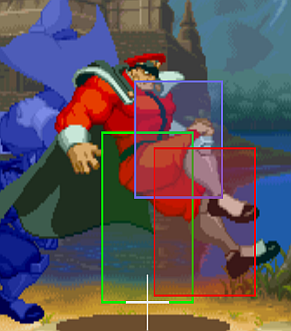
[[File:KickACTeleport.png]] | [[File:KickACTeleport.png]] | ||
== Special Moves == | == Special Moves == | ||
Revision as of 21:10, 5 August 2020
Introduction
Bison (aka Dictator or Vega in Japan), leader of the criminal organization known as Shadaloo, hears of a fighter named Ryu who defeated his new henchman, Sagat. Bison decides to recruit Ryu and begins the search for him. In the meantime, he is confronted by Rose, a mysterious woman who wields power that is in many ways similar to his own. Rose wins the ensuing battle but only to find out that Bison has left the battlefield completely unscathed and has possibly threw the fight. Reasons for this are disclosed during the events of SFA3.
Afterwards, Bison encounters Chun Li. They have a brief duel in which Bison toys around with the girl. He flees and lets Chun Li know that he murdered her father.
After this, Bison is finally able to track down Ryu. At first, Bison attempts to persuade Ryu to join him by promising that he would make him the greatest fighter ever. Ryu mocks him and the two engage in combat. Bison wins and takes Ryu's body to his scientists for a brainwashing via exposure to Psycho Power. It is debatable whether this ending is canon or not, however, the exact events which it depicts did take place during SFA3.
Try and think of the character as Dictator with a DeeJay style fireball, powerful in the right situations but can be unsafe if you don't pay attention. Keep the opponent away with your safe pokes and fireball. MP is your go to button for all kinds of situations. You can kind of mash out counter hits but don't go overboard. Standing MK is a good poke at far range. The hitbox is very low so it is not an anti-air. Also very good for poking shotos that try and move around the screen unsafely with tatsus. As far as anti-airs go you have 3 options. Stand HP, Crouch HP, and Stand HK. All of these have their own situations. For example Crouching HP is faster than Standing HP even though they have similar hitboxes. While Stand HK has a different range/hitbox all together. Mess around with the character in training mode and get a good feel for your normals. Most of your play time will be blocking and using pokes.
Pros:
- Really fast Punch AC
- Great walk speed
- Decent normals with some that can be use for ticks, anti-airs, etc.
Cons:
- CCs are very limited
- Supers have almost no use
- Doesn't really have combos with the exception of his BnBs
Normal Moves
STANDING
![]() - Quick jab, with small frames advantage. Not great.
- Quick jab, with small frames advantage. Not great.
![]() - Glow version of his s.lp, with great priority and blockstun, similar to ST Chun’s s.mp. Can do multiple in a row to counter hit and anti jump characters up close. Serves as far anti air in a lot of matches. This is his up close bully move.
- Glow version of his s.lp, with great priority and blockstun, similar to ST Chun’s s.mp. Can do multiple in a row to counter hit and anti jump characters up close. Serves as far anti air in a lot of matches. This is his up close bully move.
![]() - Upward angled punch, which looks like it can be used as anti-air, but has actually pretty bad priority, though it ok to use sometimes as it’s faster than c.fp. Lots of meaty range.
- Upward angled punch, which looks like it can be used as anti-air, but has actually pretty bad priority, though it ok to use sometimes as it’s faster than c.fp. Lots of meaty range.
![]() - Quick knee kick to the mid section, cancelable, good priority.
- Quick knee kick to the mid section, cancelable, good priority.
![]() - Straight kick with good range. Universal poke, not too fast, not too bad recovery. Very good to zone.
- Straight kick with good range. Universal poke, not too fast, not too bad recovery. Very good to zone.
![]() - A two hit Anti-air angled kick. Good anti air priority and first hit is cancelable to anything. Use for AC reversal up close.
- A two hit Anti-air angled kick. Good anti air priority and first hit is cancelable to anything. Use for AC reversal up close.
CROUCHING
cr.![]() - Little jab to the shin, not really all that though is has ok range for a jab.
- Little jab to the shin, not really all that though is has ok range for a jab.
cr.![]() - A straight punch with good priority, cancelable.
- A straight punch with good priority, cancelable.
cr.![]() - Very good anti air once its out, must do early for it to be effective, lots of meaty frames.
- Very good anti air once its out, must do early for it to be effective, lots of meaty frames.
cr.![]() - Quick kick to the foot, can hit meaty, not chainable.
- Quick kick to the foot, can hit meaty, not chainable.
cr.![]() - A low kick similar to c.lk, hits meaty and cancelable.
- A low kick similar to c.lk, hits meaty and cancelable.
cr.![]() - Great surprise move and safe when distance right, same applications as other games, can be kara canceled for add reach on specials.
- Great surprise move and safe when distance right, same applications as other games, can be kara canceled for add reach on specials.
JUMPING
nj.![]() - Best air-to-air, quick, but low damage.
- Best air-to-air, quick, but low damage.
nj.![]() - Jumping version of s.mk great neutral jump moves.
- Jumping version of s.mk great neutral jump moves.
dj.![]() - longer horizontal range than neutral. This air-to-air is more situational, Jump LK is still the go to button though.
- longer horizontal range than neutral. This air-to-air is more situational, Jump LK is still the go to button though.
dj.![]() - Same hitbox data as Neutral Jump LK. Best air-to-air, quick, but low damage.
- Same hitbox data as Neutral Jump LK. Best air-to-air, quick, but low damage.
dj.![]() - Jumping version of s.mk great neutral jump moves.
- Jumping version of s.mk great neutral jump moves.
dj.![]() - Angled jump in with good priority.
- Angled jump in with good priority.
Normal Throws
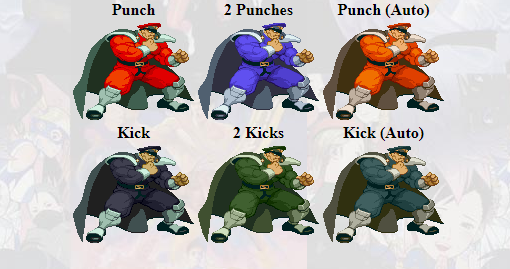
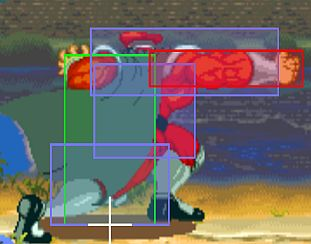
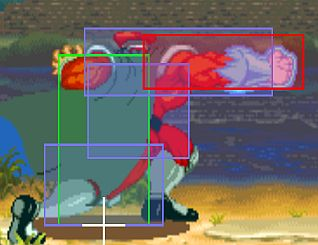
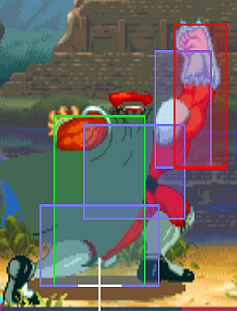
Alpha Counters
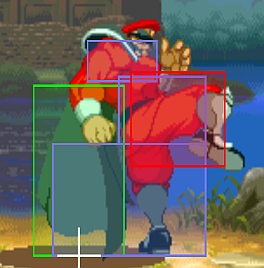
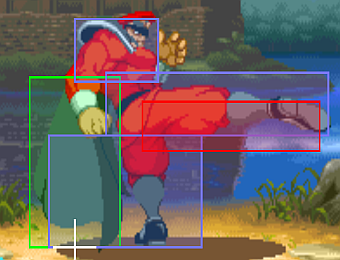
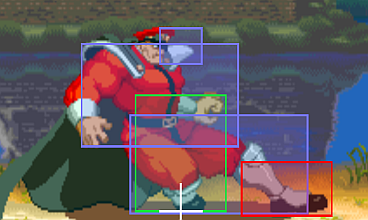
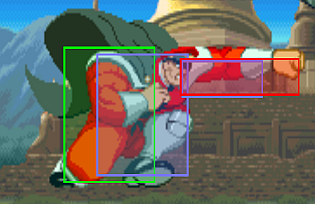
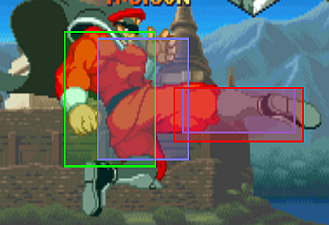
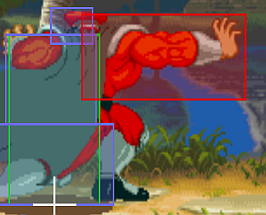
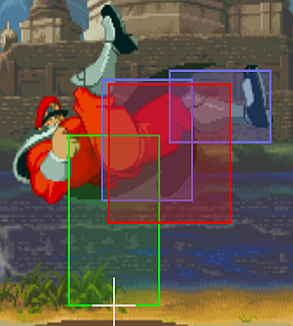
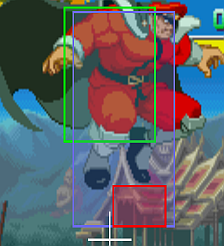
- Comes out ridiculously fast, and has great range
NOTE* In the USA Revision 960430, Punch AC does not have a "guard" animation when activated, and therefore is "unblockable". Special thanks to Raf for this finding!
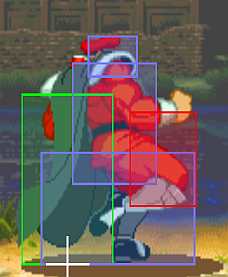
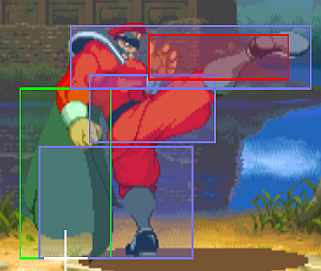
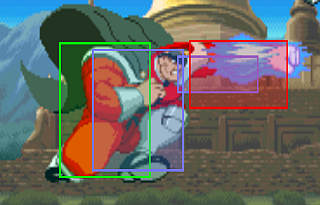
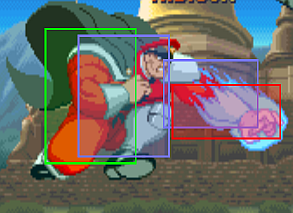
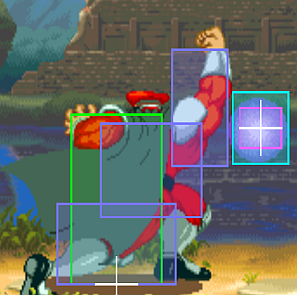
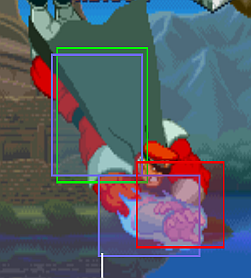
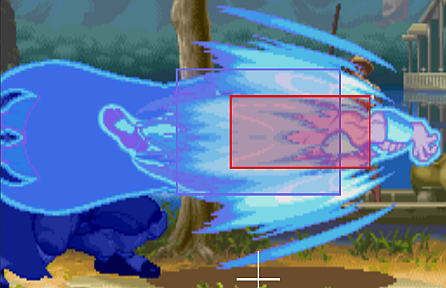
- Bison Teleports behind the opponent, enabling good punish potential.
Special Moves
Psycho Shot
Charge ![]() ,
, ![]() +
+ ![]() - A fireball. Although its a charge, the recovery sucks. What is best about this move is its size, speed, and hitbox. Very hard to jump over (lp version) cause it is so slow, can be super meaty, and change bison’s hitbox (the fireballs anti airs A LOT).
- A fireball. Although its a charge, the recovery sucks. What is best about this move is its size, speed, and hitbox. Very hard to jump over (lp version) cause it is so slow, can be super meaty, and change bison’s hitbox (the fireballs anti airs A LOT).
Double Knee Press
Charge ![]() ,
, ![]() +
+ ![]() - Very good move when mixed with somersault skull diver, safe as hell and annoying. Always whiffs on Evil Ryu and on Sak sometimes. Can kara a rh into this, mix this with instant skull divers to keep your opponent guessing. Good priority and hard to cc and anti air. If hit anywhere during the move to include recovery results in a air reset. Press P for follow up, safe on block, easy to ac or cc though.
- Very good move when mixed with somersault skull diver, safe as hell and annoying. Always whiffs on Evil Ryu and on Sak sometimes. Can kara a rh into this, mix this with instant skull divers to keep your opponent guessing. Good priority and hard to cc and anti air. If hit anywhere during the move to include recovery results in a air reset. Press P for follow up, safe on block, easy to ac or cc though.
Head Press
Charge ![]() ,
, ![]() +
+ ![]() , then hold
, then hold ![]() /
/![]() - Slight frame advantage on block and good when whiffed and mixed with stomps. Same properties as headstomp on hit.
- Slight frame advantage on block and good when whiffed and mixed with stomps. Same properties as headstomp on hit.
Somersault Skull Diver
(After Head Press)![]() - Slight frame advantage on block and good when whiffed and mixed with stomps. Same properties as headstomp on hit.
- Slight frame advantage on block and good when whiffed and mixed with stomps. Same properties as headstomp on hit.
Somersault Skull Diver
Charge ![]() ,
, ![]() +
+ ![]() , then hold
, then hold ![]() /
/![]() and press
and press ![]() - Bison goes in the air as if to headstomp but does nothing unless you press p which causes him to punch dive. Slight frame advantage on block and good when whiffed and mixed with stomps. Same properties as headstomp on hit.
- Bison goes in the air as if to headstomp but does nothing unless you press p which causes him to punch dive. Slight frame advantage on block and good when whiffed and mixed with stomps. Same properties as headstomp on hit.
Vega Warp
![]() /
/ ![]() +
+ ![]() /
/![]() - Very good teleport, great to take you away from your opponent.
- Very good teleport, great to take you away from your opponent.
Super Moves
Psycho Crusher
Charge ![]() ,
, ![]() ,
, ![]() ,
, ![]() +
+ ![]() - Meh. Lvl 1 doesnt have good priority, lvl 2 is ok, but lvl 3 is beast. Use lvl 3 version as anti ait to make your opponent shit themsleves. Horrible wake up option as it does not track opponent if it hit a limb, wasting the super.
- Meh. Lvl 1 doesnt have good priority, lvl 2 is ok, but lvl 3 is beast. Use lvl 3 version as anti ait to make your opponent shit themsleves. Horrible wake up option as it does not track opponent if it hit a limb, wasting the super.
Knee Press Nightmare
Charge ![]() ,
, ![]() ,
, ![]() ,
, ![]() +
+ ![]() - Great lvl one to blow through fireballs and on wake up.
- Great lvl one to blow through fireballs and on wake up.
The Basics
Play Style:
Bison is fast in this game. Stupid fast for his size. He can be in your face or turtle, depends how you roll. Walking mp is very effective versus mashers and will counter hit the hell out of them. Utilize his fast walk speed to get throws when close, and counter hit with various normals when you get in. Bison only real combo is off s.rh so you wont be doing combo vids. Harass from afar with slow fireballs, anti air with s.rh and c.fp. Mid range keep your distance with s.mk and from far screen you can sweep to close the gap.
Your main objective is to annoying your oppenont into messing up. Constant barrages of headstomp, skull divers, and lp fireballs from a distance will frustrate your opponent into acting rash. Every blocked skull diver (beware of ac) is a guessing game for you opponent. You can go for a throw, ac their attack attempt, or activate a cc, or do another skull diver.
Bison can pressure well in the corner, example of a annoying pattern would be skull diver, [c.lp xx instant skull diver]x2-3. Mix in some walking lks, a throw, neutral jumps, empty jump throw and you can begin to see how annoying Bison can be.
Bison is very versatile with meter. You can blow through moves with knee press nightmare, alpha counter, or cc. I sometimes blow a lvl 1 cc just to get close. Here are some examples:
Activate - lp psycho shot x3, teleport behind or in front
lp psycho shot x3, headstomp -> skull diver follow up lp psycho shot x3, empty somersault skull diver or follow up As for ACs, Bison’s fist of hit punch ac seems invincible. Alpha counter reversals with dps wont work on him unless close. If you opponent does ac reversals use kick ac. Kick ac is very very good. Bison will teleport behind the opponent then you can CC or throw. Buff stuff. If they ac reversal his kick ac, Bison gets a free hit.
Try and think of the character as Dictator with a DeeJay style fireball, powerful in the right situations but can be unsafe if you don't pay attention. Keep the opponent away with your safe pokes and fireball. MP is your go to button for all kinds of situations. You can kind of mash out counter hits but don't go overboard. Standing MK is a good poke at far range. The hitbox is very low so it is not an anti-air. Also very good for poking shotos that try and move around the screen unsafely with tatsus. As far as anti-airs go you have 3 options. Stand HP, Crouch HP, and Stand HK. All of these have their own situations. For example Crouching HP is faster than Standing HP even though they have similar hitboxes. While Stand HK has a different range/hitbox all together. Mess around with the character in training mode and get a good feel for your normals. Most of your play time will be blocking and using pokes.
-I main Bison in A2. He’s one of my favorite characters to use. The way I play Bison: brutally patient.
I basically play keep away with poking and throwing mixed in. The ideal situation for Bison, IMO, is to constantly have his opponent at the edge of his standing MK. You’ll play ground footsies with standing MK, mix in some LP Psycho Balls (if safe). If the opponent backs away or looks like he’s about to jump then you throw a standing HK. If your opponent gets in close, you throw standing or ducking MPs or you throw. If your opponent is attempting a jump-in, then you throw a well timed LP psycho ball as an anti-air or a do a standing HK or ducking HP (both riskier at trade-ins of course). Sometimes a headstomp works as an anti-air also if the timing is right.
If you want to mix things up, you might want to jump-in with an early HK or a late LK. I like to do air-to-air with his MK also because of its horizontal reach. I’m sure there are some small combos you can do-- mix that in if you get the opportunity. You can also sparingly do headstomps-- but I think A2 Bison’s headstomps have low priority in this game so you’ll end up trading or losing a lot if you get predictable with them. Sometimes you can use HK Scissor kick to punish wiffed moves from a distance-- but I think almost all versions of the scissor kick will leave you seriously vulnerable if blocked. Use them only in combos.
I’m pretty sure you can combo into his scissor kick super. Use that if you get the opening. His psycho crusher super is pure trash at all levels and in every situation. Never use it. Don’t ask me about CCs with Bison cause I just don’t really utilize them.
I love A2 Bison. He’s my main. I used to get on GGPO last year but stopped cause I no longer have a dedicated computer for it. I would play A2 regularly if it were released on Live though. Sigh sigh sigh. I’ll never stop loving this game.
Funny thing, I use a similar play style with 3S Remy and SSF4 Honda. Poke, poke, poke, throw, poke, poke, poke. Its an uphill battle but I like charge characters. Honda struggles a lot less cause of his much larger stamina, damage potential and versatility.-
-M.Bison meaty options:
As RSX has mentioned earlier, if you use the kick Warp after throwing the opponent and hit crouching Forward, your attack will be a meaty. You can also set up the meaty crouching Forward with a kick Warp after a Level 1 Knee Press Nightmare. After you hit with your meaty crouching Forward, with good timing it’s possible to link into another crouching Forward, which can then be cancelled into a Knee Press Nightmare. From there you can go into a loop. What’s handy, though, is the fact that you can also use his crouching Short as a meaty, which you can then link into the first hit of his standing Roundhouse, which can be cancelled into a Nightmare or the Double Knee Press. So this allows you to throw an opponent who is expecting a frame trapping crouching Forward - or is tricked by the similar looking animation of the crouching short to the crouching Forward.
Meaty Combo options starting from an unteched throw or a Level 1 Knee Press Nightmare:
meaty crouching Forward-> crouching Forward-> Knee Press Nightmare meaty crouching Forward-> standing Roundhouse (first hit)-> Knee Press Nightmare or Roundhouse Double Knee Press meaty crouching Short-> standing Roundhouse-> Roundhouse Double Knee Press or Nightmare Meaty mix-up possibilities starting with a throw or a Level 1 Knee Press Nightmare:
meaty crouching Forward-> walk in and throw-> if not teched, repeat the meaty loop. meaty crouching Forward-> hesitate a small moment, to let the opponent start a throw tech-> crouching Forward-> Level 1 Knee Press Nightmare-> loop. meaty crouching Short-> throw meaty crouching Short-> hesitate for a small moment-> crouching forward-> Nightmare-> loop if possible-
Combos
1) Jump HK > Stand/Crouch MP (2 hits, 26 dmg, 14 stun)
Good 2 hit BnB off a safe jump in. Jump HK is pretty safe and the follow up is easy. Leaves you at +20 to +22 frame advantage. Can be followed up with fireball for free if you have enough charge time, but it will not combo.
2) Jump HK > Stand HK (3 hits, 30 dmg, 16 stun)
Another good and simple BnB off a safe jump in. Better damage than combo 1 but leaves you at an unsafe range to get clipped by a custom combo. However if they do not have meter you are outside of sweep range for most characters.
s.rh xx hk knee press s.rh or c.mk xx any super
Advanced Combos
1) Jump HK > Stand HK (1 hit) > Scissor Kicks (4 hits, 38 dmg, 16 stun)
This will end up being your go to big damage combo. The charge time you are given from the jump in is VERY strict. Practice this one in training mode first to get the timing down. The input from the 1 hit of stand HK to scissor kicks is later than you think. It does the same amount of stun as Basic Combo #2 however 8 points of damage can be the difference between winning and losing.
2) Crouch MP > Super Move
Level 1 Psycho Crusher (4 hits, 42 dmg, 6 stun)
Level 2 Psycho Crusher (5 hits, 58 dmg, 6 stun)
Level 3 Psycho Crusher (7 hits, 79 dmg, 6 stun)
Level 1 Scissor Kicks (5 hits, 51 dmg, 10 stun)
Level 2 Scissor Kicks (7 hits, 56 dmg, 9 stun)
Level 3 Scissor Kicks (9 hits, 74 dmg, 10 stun)
Easier to pull off than it looks at first glance. Usually happens the most with shotos who whiff a DP up close. Basically anytime you know you have a charge and can land a close/meaty crouch MP. My personal favorite is to hit the strong and enter the joystick input. Then negative edge for the level 1 Psycho Crusher. If you mess up the input or don't have charge you should be safe.
3) Jump LK (Cross up) > Stand HK (3 hits, 35 dmg, 14 stun)
Harder combo to pull off but can catch people off guard. The follow is easy but getting the spacing for the cross up can be tough. I recommend doing this if you notice that you have a soft corner.
Example of a soft corner. - https://www.youtube.com/watch?v=KBIhZvoneKQ
Combo into super (1 frame??) - https://www.youtube.com/watch?v=YrhJyrZ_9LQ
Advanced Strategy
Bison's Crossup
Known working characters: Bison, Sodom, Charlie, Birdie, Zangief
Hard to do/Doesn't Crossup/Soft corner only: Adon, Ryu, Ken
(List will be updated as I do more training mode)
MEATIES!!!
These are important because if make it alot more difficult for your opponent to do wake-up reversals on you, and allow link not normally possible.
s.fp- Hits super meaty, but no real combo opportunity cause of push back
c.fp- same as above
c.mk- Hits low and can link a s.lk and I think rh, been awhile idr.
s.mp- Heavy frame advantage.
S.mp is very good up close giving a hefty amount of frame advantage, you can link a s.lk after
c.mk is a very good meaty
After a hp throw, a teleport will cross up and allow for a meaty c.mk
You can combo into SK with s.rh
Headstomp/skull diver mix up is 2 good, if bison gets hit in recovery he is counted as being in the air. punch follow up is prefect cc bait/set up, ac set up.
c.fp is meaty as hell
s.lk up close is hella good to poke with
c.fp and s.hk are good aa, as well as s.mp in alot of situations
Slow fireball is SOOO gay, abuse it, be careful vs shotos cause they can air hurricane. If you have a lvl 3, try to bait a air hurricane and combo into lvl 3 pyscho crusher to make them shit their pants.
j.lk is his best air to air, as well as air grab.
Custom Combos
http://sfz2.wordpress.com/projects/sfz2-custom-combos-videos/m-bison-custom-combos/
Practical Custom Combos:
1) Activate > Cr. HK > HK Scissor Kicks xN
2) Kick Alpha Counter (Teleport behind) > Activate > Cr. HK > HK Scissor Kicks xN
You can also Cr. HK after the CC is finished for HKD setups:
Bison: lvl 1/2- c.rh xx SK xN, sweep xx headstomp, p. Land and unblockable sweep
lvl 3- c.rh xx SK x4, s.mp xx headstomp, p. Land and unblockable sweep
http://wiki.shoryuken.com/Street_Fighter_Alpha_2#High_Knock_Down_Juggle_Glitch
Match-ups
Vs. Adon:
4-6
Vs. Akuma:
4-6
Vs. Birdie:
6-4
Vs. Charlie:
5-5
Vs. Chun-Li:
3-7
Vs. Dan:
6-4
Vs. Dhalsim:
4-6
Vs. Gen:
5-5
Vs. Guy:
4-6
Vs. Ken:
4-6
Vs. M. Bison (dictator-self): Dictator always wins the Dictator match-up.
5-5
Vs. Rolento:
4-6
Vs. Rose: use the kick AC against rose illusion super.
4-6
Vs. Ryu:
4-6
Vs. Sagat:
6-4
Vs. Sakura:
4-6
Vs. Sodom:
5-5 (Maybe 6-4)
Vs. Zangief:
7-3
| Characters |
|---|
| Adon - Akuma - Birdie - Charlie - Chun-Li - Dan - Dhalsim - Evil Ryu - Gen - Guy - Ken - M.Bison - Rolento - Rose - Ryu - Sagat - Sakura - Sodom - Zangief |

