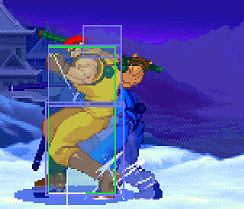
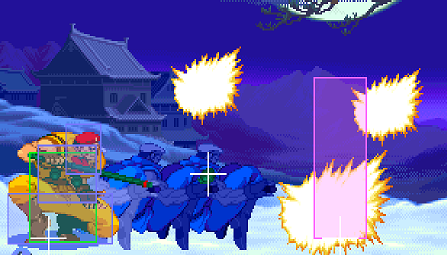
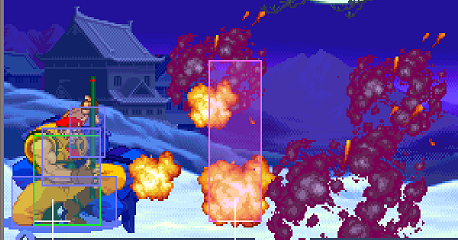
| Line 33: | Line 33: | ||
== Normal Moves == | == Normal Moves == | ||
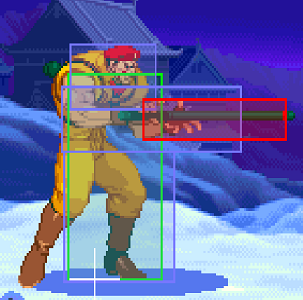
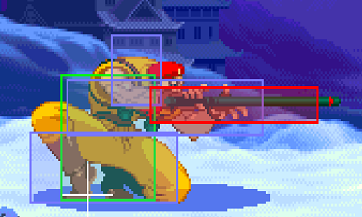
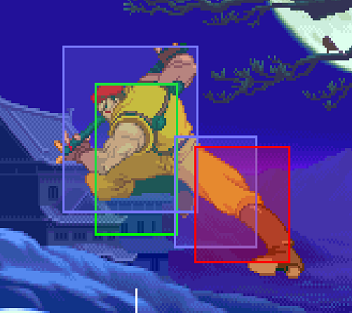
[[File:Lp.png]]- | [[File:Lp.png]]- Really good poke, walking [[File:Lp.png]] can get annoying real fast for them follow them up with a cr.[[File:Hp.png]] for a counter hit. | ||
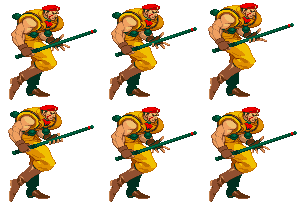
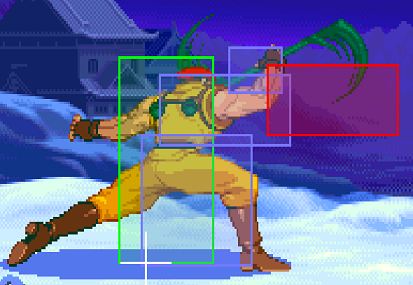
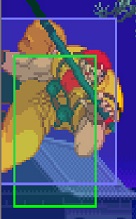
[[File:RolentoSFA2S.lp.png]] | [[File:RolentoSFA2S.lp.png]] | ||
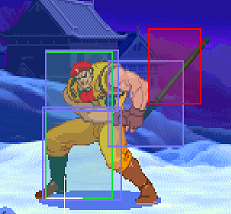
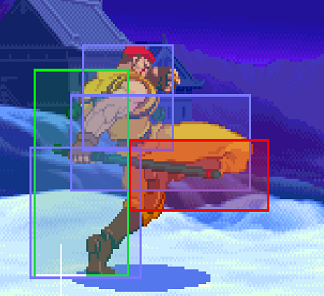
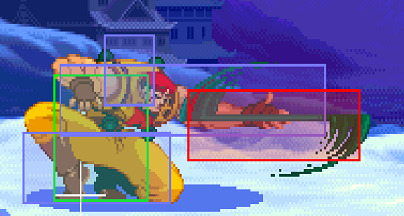
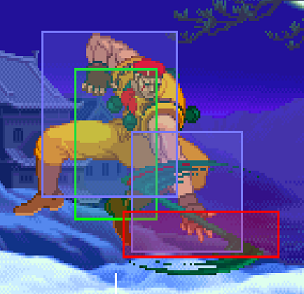
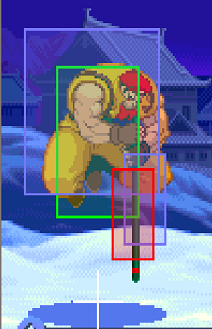
[[File:Mp.png]]- The lovely anti air that works wonders vs almost any character's jumpins. Can Anti | [[File:Mp.png]]- The lovely anti air that works wonders vs almost any character's jumpins. Can Anti-air Chun just fine with it. Only people that you gotta worry about are Zangief and Birdie. | ||
[[File:RolentoSFA2S.mp.png]] | [[File:RolentoSFA2S.mp.png]] | ||
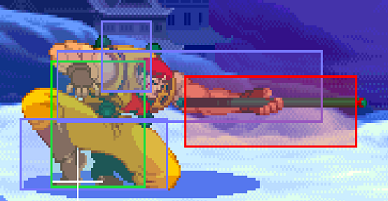
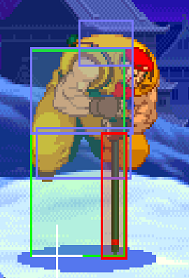
[[File:Hp.png]]- Forget this. Never use it, learn to throw with Mp or Mk for him just for the sole reason you’ll die if you get this move out. | [[File:Hp.png]]- Forget this. Never use it, learn to throw with [[File:Mp.png]] or [[File:Mk.png]] for him just for the sole reason you’ll die if you get this move out. | ||
| Line 58: | Line 58: | ||
[[File:Mk.png]]- Kinda good | [[File:Mk.png]]- Kinda good anti-air I guess? Wouldn’t really use it much. | ||
| Line 88: | Line 88: | ||
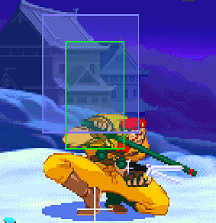
cr.[[File:Hp.png]]- Probably his best poke. A fierce that hits low with awesome priority, use it anytime you're gonna end a poke string. Can even walk up and do it again, but just be careful of them jumping and be ready to | cr.[[File:Hp.png]]- Probably his best poke. A fierce that hits low with awesome priority, use it anytime you're gonna end a poke string. Can even walk up and do it again, but just be careful of them jumping and be ready to [[File:Mp.png]] | ||
| Line 112: | Line 112: | ||
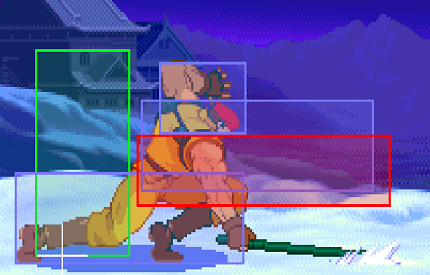
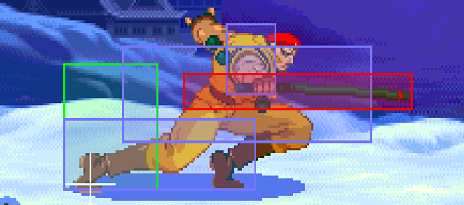
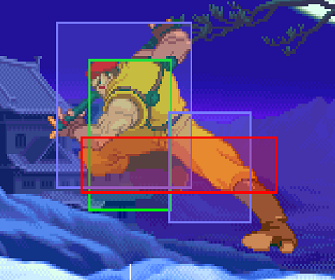
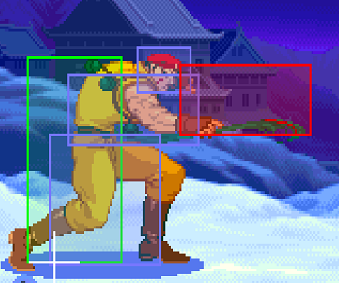
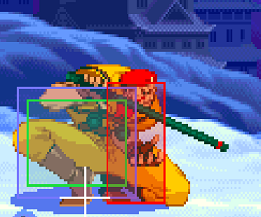
cr.[[File:Hk.png]]- Pretty good slide, and fairly safe if you don't do it point blank. He can do things like a meaty slide on their wakeup, then they'll try to hit and you can Kick AC then as it crossed up go ahead and CC, or | cr.[[File:Hk.png]]- Pretty good slide, and fairly safe if you don't do it point blank. He can do things like a meaty slide on their wakeup, then they'll try to hit and you can Kick AC then as it crossed up go ahead and CC, or cr.[[File:Mk.png]] into patriot circles. | ||
[[File:lentC.rh.png]] | [[File:lentC.rh.png]] | ||
| Line 120: | Line 120: | ||
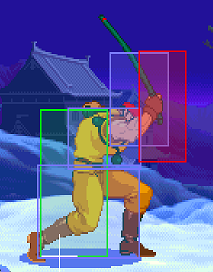
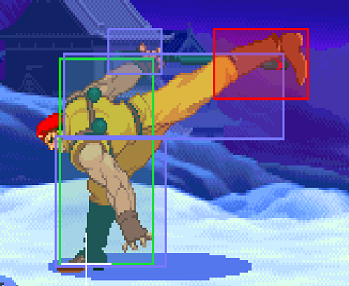
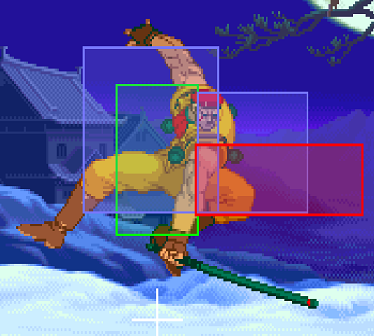
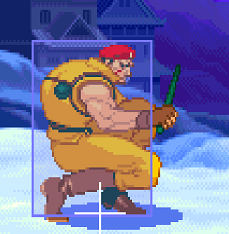
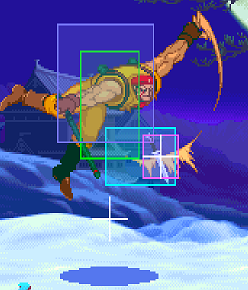
nj.[[File:Lp.png]]- Awesome air priority. Can use it for air to air or if you think someone is about to jump in just do a | nj.[[File:Lp.png]]- Awesome air priority. Can use it for air to air or if you think someone is about to jump in just do a nj.[[File:Lp.png]] (think nj.[[File:Hp.png]] with blanka in cvs2.) | ||
[[File:Rol_nj.lp.png]] | [[File:Rol_nj.lp.png]] | ||
| Line 163: | Line 163: | ||
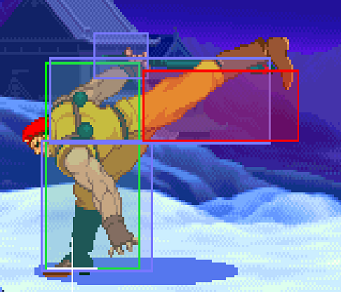
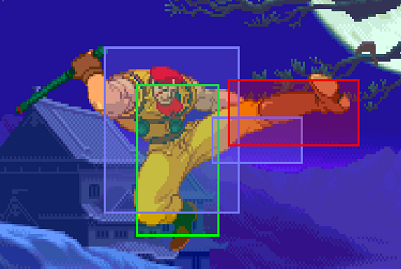
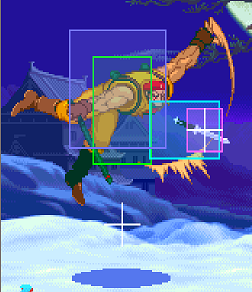
dj.[[File:Lk.png]]- Awesome air to air, with a slightly upward angle compared to | dj.[[File:Lk.png]]- Awesome air to air, with a slightly upward angle compared to dj.[[File:Lp.png]] | ||
| Line 170: | Line 170: | ||
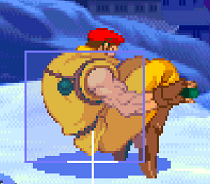
dj.[[File:Mk.png]]- His yummy crossup. If you can confirm that this hit, you can land some | dj.[[File:Mk.png]]- His yummy crossup. If you can confirm that this hit, you can land some great damage by doing a combo or activating CC after it hits. | ||
Revision as of 02:47, 23 February 2019
Introduction
A commando in the Vietnam War, the strict and insane Rolento now controls his own army of soldiers. He preaches survival at all times, even when captured by the enemy. He even hung a soldier with a metal cable just to make a point!
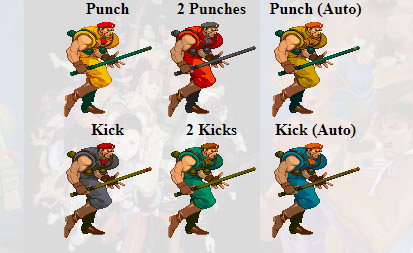
Rolento is a solid character that needs meter to setup his best options. Without meter your best option is to use his multiple evasive tactics to build meter. When you have meter then apply pressure to force mistakes for his ultra damaging CC!
Pros
-Extremely good pokes
-Decent punch AC, awesome kick AC
-90%+ Lvl 3 CC
-Great air priority
-Some okay mixup (much better in the corner)
-Arguably not really any bad match ups since he can't really be zoned by anyone and can run away as long as you want basically. If you get stuck in the corner Kick AC and run away some more.
Moves List
Normal Moves
![]() - Really good poke, walking
- Really good poke, walking ![]() can get annoying real fast for them follow them up with a cr.
can get annoying real fast for them follow them up with a cr.![]() for a counter hit.
for a counter hit.
![]() - The lovely anti air that works wonders vs almost any character's jumpins. Can Anti-air Chun just fine with it. Only people that you gotta worry about are Zangief and Birdie.
- The lovely anti air that works wonders vs almost any character's jumpins. Can Anti-air Chun just fine with it. Only people that you gotta worry about are Zangief and Birdie.
![]() - Forget this. Never use it, learn to throw with
- Forget this. Never use it, learn to throw with ![]() or
or ![]() for him just for the sole reason you’ll die if you get this move out.
for him just for the sole reason you’ll die if you get this move out.
![]() - Overall I don’t really use these.
- Overall I don’t really use these.
![]() - Kinda good anti-air I guess? Wouldn’t really use it much.
- Kinda good anti-air I guess? Wouldn’t really use it much.
![]() - Meh, like a slower
- Meh, like a slower ![]() , wouldn’t use it much.
, wouldn’t use it much.
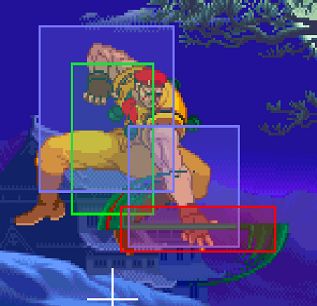
cr.![]() - A pretty good poke. 3 hits with his baton that hits low, comes out quick, and looks like it gives you some frame advantage. Use it mainly for mixups. He can do a cr.
- A pretty good poke. 3 hits with his baton that hits low, comes out quick, and looks like it gives you some frame advantage. Use it mainly for mixups. He can do a cr.![]() then go for another jump in or if you think they'll hit something do a cr.
then go for another jump in or if you think they'll hit something do a cr.![]() - after it for yet another counter hit.
- after it for yet another counter hit.
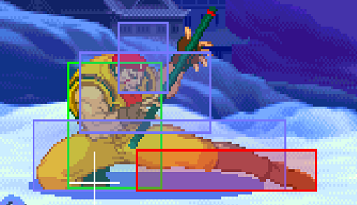
cr.![]() - Probably his best poke. A fierce that hits low with awesome priority, use it anytime you're gonna end a poke string. Can even walk up and do it again, but just be careful of them jumping and be ready to
- Probably his best poke. A fierce that hits low with awesome priority, use it anytime you're gonna end a poke string. Can even walk up and do it again, but just be careful of them jumping and be ready to ![]()
cr.![]() - Hits low. cr.LP is the better option though.
- Hits low. cr.LP is the better option though.
cr.![]() - Really good poke. can be cancelled it into any of his specials(KNIFE)or even Scouter Jump for some mix-up.
- Really good poke. can be cancelled it into any of his specials(KNIFE)or even Scouter Jump for some mix-up.
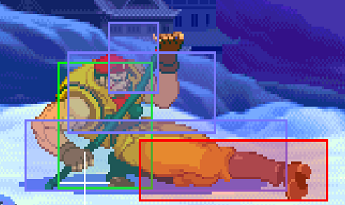
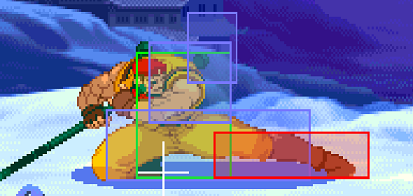
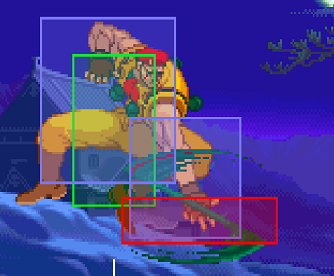
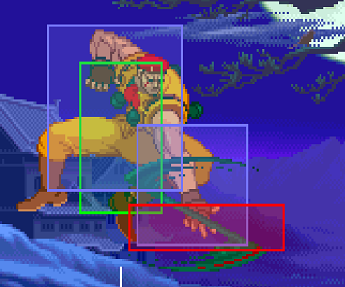
cr.![]() - Pretty good slide, and fairly safe if you don't do it point blank. He can do things like a meaty slide on their wakeup, then they'll try to hit and you can Kick AC then as it crossed up go ahead and CC, or cr.
- Pretty good slide, and fairly safe if you don't do it point blank. He can do things like a meaty slide on their wakeup, then they'll try to hit and you can Kick AC then as it crossed up go ahead and CC, or cr.![]() into patriot circles.
into patriot circles.
JUMPING
Jumping ![]() (Neutral jump)
(Neutral jump)
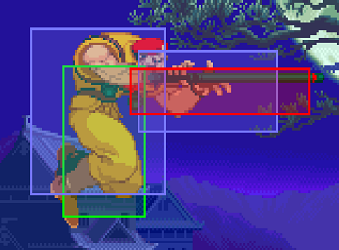
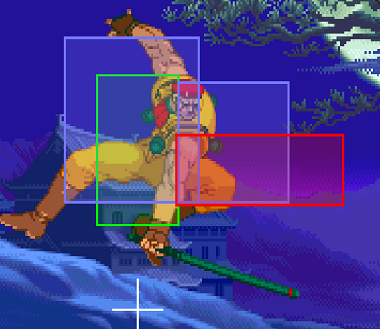
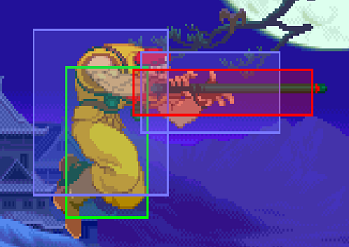
nj.![]() - Awesome air priority. Can use it for air to air or if you think someone is about to jump in just do a nj.
- Awesome air priority. Can use it for air to air or if you think someone is about to jump in just do a nj.![]() (think nj.
(think nj.![]() with blanka in cvs2.)
with blanka in cvs2.)
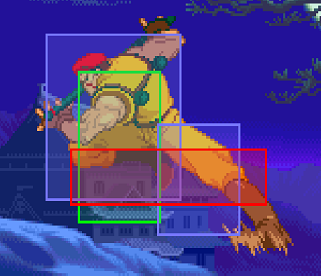
dj.![]() - His usual 3 hit baton air move, pretty bad air to air so you'll probably always get beat if they jump too, but really good as a jump in since it hits 3 times, makes it a little slightly harder to AC. This is a really good jump-in when looking for a hit into combo or CC.
- His usual 3 hit baton air move, pretty bad air to air so you'll probably always get beat if they jump too, but really good as a jump in since it hits 3 times, makes it a little slightly harder to AC. This is a really good jump-in when looking for a hit into combo or CC.
dj.![]() - Pretty decent jump-in and semi good air to air, has more horizontal range so sometimes you could beat out an anti air poke attempt.
- Pretty decent jump-in and semi good air to air, has more horizontal range so sometimes you could beat out an anti air poke attempt.
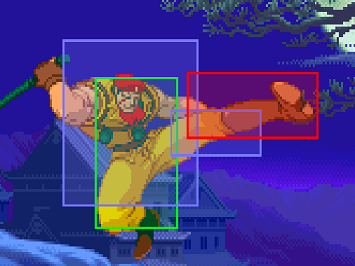
dj.![]() - Awesome air to air, with a slightly upward angle compared to dj.
- Awesome air to air, with a slightly upward angle compared to dj.![]()
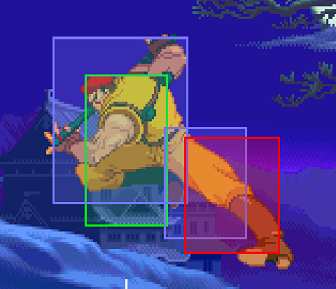
dj.![]() - His yummy crossup. If you can confirm that this hit, you can land some great damage by doing a combo or activating CC after it hits.
- His yummy crossup. If you can confirm that this hit, you can land some great damage by doing a combo or activating CC after it hits.
Command Moves
Scouter Jump
Spike Rod
Fake Rod
Throws
Special Moves
Patriot Circle
(![]() +
+ ![]() (Can be repeated up to 3 times)
(Can be repeated up to 3 times)
Only good for comboing and you really have to be point blank for it to do that. Can combo from cr.LP, cr.LP, or cr.MK. CANNOT combo from two of them..IE, you can't do cr.LK, then try to counter hit cr.LP into rekka. You'll get pushed back too far.
Mekong Delta Air Raid
Mekong Delta Escape
![]() +
+ ![]() - then press
- then press ![]() or
or ![]() to move
to move
One of the best things about Rolento. Prevents people from mashing, prevents him for being zoned well, and on counter hit does a ton of damage + dizzy. You can throw one of these after any c.LP/st.LP or cr.MK. If they hit anything they'll be hit. Mixup with throws when you're close, toss when far to zone them/prevent zoning. Once you get into the corner you can do sick things if they don't have meter. cr.LP into knives, into mk, into knives, into scouter jumps into more pokes into more knives, etc. Toss in some throws/cc's and you'll have a frustrated opponent for sure.
Trick Landing
(Just before landing from a jump) ![]() or
or ![]() +
+ ![]()
Super Moves
Take No Prisoner
Mine Sweeper
Basic Strategy
As stated above, Rolentos gameplan revolves around running away and building meter early and pressuring once meter is gained. The best ways to do this is to move out to long range and whiff LP Mekong Delta Air Raid roll segment to build meter quickly. When your opponent approaches use Mekong Delta Air Escape and hold towards your opponent to make your way to the opposite side of the screen to retain range to continue meter building. you can also come out of the jump with HK to build more meter and continue rolling on landing for meter. Be wary of early jump attacks used to counter the Delta Escape tactic as you are leaving the ground. Try to read these attempts and bait them by whiffing cr.LP. If they jump simply use an anti air to counter them.
Once you have meter, then you can begin to pressure your opponent. Best way to apply pressure is with cr.HP and cr.HK. cr.HP is the more offensive of the two, mainly used when your opponent is in range for attack. cr.HK is used for whiff punishing or to catch a mobile character walking backwards. It is very useful to throw an occasional HK Stinger when your opponent is turtling. Rolento will recover just before the knife is blocked so you can go for the early cr.HK, a late throw, or the late CC when you have them respecting the throw attempt.
A very useful way to bait an attack and land a safe CC is to do the roll part of LP Mekong Delta Air Raid as a read on a low attack.
A way to set this up is to walk into attack range and roll away. If you see the attack miss, activate and perform your ground CC for big damage!
st.LP is an important pressure tool. It has great start up and recovery enabling you to setup a bootleg frame trap by doing walk up LP granted you are able to anticipate the opponents attack patterns. The timing of walk up LP must be timed in anticipation of the opponents attack but if they try to attack between the two LPs then the 2nd will likely beat most options. If you can anticipate a st.LP hitting, you can link a cr.MK from it and go for rekkas. Once your opponent begins to play defensively and respect your offense you can throw in an occasional walk up throw (always with MP for safety!) to open them up. Simply walking up and activating CC is a good option when your opponents begin attempting to counter your throws. If you anticipate a ground attack with long recovery you can go for crossup MK and combo from there.
"I generally try to pressure with knife throws from just outside my cr.Fierce range. If they try walking forward or sticking out a poke, I cr.Fierce. If they jump in, I use st.Strong or st.Fierce depending on the angle of their jump. If they’re getting too close to me, I do cr.Jabs or cr.Forward xx Jab roll to get back into my optimal range. When I’m getting too close to the corner, I use wall jump to switch sides before I actually get cornered. What should I be doing?
you can also:
learn his ccs, and use them to counter (tick) throws and the opponent’s attack after you’ve blocked a non-deep jump in poke with standing jabs up-close and end the string with crouching mk xx stinger use vertical jumping jab and short as anti-air moves use the mekong delta attack to roll through fireballs use the level 3 take no prisoner as an anti-fireball. the high jump is also good for this cross up with mk high jump d+mk has great priority, and can be useful in rushing use the kick alpha counter against laggy moves and follow with standing jab-> patriot circle or a cc bait out anti-moves (dps and the like) with his qcb+k. you have great control over this move and it’s fast, so you can use it to fly over dps unscathed, or land right in front and punish use crouching strong-> crouching fierce as a poke string play footsies with crouching roundhouse, and punish whiffed moves with crouching fierce use the higher levels of his super gauge for a cc to walk through fireballs and counter be aware that connecting with all hits of the patriot circle gives the opponent a generous amount of super meter"
"Always throw with st. strong. Using fierce is bad because even if it hits up close, it’s very punishable on hit. Stand fierce is a great move, just not from that range. As for his kick throw, it seems to do the exact same damage as his punch throw, except it does no damage if they tech (whereas punch will do a small bit on tech, just like any other throw). Quite a shame since kick throw looks way cool.
Tripwire super gives him advantage on block, and can be used as a tick. It also can’t be blocked if you do it point-blank and they are not blocking low before the flash (any level).
Scouter hop forward (d,u) into j. strong puts him in a situation where he only has a bit of advantage; st. or cr. jab will combo but not much else. A lot of people will try to throw or even sac-throw when they get hit. Use this as a setup by doing scouter -> j. strong -> land CC or tripwire."
Defense
st.MP is a great anti air, along with j.LP and st.HP. Rolentos Anti Air CC is also a good (but expensive) option, but it deals great damage so don't be hesitant to use it if you can.
Alpha Counters
Punch AC This Alpha Counter has good usage against close ranged attacks. It does good damage and causing a knockdown. The last hit usually misses from anywhere further than close range so be careful with your spacing.
Kick AC Instead of dealing damage, Rolento flies past the opponent with a jump. This is useful for escaping corner pressure, and it also switches positions with your opponent putting you in position to apply pressure of your own. It also has a limited effectiveness against projectiles, allowing you to counter from close range and activate a CC to punish projectile recovery.
Advanced Strategy
Mekong Delta Escape Tricks
The Mekong Delta Escape is one of the best mobility options in the game. It gives you the ability to control where you will land by holding back or forward after he jumps off the wall. Its useful for dealing with projectiles as well as making your opponent guess whether or not its safe to anti air Rolentos jumping attacks.
If you think the opponent is looking to counter a jump, perform MDE then after leaving the wall hold back before reaching your opponent. If done right you will drop about sweep distance from your opponent. Most anti air attempts should whiff here giving you the option to punish with cr.HK or a CC.
If you have your opponent hesistant to anti air the jump, after leaving the wall hold forward until you pass over your opponents head then back to steady yourself and perform j.MK for the crossup, hitting your opponent from behind.
or...
After leaving the wall, press no directions and perform a late j.HK during descent. This will hit from the front.
Stinger Tactics
Rolentos knife can be used in block strings and as meaty for pressure.
Kara Canceling into stinger from medium or heavy attacks counter hits mashing buttons or low level CCs
Normal Combos
c.MK,Patriot Circle x3
crossup MK, cr.LPx2 xx HP Patriot Circle
st.LP, cr.MK
Custom Combos
ground: CC, low roundhouse slide, SJ, hit short 3-5 times while in the air. if you have more levels just kick SJ when you land and go up with more shorts
Anti air: CC, standing strong, SJ, hit short 3-5 times while in the air. same as above....if you have more levels keep SJ
Rolento: Any lvl- c.rh xx [scouter jump piano mash all kicks or mash lk]xN
aa cc- s.lp instead of c.rh into above combo
Match-ups
Vs. Adon:
Vs. Akuma:
Vs. Birdie:
Vs. Charlie:
Vs. Chun-Li:
Vs. Dan:
Vs. Dhalsim:
Vs. Gen:
Vs. Guy:
Vs. Ken:
Vs. M. Bison (dictator):
Vs. Rolento (self):
Vs. Rose:
Vs. Ryu:
Vs. Sagat:
Vs. Sakura:
Vs. Sodom:
Vs. Zangief:
| Characters |
|---|
| Adon - Akuma - Birdie - Charlie - Chun-Li - Dan - Dhalsim - Evil Ryu - Gen - Guy - Ken - M.Bison - Rolento - Rose - Ryu - Sagat - Sakura - Sodom - Zangief |
