m (→Super Move) |
No edit summary |
||
| Line 29: | Line 29: | ||
*Obvious stuff: O.Ken can not tech throws, does not have the Crazy Kicks, Knee Bash grab and Super; | *Obvious stuff: O.Ken can not tech throws, does not have the Crazy Kicks, Knee Bash grab and Super; | ||
*O.Ken has a faster pre-jump animation by 1 frame; | *O.Ken has a faster pre-jump animation by 1 frame; | ||
*O.Ken does not | *O.Ken does not have an air throw; | ||
*O.Ken has some differences in some of his normals: | *O.Ken has some differences in some of his normals: | ||
**Far Standing Jab has better priority; | **Far Standing Jab has better priority; | ||
| Line 44: | Line 44: | ||
**Diagonal Jumping Short has worse priority during the first 10 active frames; | **Diagonal Jumping Short has worse priority during the first 10 active frames; | ||
**Diagonal Jumping Forward is an aerial kick with very good priority while for N.Ken it's a new kick made almost exclusively for crossup, but its not easy to time like for O.Ken; | **Diagonal Jumping Forward is an aerial kick with very good priority while for N.Ken it's a new kick made almost exclusively for crossup, but its not easy to time like for O.Ken; | ||
**Neutral Jumping Roundhouse has better air to air priority but worse air to ground priority and | **Neutral Jumping Roundhouse has better air-to-air priority but worse air-to-ground priority and does more damage; | ||
**Diagonal Jumping Roundhouse can be used as a | **Diagonal Jumping Roundhouse can be used as a cross-up attack and has better air-to-air priority, but has somewhat worse air-to-ground priority. It also does more damage; | ||
*O.Ken's Hadoukens have a 1 frame faster startup. His Strong Hadoukens have 1 frame faster recovery and his Fierce ones have a 2 frame faster recovery; | *O.Ken's Hadoukens have a 1 frame faster startup. His Strong Hadoukens have 1 frame faster recovery and his Fierce ones have a 2 frame faster recovery; | ||
*O.Ken's Shoryukens are invulnerable | *O.Ken's Shoryukens are invulnerable until their apex. Jab and Strong versions do not have 2 grounded frames where Ken is throwable; | ||
===Color Options=== | ===Color Options=== | ||
Revision as of 20:22, 18 August 2012
Introduction
Ryu's training partner, Ken, has developed his own style of moves and variations since his clone days of Street Fighter II: World Warrior. In ST, he can be a very tough character to beat if played right with the tools he has and the right mindset.
Competitive Overview
Strengths & Weaknesses
- Good projectile and anti-air special moves, but with long recovery;
- His Jab Shoryuken is a good anti-air move, and very damaging;
- Very dangerous mix-ups from his knee bash loop;
- Has a hold, which can be understood as a throw that can not be easily softened for just 50% damage;
- Short invincibility in his Shoryukens while active;
- Long start-up on his projectile;
- Ground Tatsu has no invulnerability and starts as a grounded move: it does not avoid safe jumps nor throws;
- Super can be hit-confirmed, but it is never safe on block;
- Average throw range;
- Most normals have average range;
- All shotos's diagonal jumping Fierce and Roundhouse attacks have nerfed dizzy properties;
- The normals with most range have a very long recovery time.
New & Old Versions Comparison
To select O.Ken, choose Ken and then press → ← ← ← Jab/Fierce, pressing Short simultaneously with the punch button for the alternate color.
Here is the list of differences:
- Obvious stuff: O.Ken can not tech throws, does not have the Crazy Kicks, Knee Bash grab and Super;
- O.Ken has a faster pre-jump animation by 1 frame;
- O.Ken does not have an air throw;
- O.Ken has some differences in some of his normals:
- Far Standing Jab has better priority;
- Close Standing Fierce second active hitbox has much better priority;
- Far Standing Short is the anti air kick like the Far Standing Kick while for N.Ken it's a low hitting kick like the close version;
- Crouching Short has much better priority;
- Far Standing Forward has a slower startup;
- Close Standing Forward is a knee attack, while for N.Ken is a high kick similar to his old Close Standing Roundhouse;
- Crouching Forward has much better priority;
- Close Standing Roundhouse is a useless kick with minor anti air priority that hits twice while for N.Ken its a kick that moves him forward while attacking low;
- Far Standing Roundhouse is the classic mediocre anti air shoto kick while for N.Ken its a kick that moves him forward while attacking low;
- Crouching Roundhouse has much better priority and do more damage;
- Both Jumping Fierces do more damage;
- Diagonal Jumping Short has worse priority during the first 10 active frames;
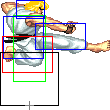
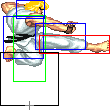
- Diagonal Jumping Forward is an aerial kick with very good priority while for N.Ken it's a new kick made almost exclusively for crossup, but its not easy to time like for O.Ken;
- Neutral Jumping Roundhouse has better air-to-air priority but worse air-to-ground priority and does more damage;
- Diagonal Jumping Roundhouse can be used as a cross-up attack and has better air-to-air priority, but has somewhat worse air-to-ground priority. It also does more damage;
- O.Ken's Hadoukens have a 1 frame faster startup. His Strong Hadoukens have 1 frame faster recovery and his Fierce ones have a 2 frame faster recovery;
- O.Ken's Shoryukens are invulnerable until their apex. Jab and Strong versions do not have 2 grounded frames where Ken is throwable;
Color Options
| Jab | Strong | Fierce | Start | Old |
 |
 |
 |
 |

|
 |
 |
 |
 |

|
| Short | Forward | Roundhouse | Hold | Old Alternative |
--Born2SPD
Moves Analysis
Normal Moves
Ground Normals
Disclaimer: Ground normals take one extra frame to enter their start-up, which is the reason for the additional frame on the 'Simplified' row.
- Close Standing Jab:
| Damage | 4 |  |
 |

|
| Stun | 0~5 | |||
| Stun Timer | 40 | |||
| Chain Cancel | No | |||
| Special Cancel | Yes | |||
| Super Cancel | Yes | |||
| Frame Advantage | ? | |||
| Frame Count | 2 | 4 | 5 | |
| Simplified | 1 + 2 | 4 | 5 | |
Ken performs an elbow smash in front and above his head. Fast start-up anti-air up close, with just OK priority.
- Far Standing Jab:
| Damage | 4 |  |
 |
 |

|
| Stun | 0~5 | ||||
| Stun Timer | 40 | ||||
| Chain Cancel | Yes | ||||
| Special Cancel | Yes | ||||
| Super Cancel | Yes | ||||
| Frame Advantage | ? | ||||
| Frame Count | 2 | 4 | 4 | 1 | |
| Simplified | 1 + 2 | 4 | 5 | ||
Rapid-fire Jab that has very good priority (Ken's arm is completely invulnerable) but just acceptable reach and very low damage.
- Crouching Jab:
| Damage | 4 |  |
 |
 |

|
| Stun | 0~5 | ||||
| Stun Timer | 40 | ||||
| Chain Cancel | Yes | ||||
| Special Cancel | Yes | ||||
| Super Cancel | Yes | ||||
| Frame Advantage | ? | ||||
| Frame Count | 2 | 4 | 4 | 1 | |
| Simplified | 1 + 2 | 4 | 5 | ||
Rapid-fire ducking Jab with OK reach and very good priority. Ken's arm is completely invincible.
- Close Standing Strong:
| Damage | 21 |  |
 |
 |
 |
 |
 |

|
| Stun | 5~11 | |||||||
| Stun Timer | 60 | |||||||
| Chain Cancel | No | |||||||
| Special Cancel | Yes | |||||||
| Super Cancel | Yes | |||||||
| Frame Advantage | ? | |||||||
| Frame Count | 1 | 2 | 2 | 6 | 4 | 3 | 4 | |
| Simplified | 1 + 3 | 2 | 17 | |||||
Ken performs a hook. This move has a not very good recovery, so try canceling it into some special such as the hadouKen to avoid punishment.
- Far Standing Strong:
| Damage | 19 |  |
 |
 |
 |
 |

|
| Stun | 5~11 | ||||||
| Stun Timer | 60 | ||||||
| Chain Cancel | No | ||||||
| Special Cancel | Yes | ||||||
| Super Cancel | Yes | ||||||
| Frame Advantage | ? | ||||||
| Frame Count | 1 | 2 | 4 | 3 | 3 | 1 | |
| Simplified | 1 + 3 | 4 | 7 | ||||
Ken performs a straight punch. This move has very good recovery, reach and priority. Works as anti-air against some moves, but notice Ken's body moves forward a bit, so you need some room to use it correctly. Ken's whole arm is invincible in this attack.
- Crouching Strong:
| Damage | 19 |  |
 |
 |
 |
 |

|
| Stun | 5~11 | ||||||
| Stun Timer | 60 | ||||||
| Chain Cancel | No | ||||||
| Special Cancel | Yes | ||||||
| Super Cancel | Yes | ||||||
| Frame Advantage | ? | ||||||
| Frame Count | 1 | 2 | 4 | 3 | 3 | 1 | |
| Simplified | 1 + 3 | 4 | 7 | ||||
Ken does a crouching straight. Good damage, stun, recovery and priority. Ken's whole arm is completely invincible.
- Close Standing Fierce:
| Damage | 24 |  |
 |
 |
 |

|
| Stun | 3~9/10~16 | |||||
| Stun Timer | 40/80 | |||||
| Chain Cancel | No | |||||
| Special Cancel | Yes/No | |||||
| Super Cancel | Yes/Yes | |||||
| Frame Advantage | ? | |||||
| Frame Count | 3 | 2 | 6 | 10 | 13 | |
| Simplified | 1 + 3 | 8 | 23 | |||
Ken does a close upper. It works as anti-air if the enemy is on top of you, but it is more vulnerable to cross-ups when compared to the close Fierce from all other shoto characters (O.Ken, Ryu, O.Ryu). In case it hits close, during the first active part, it can be canceled into any special attack for a basic but damaging combo. Bad recovery, punishable if used from point-blank or if the enemy has super (most characters).
- Far Standing Fierce:
| Damage | 24 |  |
 |
 |
 |
 |

|
| Stun | 10~16 | ||||||
| Stun Timer | 80 | ||||||
| Chain Cancel | No | ||||||
| Special Cancel | No | ||||||
| Super Cancel | Yes | ||||||
| Frame Advantage | ? | ||||||
| Frame Count | 3 | 2 | 6 | 10 | 12 | 1 | |
| Simplified | 1 + 5 | 6 | 23 | ||||
Similar to far.Strong, but with higher damage and longer reach, but the head hitbox moves forward just as much and the recovery is hideous. This move can not be canceled into specials, so make sure it hits or you will pay the price.
- Crouching Fierce:
| Damage | 24/19 |  |
 |
 |
 |
 |

|
| Stun | 3~9/10~16 | ||||||
| Stun Timer | 40/80 | ||||||
| Chain Cancel | No | ||||||
| Special Cancel | Yes/No | ||||||
| Super Cancel | Yes/No | ||||||
| Frame Advantage | ? | ||||||
| Frame Count | 3 | 3 | 8 | 10 | 12 | 1 | |
| Simplified | 1 + 3 | 11 | 23 | ||||
Uppercut from crouching position. It does good damage and has a deceptively long horizontal reach, but just average to low priority and quite long recovery. This move is unsafe on block or hit and is mainly used in combos or as close-up anti-air.
- Close Standing Short:
| Damage | 11 |  |
 |
 |
 |
 |

|
| Stun | 0~5 | ||||||
| Stun Timer | 40 | ||||||
| Chain Cancel | Yes | ||||||
| Special Cancel | No | ||||||
| Super Cancel | Yes | ||||||
| Frame Advantage | ? | ||||||
| Frame Count | 2 | 3 | 2 | 4 | 3 | 1 | |
| Simplified | 1 + 5 | 2 | 8 | ||||
Ken performs a low kick that can be canceled into a far Short or crouching Short. This move must be blocked low.
- Far Standing Short:
| Damage | 12 |  |
 |
 |
 |
 |
 |
 |

|
| Stun | 0~5 | ||||||||
| Stun Timer | 40 | ||||||||
| Chain Cancel | No | ||||||||
| Special Cancel | No | ||||||||
| Super Cancel | No | ||||||||
| Frame Advantage | ? | ||||||||
| Frame Count | 3 | 2 | 2 | 2 | 2 | 3 | 3 | 1 | |
| Simplified | 1 + 7 | 2 | 9 | ||||||
Like the Close version, but without cancels and worse priority. Hits low as well.
- Crouching Short:
| Damage | 4 |  |
 |
 |

|
| Stun | 0~5 | ||||
| Stun Timer | 40 | ||||
| Chain Cancel | Yes | ||||
| Special Cancel | Yes | ||||
| Super Cancel | Yes | ||||
| Frame Advantage | ? | ||||
| Frame Count | 3 | 4 | 4 | 1 | |
| Simplified | 1 + 3 | 4 | 5 | ||
Rapid fire crouching low kick. Mediocre priority but good reach.
- Close Standing Forward:
| Damage | 19 |  |
 |
 |
 |

|
| Stun | 5~11 | |||||
| Stun Timer | 60 | |||||
| Chain Cancel | No | |||||
| Special Cancel | No | |||||
| Super Cancel | No | |||||
| Frame Advantage | ? | |||||
| Frame Count | 3 | 4 | 8 | 10 | 1 | |
| Simplified | 1 + 7 | 8 | 11 | |||
Has same vertical priority from Old Shotos cl.Rh but worse horizontal priority. For some reason, this move triggers from further away than other close normals. OK for anti air up close.
- Far Standing Forward:
| Damage | 19 |  |
 |
 |
 |

|
| Stun | 5~11 | |||||
| Stun Timer | 60 | |||||
| Chain Cancel | No | |||||
| Special Cancel | No | |||||
| Super Cancel | No | |||||
| Frame Advantage | ? | |||||
| Frame Count | 3 | 4 | 8 | 6 | 1 | |
| Simplified | 1 + 7 | 8 | 7 | |||
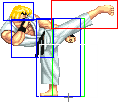
High side kick with good priority, but very slow start-up. Good anti-air if you can hit the button early enough.
- Crouching Forward:
| Damage | 19 |  |
 |
 |
 |
 |

|
| Stun | 5~11 | ||||||
| Stun Timer | 60 | ||||||
| Chain Cancel | No | ||||||
| Special Cancel | Yes | ||||||
| Super Cancel | Yes | ||||||
| Frame Advantage | ? | ||||||
| Frame Count | 1 | 2 | 6 | 4 | 4 | 1 | |
| Simplified | 1 + 3 | 6 | 9 | ||||
Crouching side kick. This move has good reach and recovery, but is has projected vulnerable hitboxes before it becomes active. It is an important tool when closing the gap on the enemy and trying to push him into the corner as it can be canceled into Hadoukens. It is also used in bread and butter combos.
- Close/Far Standing Roundhouse:
| Damage | 22 |  |
 |
 |
 |
|
| Stun | 10~16 | |||||
| Stun Timer | 80 | |||||
| Chain Cancel | No | |||||
| Special Cancel | No | |||||
| Super Cancel | No | |||||
| Frame Advantage | ? | |||||
| Frame Count | 2 | 2 | 2 | 2 | 4 | |
| Simplified | 1 + 8 | 4 | ||||
 |
 |
 |

| |
| Frame Count | 4 | 4 | 4 | 5 |
| Simplified | 17 | |||
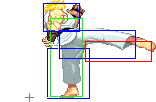
- Crouching Roundhouse:
| Damage | 22 |  |
 |
 |
 |

|
| Stun | 5~11 | |||||
| Stun Timer | 130 | |||||
| Chain Cancel | No | |||||
| Special Cancel | Yes | |||||
| Super Cancel | Yes | |||||
| Frame Advantage | ? | |||||
| Frame Count | 3 | 6 | 6 | 8 | 11 | |
| Simplified | 1 + 3 | 6 | 25 | |||
Ken's sweep kick. This move generates a fast knockdown if it hits. It has good range and the priority is such that it beats or trades with a number of moves. The recovery, however, is very long, so good players will try to bait this move so as to punish it afterward. This can be canceled into HadouKens so you can push the enemy towards his corner or Shoryukens and Short tatsus for super meter.
Aerial normals
- Neutral Jumping Jab:
| Damage | 11 |  |

|
| Stun | 1~7 | ||
| Stun Timer | 40 | ||
| Special Cancel | Yes | ||
| Frame Count | 2 | ∞ | |
Ken performs a jumping jab that is active throughout the whole jump. Ken's hand has a relatively large active hitbox around it, making this a good air-to-air move. It can be used for jumping on you opponent after a knockdown and not generate much push-back, allowing you to apply mix-ups such as throw, cr.forward xx Hadouken/super or delayed Jab SRK (to beat reversal throws).
- Diagonal Jumping Jab:
| Damage | 11 |  |

|
| Stun | 1~7 | ||
| Stun Timer | 40 | ||
| Special Cancel | Yes | ||
| Frame Count | 2 | ∞ | |
Ken performs a jumping jab that is active throughout the whole jump. Ken's hand has a relatively large active hitbox around it, making this a good air-to-air move. It can be used for jumping on you opponent after a knockdown and not generate much push-back, allowing you to apply mix-ups such as throw, cr.forward xx Hadouken/super or delayed Jab SRK (to beat reversal throws). This beats Zangief's Lariats from the right distance and still hits him if he crouches.
- Neutral Jumping Strong:
| Damage | 19 |  |
 |
 |
 |
 |
 |

|
| Stun | 5~11 | |||||||
| Stun Timer | 50 | |||||||
| Special Cancel | Yes | |||||||
| Frame Count | 2 | 2 | 20 | 4 | 4 | 4 | ∞ | |
| Simplified | 4 | 20 | ∞ | |||||
This aerial punch stays active for quite some time, for a Strong punch. It has very good horizontal reach and Ken's arm is completely invincible. A move to be considered when afraid of wall dives crossing you or aerial attacks in general. This attack does not hit crouching opponents.
- Diagonal Jumping Strong:
| Damage | 19 |  |
 |
 |
 |
 |
 |

|
| Stun | 5~11 | |||||||
| Stun Timer | 50 | |||||||
| Special Cancel | Yes | |||||||
| Frame Count | 2 | 2 | 8 | 4 | 4 | 4 | ∞ | |
| Simplified | 4 | 8 | ∞ | |||||
The same as above but with different frame count.
- Neutral Jumping Fierce:
| Damage | 22 |  |
 |
 |
 |
 |
 |

|
| Stun | 11~17 | |||||||
| Stun Timer | 60 | |||||||
| Special Cancel | Yes | |||||||
| Frame Count | 2 | 2 | 20 | 4 | 4 | 4 | ∞ | |
| Simplified | 4 | 20 | ∞ | |||||
Stays active a lot of time, for a fierce punch.
- Diagonal Jumping Fierce:
| Damage | 22 |  |
 |
 |
 |
 |
 |

|
| Stun | 3~9 | |||||||
| Stun Timer | 40 | |||||||
| Special Cancel | Yes | |||||||
| Frame Count | 2 | 2 | 8 | 4 | 4 | 4 | ∞ | |
| Simplified | 4 | 8 | ∞ | |||||
This move has very good air to ground priority, and Ken's arm is also completely invincible. It can be used as anti-air from certain distances, and also beats or trades most other aerial attacks.
- Neutral Jumping Short:
| Damage | 12 |  |
 |

|
| Stun | 1~7 | |||
| Stun Timer | 40 | |||
| Special Cancel | Yes | |||
| Frame Count | 3 | 40 | ∞ | |
This stays out for quite some time, but it has a very short reach. Mostly useless.
- Diagonal Jumping Short:
| Damage | 11 |  |
 |
 |

|
| Stun | 1~7 | ||||
| Stun Timer | 40 | ||||
| Special Cancel | No | ||||
| Frame Count | 2 | 3 | 10 | ∞ | |
| Simplified | 5 | ∞ | |||
This stays out for quite some time, but safe jumps aside, this does not have many uses. Its main downside is the short reach.
- Neutral Jumping Forward:
| Damage | 19 |  |
 |
 |
 |

|
| Stun | 5~11 | |||||
| Stun Timer | 50 | |||||
| Special Cancel | No | |||||
| Frame Count | 5 | 13 | 6 | 6 | ∞ | |
| Simplified | 5 | 13 | ∞ | |||
OK kick that stays active for some time. It can be used in certain situations where the enemy has trouble knowing which way to block. That aside, prefer neutral Strong, Fierce or Roundhouse.
- Diagonal Jumping Forward:
| Damage | 22/19 |  |
 |
 |
 |
 |
 |
 |
 |

|
| Stun | 3~9/5~11 | |||||||||
| Stun Timer | 40/50 | |||||||||
| Special Cancel | No | |||||||||
| Frame Count | 1 | 2 | 2 | 5 | 8 | 3 | 3 | 3 | ∞ | |
| Simplified | 5 | 13 | ∞ | |||||||
- Neutral Jumping Roundhouse:
| Damage | 22 |  |
 |
 |
 |
 |
 |

|
| Stun | 11~17 | |||||||
| Stun Timer | 60 | |||||||
| Special Cancel | Yes/No | |||||||
| Frame Count | 2 | 4 | 4 | 4 | 3 | 3 | ∞ | |
| Simplified | 2 | 8 | ∞ | |||||
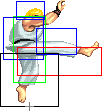
Neutral spin kick that has good reach. The first active part becomes active very fast, saving you from some troublesome situations.
- Diagonal Jumping Roundhouse:
| Damage | 22 |  |
 |
 |
 |
 |
 |

|
| Stun | 3~9 | |||||||
| Stun Timer | 40 | |||||||
| Special Cancel | No | |||||||
| Frame Count | 2 | 3 | 7 | 3 | 3 | 3 | ∞ | |
| Simplified | 5 | 7 | ∞ | |||||
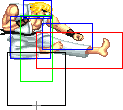
This has good reach, but as it projects vulnerable hitboxes, it can also be countered if you whiff. From certain distances, this can also be used as anti-air, in the same fashion as diagonal jumping Fierce, hitting your enemy from above his attack or around the head. This move can no longer be used as a cross-up aerial attack.
Throws
Ken can throw using Strong, Fierce, Forward, and Roundhouse. He has an air throw as well. The direction of the joystick determines the direction the enemy gets thrown at. All his throws have the same range and do 22% damage. His Knee Bash Grab does 18% damage at the first hit plus 3% each additional hit. For damage, knee bash is the way to go, for positioning the Roundhouse throw is often preferred, since it approaches the corner faster.
- Shoulder Throw a.k.a. Seoi Nage: (←/→ + Strong/Fierce)
| Damage | 32 |  |
 |

|
| Stun | 7~13 | |||
| Stun Timer | 100 | |||
| Range (from axis) | 48 | |||
| (from throwable box) | 19 |
Both punch throws are the same, which allow Ken to grab the enemy and throw him above his head.
- Knee Bash a.k.a. Tsukami Nage: (←/→ + Forward)
| Damage | 26 + 4*n |  |
 |

|
| Set amount of hits | 5 | |||
| Holds do no stun | ||||
| Range (from axis) | 48 | |||
| (from throwable box) | 19 | |||
Very nasty grab with very good mixup potential. Read below for more in depth strategies regarding this grab.
- Rolling Circle Throw a.k.a. Jigoku Guruma: (←/→ + Roundhouse)
| Damage | 32 |  |
 |

|
| Stun | 7~13 | |||
| Stun Timer | 100 | |||
| Range (from axis) | 48 | |||
| (from throwable box) | 19 |
Ken pulls the enemy towards himself, roll on the ground while holding him and throw him with the aid of his leg.
- Air Rolling Circle Throw a.k.a. Jigoku Fuusha: (Ken and opponent in air, ↖/↙/←/→/↘/↗ + Forward/Roundhouse)
| Damage | 32 | 
|
| Stun | 7~13 | |
| Stun Timer | 100 | |
| Range (from axis) | 48 | |
| (from throwable box) | 19 |
In ST Ken received an air throw, its a nice buff but as any other air throw, it will come out most times accidentally.
Special Moves
All motions are listed under the assumption that Ken is facing right.
- Hadouken a.k.a. Fireball: (↓↘→ + P)
Detailed Input: (↓ [0~6f] ↘ [0~6f] → [0~10/9/7f] Jab/Strong/Fierce)
- Startup:
| Super Meter | 2 |  |
 |
 |

|
| Frame Count | 2 | 7 | 3 | 1 | |
| Simplified | 13 | ||||
- Active:
- Jab Version:
| Damage | 16 |  |
 |
 |

|
| Stun | 5~11 | ||||
| Stun Timer | 110 | ||||
| Frame Count | 1 | 1 | 2 | 2... | |
| Simplified | 40 | ||||
- Strong Version:
| Damage | 17 |  |
 |
 |

|
| Stun | 5~11 | ||||
| Stun Timer | 110 | ||||
| Frame Count | 1 | 1 | 2 | 2... | |
| Simplified | 41 | ||||
- Fierce Version:
| Damage | 19 |  |
 |
 |

|
| Stun | 5~11 | ||||
| Stun Timer | 110 | ||||
| Frame Count | 1 | 1 | 2 | 2... | |
| Simplified | 42 | ||||
Ken throws two flying fists which are engulfed by blue energy towards his enemy. The strength of the punch determines its speed: Jab flies the slowest, while Fierce flies the fastest. The Jab does 11% damage, the Strong does 12% damage and the Fierce one does 14%, which happens to be the highest damaging projectile in the game. All 3 versions (Jab, Strong, Fierce) have Ken release the projectile at the same interval, which is 13 frames, and have vulnerable "after-throw" state that takes 40 frames to recover for Jab, 41 for Strong and 42 for Fierce. This is as fast as O.Ken's Jab Hadouken, just with the start-up slower by one frame. Due to the slower start-up on your move and slower projectiles in general, so it is harder for you to hit enemies out of their moves, compared to Ryu's, O.Ryu's and O.Ken's projectiles. Your main goals are to force them to jump, as you have a perfectly good anti-air move in your Shoryuken; push them into their corner, where their mobility is severely hindered; get them in the mood of throwing projectiles as soon as they can, to stop taking chip and for you to jump instead; and put them in a defensive stance, making it easier for you to approach and apply your strong melee game.
- Shouryuken a.k.a. Dragon Punch: (→↓↘ + P)
Detailed Input: (→ [0~6f] ↓ [0~6f] ↘ [0~10/9/7f] Jab/Strong/Fierce)
- Jab Version:
| Damage | 33/22 |  |
 |
 |
 |
 |
 |

|
| Stun | 9~15/2~8 | |||||||
| Stun Timer | 100/90 | |||||||
| Super Meter | 8 | |||||||
| Frame Count | 2 | 4 | 2 | 12 | 6 | 10 | 3 | |
| Simplified | 2 | 18 | 19 | |||||
- Strong Version:
| Damage | 29+12 |  |
 |
 |
 |
 |
 |

|
| Stun | 9~15+2~8 | |||||||
| Stun Timer | 100+90 | |||||||
| Super Meter | 8 | |||||||
| Frame Count | 2 | 4 | 2 | 20 | 6 | 18 | 3 | |
| Simplified | 2 | 4 | 22 | 27 | ||||
- Fierce Version:
| Damage | 4+27+11 |  |
File:Ken srk2frcanm.png |  |
File:Ken srk4frcanm.png | File:Ken srk5frcanm.png | File:Ken srk6frcanm.png | File:Ken srk7frcanm.png |
| Stun | 1~7+9~15+1~7 | |||||||
| Stun Timer | 30+100+30 | |||||||
| Super Meter | 8 | |||||||
| Frame Count | 2 | 2 | 1 | 25 | 6 | 25 | 3 | |
| Simplified | 2 | 2 | 26 | 34 | ||||
Ken becomes completely invincible and does an upper followed up with a rising punch, then remains completely defenseless as he falls back to the ground. The Jab version will cause a full knockdown on his enemy. It does 23% damage early and 14% while ascending. The Strong one hits up to two times and causes a full knockdown if the rising punch connects, while the Fierce version causes flaming hitstun, hits up to three times and also causes a full knockdown if the rising fist hits, but this often does not happen if the initial stages connect but from point-blank range. The Jab Shoryuken is very good for evading projectiles and it is Ken's best reversal move by far, possibly the best in the whole game, as it causes good damage if it hits early, always knocks down on hit and is safe on block against most characters.
Ken's Fierce Shoryuken does not do much damage when hitting while ascending, but it controls a good part of the air space in front of him. If you are not recovering from a move and the enemy jumped forward from a distance such that you are unsure if a late Jab Shoryuken will hit, use the Fierce version to knock him out of the air safely. It can also be used to prevent the enemy from jumping straight up in front of you from close to mid distance. Some floaty jumps over Hadoukens can be punished that way. Finally, it hits on the first frame. A perfectly timed safe jump may work half the time against your other Shoryukens, but if you use the Fierce version, you are guaranteed to hit, albeit for low damage. The move, however, is not invulnerable while ascending. A few aerial attacks can trade or beat the move cleanly. For instance, most O.Chun Li's diagonal kicks and N.Chun Li's neutral Fierce beat the rising part of the Fierce and Strong Shoryukens from the front.
Since a properly-timed Dragon Punch will beat most other moves, its simplest and most common application is as a general anti-air counter, because you have a lot of time to react and time the attack as you see the opponent approaching through the air. Because it'll knock down, you can continue pressuring with whatever you like, such as a meaty fireball or a cross-up attack. In addition to it, any character that can not alter its jump arc will be unable to evade any versions of the move, as Ken is invulnerable during the whole active part. Notice that Ken does more damage if it hits early, so time it late if possible.
Ken's Jab Shoryuken is a very strong tool in footsies. You can stuff virtually any normal ground attack from your opponent, and the timing is much more lenient than for Ryu's Shoryuken, as Ken's has slightly more horizontal range and much better vertical range, making it easier to stuff low pokes.
Two of N.Ken's Shoryukens have vulnerable grounded frames. Precisely, Jab and Strong Shoryukens have two vulnerable grounded frames, while Fierce Shoryuken has none. This means Ken may get hit and comboed, which is particularly dangerous and common after cross-up aerial attacks. He can also be thrown if the enemy has a very long range throw or on wake-up, as a reversal.
- Tatsumaki Senpuu Kiaku a.k.a. Hurricane Kick: (↓↙← + K)
Detailed Input: (↓ [0~6f] ↙ [0~6f] ← [0~10/9/7f] Short/Forward/Roundhouse)
- Startup:
| Damage | 11 |  |
 |
 |
 |

|
| Stun | 3~9 | |||||
| Stun Timer | 90 | |||||
| Super Meter | 6 | |||||
| Frame Count | 1 | 3 | 3 | 3 | 1 | |
| Simplified | 1 | 3 | 7 | |||
- Spin:
- Short Version: This happens 3 times.
- Forward Version: This happens 4 times.
- Roundhouse Version: This happens 5 times.
| Damage | 11 |  |
 |
 |

|
| Stun | 3~9 | ||||
| Stun Timer | 90 | ||||
| Frame Count | 2 | 1 | 2 | 2 | |
- Recovery:
 |
 |
 |

| |
| Frame Count | 4 | 4 | 4 | 0 |
| Simplified | 12 | 0 | ||
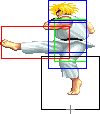
Ken immediately becomes airborne, attacks with a knee bash, then advances with fast spinning kicks that may combo one after the other. Different kicks have different effects: Short has the lowest duration and speed, while Roundhouse has the highest. Unlike Ryu, Ken is never invulnerable during this move.
Ken's Hurricane Kick also travels right over some projectiles and can be used to punish characters like Dhalsim and Guile for trying to use them. However, as it does not cause a knock down, Ken may be punished after or during the move. Because Ken has no invulnerability in his Tatsumaki kicks, however, he can not use them to avoid meaty projectiles and low attacks, even those of Dhalsim and Guile. He can not avoid safe jumps with them, too. As Ken is airborne as the move starts, he can avoid throws with it.
- Kuuchuu Tatsumaki Senpuu Kiaku a.k.a. Air Hurricane Kick: (In air, ↓↙← + K)
- Spin: (The Air version does not has a startup animation)
- Short Version: This happens 3 times.
- Forward Version: This happens 4 times.
- Roundhouse Version: This happens 5 times.
| Damage | 11 |  |
 |
 |

|
| Stun | 3~9 | ||||
| Stun Timer | 90 | ||||
| Super Meter | 6 | ||||
| Frame Count | 2 | 1 | 2 | 2 | |
- Recovery:
 |
 |
 |
 |
 |

| |
| Frame Count | 4 | 4 | 4 | 4 | ∞ | 7 |
| Simplified | ∞ | 7 | ||||
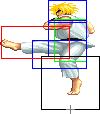
The Hurricane Kick can also be done while airborne. Again, stronger kicks give it longer duration. Unlike the ground version, it doesn't always move Ken forward; if performed while jumping backwards, Ken will continue moving in that direction. Ken's air Tatsumakis have a 50% chance of being unblockable if the move connects on the first frame.
The Air Hurricane Kick has some interesting effects on the speed and trajectory of the jump, as felineki writes:
The character's vertical velocity is not directly affected. Rather, their gravity value is temporarily adjusted. Every character has their own jump gravity value (as I'm sure you've noticed, Dhalsim falls much more slowly from a jump than Claw). This normally stays constant throughout a jump. However, when a shoto performs a mid-air hurricane kick, their gravity value is temporarily decreased. This gives them the effect of falling more slowly if it is performed on the way down, or allowing them to gain more height if done on the way up.
The decreased gravity value lasts as long as the character's leg is out, able to hit. As soon as they pull their leg back in, the gravity value returns to normal.
In addition, they are given a slight boost in horizontal velocity as the kick starts (a forward boost if jumping forward or straight up, a backward boost if jumping back). This additional velocity lasts until they actually touch the ground.
Similarly to Ryu's, Ken's Air Hurricane Kick has a multitude of uses. It serves as an alternative air attack with alternative properties than Ken's normal attacks and may interact with opponent anti-air moves differently. As it changes jump properties, it can surprise the opponent. Done correctly, it can actually cross-up enemy air counters like the Flash Kick to hit the opponent from behind. Ken's air tatsu, however, can combo (for more than one hit) on the way down, hits crouching characters much more often and is much better for shennanigans. These include the cross-up tatsu and the juice kick.
While the air hurricane kick looks like the grounded one, in fact it has much worse priority. Also, it does not recover instantly when Ken touches the ground. Watch out for this if the enemy has a long reaching move or a super that moves it fast in your direction, such as Chun Li's, as this increased recovery can be exploited for major damage.
- Crazy Kicks:
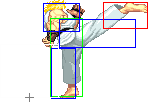
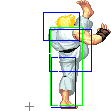
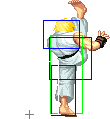
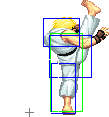
In ST, Ken has the ability to do some useless funky/crazy kicks, he has 3 variations of them, which can be turned into a overhead if you hold the kick button or just press any kick in its start-up (before the first hitting frame). These moves have all the same strength: doing it with a Short or Roundhouse will result in the same move.
- Inside Crescent: (↓↘→ + K)
Detailed Input: (↓ [0~6f] ↘ [0~6f] → [0~9f] K)
- Startup:
| Super Meter | 6 |  |
 |

|
| Frame Count | 2 | 2 | 3 | |
| Simplified | 7 | |||
- Normal:
| Damage | 4+26 |  |
|
| Stun | 0~4+7~13 | ||
| Stun Timer | 20+90 | ||
| Frame Count | 3 | 5 | |
| Simplified | 3 | 5 | |
 |
 |
 |
 |
 |
 |

| |
| Frame Count | 4 | 4 | 4 | 2 | 2 | 2 | 3 |
| Simplified | 17 | ||||||
- Hold:
| Damage | 4 |  |
 |
 |
 |

|
| Stun | 0~4 | |||||
| Stun Timer | 20 | |||||
| Frame Count | 2 | 2 | 2 | 10 | 4 | |
| Simplified | 2 | 18 | ||||
| Damage | 21 | 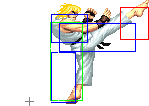 |
 |
 |
 |

|
| Stun | 7~13 | |||||
| Stun Timer | 90 | |||||
| Frame Count | 3 | 3 | 3 | 3 | 1 | |
| Simplified | 6 | 7 | ||||
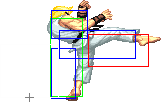
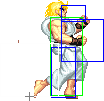
A fast high hitting kick. Good for jump in combos, since comboing a Hadouken with Ken is hard in ST and this funky kick will combo easily off of low short or forward.
- Outside Crescent: (→↘↓ + K)
Detailed Input: (→ [0~6f] ↘ [0~6f] ↓ [0~9f] K)
- Startup:
| Super Meter | 6 |  |
 |
 |
 |
|
| Frame Count | 2 | 2 | 2 | 2 | 8 | |
| Simplified | 16 | |||||
- Normal:
| Damage | 4+24 | 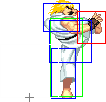 |
 |
 |
 |
 |

|
| Stun | 2~8+7~13 | ||||||
| Stun Timer | 90+90 | ||||||
| Frame Count | 3 | 3 | 3 | 3 | 2 | 5 | |
| Simplified | 3 | 3 | 13 | ||||
- Hold:
| Damage | 4 |  |
 |
 |
 |
|
| Stun | 0~4 | |||||
| Stun Timer | 90 | |||||
| Frame Count | 2 | 2 | 2 | 10 | 4 | |
| Simplified | 2 | 18 | ||||
| Damage | 21 | 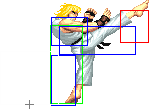 |
 |
 |
 |

|
| Stun | 7~13 | |||||
| Stun Timer | 90 | |||||
| Frame Count | 3 | 3 | 3 | 3 | 1 | |
| Simplified | 6 | 7 | ||||
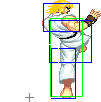
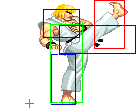
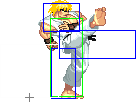
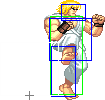
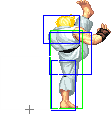
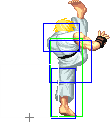
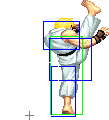
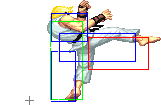
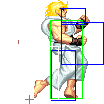
A two-hit kick that gives Ken a lot of frame advantage if blocked/hit but has slow startup. Hits crouching characters.
- Roundhouse: (←↙↓↘→ + K)
Detailed Input: (← [0~6f] ↙ [0~6f] ↓ [0~6f] ↘ [0~6f] → [0~9f] K)
- Startup:
| Super Meter | 6 |  |
 |
 |

|
| Frame Count | 3 | 3 | 3 | 3 | |
| Simplified | 12 | ||||
- Normal:
| Damage | 27 |  |
 |
 |
 |
 |

|
| Stun | 0~5/7~13 | ||||||
| Stun Timer | 20/90 | ||||||
| Frame Count | 3 | 4 | 6 | 2 | 4 | 3 | |
| Simplified | 7 | 15 | |||||
- Hold:
| Damage | 27 |  |
 |
 |
 |
|
| Stun | 0~4 | |||||
| Stun Timer | 20 | |||||
| Frame Count | 2 | 3 | 3 | 10 | 4 | |
| Simplified | 2 | 20 | ||||
| Damage | 21 | 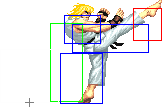 |
 |
 |
 |

|
| Stun | 7~13 | |||||
| Stun Timer | 90 | |||||
| Frame Count | 3 | 3 | 3 | 3 | 1 | |
| Simplified | 6 | 7 | ||||
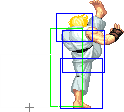
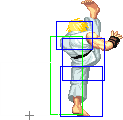
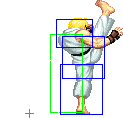
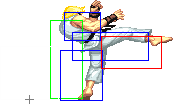
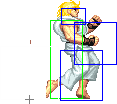
His old far standing Roundhouse became this move with less active hitting frames. It is one of the few moves in super turbo that has that special knockdown that makes the opponent land very far. Not very useful for anything really.
Super Move
- Shouryuu Reppa: (↓↘→↓↘ + P)
Detailed Input: (↓ [0~14f] ↘ [0~14f] → [0~14f] ↓ [0~14f] ↘ [0~9f] P)
| Damage | 16*5 |  |
 |
 |
 |
 |
 |
 |
 |
 |
 |

| |
| Stun | 0~4 | ||||||||||||
| Stun Timer | 20 | ||||||||||||
| Frame Count | 1 + [18] + 1 | 2 | 6 | 6 | 5 | 2 | 2 | 2 | 26 | 6 | 25 | 2 | |
| Simplified | 2 | 2 | 6 | 13 | 2 | 2 | 26 | 33 | |||||
His double-Shoryuken super. Note that this super is invincible until he's on the way down from the second DP. It seems he has very little landing recovery frames, so a throw or a DP on landing can catch an unsuspecting opponent (if you're allowed to land in the first place). As one of the oddities of ST, Ken cannot use his super for a reversal attack. If you input the super at the reversal timing you'll get your last special move instead.
The Basics
Anti-air
Ken has a perfectly good invincible anti-air (Shoryuken), but sometimes that's not enough for certain situations. Be smart with them and use effective anti-air options for each situation.
*When the opponent jumps at you honestly.
- -Jab DP
- -Super (this does about 3 hits max and will do more damage than a Jab DP)
- -Stand far forward (just decent, use it like you would with Ryu's s.RH)
- -hcf+kick (this looks like his old stand far RH, time it well since it doesn't last very long)
- -c.Fierce (be aware that it could trade with the opponent's normals)
*When the opponent jumps at you and decides to stick out a move that would reach, but is still far enough away to cause a Jab DP to whiff.
- -Stand far Strong (this will beat most any jumping attack at the tip of the punch if the other person sticks out on the way down, and it's safe if they decide not to stick out anything since you pull back your arm really quickly. It's the safest option but beware against Sagat's RH since his legs are really long and s.Strong won't beat it.)
- -Super (It travels far forward and will hit them regardless. It's the best option with no guessing involved.)
- -Early forward j.RH (Jump at the opponent and kick them before they press their attack)
- -Jab DP (If the opponent stuck something out it works, but if they didn't, the DP whiffs and you eat a combo)
- -c.RH (If the opponent stuck something out you get hit in the head but that's usually about it, if they didn't stick something out you sweep the opponent clean)
*Against cross up jumps
- -Jab DP (You'll need to perform this with a modified command to get it to face the other way. When they are going over your head, do f,df,d,db+Jab and it'll turn Ken around and hit them clean in the back.)
- -s.fierce (if you weren't knocked down when the opponent tried a cross up on you, you can shoot them down on the way up with a close stand fierce)
Ground Pokes/Footsies
Pokes
Ken's best pokes are c.Short, c.Forward, c.Strong and s.Roundhouse. For close up pokes c.Strong and c.Short are best, since you gain frame advantage from those two, and for ranges where c.RH won't reach, s.RH is good, but be careful since the move is a bit laggy and can be bad news if whiffed.
Footsie tools
c.Short, c.Forward, and c.Roundhouse are the best for footsies. Usually it consists of several c.Shorts into either c.Forward or c.RH into a fireball.
Advanced Strategy
Knee Bash Mix-Ups
This is one nasty mofo of a throw. Not only does it do good damage, it offers you the chance to mixup and go for something else afterward. Here are some options:
- Walk up, c.Short x2, hit confirm to super.
- Walk underneath the opponent, combo. (Go for s.HP xx Jab DP as you recover quickly in case the opponent blocks).
- Jump in Jab XX Hurricane. When you land you get another mixup, you can go for knee bash, Dragon Punch, tick throw, c.Forward into Dragon, sweep XX fireball. Loads of stuff.
- Tick throw (e.g. crouching short into Knee Bash)
- Jab Dragon (If you think the opponent will try to tech out of another Knee Bash attempt)
- Jump over cross-up j.Forward.
- c.Forward/sweep into fireball.
- Walk underneath, c.Forward/sweep into fireball.
- Nothing at all (If you have conditioned them with a lot of follow-up tick throws, they may well try to reversal, so do nothing, wait for them to land from their reversal move and then combo them).
Safe jump Jab after Knee Bash throw
(From the Yoga Book Hyper, translated by NKI) "If you jump immediately after the Knee Bash throw, it can be a safe jump depending on who your opponent is. It is extremely useful against Ryu, Boxer and Dee Jay, so you definitely want to use it against them. All you have to do is hold up/towards as the throw is finishing. As soon as you're airborne, hit Jab and it will be a meaty on the landing opponent."
- Note from NKI: It's only a safe jump against Boxer, and DeeJay's Forward and RH upkicks. (DeeJay can hit Ken with reversal Short upkicks, but not Forward or RH.)
Connecting jump Jab to Hurricane Kick
This is another tricky piece of execution with Ken. You can combo his jumping Jab into any Hurricane Kick (HK is best). This is particularly good after a Knee Bash. The best way to do it is to do a QCB and then at back press Jab followed by HK very quickly. (Or do the Jab at down-back).
"Juice Kick"
Ken's air Hurricane in ST is really nasty and there are several different variations on it. One of the best is known as the "Juice Kick." This is when you do an air hurricane almost immediately after jumping toward the opponent. If you do it right, Ken's arc of travel will be REALLY low to the ground. This almost has the effect of a Dhalsim-style teleport, but you hit at the same time! This is really good against Sagat; if you sense he is going to throw a Low Tiger, you can Juice Kick and connect with his limbs before he recovers!
Button-Release Hadouken
Check this article from Nohoho's blog.
Built-in Shoryuken
Check this article from Nohoho's blog.
Walking Dragon Punch
(From the Yoga Book Hyper, translated by NKI) "Equally as important as well-timed fireballs is the walking DP. That is, walking towards the opponent, and when you get close, doing a Jab DP. If the opponent sticks out a move to try to stop you from walking forward, not only will pretty much every move lose to the DP, but they also get knocked down, so you can continue to pressure them as they get up. Of course if you whiff the DP, the opponent can punish it, but because they'll be scared of that DP, it's pretty easy to close the gap just by walking towards them. You want to keep the pressure on the opponent."
Psychic Dragon Punches
Ken's DP is one of the best moves in ST. It comes out quickly, has mad priority and recovers really fast. Only O. Ken has a better DP style move in this game. You can therefore exploit the assets of the DP to use "Psychic" style tactics to beat pokes and throw attempts to really head-fuck your opponent. The use of Psychic DP's is matchup-dependent, but you can DP through Dhalsim's long limbs, a Shoto's sweep or you can clip an opponent throwing a fireball on startup and pass through the fireball or trade. AI won't expand on this, but take a look at any high-level N. Ken player (particularly Japanese players Ani-Ken and M.Tsun) and you will see lots of uses of this technique.
Fireball Trap
On top of this Ken also has the classic Fireball trap, although in comparison to Sagat and Ryu, Ken's version is weak. At the right ranges, if you throw a Jab fireball and it gets blocked, then you can throw a Fierce fireball for free which the opponent will have no choice but to block. The Jab fireball also travels pretty slowly, allowing you to advance towards the opponent. If they jump over your fireball, anti-air them with one of the methods above, or if they are jumping from far away, sweep them as they land and cancel into a fireball in case they land safely. Mix-up your fireballs when applying pressure from afar and be wary of Ken's recovery on his Fierce fireball, you're asking to be jumped at if you throw this at the wrong time. Be wary when fighting characters like Guile, Sagat and Ryu, whose faster-traveling projectiles will wear you down gradually in a fireball war.
Combos
Ken doesn't have a dizzy combo that consistently works against every character in the game, but he has pretty buff combos that dizzy depending on your luck.
- Cross up j.Forward, cr.Strong xx Jab Shoryuken. Hit-confirm the aerial attack so you can cancel into the Jab Shoryuken for major damage and a knockdown on hit, or apply mix-ups in case the move is blocked.
- Cross up j.Forward, cr.Strong, cr.Forward XX qcf+K will dizzy almost always, but it only works against fat characters like Guile, Sim or 'Gief. Against normal characters, switch the c.Forward with c.Short and it still combos. It only works against standing characters.
- Cross up j.Forward, cr.Short XX qcf+K (hold K to get the overhead), c.RH. This combo also only works against standing fat characters, but this combo is one of the most fancy combos you can pull off in real matches.
- Jump/Crossup j.Forward, s.Fierce XX DP+Jab. Although it may not dizzy a lot, this combo usually takes off about 40%-50% of the opponent's life.
j.Forward/Fierce/RH, cr.Forward XX qcf+K. This is the standard 3-hit combo. Easy to land with good enough damage against standing characters (missed FB is a good occasion to use this combo) from a non-crossup jump attack.
j.Jab/Fierce XX air Hurricane Kick, s./cr.RH. You may be able to switch out the RH at the end with a cr.Short XX qcf+K for a 4-hit combo against fat characters. Has to be standing. The air Hurricane Kick gives you a lot of frame advantage so a walk-up throw is also a viable strategy here, especially since N.Ken's forward throw is so good.
Crossup j.Forward, cr.Short x2 XX Super. This is the most powerful combo that Ken has and is very easy to execute once you get the hang of it. For this combo to work you need to press Short+any punch for the Super since rapid-fire shorts cannot be canceled normally, but rapid cancel does allow this combo to work with just 1 added button press for the Super. Do it slowly, as if pressing another rapid fire short instead of the ordinary cancel timing. Note that this combo doesn't work 9 times out of 10 against a standing Chun even if executed perfectly, because Chun is too skinny and the first hit of the Super will completely whiff and give her the opportunity to block the rest.
Match-ups
Matchups classified with this diagram in mind. For the old characters i guessed the positions.
--Born2SPD
Serious Advantage Match-ups
Vs. E. Honda:
- 7 - 3
Advantage Match-ups
Vs. M. Bison (dictator):
- 6 - 4
Fair Match-ups
Vs. Blanka:
- 5 - 5
Round Start
Wait, cr.Forward, st.RH, cr.Strong, walk-up Shoryuken, knee bash.
Main Strategy
You basically want to rush him down and hope it works. Since your Hadouken is slow, his jump is fast and his normal moves have more range and damage, you will want to use your best normals (st.RH, cr.RH, cr.Jab, cr.Strong, cr.Fwd), walk-up Shoryuken and knee bash to keep the pressure on him. Use Hadoukens rarely, as if he reacts in time, you will lose the round. If you corner him, use a meaty Jab Hadouken and mix up knee bash, Jab Shoryuken and cr.kicks into Hadouken.
Vs. Cammy:
- 5 - 5
Vs. Dee Jay:
- 5 - 5
Vs. Fei Long:
- 4.5 - 5.5
Vs. Ken (self):
Vs. T. Hawk:
- 5.5 - 4.5
Vs. O. T. Hawk:
Vs. Sagat:
- 5 - 5
Disadvantage Match-ups
Vs. Balrog (boxer):
- 3.5 - 6.5
Round Start
Block, wait a bit and st.Strong, small step towards and cr.Forward, small step towards and Jab Shoryuken, jump back.
Main Strategy
From a distance, you want to zone him with Hadoukens. From shorter distances, you will want to play footsies with Jab Shoryuken, cr.RH, cr.Strong and knee bash. Only use Hadoukens between repeated Fierce punches or after a knock down, as he can react to the start-up and punish you for throwing them. Getting knocked down will then lead to a dangerous situation as you wake up, being that his main options are Jab Heabutt (beats anything but blocking), bait (so as to punish a reversal or whiffed Fierce), cr.Jab (x1/2) into hold or bait, meaty cr.Forward into hold or linked into cr.Strong xx Low Rush (usually dizzies). His reversal move (Buffalo Headbutt) has a relatively long start-up, making it easy to time safe jumps at him. Thus, do your standard safe jump mix-ups (aerial Jab, Short, Forward or Fierce, sometimes cancelling the punches into Tatsumaki, then mixing up Jab SRK, knee bash, and crouching kicks). If you can bait his super, jumping Fierce beats it after the invulnerability wears off. Your cr.Strong can beat his cr.Strong from the right range, and it will also stuff his standing Fierce. You can eat a cr.RH from that range, though.
Vs. Chun-Li:
- 3.5 - 6.5
Vs. Guile:
- 3.5 - 6.5
Vs. O. Ken:
Vs. Ryu:
- 3.5 - 6.5
Vs. Vega (claw):
- 4 - 6
Vs. Zangief:
- 4 - 6
Serious Disadvantage Match-ups
Vs. Dhalsim:
- 2.5 - 7.5
Round Start
Block, wait a bit and Jab Shoryuken, walk-up Jab Shoryuken, knee bash, walk up and block.
Main Strategy
He can punish your Hadoukens on reaction from most distances, so you will have to rely on a rush down strategy. As his far pokes, even though with good range, have poor priority, Jab Shoryuken is a good option to stuff mashers and random pokes. That aside, you will want to walk up and hold him with your knee bash, stand just outside his close poke range and let him whiff one before holding him or use a crouching kick. He is relatively fat when it comes to cross-ups, but don't miss the timing if you knock him down or he will slide and throw you for free. Dhalsim has weak, hard-to-use and mostly useless reversals (his teleports), so abuse knee bash loops and meaty Shorts hit-confirms. This is your worst match-up, have no fear of being called cheap.
