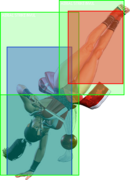
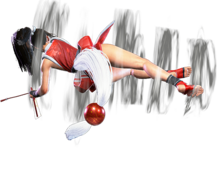
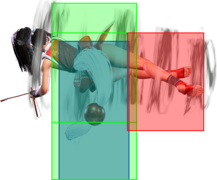
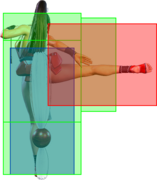
|
|
| Line 798: |
Line 798: |
| | info = | | | info = |
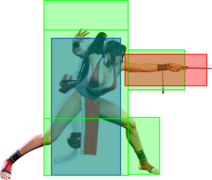
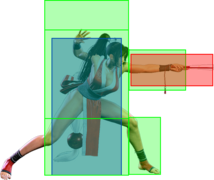
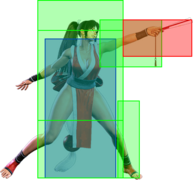
| {{AttackDataCargo-SF6/Query|mai_214lp}} | | {{AttackDataCargo-SF6/Query|mai_214lp}} |
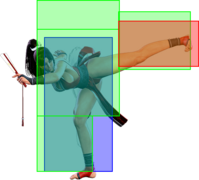
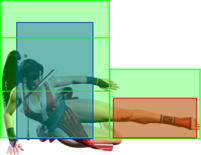
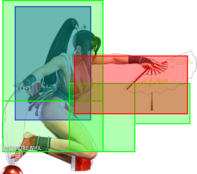
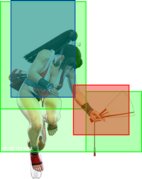
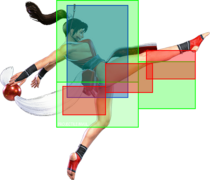
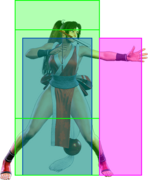
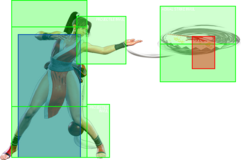
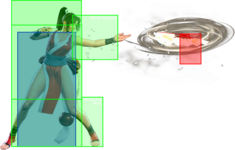
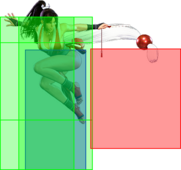
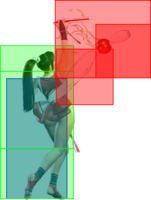
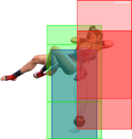
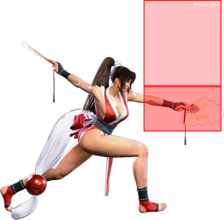
| | * Strike hitbox that can dissipate standard 1-hit projectiles during active frames |
| * {{clr|PC|Counter-hit/Punish Counter}}: KD +35 | | * {{clr|PC|Counter-hit/Punish Counter}}: KD +35 |
| * Does not knock down on regular hit. | | * '''Cancel Hitconfirm Window:''' 17f (Super) |
| * Applies 20% damage scaling to next hit when beginning a combo; counts as 2 hits for damage scaling when comboed into (applies to next hit) | | * Applies 20% damage scaling to next hit when beginning a combo; counts as 2 hits for damage scaling when comboed into (applies to next hit) |
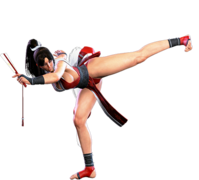
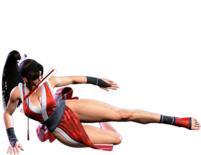
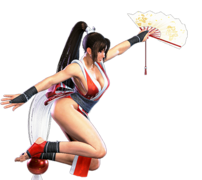
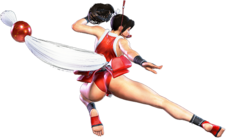
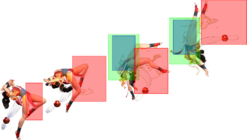
| Safe when spaced and clashes with projectiles, but difficult to space after light normal strings due to how Mai moves forwards.
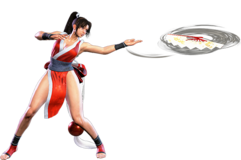
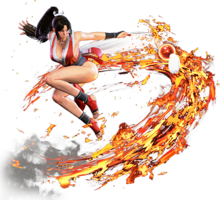
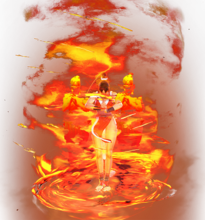
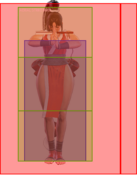
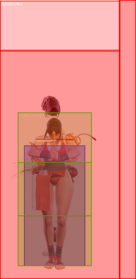
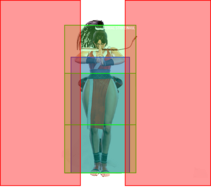
| | An incredibly disjointed poke that leaves Mai safe when spaced in neutral. While it can clash with fireballs, this is usually impractical due to its startup and forward movement. A blocked cancel into {{clr|L|LP Ryuuenbu}} is punishable by most characters unless it's very well spaced; a max-range {{clr|M|2MK}} is the best option due to its pushback and lack of forward movement. For characters with [[Street_Fighter_6/Game_Data#4f_Normals-1|short range 4-frame normals]], you may be able to abuse this more often in pressure strings. |
| | |
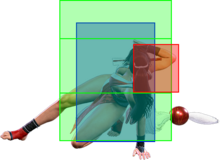
| | As a combo tool, {{clr|L|LP Ryuuenbu}} leaves Mai {{sf6-adv|P|+3}} just outside of throw range, forcing her to walk at least 1-2 frames for throw pressure. It can only combo from {{clr|L|5LP}} in light strings, though you would usually rather have {{clr|M|214MP}} or {{clr|L|236LK}} instead. In long range cancels (particularly whiff punishes), the {{clr|L|214LP}} is the safest version, as other strengths can whiff the first hit and drop the combo. |
| | |
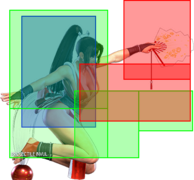
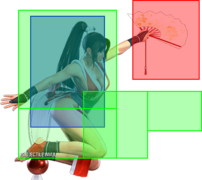
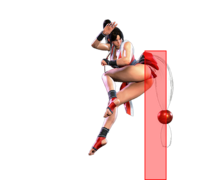
| | With 7 active frames, {{clr|L|LP Ryuuenbu}} can be a great option for meaty pressure, leaving Mai up to {{sf6-adv|VP|+9 oH}} / {{sf6-adv|P|+2 oB}} with a well-timed setup (such as {{clr|H|2HK}}, whiff {{clr|L|5LK}}, {{clr|L|214LP}}). If you catch the opponent mashing on a deep {{clr|PC|Counter-hit}} connect, Mai has enough advantage to pick up a juggle. |
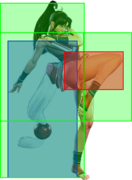
| {{AttackDataCargo-SF6/Query|mai_214mp}} | | {{AttackDataCargo-SF6/Query|mai_214mp}} |
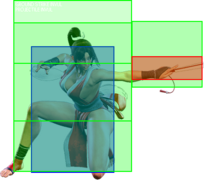
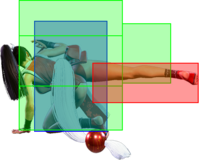
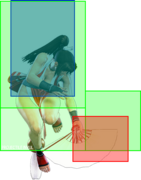
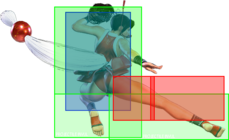
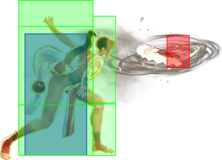
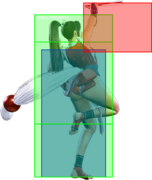
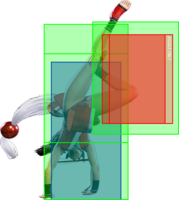
| | * 2 hits; 2nd hit is a strike hitbox that can dissipate standard 1-hit projectiles |
| | * '''Cancel Hitconfirm Window:''' 34f / 17f (Super, 2nd hit) |
| * '''When only 2nd hit connects:''' | | * '''When only 2nd hit connects:''' |
| ** Applies 20% damage scaling to next hit when beginning a combo (e.g. spaced near max range, cancel to {{clr|SA|SA3}}) | | ** Applies 20% damage scaling to next hit when beginning a combo (e.g. spaced near max range, cancel to {{clr|SA|SA3}}) |
| ** Counts as 2 hits for damage scaling when comboed into (e.g. whiff punish {{clr|H|5HP}} > {{clr|M|2nd hit 214MP}} > {{clr|SA|SA3}}) | | ** Counts as 2 hits for damage scaling when comboed into (e.g. whiff punish {{clr|H|5HP}} > {{clr|M|2nd hit 214MP}} > {{clr|SA|SA3}}) |
| Typically outclassed by Mai's 236Ks when available in terms of corner carry. Has enough frame advantage on hit to safely set up a meaty hold Kachousen.
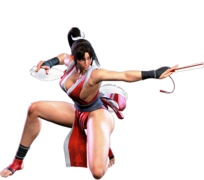
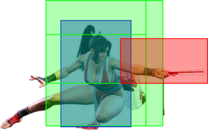
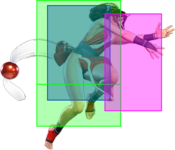
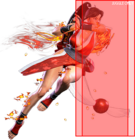
| | Similar combo utility to {{clr|L|214LP}}, but gives Mai a knockdown even on regular hits. It combos from {{clr|L|5LP}} and mediums/heavies, though the first hit can whiff at longer poke ranges, leaving Mai punishable. Compared to 236K, {{clr|M|MP Ryuuenbu}} is a bit more restrictive in combos, and offers less corner carry. In exchange, Mai gets improved knockdown advantage, allowing her to set up fully held Kachousen oki (though this is risky if the opponent has a reversal that can beat projectiles). |
| | |
| | As a neutral option, {{clr|M|214MP}} is harder to use effectively than the {{clr|L|LP}} version, but it can still be spaced safely at max range against every character (except vs. Ken {{clr|SA|SA2}}. |
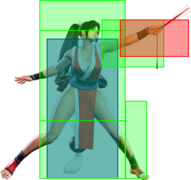
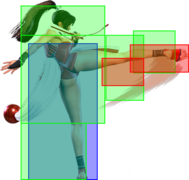
| {{AttackDataCargo-SF6/Query|mai_214hp}} | | {{AttackDataCargo-SF6/Query|mai_214hp}} |
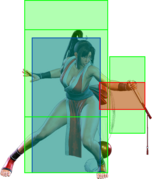
| * Whiffs on crouching opponents | | * Whiffs on crouching opponents |
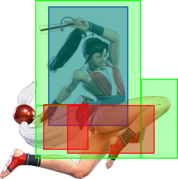
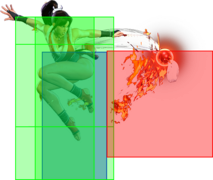
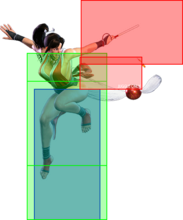
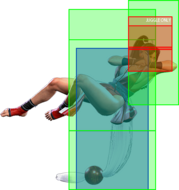
| | * 2 hits; 2nd hit is a strike hitbox that can dissipate standard 1-hit projectiles |
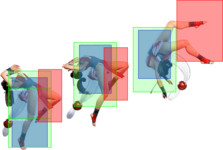
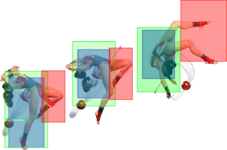
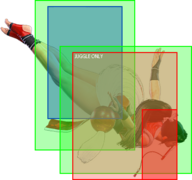
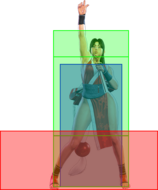
| | * Head hurtbox is '''Anti-Air Invuln''' on frames 6-17; cannot hit cross-up (slow but rewarding anti-air) |
| * Puts opponent into {{sf6-jug|limited juggle}} state | | * Puts opponent into {{sf6-jug|limited juggle}} state |
| | * '''Cancel Hitconfirm Window:''' 37f / 19f (Super, 2nd hit) |
| * Counts as 2 hits for damage scaling when comboed into (applies to next hit) | | * Counts as 2 hits for damage scaling when comboed into (applies to next hit) |
| Launches standing opponents into a juggle which allows 10f or faster moves like her supers and {{clr|L|236LK}} to connect.
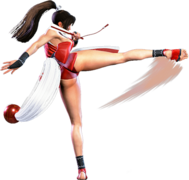
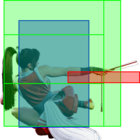
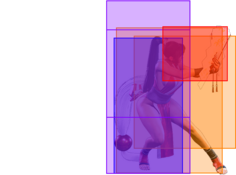
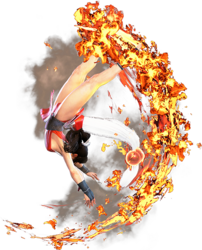
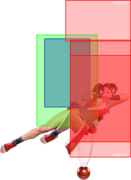
| | A launching special that only works on standing or airborne opponents. This makes it great in punishes, but hitconfirm routes generally should include a {{clr|DR|DRC~}}{{clr|H|4HK}} to ensure the opponent is standing. Though it has some limited air invincibility, the slow startup makes it difficult to use as a reaction anti-air. |
| | |
| | On a grounded connect, Mai can connect 10f or faster moves like {{clr|L|236LK}} or any {{clr|SA|Super}}. Anti-air juggles can lead to better options like {{clr|M|236MK}} or {{clr|OD|236KK}}. |
| {{AttackDataCargo-SF6/Query|mai_214pp}} | | {{AttackDataCargo-SF6/Query|mai_214pp}} |
| * Puts opponent into {{sf6-jug|limited juggle}} state | | * Puts opponent into {{sf6-jug|limited juggle}} state ({{sf6-jug|free juggle}} if only 3rd hit connects) |
| * 8f extra recovery on block | | * 8f extra recovery on block |
| <br>
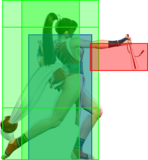
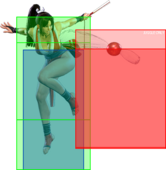
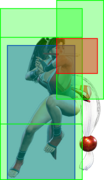
| | * 3 hits; 2nd/3rd hits are strike hitboxes that can dissipate 1-hit {{clr|OD|OD}} projectiles |
| | * '''Cancel Hitconfirm Window:''' 53f / 33f / 15f (Super, 3rd hit) |
| | ** {{clr|SA|SA2/SA3}} cancel is only useful for chip damage or when absorbed by armor |
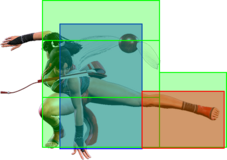
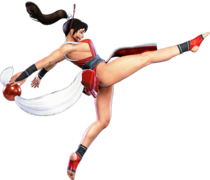
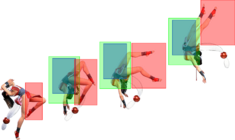
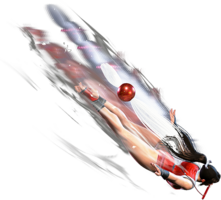
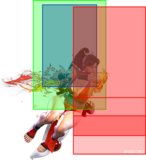
| | Gives a launch slightly higher than the {{clr|H|HP}} version without the need for a standing hitconfirm. Juggles into {{clr|M|236MK}} for solid corner carry, or you can dump some extra meter for {{clr|OD|236KK}}, {{clr|M|j.MP}} > j.214P. Importantly, it also juggles into {{clr|SA|SA1}} midscreen, giving Mai a reliable way to build Flame Stocks. Her other two {{clr|SA|Supers}} also juggle here; always pick a juggle route rather than canceling {{clr|OD|214PP}} directly, as cancels will whiff or give a weak partial-connect. |
|
| |
|
| | {{clr|OD|OD Ryuuenbu}} has the greatest tendency to whiff the first hit when canceled into, so it's not recommended as a buffer from max range cancelable buttons. |
| }} | | }} |
| |-| | | |-| |
| Line 846: |
Line 864: |
| | info = | | | info = |
| {{AttackDataCargo-SF6/Query|mai_214lp_flame}} | | {{AttackDataCargo-SF6/Query|mai_214lp_flame}} |
| | * Strike hitbox that can dissipate standard 1-hit projectiles during active frames |
| | * '''Cancel Hitconfirm Window:''' 17f (Super) |
| * Applies 20% damage scaling to next hit when beginning a combo; counts as 2 hits for damage scaling when comboed into (applies to next hit) | | * Applies 20% damage scaling to next hit when beginning a combo; counts as 2 hits for damage scaling when comboed into (applies to next hit) |
| | Unlike the regular version, {{clr|L|Flame 214LP}} is always safe on block. The pushback also makes it great for creating spacing traps against the opponent's light normals, even when canceled into from ranged pokes like {{clr|M|2MK}} and {{clr|M|5MP}}. Mai gets a knockdown with solid oki, no {{clr|PC|Counter-hit/Punish Counter}} required. Can be up to KD +41 / {{sf6-adv|P|+4 oB}} with meaty timing. |
| {{AttackDataCargo-SF6/Query|mai_214mp_flame}} | | {{AttackDataCargo-SF6/Query|mai_214mp_flame}} |
| | * 2 hits; 2nd hit is a strike hitbox that can dissipate standard 1-hit projectiles |
| | * Puts opponent into {{sf6-jug|limited juggle}} state |
| | * '''Cancel Hitconfirm Window:''' 34f / 17f (Super, 2nd hit) |
| * Counts as 2 hits for damage scaling when comboed into (applies to next hit) | | * Counts as 2 hits for damage scaling when comboed into (applies to next hit) |
| ** When only 2nd hit connects: applies 20% damage scaling to next hit when beginning a combo | | ** When only 2nd hit connects: applies 20% damage scaling to next hit when beginning a combo |
| | Moves forward during the active frames, making it more reliable in combos than the non-flame version. Also sets up a perfect +42 safe jump for easy knockdown pressure. Mai can juggle a 6f or faster attack afterward, such as {{clr|M|623MK}}/{{clr|OD|623KK}} or another {{clr|SA|SA1}} to replenish Flame Stocks. |
| | |
| | The hitbox expands on the 2nd hit's 3rd active frame, allowing it to be spaced more safely on block ({{sf6-adv|VM|-4}} and well outside of punish range). However, be aware that Mai loses the safe jump at this spacing. Despite the forward movement, {{clr|M|Flame 214MP}} can still drop in some whiff punish scenarios. |
| {{AttackDataCargo-SF6/Query|mai_214hp_flame}} | | {{AttackDataCargo-SF6/Query|mai_214hp_flame}} |
| * Whiffs on crouching opponents | | * Whiffs on crouching opponents |
| * Puts opponent into {{sf6-jug|limited juggle}} state | | * 2 hits; 2nd hit is a strike hitbox that can dissipate standard 1-hit projectiles |
| | * Head hurtbox is '''Anti-Air Invuln''' on frames 6-17; cannot hit cross-up (slow but rewarding anti-air) |
| | * Puts opponent into {{sf6-jug|limited juggle}} state; higher launch than non-flame version |
| | * '''Cancel Hitconfirm Window:''' 37f / 19f (Super, 2nd hit) |
| | Functionally similar to the non-flame version except that it incurs no extra damage scaling, making this a powerful combo tool on standing opponents. It also has a slightly higher launch, allowing Mai to juggle into {{clr|OD|236KK}} for damage/corner carry, or {{clr|M|Flame 214MP}} for a safe jump. |
| {{AttackDataCargo-SF6/Query|mai_214pp_flame}} | | {{AttackDataCargo-SF6/Query|mai_214pp_flame}} |
| * Puts opponent into {{sf6-jug|limited juggle}} state | | * Puts opponent into {{sf6-jug|limited juggle}} state ({{sf6-jug|free juggle}} if only 3rd hit connects) |
| | * Allows more lenient juggle routing than non-flame version (Juggle Increase: 2 -> 1) |
| * 8f extra recovery on block | | * 8f extra recovery on block |
| <br>
| | * 3 hits; 2nd/3rd hits are strike hitboxes that can dissipate 1-hit {{clr|OD|OD}} projectiles |
| | | * '''Cancel Hitconfirm Window:''' 53f / 33f / 15f (Super, 3rd hit) |
| | ** {{clr|SA|SA2/SA3}} cancel is only useful for chip damage or when absorbed by armor |
| | Similar to the non-flame version, but the slightly more relaxed juggle state gives Mai some useful follow-up options. {{clr|M|214MP}} connects on both hits for a +42 safe jump, and {{clr|H|214HP}} into {{clr|L|236LK}} juggles for great damage and corner carry. |
| }} | | }} |
| </tabber> | | </tabber> |


