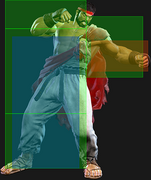
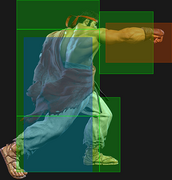
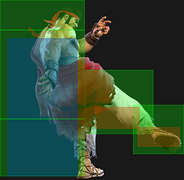
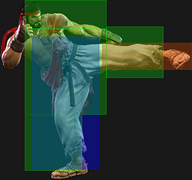
|
|
| Line 570: |
Line 570: |
| ** Causes both the 20% Starter and 20% Multiplier scaling to apply to the follow-up combo | | ** Causes both the 20% Starter and 20% Multiplier scaling to apply to the follow-up combo |
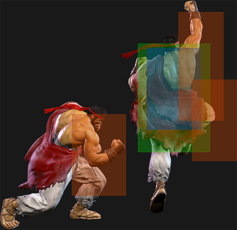
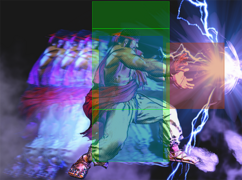
| See [[Street_Fighter_6/Gauges#Drive_Impact|Drive Impact]] on the Gauges page for more details. | | See [[Street_Fighter_6/Gauges#Drive_Impact|Drive Impact]] on the Gauges page for more details. |
| | |
|
| |
|
| When canceled from a normal, these are the important '''blockstring gaps'''; a gap of N will trade with an N-frame startup attack; [] = Burnout | | When canceled from a normal, these are the important '''blockstring gaps'''; a gap of N will trade with an N-frame startup attack; [] = Burnout |
| Line 579: |
Line 580: |
| * {{clr|M|5MP}}, {{clr|M|2MK}}, {{clr|H|4HK (1st)}}: 13[9] | | * {{clr|M|5MP}}, {{clr|M|2MK}}, {{clr|H|4HK (1st)}}: 13[9] |
| * Note: A gap ≥ 6f can be thrown, and a gap ≥ 9f can be jumped out of by most characters | | * Note: A gap ≥ 6f can be thrown, and a gap ≥ 9f can be jumped out of by most characters |
| | |
|
| |
|
| Against the following characters in Burnout: | | Against the following characters in Burnout: |
| Line 584: |
Line 586: |
| * '''Marisa (214K)''', frame 3 armor | | * '''Marisa (214K)''', frame 3 armor |
| * '''Zangief ({{clr|H|5[HP]}})''', frame 4 armor | | * '''Zangief ({{clr|H|5[HP]}})''', frame 4 armor |
| | |
| | |
| It's important to use a blockstring that cannot be absorbed by their armor/counter moves. Ideally, the string should also not be a true combo, or it will cause a Lock and prevent Stun.<br>{{clr|OD|*}} Denotes a move that causes Lock on Counter-hit, allowing the opponent to escape a Stun by mashing on wakeup. | | It's important to use a blockstring that cannot be absorbed by their armor/counter moves. Ideally, the string should also not be a true combo, or it will cause a Lock and prevent Stun.<br>{{clr|OD|*}} Denotes a move that causes Lock on Counter-hit, allowing the opponent to escape a Stun by mashing on wakeup. |
| * {{clr|H|5HP}}{{clr|OD|*}} > {{clr|DR|DI}}: 2f blockstring gap prevents opponent from absorbing the hit | | * {{clr|H|5HP}}{{clr|OD|*}} > {{clr|DR|DI}}: 2f blockstring gap prevents opponent from absorbing the hit |
| Line 644: |
Line 648: |
| * 3-bar version performed on hit/block from a cancelable normal | | * 3-bar version performed on hit/block from a cancelable normal |
| ** Can also be performed from whiffed cancelable light normals | | ** Can also be performed from whiffed cancelable light normals |
| | |
| | |
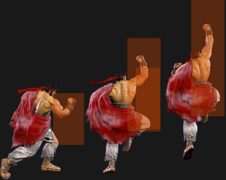
| See [[Street_Fighter_6/Gauges#Drive_Rush|Drive Rush]] on the Gauges page for more details. See Strategy page for [[Street_Fighter_6/Ryu/Strategy#Drive_Rush|Blockstring Gaps and Combo Routes]] | | See [[Street_Fighter_6/Gauges#Drive_Rush|Drive Rush]] on the Gauges page for more details. See Strategy page for [[Street_Fighter_6/Ryu/Strategy#Drive_Rush|Blockstring Gaps and Combo Routes]] |
| * Startup refers to minimum time before an attack can cancel the {{clr|DR|Drive Rush}} animation | | * Startup refers to minimum time before an attack can cancel the {{clr|DR|Drive Rush}} animation |
| Line 651: |
Line 657: |
| * Applies 15% damage scaling multiplier to any follow-up hits when used mid-combo | | * Applies 15% damage scaling multiplier to any follow-up hits when used mid-combo |
| ** Only applies scaling once per combo; does not apply when a {{clr|DR|Drive Rush}} enhanced attack starts the combo | | ** Only applies scaling once per combo; does not apply when a {{clr|DR|Drive Rush}} enhanced attack starts the combo |
| | |
|
| |
|
| Distance: | | Distance: |


