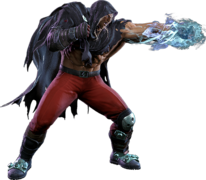
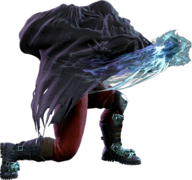
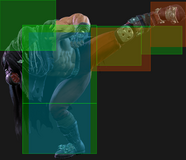
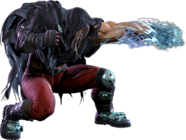
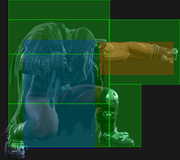
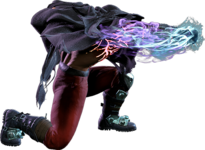
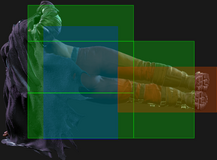
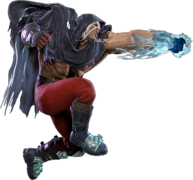
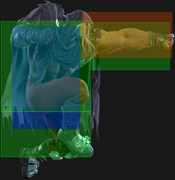
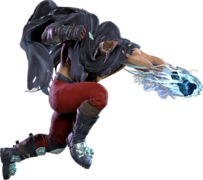
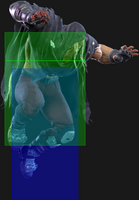
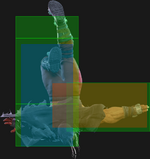
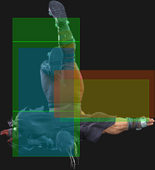
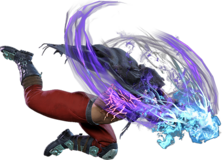
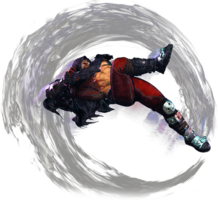
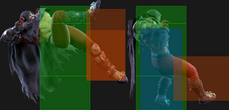
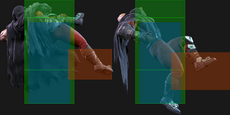
Street Fighter 6/M.Bison: Difference between revisions

From SuperCombo Wiki
No edit summary
Line 370: Line 370:
* Forces stand
* Forces stand
* '''Cancel Hitconfirm Window:''' 18f
* '''{{clr|4|Drive Rush}} cancel advantage:''' {{sf6-adv|VP|+15}} oH / {{sf6-adv|VP|+12}} oB
* '''{{clr|DR|Drive Rush}} cancel advantage:''' {{sf6-adv|VP|+15}} oH / {{sf6-adv|VP|+12}} oB
<br>
<br>
Bison's main pressure tool up close with very low pushback, granting him advantage on block without the massive startup of {{clr|H|5HP}}. It can lead to powerful combos on {{clr|PC|Punish Counter}} or out of a {{clr|DR|Drive Rush}} starter. If the opponent respects your block pressure, you can drain an entire bar of Drive meter with {{clr|DR|DR~}}{{clr|H|4HK}}, {{clr|H|4HK}}; just be sure not to overuse this sequence, as it can be interrupted with a 4f normal.
Line 520: Line 520:
* On Block: Applies 20% scaling multiplier to all follow-up hits after Wall Splat; the next attack can incur additional Starter Scaling
* Combos when canceled from {{clr|H|2HP}} or Punish Counter {{clr|H|4HK}}/{{clr|M|5MP}} (no corner wallsplat; useful for depleting Drive gauge, especially after Perfect Parry)
* A blocked {{clr|4|DI}} can combo into another {{clr|4|DI}} if opponent is not fully cornered (Stuns if opponent has less than 1.5 Drive bars)
* A blocked {{clr|DR|DI}} can combo into another {{clr|DR|DI}} if opponent is not fully cornered (Stuns if opponent has less than 1.5 Drive bars)
** This happens because a blocked {{clr|4|DI}} is not considered a "hit" for combo purposes
** This happens because a blocked {{clr|DR|DI}} is not considered a "hit" for combo purposes
** Causes both the 20% Starter and 20% Multiplier scaling to apply to the follow-up combo
See [[Street_Fighter_6/Gauges#Drive_Impact|Drive Impact]] on the Gauges page for more details.
Line 535: Line 535:
* '''Marisa (214K)''', frame 3 armor
* '''Zangief ({{clr|H|5[HP]}})''', frame 4 armor
It's important to use a blockstring that cannot be absorbed by their armor/counter moves. Ideally, the string should also not be a true combo, or it will cause a Lock and prevent Stun.<br>{{clr|10|*}} Denotes a move that causes Lock on Counter-hit, allowing the opponent to escape a Stun by mashing on wakeup.
It's important to use a blockstring that cannot be absorbed by their armor/counter moves. Ideally, the string should also not be a true combo, or it will cause a Lock and prevent Stun.<br>{{clr|OD|*}} Denotes a move that causes Lock on Counter-hit, allowing the opponent to escape a Stun by mashing on wakeup.
* {{clr|H|4HK}}{{clr|10|*}} > {{clr|4|DI}}: 1f blockstring gap prevents opponent from absorbing the hit
* {{clr|H|4HK}}{{clr|OD|*}} > {{clr|DR|DI}}: 1f blockstring gap prevents opponent from absorbing the hit
* {{clr|4|DR~}}{{clr|H|2HP}}{{clr|10|*}} > {{clr|4|DI}}: 1f blockstring gap prevents opponent from absorbing the hit
* {{clr|DR|DR~}}{{clr|H|2HP}}{{clr|OD|*}} > {{clr|DR|DI}}: 1f blockstring gap prevents opponent from absorbing the hit
* {{clr|4|DR~}}{{clr|M|5MP}}{{clr|10|*}} > {{clr|4|DI}}: 1f blockstring gap prevents opponent from absorbing the hit
* {{clr|DR|DR~}}{{clr|M|5MP}}{{clr|OD|*}} > {{clr|DR|DI}}: 1f blockstring gap prevents opponent from absorbing the hit
* {{clr|4|DR~}}{{clr|M|2MP}}{{clr|10|*}} > {{clr|4|DI}}: 3f blockstring gap will work vs. Zangief {{clr|H|5[HP]}}
* {{clr|DR|DR~}}{{clr|M|2MP}}{{clr|OD|*}} > {{clr|DR|DI}}: 3f blockstring gap will work vs. Zangief {{clr|H|5[HP]}}
* {{clr|4|DR~}}{{clr|M|2MK}} > {{clr|4|DI}}: 3f blockstring gap will work vs. Zangief {{clr|H|5[HP]}}
* {{clr|DR|DR~}}{{clr|M|2MK}} > {{clr|DR|DI}}: 3f blockstring gap will work vs. Zangief {{clr|H|5[HP]}}
}}
}}


Line 597: Line 597:
** Can also be performed from whiffed cancelable light normals
See [[Street_Fighter_6/Gauges#Drive_Rush|Drive Rush]] on the Gauges page for more details. See Strategy page for [[Street_Fighter_6/M.Bison/Strategy#Drive_Rush|Blockstring Gaps and Combo Routes]]
* Startup refers to minimum time before an attack can cancel the {{clr|4|Drive Rush}} animation
* Startup refers to minimum time before an attack can cancel the {{clr|DR|Drive Rush}} animation
* The first 15 recovery frames are cancelable into any attack
* The final 22 recovery frames are cancelable into any attack or movement option or blocking (except Parry)
* Only Normal and Command Normal attacks are enhanced with '''+4''' frame advantage and improved juggle properties
* Applies 15% damage scaling multiplier to any follow-up hits when used mid-combo
** Only applies scaling once per combo; does not apply when a {{clr|4|Drive Rush}} enhanced attack starts the combo
** Only applies scaling once per combo; does not apply when a {{clr|DR|Drive Rush}} enhanced attack starts the combo


Distance:
Distance:
* 0.593 (min, cancel into immediate Throw)
* 2.650 (min, earliest blocking/movement frame)
* 4.425 (max, final {{clr|4|DR}} frame)
* 4.425 (max, final {{clr|DR|DR}} frame)
}}
}}
<br>
<br>
Line 746: Line 746:
| info    =
| info    =
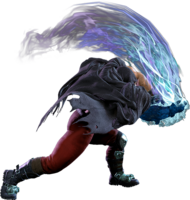
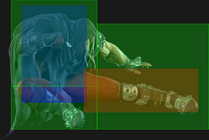
{{AttackDataCargo-SF6/Query|m.bison_236lk}}
* '''Low Crush''' 7-15f (not airborne)
* 5f extra recovery on whiff; {{clr|PC|Counter-Hit/Punish Counter}} bonus advantage carries through both hits
* '''Cancel Hitconfirm Window:''' 16f (Super)
* Applies 30% damage scaling to next hit when beginning a combo (100/70/60...)
{{AttackDataCargo-SF6/Query|m.bison_236mk}}
* '''Low Crush''' 11-19f (not airborne)
* 5f extra recovery on whiff; {{clr|PC|Counter-Hit/Punish Counter}} bonus advantage carries through both hits
* '''Cancel Hitconfirm Window:''' 16f (Super)
* Applies 20% damage scaling to next hit when beginning a combo (100/80/70...)
{{AttackDataCargo-SF6/Query|m.bison_236hk}}
* '''Low Crush''' 14-24f (not airborne)
* 5f extra recovery on whiff; {{clr|PC|Counter-Hit/Punish Counter}} bonus advantage carries through both hits
* '''Cancel Hitconfirm Window:''' 16f (Super)
{{AttackDataCargo-SF6/Query|m.bison_236kk}}
* '''Low Crush''' 12-19f (not airborne)
* 3rd hit puts opponent into {{sf6-jug|limited juggle}} state
* '''Cancel Hitconfirm Window:''' 31f (Super); cancel is only useful to counter {{clr|DR|Drive Impact}}
Line 1,024: Line 1,031:
A forward-moving Super that reaches about half screen. From farther out, only the later hits connect, making the move considerably weaker and not worth using. It functions as Bison's primary reversal, only losing to projectiles or frame-perfect meaty safe jabs on some characters. However, the forward movement and hitbox position makes it a poor anti-air at most ranges.


Knee Press Nightmare is a solid juggle ender for tacking on damage, notably after a Psycho Mine infused {{clr|H|HP Backfist}} or {{clr|H|HP Psycho Crusher}}. Bison almost always has stronger cancel options, but it's possible to hitconfirm on reaction from his far-reaching {{clr|H|5HP}} for damage and corner carry. The threat of a cancel to {{clr|SA|SA1}} also makes this poke viable against {{clr|4|Drive Impact}} in neutral.
Knee Press Nightmare is a solid juggle ender for tacking on damage, notably after a Psycho Mine infused {{clr|H|HP Backfist}} or {{clr|H|HP Psycho Crusher}}. Bison almost always has stronger cancel options, but it's possible to hitconfirm on reaction from his far-reaching {{clr|H|5HP}} for damage and corner carry. The threat of a cancel to {{clr|SA|SA1}} also makes this poke viable against {{clr|DR|Drive Impact}} in neutral.


Bison does not get any follow-up oki on hit; when used midscreen, he ends up a full screen apart afterwards, and is still left about a half screen away against a cornered opponent. It also depletes any planted Psycho Mine, so using this Super often comes at the cost of future damage and pressure.  

Revision as of 03:43, 8 July 2024


Introduction

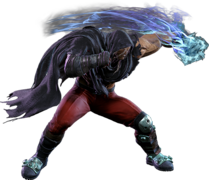
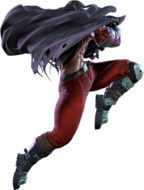
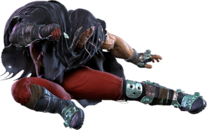
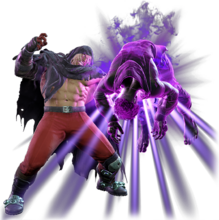
A man who resembles M. Bison, the leader of Shadaloo, who was believed to be dead. He has lost his memories, but has violent tendencies. He appears in locations related to Shadaloo, guided by Psycho Power.

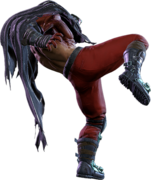
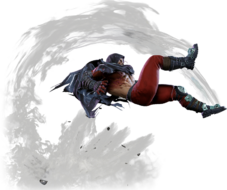
M. Bison is a bully style character with oppressive special moves that can dominate the neutral, and powerful normals that make opponents think twice about contesting. He benefits from the system mechanics of SF6 more than most other characters - his iconic Double Knee Press (or Scissor Kick) is no longer a charge motion, and its strong frame data makes it a safe tool to pester opponents with when properly spaced. Drive Rush allows him to turn many of his errant hits into devastating combos, and OD Psycho Crusher is a fantastic anti-fireball tool that can beat many projectiles on reaction. His Hell Attack target combo (j.MP~j.MP) can punish poor jumps and leads to very high juggle damage on a successful callout.

Once he's in, Bison has excellent pressure normals such as 5HP or 4HK that let him maintain advantage and whittle down the opponent's Drive Gauge until they crack. A key skill for playing Bison is gauging your opponent's temperament; waiting for the moment they run out of patience, then swatting them down for daring to press a button.

While many of these strengths existed in previous iterations of the character, SF6 Bison has plenty of unique tools that bring him to another level. 6HP is an overhead that's on the slow side, but can easily catch opponents who've been conditioned to guard his plus-on-block normals. It even leads into a full combo when used from Drive Rush, giving Bison another layer of mixup beyond his usual repertoire.

Last but certainly not least is his new special, Backfist Combo, which implements the Psycho Mine from his SFV V-Trigger 2 into his moveset. Finishing combos with this attack leaves your opponent in a very dangerous position, as the mine explosion can either make certain moves safe (such as Psycho Crusher) or dramatically increase the combo damage off his more common starters. If his opponent makes the wrong guess, optimised Bison combos can absolutely shred their lifebar in one violent swing.

Bison's main weakness is that, like most dictators, he is much weaker when he isn't in control. He lacks an invincible OD reversal, and while his supers have some invulnerability a savvy opponent can thwart your escape with a meaty jab. If you find yourself on the back foot as Bison, you'll have to rely on patient defense and the system mechanics until you find another opening to exert your dominance.

If you want to control the pace of a match and make your opponent second guess every decision they make, give in to the Psycho Power and let M. Bison take the reins.


Pick if you like: Avoid if you dislike:
  • Excellent normals for poking and pressure
  • A kit dedicated to predicting and punishing your opponent's moves
  • Powerful "neutral skip" tools that circumvent traditional fireball games
  • Oppressive offense with the threat of devastating damage if you make the right callout
  • Wearing people down with moves that can feel outright suffocating
  • Not having an easy answer to your opponent's pressure
  • Relying on fundamentals and system mechanics to get out of a bad spot
  • Having to plan your offense around a timed detonation


Classic & Modern Versions Comparison

List of differences with Modern M. Bison
Missing Normals
  • Standing Light Kick (5LK)
  • Standing Heavy Kick (5HK)
  • Jumping Light Punch (j.LP)
  • Jumping Medium Kick (j.MK)
  • Jumping Heavy Punch (j.HP)
Missing Command Normals
  • Hover Kick (3HK)
Shortcut-Only Specials
  • N/A
Assist Combos
  • A[L~L~L]: 2LK ~ 5LP ~ L Double Knee Press
    • On Block: stops at 5LP
  • A[M~M~M]: 2MP ~ OD Backfist Combo ~ SA2
    • On Block: stops at OD Backfist Combo
    • Burnout: 2MP ~ M Backfist Combo
  • A[H ~ H ~ H ~ H ~ H]: 5MP ~ 2MP ~ OD Double Knee Press ~ M Psycho Crusher Attack ~ SA3
    • Burnout: 5MP ~ 2MP ~ M Double Knee Press ~ SA3
    • On Block: stops at 2MP
Miscellaneous Changes
  • Must let go of Auto button when performing 2nd hit of Shadow Hammer (A[H]~6H) / Shadow Spear (A[H]~2H)
  • Shin Bison can only perform the PPP versions of Bison Warp with 6LMH / 4LMH
    • Cannot teleport in front of opponent, and backwards teleport is the short version


M.Bison
SF6 Mbison Portrait.png
Vitals
Life Points 10000
Ground Movement
Forward Walk Speed 0.048
Backward Walk Speed 0.0312
Forward Dash Speed 19
Backward Dash Speed 23
Forward Dash Distance 1.54
Backward Dash Distance 0.754
Drive Rush Min. Distance (Throw) 0.593
Drive Rush Min. Distance (Block) 2.650
Drive Rush Max Distance 4.425
Jumping
Jump Speed 4+38+3
Jump Apex 2.115
Forward Jump Distance 1.90
Backward Jump Distance 1.52
Throws
Throw Range 0.8
Throw Hurtbox 0.33
Frame Data Glossary - SF6
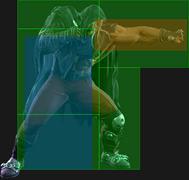
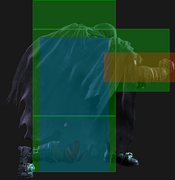
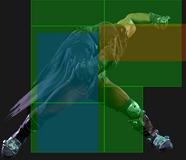
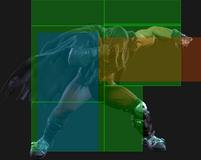
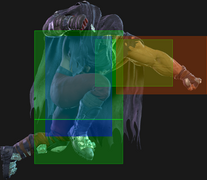
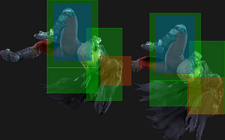
Hitbox Images

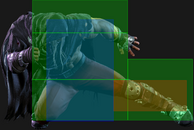
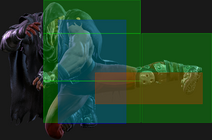
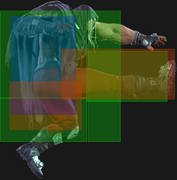
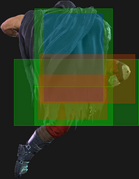
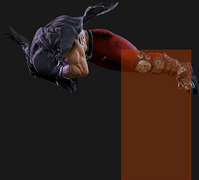
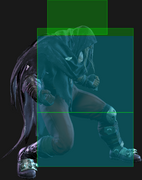
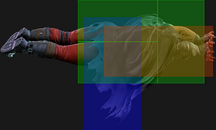
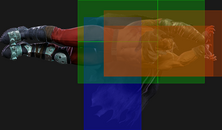
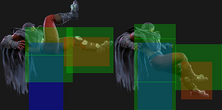
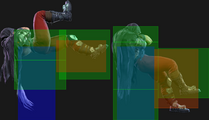
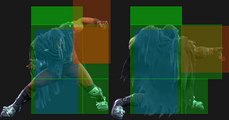
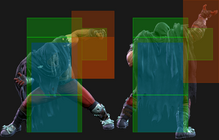
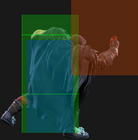
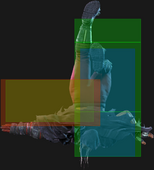
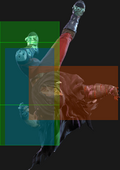
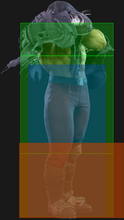
🟥 (Red): Attack hitbox

  • Appears pink for Throw hitboxes

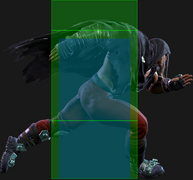
🟩 (Green): Vulnerable hurtbox that can be hit by strikes/projectiles

  • If a move's hitbox and hurtbox overlap, the colors blend to appear orange

🟦 (Blue): Vulnerable throw hurtbox

  • Will be thrown if Pink throw hitbox touches Blue throw hurtbox


Active

How many frames a move remains active (can hurt opponents) for. For projectiles with a maximum active period, a value may be listed in [brackets], but this number is not factored into the move's total frame count.

  • For multi-hit moves with no gaps between the active hitboxes, active frames are listed as X,Y (or sometimes X*Y)
  • For multi-hit moves with gaps between hits, active frames are listed as X(n)Y where n = the frame gap between hitboxes.


Cancel

Available options for canceling one move into another move.

  • "Chn": Chain cancel (Light normals; specific chain options listed in Description)
  • "TC": Target Combo
  • "Sp": Special move
  • "SA": Super Art (if a number is listed, refers only to that specific Super; SA3 = Lv.3 Super Art)
  • "Jmp": Jump cancel (usually on hit only, if applicable)
  • "SS": Serenity Stream (Chun-Li's stance)
    • If one hit of a multi-hit attack is cancelable, this can be indicated with (1st), (2nd), etc.
    • Occasionally, a move can be canceled only into a specific follow-up (e.g. Dee Jay [4]6P > 22PP); this can be indicated by listing the move input in the Cancel field, or with an asterisk that is explained in the move notes (Sp*)


Cancel Hitconfirm Windows

Hitconfirm reaction windows into Special Moves, Target Combos, and Super Arts.

  • Refers to the amount of time (in frames) you have to cancel one attack into another attack on reaction
    • e.g. most cancelable 2MKs have a 13 frame window to cancel into a Special/Super on reaction, making them nearly impossible to hitconfirm
  • Counts from the first frame the attack connects until the final cancelable frame
    • Visual effects like hitsparks and HP drain do not actually occur until frame 2; the first frame is still counted to keep the numbers consistent with previous games, and because it is technically possible to start reacting to the character's reeling animation on frame 1
  • If a Target Combo is cancelable into another attack, the hitconfirm window will include the entire sequence starting from the first hit
    • If there is a frame gap on block between hits of the TC, the hitconfirm window may also be included for just the followup hit
    • Some sequences like Ken's 5MP~HP TC may have a range of values listed (43f~47f). In this example, inputting 5MP~HP at its usual timing gives a 43f hitconfirm into a Special/Super. Delaying the chain into HP gives more total time for the final hitconfirm.


Damage

Attack damage on hit. Multi-hit moves may have the damage listed for individual hits as X,Y (or sometimes X*Y). Sometimes a move's damage changes depending on which active frame connects, or on cinematic vs. non-cinematic hits; in this case, multiple values may be listed, and it will be clarified in the move description.

Damage Scaling

Some moves cause additional damage scaling in combos. Refer to Game Data page for a more detailed breakdown.

Scaling Types:

  • Starter: When a move begins the combo, the next attack is scaled by X percent
    • e.g. Ryu 2MK (20% Starter) > Hadoken: Hadoken is at 80% damage scaling
  • Combo: When a move is comboed into, the next attack is scaled by X percent or X number of hits
    • e.g. Ryu 2HP > OD High Blade Kick (2-Hit Combo Scaling) > Shoryuken: Shoryuken is at 70% damage scaling (100% > 100% > [skip 80%] > 70%)
    • e.g. Cammy 5HP > OD Spiral Arrow (5% Combo Scaling) > Cannon Spike: Cannon Spike is at 75% damage scaling (100% > 100% > [80-5 = 75%])
  • Immediate: When a move is comboed into, this attack is scaled by X percent
    • e.g. Drive Impact Crumple (20% Starter) > Throw (20% Immediate): Throw is at 60% damage scaling
  • Multiplier: A damage scaling multiplier applies after Perfect Parry (50%) and mid-combo Drive Rush (15%). Any hits in the combo continue their usual damage scaling, but reduced by these amounts. These can bring the minimum scaling below the usual 10%, and they stack with each other; as a result, the minimum scaling can reach 4% using a long Drive Rush combo after Perfect Parry.
  • Minimum Scaling: The lowest damage scaling that can be applied to an attack. Super Art Level 1/2/3 generally has 30%/40%/50% minimum scaling respectively. This ensures the attack will still do reasonable damage even at the end of a heavily scaled combo.


Drive Rush Cancel Advantage

Refers to the frame advantage when canceling a normal, command normal, or Target Combo into Drive Rush on hit or block (abbreviated as DRC for Drive Rush Cancel). This is calculated at the moment a follow-up attack can be input, not at the moment the character can block or perform movement options. An attack that with DRC +8 on Hit can link into an 8-frame attack, and DRC +4 on Block can create a true blockstring into a 4-frame attack.

Note that any DRC on Block worse than +4 cannot form a true blockstring, allowing the opponent to interrupt with an invincible reversal. Most light normals are slightly negative after a DRC on block, meaning the opponent can mash their fastest normal to guarantee a counter-hit (though this requires fast reactions). The attacking character could punish this with Light > DRC into an immediate invincible attack, but this would be an incredibly expensive and high-risk gambit.

Forced Knockdown

Most airborne command normals, special moves, and Super Arts put the user in a "Forced Knockdown" state. While in this state, an air knockdown will occur when being hit by any attack, even if it would otherwise cause an air reset.

As an example, Ryu's 2HP causes an air reset when used as an anti-air. Against a move like Cammy's Hooligan Combination, however, the 2HP puts her into an air knockdown state. This allows Ryu to successfully cancel 2HP into Shoryuken for a juggle, similar to how a Drive Impact wall splat works. Taking advantage of Forced Knockdown juggles is important for dealing with moves like Ken's Dragonlash, Dhalsim's Air Teleport, or Kimberly's 6HK~Hop sequence.

Moves that already cause an air knockdown, like most j.MP air-to-airs, will not display the "Forced Knockdown" message.

Guard

Refers to the direction an attack must be blocked. L is for Low attacks (must be blocked crouching), H is for High attacks/overheads (must be blocked standing), LH is for attacks that can be blocked crouching or standing. T is for Throw attacks which cannot be blocked.

Juggles

When a character is put into an Air Knockdown state, it is often possible to follow up with a Juggle attack before they hit the ground. In the simplest terms, there are 2 main juggle states:

  • Free Juggle: any attack can juggle, causing an Air Reset or an Air Knockdown
  • Limited Juggle: only specific attacks with juggle potential may juggle


The following is a more detailed overview of the SF6 juggle system:

Juggle Count (JC): The status of the character being juggled. A high JC limits which attacks can work in juggles.

  • JC0: free juggle state - any attack that can hit an airborne opponent will work
  • JC1+: limited juggle state - juggle only works if the attack's Juggle Limit ≥ defender's Juggle Count
    • A juggle count of -1 represents a crumple state; this can lead to a grounded or airborne hit depending on timing

Juggle Start (JS): When starting a juggle, the opponent's JC will be set to this value. May be different vs. standing and airborne opponents.

  • Attack with Juggle Start value of 3 will put opponent at JC3, so only attacks with Juggle Limit value ≥ 3 can follow up
  • Even for attacks that don't normally start a juggle, this is relevant for Forced Knockdown and Crumple situations

Juggle Increase (JI): When opponent is already in a juggle state, attacks will increase the opponent's JC by this amount.

  • Airborne opponent at JC1 followed by attack with Juggle Increase value of 3 will set opponent to JC4

Juggle Limit (JL): Property of an attack hitbox that determines whether it connects on a juggled opponent. The JL must be ≥ the opponent's JC to hit successfully.

  • An uppercut with a JL value of 5 will connect on an opponent at JC5 or below, but will whiff on JC6 opponent
  • Most normals have a JL value of 0, meaning they only work in Free Juggle (JC0) states
  • Some multi-hit attacks have different JL values on each hit, so a 3-hit move may only hit twice in juggles

An example to tie everything together:

  • An attack (JS3) launches opponent into the air (Opponent now at JC3)
  • Followed up with an attack (JI2/JL4); it connects, because JL4 ≥ JC3 (Opponent now at JC5)
  • Attempts to juggle again with same attack (JL4), but whiffs because JL4 < JC5 (Opponent hits the ground)

Drive Rush notes:

  • DR normals have a Juggle Start/Increase value of 0
  • DR normals have +3 added to their usual Juggle Limit

More recently, the official definitions used by Capcom are slightly different than these community-designated terms. When reading official patch notes, the following terms are used instead:

  • Combo Count Initial Value
  • Combo Count Additional Value
  • Combo Count Upper Limit


On Hit/Block

These are frame advantage values when the attack hits or is blocked. If the number is positive, then the move will recover before the defender can act again. If the number is negative, the defender will be able to act before the attacker and maybe even punish. KD refers to knockdown on hit, and the listed KD Advantage refers to how many frames the attacker can act before the defender finishes their wakeup animation.

  • Note that generally, there is an extra +2 hit advantage on Counterhits and +4 hit advantage on Punish Counters (exceptions are noted in the description).


Recovery

How many frames it takes for a move to finish after the active frames have finished. For projectiles, recovery is considered to begin after the first active frame.

  • Moves with different recovery values on hit/block/whiff may have multiple values listed like X(Y), with specific details listed in the description.


Startup

How many frames it takes before the move becomes 'active' or have a hit box. The last startup frame and the first active frame are the same frame, meaning all values are written as Startup + 1.

  • Moves with multiple relevant startup values may be listed as X(Y); for example, a move that hits airborne first before hitting grounded opponents, or a 2-hit move where the first hit whiffs at some ranges.


IASA / Actionable Recovery

Some moves play out an extended recovery animation when no other button/direction is input (for crouching moves, it applies when holding any down direction). These are often referred to as "actionable recovery" frames; in some games, the term IASA (Interruptible As Soon As) refers to the frame that Actionable Recovery begins.

Letting the Actionable Recovery frames play out can change the character's position, potentially setting up spacing traps by recovering farther away. For example, Manon 5HP will recover much farther away from the opponent if no input is performed immediately after her recovery; holding back or down-back to block will keep her much closer to the opponent.


Normals

Standing Normals

5LP
Standing Light Punch
SF6 Classic.png 5LP
SF6 Modern.png 5L
SF6 Mbison 5lp.png
SF6 Mbison 5lp hitbox.png
Hitboxes Off
Hitboxes On

5LP
Standing Light Punch
Startup Active Recovery Cancel Damage Guard On Hit On Block
5 3 9 Chn Sp SA 300 LH +4 -2
  • Chains into 5LP/2LP/2LK
  • Cancel Hitconfirm Window: 13f
  • Drive Rush cancel advantage: +5 oH / -1 oB
  • Applies 20% damage scaling to next hit when beginning a combo (100/80/70...)


Bison's longest reaching light normal, comparable to a 5LK on many other characters. At 5f startup, it will not combo from Counter-Hit LK Scissors. At the end of a 3-light chain, it also fails to combo into LP Backfist Combo due to the pushback.

5MP
Standing Medium Punch
SF6 Classic.png 5MP
SF6 Modern.png A[H]
SF6 Mbison 5mp.png
SF6 Mbison 5mp hitbox.png
Hitboxes Off
Hitboxes On

5MP
Standing Medium Punch
Startup Active Recovery Cancel Damage Guard On Hit On Block
8 3 15 Sp SA TC 600 LH +6 0
  • Cancel Hitconfirm Window: 15f (requires Counter-Hit for 5MP~6HP TC)
  • Drive Rush cancel advantage: +14 oH / +8 oB


Important combo tool that sets up a strong tick throw with Drive Rush. Naturally links into 2MP for good damage, and can combo into the 2HK Target Combo (which is also a safe frame trap on block).

With Drive Rush, it gains enough hitstun to link 2HP for a more rewarding hitconfirm. DR~5MP can frame trap into the overhead 6HP follow-up on block, or extend a juggle with a ground bounce on hit; however, the extra blockstun sacrifices Bison's ability to frame trap into the low 2HK TC ender.

5HP
Standing Heavy Punch
SF6 Classic.png 5HP
SF6 Modern.png 5H
SF6 Mbison 5hp.png
SF6 Mbison 5hp hitbox.png
SF6 Mbison 5hp hitbox 2.png
Hitboxes Off
Hitboxes On

5HP
Standing Heavy Punch
Startup Active Recovery Cancel Damage Guard On Hit On Block
19 3 17 SA 1000 LH +4(+6) +1(+3)
  • Punish Counter: +17~19 Stagger
  • Slams airborne opponents down into limited juggle OTG state (higher bounce on Punish Counter)
  • Cancel Hitconfirm Window: 17f / 29f PC (Super)
  • Applies 20% damage scaling to next hit when beginning a combo (100/80/70...)
  • Extends a hurtbox 1f before active that is vulnerable to projectiles


A slow, long-range advancing poke with great hitbox priority, making it an excellent spacing trap tool. It is plus on block without Drive Rush, and gains additional frame advantage when spaced at max range. While susceptible to a predictive Drive Impact, it can be canceled into a Super on reaction; it also has low enough recovery to counter-DI if the opponent activates it too late.

The Punish Counter properties allow Bison to convert 5HP into high damage, which dissuades opponents from throwing out quick lights/mediums to counterpoke Scissor Kick. It can also be an effective punish against very unsafe moves (like reversals), though the damage scaling causes Bison to lose some damage.

5LK
Standing Light Kick
5LK
SF6 Mbison 5lk.png
SF6 Mbison 5lk hitbox.png
Hitboxes Off
Hitboxes On

5LK
Standing Light Kick
Startup Active Recovery Cancel Damage Guard On Hit On Block
4 2 10 Sp SA 300 LH +3 -1
  • Cancel Hitconfirm Window: 12f
  • Drive Rush cancel advantage: +5 oH / +1 oB
  • Applies 20% damage scaling to next hit when beginning a combo (100/80/70...)


Bison's longest-reaching 4f button. Unlike his other light normals, this one must be linked into rather than chained. While it has less range than 5LP, this is the preferred ender for 3-light hitconfirms, as the forward movement allows LP Backfist Combo to connect.

5LK is plus on block when canceled into Drive Rush, which is an extremely rare property for a light normal.

5MK
Standing Medium Kick
SF6 Classic.png 5MK
SF6 Modern.png 5M
SF6 Mbison 5mk.png
SF6 Mbison 5mk hitbox.png
Hitboxes Off
Hitboxes On

5MK
Standing Medium Kick
Startup Active Recovery Cancel Damage Guard On Hit On Block
10 4 16 - 700 LH +2 -3

A strong poke due to its range and slightly disjointed hitbox. The lower body hurtbox does not extend much, making it useful against opponents with shorter-ranged 2MKs. Useful for keeping the opponent at Bison's preferred range where the threat of Scissor Kick or Drive Rush starters are hard to deal with.

5HK
Standing Heavy Kick
5HK
SF6 Mbison 5hk.png
SF6 Mbison 5hk hitbox.png
Hitboxes Off
Hitboxes On

5HK
Standing Heavy Kick
Startup Active Recovery Cancel Damage Guard On Hit On Block
13 4 19 - 900 LH +6 -2
  • Foot hurtbox is Anti-Air Invuln 13-16f
  • Punish Counter: KD +73 Crumple (+7 before becoming airborne)
  • Puts airborne opponents into limited juggle state (much higher launch on Punish Counter)
  • Whiffs on crouching opponents at longer ranges
  • Extends a hurtbox 1f before active that is vulnerable to projectiles


A long-range kick with a slight upward angle that moves Bison forward during the animation. Mostly useful as a punish starter, allowing either a grounded combo or a juggle extension depending on the follow-up timing. It naturally links into 2MP even without a Punish Counter, but the slow startup makes this impractical unless confirmed from a Drive Rush cancel or a deep jump-in.

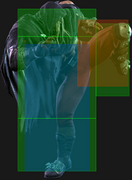
Can be used as an anti-air against long-range jumps due to the invincibility around Bison's foot, though in practice it can be difficult to use this way.


Crouching Normals

2LP
Crouching Light Punch
SF6 Classic.png 2LP
SF6 Modern.png 2L
SF6 Mbison 2lp.png
SF6 Mbison 2lp hitbox.png
Hitboxes Off
Hitboxes On

2LP
Crouching Light Punch
Startup Active Recovery Cancel Damage Guard On Hit On Block
4 2 10 Chn Sp SA 300 LH +4 -2
  • Chains into 5LP/2LP/2LK
  • Cancel Hitconfirm Window: 12f
  • Drive Rush cancel advantage: +5 oH / -1 oB
  • Applies 20% damage scaling to next hit when beginning a combo (100/80/70...)
  • Topmost hurtbox on frames 1-5 is vulnerable only to aerial attacks, preventing its use as an anti-air


A fast 4f normal with decent range. Useful in chain hitconfirms, although a 3-light chain into LP Backfist Combo whiffs if you don't end with a link to 5LK. Also a good defensive option to interrupt the opponent's pressure strings, as it links to 2MP on Counter-Hit.

2MP
Crouching Medium Punch
SF6 Classic.png 2MP
SF6 Modern.png A[M]
SF6 Mbison 2mp.png
SF6 Mbison 2mp hitbox.png
Hitboxes Off
Hitboxes On

2MP
Crouching Medium Punch
Startup Active Recovery Cancel Damage Guard On Hit On Block
6 3 14(17) Sp SA 600 LH +5 -1
  • 3f extra recovery on whiff
  • Cancel Hitconfirm Window: 15f
  • Drive Rush cancel advantage: +12 oH / +6 oB
  • Topmost hurtbox on frames 1-8 is vulnerable only to aerial attacks, preventing its use as an anti-air


An important combo and neutral tool with great range for a 6f cancelable medium. Combos into Bison's useful Medium/OD specials, and gets a powerful link to 4HK when canceled into Drive Rush. Combos from 5HK, 5MP, CH 5LP/2LP, and many Drive Rush starters like DR~6HP.

2HP
Crouching Heavy Punch
SF6 Classic.png 2HP
SF6 Modern.png 2H
SF6 Mbison 2hp.png
SF6 Mbison 2hp hitbox.png
Hitboxes Off
Hitboxes On

2HP
Crouching Heavy Punch
Startup Active Recovery Cancel Damage Guard On Hit On Block
10 6 21 Sp SA 900 LH 0 -9
  • Forces stand
  • Puts airborne opponents into limited juggle state on Counter-hit/Punish Counter
  • Great anti-air hitbox priority on frames 12-15 but cannot hit cross-up; only the first 2 active frames are cancelable
  • Cancel Hitconfirm Window: 16f
  • Drive Rush cancel advantage: +17 oH / +8 oB


A slow but very consistent anti-air when used early enough. Can lead to a follow-up juggle unless the opponent empty jumps, though the anti-air frames are not cancelable. Used in grounded combos after PC/DR 5MP, it can cancel into useful moves like HP Backfist Combo or HP Psycho Crusher.

2LK
Crouching Light Kick
SF6 Classic.png 2LK
SF6 Modern.png A[L]
SF6 Mbison 2lk.png
SF6 Mbison 2lk hitbox.png
Hitboxes Off
Hitboxes On

2LK
Crouching Light Kick
Startup Active Recovery Cancel Damage Guard On Hit On Block
5 2 10 Chn 200 L +4 -2
  • Chains into 5LP/2LP/2LK
  • Applies 20% damage scaling to next hit when beginning a combo (100/80/70...)


Very good low starter, especially when combined with Drive Rush. It has the rare property of linking to other lights without a chain, as well as linking to a cancelable 2MP on Counter-hit.

2MK
Crouching Medium Kick
SF6 Classic.png 2MK
SF6 Modern.png 2M
SF6 Mbison 2mk.png
SF6 Mbison 2mk hitbox.png
Hitboxes Off
Hitboxes On

2MK
Crouching Medium Kick
Startup Active Recovery Cancel Damage Guard On Hit On Block
8 3 19 Sp SA 500 L -2 -6
  • Cancel Hitconfirm Window: 13f
  • Drive Rush cancel advantage: +8 oH / +4 oB
  • Applies 20% damage scaling to next hit when beginning a combo (100/80/70...)
  • Extends an extra-wide hurtbox through the first 9 recovery frames on whiff


A cancelable low poke with good range, comparable to Luke or Ryu. Allows Bison to apply the ever-useful 2MK > Drive Rush cancel in neutral for a hitconfirm or block pressure. It also serves as a defensive option against throw baits, as opponents tend to walk back for a short time.

5MP and 2MP are generally preferred in combos, though sometimes 2MK is the only attack that will link at longer ranges.

2HK
Crouching Heavy Kick
SF6 Classic.png 2HK
SF6 Modern.png 3H
SF6 Mbison 2hk.png
SF6 Mbison 2hk hitbox.png
Hitboxes Off
Hitboxes On

2HK
Crouching Heavy Kick
Startup Active Recovery Cancel Damage Guard On Hit On Block
11 3 26 - 900 L HKD +29 -12
  • Counter-Hit/Punish Counter: HKD +45
  • Has juggle potential; not a Hard Knockdown when juggled into
  • Puts airborne opponents into limited juggle state (can combo with Psycho Mine detonation)


A great sweep with long range and a slightly disjointed hitbox. While technically unsafe, the high pushback prevents most opponents from punishing with their own sweep; many characters will have to rely on Supers to punish, if they are lucky enough to have one that reaches.


Jumping Normals

j.LP
Jumping Light Punch
j.LP
SF6 Mbison jlp.png
SF6 Mbison jlp hitbox.png
Hitboxes Off
Hitboxes On

j.LP
Jumping Light Punch
Startup Active Recovery Cancel Damage Guard On Hit On Block
5 4 3 land - 300 H +8(+9) +4(+5)

A fast normal used as a panic air-to-air when j.MP would be too slow. Against grounded opponents, it can only hit when very close to the ground, which can set up a surprise tick throw if you expect the opponent to block.

j.MP
Jumping Medium Punch
SF6 Classic.png j.MP
SF6 Modern.png j.M
SF6 Mbison jmp.png
SF6 Mbison jmp hitbox.png
Hitboxes Off
Hitboxes On

j.MP
Jumping Medium Punch
Startup Active Recovery Cancel Damage Guard On Hit On Block
8 4 3 land TC 700 H +9(+11) +5(+7)
  • Puts airborne opponents into limited juggle state
  • Shifts M. Bison's hurtbox upward during startup


A great air-to-air due to its knockdown properties. The cancel into Hell Attack (j.MP~j.MP) can be delayed significantly, allowing Bison to control how high the opponent is juggled. It also gives more time to build charge for Psycho Crusher upon landing. The j.MP itself has less juggle potential than similar buttons on other characters, so there are not many ways to combo into this juggle route.

j.HP
Jumping Heavy Punch
j.HP
SF6 Mbison jhp.png
SF6 Mbison jhp hitbox.png
Hitboxes Off
Hitboxes On

j.HP
Jumping Heavy Punch
Startup Active Recovery Cancel Damage Guard On Hit On Block
9 6 3 land - 800 H +7(+15) +3(+11)
  • Spike knockdown vs. airborne opponents on Counter-Hit/Punish Counter


Bison's best jump-in for close range approaches with its good vertical hitbox. Can be used earlier in Bison's jump arc than any other air normal, allowing him to vary his attack timing; however, an early j.HP can have below-average hit/block advantage as a result. On a deeper connect, it can link to strong combo starters like 4HK or 5MP.

j.LK
Jumping Light Kick
SF6 Classic.png j.LK
SF6 Modern.png j.L
SF6 Mbison jlk.png
SF6 Mbison jlk hitbox.png
Hitboxes Off
Hitboxes On

j.LK
Jumping Light Kick
Startup Active Recovery Cancel Damage Guard On Hit On Block
5 7 3 land - 300 H +5(+10) +1(+6)
  • Can hit Cross-up


Can be used as an air-to-air or as a cross-up approach tool, though it's generally worse than j.LP and j.MK respectively. The one advantage of j.LK is that it can still work as an air-to-air during a forward jump if the opponent crosses behind Bison.

j.MK
Jumping Medium Kick
j.MK
SF6 Mbison jmk.png
SF6 Mbison jmk hitbox.png
Hitboxes Off
Hitboxes On

j.MK
Jumping Medium Kick
Startup Active Recovery Cancel Damage Guard On Hit On Block
7 7 3 land - 500 H +8(+13) +4(+9)
  • Can hit Cross-up
  • Shifts M. Bison's hurtbox upward during startup


Your main tool for ambiguous left/right mixups when jumping at cross-up range. Mix with j.HP to make the opponent less confident in their anti-air timing.

j.HK
Jumping Heavy Kick
SF6 Classic.png j.HK
SF6 Modern.png j.H
SF6 Mbison jhk.png
SF6 Mbison jhk hitbox.png
Hitboxes Off
Hitboxes On

j.HK
Jumping Heavy Kick
Startup Active Recovery Cancel Damage Guard On Hit On Block
10 6 3 land - 800 H +11(+15) +7(+11)

Bison's best jump-in for ranged approaches due to its long horizontal range. Can consistently link to a strong combo starter like 4HK or 5MP on landing.


Command Normals

6HP
Psycho Hammer
Overhead
SF6 Classic.png 6HP
SF6 Modern.png 6H
SF6 Mbison 6hp.png
SF6 Mbison 6hp hitbox.png
Hitboxes Off
Hitboxes On

6HP
Psycho Hammer
Startup Active Recovery Cancel Damage Guard On Hit On Block
22 3 20 - 800 H +3 -3


A solid overhead with good range and average startup speed. Like most overheads, it is most useful after Drive Rush, where it gains a link to 2MP while being +1 on block. With Bison's excellent Drive Rush speed and useful low starters like 2LK and 2MK, he has ample opportunity to crack an opponent's defense.

After a MP Backfist Combo knockdown in the corner, Bison has a perfect setup into meaty 6HP, which becomes +5 oH / -1 oB to combo without meter. He can also apply overhead pressure to an opponent implanted with Psycho Mine; if timed right before the detonation, the opponent will be opened up for a huge juggle combo. To avoid being predictable, alternate this with low-hitting options like 2MK or the 5MP~2HK Target Combo.

6HP has utility in juggle routes, causing a ground bounce that can combo into Backfist Combo for extended Psycho Mine pressure. This is easier to do in the corner, as some midscreen routes leave the opponent too far away or require a strict microwalk to connect.

4HK
Evil Knee
SF6 Classic.png 4HK
SF6 Modern.png 4H
SF6 Mbison 4hk.png
SF6 Mbison 4hk hitbox.png
Hitboxes Off
Hitboxes On

4HK
Evil Knee
Startup Active Recovery Cancel Damage Guard On Hit On Block
10 4 17 Sp SA 800 LH +4 +1
  • Forces stand
  • Cancel Hitconfirm Window: 18f
  • Drive Rush cancel advantage: +15 oH / +12 oB


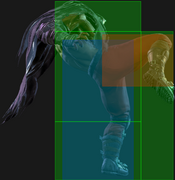
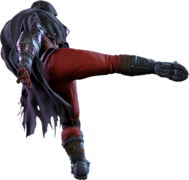
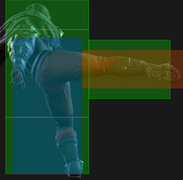
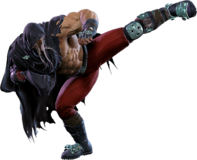
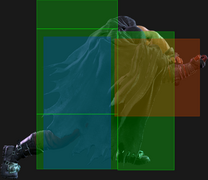
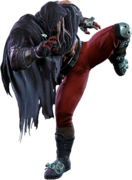
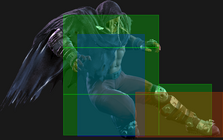
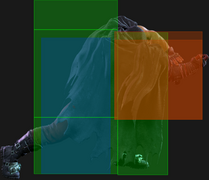
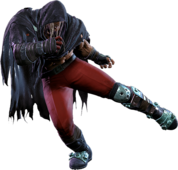
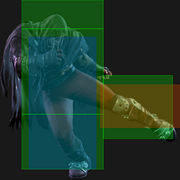
Bison's main pressure tool up close with very low pushback, granting him advantage on block without the massive startup of 5HP. It can lead to powerful combos on Punish Counter or out of a Drive Rush starter. If the opponent respects your block pressure, you can drain an entire bar of Drive meter with DR~4HK, 4HK; just be sure not to overuse this sequence, as it can be interrupted with a 4f normal.

One of Bison's best cancelable normals, it can combo into his slower and stronger special moves. However, 2HP is stronger if you intend to cancel directly into a special move, and has the same startup. When canceled into Drive Rush, 4HK can form a true blockstring into itself, or can be manually delayed to set up a frame trap.

3HK
Hover Kick
Slide
3HK
SF6 Mbison 3hk.png
SF6 Mbison 3hk hitbox.png
Hitboxes Off
Hitboxes On

3HK
Hover Kick
Startup Active Recovery Cancel Damage Guard On Hit On Block
15 10 23 - 900 L KD +25(+34) -15(-6)
  • Counter-Hit/Punish Counter: HKD +41~50
  • Has juggle potential; not a Hard Knockdown when juggled into
  • Bison is in a crouching state for the entire move duration


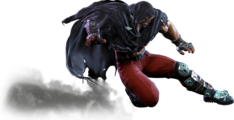
Bison zooms forward on his heels, sweeping the opponent from around 75% of the screen. Unlike his normal sweep, this can't be abused so freely; unless the opponent is in Burnout or has a Psycho Mine about to explode, 3HK is always punishable on block even at max range. Still, with proper spacing the punish can be less severe, particularly against characters that lack a 6f medium.

The slide is good for catching installs (like Lily wind stocks, Jamie drinks, etc.) that would normally be hard to punish at long range. The startup is too slow to use 3HK in most grounded combos, but the high juggle potential gives it some utility in situations where Psycho Crusher charge is not available.


Target Combos

5MP~6HP
Shadow Hammer
SF6 Classic.png 5MP~6HP
SF6 Modern.png A[M]~6H
SF6 Mbison 6hp.png
SF6 Mbison 5mp 6hp hitbox.png
Hitboxes Off
Hitboxes On

5MP~6HP
Shadow Hammer
Startup Active Recovery Cancel Damage Guard On Hit On Block
22 3 20 - 800 H +3 -3
  • Puts airborne opponents into limited juggle OTG state
  • Interruptible 7f gap on block after 5MP


This follow-up attack is effectively the same as Bison's command overhead. Just like 6HP, it can be used in juggle routes for a ground bounce, most notably after DR~5MP. On a grounded hit, this TC will not combo without extra advantage from CH/PC/DR or a deep meaty 5MP connect.

As a mixup tool, this overhead is safe just like its low counterpart. However, it can be interrupted on block with a quick normal unless Bison starts with DR~5MP or the opponent is in Burnout.

5MP~2HK
Shadow Spear
SF6 Classic.png 5MP~2HK
SF6 Modern.png A[M]~2H
SF6 Mbison 5mp 2hk.png
SF6 Mbison 5mp 2hk hitbox.png
Hitboxes Off
Hitboxes On

5MP~2HK
Shadow Spear
Startup Active Recovery Cancel Damage Guard On Hit On Block
16 4 20 - 700 L +3 -3
  • 1f gap on block that can lead to CH light normals


A safe, low-hitting alternative to the overhead Target Combo. The blockstring gap is much smaller, leading to Counter-Hit combos if the opponent mashes expecting the overhead. On block, Bison is left close to the opponent at -3, forcing him to take a strike/throw mixup.

If the opponent reacts to either Target Combo extension, they can hold down back and attempt to Perfect Parry this low ender, making it punishable. This also parries the overhead ender, making it low-risk as long as they are actually reacting to the startup. If you think the opponent may be auto-piloting a parry after blocked 5MP, try doing nothing to bait it out for a Throw punish.

If the opponent is in Burnout, there is no longer a gap in the blockstring. This makes it a strong bully tool that forces the opponent to block low in a true blockstring. Since it becomes +1 on block, the opportunity for a Counter-Hit occurs after the 2HK ender instead.

j.MP~j.MP
Hell Attack
SF6 Classic.png j.MP~j.MP
SF6 Modern.png j.M~j.M
SF6 Mbison jmp jmp.png
SF6 Mbison jmp jmp hitbox.png
Hitboxes Off
Hitboxes On

j.MP~j.MP
Hell Attack
Startup Active Recovery Cancel Damage Guard On Hit On Block
7 4 3 land - 700 LH - -


A great follow-up to air-to-air j.MP, allowing Bison to pick up a juggle even when hitting on the way up. This TC can be significantly delayed, giving more advantage after landing and guaranteeing enough charge time for Psycho Crusher if you begin charging right after you jump. You can also choose to end with Backfist Combo to plant a Psycho Mine; in general, the MP/HP versions are more consistent due to their extra range, as long as you delay the hits of the TC.


Throws

Forward Throw (LPLK)
Forward Throw
LPLK
SF6 Mbison lplk.png
SF6 Mbison lplk hitbox.png
Hitboxes Off
Hitboxes On

LPLK
Deadly Throw
Startup Active Recovery Cancel Damage Guard On Hit On Block
5 3 23 - 1200 (2040) T KD +21 -
  • Punish Counter: HKD +21
  • Applies 20% immediate damage scaling when comboed into (e.g. after Crumple)


After landing a corner throw, Bison can dash forward for an auto-timed +2 throw loop that beats any non-invincible reversal option. He also has enough advantage to walk forward for a manually timed throw loop; this has the advantage of allowing Bison to walk back out of the opponent's throw range for a shimmy, leading to much higher damage.

If you want to use Drive Rush for enhanced pressure, DR~4HK can be auto-timed for a meaty connect, making it +9 oH / +6 oB. A second 4HK on block will keep Bison at frame advantage while allowing a trade combo vs. 4f normals. DR~5MP can connect meaty, but requires a slight manual delay; otherwise, it will whiff before the opponent recovers.

Midscreen, Bison can use Drive Rush into a delayed button like 4HK, 5MP, or 2MK to catch the opponent's Back Rise, but in order to threaten another throw he risks eating the opponent's wakeup button. If for some reason the opponent chooses not to Back Rise, this gives him oki similar to a corner throw.

Back Throw (4LPLK)
Back Throw
4LPLK
SF6 Mbison 4lplk.png
SF6 Mbison lplk hitbox.png
Hitboxes Off
Hitboxes On

4LPLK
Death Tower
Startup Active Recovery Cancel Damage Guard On Hit On Block
5 3 23 - 1200 (2040) T KD +18 -
  • Side switches
  • Punish Counter: HKD +18
  • Applies 20% immediate damage scaling when comboed into (e.g. after Crumple)


After throwing the opponent back into the corner, Bison can pressure with ranged meaty normals like 5HP or 5MK to chip away at the opponent's Drive gauge. For real oki, Drive Rush is required. Two of the best routes are:

  • DR~4HK - +5 oB, frame traps into 5MP for two likely Counter-Hit points.
    • On hit, ends with 5MP, 2MP > M/OD special
    • After CH 4HK, can link into another 4HK > H Special for excellent damage
  • DR~5MP - Auto-timed for a +4 oB tick throw.
    • Attempting another 5MP on block results in a trade vs. 4f normals, which links to 2MP (due to pushback, must use 2MK vs. Blanka/E. Honda 5LK or Guile/Manon 2LP)
    • On hit, Bison can link to 4HK for a powerful HP Psycho Crusher or HP Backfist Combo ender

Midscreen, the opponent recovers too far away to chase down. If the Back Throw connects right after planting a Psycho Mine, Bison can attempt a MP/HP Psycho Crusher to secure frame advantage. If the opponent tries to jump over Psycho Crusher on reaction, the Mine will explode mid-air. However, this setup gives the opponent plenty of time to react with an anti-air invincible move, removing the threat of the Mine entirely, so it should be used sparingly.


Drive System

Drive Impact (HPHK)
Drive Impact
HPHK
SF6 Mbison hphk.png
SF6 Mbison hphk hitbox.png
Hitboxes Off
Hitboxes On

HPHK
Hell Twist
Startup Active Recovery Cancel Damage Guard On Hit On Block
26 2 35 - 800 LH KD +35 / Wall Splat KD +65 -3 / Wall Splat HKD +72
  • Armor (2-hit): 1-27f; Range: 2.537 (1.217 movement + 1.32 hitbox)
  • On Hit/PC: Applies 20% damage scaling to next hit when beginning a combo
  • On Block: Applies 20% scaling multiplier to all follow-up hits after Wall Splat; the next attack can incur additional Starter Scaling
  • Combos when canceled from 2HP or Punish Counter 4HK/5MP (no corner wallsplat; useful for depleting Drive gauge, especially after Perfect Parry)
  • A blocked DI can combo into another DI if opponent is not fully cornered (Stuns if opponent has less than 1.5 Drive bars)
    • This happens because a blocked DI is not considered a "hit" for combo purposes
    • Causes both the 20% Starter and 20% Multiplier scaling to apply to the follow-up combo

See Drive Impact on the Gauges page for more details.

When canceled from a normal, these are the important blockstring gaps; a gap of N will trade with an N-frame startup attack; [] = Burnout

  • 4HK: 5[1]
  • 5MP, 2HP: 9[5]
  • 2MP, 2MK: 11[7]
  • Note: A gap ≥ 6f can be thrown, and a gap ≥ 9f can be jumped out of by most characters

Against the following characters in Burnout:

  • JP (22K), frame 3 counter
  • Marisa (214K), frame 3 armor
  • Zangief (5[HP]), frame 4 armor

It's important to use a blockstring that cannot be absorbed by their armor/counter moves. Ideally, the string should also not be a true combo, or it will cause a Lock and prevent Stun.
* Denotes a move that causes Lock on Counter-hit, allowing the opponent to escape a Stun by mashing on wakeup.

  • 4HK* > DI: 1f blockstring gap prevents opponent from absorbing the hit
  • DR~2HP* > DI: 1f blockstring gap prevents opponent from absorbing the hit
  • DR~5MP* > DI: 1f blockstring gap prevents opponent from absorbing the hit
  • DR~2MP* > DI: 3f blockstring gap will work vs. Zangief 5[HP]
  • DR~2MK > DI: 3f blockstring gap will work vs. Zangief 5[HP]

Drive Reversal (6HPHK)
Drive Reversal
SF6 Classic.png 6HPHK
SF6 Modern.png 6DI
SF6 Mbison 6hphk.png
SF6 Mbison 6hphk hitbox.png
Hitboxes Off
Hitboxes On

6HPHK
Hell Drive (Block)
Startup Active Recovery Cancel Damage Guard On Hit On Block
20 3 26(31) - 500 recoverable LH KD +23 -6
  • Full Invuln: 1-22f; Armor Break
  • 5f extra recovery on hit; 4f screen freeze during startup
6HPHK
Hell Drive (Recovery)
Startup Active Recovery Cancel Damage Guard On Hit On Block
18 3 26(31) - 500 recoverable LH KD +23 -6
  • Full Invuln: 1-20f; Armor Break
  • 5f extra recovery on hit; no screen freeze

See Drive Reversal on the Gauges page for more details.

Drive Parry (MPMK)
Drive Parry
MPMK
SF6 Mbison mpmk.png
SF6 Mbison mpmk hitbox.png
Hitboxes Off
Hitboxes On

MPMK
Drive Parry
Startup Active Recovery Cancel Damage Guard On Hit On Block
1 12 or until released 33(1)(11) - - - - -

See Drive Parry on the Gauges page for more details.

  • Perfect Parry:
    • Applies a 50% damage scaling multiplier to any punish afterwards
    • vs. strikes, has only 1f recovery and prevents the opponent from canceling their attack
    • vs. projectiles, puts you into a fixed 11f recovery

Drive Rush (MPMK~66)
Drive Rush
SF6 Classic.png MPMK~66
SF6 Modern.png DP~66
SF6 Mbison 66.png
SF6 Mbison 66 hitbox.png
Hitboxes Off
Hitboxes On

MPMK~66
Parry Drive Rush
Startup Active Recovery Cancel Damage Guard On Hit On Block
3+8 - 15(37) - - - - -
  • 1-bar version performed out of Parry
  • Startup is 1+8 immediately after successful Parry
MPMK or 66
Drive Rush Cancel
Startup Active Recovery Cancel Damage Guard On Hit On Block
9 - 15(37) - - - - -
  • 3-bar version performed on hit/block from a cancelable normal
    • Can also be performed from whiffed cancelable light normals

See Drive Rush on the Gauges page for more details. See Strategy page for Blockstring Gaps and Combo Routes

  • Startup refers to minimum time before an attack can cancel the Drive Rush animation
  • The first 15 recovery frames are cancelable into any attack
  • The final 22 recovery frames are cancelable into any attack or movement option or blocking (except Parry)
  • Only Normal and Command Normal attacks are enhanced with +4 frame advantage and improved juggle properties
  • Applies 15% damage scaling multiplier to any follow-up hits when used mid-combo
    • Only applies scaling once per combo; does not apply when a Drive Rush enhanced attack starts the combo

Distance:

  • 0.593 (min, cancel into immediate Throw)
  • 2.650 (min, earliest blocking/movement frame)
  • 4.425 (max, final DR frame)


Special Moves

Psycho Mine Detonation
-
SF6 Mbison psycho mine.png
"Gunpowder, gelatine"
SF6 Mbison psycho mine hitbox.png
Hitboxes Off
Hitboxes On

-
Psycho Mine (Detonation)
Startup Active Recovery Cancel Damage Guard On Hit On Block
300 1 - - 500 LH KD -


After landing Backfist Combo, Bison attaches a Psycho Mine to the opponent. Following approximately six seconds (or 600 frames), the mine detonates, either launching the opponent or giving Bison frame advantage. If Bison hits the opponent with a special move that involves Psycho Power (aka Psycho Crusher, Devil's Reverse, or Backfist Combo), the mine will automatically detonate on hit and on block. On hit, Bison gains access to new combo routes, and on block he is left very plus.

Psycho Mines are an essential part of Bison's gameplan, and his use of them is a huge part of him maintaining offensive momentum after a combo. As Bison's greatest strength is his offensive power, using Psycho Mines to maintain control of the match is crucial.

Generally, Bison can "spend" a Psycho Mine in one of two ways- either to reinforce mixups, or to maintain advantage. To enforce mixups, Bison can plant a Psycho Mine and then meaty with buttons like 5MP or 4HK, then look for an overhead or low opportunity and convert. To maintain advantage, Bison can immediately layer a detonator special after a mine plant and continue pressuring the opponent. For example, LP Backfist Combo > Meaty LP Psycho Crusher leaves Bison +6, has good corner carry, and strips 1 bar of Drive Gauge on hit.

The timed detonation for Psycho Mine launches opponents much higher than the manually triggered versions from Backfist Combo or Psycho Crusher. Combo options are generally j.MP~MP > LP Crusher.

Psycho Crusher Attack ([4]6P)
Psycho Crusher Attack
SF6 Classic.png [4]6P
SF6 Modern.png [4]6X
SF6 Mbison 46lp.png
SF6 Mbison 46lp hitbox.png
SF6 Mbison 46lp hitbox 2.png

SF6 Mbison 46pp hitbox.png
SF6 Mbison 46pp hitbox 2.png
SF6 Mbison 46pp hitbox 3.png
OD Version
Hitboxes Off
Hitboxes On

[4]6LP
Psycho Crusher Attack
Startup Active Recovery Cancel Damage Guard On Hit On Block
16 16 24 SA3 1200 LH KD +20(+35) -20(-5)
  • Anti-Air Invuln: 6-17f; Projectile Clash 16-31f (1-hit, meterless priority)
    • Forward hurtbox is Projectile Invuln 17-31f
  • Cancel Hitconfirm Window: 17f (Super); 1f later active frame gives 1f less hitconfirm time
  • Applies 30% damage scaling to next hit when beginning a combo (100/70/60...)
[4]6MP
Psycho Crusher Attack
Startup Active Recovery Cancel Damage Guard On Hit On Block
20 16 24 SA3 1400 LH KD +20(+35) -20(-5)
  • Anti-Air Invuln: 6-21f; Projectile Clash 20-35f (1-hit, meterless priority)
    • Forward hurtbox is Projectile Invuln 21-35f
  • Cancel Hitconfirm Window: 15f (Super); 1f later active frame gives 1f less hitconfirm time
  • Applies 30% damage scaling to next hit when beginning a combo (100/70/60...)
[4]6HP
Psycho Crusher Attack
Startup Active Recovery Cancel Damage Guard On Hit On Block
24 26 24 SA3 1600 LH KD +14(+39) -23(+2)
  • Anti-Air Invuln: 6-25f; Projectile Clash 24-49f (1-hit, meterless priority)
    • Forward hurtbox is Projectile Invuln 23-49f
  • Cancel Hitconfirm Window: 15f (Super); 1f later active frame gives 1f less hitconfirm time
  • Applies 30% damage scaling to next hit when beginning a combo (100/70/60...)
[4]6PP
Psycho Crusher Attack
Startup Active Recovery Cancel Damage Guard On Hit On Block
16 7,6,3 20 SA2* SA3 400x2,500 (1300) LH KD +35(+37) -3(-1)
  • Anti-Air Invuln: 6-17f; Projectile Invuln: 13-31f
  • Cancel Hitconfirm Window: 47f/35f/24f (Super); less hitconfirm time on later hits/active frames
  • Applies 30% damage scaling to next hit when beginning a combo (100/70/60...)


Psycho Crusher is Bison's highest damage combo ender and a strong gap-closing tool. All normal versions will clash with normal projectiles, and the OD version will beat them clean. Without a bomb, no version of Psycho Crusher will be plus. The move has anti-air invuln starting from frame 6 and projectile invuln once the flames around Bison ignite, making it Bison's default anti-air special.

As Psycho Crusher requires charge, learning to hold charge while buffering other inputs is crucial. This is especially important for Crusher, as the move can cancel into SA3 for huge damage meterless. Look for places to store charge in combos, such as 5MP > 2MP instead being input as 4MP > 1MP.

Crusher is Bison's major answer to fireballs, but using it as an anti-fireball tool can be tricky. Using it from fullscreen is a death sentence, and the back charge naturally forces you to hold down-back to avoid walking too far away. Consider using Shadow Rise alongside Crusher to maintain offensive threat. As Crusher is horribly minus on block, you really want to make sure you're going to connect with the opponent before going through with it.

An important thing to know for Crusher is that Bison is counted as airborne for the duration of the animation. This means Crusher will lose to most anti-air specials on reaction, making it difficult for him to apply Psycho Mine oki in certain matchups. Make sure to punish Bison players for trying this if you play a character with such a special!

OD Crusher avoids a lot of these issues, beating most projectiles and keeping Bison safe. It can be a great way to force yourself in if you don't want to take the risk of navigating neutral, while also being a great deterrent for overly-aggressive or jumpy opponents.

Psycho Crusher (Mine)
SF6 Classic.png [4]6P
SF6 Modern.png [4]6X
SF6 Mbison 46lp.png

SF6 Mbison 46pp mine.png
"Dynamite with a Lazer Beam"
SF6 Mbison 46lp hitbox.png
SF6 Mbison 46lp hitbox 2.png

SF6 Mbison 46pp hitbox.png
SF6 Mbison 46pp hitbox 2.png
SF6 Mbison 46pp hitbox 3.png
OD Version
Hitboxes Off
Hitboxes On

[4]6LP
Psycho Crusher (Mine)
Startup Active Recovery Cancel Damage Guard On Hit On Block
16 16,1 23 SA3 1200,500 (1700) LH KD +39(+42) +6
  • Detonates Psycho Mine on hit/block
  • Anti-Air Invuln: 6-17f; Projectile Clash 16-31f (1-hit, meterless priority)
    • Forward hurtbox is Projectile Invuln 17-31f
  • Cancel Hitconfirm Window: 17f (Super); 1f later active frame gives 1f less hitconfirm time
  • Applies 30% damage scaling to next hit when beginning a combo (100/70/60...)
[4]6MP
Psycho Crusher (Mine)
Startup Active Recovery Cancel Damage Guard On Hit On Block
20 16,1 23 SA3 1400,500 (1900) LH KD +39(+42) +6
  • Detonates Psycho Mine on hit/block
  • Anti-Air Invuln: 6-21f; Projectile Clash 20-35f (1-hit, meterless priority)
    • Forward hurtbox is Projectile Invuln 21-35f
  • Cancel Hitconfirm Window: 15f (Super); 1f later active frame gives 1f less hitconfirm time
  • Applies 30% damage scaling to next hit when beginning a combo (100/70/60...)
[4]6HP
Psycho Crusher (Mine)
Startup Active Recovery Cancel Damage Guard On Hit On Block
24 26,1 23 SA3 1600,500 (2100) LH KD +46(+51) +5
  • Detonates Psycho Mine on hit/block
  • Anti-Air Invuln: 6-25f; Projectile Clash 24-49f (1-hit, meterless priority)
    • Forward hurtbox is Projectile Invuln 23-49f
  • Cancel Hitconfirm Window: 15f (Super); 1f later active frame gives 1f less hitconfirm time
  • Applies 30% damage scaling to next hit when beginning a combo (100/70/60...)
[4]6PP
Psycho Crusher (Mine)
Startup Active Recovery Cancel Damage Guard On Hit On Block
16 7,6,3(1)1 18 - 400x4 (1600) LH KD +82(+83) +10
  • Detonates Psycho Mine on hit/block
  • Anti-Air Invuln: 6-17f; Projectile Invuln: 13-31f
  • Applies 30% damage scaling to next hit when beginning a combo (100/70/60...)
    • After OTG bounce, a late follow-up juggle also has 10% immediate scaling applied


With a mine on the opponent, Psycho Crusher goes from risky to advantageous. The mine explosion ensures it will be Bison's turn on block and turns the OD version into a terrifying juggle starter.

Most versions of Psycho Crusher will leave Bison at +5 or 6 if timed correctly, giving him a perfect opportunity for whatever mixup he wants. Notably, Backfist Combo > Meaty Psycho Crusher is incontestable outside of invulnerable moves or Perfect Parry, allowing Bison meterless okizeme if he chooses it.

On hit, Psycho Crusher detonates the mine for better damage and frame advantage. Where the real carnage starts is with OD Crusher, which puts the opponent in a unique cinematic juggle on hit. This juggle has incredible scaling and leads into full meter dumps for Bison. When optimized, an OD Crusher meter dump can deal close to 8k damage, easily putting an opponent in their place and potentially winning you the round. Even without the full meter dump, the juggle state is so advantageous that Bison can follow up with whatever he wants, ensuring high damage returns no matter the amount of Drive or super meter invested.

Double Knee Press (236K)
Double Knee Press
Scissor Kick
SF6 Classic.png 236K
SF6 Modern.png 236X or 6S (L)
SF6 Mbison 236lk.png

SF6 Mbison 236kk.png
OD Follow-up
SF6 Mbison 236lk hitbox.png

SF6 Mbison 236kk hitbox.png


SF6 Mbison 236kk hitbox 2.png
Hitboxes Off
Hitboxes On

236LK
Double Knee Press
Startup Active Recovery Cancel Damage Guard On Hit On Block
13 2(1)2 20(25) SA3 (1st) 300,500 (800) LH +2(+3) -5(-4)
  • Low Crush 7-15f (not airborne)
  • 5f extra recovery on whiff; Counter-Hit/Punish Counter bonus advantage carries through both hits
  • Cancel Hitconfirm Window: 16f (Super)
  • Applies 30% damage scaling to next hit when beginning a combo (100/70/60...)
236MK
Double Knee Press
Startup Active Recovery Cancel Damage Guard On Hit On Block
17 2(1)2 20(25) SA3 (1st) 300,600 (900) LH +3(+4) -5(-4)
  • Low Crush 11-19f (not airborne)
  • 5f extra recovery on whiff; Counter-Hit/Punish Counter bonus advantage carries through both hits
  • Cancel Hitconfirm Window: 16f (Super)
  • Applies 20% damage scaling to next hit when beginning a combo (100/80/70...)
236HK
Double Knee Press
Startup Active Recovery Cancel Damage Guard On Hit On Block
22 2(1)2 20(25) SA3 (1st) 500,700 (1200) LH +3(+4) -4(-3)
  • Low Crush 14-24f (not airborne)
  • 5f extra recovery on whiff; Counter-Hit/Punish Counter bonus advantage carries through both hits
  • Cancel Hitconfirm Window: 16f (Super)
236KK
Double Knee Press
Startup Active Recovery Cancel Damage Guard On Hit On Block
17 2(1)2(17)3 28 SA2 SA3 (2nd) 250x2,300 (800) LH KD +55 -15
  • Low Crush 12-19f (not airborne)
  • 3rd hit puts opponent into limited juggle state
  • Cancel Hitconfirm Window: 31f (Super); cancel is only useful to counter Drive Impact


Scissor Kicks are Bison's premier special move. On hit, Bison is left close to the opponent with frame advantage for an immediate strike/throw mixup. If spaced, he can use its low crush properties and relative safety to his advantage to demolish challenge attempts. Thanks to Scissor Kicks leaving the opponent standing, Bison can link out of Scissor Kicks on Counter-Hit/Punish Counter to further discourage challenge attempts.

OD Scissors loses the utility on block in favor of better conversions on hit. The launch is high enough for Bison to juggle Backfist Combo afterwards to set a Psycho Mine and start his gameplan. Additional launch height before OD Scissors gives him better juggles afterwards. The corner carry off of OD Scissors > HP Backfist is nearly half of the screen by itself, and it also leads into a perfect LP Crusher for okizeme.

Backfist Combo (214P)
Backfist Combo
SF6 Classic.png 214P
SF6 Modern.png 214X or 5S (M)
SF6 Mbison 214lp.png
SF6 Mbison 214lp 2.png

SF6 Mbison 214pp.png
SF6 Mbison 214pp 2.png
SF6 Mbison 214lp hitbox.png

SF6 Mbison 214pp hitbox.png
SF6 Mbison 214pp hitbox 2.png
Hitboxes Off
Hitboxes On

214LP
Backfist Combo
Startup Active Recovery Cancel Damage Guard On Hit On Block
13 2(10)5 25 SA3 (2nd) 300,400 (700) LH KD +24 -14
  • Plants a Psycho Mine on hit
  • Cancel Hitconfirm Window: 49f (Super)
214MP
Backfist Combo
Startup Active Recovery Cancel Damage Guard On Hit On Block
17 2(10)5 26 SA3 (2nd) 300,500 (800) LH KD +23 -15
  • Plants a Psycho Mine on hit
  • Cancel Hitconfirm Window: 49f (Super)
214HP
Backfist Combo
Startup Active Recovery Cancel Damage Guard On Hit On Block
22 3(10)5 26 SA3 (2nd) 300,600 (900) LH KD +31 -15
  • Plants a Psycho Mine on hit
  • Cancel Hitconfirm Window: 50f (Super)
214PP
Backfist Combo
Startup Active Recovery Cancel Damage Guard On Hit On Block
14 2(19)3(23)3 44 SA2 SA3 (3rd) 400x3 (1200) LH KD +24 -25
  • Plants a Psycho Mine on hit
  • Cancel Hitconfirm Window: 86f (Super)


Bison's new combo ender, and arguably his most important special. Does mediocre damage and sends the opponent midscreen after hit, but plants a Psycho Mine on them for later. More information on Psycho Mines and their use can be found under the respective special.

Bison ultimately has a choice between either this special or Psycho Crusher when looking to end a combo. Psycho Crusher leaves Bison at better advantage and does more damage, while Backfist Combo does worse damage but plants a mine. Backfist Combo has no real use in neutral or pressure without a mine attached to the opponent, so Bison should keep this move strictly for combos only.

OD Backfist Combo hits three times, and notably takes an extra second for the Psycho Mine counter. This means the Psycho Mine will detonate after five seconds instead of six. Bison can use this to force Psycho Mine mixups faster than usual, such as Throw > 6HP for an immediate overhead that combos. OD Backfist also combos into Level 3, making it a good cancel point if you lack charge for a Psycho Crusher.

Backfist Combo (Mine) (214P)
Backfist Combo (Mine)
SF6 Classic.png 214P
SF6 Modern.png 214X or 5S (M)
SF6 Mbison 214lp.png
SF6 Mbison 214lp 2.png

SF6 Mbison 214pp.png
SF6 Mbison 214pp 2.png
"Guaranteed to blow your mind..."
SF6 Mbison 214lp hitbox.png

SF6 Mbison 214pp hitbox.png
SF6 Mbison 214pp hitbox 2.png
"Anytiiiiiime~"
Hitboxes Off
Hitboxes On

214LP
Backfist Combo (Mine)
Startup Active Recovery Cancel Damage Guard On Hit On Block
13 2(10)5,1 24 SA3 (2nd) 300,500x2 (1300) LH KD +42 +6
  • Detonates Psycho Mine on hit/block
  • Cancel Hitconfirm Window: 51f (Super)
214MP
Backfist Combo (Mine)
Startup Active Recovery Cancel Damage Guard On Hit On Block
17 2(10)5,1 25 SA3 (2nd) 300,600,500 (1400) LH KD +42 +6
  • Detonates Psycho Mine on hit/block
  • Cancel Hitconfirm Window: 51f (Super)
214HP
Backfist Combo (Mine)
Startup Active Recovery Cancel Damage Guard On Hit On Block
22 3(10)5,1 25 SA3 (2nd) 300,700,500 (1500) LH KD +49 +6
  • Detonates Psycho Mine on hit/block
  • Cancel Hitconfirm Window: 52f (Super)
214PP
Backfist Combo (Mine)
Startup Active Recovery Cancel Damage Guard On Hit On Block
14 2(19)1(26)1,1 44 SA2 SA3 (4th) 400,500,400x2 (1700) LH KD +48 -3
  • Detonates Psycho Mine on hit/block
  • Cancel Hitconfirm Window: 103f (Super)


With a Psycho Mine on the opponent, Backfist Combo is a great tool for stripping Drive Gauge as it does 1.5 bars by itself. Bison can use this to end pressure sequences while maintaining advantage, allowing him to set up frame traps or throws.

On hit, Backfist Combo will detonate the active mine. The LP and MP versions lead to a safe jump in the corner, while the HP version leads into LP Psycho Crusher for a SA3 cancel. The OD version gives Bison a juggle with just enough frame advantage to land an LP Backfist Combo, allowing him to either resume pressure on wakeup or push another mixup.

Shadow Rise ([2]8K)
Shadow Rise
SF6 Classic.png [2]8K
SF6 Modern.png [2]8X or [2]S (M)
SF6 Mbison 28k.png
SF6 Mbison 28k hitbox.png
Hitboxes Off
Hitboxes On

[2]8K
Shadow Rise
Startup Active Recovery Cancel Damage Guard On Hit On Block
18~46 - 4/9/13 land - - - - -
  • Airborne 9-49f (Forced Knockdown state)
  • 40f charge time; charge lasts up to 10f after releasing down direction
  • Button strength determines trajectory and landing recovery time
    • LK short, 4f rec / MK mid, 9f rec / HK far, 14f rec
    • Bison is in a crouching state on the final landing recovery frame
  • Can input OD follow-ups with PP or KK
[2]8KK
Shadow Rise
Startup Active Recovery Cancel Damage Guard On Hit On Block
16~42 - 5 land - - - - -
  • Throw Invuln: 1-8f; Airborne 9-50f (Forced Knockdown state)
  • 40f charge time; charge lasts up to 10f after releasing down direction
  • Automatically tracks opponent's location; follow-ups automatically become the OD version
  • Bison is in a crouching state on the final landing recovery frame


A command jump that can lead to the Head Press or Devil Reverse follow-ups. The button strength determines how far the jump travels, allowing Bison to approach quickly or hang back to bait the opponent's response. The longer range versions have more landing recovery if no follow-up is input, making it riskier to approach with an empty jump. The jump height and variable follow-up timings make it difficult for opponents to consistently anti-air Bison's aerial approach.

The OD version automatically tracks the opponent's location. This makes it a better anti-zoning tool from long range where even the HK version won't reach, but it doesn't allow Bison to cross behind the opponent. Head Press and Devil Reverse automatically become their respective OD version without spending additional Drive meter.

Meterless Shadow Rise can also transition to these OD follow-ups. This gives you time to react to the opponent's response before you commit to spending meter. It also helps in certain juggle routes into OD Head Press, as HK Shadow Rise covers horizontal ground more quickly.

There are a few advantages to starting with OD Shadow Rise, however. It has throw invincibility on startup, which can help to escape corner throw loops. However, the follow-ups won't punish a meaty throw, and he can't steer the jump to fly out of the corner, so there is still some risk involved. The other advantage is that follow-ups can be input 2 frames earlier. While this doesn't sound significant, it can make a huge difference in specific scenarios; for example, if you land a corner knockdown with Backfist Combo and you expect the opponent will Drive Reversal your meaty normal, a cancel into OD Shadow Rise~OD Devil Reverse will land as a Punish Counter for incredible damage. Attempting the same setup with meterless Shadow Rise allows the opponent to block (except for Chun-Li and Dhalsim).

Devil Reverse ([2]8K~P)
Devil Reverse
SF6 Classic.png [2]8K~P
SF6 Modern.png [2]8X~S or [2]S~S
SF6 Mbison 28k p.png

SF6 Mbison 28kk p.png
OD Follow-up
SF6 Mbison 28k p hitbox.png
SF6 Mbison 28k p cross hitbox.png
Cross-up

SF6 Mbison 28kk p hitbox.png
OD Version
SF6 Mbison 28kk p cross hitbox.png
Cross-up
SF6 Mbison 28kk p hitbox 2.png
OD Follow-up
Hitboxes Off
Hitboxes On

[2]8K~P
Devil Reverse
Startup Active Recovery Cancel Damage Guard On Hit On Block
18+16 until land 10 land - 800 H KD +35(+43) +1(+9)
  • Can be steered left/right
  • Forced Knockdown state until landing
    • Bison is in a crouching state on the final landing recovery frame
[2]8KK~P or [2]8K~PP
Devil Reverse
Startup Active Recovery Cancel Damage Guard On Hit On Block
16+21 until land 5(10) land - 700x2 (1400) H KD +35(+43) +4(+10)
  • 2 hits; can be steered left/right
  • 5f extra landing recovery on whiff
  • Forced Knockdown state until landing
    • On whiff: Bison is in a crouching state on the final landing recovery frame
    • On hit/block: Bison is in a crouching state on all landing recovery frames


Bison descends from Shadow Rise with his hand outstretched and imbued with Psycho Power. His hand counts as an active hitbox, and leaves Bison plus when blocked.

Devil's Reverse is both a weird move to use and a weird move to deal with. It's best to think of this like a slow divekick- it's air-to-ground, leaves him plus on block or knocks down on hit, and punishes people with poor anti-air reactions.

You can steer Devil's Reverse upon hitting the input, allowing Bison to potentially dodge anti-air attempts if you're prescient. You can also use the move as an air-to-air callout, which has explosive results if a Psycho Mine is attached.

OD Devil's Reverse leaves Bison more plus on block and does more damage on hit. The move doesn't gain many advanced properties unless a mine is planted on the opponent.

Devil Reverse (Mine) ([2]8K~P)
Devil Reverse (Mine)
SF6 Classic.png [2]8K~P
SF6 Modern.png [2]8X~S or [2]S~S
SF6 Mbison 28k p.png

SF6 Mbison 28kk p.png
OD Follow-up
SF6 Mbison 28k p hitbox.png
SF6 Mbison 28k p cross hitbox.png
Cross-up

SF6 Mbison 28kk p hitbox.png
OD Version
SF6 Mbison 28kk p cross hitbox.png
Cross-up
SF6 Mbison 28kk p hitbox 2.png
OD Follow-up
Hitboxes Off
Hitboxes On

[2]8K~P
Devil Reverse (Mine)
Startup Active Recovery Cancel Damage Guard On Hit On Block
18+16 until land 8 land - 800,700,500 (2000) H KD +52(+58) +21(+27)
  • Detonates Psycho Mine on hit/block unless the final active frame connects
    • Does not detonate on Perfect Parry
  • Can be steered left/right
  • Puts opponents into limited juggle state (follow-ups possible in the corner)
  • Forced Knockdown state until landing
    • Bison is in a crouching state on all landing recovery frames
[2]8KK~P or [2]8K~PP
Devil Reverse (Mine)
Startup Active Recovery Cancel Damage Guard On Hit On Block
16+21 until land 8 land - 700x3,500 (2600) H KD +54(+59) +23(+28)
  • Detonates Psycho Mine on hit/block unless the final active frame connects
    • Does not detonate on Perfect Parry
  • Can be steered left/right
  • Puts opponents into limited juggle state (follow-ups possible in the corner)
  • Forced Knockdown state until landing
    • Bison is in a crouching state on all landing recovery frames


With a Psycho Mine attached, Devil's Reverse becomes a terrifying, highly damaging anti-ground move. If blocked, Devil's Reverse gives Bison huge plus frames, and if it hits, the mine detonates for additional damage and a great knockdown.

OD Devil's Reverse gains an additional hit that can be followed up with a Drive Rush normal. Despite hitting three times, this is one of Bison's best starters, and a full meterdump can lead to 6k or more damage.

Head Press ([2]8K~K)
Head Press
SF6 Classic.png [2]8K~K
SF6 Modern.png [2]8X~X or [2]S~X
SF6 Mbison 28k k.png
SF6 Mbison 28k k hitbox.png
Hitboxes Off
Hitboxes On

[2]8K~K
Head Press
Startup Active Recovery Cancel Damage Guard On Hit On Block
18+15 until land 26 land - 800 H -29(-23) -39(-38)
  • Bounces off opponent's head on hit/block (can steer left/right after bounce)
  • Bison can auto-correct to face opponent before descending; can hit cross-up
  • Punish Counter: HKD +13~15
  • Forced Knockdown state until landing
  • Puts airborne opponents into limited juggle OTG state, followed by HKD
    • No follow-up, but prevents Bison from being punishable on hit
[2]8KK~K or [2]8K~KK
Head Press
Startup Active Recovery Cancel Damage Guard On Hit On Block
16+15 until land 12 land - 2000(1200) H HKD +27 +4(+7)
  • Transitions to cinematic follow-up on grounded hit (causes a planted Psycho Mine to disappear)
  • Bison can auto-correct to face opponent before descending; can hit cross-up (but very rarely happens)
  • Lands near opponent on block (does not bounce away)
  • Forced Knockdown state until landing
  • Puts airborne opponents into limited juggle OTG state


Bison pauses mid-air, then quickly descends straight down with a stomp. This hesitation, combined with its solid hitbox, makes the move very difficult to anti-air; most AA normals and specials cannot hit cross-up and are likely to whiff underneath.

Meterless Head Press leads to the same situation on hit or block - while technically very unsafe, Bison can control his landing trajectory and threaten a follow-up attack, meaning he is rarely punishable without a hard read. Head Press scores a Hard Knockdown if it hits an airborne opponent or lands as a Punish Counter (like after a whiffed anti-air attempt), which eliminates the Skull Diver mixup but guarantees a strong oki situation.

OD Head Press leads to great damage on its cinematic hit, and on block he lands right in front of the opponent to continue his pressure. If the move connects on an airborne opponent, it does 800 less damage but allows a follow-up juggle from the ground bounce. This can be used in certain juggle routes, like after OD Psycho Crusher with a Psycho Mine. Midscreen, it's often better to use a meterless Shadow Rise (particularly the HK version) before inputting the OD Head Press with KK, as it lets Bison cover more distance.

Somersault Skull Diver ([2]8K~K~P)
Somersault Skull Diver
SF6 Classic.png [2]8K~K~P
SF6 Modern.png [2]8X~X~X or [2]S~X~X
SF6 Mbison 28k k p.png
SF6 Mbison 28k k p hitbox.png
Hitboxes Off
Hitboxes On

[2]8K~K~P
Somersault Skull Diver
Startup Active Recovery Cancel Damage Guard On Hit On Block
12 10 10 land - 800 H +8(+14) +3(+9)
  • Can be performed after meterless Head Press bounce on hit/block
  • Forced Knockdown state until landing
  • Puts airborne opponents into limited juggle state
  • Lower body hurtbox shifts upward 1-21f (startup + active)


A follow-up to a meterless Head Press that can be used as a left/right mixup or as a means of keeping himself safe. By bouncing far away from the opponent and coming down with Skull Diver, the opponent will have a much harder time punishing his retreat with Drive Rush. If the opponent tries to chase Bison with a jump, he can react and start a juggle.

Bison can hit the opponent on either side depending on which direction he is facing when the button is input, allowing for some tricky cross-up setups that are difficult to anti-air. It leaves him at a significant advantage on hit or block and deals a good chunk of Drive damage as well. This may cause opponents to parry instead, opening up an opportunity for Bison to land and punish with a Throw.


Super Arts

Level 1 Super (236236K)
Knee Press Nightmare
Level 1 Super Art
SF6 Classic.png 236236K
SF6 Modern.png 236236L or 5HS or 6HS
SF6 Mbison 236236k.png
SF6 Mbison 236236k hitbox.png


SF6 Mbison 236236k hitbox 2.png
Hitboxes Off
Hitboxes On

236236K
Knee Press Nightmare
Startup Active Recovery Cancel Damage Guard On Hit On Block
10 2(1)3(31)2(1)2 62 - 2000 (600~1200) LH KD +11
(KD +2)
-41
  • Strike/Throw Invuln: 1-11f; Armor Break
  • Only 1st hit allows Bison to enter full animation
    • 2nd-4th hits lead to weaker version with 600~1200 damage and +2 KD advantage
  • Causes a planted Psycho Mine to disappear on hit
  • Drive Gauge Depletion: 0.5 bars (hit) / 0.25 bars (block)
  • 30% minimum damage scaling


A forward-moving Super that reaches about half screen. From farther out, only the later hits connect, making the move considerably weaker and not worth using. It functions as Bison's primary reversal, only losing to projectiles or frame-perfect meaty safe jabs on some characters. However, the forward movement and hitbox position makes it a poor anti-air at most ranges.

Knee Press Nightmare is a solid juggle ender for tacking on damage, notably after a Psycho Mine infused HP Backfist or HP Psycho Crusher. Bison almost always has stronger cancel options, but it's possible to hitconfirm on reaction from his far-reaching 5HP for damage and corner carry. The threat of a cancel to SA1 also makes this poke viable against Drive Impact in neutral.

Bison does not get any follow-up oki on hit; when used midscreen, he ends up a full screen apart afterwards, and is still left about a half screen away against a cornered opponent. It also depletes any planted Psycho Mine, so using this Super often comes at the cost of future damage and pressure.

When attempting to chip out a burned out opponent with a raw SA1, every character except Dhalsim, Lily, and Zangief can jump to avoid it after the Super freeze. Additionally, Dhalsim can avoid it with teleport; Lily can counter with SA1, and Zangief can escape with SA1 or punish with SA2.

Level 2 Super (214214K)
Psycho Punisher
Level 2 Super Art
SF6 Classic.png 214214K
SF6 Modern.png 214214M or 4HS
SF6 Mbison 214214k.png
SF6 Mbison 214214k hitbox.png
Hitboxes Off
Hitboxes On

214214K
Psycho Punisher
Startup Active Recovery Cancel Damage Guard On Hit On Block
26 7 52 - 3000 LH HKD +23 -34
  • Full Invuln: 1-32f; Armor Break
  • Can steer left/right during startup; can hit cross-up
  • Causes a planted Psycho Mine to disappear on hit
  • Drive Gauge Depletion: 1 bar (hit) / 0.5 bars (block)
  • 40% minimum damage scaling


Bison leaps toward the opponent before stomping to the ground. If the move connects, the opponent is put into a brief cinematic.

While slow to startup, Psycho Punisher can reach any part of the screen, allowing Bison to punish ranged projectiles or install specials that would otherwise be too far to reach. In combos, it's best used after launches or ground bounces that can accommodate its slow speed; juggling into 5HP > SA2 or canceling from OD Backfist are good examples. Notably, OD Psycho Crusher does not naturally combo into SA2 despite being cancelable; be sure not to attempt this without a Psycho Mine planted.

While SA2 can hit on both sides, an opponent can easily parry or jump out of the way after the Super freeze. Because Bison is technically never considered airborne, moves with anti-air invincibility (like most meterless DPs) cannot counter SA2. Against an opponent in Burnout (or very close to it), using this Super with meaty timing after a knockdown or air reset could allow for an ambiguous left/right mixup. However, the risk of attempting this vastly outweighs the potential reward, so the cross-up hit should only be used to switch sides on a confirmed hit.

After the cinematic, Bison sends the opponent flying a full screen away; in the corner, he will remain close enough for strong oki. A forward dash leaves him at +4, which sets up an auto-timed strike/throw mixup and potential 5MP trade combos. DR~4HK hits as a last-frame meaty, becoming +11 oH / +8 oB, making it one of the strongest meaty options in the game.

Level 3 Super (236236P)
Unlimited Psycho Crusher
Level 3 Super Art
SF6 Classic.png 236236P
SF6 Modern.png 236236H or 2HS
SF6 Mbison 236236p.png

SF6 Mbison 236236p ca.png
Critical Art adds 500 more damage
SF6 Mbison 236236p hitbox.png
Critical Art adds 500 more damage
Hitboxes Off
Hitboxes On

236236P
Unlimited Psycho Crusher
Startup Active Recovery Cancel Damage Guard On Hit On Block
10(5) 6 65 - 4000 LH HKD +15 -46
  • Full Invuln: 1-15f; Armor Break
  • 5f startup when canceled from special moves
  • Causes a planted Psycho Mine to disappear on hit
  • Drive Gauge Depletion: 1.5 bars (hit) / 0.75 bars (block)
    • Cinematic time regenerates ~2 Drive bars for M. Bison
  • 50% minimum damage scaling; applies a 10% damage scaling penalty when canceled from special moves
236236P
Unlimited Psycho Crusher (CA)
Startup Active Recovery Cancel Damage Guard On Hit On Block
10(5) 6 65 - 4500 LH HKD +15 -46
  • Full Invuln: 1-15f; Armor Break
  • Available at 25% HP or below
  • 5f startup when canceled from special moves
  • Causes a planted Psycho Mine to disappear on hit
  • Drive Gauge Depletion: 2 bars (hit) / 1 bar (block)
    • Cinematic time regenerates ~2.2 Drive bars for M. Bison
  • 50% minimum damage scaling; applies 10% immediate damage scaling when canceled from special moves


A powerful version of Psycho Crusher with just under half screen range, making it a viable reversal and projectile punish in some matchups. Bison has many ways to combo into this Super, with Psycho Crusher generally being the strongest cancel route. With a Psycho Mine planted, both HP Backfist and HP Psycho Crusher juggle the opponent high enough to combo into SA3 without a cancel, which can increase the damage in low-scaling combo routes.

After the cinematic, Bison can Drive Rush to pressure the opponent. Attempting a Throw can get beaten by wakeup buttons, but the threat of eating a full combo can cause opponents to remain blocking. DR~2MP, 2MP is generally the best option for pressure and hitconfirms; 5MP trades with 4f normals, but the pushback prevents the powerful trade combos he can get in other oki scenarios.

When attempting to chip out a burned out opponent with a raw SA3, they will not be able to jump away after the Super freeze. Without an invincible Super, only Dhalsim (Teleport) and JP (Amnesia) can avoid the chip.


Taunts

Neutral Taunt (5PPPKKK)
Neutral Taunt
5PPPKKK
SF6 Mbison 5pppkkk.png
"A gnat like you will be buried here."

SF6 Mbison 5pppkkk 8.png
"A gnat like you is of no use to me."
(hold up)

SF6 Mbison 5pppkkk 2.png
"A gnat like you has no value to anyone. You're a worthless piece of trash!"
(hold down)

5PPPKKK
Neutral Taunt
Startup Active Recovery Cancel Damage Guard On Hit On Block
544 (total) - - - - - - -
  • Change to an alternate taunt by holding Up or Down on frame 235
5PPPKKK~8
Neutral Taunt (Up)
Startup Active Recovery Cancel Damage Guard On Hit On Block
475 (total) - - - - - - -
5PPPKKK~2
Neutral Taunt (Down)
Startup Active Recovery Cancel Damage Guard On Hit On Block
770 (total) - - - - - - -

Forward Taunt (6PPPKKK)
Forward Taunt
6PPPKKK
SF6 Mbison 6pppkkk.png
"Hmph. Do you fear me?"
SF6 Mbison 6pppkkk mine.png
"Three. Two. One. BOOM!"

6PPPKKK
Forward Taunt
Startup Active Recovery Cancel Damage Guard On Hit On Block
411 (total) - - - - - - -
6PPPKKK
Forward Taunt (Mine)
Startup Active Recovery Cancel Damage Guard On Hit On Block
409 2 150 - 500 LH KD -
  • Detonates a planted Psycho Mine at the end of the countdown
  • Activating the taunt can overwrite the previous Psycho Mine timer, extending its total time

Back Taunt (4PPPKKK)
Back Taunt
4PPPKKK
SF6 Mbison 4pppkkk.png
"My power howls. Face me!"
SF6 Mbison 4pppkkk 2.png
"Not yet."
SF6 Mbison 4pppkkk hitbox.png
"My power howls. Face me!"
SF6 Mbison 4pppkkk hitbox 2.png
"Not yet."
Hitboxes Off
Hitboxes On

4PPPKKK
Back Taunt
Startup Active Recovery Cancel Damage Guard On Hit On Block
400+42 (792 total) 4 202 - 0 - KD -96 -
  • Activates an unblockable strike if opponent steps within range
    • Knocks down for 0 damage; also comes out if opponent is behind M. Bison
    • If opponent does not approach: "Hmph. Coward."


SF6 Navigation

General
FAQ
HUD
Characters
A.K.I.
Akuma
Blanka
Cammy
Chun-Li
Dee Jay
Dhalsim
Ed
E. Honda
Guile
Jamie
JP
Juri
Ken
Kimberly
Lily
Luke
M. Bison
Mai
Manon
Marisa
Rashid
Ryu
Terry
Zangief
Data
Akuma
Cammy
Ed
Guile
Jamie
JP
Juri
Ken
Lily
Luke
Mai
Manon
Ryu
Terry