|
|
| Line 17: |
Line 17: |
| * Chains into {{clr|L|5LP}}/{{clr|L|2LP}}/{{clr|L|2LK}} | | * Chains into {{clr|L|5LP}}/{{clr|L|2LP}}/{{clr|L|2LK}} |
| * '''Cancel Hitconfirm Window:''' 12f | | * '''Cancel Hitconfirm Window:''' 12f |
| * '''{{clr|4|Drive Rush}} cancel advantage:''' {{sf6-adv|VP|+5}} oH / {{sf6-adv|E|0}} oB | | * '''{{clr|DR|Drive Rush}} cancel advantage:''' {{sf6-adv|VP|+5}} oH / {{sf6-adv|E|0}} oB |
| * Applies 20% damage scaling to next hit when beginning a combo (100/80/70...) | | * Applies 20% damage scaling to next hit when beginning a combo (100/80/70...) |
| <br> | | <br> |
| Line 36: |
Line 36: |
| * Chains into 5MP~HK target combo | | * Chains into 5MP~HK target combo |
| * '''Cancel Hitconfirm Window:''' 15f | | * '''Cancel Hitconfirm Window:''' 15f |
| * '''{{clr|4|Drive Rush}} cancel advantage:''' {{sf6-adv|VP|+12}} oH / {{sf6-adv|VP|+8}} oB | | * '''{{clr|DR|Drive Rush}} cancel advantage:''' {{sf6-adv|VP|+12}} oH / {{sf6-adv|VP|+8}} oB |
| <br> | | <br> |
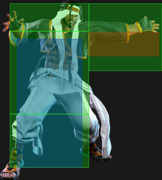
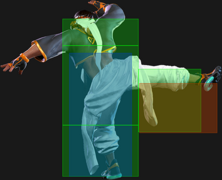
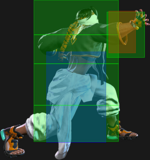
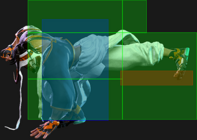
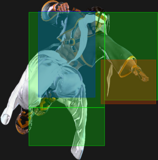
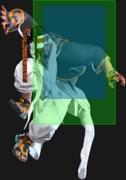
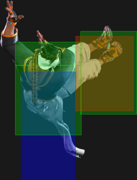
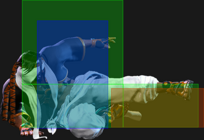
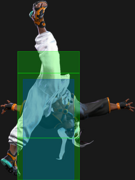
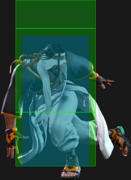
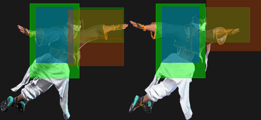
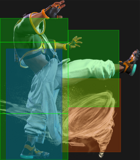
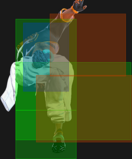
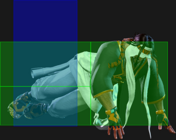
| One of Rashid's two medium normals with advantage on block. {{clr|M|5MP}} is a bit worse than {{clr|M|2MP}} in pressure due to its larger pushback, but it gives access to a useful launching Target Combo ({{clr|M|5MP}}~{{clr|H|HK}}) instead. This button also serves as useful combo filler after a {{clr|M|5MK}} starter. | | One of Rashid's two medium normals with advantage on block. {{clr|M|5MP}} is a bit worse than {{clr|M|2MP}} in pressure due to its larger pushback, but it gives access to a useful launching Target Combo ({{clr|M|5MP}}~{{clr|H|HK}}) instead. This button also serves as useful combo filler after a {{clr|M|5MK}} starter. |
|
| |
|
| Rashid can frame trap with light normals after {{clr|M|5MP}}, but his options out of this are very limited due to his generally stubby buttons. It is a great button to use out of {{clr|4|Drive Rush}} on both hit and block. | | Rashid can frame trap with light normals after {{clr|M|5MP}}, but his options out of this are very limited due to his generally stubby buttons. It is a great button to use out of {{clr|DR|Drive Rush}} on both hit and block. |
| }} | | }} |
|
| |
|
| Line 55: |
Line 55: |
| {{AttackDataCargo-SF6/Query|rashid_5hp}} | | {{AttackDataCargo-SF6/Query|rashid_5hp}} |
| * '''Cancel Hitconfirm Window:''' 17f | | * '''Cancel Hitconfirm Window:''' 17f |
| ** Special/{{clr|4|DR}} cancel is delayed until after 2nd active frame | | ** Special/{{clr|DR|DR}} cancel is delayed until after 2nd active frame |
| * '''{{clr|4|Drive Rush}} cancel advantage:''' {{sf6-adv|VP|+14}} oH / {{sf6-adv|VP|+9}} oB | | * '''{{clr|DR|Drive Rush}} cancel advantage:''' {{sf6-adv|VP|+14}} oH / {{sf6-adv|VP|+9}} oB |
| <br> | | <br> |
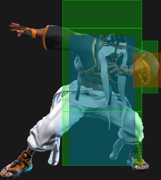
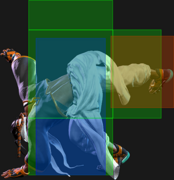
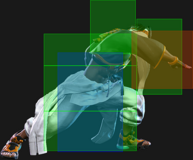
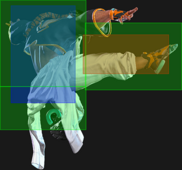
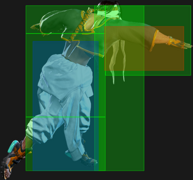
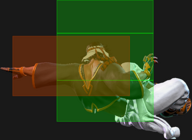
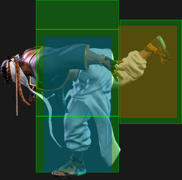
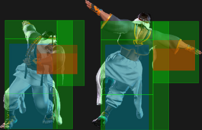
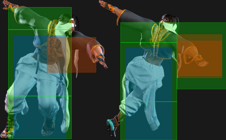
| A decent counterpoke due to its hitbox, but lacking the range to compete with some of the games stronger buttons. This button is great in many {{clr|4|Drive Rush}} combos, although it is too slow to combo from {{clr|M|2MK}} > {{clr|4|DRC}} without at least a Counter-hit advantage bonus. | | A decent counterpoke due to its hitbox, but lacking the range to compete with some of the games stronger buttons. This button is great in many {{clr|DR|Drive Rush}} combos, although it is too slow to combo from {{clr|M|2MK}} > {{clr|DR|DRC}} without at least a Counter-hit advantage bonus. |
|
| |
|
| Rashid has several useful cancel routes like {{clr|M|MK}}/{{clr|10|OD}} Eagle Spike or {{clr|10|OD Arabian Cyclone}}. With a Punish Counter or {{clr|4|DR~}}{{clr|H|5HP}} starter, you gain access to {{clr|H|HK Eagle Spike's}} enormous corner carry as well. | | Rashid has several useful cancel routes like {{clr|M|MK}}/{{clr|OD|OD}} Eagle Spike or {{clr|OD|OD Arabian Cyclone}}. With a Punish Counter or {{clr|DR|DR~}}{{clr|H|5HP}} starter, you gain access to {{clr|H|HK Eagle Spike's}} enormous corner carry as well. |
| }} | | }} |
|
| |
|
| Line 75: |
Line 75: |
| {{AttackDataCargo-SF6/Query|rashid_5lk}} | | {{AttackDataCargo-SF6/Query|rashid_5lk}} |
| * '''Cancel Hitconfirm Window:''' 13f | | * '''Cancel Hitconfirm Window:''' 13f |
| ** {{clr|4|DR}} cancel is delayed until after active frames | | ** {{clr|DR|DR}} cancel is delayed until after active frames |
| * '''{{clr|4|Drive Rush}} cancel advantage:''' {{sf6-adv|VP|+4}} oH / {{sf6-adv|E|0}} oB | | * '''{{clr|DR|Drive Rush}} cancel advantage:''' {{sf6-adv|VP|+4}} oH / {{sf6-adv|E|0}} oB |
| * Applies 20% damage scaling to next hit when beginning a combo (100/80/70...) | | * Applies 20% damage scaling to next hit when beginning a combo (100/80/70...) |
| <br> | | <br> |
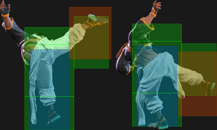
| {{clr|L|5LK}} has the most hitstun of any of Rashid's light normals, allowing it to combo into {{clr|L|214LK}}. The range is a little short, limiting Rashid's combo options; {{clr|4|DR~}}{{clr|L|2LK}} momentum is needed to link into this from a low chain. | | {{clr|L|5LK}} has the most hitstun of any of Rashid's light normals, allowing it to combo into {{clr|L|214LK}}. The range is a little short, limiting Rashid's combo options; {{clr|DR|DR~}}{{clr|L|2LK}} momentum is needed to link into this from a low chain. |
| }} | | }} |
|
| |
|
| Line 95: |
Line 95: |
| * 2f extra recovery on whiff | | * 2f extra recovery on whiff |
| <br> | | <br> |
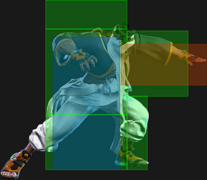
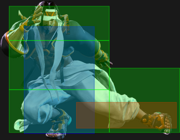
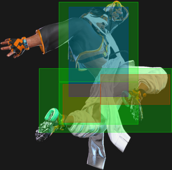
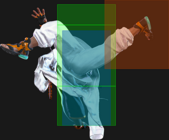
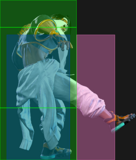
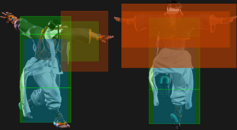
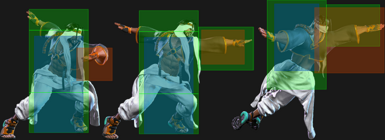
| One of Rashid's farthest reaching pokes, this combo starter links naturally into {{clr|M|5MP}} if close enough. Without {{clr|4|Drive Rush}} or Burnout, the block disadvantage will immediately end Rashid's pressure. | | One of Rashid's farthest reaching pokes, this combo starter links naturally into {{clr|M|5MP}} if close enough. Without {{clr|DR|Drive Rush}} or Burnout, the block disadvantage will immediately end Rashid's pressure. |
|
| |
|
| At max range, {{clr|M|5MK}} will not combo into anything, but on Counter-hit it links to itself for a little extra damage. Somewhat vulnerable to {{clr|4|Drive Impact}} since it cannot cancel, but Rashid has plenty of options to discourage random {{clr|4|DI}} usage. | | At max range, {{clr|M|5MK}} will not combo into anything, but on Counter-hit it links to itself for a little extra damage. Somewhat vulnerable to {{clr|DR|Drive Impact}} since it cannot cancel, but Rashid has plenty of options to discourage random {{clr|DR|DI}} usage. |
| }} | | }} |
|
| |
|
| Line 113: |
Line 113: |
| | info = | | | info = |
| {{AttackDataCargo-SF6/Query|rashid_5hk}} | | {{AttackDataCargo-SF6/Query|rashid_5hk}} |
| * Punish Counter: KD +49 Launch ({{sf6-jug|limited juggle}} state) | | * {{clr|PC|Punish Counter}}: KD +49 Launch ({{sf6-jug|limited juggle}} state) |
| * Puts airborne opponents into {{sf6-jug|limited juggle}} state | | * Puts airborne opponents into {{sf6-jug|limited juggle}} state |
| * Forces Stand on hit; final 2 active frames whiff on crouching opponents | | * Forces Stand on hit; final 2 active frames whiff on crouching opponents |
| Line 139: |
Line 139: |
| * Chains into {{clr|L|5LP}}/{{clr|L|2LP}}/{{clr|L|2LK}} | | * Chains into {{clr|L|5LP}}/{{clr|L|2LP}}/{{clr|L|2LK}} |
| * '''Cancel Hitconfirm Window:''' 13f | | * '''Cancel Hitconfirm Window:''' 13f |
| ** {{clr|4|DR}} cancel is delayed until after 2nd active frame | | ** {{clr|DR|DR}} cancel is delayed until after 2nd active frame |
| * '''{{clr|4|Drive Rush}} cancel advantage:''' {{sf6-adv|VP|+4}} oH / {{sf6-adv|M|-2}} oB | | * '''{{clr|DR|Drive Rush}} cancel advantage:''' {{sf6-adv|VP|+4}} oH / {{sf6-adv|M|-2}} oB |
| * Applies 20% damage scaling to next hit when beginning a combo (100/80/70...) | | * Applies 20% damage scaling to next hit when beginning a combo (100/80/70...) |
| <br> | | <br> |
| Line 162: |
Line 162: |
| * Can whiff on crouching opponents longer ranges | | * Can whiff on crouching opponents longer ranges |
| * '''Cancel Hitconfirm Window:''' 16f | | * '''Cancel Hitconfirm Window:''' 16f |
| * '''{{clr|4|Drive Rush}} cancel advantage:''' {{sf6-adv|VP|+11}} oH / {{sf6-adv|VP|+8}} oB | | * '''{{clr|DR|Drive Rush}} cancel advantage:''' {{sf6-adv|VP|+11}} oH / {{sf6-adv|VP|+8}} oB |
| <br> | | <br> |
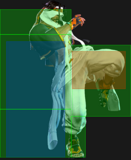
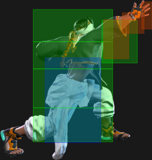
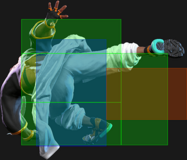
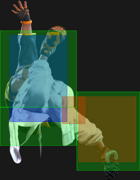
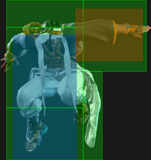
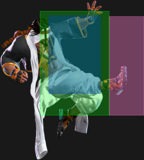
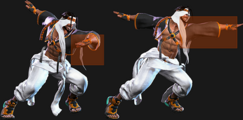
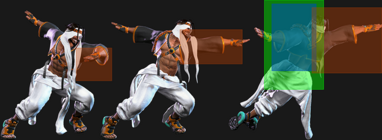
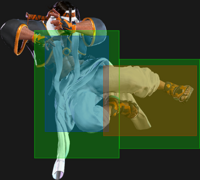
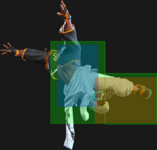
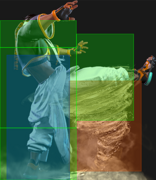
| Rashid's other plus on block normal alongside {{clr|M|5MP}}. In comparison, {{clr|M|2MP}} has more active frames and less pushback, making it better as a meaty tool. It is generally worse as combo filler because it often won't connect on the first active frame, so stick with {{clr|M|5MP}} for that purpose. | | Rashid's other plus on block normal alongside {{clr|M|5MP}}. In comparison, {{clr|M|2MP}} has more active frames and less pushback, making it better as a meaty tool. It is generally worse as combo filler because it often won't connect on the first active frame, so stick with {{clr|M|5MP}} for that purpose. |
| Line 186: |
Line 186: |
| One of Rashid's better ranged pokes, despite being a little slow on startup and recovery. It can be buffered into Supers to greatly increase its damage potential, and can even be canceled on reaction if you're fast enough. | | One of Rashid's better ranged pokes, despite being a little slow on startup and recovery. It can be buffered into Supers to greatly increase its damage potential, and can even be canceled on reaction if you're fast enough. |
|
| |
|
| {{clr|H|2HP}} can be used as a punish starter into {{clr|H|5HP}}, but the high pushback will cause combos to drop outside of close range. Its best combo use is in {{clr|4|Drive Rush}} cancels after {{clr|M|5MP}}, {{clr|H|5HP}}, or Punish Counter {{clr|M|2MK}}, providing the same link options without the finicky range issues. | | {{clr|H|2HP}} can be used as a punish starter into {{clr|H|5HP}}, but the high pushback will cause combos to drop outside of close range. Its best combo use is in {{clr|DR|Drive Rush}} cancels after {{clr|M|5MP}}, {{clr|H|5HP}}, or Punish Counter {{clr|M|2MK}}, providing the same link options without the finicky range issues. |
| }} | | }} |
|
| |
|
| Line 203: |
Line 203: |
| * Applies 20% damage scaling to next hit when beginning a combo (100/80/70...) | | * Applies 20% damage scaling to next hit when beginning a combo (100/80/70...) |
| <br> | | <br> |
| Rashid's {{clr|L|2LK}} is fairly standard, allowing for chains into either LP button that can be canceled for a low-damage combo. The pushback is higher than his other lights, so he won't be able to end a combo with {{clr|L|5LK}} > {{clr|L|214LK}}, but he can still get a 3-hit combo into Spinning Mixer. When used after {{clr|4|Drive Rush}}, Rashid can frame trap into {{clr|M|5MP}}, which also allows a quick confirm on hit. | | Rashid's {{clr|L|2LK}} is fairly standard, allowing for chains into either LP button that can be canceled for a low-damage combo. The pushback is higher than his other lights, so he won't be able to end a combo with {{clr|L|5LK}} > {{clr|L|214LK}}, but he can still get a 3-hit combo into Spinning Mixer. When used after {{clr|DR|Drive Rush}}, Rashid can frame trap into {{clr|M|5MP}}, which also allows a quick confirm on hit. |
| }} | | }} |
|
| |
|
| Line 218: |
Line 218: |
| {{AttackDataCargo-SF6/Query|rashid_2mk}} | | {{AttackDataCargo-SF6/Query|rashid_2mk}} |
| * '''Cancel Hitconfirm Window:''' 13f | | * '''Cancel Hitconfirm Window:''' 13f |
| ** {{clr|4|DR}} cancel is delayed until after active frames | | ** {{clr|DR|DR}} cancel is delayed until after active frames |
| * '''{{clr|4|Drive Rush}} cancel advantage:''' {{sf6-adv|VP|+8}} oH / {{sf6-adv|VP|+4}} oB | | * '''{{clr|DR|Drive Rush}} cancel advantage:''' {{sf6-adv|VP|+8}} oH / {{sf6-adv|VP|+4}} oB |
| * Applies 20% damage scaling to next hit when beginning a combo (100/80/70...) | | * Applies 20% damage scaling to next hit when beginning a combo (100/80/70...) |
| <br> | | <br> |
| Rashid's farthest reaching special cancelable move. This is an integral neutral tool as it can be useful to setup {{clr|4|Drive Rush}} or buffered special moves. The range is on the lower end when it comes to cancelable {{clr|M|2MKs}}, but it's also one of the faster ones at 7f startup. After confirming a hit into {{clr|4|Drive Rush}} cancel, Rashid's best link is {{clr|M|5MK}}, {{clr|H|5HP}}. If you whiff punish with {{clr|M|2MK}}, go into {{clr|H|2HP}}, {{clr|H|5HP}} instead for extra damage. | | Rashid's farthest reaching special cancelable move. This is an integral neutral tool as it can be useful to setup {{clr|DR|Drive Rush}} or buffered special moves. The range is on the lower end when it comes to cancelable {{clr|M|2MKs}}, but it's also one of the faster ones at 7f startup. After confirming a hit into {{clr|DR|Drive Rush}} cancel, Rashid's best link is {{clr|M|5MK}}, {{clr|H|5HP}}. If you whiff punish with {{clr|M|2MK}}, go into {{clr|H|2HP}}, {{clr|H|5HP}} instead for extra damage. |
| }} | | }} |
|
| |
|
| Line 236: |
Line 236: |
| | info = | | | info = |
| {{AttackDataCargo-SF6/Query|rashid_2hk}} | | {{AttackDataCargo-SF6/Query|rashid_2hk}} |
| * Counter-hit/Punish Counter: HKD +47 | | * {{clr|PC|Counter-hit/Punish Counter}}: HKD +47 |
| * Has juggle potential; not a Hard Knockdown when juggled into | | * Has juggle potential; not a Hard Knockdown when juggled into |
| * 4f extra recovery on block (block disadvantage is fixed regardless of which active frame connects) | | * 4f extra recovery on block (block disadvantage is fixed regardless of which active frame connects) |
| Line 386: |
Line 386: |
| * Counter-hit/Punish Counter bonus advantage applies to both hits | | * Counter-hit/Punish Counter bonus advantage applies to both hits |
| * '''Cancel Hitconfirm Window:''' 11f (1st hit only) | | * '''Cancel Hitconfirm Window:''' 11f (1st hit only) |
| * '''{{clr|4|Drive Rush}} cancel advantage:''' {{sf6-adv|VP|+13}} oH / {{sf6-adv|VP|+7}} oB | | * '''{{clr|DR|Drive Rush}} cancel advantage:''' {{sf6-adv|VP|+13}} oH / {{sf6-adv|VP|+7}} oB |
| * Can be affected by Air Current on frames 3-10 (travels fullscreen) | | * Can be affected by Air Current on frames 3-10 (travels fullscreen) |
| <br> | | <br> |
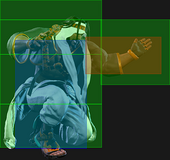
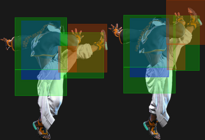
| Rashid takes a big step forward while attacking twice. The gap between hits is quite large, so the second hit is easily interrupted if the first hit whiffs in neutral. After a whiff punish, Rashid can link into a light normal to extend the combo. This is much easier to do if there is an Air Current on the screen due to the massive range buff it receives. | | Rashid takes a big step forward while attacking twice. The gap between hits is quite large, so the second hit is easily interrupted if the first hit whiffs in neutral. After a whiff punish, Rashid can link into a light normal to extend the combo. This is much easier to do if there is an Air Current on the screen due to the massive range buff it receives. |
|
| |
|
| The most common use for {{clr|M|6MP}} is to extend juggle combos by canceling the first hit. For example, after a corner {{clr|4|Drive Impact}} wallsplat, Rashid can juggle {{clr|H|5HP}} > {{clr|M|214MP}}, then juggling into {{clr|M|6MP}} > {{clr|H|236HP}}. There are various juggles where the height or spacing can be inconsistent, and starting with {{clr|M|6MP}} simplifies the combo. | | The most common use for {{clr|M|6MP}} is to extend juggle combos by canceling the first hit. For example, after a corner {{clr|DR|Drive Impact}} wallsplat, Rashid can juggle {{clr|H|5HP}} > {{clr|M|214MP}}, then juggling into {{clr|M|6MP}} > {{clr|H|236HP}}. There are various juggles where the height or spacing can be inconsistent, and starting with {{clr|M|6MP}} simplifies the combo. |
| }} | | }} |
|
| |
|
| Line 408: |
Line 408: |
| * Can be affected by Air Current on frames 4-25 (travels nearly fullscreen) | | * Can be affected by Air Current on frames 4-25 (travels nearly fullscreen) |
| <br> | | <br> |
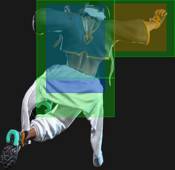
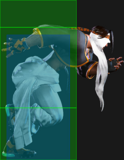
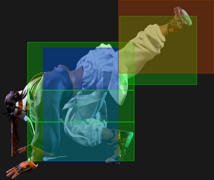
| Rashid hops forward and comes down with an overhead elbow that is safe on block and somewhat hard to see. With perfect spacing or meaty timing it is possible to link naturally into a light normal, but this is very precise. The range boost from an Air Current makes {{clr|H|6HP}} a great surprise attack in neutral, especially if there is an active {{clr|10|SA2}} tornado on screen. | | Rashid hops forward and comes down with an overhead elbow that is safe on block and somewhat hard to see. With perfect spacing or meaty timing it is possible to link naturally into a light normal, but this is very precise. The range boost from an Air Current makes {{clr|H|6HP}} a great surprise attack in neutral, especially if there is an active {{clr|SA|SA2}} tornado on screen. |
|
| |
|
| When used out of {{clr|4|Drive Rush}}, Rashid is slightly plus on block and can link into {{clr|M|5MP}} on hit, greatly increasing his damage potential. | | When used out of {{clr|DR|Drive Rush}}, Rashid is slightly plus on block and can link into {{clr|M|5MP}} on hit, greatly increasing his damage potential. |
| }} | | }} |
|
| |
|
| Line 431: |
Line 431: |
| * Can be affected by Air Current on frames 6-19 (travels fullscreen) | | * Can be affected by Air Current on frames 6-19 (travels fullscreen) |
| <br> | | <br> |
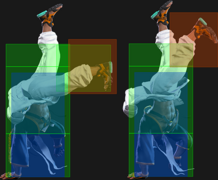
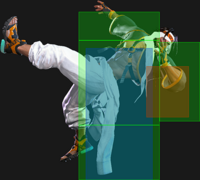
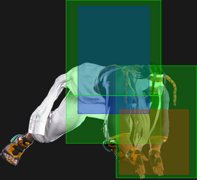
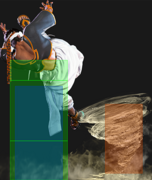
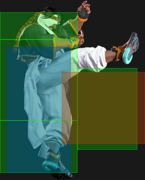
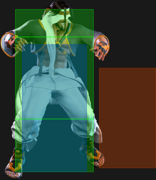
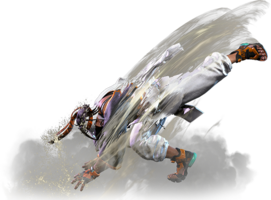
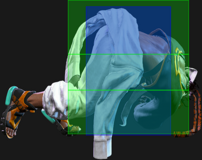
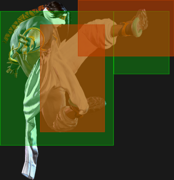
| A hopkick with decent range that can beat many low pokes in neutral while remaining safe on block. If spaced perfectly, it can be up to {{sf6-adv|VP|+5}} on hit and {{sf6-adv|E|0}} on block even without a {{clr|4|Drive Rush}} enhancement. After successfully punishing a low poke, the forward movement ensures Rashid will be in range to combo into {{clr|M|5MP}}. {{clr|H|6HK}} also works well after {{clr|4|Drive Rush}}; if the opponent uses delayed jabs to stuff attempted overheads, using {{clr|H|6HK}} instead is likely to result in a counter-hit. | | A hopkick with decent range that can beat many low pokes in neutral while remaining safe on block. If spaced perfectly, it can be up to {{sf6-adv|VP|+5}} on hit and {{sf6-adv|E|0}} on block even without a {{clr|DR|Drive Rush}} enhancement. After successfully punishing a low poke, the forward movement ensures Rashid will be in range to combo into {{clr|M|5MP}}. {{clr|H|6HK}} also works well after {{clr|DR|Drive Rush}}; if the opponent uses delayed jabs to stuff attempted overheads, using {{clr|H|6HK}} instead is likely to result in a counter-hit. |
|
| |
|
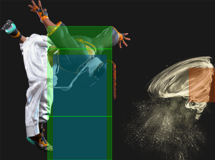
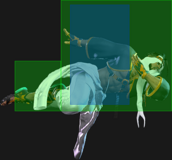
| Although Rashid's lower body hurtbox disappears during the flip, this move can still lose to particularly tall lows (such as Zangief's sweep). | | Although Rashid's lower body hurtbox disappears during the flip, this move can still lose to particularly tall lows (such as Zangief's sweep). |
| Line 475: |
Line 475: |
| * Shifts Rashid's hurtbox upward during startup | | * Shifts Rashid's hurtbox upward during startup |
| <br> | | <br> |
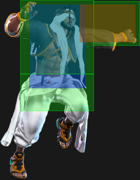
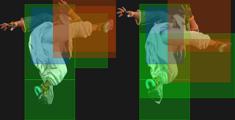
| Aerial Shot is a good air-to-air due to its knockdown potential, allowing Rashid to pick up juggles depending on the height it connects. The hitbox is relatively high up, making it harder to use against grounded opponents without getting anti-aired. After a {{clr|4|Drive Impact}} crumple, Rashid can use {{clr|H|j.8HK}} to knock the opponent into the air as he descends, opening up some useful juggle routes without excessive scaling or meter use. | | Aerial Shot is a good air-to-air due to its knockdown potential, allowing Rashid to pick up juggles depending on the height it connects. The hitbox is relatively high up, making it harder to use against grounded opponents without getting anti-aired. After a {{clr|DR|Drive Impact}} crumple, Rashid can use {{clr|H|j.8HK}} to knock the opponent into the air as he descends, opening up some useful juggle routes without excessive scaling or meter use. |
| }} | | }} |
|
| |
|
| Line 495: |
Line 495: |
| * Can be affected by Air Current for entire duration (except 18f recovery), increasing its speed | | * Can be affected by Air Current for entire duration (except 18f recovery), increasing its speed |
| <br> | | <br> |
| By inputting a dash and holding forward, Rashid transitions to a sprint animation. Can lead to 2 possible attack follow-ups. Useful for covering large distances when Rashid has significant knockdown advantage, but {{clr|4|Drive Rush}} is much better for approaching in neutral. | | By inputting a dash and holding forward, Rashid transitions to a sprint animation. Can lead to 2 possible attack follow-ups. Useful for covering large distances when Rashid has significant knockdown advantage, but {{clr|DR|Drive Rush}} is much better for approaching in neutral. |
| }} | | }} |
|
| |
|
| Line 522: |
Line 522: |
| * Can be affected by Air Current on frames 1-17 | | * Can be affected by Air Current on frames 1-17 |
| <br> | | <br> |
| Rashid's Slide can be used against most standard projectiles, but will not go under low ones like Juri {{clr|L|236LK}} or Rashid {{clr|10|236KK}}; the early frames of his meterless 236K is also low to the ground. Because Rashid has to perform a forward dash and wait 20f to start the slide, it is not practical as a pure reaction counter. Like most slides, it can be made safe if spaced near max range. This also helps Rashid stay close after a side switch on hit, opening up [https://www.youtube.com/watch?v=2_cXe1klgTc stronger follow-up routes]. Hitting a cornered opponent keeps Rashid at point blank for even easier follow-up conversions, with no Punish Counter required. | | Rashid's Slide can be used against most standard projectiles, but will not go under low ones like Juri {{clr|L|236LK}} or Rashid {{clr|OD|236KK}}; the early frames of his meterless 236K is also low to the ground. Because Rashid has to perform a forward dash and wait 20f to start the slide, it is not practical as a pure reaction counter. Like most slides, it can be made safe if spaced near max range. This also helps Rashid stay close after a side switch on hit, opening up [https://www.youtube.com/watch?v=2_cXe1klgTc stronger follow-up routes]. Hitting a cornered opponent keeps Rashid at point blank for even easier follow-up conversions, with no Punish Counter required. |
| {{AttackDataCargo-SF6/Query|rashid_66_hold_6k}} | | {{AttackDataCargo-SF6/Query|rashid_66_hold_6k}} |
| * '''Airborne/Throw Invuln:''' 6-21f ({{FKD}} state) | | * '''Airborne/Throw Invuln:''' 6-21f ({{FKD}} state) |
| Line 530: |
Line 530: |
| * Can be affected by Air Current on frames 1-3 (becomes Enhanced version) | | * Can be affected by Air Current on frames 1-3 (becomes Enhanced version) |
| <br> | | <br> |
| The airborne frames of Run~6K make this useful against throw tech and low pokes, granting a link to {{clr|M|5MP}} on Punish Counter. This can be especially useful against opponents who wake up with {{clr|M|2MK}} to call out your shimmy attempt. However, it's unsafe on block unless it is well-spaced (or the opponent is in Burnout); canceling into {{clr|10|SA2}} is the only other way to keep it safe. | | The airborne frames of Run~6K make this useful against throw tech and low pokes, granting a link to {{clr|M|5MP}} on Punish Counter. This can be especially useful against opponents who wake up with {{clr|M|2MK}} to call out your shimmy attempt. However, it's unsafe on block unless it is well-spaced (or the opponent is in Burnout); canceling into {{clr|SA|SA2}} is the only other way to keep it safe. |
| {{AttackDataCargo-SF6/Query|rashid_66_hold_6k_enhanced}} | | {{AttackDataCargo-SF6/Query|rashid_66_hold_6k_enhanced}} |
| * '''Airborne''' 21-36f ({{FKD}} state) | | * '''Airborne''' 21-36f ({{FKD}} state) |
| Line 536: |
Line 536: |
| * Applies 20% damage scaling to next hit when beginning a combo; counts as 2 hits for damage scaling when comboed into (applies to next hit) | | * Applies 20% damage scaling to next hit when beginning a combo; counts as 2 hits for damage scaling when comboed into (applies to next hit) |
| <br> | | <br> |
| The enhanced version of Run~6K is mostly used for corner carry juggles. One common route is {{clr|M|5MP}}~{{clr|H|HK}} > {{clr|10|214PP}}, followed by Run~6HK to force an OTG bounce. If the first hit doesn't connect, the move can still cause a regular knockdown. However, it's more unsafe than the non-enhanced version due to being {{sf6-adv|VM|-5}} and having lots of forward momentum. Unlike the regular version, it cannot be Super canceled. | | The enhanced version of Run~6K is mostly used for corner carry juggles. One common route is {{clr|M|5MP}}~{{clr|H|HK}} > {{clr|OD|214PP}}, followed by Run~6HK to force an OTG bounce. If the first hit doesn't connect, the move can still cause a regular knockdown. However, it's more unsafe than the non-enhanced version due to being {{sf6-adv|VM|-5}} and having lots of forward momentum. Unlike the regular version, it cannot be Super canceled. |
| }} | | }} |
|
| |
|
| Line 565: |
Line 565: |
| Side Flip enhances Rashid's already great mobility options, giving him a side switch and multiple air trajectories to confuse the opponent. | | Side Flip enhances Rashid's already great mobility options, giving him a side switch and multiple air trajectories to confuse the opponent. |
|
| |
|
| With an active Air Current, Rashid gains massive distance on 6KK and on all versions of the flip. This can be useful to escape the corner or for {{clr|10|SA2}} tornado mixups. | | With an active Air Current, Rashid gains massive distance on 6KK and on all versions of the flip. This can be useful to escape the corner or for {{clr|SA|SA2}} tornado mixups. |
| }} | | }} |
| <br> | | <br> |
| Line 584: |
Line 584: |
| * True blockstring even at max delay | | * True blockstring even at max delay |
| * '''Cancel Hitconfirm Window:''' 49f | | * '''Cancel Hitconfirm Window:''' 49f |
| ** Special/{{clr|4|DR}} cancel is delayed until after 4th recovery frame | | ** Special/{{clr|DR|DR}} cancel is delayed until after 4th recovery frame |
| * '''{{clr|4|Drive Rush}} cancel advantage:''' KD +65 oH / {{sf6-adv|P|+3}} oB | | * '''{{clr|DR|Drive Rush}} cancel advantage:''' KD +65 oH / {{sf6-adv|P|+3}} oB |
| * Counts as 2 hits for damage scaling when comboed into (applies to next hit) | | * Counts as 2 hits for damage scaling when comboed into (applies to next hit) |
| <br> | | <br> |
| A useful Target Combo extension from {{clr|M|5MP}}. The timing of the cancel window doesn't allow Eagle Spike to connect outside of the corner, but Rashid can use {{clr|10|214PP}} into Run~6K for great corner carry and a follow-up juggle. The two hits of the TC are always a true blockstring, so even on a missed hitconfirm you can simply cancel to {{clr|L|236LP}} for safety on block. | | A useful Target Combo extension from {{clr|M|5MP}}. The timing of the cancel window doesn't allow Eagle Spike to connect outside of the corner, but Rashid can use {{clr|OD|214PP}} into Run~6K for great corner carry and a follow-up juggle. The two hits of the TC are always a true blockstring, so even on a missed hitconfirm you can simply cancel to {{clr|L|236LP}} for safety on block. |
| }} | | }} |
| <br> | | <br> |
| Line 604: |
Line 604: |
| | info = | | | info = |
| {{AttackDataCargo-SF6/Query|rashid_lplk}} | | {{AttackDataCargo-SF6/Query|rashid_lplk}} |
| * Punish Counter: HKD +27 | | * {{clr|PC|Punish Counter}}: HKD +27 |
| * Applies 20% immediate damage scaling when comboed into (e.g. after Crumple) | | * Applies 20% immediate damage scaling when comboed into (e.g. after Crumple) |
| <br> | | <br> |
| Rashid gets excellent knockdown advantage on his forward throw, allowing for a corner throw loop that can be mixed up with a shimmy to bait the opponent's throw tech. Each throw must be manually timed, as he has too much knockdown advantage after a dash to throw immediately. Remember that holding forward after a dash results in a Run, which will affect the throw loop setup. | | Rashid gets excellent knockdown advantage on his forward throw, allowing for a corner throw loop that can be mixed up with a shimmy to bait the opponent's throw tech. Each throw must be manually timed, as he has too much knockdown advantage after a dash to throw immediately. Remember that holding forward after a dash results in a Run, which will affect the throw loop setup. |
|
| |
|
| Midscreen, the opponent is left too far away for Rashid to get oki even with {{clr|4|Drive Rush}}. | | Midscreen, the opponent is left too far away for Rashid to get oki even with {{clr|DR|Drive Rush}}. |
| }} | | }} |
|
| |
|
| Line 624: |
Line 624: |
| {{AttackDataCargo-SF6/Query|rashid_4lplk}} | | {{AttackDataCargo-SF6/Query|rashid_4lplk}} |
| * Side switch | | * Side switch |
| * Punish Counter: HKD +24 | | * {{clr|PC|Punish Counter}}: HKD +24 |
| * Applies 20% immediate damage scaling when comboed into (e.g. after Crumple) | | * Applies 20% immediate damage scaling when comboed into (e.g. after Crumple) |
| <br> | | <br> |
| After the side switch, Rashid is left far from the opponent. He can chase them down with {{clr|4|DR~}}{{clr|H|6HK}} anywhere on the screen, which will beat wakeup buttons and leave him {{sf6-adv|P|+1}} on block. In the corner, another option is {{clr|4|DR~}}{{clr|H|2HP}}; this has massive pushback on hit or block, but allows a link directly into {{clr|10|SA1}}. Rashid's {{clr|4|Drive Rush}} momentum does not carry him far enough to attempt a throw mixup even if the opponent respects these options and commits to blocking. | | After the side switch, Rashid is left far from the opponent. He can chase them down with {{clr|DR|DR~}}{{clr|H|6HK}} anywhere on the screen, which will beat wakeup buttons and leave him {{sf6-adv|P|+1}} on block. In the corner, another option is {{clr|DR|DR~}}{{clr|H|2HP}}; this has massive pushback on hit or block, but allows a link directly into {{clr|SA|SA1}}. Rashid's {{clr|DR|Drive Rush}} momentum does not carry him far enough to attempt a throw mixup even if the opponent respects these options and commits to blocking. |
| }} | | }} |
|
| |
|
| Line 641: |
Line 641: |
| | info = | | | info = |
| {{AttackDataCargo-SF6/Query|rashid_jlplk}} | | {{AttackDataCargo-SF6/Query|rashid_jlplk}} |
| * Punish Counter: HKD +27 | | * {{clr|PC|Punish Counter}}: HKD +27 |
| <br> | | <br> |
| Air Throw is a good air-to-air against close range jumps. Rashid slides on the opponent like a skateboard, taking them toward the corner. In the corner, he can get follow-up oki with {{clr|4|Drive Rush}}, but midscreen he is left quite far away from the opponent. | | Air Throw is a good air-to-air against close range jumps. Rashid slides on the opponent like a skateboard, taking them toward the corner. In the corner, he can get follow-up oki with {{clr|DR|Drive Rush}}, but midscreen he is left quite far away from the opponent. |
| }} | | }} |
| <br> | | <br> |
| Line 663: |
Line 663: |
| * On Block: Applies 20% scaling multiplier to all follow-up hits after Wall Splat; the next attack can incur additional Starter Scaling | | * On Block: Applies 20% scaling multiplier to all follow-up hits after Wall Splat; the next attack can incur additional Starter Scaling |
| * Combos when canceled from Punish Counter {{clr|H|5HP}}/{{clr|M|6MP}} (no corner wallsplat; useful for depleting Drive gauge, especially after Perfect Parry) | | * Combos when canceled from Punish Counter {{clr|H|5HP}}/{{clr|M|6MP}} (no corner wallsplat; useful for depleting Drive gauge, especially after Perfect Parry) |
| * A blocked {{clr|4|DI}} can combo into another {{clr|4|DI}} if opponent is not fully cornered (Stuns if opponent has less than 1.5 Drive bars) | | * A blocked {{clr|DR|DI}} can combo into another {{clr|DR|DI}} if opponent is not fully cornered (Stuns if opponent has less than 1.5 Drive bars) |
| ** This happens because a blocked {{clr|4|DI}} is not considered a "hit" for combo purposes | | ** This happens because a blocked {{clr|DR|DI}} is not considered a "hit" for combo purposes |
| ** Causes both the 20% Starter and 20% Multiplier scaling to apply to the follow-up combo | | ** Causes both the 20% Starter and 20% Multiplier scaling to apply to the follow-up combo |
| See [[Street_Fighter_6/Gauges#Drive_Impact|Drive Impact]] on the Gauges page for more details. | | See [[Street_Fighter_6/Gauges#Drive_Impact|Drive Impact]] on the Gauges page for more details. |
| Line 679: |
Line 679: |
| * '''Marisa (214K)''', frame 3 armor | | * '''Marisa (214K)''', frame 3 armor |
| * '''Zangief ({{clr|H|5[HP]}})''', frame 4 armor | | * '''Zangief ({{clr|H|5[HP]}})''', frame 4 armor |
| It's important to use a blockstring that cannot be absorbed by their armor/counter moves. Ideally, the string should also not be a true combo, or it will cause a Lock and prevent Stun.<br>{{clr|10|*}} Denotes a move that causes Lock on Counter-hit, allowing the opponent to escape a Stun by mashing on wakeup. | | It's important to use a blockstring that cannot be absorbed by their armor/counter moves. Ideally, the string should also not be a true combo, or it will cause a Lock and prevent Stun.<br>{{clr|OD|*}} Denotes a move that causes Lock on Counter-hit, allowing the opponent to escape a Stun by mashing on wakeup. |
| * {{clr|4|DR~}}{{clr|H|5HP}}{{clr|10|*}} > delay {{clr|4|DI}}: 1f blockstring gap prevents opponent from absorbing the hit (delay must be frame-perfect) | | * {{clr|DR|DR~}}{{clr|H|5HP}}{{clr|OD|*}} > delay {{clr|DR|DI}}: 1f blockstring gap prevents opponent from absorbing the hit (delay must be frame-perfect) |
| * {{clr|4|DR~}}{{clr|M|5MP}}{{clr|10|*}} > {{clr|4|DI}}: 2f blockstring gap prevents opponent from absorbing the hit | | * {{clr|DR|DR~}}{{clr|M|5MP}}{{clr|OD|*}} > {{clr|DR|DI}}: 2f blockstring gap prevents opponent from absorbing the hit |
| * {{clr|4|DR~}}{{clr|M|6MP}}{{clr|10|*}} > {{clr|4|DI}}: 2f blockstring gap prevents opponent from absorbing the hit | | * {{clr|DR|DR~}}{{clr|M|6MP}}{{clr|OD|*}} > {{clr|DR|DI}}: 2f blockstring gap prevents opponent from absorbing the hit |
| * {{clr|4|DR~}}{{clr|M|2MP}} > {{clr|4|DI}}: 2f blockstring gap prevents opponent from absorbing the hit | | * {{clr|DR|DR~}}{{clr|M|2MP}} > {{clr|DR|DI}}: 2f blockstring gap prevents opponent from absorbing the hit |
| * {{clr|4|DR~}}{{clr|M|2MK}} > {{clr|4|DI}}: 3f blockstring gap will work vs. Zangief {{clr|H|5[HP]}} | | * {{clr|DR|DR~}}{{clr|M|2MK}} > {{clr|DR|DI}}: 3f blockstring gap will work vs. Zangief {{clr|H|5[HP]}} |
| }} | | }} |
|
| |
|
| Line 741: |
Line 741: |
| ** Can also be performed from whiffed cancelable light normals | | ** Can also be performed from whiffed cancelable light normals |
| See [[Street_Fighter_6/Gauges#Drive_Rush|Drive Rush]] on the Gauges page for more details. See Strategy page for [[Street_Fighter_6/Rashid/Strategy#Drive_Rush|Blockstring Gaps and Combo Routes]] | | See [[Street_Fighter_6/Gauges#Drive_Rush|Drive Rush]] on the Gauges page for more details. See Strategy page for [[Street_Fighter_6/Rashid/Strategy#Drive_Rush|Blockstring Gaps and Combo Routes]] |
| * Startup refers to minimum time before an attack can cancel the {{clr|4|Drive Rush}} animation | | * Startup refers to minimum time before an attack can cancel the {{clr|DR|Drive Rush}} animation |
| * The first 15 recovery frames are cancelable into any attack | | * The first 15 recovery frames are cancelable into any attack |
| * The final 22 recovery frames are cancelable into any attack or movement option or blocking (except Parry) | | * The final 22 recovery frames are cancelable into any attack or movement option or blocking (except Parry) |
| * Only Normal and Command Normal attacks are enhanced with '''+4''' frame advantage and improved juggle properties | | * Only Normal and Command Normal attacks are enhanced with '''+4''' frame advantage and improved juggle properties |
| * Applies 15% damage scaling multiplier to any follow-up hits when used mid-combo | | * Applies 15% damage scaling multiplier to any follow-up hits when used mid-combo |
| ** Only applies scaling once per combo; does not apply when a {{clr|4|Drive Rush}} enhanced attack starts the combo | | ** Only applies scaling once per combo; does not apply when a {{clr|DR|Drive Rush}} enhanced attack starts the combo |
|
| |
|
| Distance: | | Distance: |
| * 0.796 (min, cancel into immediate Throw) | | * 0.796 (min, cancel into immediate Throw) |
| * 2.253 (min, earliest blocking/movement frame) | | * 2.253 (min, earliest blocking/movement frame) |
| * 2.998 (max, final {{clr|4|DR}} frame) | | * 2.998 (max, final {{clr|DR|DR}} frame) |
| }} | | }} |
| <br> | | <br> |
| Line 779: |
Line 779: |
| | info = | | | info = |
| {{AttackDataCargo-SF6/Query|rashid_236lp}} | | {{AttackDataCargo-SF6/Query|rashid_236lp}} |
| * Counter-hit/Punish Counter bonus advantage applies through all hits (especially useful vs. {{clr|4|Drive Impact}}) | | * Counter-hit/Punish Counter bonus advantage applies through all hits (especially useful vs. {{clr|DR|Drive Impact}}) |
| * '''Cancel Hitconfirm Window:''' 10f (Super, 1st hit) | | * '''Cancel Hitconfirm Window:''' 10f (Super, 1st hit) |
| * Applies 30% damage scaling to next hit when beginning a combo (100/70/60...) | | * Applies 30% damage scaling to next hit when beginning a combo (100/70/60...) |
| Line 804: |
Line 804: |
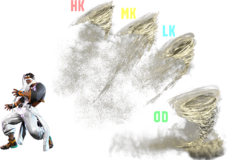
| Spinning Mixer is a great special move due to its versatility; each version brings something unique to the table. | | Spinning Mixer is a great special move due to its versatility; each version brings something unique to the table. |
|
| |
|
| 236LP is a good buffer from Rashid's light normals due to its safety on block. While it's not a good idea to consistently put yourself in a {{sf6-adv|M|-3}} situation, Rashid's stubby cancelable normals often don't permit him to get close enough for a proper hitconfirm. Using 5LP > 236LP to interrupt the opponent's pressure is often a good way to take back Rashid's turn, and it has the added benefit of breaking {{clr|4|Drive Impact}} armor if done early enough, allowing a link into another 5LP. On hit, this move does mediocre damage and corner carry, but allows for a strike/throw mixup. If the opponent is in Burnout, 236LP is {{sf6-adv|P|+1}} on block; this allows for some limited follow-up pressure, but the pushback is too high for Rashid to loop this continuously. | | 236LP is a good buffer from Rashid's light normals due to its safety on block. While it's not a good idea to consistently put yourself in a {{sf6-adv|M|-3}} situation, Rashid's stubby cancelable normals often don't permit him to get close enough for a proper hitconfirm. Using 5LP > 236LP to interrupt the opponent's pressure is often a good way to take back Rashid's turn, and it has the added benefit of breaking {{clr|DR|Drive Impact}} armor if done early enough, allowing a link into another 5LP. On hit, this move does mediocre damage and corner carry, but allows for a strike/throw mixup. If the opponent is in Burnout, 236LP is {{sf6-adv|P|+1}} on block; this allows for some limited follow-up pressure, but the pushback is too high for Rashid to loop this continuously. |
|
| |
|
| 236MP also works consistently from light hitconfirms, giving a knockdown and more corner carry than the LP version. The damage is a little lower, but in the corner Rashid can cancel his landing frames into 236PP to make it more rewarding. In certain juggles, these landing frames can also juggle into a Super. MP Mixer gives Rashid a reliable meterless pickup after Punish Counter 5HK, which is great for his whiff punish game. It can be used as an anti-air at certain ranges where 236HP won't reach, but the timing window is somewhat strict and may lose to strong jump-ins. | | 236MP also works consistently from light hitconfirms, giving a knockdown and more corner carry than the LP version. The damage is a little lower, but in the corner Rashid can cancel his landing frames into 236PP to make it more rewarding. In certain juggles, these landing frames can also juggle into a Super. MP Mixer gives Rashid a reliable meterless pickup after Punish Counter 5HK, which is great for his whiff punish game. It can be used as an anti-air at certain ranges where 236HP won't reach, but the timing window is somewhat strict and may lose to strong jump-ins. |
| Line 859: |
Line 859: |
| Enhanced 236MP travels fullscreen and does almost twice as much damage as the standard version. While it's great at taking the opponent to the corner, it no longer allows a follow-up OD Spinning Mixer juggle. | | Enhanced 236MP travels fullscreen and does almost twice as much damage as the standard version. While it's great at taking the opponent to the corner, it no longer allows a follow-up OD Spinning Mixer juggle. |
|
| |
|
| Enhanced 236HP is the highest damage version of Spinning Mixer. Otherwise, it is mostly the same as the standard version, and is useful if the opponent is too late jumping over a 236[K] or a whiffed 214PP. Many {{clr|10|SA2}} juggles will end with this move. | | Enhanced 236HP is the highest damage version of Spinning Mixer. Otherwise, it is mostly the same as the standard version, and is useful if the opponent is too late jumping over a 236[K] or a whiffed 214PP. Many {{clr|SA|SA2}} juggles will end with this move. |
|
| |
|
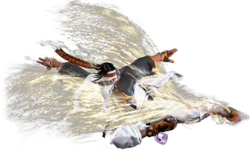
| At only 4f startup, Enhanced 236PP is the fastest invincible reversal in the game. It can be used to catch jumps or whiffed attacks from long range; however, the invincibility window is shortened to match the faster startup, so it's not always reliable in those situations. The main benefit of Enhanced OD Mixer is that it cancels to Arabian Skyhigh (j.214K) in mid-air, giving Rashid a high damage extension. This cancel also works on block, which may confuse the opponent enough for them to mess up their punish attempt. | | At only 4f startup, Enhanced 236PP is the fastest invincible reversal in the game. It can be used to catch jumps or whiffed attacks from long range; however, the invincibility window is shortened to match the faster startup, so it's not always reliable in those situations. The main benefit of Enhanced OD Mixer is that it cancels to Arabian Skyhigh (j.214K) in mid-air, giving Rashid a high damage extension. This cancel also works on block, which may confuse the opponent enough for them to mess up their punish attempt. |
| Line 901: |
Line 901: |
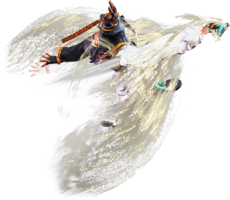
| Rashid flies forward with a thrusting kick, dealing solid damage and corner carry. It is usually the preferred ender when possible, but the slow startup makes it much more restrictive in combos than [[#Spinning_Mixer_(236P)|Spinning Mixer]]. The great KD advantage lets Rashid set up his bag of tricks, like a fully charged [[#Whirlwind_Shot_(236K)|Whirlwind Shot]] after the MK and HK versions. OD Eagle Spike can be used in combos to escape the corner and score some extra juggle damage. | | Rashid flies forward with a thrusting kick, dealing solid damage and corner carry. It is usually the preferred ender when possible, but the slow startup makes it much more restrictive in combos than [[#Spinning_Mixer_(236P)|Spinning Mixer]]. The great KD advantage lets Rashid set up his bag of tricks, like a fully charged [[#Whirlwind_Shot_(236K)|Whirlwind Shot]] after the MK and HK versions. OD Eagle Spike can be used in combos to escape the corner and score some extra juggle damage. |
|
| |
|
| All versions are massively unsafe on block; while he bounces far away, {{clr|4|Drive Rush}} makes it trivial to punish with a strong combo. On all blocked Eagle Spikes, Rashid bounces off with a fixed recovery; this means that he cannot make the move safer by connecting on a later active frame. This does not apply on hit, as he can get better KD advantage on a late connect; this even allows unique juggles after a well-spaced corner 214LK, such as 236LP > 236MP > 236PP. | | All versions are massively unsafe on block; while he bounces far away, {{clr|DR|Drive Rush}} makes it trivial to punish with a strong combo. On all blocked Eagle Spikes, Rashid bounces off with a fixed recovery; this means that he cannot make the move safer by connecting on a later active frame. This does not apply on hit, as he can get better KD advantage on a late connect; this even allows unique juggles after a well-spaced corner 214LK, such as 236LP > 236MP > 236PP. |
|
| |
|
| If Eagle Spike passes through an active Air Current, it turns into the enhanced version instead. | | If Eagle Spike passes through an active Air Current, it turns into the enhanced version instead. |
| Line 929: |
Line 929: |
| * Puts opponent into {{sf6-jug|limited juggle}} state on hit; great corner carry | | * Puts opponent into {{sf6-jug|limited juggle}} state on hit; great corner carry |
| * On hit/block, bounces away on recovery (frame advantage is not affected by spacing) | | * On hit/block, bounces away on recovery (frame advantage is not affected by spacing) |
| * Punish Counter: KD +113 Tumble (allows follow-up 214K) | | * {{clr|PC|Punish Counter}}: KD +113 Tumble (allows follow-up 214K) |
| {{AttackDataCargo-SF6/Query|rashid_214hk_enhanced}} | | {{AttackDataCargo-SF6/Query|rashid_214hk_enhanced}} |
| * '''Airborne''' 8-36f ({{FKD}} state) | | * '''Airborne''' 8-36f ({{FKD}} state) |
| * Puts opponent into {{sf6-jug|limited juggle}} state on hit; great corner carry | | * Puts opponent into {{sf6-jug|limited juggle}} state on hit; great corner carry |
| * On hit/block, bounces away on recovery (frame advantage is not affected by spacing) | | * On hit/block, bounces away on recovery (frame advantage is not affected by spacing) |
| * Punish Counter: KD +113 Tumble (allows follow-up 214K) | | * {{clr|PC|Punish Counter}}: KD +113 Tumble (allows follow-up 214K) |
| {{AttackDataCargo-SF6/Query|rashid_214kk_enhanced}} | | {{AttackDataCargo-SF6/Query|rashid_214kk_enhanced}} |
| * '''Projectile Invuln:''' 7-37f; '''Airborne''' 9-37f ({{FKD}} state) | | * '''Projectile Invuln:''' 7-37f; '''Airborne''' 9-37f ({{FKD}} state) |
| Line 940: |
Line 940: |
| * On block, bounces away with extra recovery (block disadvantage is not affected by spacing) | | * On block, bounces away with extra recovery (block disadvantage is not affected by spacing) |
| <br> | | <br> |
| When enhanced by an Air Current, Eagle Spike gets extra damage, faster startup, better block advantage and more block pushback. The LK version gets improved corner carry, putting it more in line with the higher strength versions; it can still be punished by some Supers and character-specific {{clr|4|Drive Rush}} starters, so it's not completely abusable. The MK and HK versions (which are functionally identical to each other) are safe against most of the cast; even a move like Cammy's {{clr|10|SA3}} will not reach for a midscreen punish. The downside is that they also bounce back fullscreen on hit, causing Rashid to lose his best follow-up oki. | | When enhanced by an Air Current, Eagle Spike gets extra damage, faster startup, better block advantage and more block pushback. The LK version gets improved corner carry, putting it more in line with the higher strength versions; it can still be punished by some Supers and character-specific {{clr|DR|Drive Rush}} starters, so it's not completely abusable. The MK and HK versions (which are functionally identical to each other) are safe against most of the cast; even a move like Cammy's {{clr|SA|SA3}} will not reach for a midscreen punish. The downside is that they also bounce back fullscreen on hit, causing Rashid to lose his best follow-up oki. |
|
| |
|
| Enhanced OD Eagle Spike has projectile invincibility, and is quite rewarding to land. The damage potential is higher since Rashid is not subjected to extra damage scaling like the standard version. It can be difficult to actually make use of this invincibility since it requires Rashid to set up the Air Current immediately beforehand. Walking in front of the {{clr|10|SA2}} projectile is one of the few practical scenarios where this might be useful. | | Enhanced OD Eagle Spike has projectile invincibility, and is quite rewarding to land. The damage potential is higher since Rashid is not subjected to extra damage scaling like the standard version. It can be difficult to actually make use of this invincibility since it requires Rashid to set up the Air Current immediately beforehand. Walking in front of the {{clr|SA|SA2}} projectile is one of the few practical scenarios where this might be useful. |
| }}</tabber> | | }}</tabber> |
|
| |
|
| Line 996: |
Line 996: |
| A fully charged Whirlwind Shot is the only meterless way for Rashid to create an Air Current. Setting up oki scenarios into 236[K] allows Rashid to follow up with enhanced Spinning Mixer for even more damage or block pressure. It's important to be aware of the opponent's reversal options when setting this up, however; Level 1 Supers will lose to the projectile release, but some Level 2 and 3 Supers can shut down much of Rashid's Whirlwind oki. | | A fully charged Whirlwind Shot is the only meterless way for Rashid to create an Air Current. Setting up oki scenarios into 236[K] allows Rashid to follow up with enhanced Spinning Mixer for even more damage or block pressure. It's important to be aware of the opponent's reversal options when setting this up, however; Level 1 Supers will lose to the projectile release, but some Level 2 and 3 Supers can shut down much of Rashid's Whirlwind oki. |
|
| |
|
| A defensive {{clr|4|Drive Impact}} is something you must always consider when doing using charged Whirlwind Shot. The OD version charges fast enough that Rashid can cancel into it from medium or heavy normals to beat {{clr|4|DI}} (but not from 5MP~HK). In neutral, {{clr|4|DI}} is also not a viable reaction; at worst, Rashid would get Counter-hit by an early {{clr|4|DI}} rather than crumpled. Charging the meterless version is a bit more risky; there is plenty of time for the defender to hit {{clr|4|DI}} in neutral or from a canceled poke, since only the fully charged version can break the armor. Again, this will only result in a Counter-hit, so it's not a tremendous risk. Rashid does have an interesting counter strategy against {{clr|4|Drive Impact}} - he can release the Whirlwind on reaction to DI, and immediately cancel into {{clr|10|SA3}} to break through the armor. | | A defensive {{clr|DR|Drive Impact}} is something you must always consider when doing using charged Whirlwind Shot. The OD version charges fast enough that Rashid can cancel into it from medium or heavy normals to beat {{clr|DR|DI}} (but not from 5MP~HK). In neutral, {{clr|DR|DI}} is also not a viable reaction; at worst, Rashid would get Counter-hit by an early {{clr|DR|DI}} rather than crumpled. Charging the meterless version is a bit more risky; there is plenty of time for the defender to hit {{clr|DR|DI}} in neutral or from a canceled poke, since only the fully charged version can break the armor. Again, this will only result in a Counter-hit, so it's not a tremendous risk. Rashid does have an interesting counter strategy against {{clr|DR|Drive Impact}} - he can release the Whirlwind on reaction to DI, and immediately cancel into {{clr|SA|SA3}} to break through the armor. |
|
| |
|
| All versions of Whirlwind Shot '''cannot be used if {{clr|10|SA2}} is active''' on the screen. The active hitbox must be fully dissipated before Rashid can start inputting another projectile. | | All versions of Whirlwind Shot '''cannot be used if {{clr|SA|SA2}} is active''' on the screen. The active hitbox must be fully dissipated before Rashid can start inputting another projectile. |
| }} | | }} |
|
| |
|
| Line 1,079: |
Line 1,079: |
| ** {{clr|LP|214LP}}/{{clr|MP|214MP}}: {{sf6-adv|VM|-5}} oH / {{sf6-adv|VM|-13}} oB | | ** {{clr|LP|214LP}}/{{clr|MP|214MP}}: {{sf6-adv|VM|-5}} oH / {{sf6-adv|VM|-13}} oB |
| ** {{clr|HP|214HP}}: KD +43 / {{sf6-adv|P|+1}} oB | | ** {{clr|HP|214HP}}: KD +43 / {{sf6-adv|P|+1}} oB |
| ** {{clr|10|214PP}}: KD +39 / {{sf6-adv|VM|-16}} oB | | ** {{clr|OD|214PP}}: KD +39 / {{sf6-adv|VM|-16}} oB |
| ** Note: a late meaty 214P on the opponent's wakeup gives much better advantage after the roll | | ** Note: a late meaty 214P on the opponent's wakeup gives much better advantage after the roll |
| {{AttackDataCargo-SF6/Query|rashid_214p_6k_k}} | | {{AttackDataCargo-SF6/Query|rashid_214p_6k_k}} |
| * '''Upper Body Projectile Invuln:''' 1-19f | | * '''Upper Body Projectile Invuln:''' 1-19f |
| * On the ground, only combos naturally from {{clr|HP|214HP}}/{{clr|10|214PP}} versions | | * On the ground, only combos naturally from {{clr|HP|214HP}}/{{clr|OD|214PP}} versions |
| * Crouching state for entire move duration | | * Crouching state for entire move duration |
| * Puts opponent into {{sf6-jug|limited juggle}} state on hit | | * Puts opponent into {{sf6-jug|limited juggle}} state on hit |
| Line 1,091: |
Line 1,091: |
| The follow-ups to Arabian Cyclone give Rashid extra mobility options to confuse the opponent and navigate through their defenses. Gliding with 4K lets Rashid perform a low-height float into an air normal that hits overhead; the unusual look of this glide can be confusing to defend against if you're not looking for it. It also allows meterless combo extensions after 214HP juggles, usually ending with a j.HK knockdown. This gives decent meterless damage and corner carry from a Target Combo starter. | | The follow-ups to Arabian Cyclone give Rashid extra mobility options to confuse the opponent and navigate through their defenses. Gliding with 4K lets Rashid perform a low-height float into an air normal that hits overhead; the unusual look of this glide can be confusing to defend against if you're not looking for it. It also allows meterless combo extensions after 214HP juggles, usually ending with a j.HK knockdown. This gives decent meterless damage and corner carry from a Target Combo starter. |
|
| |
|
| Assault Roll can be used to close the gap after a blocked 214HP, giving Rashid frame advantage. Other versions are unsafe on block but may occasionally work as a gimmick if the opponent is not expecting it. If the HP or OD Cyclone hits, Rashid can cancel his roll into Nail Assault to pick up the juggle, which further cancels into {{clr|10|SA3}}. While the roll and Nail Assault can both duck under standard projectiles, it is difficult to use this as a reaction counter due to the slow startup of Arabian Cyclone. | | Assault Roll can be used to close the gap after a blocked 214HP, giving Rashid frame advantage. Other versions are unsafe on block but may occasionally work as a gimmick if the opponent is not expecting it. If the HP or OD Cyclone hits, Rashid can cancel his roll into Nail Assault to pick up the juggle, which further cancels into {{clr|SA|SA3}}. While the roll and Nail Assault can both duck under standard projectiles, it is difficult to use this as a reaction counter due to the slow startup of Arabian Cyclone. |
| }} | | }} |
|
| |
|
| Line 1,150: |
Line 1,150: |
| * Aerial hit does 300 less damage, no side switch, and has variable KD advantage depending on height | | * Aerial hit does 300 less damage, no side switch, and has variable KD advantage depending on height |
| <br> | | <br> |
| Rashid's {{clr|10|SA1}} is an upward kick that is useful in juggles, as an anti-air, or as an invincible reversal that can help escape the corner. It has a somewhat shallow trajectory, making it weak to jumps right above him, but Rashid already has {{clr|H|236HP}} to cover this range. | | Rashid's {{clr|SA|SA1}} is an upward kick that is useful in juggles, as an anti-air, or as an invincible reversal that can help escape the corner. It has a somewhat shallow trajectory, making it weak to jumps right above him, but Rashid already has {{clr|H|236HP}} to cover this range. |
|
| |
|
| Because the grounded version switches sides, you generally want to avoid ending a grounded combo with this Super if the opponent is near the corner. Instead, use a route that juggles into it; the positioning is worth far more than the slight damage loss. | | Because the grounded version switches sides, you generally want to avoid ending a grounded combo with this Super if the opponent is near the corner. Instead, use a route that juggles into it; the positioning is worth far more than the slight damage loss. |
|
| |
|
| On block, Rashid bounces far away from the opponent. However, at {{sf6-adv|VM|-53}} it is still easy to punish, especially with {{clr|4|Drive Rush}} or a forward dash into {{clr|4|Drive Impact}}. | | On block, Rashid bounces far away from the opponent. However, at {{sf6-adv|VM|-53}} it is still easy to punish, especially with {{clr|DR|Drive Rush}} or a forward dash into {{clr|DR|Drive Impact}}. |
|
| |
|
| {{clr|10|SA1}} only does 500 damage on the first hit in the event of a trade, which can happen if Rashid runs into a projectile as he hits the opponent. | | {{clr|SA|SA1}} only does 500 damage on the first hit in the event of a trade, which can happen if Rashid runs into a projectile as he hits the opponent. |
| }} | | }} |
|
| |
|
| Line 1,183: |
Line 1,183: |
| * Creates an Air Current that lasts until 120f after Super dissipates (enhances many of Rashid's moves) | | * Creates an Air Current that lasts until 120f after Super dissipates (enhances many of Rashid's moves) |
| <br> | | <br> |
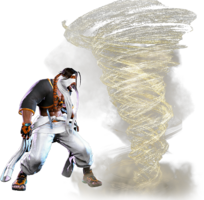
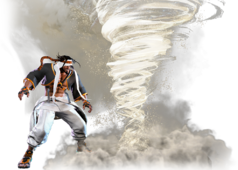
| Rashid summons a slow-moving tornado that gives access to damaging juggles on hit and mixups on block due to the Air Current enhancement. If activating it raw in neutral, it should be done from a long distance so that the opponent cannot interrupt the startup. If Rashid is hit before the tornado spawns, it will not come out and the meter will be wasted. Because the tornado has Super priority, it cannot be dissipated with regular or {{clr|10|OD}} projectiles. Unlike most projectiles, it also does not disappear if it ends up off-screen. | | Rashid summons a slow-moving tornado that gives access to damaging juggles on hit and mixups on block due to the Air Current enhancement. If activating it raw in neutral, it should be done from a long distance so that the opponent cannot interrupt the startup. If Rashid is hit before the tornado spawns, it will not come out and the meter will be wasted. Because the tornado has Super priority, it cannot be dissipated with regular or {{clr|OD|OD}} projectiles. Unlike most projectiles, it also does not disappear if it ends up off-screen. |
|
| |
|
| If the opponent attempts to Drive Reversal a button canceled into {{clr|10|SA2}}, Rashid will get knocked down but the tornado will still punish them. Rashid can follow this up with {{clr|H|HK Eagle Spike}} from anywhere on screen, even if he Back Rises. Other juggle options are also possible after a Neutral Rise, such as {{clr|4|Drive Rush}} into enhanced {{clr|10|OD Spinning Mixer}} if you want to spend more meter to optimize the damage. Chun-Li's Drive Reversal will only hit once, leaving Rashid at point blank for an even easier juggle. Dhalsim's also hit once but doesn't knock down at all, giving Rashid much more combo flexibility. | | If the opponent attempts to Drive Reversal a button canceled into {{clr|SA|SA2}}, Rashid will get knocked down but the tornado will still punish them. Rashid can follow this up with {{clr|H|HK Eagle Spike}} from anywhere on screen, even if he Back Rises. Other juggle options are also possible after a Neutral Rise, such as {{clr|DR|Drive Rush}} into enhanced {{clr|OD|OD Spinning Mixer}} if you want to spend more meter to optimize the damage. Chun-Li's Drive Reversal will only hit once, leaving Rashid at point blank for an even easier juggle. Dhalsim's also hit once but doesn't knock down at all, giving Rashid much more combo flexibility. |
| }} | | }} |
|
| |
|
| Line 1,212: |
Line 1,212: |
| * 50% minimum damage scaling; applies 10% immediate damage scaling when canceled from special moves | | * 50% minimum damage scaling; applies 10% immediate damage scaling when canceled from special moves |
| <br> | | <br> |
| Rashid's {{clr|10|SA3}} has him performing an invincible version of his {{clr|L|LP Spinning Mixer}} as he glides toward the opponent. The startup is somewhat slow, making it vulnerable to light meaties, and it's even slower at longer ranges due to Rashid's travel time. If it hits, it immediately enters a cinematic; this makes it somewhat useful against projectiles from within ~1/2 screen, as he only needs to clip an extended hurtbox to score a punish. While {{clr|10|SA3}} is extremely invincible, the full invuln does not last through all active frames. In the event of a trade, it only deals 10 damage and Rashid may be susceptible to trade combos. | | Rashid's {{clr|SA|SA3}} has him performing an invincible version of his {{clr|L|LP Spinning Mixer}} as he glides toward the opponent. The startup is somewhat slow, making it vulnerable to light meaties, and it's even slower at longer ranges due to Rashid's travel time. If it hits, it immediately enters a cinematic; this makes it somewhat useful against projectiles from within ~1/2 screen, as he only needs to clip an extended hurtbox to score a punish. While {{clr|SA|SA3}} is extremely invincible, the full invuln does not last through all active frames. In the event of a trade, it only deals 10 damage and Rashid may be susceptible to trade combos. |
|
| |
|
| Altair can be juggled into, although the slow startup means it will not work in every possible juggle route; for example, a grounded {{clr|M|236MP}} cannot cancel its landing recovery into {{clr|10|SA3}}. Some common cancel routes include {{clr|L|236LP}} (1st hit), {{clr|M|236MP}} (1st/2nd hits), 214P, and Roll > Nail Assault. | | Altair can be juggled into, although the slow startup means it will not work in every possible juggle route; for example, a grounded {{clr|M|236MP}} cannot cancel its landing recovery into {{clr|SA|SA3}}. Some common cancel routes include {{clr|L|236LP}} (1st hit), {{clr|M|236MP}} (1st/2nd hits), 214P, and Roll > Nail Assault. |
|
| |
|
| After the cinematic, Rashid can apply pressure with a {{clr|4|Drive Rush}} starter anywhere on the screen, although he cannot throw against a reversal 4f light normal. {{clr|H|6HK}} is also a useful meterless meaty option after a regular {{clr|10|SA3}} (but not {{clr|10|CA}}); Rashid must walk forward slightly if using this midscreen, otherwise it will whiff on opponents that don't hit a button. | | After the cinematic, Rashid can apply pressure with a {{clr|DR|Drive Rush}} starter anywhere on the screen, although he cannot throw against a reversal 4f light normal. {{clr|H|6HK}} is also a useful meterless meaty option after a regular {{clr|SA|SA3}} (but not {{clr|SA|CA}}); Rashid must walk forward slightly if using this midscreen, otherwise it will whiff on opponents that don't hit a button. |
|
| |
|
| The biggest weakness of {{clr|10|SA3}} is that {{clr|10|SA2}} exists; much like Blanka, Rashid's optimal strategy is almost always to throw out {{clr|10|SA2}} the moment he gets it. The best use case for {{clr|10|SA3}} is to guarantee a kill in the final round or to use the extra Drive damage to put the opponent into Burnout. | | The biggest weakness of {{clr|SA|SA3}} is that {{clr|SA|SA2}} exists; much like Blanka, Rashid's optimal strategy is almost always to throw out {{clr|SA|SA2}} the moment he gets it. The best use case for {{clr|SA|SA3}} is to guarantee a kill in the final round or to use the extra Drive damage to put the opponent into Burnout. |
| }} | | }} |
| <br> | | <br> |


