|
|
| Line 49: |
Line 49: |
| {{AttackDataCargo-SF6/Query|Jamie_5lp}} | | {{AttackDataCargo-SF6/Query|Jamie_5lp}} |
| * '''Cancel Hitconfirm Window:''' 12f | | * '''Cancel Hitconfirm Window:''' 12f |
| * '''Drive Rush cancel advantage:''' {{sf6-adv|VP|+4}} oH / {{sf6-adv|M|-1}} oB | | * '''{{clr|4|Drive Rush}} cancel advantage:''' {{sf6-adv|VP|+4}} oH / {{sf6-adv|M|-1}} oB |
| * '''SA2 cancel advantage:''' {{sf6-adv|VP|+7}} oH / {{sf6-adv|P|+2}} oB | | * '''{{clr|10|SA2}} cancel advantage:''' {{sf6-adv|VP|+7}} oH / {{sf6-adv|P|+2}} oB |
| * '''Drink cancel advantage:''' {{sf6-adv|VM|-37}} oH / {{sf6-adv|VM|-42}} oB | | * '''Drink cancel advantage:''' {{sf6-adv|VM|-37}} oH / {{sf6-adv|VM|-42}} oB |
| * Applies 10% damage scaling to next hit when beginning a combo (100/90/80...) | | * Applies 10% damage scaling to next hit when beginning a combo (100/90/80...) |
| Line 59: |
Line 59: |
| * Damage DL1-DL4: 285/300/315/330 | | * Damage DL1-DL4: 285/300/315/330 |
| * '''Cancel Hitconfirm Window:''' 13f | | * '''Cancel Hitconfirm Window:''' 13f |
| * '''Drive Rush cancel advantage:''' {{sf6-adv|VP|+4}} oH / {{sf6-adv|M|-1}} oB | | * '''{{clr|4|Drive Rush}} cancel advantage:''' {{sf6-adv|VP|+4}} oH / {{sf6-adv|M|-1}} oB |
| * '''SA2 cancel advantage:''' {{sf6-adv|VP|+7}} oH / {{sf6-adv|P|+2}} oB | | * '''{{clr|10|SA2}} cancel advantage:''' {{sf6-adv|VP|+7}} oH / {{sf6-adv|P|+2}} oB |
| * '''Drink cancel advantage:''' {{sf6-adv|VM|-37}} oH / {{sf6-adv|VM|-42}} oB | | * '''Drink cancel advantage:''' {{sf6-adv|VM|-37}} oH / {{sf6-adv|VM|-42}} oB |
| * Applies 10% damage scaling to next hit when beginning a combo (100/90/80...) | | * Applies 10% damage scaling to next hit when beginning a combo (100/90/80...) |
| Line 100: |
Line 100: |
| ** Last 2 hits maintain juggle state and allow for a follow-up juggle | | ** Last 2 hits maintain juggle state and allow for a follow-up juggle |
| * '''Cancel Hitconfirm Window:''' 18f | | * '''Cancel Hitconfirm Window:''' 18f |
| ** Special/DR cancel is delayed until after 3rd recovery frame of 2nd hit | | ** Special/{{clr|4|DR}} cancel is delayed until after 3rd recovery frame of 2nd hit |
| * '''Drive Rush cancel advantage:''' {{sf6-adv|VP|+8}} oH / {{sf6-adv|P|+2}} oB | | * '''{{clr|4|Drive Rush}} cancel advantage:''' {{sf6-adv|VP|+8}} oH / {{sf6-adv|P|+2}} oB |
| * '''SA2 cancel advantage:''' {{sf6-adv|VP|+11}} oH / {{sf6-adv|VP|+5}} oB | | * '''{{clr|10|SA2}} cancel advantage:''' {{sf6-adv|VP|+11}} oH / {{sf6-adv|VP|+5}} oB |
| * '''Drink cancel advantage:''' {{sf6-adv|VM|-33}} oH / {{sf6-adv|VM|-39}} oB | | * '''Drink cancel advantage:''' {{sf6-adv|VM|-33}} oH / {{sf6-adv|VM|-39}} oB |
| <br> | | <br> |
| Line 130: |
Line 130: |
| * Chains into {{clr|L|5LK}}/{{clr|L|2LP}}/{{clr|L|2LK}} | | * Chains into {{clr|L|5LK}}/{{clr|L|2LP}}/{{clr|L|2LK}} |
| * '''Cancel Hitconfirm Window:''' 13f | | * '''Cancel Hitconfirm Window:''' 13f |
| ** DR cancel is delayed until after 2nd active frame | | ** {{clr|4|DR}} cancel is delayed until after 2nd active frame |
| * '''Drive Rush cancel advantage:''' {{sf6-adv|VP|+5}} oH / {{sf6-adv|P|+1}} oB | | * '''{{clr|4|Drive Rush}} cancel advantage:''' {{sf6-adv|VP|+5}} oH / {{sf6-adv|P|+1}} oB |
| * '''SA2 cancel advantage:''' {{sf6-adv|VP|+9}} oH / {{sf6-adv|VP|+5}} oB | | * '''{{clr|10|SA2}} cancel advantage:''' {{sf6-adv|VP|+9}} oH / {{sf6-adv|VP|+5}} oB |
| * '''Drink cancel advantage:''' {{sf6-adv|VM|-35}} oH / {{sf6-adv|VM|-39}} oB | | * '''Drink cancel advantage:''' {{sf6-adv|VM|-35}} oH / {{sf6-adv|VM|-39}} oB |
| * Applies 10% damage scaling to next hit when beginning a combo (100/90/80...) | | * Applies 10% damage scaling to next hit when beginning a combo (100/90/80...) |
| Line 155: |
Line 155: |
| * '''Cancel Hitconfirm Window:''' 15f | | * '''Cancel Hitconfirm Window:''' 15f |
| * Leg hurtbox is raised on frames 4-12 (can avoid low pokes) | | * Leg hurtbox is raised on frames 4-12 (can avoid low pokes) |
| * '''Drive Rush cancel advantage:''' {{sf6-adv|VP|+11}} oH / {{sf6-adv|VP|+7}} oB | | * '''{{clr|4|Drive Rush}} cancel advantage:''' {{sf6-adv|VP|+11}} oH / {{sf6-adv|VP|+7}} oB |
| * '''SA2 cancel advantage:''' {{sf6-adv|VP|+14}} oH / {{sf6-adv|VP|+10}} oB | | * '''{{clr|10|SA2}} cancel advantage:''' {{sf6-adv|VP|+14}} oH / {{sf6-adv|VP|+10}} oB |
| * '''Drink cancel advantage:''' {{sf6-adv|VM|-30}} oH / {{sf6-adv|VM|-34}} oB | | * '''Drink cancel advantage:''' {{sf6-adv|VM|-30}} oH / {{sf6-adv|VM|-34}} oB |
| <br> | | <br> |
| Line 177: |
Line 177: |
| * Puts airborne opponents into {{sf6-jug|limited juggle}} state | | * Puts airborne opponents into {{sf6-jug|limited juggle}} state |
| * '''Cancel Hitconfirm Window:''' 17f (PC: 29f) | | * '''Cancel Hitconfirm Window:''' 17f (PC: 29f) |
| ** Special/DR cancel is delayed until after 2nd active frame | | ** Special/{{clr|4|DR}} cancel is delayed until after 2nd active frame |
| * '''Drive Rush cancel advantage:''' {{sf6-adv|VP|+14}} oH / {{sf6-adv|VP|+8}} oB | | * '''{{clr|4|Drive Rush}} cancel advantage:''' {{sf6-adv|VP|+14}} oH / {{sf6-adv|VP|+8}} oB |
| * '''SA2 cancel advantage:''' {{sf6-adv|VP|+17}} oH (PC: KD +87)) / {{sf6-adv|VP|+11}} oB | | * '''{{clr|10|SA2}} cancel advantage:''' {{sf6-adv|VP|+17}} oH (PC: KD +87)) / {{sf6-adv|VP|+11}} oB |
| * '''Drink cancel advantage:''' {{sf6-adv|VM|-27}} oH (PC: KD +43) / {{sf6-adv|VM|-33}} oB | | * '''Drink cancel advantage:''' {{sf6-adv|VM|-27}} oH (PC: KD +43) / {{sf6-adv|VM|-33}} oB |
| <br> | | <br> |
| Line 203: |
Line 203: |
| * Chains into {{clr|L|5LK}}/{{clr|L|2LP}}/{{clr|L|2LK}} | | * Chains into {{clr|L|5LK}}/{{clr|L|2LP}}/{{clr|L|2LK}} |
| * '''Cancel Hitconfirm Window:''' 13f | | * '''Cancel Hitconfirm Window:''' 13f |
| ** DR cancel is delayed until after 2nd active frame | | ** {{clr|4|DR}} cancel is delayed until after 2nd active frame |
| * '''Drive Rush cancel advantage:''' {{sf6-adv|VP|+5}} oH / {{sf6-adv|M|-1}} oB | | * '''{{clr|4|Drive Rush}} cancel advantage:''' {{sf6-adv|VP|+5}} oH / {{sf6-adv|M|-1}} oB |
| * '''SA2 cancel advantage:''' {{sf6-adv|VP|+9}} oH / {{sf6-adv|P|+3}} oB | | * '''{{clr|10|SA2}} cancel advantage:''' {{sf6-adv|VP|+9}} oH / {{sf6-adv|P|+3}} oB |
| * '''Drink cancel advantage:''' {{sf6-adv|VM|-35}} oH / {{sf6-adv|VM|-41}} oB | | * '''Drink cancel advantage:''' {{sf6-adv|VM|-35}} oH / {{sf6-adv|VM|-41}} oB |
| * Applies 10% damage scaling to next hit when beginning a combo (100/90/80...) | | * Applies 10% damage scaling to next hit when beginning a combo (100/90/80...) |
| Line 225: |
Line 225: |
| * Damage DL0-DL4: 540/570/600/630/660 | | * Damage DL0-DL4: 540/570/600/630/660 |
| * '''Cancel Hitconfirm Window:''' 16f | | * '''Cancel Hitconfirm Window:''' 16f |
| * '''Drive Rush cancel advantage:''' {{sf6-adv|VP|+9}} oH / {{sf6-adv|VP|+6}} oB | | * '''{{clr|4|Drive Rush}} cancel advantage:''' {{sf6-adv|VP|+9}} oH / {{sf6-adv|VP|+6}} oB |
| * '''SA2 cancel advantage:''' {{sf6-adv|VP|+12}} oH / {{sf6-adv|VP|+9}} oB | | * '''{{clr|10|SA2}} cancel advantage:''' {{sf6-adv|VP|+12}} oH / {{sf6-adv|VP|+9}} oB |
| * '''Drink cancel advantage:''' {{sf6-adv|VM|-32}} oH / {{sf6-adv|VM|-35}} oB | | * '''Drink cancel advantage:''' {{sf6-adv|VM|-32}} oH / {{sf6-adv|VM|-35}} oB |
| <br> | | <br> |
| Line 247: |
Line 247: |
| * Forces stand on hit | | * Forces stand on hit |
| * '''Cancel Hitconfirm Window:''' 16f; only the first 2 active frames are cancelable | | * '''Cancel Hitconfirm Window:''' 16f; only the first 2 active frames are cancelable |
| * '''Drive Rush cancel advantage:''' {{sf6-adv|VP|+18}} oH / {{sf6-adv|VP|+10}} oB | | * '''{{clr|4|Drive Rush}} cancel advantage:''' {{sf6-adv|VP|+18}} oH / {{sf6-adv|VP|+10}} oB |
| * '''SA2 cancel advantage:''' {{sf6-adv|VP|+21}} oH / {{sf6-adv|VP|+13}} oB | | * '''{{clr|10|SA2}} cancel advantage:''' {{sf6-adv|VP|+21}} oH / {{sf6-adv|VP|+13}} oB |
| * '''Drink cancel advantage:''' {{sf6-adv|VM|-23}} oH / {{sf6-adv|VM|-31}} oB | | * '''Drink cancel advantage:''' {{sf6-adv|VM|-23}} oH / {{sf6-adv|VM|-31}} oB |
| <br> | | <br> |
| Line 285: |
Line 285: |
| * Damage DL0-DL4: 450/475/500/525/550 | | * Damage DL0-DL4: 450/475/500/525/550 |
| * '''Cancel Hitconfirm Window:''' 13f | | * '''Cancel Hitconfirm Window:''' 13f |
| ** Special/DR cancel is delayed until after 2nd active frame | | ** Special/{{clr|4|DR}} cancel is delayed until after 2nd active frame |
| * '''Drive Rush cancel advantage:''' {{sf6-adv|VP|+9}} oH / {{sf6-adv|VP|+4}} oB | | * '''{{clr|4|Drive Rush}} cancel advantage:''' {{sf6-adv|VP|+9}} oH / {{sf6-adv|VP|+4}} oB |
| * '''SA2 cancel advantage:''' {{sf6-adv|VP|+12}} oH / {{sf6-adv|VP|+7}} oB | | * '''{{clr|10|SA2}} cancel advantage:''' {{sf6-adv|VP|+12}} oH / {{sf6-adv|VP|+7}} oB |
| * '''Drink cancel advantage:''' {{sf6-adv|VM|-32}} oH / {{sf6-adv|VM|-37}} oB | | * '''Drink cancel advantage:''' {{sf6-adv|VM|-32}} oH / {{sf6-adv|VM|-37}} oB |
| * Applies 20% damage scaling to next hit when beginning a combo (100/80/70...) | | * Applies 20% damage scaling to next hit when beginning a combo (100/80/70...) |
| Line 444: |
Line 444: |
| {{AttackDataCargo-SF6/Query|Jamie_2kk_dl2}} | | {{AttackDataCargo-SF6/Query|Jamie_2kk_dl2}} |
| * Damage DL0-DL4: 540/570/600/630/660 | | * Damage DL0-DL4: 540/570/600/630/660 |
| * Puts opponent into {{sf6-jug|limited juggle}} state ({{sf6-jug|free juggle}} if performed from Drive Rush) | | * Puts opponent into {{sf6-jug|limited juggle}} state ({{sf6-jug|free juggle}} if performed from {{clr|4|Drive Rush}}) |
| * '''Cancel Hitconfirm Window:''' 17f (jump, on hit only) | | * '''Cancel Hitconfirm Window:''' 17f (jump, on hit only) |
| * Applies 20% damage scaling to next hit when beginning a combo (100/80/70...) | | * Applies 20% damage scaling to next hit when beginning a combo (100/80/70...) |
| Line 450: |
Line 450: |
| Tensei Kick is an anti-air launcher that's stricter to land but higher reward than a DP. The jump cancel will always jump forward regardless of which direction is held, and it cannot cancel to a grounded special move during prejump frames. | | Tensei Kick is an anti-air launcher that's stricter to land but higher reward than a DP. The jump cancel will always jump forward regardless of which direction is held, and it cannot cancel to a grounded special move during prejump frames. |
|
| |
|
| From a drive rush canceled normal on hit it's possible to link into this and do j.HK 2HK~K~P for a combo with decent wall carry and a drink while still being +4 <br> | | From a {{clr|4|Drive Rush}} canceled normal on hit it's possible to link into this and do j.HK 2HK~K~P for a combo with decent wall carry and a drink while still being +4 <br> |
| At DL1 or higher, Jamie can anti-air with 2KK into j.MP > j.214KK, then land and juggle his 2HK~K~P Target Combo for a free Drink Level. | | At DL1 or higher, Jamie can anti-air with 2KK into j.MP > j.214KK, then land and juggle his 2HK~K~P Target Combo for a free Drink Level. |
| }} | | }} |
| Line 472: |
Line 472: |
| * '''Cancel Hitconfirm Window:''' 15f (TC) | | * '''Cancel Hitconfirm Window:''' 15f (TC) |
| <br> | | <br> |
| A hopping overhead that uniquely low crushes in its late frames and can be spaced to hit later in its active frames, resulting in better frame advantage. When used out of Drive Rush, Jamie can link light normals or 5HP afterward. | | A hopping overhead that uniquely low crushes in its late frames and can be spaced to hit later in its active frames, resulting in better frame advantage. When used out of {{clr|4|Drive Rush}}, Jamie can link light normals or 5HP afterward. |
|
| |
|
| At DL2 and above, 6MK has more range and a Target Combo follow-up ([[#6MK~MK~P|6MK~MK~P]]) for a knockdown and an optional Drink level increase. | | At DL2 and above, 6MK has more range and a Target Combo follow-up ([[#6MK~MK~P|6MK~MK~P]]) for a knockdown and an optional Drink level increase. |
| Line 494: |
Line 494: |
| * Damage DL0-DL2: 720/760/800 | | * Damage DL0-DL2: 720/760/800 |
| * '''Cancel Hitconfirm Window:''' 19f (Super) | | * '''Cancel Hitconfirm Window:''' 19f (Super) |
| * '''SA2 cancel advantage:''' {{sf6-adv|VP|+15}} oH / {{sf6-adv|VP|+11}} oB | | * '''{{clr|10|SA2}} cancel advantage:''' {{sf6-adv|VP|+15}} oH / {{sf6-adv|VP|+11}} oB |
| {{AttackDataCargo-SF6/Query|Jamie_4hp_dl3}} | | {{AttackDataCargo-SF6/Query|Jamie_4hp_dl3}} |
| * Damage DL3-DL4: 840/880 | | * Damage DL3-DL4: 840/880 |
| * '''Cancel Hitconfirm Window:''' 19f (Super) / 20f (TC) | | * '''Cancel Hitconfirm Window:''' 19f (Super) / 20f (TC) |
| * '''SA2 cancel advantage:''' {{sf6-adv|VP|+14}} oH / {{sf6-adv|VP|+12}} oB | | * '''{{clr|10|SA2}} cancel advantage:''' {{sf6-adv|VP|+14}} oH / {{sf6-adv|VP|+12}} oB |
| <br> | | <br> |
| Hermit's Elbow pulls back during startup, making it a useful shimmy tool in tick throw situations. If you successfully bait the opponent's throw and land a Punish Counter, it becomes +5 and can link into 5LK or 5HP. At its max possible range, it can become +4 as a meaty and link into 2LP without a Counter-hit. The super cancel window is also quite lenient, allowing for high damage confirms. | | Hermit's Elbow pulls back during startup, making it a useful shimmy tool in tick throw situations. If you successfully bait the opponent's throw and land a Punish Counter, it becomes +5 and can link into 5LK or 5HP. At its max possible range, it can become +4 as a meaty and link into 2LP without a Counter-hit. The super cancel window is also quite lenient, allowing for high damage confirms. |
|
| |
|
| At Drink Lv.3, 4HP gains a Target Combo follow-up into HP. This TC will only combo if the 4HP hits meaty or with extra frame advantage from Counter-hit. In order to confirm the TC as late as possible on reaction, a Punish Counter, Drive Rush start, or final-frame meaty timing is required. However, Jamie gets more damage by simply linking 5LP~LK~MP, since the 4HP becomes +5 in these scenarios. Note that due to increased pushback, the DL3 version can no longer link to 5HP even at +5. | | At Drink Lv.3, 4HP gains a Target Combo follow-up into HP. This TC will only combo if the 4HP hits meaty or with extra frame advantage from Counter-hit. In order to confirm the TC as late as possible on reaction, a Punish Counter, {{clr|4|Drive Rush}} start, or final-frame meaty timing is required. However, Jamie gets more damage by simply linking 5LP~LK~MP, since the 4HP becomes +5 in these scenarios. Note that due to increased pushback, the DL3 version can no longer link to 5HP even at +5. |
| }} | | }} |
|
| |
|
| Line 522: |
Line 522: |
| * Damage DL0-DL3: 810/855/900/945 | | * Damage DL0-DL3: 810/855/900/945 |
| * '''Cancel Hitconfirm Window:''' 18f (Super) | | * '''Cancel Hitconfirm Window:''' 18f (Super) |
| * '''SA2 cancel advantage:''' {{sf6-adv|VP|+19}} oH / {{sf6-adv|VP|+13}} oB | | * '''{{clr|10|SA2}} cancel advantage:''' {{sf6-adv|VP|+19}} oH / {{sf6-adv|VP|+13}} oB |
| {{AttackDataCargo-SF6/Query|Jamie_6hk_dl4}} | | {{AttackDataCargo-SF6/Query|Jamie_6hk_dl4}} |
| * '''Cancel Hitconfirm Window:''' 18f (Super) / 22f (TC) | | * '''Cancel Hitconfirm Window:''' 18f (Super) / 22f (TC) |
| ** TC confirm into 4HK must be input within 20f for a Counter-hit combo into Headbutt | | ** TC confirm into 4HK must be input within 20f for a Counter-hit combo into Headbutt |
| * '''SA2 cancel advantage:''' {{sf6-adv|VP|+19}} oH / {{sf6-adv|VP|+13}} oB | | * '''{{clr|10|SA2}} cancel advantage:''' {{sf6-adv|VP|+19}} oH / {{sf6-adv|VP|+13}} oB |
| <br> | | <br> |
| A long range stepkick that can be confirmed into a Super on hit. You cannot space it to connect meaty at max range, so the only follow-up links require Counter-hit, Punish Counter, or Drive Rush (which travels nearly full screen). | | A long range stepkick that can be confirmed into a Super on hit. You cannot space it to connect meaty at max range, so the only follow-up links require Counter-hit, Punish Counter, or {{clr|4|Drive Rush}} (which travels nearly full screen). |
|
| |
|
| At Drink Lv.4, the move gains extra range and some new Target Combo follow-ups. The TC requires a Counter-hit to combo, but the timing is very lenient to react to this. Even if the confirm is missed, the TC follow-ups are cancelable themselves, allowing Jamie to end with a safe option like 236PP even on a failed hitconfirm. | | At Drink Lv.4, the move gains extra range and some new Target Combo follow-ups. The TC requires a Counter-hit to combo, but the timing is very lenient to react to this. Even if the confirm is missed, the TC follow-ups are cancelable themselves, allowing Jamie to end with a safe option like 236PP even on a failed hitconfirm. |
| Line 583: |
Line 583: |
| * () refers to scaled damage when beginning combo with 5LP~LK | | * () refers to scaled damage when beginning combo with 5LP~LK |
| * '''Cancel Hitconfirm Window:''' 52f | | * '''Cancel Hitconfirm Window:''' 52f |
| ** Special/DR cancel is delayed until after 1st recovery frame | | ** Special/{{clr|4|DR}} cancel is delayed until after 1st recovery frame |
| * '''Drive Rush cancel advantage:''' {{sf6-adv|VP|+9}} oH / {{sf6-adv|P|+1}} oB | | * '''{{clr|4|Drive Rush}} cancel advantage:''' {{sf6-adv|VP|+9}} oH / {{sf6-adv|P|+1}} oB |
| * '''SA2 cancel advantage:''' {{sf6-adv|VP|+12}} oH / {{sf6-adv|VP|+4}} oB | | * '''{{clr|10|SA2}} cancel advantage:''' {{sf6-adv|VP|+12}} oH / {{sf6-adv|VP|+4}} oB |
| * '''Drink cancel advantage:''' {{sf6-adv|VM|-32}} oH / {{sf6-adv|VM|-40}} oB | | * '''Drink cancel advantage:''' {{sf6-adv|VM|-32}} oH / {{sf6-adv|VM|-40}} oB |
| <br> | | <br> |
| Since 5LP loses much of its frame advantage at Drink Lv.1 and above, this Target Combo is the primary way to convert jab into damage. The MP ender can combo into 236LP/MP/PP, 214LP, 236LK, 623K, or Super. The only safe enders after committing to the TC follow-up are 236PP and SA2. If the opponent tries to punish the TC on block, Jamie can frame trap any non-invincible reversal with 236LP or the much safer 236PP. | | Since 5LP loses much of its frame advantage at Drink Lv.1 and above, this Target Combo is the primary way to convert jab into damage. The MP ender can combo into 236LP/MP/PP, 214LP, 236LK, 623K, or Super. The only safe enders after committing to the TC follow-up are 236PP and {{clr|10|SA2}}. If the opponent tries to punish the TC on block, Jamie can frame trap any non-invincible reversal with 236LP or the much safer 236PP. |
| }} | | }} |
|
| |
|
| Line 615: |
Line 615: |
| Confirming this TC directly from 6MK is strict, but possible with good reactions. It's hard to chase down the opponent for midscreen oki, so ending with a Drink is usually worthwhile. | | Confirming this TC directly from 6MK is strict, but possible with good reactions. It's hard to chase down the opponent for midscreen oki, so ending with a Drink is usually worthwhile. |
|
| |
|
| In the corner, ending with a Drink puts Jamie at -1, making it a little risky; if going from DL3 to DL4, he instead gets slight KD advantage to apply pressure. Jamie can apply much better corner pressure by skipping the drink. 6MK~MK sets up the perfect timing for a meaty 214HP to become {{sf6-adv|P|+2}} on block while remaining safe against Drive Impact. Many opponents will instinctively press a button here, giving Jamie a free Counter-hit. | | In the corner, ending with a Drink puts Jamie at -1, making it a little risky; if going from DL3 to DL4, he instead gets slight KD advantage to apply pressure. Jamie can apply much better corner pressure by skipping the drink. 6MK~MK sets up the perfect timing for a meaty 214HP to become {{sf6-adv|P|+2}} on block while remaining safe against {{clr|4|Drive Impact}}. Many opponents will instinctively press a button here, giving Jamie a free Counter-hit. |
| }} | | }} |
|
| |
|
| Line 634: |
Line 634: |
| {{AttackDataCargo-SF6/Query|Jamie_4hp_hp_dl3}} | | {{AttackDataCargo-SF6/Query|Jamie_4hp_hp_dl3}} |
| * Damage DL3-DL4: 630/660 | | * Damage DL3-DL4: 630/660 |
| * 3f gap between hits on block; requires extra frame advantage to combo from 4HP (Counter-hit, Punish Counter, Drive Rush, meaty timing) | | * 3f gap between hits on block; requires extra frame advantage to combo from 4HP (Counter-hit, Punish Counter, {{clr|4|Drive Rush}}, meaty timing) |
| * '''Cancel Hitconfirm Window:''' 18f / 56f (from CH 4HP~HP) | | * '''Cancel Hitconfirm Window:''' 18f / 56f (from CH 4HP~HP) |
| * '''SA2 cancel advantage:''' {{sf6-adv|VP|+18}} oH / {{sf6-adv|VP|+6}} oB | | * '''{{clr|10|SA2}} cancel advantage:''' {{sf6-adv|VP|+18}} oH / {{sf6-adv|VP|+6}} oB |
| {{AttackDataCargo-SF6/Query|Jamie_4hp_hp_hk_dl3}} | | {{AttackDataCargo-SF6/Query|Jamie_4hp_hp_hk_dl3}} |
| * Damage DL3-DL4: 840(672)/880(704) | | * Damage DL3-DL4: 840(672)/880(704) |
| Line 674: |
Line 674: |
| * Cancelable into any special or Super | | * Cancelable into any special or Super |
| * '''Cancel Hitconfirm Window:''' 20f (Headbutt) / 59-60f (CH 6HK + Headbutt) | | * '''Cancel Hitconfirm Window:''' 20f (Headbutt) / 59-60f (CH 6HK + Headbutt) |
| ** Special/DR cancel is delayed until after active frames | | ** Special/{{clr|4|DR}} cancel is delayed until after active frames |
| * '''Drive Rush cancel advantage:''' KD +51 oH / {{sf6-adv|VP|+7}} oB | | * '''{{clr|4|Drive Rush}} cancel advantage:''' KD +51 oH / {{sf6-adv|VP|+7}} oB |
| * '''SA2 cancel advantage:''' KD +54 oH / {{sf6-adv|VP|+10}} oB | | * '''{{clr|10|SA2}} cancel advantage:''' KD +54 oH / {{sf6-adv|VP|+10}} oB |
| * '''Drink cancel advantage:''' KD +10 oH / {{sf6-adv|VM|-34}} oB | | * '''Drink cancel advantage:''' KD +10 oH / {{sf6-adv|VM|-34}} oB |
| {{AttackDataCargo-SF6/Query|Jamie_6hk_4hk_p_mid_dl4}} | | {{AttackDataCargo-SF6/Query|Jamie_6hk_4hk_p_mid_dl4}} |
| * Cancelable into any special or Super | | * Cancelable into any special or Super |
| * '''Cancel Hitconfirm Window:''' 60/40/17f (more hits = more hitconfirm time) | | * '''Cancel Hitconfirm Window:''' 60/40/17f (more hits = more hitconfirm time) |
| * '''Drive Rush cancel advantage:''' KD +54 oH / {{sf6-adv|VP|+10}} oB | | * '''{{clr|4|Drive Rush}} cancel advantage:''' KD +54 oH / {{sf6-adv|VP|+10}} oB |
| * '''SA2 cancel advantage:''' KD +57 oH / {{sf6-adv|VP|+13}} oB | | * '''{{clr|10|SA2}} cancel advantage:''' KD +57 oH / {{sf6-adv|VP|+13}} oB |
| * '''Drink cancel advantage:''' KD +13 oH / {{sf6-adv|VM|-31}} oB | | * '''Drink cancel advantage:''' KD +13 oH / {{sf6-adv|VM|-31}} oB |
| {{AttackDataCargo-SF6/Query|Jamie_6hk_4hk_p_far_dl4}} | | {{AttackDataCargo-SF6/Query|Jamie_6hk_4hk_p_far_dl4}} |
| Line 714: |
Line 714: |
| Allows for strong corner throw loops that are easily auto-timed with a forward dash, leaving Jamie at +4. | | Allows for strong corner throw loops that are easily auto-timed with a forward dash, leaving Jamie at +4. |
|
| |
|
| Holding the Throw input causes Jamie to end with a Drink in exchange for worse oki, making it a valuable tool for leveling up. In the corner, he still has enough advantage to pressure with 5MK. This can be safely canceled into 236MP against most characters; only extremely fast long-range moves like Ken's SA2 can punish Jamie on block. Even moves like Ken's OD Shoryuken, Cammy's OD Cannon Spike, and Luke's SA1 cannot punish at this range. | | Holding the Throw input causes Jamie to end with a Drink in exchange for worse oki, making it a valuable tool for leveling up. In the corner, he still has enough advantage to pressure with 5MK. This can be safely canceled into 236MP against most characters; only extremely fast long-range moves like Ken's {{clr|10|SA2}} can punish Jamie on block. Even moves like Ken's OD Shoryuken, Cammy's OD Cannon Spike, and Luke's {{clr|10|SA1}} cannot punish at this range. |
| }} | | }} |
|
| |
|
| Line 813: |
Line 813: |
| {{AttackDataCargo-SF6/Query|Jamie_66}} | | {{AttackDataCargo-SF6/Query|Jamie_66}} |
| * Applies 15% damage scaling multiplier to any follow-up hits when used mid-combo | | * Applies 15% damage scaling multiplier to any follow-up hits when used mid-combo |
| ** Only applies scaling once per combo; does not apply when an enhanced Drive Rush attack starts the combo | | ** Only applies scaling once per combo; does not apply when an enhanced {{clr|4|Drive Rush}} attack starts the combo |
| See [[Street_Fighter_6/Gauges#Drive_Rush|Drive Rush]] on the Gauges page for more details. Frame data shown in (parentheses) refers to Parry Drive Rush. | | See [[Street_Fighter_6/Gauges#Drive_Rush|Drive Rush]] on the Gauges page for more details. Frame data shown in (parentheses) refers to {{clr|4|Parry Drive Rush}}. |
| * Distance: | | * Distance: |
| ** 0.988 (min, cancel into immediate Throw) | | ** 0.988 (min, cancel into immediate Throw) |
| ** 2.030 (min, earliest blocking/movement frame) | | ** 2.030 (min, earliest blocking/movement frame) |
| ** 3.002 (max, final DR frame) | | ** 3.002 (max, final {{clr|4|DR}} frame) |
| * See Strategy page for [[Street_Fighter_6/Jamie/Strategy#Drive_Rush|Blockstring Gaps and Combo Routes]] | | * See Strategy page for [[Street_Fighter_6/Jamie/Strategy#Drive_Rush|Blockstring Gaps and Combo Routes]] |
| }} | | }} |
| Line 880: |
Line 880: |
| * '''Cancel Hitconfirm Window:''' 23f (Follow-up) / 15f (Super) | | * '''Cancel Hitconfirm Window:''' 23f (Follow-up) / 15f (Super) |
| ** 22f confirm window to combo into ~6K | | ** 22f confirm window to combo into ~6K |
| * '''SA2 cancel advantage:''' {{sf6-adv|VP|+17}} oH / {{sf6-adv|VP|+14}} oB | | * '''{{clr|10|SA2}} cancel advantage:''' {{sf6-adv|VP|+17}} oH / {{sf6-adv|VP|+14}} oB |
| <br> | | <br> |
| Freeflow Strikes (or "Rekkas") are forward-moving strikes that can be confirmed into optional follow-ups. Higher strength versions move farther but have slower startup, with the OD version gaining both speed and longer range. At Drink Lv.0 to Lv.3, each Rekka is a single hit, and only the first part of the sequence can cancel into Super. If well-spaced, the first meterless Freeflow Strike is often safe; the LP version is usually the best for this since it has less forward movement, but this can also cause it to whiff in max range cancels. The OD version is always safe. | | Freeflow Strikes (or "Rekkas") are forward-moving strikes that can be confirmed into optional follow-ups. Higher strength versions move farther but have slower startup, with the OD version gaining both speed and longer range. At Drink Lv.0 to Lv.3, each Rekka is a single hit, and only the first part of the sequence can cancel into Super. If well-spaced, the first meterless Freeflow Strike is often safe; the LP version is usually the best for this since it has less forward movement, but this can also cause it to whiff in max range cancels. The OD version is always safe. |
|
| |
|
| When attempting to confirm into the 6P or 6K follow-ups on hit, it's important to note that the follow-up speed depends on the strength of the first Rekka. Delaying the confirm too long, especially on HP Rekka, can cause the follow-up to come out without comboing. The 6K follow-up is slightly slower than 6P, which also makes the confirm slightly stricter. OD Rekka canceled into SA2 is a great option on hit or block, leading to great combos or block pressure from a mid-range poke. | | When attempting to confirm into the 6P or 6K follow-ups on hit, it's important to note that the follow-up speed depends on the strength of the first Rekka. Delaying the confirm too long, especially on HP Rekka, can cause the follow-up to come out without comboing. The 6K follow-up is slightly slower than 6P, which also makes the confirm slightly stricter. OD Rekka canceled into {{clr|10|SA2}} is a great option on hit or block, leading to great combos or block pressure from a mid-range poke. |
|
| |
|
| This move and its follow-ups can be used in juggles, but they can be very inconsistent depending on the screen position and opponent's juggle height; OD Rekkas are the most consistent overall, and the corner makes things easier as well. | | This move and its follow-ups can be used in juggles, but they can be very inconsistent depending on the screen position and opponent's juggle height; OD Rekkas are the most consistent overall, and the corner makes things easier as well. |
| Line 914: |
Line 914: |
| * '''Cancel Hitconfirm Window:''' 36f (Follow-up) / 27f (Super) | | * '''Cancel Hitconfirm Window:''' 36f (Follow-up) / 27f (Super) |
| ** 35f confirm window to combo into ~6P | | ** 35f confirm window to combo into ~6P |
| * '''SA2 cancel advantage:''' {{sf6-adv|VP|+18}} oH / {{sf6-adv|VP|+13}} (1st hit), {{sf6-adv|VP|+12}} (2nd hit) oB | | * '''{{clr|10|SA2}} cancel advantage:''' {{sf6-adv|VP|+18}} oH / {{sf6-adv|VP|+13}} (1st hit), {{sf6-adv|VP|+12}} (2nd hit) oB |
| <br> | | <br> |
| At max Drink Level, Freeflow Strikes becomes a 2-hit attack, gaining additional damage and making it much easier to confirm follow-ups or Super. It also becomes safe on block for all versions, giving Jamie a great confirmable pressure tool from mid-range. In some juggle routes, it becomes harder to combo into the 6K follow-ups due to the extra pushback, so the 6P follow-ups are recommended for more consistency. | | At max Drink Level, Freeflow Strikes becomes a 2-hit attack, gaining additional damage and making it much easier to confirm follow-ups or Super. It also becomes safe on block for all versions, giving Jamie a great confirmable pressure tool from mid-range. In some juggle routes, it becomes harder to combo into the 6K follow-ups due to the extra pushback, so the 6P follow-ups are recommended for more consistency. |
| Line 1,142: |
Line 1,142: |
| ** Opponent is considered standing and throwable, but becomes airborne after follow-up hit | | ** Opponent is considered standing and throwable, but becomes airborne after follow-up hit |
| * '''Cancel Hitconfirm Window:''' 25f (Super/DL4 Follow-up) | | * '''Cancel Hitconfirm Window:''' 25f (Super/DL4 Follow-up) |
| * '''SA2 cancel advantage:''' KD +89(+103) oH / {{sf6-adv|VP|+15}} oB | | * '''{{clr|10|SA2}} cancel advantage:''' KD +89(+103) oH / {{sf6-adv|VP|+15}} oB |
| * Applies 20% damage scaling to next hit when beginning a combo (100/80/70...) | | * Applies 20% damage scaling to next hit when beginning a combo (100/80/70...) |
| <br> | | <br> |
| Line 1,174: |
Line 1,174: |
| * Forms a true blockstring after 214PP (can delay to create up to a 5f blockstring gap) | | * Forms a true blockstring after 214PP (can delay to create up to a 5f blockstring gap) |
| * '''Cancel Hitconfirm Window:''' 19f (Super) | | * '''Cancel Hitconfirm Window:''' 19f (Super) |
| * '''SA2 cancel advantage:''' KD +55(+57) oH / {{sf6-adv|VP|+12}} oB; 2f better if 6P hits grounded | | * '''{{clr|10|SA2}} cancel advantage:''' KD +55(+57) oH / {{sf6-adv|VP|+12}} oB; 2f better if 6P hits grounded |
| * Applies 20% damage scaling to next hit when beginning a combo (after blocked 214PP) | | * Applies 20% damage scaling to next hit when beginning a combo (after blocked 214PP) |
| <br> | | <br> |
| This follow-up to Swagger Step is only available at max Drink Level. It works in juggles or in grounded combos, adding significant damage especially when canceled into SA3. It is much more unsafe on block than the first part of Swagger Step, though it can be used as a risky frame trap if the opponent tries to punish you. The 6P can be delayed significantly, though this can cause it to drop against grounded opponents unless the Swagger Step hits meaty. | | This follow-up to Swagger Step is only available at max Drink Level. It works in juggles or in grounded combos, adding significant damage especially when canceled into {{clr|10|SA3}}. It is much more unsafe on block than the first part of Swagger Step, though it can be used as a risky frame trap if the opponent tries to punish you. The 6P can be delayed significantly, though this can cause it to drop against grounded opponents unless the Swagger Step hits meaty. |
| }} | | }} |
|
| |
|
| Line 1,275: |
Line 1,275: |
| * '''Projectile Invuln:''' 3-28f | | * '''Projectile Invuln:''' 3-28f |
| * '''Cancel Hitconfirm Window:''' 74f (Super); cancels on 7th hit | | * '''Cancel Hitconfirm Window:''' 74f (Super); cancels on 7th hit |
| * '''SA2 cancel advantage:''' {{sf6-adv|VP|+14}} oH / {{sf6-adv|VP|+7}} oB | | * '''{{clr|10|SA2}} cancel advantage:''' {{sf6-adv|VP|+14}} oH / {{sf6-adv|VP|+7}} oB |
| <br> | | <br> |
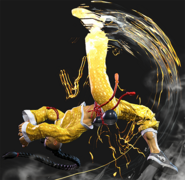
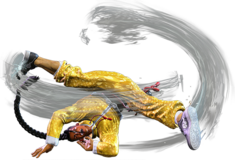
| Jamie drops to the ground and begins break dancing, slowly advancing toward the opponent. The slow startup limits this move's combo utility, though it can work in juggles when the situation arises. The high damage makes this great for super canceling, and with 2 bars the OD version can be made safe on block with an eternity to hitconfirm. 236LK gives Jamie a safe jump similar to 623LK in the corner (or midscreen if the opponent does not back rise). | | Jamie drops to the ground and begins break dancing, slowly advancing toward the opponent. The slow startup limits this move's combo utility, though it can work in juggles when the situation arises. The high damage makes this great for super canceling, and with 2 bars the OD version can be made safe on block with an eternity to hitconfirm. 236LK gives Jamie a safe jump similar to 623LK in the corner (or midscreen if the opponent does not back rise). |
|
| |
|
| Bakkai is ostensibly Jamie's "anti-projectile" move, though in practice it can be difficult to use like this. 236KK is fairly reliable at mid-range against shoto fireballs, and 236HK has the reach if your reactions are on point. 236LK and 236MK are harder to use because they travel a shorter distance during startup. And against strong projectiles like Guile's Sonic Boom, this move can only be done as a pure prediction, at which point you might as well just do a Drive Impact or Luminous Dive Kick instead. | | Bakkai is ostensibly Jamie's "anti-projectile" move, though in practice it can be difficult to use like this. 236KK is fairly reliable at mid-range against shoto fireballs, and 236HK has the reach if your reactions are on point. 236LK and 236MK are harder to use because they travel a shorter distance during startup. And against strong projectiles like Guile's Sonic Boom, this move can only be done as a pure prediction, at which point you might as well just do a {{clr|4|Drive Impact}} or Luminous Dive Kick instead. |
|
| |
|
| Grounded combo routes: (CH = +2 Counter-hit, PC = +4 Punish Counter) | | Grounded combo routes: (CH = +2 Counter-hit, PC = +4 Punish Counter) |
| Line 1,314: |
Line 1,314: |
| Tenshin is a unique command grab that allows you to combo after landing it, reminiscent of Yun, Yang, and Fei Long's similar grab from previous games without the side switch. It doesn't have quite as good range or speed as most command grabs, but the combo utility more than makes up for these faults and greatly boosts Jamie's close range mixup game. Not only can it net the most damage of any command grab with proper use of resources, but it also allows you to loop your pressure into whatever oki is desired, something that no other command grab can do nearly as well. | | Tenshin is a unique command grab that allows you to combo after landing it, reminiscent of Yun, Yang, and Fei Long's similar grab from previous games without the side switch. It doesn't have quite as good range or speed as most command grabs, but the combo utility more than makes up for these faults and greatly boosts Jamie's close range mixup game. Not only can it net the most damage of any command grab with proper use of resources, but it also allows you to loop your pressure into whatever oki is desired, something that no other command grab can do nearly as well. |
|
| |
|
| After meterless Tenshin, the opponent is in a unique grounded juggle state; grounded combos work as usual, but they are considered to have a Juggle Count of 1. This can affect any juggle route that comes afterward; for example, 2MP > DR 2KK > j.HK will not combo after Tenshin, despite normally working on grounded opponents. | | After meterless Tenshin, the opponent is in a unique grounded juggle state; grounded combos work as usual, but they are considered to have a Juggle Count of 1. This can affect any juggle route that comes afterward; for example, 2MP > {{clr|4|DR~}}2KK > j.HK will not combo after Tenshin, despite normally working on grounded opponents. |
|
| |
|
| The first attack following Tenshin is unscaled, but any following attacks have a 40% scaling penalty applied (100-60-50-40...). Since the OD version gives more than enough time to go into SA3 as the first hit, this will lead to a completely unscaled super with devastating damage, dealing more damage than Zangief's CA if you have CA yourself. There is also an interesting situation after Punish Counter 214PP's tumbling wall splat: Jamie can combo into Tenshin after this, in which case the throw is scaled by 20% and any follow-ups immediately skip to the 40% scaling penalty. | | The first attack following Tenshin is unscaled, but any following attacks have a 40% scaling penalty applied (100-60-50-40...). Since the OD version gives more than enough time to go into {{clr|10|SA3}} as the first hit, this will lead to a completely unscaled super with devastating damage, dealing more damage than Zangief's CA if you have CA yourself. There is also an interesting situation after Punish Counter 214PP's tumbling wall splat: Jamie can combo into Tenshin after this, in which case the throw is scaled by 20% and any follow-ups immediately skip to the 40% scaling penalty. |
|
| |
|
| Jamie is not point blank after the grab, but is close enough to combo into moves like 5MP, 2MP, or 5HP. While Tenshin can hit as a Counter-hit or Punish Counter, this has no effect on frame advantage (OD Tenshin does extra damage on Punish Counter only). | | Jamie is not point blank after the grab, but is close enough to combo into moves like 5MP, 2MP, or 5HP. While Tenshin can hit as a Counter-hit or Punish Counter, this has no effect on frame advantage (OD Tenshin does extra damage on Punish Counter only). |
| Line 1,381: |
Line 1,381: |
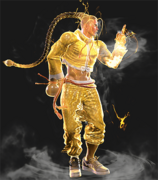
| A useful install that gives Jamie access to his entire moveset without needing to slowly accumulate drinks. The Super activation itself is good for applying pressure to force a mixup, or for extending a combo. The timer lasts 15 seconds and freezes when the opponent is in hitstop or blockstop, after which Jamie returns to his previous Drink Level. | | A useful install that gives Jamie access to his entire moveset without needing to slowly accumulate drinks. The Super activation itself is good for applying pressure to force a mixup, or for extending a combo. The timer lasts 15 seconds and freezes when the opponent is in hitstop or blockstop, after which Jamie returns to his previous Drink Level. |
|
| |
|
| If Jamie is already at Drink Lv.4, he can still use this Super for its cancel properties in order to get easy frame advantage. He can also treat his Super meter as a reserve tank for his Drive gauge, restoring 3 Drive for the cost of 2 Super bars whenever he wants. This is a great way to reduce the risk of Burnout, as the opponent will have very little time to set up a corner Drive Impact or apply chip damage. | | If Jamie is already at Drink Lv.4, he can still use this Super for its cancel properties in order to get easy frame advantage. He can also treat his Super meter as a reserve tank for his Drive gauge, restoring 3 Drive for the cost of 2 Super bars whenever he wants. This is a great way to reduce the risk of Burnout, as the opponent will have very little time to set up a corner {{clr|4|Drive Impact}} or apply chip damage. |
| }} | | }} |
|
| |
|
| Line 1,415: |
Line 1,415: |
| * 50% minimum damage scaling; applies 10% immediate damage scaling when canceled from special moves | | * 50% minimum damage scaling; applies 10% immediate damage scaling when canceled from special moves |
| <br> | | <br> |
| Jamie's SA3 goes into a cinematic if the first hit connects, while the 2nd hit is extremely weak on its own. The cinematic hit ends by launching the opponent, reminiscent of Yun's You Hou Ultra 1 from USF4. As a result, the damage is quite low, instead relying on the follow-up juggle to make it worthwhile; this unfortunately means that the damage potential is quite low in highly scaled combos. The cinematic ends abruptly, so it takes practice to learn exactly when to execute the follow-up. Jamie has several options, like 214HP, Dash 5HP, or Drive Rush 2KK into further juggles. | | Jamie's {{clr|10|SA3}} goes into a cinematic if the first hit connects, while the 2nd hit is extremely weak on its own. The cinematic hit ends by launching the opponent, reminiscent of Yun's You Hou Ultra 1 from USF4. As a result, the damage is quite low, instead relying on the follow-up juggle to make it worthwhile; this unfortunately means that the damage potential is quite low in highly scaled combos. The cinematic ends abruptly, so it takes practice to learn exactly when to execute the follow-up. Jamie has several options, like 214HP, Dash 5HP, or {{clr|4|DR~}}2KK into further juggles. |
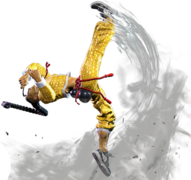
|
| |
|
| The Critical Art version lacks this ending juggle, but makes up for it with higher base damage and a cooler ending cinematic. Jamie's CA can be comboed into directly after OD Tenshin, bypassing the extra scaling that would otherwise apply and making it the most damaging throw mixup in the game. | | The Critical Art version lacks this ending juggle, but makes up for it with higher base damage and a cooler ending cinematic. Jamie's CA can be comboed into directly after OD Tenshin, bypassing the extra scaling that would otherwise apply and making it the most damaging throw mixup in the game. |
|
| |
|
| Because SA3 hits twice on block, the first hit can be used to put the opponent into Burnout before chipping out with the 2nd hit. Opponents can Drive Reversal to prevent this if Jamie uses a blockstring into SA3, but this requires them to be aware of the gimmick and to have full awareness of the HP and Drive meter situation. | | Because {{clr|10|SA3}} hits twice on block, the first hit can be used to put the opponent into Burnout before chipping out with the 2nd hit. Opponents can Drive Reversal to prevent this if Jamie uses a blockstring into {{clr|10|SA3}}, but this requires them to be aware of the gimmick and to have full awareness of the HP and Drive meter situation. |
| }} | | }} |
| <br> | | <br> |


