|
|
| Line 92: |
Line 92: |
| * Damage DL0-DL4: 810/855/900/945/990 | | * Damage DL0-DL4: 810/855/900/945/990 |
| * Counter-hit/Punish Counter bonus frame advantage carries over to all 3 hits | | * Counter-hit/Punish Counter bonus frame advantage carries over to all 3 hits |
| * High juggle potential; final 2 hits maintain juggle state and can allow a followup juggle | | * High juggle potential; final 2 hits maintain juggle state and can allow a follow-up juggle |
| * '''Cancel Hitconfirm Window:''' 18f | | * '''Cancel Hitconfirm Window:''' 18f |
| * '''SA2 Cancel Advantage:''' +11/+5 | | * '''SA2 Cancel Advantage:''' +11/+5 |
| <br> | | <br> |
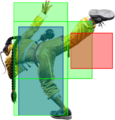
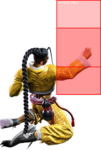
| A button notable in beating Drive Impact with its 3 hits, and being incredibly hard to interrupt as the first hit starts up in 5 frames. This is especially useful off of a Drive Rush, with 5HP > Drive Rush giving strong confirm routes, and Drive Rush into 5HP giving an easily confirmable followup link. In juggles where the last hit connects, it can be used to add free damage since it no longer requires a cancel. It's also pretty deceptive if you cancel the first two hits into Drive Impact yourself. | | A button notable in beating Drive Impact with its 3 hits, and being incredibly hard to interrupt as the first hit starts up in 5 frames. This is especially useful off of a Drive Rush, with 5HP > Drive Rush giving strong confirm routes, and Drive Rush into 5HP giving an easily confirmable follow-up link. In juggles where the last hit connects, it can be used to add free damage since it no longer requires a cancel. It's also pretty deceptive if you cancel the first two hits into Drive Impact yourself. |
|
| |
|
| While Jamie's 3-hit 5HP has some unique and interesting properties, there are some downsides to this normal's design. The first 2 hits have finicky range and low damage, but are the only ones that can be canceled. In most combos it is strictly worse than 5LK, which has identical startup, longer range and higher cancel damage. The extra hitstun allows 5HP to cancel into 236MP or 214LP, but these are not important combo routes. From longer ranges where only the 3rd hit connects, 5HP is functionally a weak 12f non-cancelable poke; 5MK, 2MK, and 5HK are stronger in this context. | | While Jamie's 3-hit 5HP has some unique and interesting properties, there are some downsides to this normal's design. The first 2 hits have finicky range and low damage, but are the only ones that can be canceled. In most combos it is strictly worse than 5LK, which has identical startup, longer range and higher cancel damage. The extra hitstun allows 5HP to cancel into 236MP or 214LP, but these are not important combo routes. From longer ranges where only the 3rd hit connects, 5HP is functionally a weak 12f non-cancelable poke; 5MK, 2MK, and 5HK are stronger in this context. |
| Line 161: |
Line 161: |
| * '''SA2 Cancel Advantage:''' +17/+11 (KD +87) | | * '''SA2 Cancel Advantage:''' +17/+11 (KD +87) |
| <br> | | <br> |
| While quite slow, 5HK has solid range due to its forward movement, making it a real threat in neutral. The long recovery on this move makes it very risky to whiff in neutral, but on block the pushback usually keeps it safe even at -5. The hitbox is quite low to the ground, making it worthless as an anti-air; the juggle properties vs. airborne only allow Jamie to safely cancel into a special when hitting the opponent's early jump frames. The crumple state from Punish Counter causes the opponent to fall backwards, making the followups a bit more limited compared to the corner. | | While quite slow, 5HK has solid range due to its forward movement, making it a real threat in neutral. The long recovery on this move makes it very risky to whiff in neutral, but on block the pushback usually keeps it safe even at -5. The hitbox is quite low to the ground, making it worthless as an anti-air; the juggle properties vs. airborne only allow Jamie to safely cancel into a special when hitting the opponent's early jump frames. The crumple state from Punish Counter causes the opponent to fall backwards, making the follow-ups a bit more limited compared to the corner. |
| }} | | }} |
| <br> | | <br> |
| Line 273: |
Line 273: |
| * Counter-hit/Punish Counter: +49 HKD | | * Counter-hit/Punish Counter: +49 HKD |
| * Has high juggle potential; no longer HKD when juggled into | | * Has high juggle potential; no longer HKD when juggled into |
| * '''Cancel Hitconfirm Window:''' 33f (PC: 43f) | | * '''Cancel Hitconfirm Window:''' 33f (PC: 43f) (TC) |
| <br> | | <br> |
| This 2-hit sweep is a low on both hits and has slightly more range on the 2nd hit. It's fairly easy to punish on block, so should not be thrown out randomly very often. 2HK has a lot of juggle potential, and leads to a Target Combo followup into HK that is great for increasing his Drink Level without sacrificing corner oki. | | This 2-hit sweep is a low on both hits and has slightly more range on the 2nd hit. It's fairly easy to punish on block, so should not be thrown out randomly very often. 2HK has a lot of juggle potential, and leads to a Target Combo follow-up into HK that is great for increasing his Drink Level without sacrificing corner oki. |
| }} | | }} |
| <br> | | <br> |
| Line 433: |
Line 433: |
| A hopping overhead that uniquely low crushes in its late frames and can be spaced/meatied to hit later in its active frames, resulting in better frame advantage. When used out of Drive Rush, Jamie can link light normals or 5HP afterward. | | A hopping overhead that uniquely low crushes in its late frames and can be spaced/meatied to hit later in its active frames, resulting in better frame advantage. When used out of Drive Rush, Jamie can link light normals or 5HP afterward. |
|
| |
|
| At DL2 and above, 6MK has more range and a Target Combo followup ([[#6MK~MK~P|6MK~MK~P]]) for a knockdown and an optional Drink level increase. | | At DL2 and above, 6MK has more range and a Target Combo follow-up ([[#6MK~MK~P|6MK~MK~P]]) for a knockdown and an optional Drink level increase. |
| }} | | }} |
|
| |
|
| Line 461: |
Line 461: |
| Hermit's Elbow pulls back during startup, making it a useful shimmy tool in tick throw situations. If you successfully bait the opponent's throw and land a Punish Counter, it becomes +5 and can link into 5LK or 5HP. At its max possible range, it can become +4 as a meaty and link into 2LP without a Counter-hit. The super cancel window is also quite lenient, allowing for high damage confirms. | | Hermit's Elbow pulls back during startup, making it a useful shimmy tool in tick throw situations. If you successfully bait the opponent's throw and land a Punish Counter, it becomes +5 and can link into 5LK or 5HP. At its max possible range, it can become +4 as a meaty and link into 2LP without a Counter-hit. The super cancel window is also quite lenient, allowing for high damage confirms. |
|
| |
|
| At Drink Lv.3, 4HP gains a Target Combo followup into HP. This TC will only combo if the 4HP hits meaty or with extra frame advantage from Counter-hit. In order to confirm the TC as late as possible on reaction, a Punish Counter, Drive Rush start, or final-frame meaty timing is required. However, Jamie gets more damage by simply linking 5LP~LK~MP, since the 4HP becomes +5 in these scenarios. Note that due to increased pushback, the DL3 version can no longer link to 5HP even at +5. | | At Drink Lv.3, 4HP gains a Target Combo follow-up into HP. This TC will only combo if the 4HP hits meaty or with extra frame advantage from Counter-hit. In order to confirm the TC as late as possible on reaction, a Punish Counter, Drive Rush start, or final-frame meaty timing is required. However, Jamie gets more damage by simply linking 5LP~LK~MP, since the 4HP becomes +5 in these scenarios. Note that due to increased pushback, the DL3 version can no longer link to 5HP even at +5. |
| }} | | }} |
|
| |
|
| Line 487: |
Line 487: |
| * '''SA2 Cancel Advantage:''' +19/+13 | | * '''SA2 Cancel Advantage:''' +19/+13 |
| <br> | | <br> |
| A long range stepkick that can be confirmed into a Super on hit. You cannot space it to connect meaty at max range, so the only followup links require Counter-hit, Punish Counter, or Drive Rush (which travels nearly full screen). | | A long range stepkick that can be confirmed into a Super on hit. You cannot space it to connect meaty at max range, so the only follow-up links require Counter-hit, Punish Counter, or Drive Rush (which travels nearly full screen). |
|
| |
|
| At Drink Lv.4, the move gains extra range and some new Target Combo followups. The TC requires a Counter-hit to combo, but the timing is very lenient to react to this. Even if the confirm is missed, the TC followups are cancelable themselves, allowing Jamie to end with a safe option like 236PP even on a failed hitconfirm. | | At Drink Lv.4, the move gains extra range and some new Target Combo follow-ups. The TC requires a Counter-hit to combo, but the timing is very lenient to react to this. Even if the confirm is missed, the TC follow-ups are cancelable themselves, allowing Jamie to end with a safe option like 236PP even on a failed hitconfirm. |
| }} | | }} |
| <br> | | <br> |
| Line 515: |
Line 515: |
| * At DL4, drink gains 1 Drive bar | | * At DL4, drink gains 1 Drive bar |
| <br> | | <br> |
| Jamie's 2-hit 2HK gives plenty of time to confirm the Target Combo followup afterward on hit, though 2HK is unsafe on block regardless. Jamie gets no midscreen oki if the opponent back rises, so the Drink ender is generally the best option. In the corner, Jamie can Drink and still push a mixup at +3. This TC has high juggle potential, and even gains slightly more KD advantage when juggled into. | | Jamie's 2-hit 2HK gives plenty of time to confirm the Target Combo follow-up afterward on hit, though 2HK is unsafe on block regardless. Jamie gets no midscreen oki if the opponent back rises, so the Drink ender is generally the best option. In the corner, Jamie can Drink and still push a mixup at +3. This TC has high juggle potential, and even gains slightly more KD advantage when juggled into. |
|
| |
|
| Unlike many Drink activations, going from DL3 to DL4 does not grant Jamie any additional advantage on hit or block. | | Unlike many Drink activations, going from DL3 to DL4 does not grant Jamie any additional advantage on hit or block. |
| Line 544: |
Line 544: |
| * () refers to scaled damage when beginning combo with 5LP~LK | | * () refers to scaled damage when beginning combo with 5LP~LK |
| <br> | | <br> |
| Since 5LP loses much of its frame advantage at Drink Lv.1 and above, this Target Combo is the primary way to convert jab into damage. The MP ender can combo into 236LP/MP/PP, 214LP, 236LK, 623K, or Super. The only safe enders after committing to the TC followup are 236PP and SA2. If the opponent tries to punish the TC on block, Jamie can frame trap any non-invincible reversal with 236LP or the much safer 236PP. | | Since 5LP loses much of its frame advantage at Drink Lv.1 and above, this Target Combo is the primary way to convert jab into damage. The MP ender can combo into 236LP/MP/PP, 214LP, 236LK, 623K, or Super. The only safe enders after committing to the TC follow-up are 236PP and SA2. If the opponent tries to punish the TC on block, Jamie can frame trap any non-invincible reversal with 236LP or the much safer 236PP. |
| }} | | }} |
|
| |
|
| Line 591: |
Line 591: |
| * Damage DL3-DL4: 630/660 | | * Damage DL3-DL4: 630/660 |
| * 3f gap between hits on block; requires extra frame advantage to combo from 4HP (Counter-hit, Punish Counter, Drive Rush, meaty timing) | | * 3f gap between hits on block; requires extra frame advantage to combo from 4HP (Counter-hit, Punish Counter, Drive Rush, meaty timing) |
| * '''Cancel Hitconfirm Window:''' 18f (single hit) / 56f (from CH 4HP~HP) | | * '''Cancel Hitconfirm Window:''' 18f / 56f (from CH 4HP~HP) |
| * '''SA2 Cancel Advantage:''' +18/+6 | | * '''SA2 Cancel Advantage:''' +18/+6 |
| {{AttackDataCargo-SF6/Query|Jamie_4hp_hp_hk_dl3}} | | {{AttackDataCargo-SF6/Query|Jamie_4hp_hp_hk_dl3}} |
| Line 597: |
Line 597: |
| * Not airborne despite the animation; 9f gap between final 2 hits on block | | * Not airborne despite the animation; 9f gap between final 2 hits on block |
| <br> | | <br> |
| This Target Combo sequence is most useful when performing 4HP as a shimmy to bait a throw tech, since it guarantees a Punish Counter if successful. If the 2nd hit of the Target Combo begins the combo, it is possible to confirm it directly into this ender. While the HP followup is unsafe, it can be used to frame trap an opponent that predictably hits buttons after blocking 4HP. If the final HK is performed on block, the opponent can interrupt with any attack 8f or faster for a full punish, so it cannot be used to frame trap an opponent in the same way. | | This Target Combo sequence is most useful when performing 4HP as a shimmy to bait a throw tech, since it guarantees a Punish Counter if successful. If the 2nd hit of the Target Combo begins the combo, it is possible to confirm it directly into this ender. While the HP follow-up is unsafe, it can be used to frame trap an opponent that predictably hits buttons after blocking 4HP. If the final HK is performed on block, the opponent can interrupt with any attack 8f or faster for a full punish, so it cannot be used to frame trap an opponent in the same way. |
| }} | | }} |
|
| |
|
| Line 623: |
Line 623: |
| | info = | | | info = |
| {{AttackDataCargo-SF6/Query|Jamie_6hk_4hk_dl4}} | | {{AttackDataCargo-SF6/Query|Jamie_6hk_4hk_dl4}} |
| * Sways and walks backward; press P at different times to change followup | | * Sways and walks backward; press P at different times to change follow-up |
| * Earliest followup timing can be input after 25f of 6HK+Sway | | * Earliest follow-up timing can be input after 25f of 6HK+Sway |
| * '''Cancel Hitconfirm Window:''' 25f (total time including 6HK and Sway) | | * '''Cancel Hitconfirm Window:''' 25f (total time including 6HK and Sway) |
| {{AttackDataCargo-SF6/Query|Jamie_6hk_4hk_p_close_dl4}} | | {{AttackDataCargo-SF6/Query|Jamie_6hk_4hk_p_close_dl4}} |
| Line 639: |
Line 639: |
| * If no input is performed during recovery, restores a second Drive bar after 112f | | * If no input is performed during recovery, restores a second Drive bar after 112f |
| <br> | | <br> |
| Every part of this Target Combo can be input on hit, block, or whiff from 6HK. The 4HK causes Jamie to stumble away from the opponent, and the timing of Jamie's P input changes which followup occurs. All listed startups include the 6HK plus the minimum/maximum delay before hitting P during the Sway animation. The close Headbutt followup is fairly easy to confirm on Counter-hit or Punish Counter 6HK. The minimum gap between 6HK and Headbutt is 1f on normal hit, 7f on block, making it a poor frame trap option. The Spinning Fists cannot be comboed into, but are useful for stopping an opponent from chasing down the Sway. The Drink causes Jamie to continue stumbling backwards, making it hard to chase down without a projectile. This does give up a lot of ground, but it may be worth the Drive build depending on the circumstances. | | Every part of this Target Combo can be input on hit, block, or whiff from 6HK. The 4HK causes Jamie to stumble away from the opponent, and the timing of Jamie's P input changes which follow-up occurs. All listed startups include the 6HK plus the minimum/maximum delay before hitting P during the Sway animation. The close Headbutt follow-up is fairly easy to confirm on Counter-hit or Punish Counter 6HK. The minimum gap between 6HK and Headbutt is 1f on normal hit, 7f on block, making it a poor frame trap option. The Spinning Fists cannot be comboed into, but are useful for stopping an opponent from chasing down the Sway. The Drink causes Jamie to continue stumbling backwards, making it hard to chase down without a projectile. This does give up a lot of ground, but it may be worth the Drive build depending on the circumstances. |
| }} | | }} |
| <br> | | <br> |
| Line 804: |
Line 804: |
| {{AttackDataCargo-SF6/Query|Jamie_236lp_dl2}} | | {{AttackDataCargo-SF6/Query|Jamie_236lp_dl2}} |
| * Damage DL0-DL3: 315/332/350/367 | | * Damage DL0-DL3: 315/332/350/367 |
| * '''Cancel Hitconfirm Window:''' 19f (Followup) / 14f (Super) | | * '''Cancel Hitconfirm Window:''' 19f (Follow-up) / 14f (Super) |
| {{AttackDataCargo-SF6/Query|Jamie_236mp_dl2}} | | {{AttackDataCargo-SF6/Query|Jamie_236mp_dl2}} |
| * Damage DL0-DL3: 360/380/400/420 | | * Damage DL0-DL3: 360/380/400/420 |
| * '''Cancel Hitconfirm Window:''' 19f (Followup) / 14f (Super) | | * '''Cancel Hitconfirm Window:''' 19f (Follow-up) / 14f (Super) |
| ** 18f confirm window to combo into ~6K | | ** 18f confirm window to combo into ~6K |
| {{AttackDataCargo-SF6/Query|Jamie_236hp_dl2}} | | {{AttackDataCargo-SF6/Query|Jamie_236hp_dl2}} |
| * Damage DL0-DL3: 405/427/450/472 | | * Damage DL0-DL3: 405/427/450/472 |
| * '''Cancel Hitconfirm Window:''' 19f (Followup) / 14f (Super) | | * '''Cancel Hitconfirm Window:''' 19f (Follow-up) / 14f (Super) |
| ** 16f confirm window to combo into ~6P, 15f to combo into ~6K | | ** 16f confirm window to combo into ~6P, 15f to combo into ~6K |
| {{AttackDataCargo-SF6/Query|Jamie_236pp_dl2}} | | {{AttackDataCargo-SF6/Query|Jamie_236pp_dl2}} |
| * Damage DL0-DL3: 405/427/450/472 | | * Damage DL0-DL3: 405/427/450/472 |
| * '''Cancel Hitconfirm Window:''' 23f (Followup) / 15f (Super) | | * '''Cancel Hitconfirm Window:''' 23f (Follow-up) / 15f (Super) |
| ** 22f confirm window to combo into ~6K | | ** 22f confirm window to combo into ~6K |
| * '''SA2 Cancel Advantage:''' +17/+14 | | * '''SA2 Cancel Advantage:''' +17/+14 |
| <br> | | <br> |
| Freeflow Strikes (or "Rekkas") are forward-moving strikes that can be confirmed into optional followups. Higher strength versions move farther but have slower startup, with the OD version gaining both speed and longer range. At Drink Lv.0 to Lv.3, each Rekka is a single hit, and only the first part of the sequence can cancel into Super. If well-spaced, the first meterless Freeflow Strike is often safe; the LP version is usually the best for this since it has less forward movement, but this can also cause it to whiff in max range cancels. The OD version is always safe. | | Freeflow Strikes (or "Rekkas") are forward-moving strikes that can be confirmed into optional follow-ups. Higher strength versions move farther but have slower startup, with the OD version gaining both speed and longer range. At Drink Lv.0 to Lv.3, each Rekka is a single hit, and only the first part of the sequence can cancel into Super. If well-spaced, the first meterless Freeflow Strike is often safe; the LP version is usually the best for this since it has less forward movement, but this can also cause it to whiff in max range cancels. The OD version is always safe. |
|
| |
|
| When attempting to confirm into the 6P or 6K followups on hit, it's important to note that the followup speed depends on the strength of the first Rekka. Delaying the confirm too long, especially on HP Rekka, can cause the followup to come out without comboing. The 6K followup is slightly slower than 6P, which also makes the confirm slightly stricter. OD Rekka canceled into SA2 is a great option on hit or block, leading to great combos or block pressure from a mid-range poke. | | When attempting to confirm into the 6P or 6K follow-ups on hit, it's important to note that the follow-up speed depends on the strength of the first Rekka. Delaying the confirm too long, especially on HP Rekka, can cause the follow-up to come out without comboing. The 6K follow-up is slightly slower than 6P, which also makes the confirm slightly stricter. OD Rekka canceled into SA2 is a great option on hit or block, leading to great combos or block pressure from a mid-range poke. |
|
| |
|
| This move and its followups can be used in juggles, but they can be very inconsistent depending on the screen position and opponent's juggle height; OD Rekkas are the most consistent overall, and the corner makes things easier as well. | | This move and its follow-ups can be used in juggles, but they can be very inconsistent depending on the screen position and opponent's juggle height; OD Rekkas are the most consistent overall, and the corner makes things easier as well. |
| }} | | }} |
| |-| | | |-| |
| Line 840: |
Line 840: |
| | info = | | | info = |
| {{AttackDataCargo-SF6/Query|Jamie_236lp_dl4}} | | {{AttackDataCargo-SF6/Query|Jamie_236lp_dl4}} |
| * '''Cancel Hitconfirm Window:''' 36f (Followup) / 29f (Super) | | * '''Cancel Hitconfirm Window:''' 36f (Follow-up) / 29f (Super) |
| ** 33f confirm window to combo into ~6P, 34f to combo into ~6K | | ** 33f confirm window to combo into ~6P, 34f to combo into ~6K |
| {{AttackDataCargo-SF6/Query|Jamie_236mp_dl4}} | | {{AttackDataCargo-SF6/Query|Jamie_236mp_dl4}} |
| * '''Cancel Hitconfirm Window:''' 36f (Followup) / 29f (Super) | | * '''Cancel Hitconfirm Window:''' 36f (Follow-up) / 29f (Super) |
| ** 33f confirm window to combo into ~6P, 31f to combo into ~6K | | ** 33f confirm window to combo into ~6P, 31f to combo into ~6K |
| {{AttackDataCargo-SF6/Query|Jamie_236hp_dl4}} | | {{AttackDataCargo-SF6/Query|Jamie_236hp_dl4}} |
| * '''Cancel Hitconfirm Window:''' 36f (Followup) / 29f (Super) | | * '''Cancel Hitconfirm Window:''' 36f (Follow-up) / 29f (Super) |
| ** 33f confirm window to combo into ~6P, 28f to combo into ~6K | | ** 33f confirm window to combo into ~6P, 28f to combo into ~6K |
| {{AttackDataCargo-SF6/Query|Jamie_236pp_dl4}} | | {{AttackDataCargo-SF6/Query|Jamie_236pp_dl4}} |
| * '''Cancel Hitconfirm Window:''' 36f (Followup) / 27f (Super) | | * '''Cancel Hitconfirm Window:''' 36f (Follow-up) / 27f (Super) |
| ** 35f confirm window to combo into ~6P | | ** 35f confirm window to combo into ~6P |
| * '''SA2 Cancel Advantage:''' +18/+13 1st hit, +18/+12 2nd hit | | * '''SA2 Cancel Advantage:''' +18/+13 1st hit, +18/+12 2nd hit |
| <br> | | <br> |
| At max Drink Level, Freeflow Strikes becomes a 2-hit attack, gaining additional damage and making it much easier to confirm followups or Super. It also becomes safe on block for all versions, giving Jamie a great confirmable pressure tool from mid-range. In some juggle routes, it becomes harder to combo into the 6K followups due to the extra pushback, so the 6P followups are recommended for more consistency. | | At max Drink Level, Freeflow Strikes becomes a 2-hit attack, gaining additional damage and making it much easier to confirm follow-ups or Super. It also becomes safe on block for all versions, giving Jamie a great confirmable pressure tool from mid-range. In some juggle routes, it becomes harder to combo into the 6K follow-ups due to the extra pushback, so the 6P follow-ups are recommended for more consistency. |
| }} | | }} |
| </tabber> | | </tabber> |
| Line 872: |
Line 872: |
| {{AttackDataCargo-SF6/Query|Jamie_236lp_6p_dl2}} | | {{AttackDataCargo-SF6/Query|Jamie_236lp_6p_dl2}} |
| * Damage DL0-DL3: 315/332/350/367 | | * Damage DL0-DL3: 315/332/350/367 |
| * '''Cancel Hitconfirm Window:''' 18f (Followup) | | * '''Cancel Hitconfirm Window:''' 18f (Follow-up) |
| * 0-2f gap between Rekka and 6P on block | | * 0-2f gap between Rekka and 6P on block |
| {{AttackDataCargo-SF6/Query|Jamie_236mp_6p_dl2}} | | {{AttackDataCargo-SF6/Query|Jamie_236mp_6p_dl2}} |
| * Damage DL0-DL3: 360/380/400/420 | | * Damage DL0-DL3: 360/380/400/420 |
| * '''Cancel Hitconfirm Window:''' 18f (Followup) | | * '''Cancel Hitconfirm Window:''' 18f (Follow-up) |
| * 0-5f gap between Rekka and 6P on block | | * 0-5f gap between Rekka and 6P on block |
| {{AttackDataCargo-SF6/Query|Jamie_236hp_6p_dl2}} | | {{AttackDataCargo-SF6/Query|Jamie_236hp_6p_dl2}} |
| * Damage DL0-DL3: 405/427/450/472 | | * Damage DL0-DL3: 405/427/450/472 |
| * '''Cancel Hitconfirm Window:''' 18f (Followup) | | * '''Cancel Hitconfirm Window:''' 18f (Follow-up) |
| * 3-8f gap between Rekka and 6P on block | | * 3-8f gap between Rekka and 6P on block |
| {{AttackDataCargo-SF6/Query|Jamie_236pp_6p_dl2}} | | {{AttackDataCargo-SF6/Query|Jamie_236pp_6p_dl2}} |
| * Damage DL0-DL3: 405/427/450/472 | | * Damage DL0-DL3: 405/427/450/472 |
| * '''Cancel Hitconfirm Window:''' 19f (Followup) | | * '''Cancel Hitconfirm Window:''' 19f (Follow-up) |
| * 0-3f gap between Rekka and 6P on block | | * 0-3f gap between Rekka and 6P on block |
| <br> | | <br> |
| The Punch followups are the preferred route for damage, juggles, and oki; they can be performed on hit, block, or whiff. The LP, MP, and OD Rekka starters require a manual delay to create a blockstring gap, while HP Rekka can automatically frame trap with a 3f gap at the fastest timing. While risky, this frame trap can be used against an opponent that tries to punish your first Rekka on block. On hit, stopping after the first 6P puts Jamie at a slight disadvantage; an unaware opponent may be caught off guard with a quick throw reset, but attempting this is sacrificing guaranteed damage and a knockdown. | | The Punch follow-ups are the preferred route for damage, juggles, and oki; they can be performed on hit, block, or whiff. The LP, MP, and OD Rekka starters require a manual delay to create a blockstring gap, while HP Rekka can automatically frame trap with a 3f gap at the fastest timing. While risky, this frame trap can be used against an opponent that tries to punish your first Rekka on block. On hit, stopping after the first 6P puts Jamie at a slight disadvantage; an unaware opponent may be caught off guard with a quick throw reset, but attempting this is sacrificing guaranteed damage and a knockdown. |
|
| |
|
| The cancel hitconfirm window applies to the 6P hit only and does not include the first 236P hit. In the startup column, [] refers to the total startup time for 236P~6P when the first Rekka whiffs, which can be useful for certain long-range punishes. | | The cancel hitconfirm window applies to the 6P hit only and does not include the first 236P hit. In the startup column, [] refers to the total startup time for 236P~6P when the first Rekka whiffs, which can be useful for certain long-range punishes. |
| Line 906: |
Line 906: |
| | info = | | | info = |
| {{AttackDataCargo-SF6/Query|Jamie_236lp_6p_dl4}} | | {{AttackDataCargo-SF6/Query|Jamie_236lp_6p_dl4}} |
| * '''Cancel Hitconfirm Window:''' 28f (Followup) | | * '''Cancel Hitconfirm Window:''' 28f (Follow-up) |
| * 2-7f gap between Rekka and 6P on block | | * 2-7f gap between Rekka and 6P on block |
| {{AttackDataCargo-SF6/Query|Jamie_236mp_6p_dl4}} | | {{AttackDataCargo-SF6/Query|Jamie_236mp_6p_dl4}} |
| * '''Cancel Hitconfirm Window:''' 28f (Followup) | | * '''Cancel Hitconfirm Window:''' 28f (Follow-up) |
| * 2-7f gap between Rekka and 6P on block | | * 2-7f gap between Rekka and 6P on block |
| {{AttackDataCargo-SF6/Query|Jamie_236hp_6p_dl4}} | | {{AttackDataCargo-SF6/Query|Jamie_236hp_6p_dl4}} |
| * '''Cancel Hitconfirm Window:''' 28f (Followup) | | * '''Cancel Hitconfirm Window:''' 28f (Follow-up) |
| * 2-7f gap between Rekka and 6P on block | | * 2-7f gap between Rekka and 6P on block |
| {{AttackDataCargo-SF6/Query|Jamie_236pp_6p_dl4}} | | {{AttackDataCargo-SF6/Query|Jamie_236pp_6p_dl4}} |
| * '''Cancel Hitconfirm Window:''' 28f (Followup) | | * '''Cancel Hitconfirm Window:''' 28f (Follow-up) |
| * 2-7f gap between Rekka and 6P on block | | * 2-7f gap between Rekka and 6P on block |
| <br> | | <br> |
| The Punch followups are the preferred route for damage, juggles, and oki; they can be performed on hit, block, or whiff. Like the initial Rekka, this followup is 2 hits when at max Drink Level. All strengths of Rekka lead to the same 2-7f gap between hits on block, which can be used to frame trap the opponent. However, this frame gap is not very useful for two reasons: the initial Rekka is safe (meaning the opponent is less likely to hit a button while attempting a punish), and a Counter-hit does not give Jamie the bonus frame advantage when both hits of the followup connect. | | The Punch follow-ups are the preferred route for damage, juggles, and oki; they can be performed on hit, block, or whiff. Like the initial Rekka, this follow-up is 2 hits when at max Drink Level. All strengths of Rekka lead to the same 2-7f gap between hits on block, which can be used to frame trap the opponent. However, this frame gap is not very useful for two reasons: the initial Rekka is safe (meaning the opponent is less likely to hit a button while attempting a punish), and a Counter-hit does not give Jamie the bonus frame advantage when both hits of the follow-up connect. |
|
| |
|
| The cancel hitconfirm window applies to the 6P hit only and does not include the first 236P hit. In the startup column, [] refers to the total startup time for 236P~6P when the first Rekka whiffs, which can be useful for certain long-range punishes. | | The cancel hitconfirm window applies to the 6P hit only and does not include the first 236P hit. In the startup column, [] refers to the total startup time for 236P~6P when the first Rekka whiffs, which can be useful for certain long-range punishes. |
| Line 950: |
Line 950: |
| * 0-2f gap before final hit on block | | * 0-2f gap before final hit on block |
| <br> | | <br> |
| The final 6P followup completes the Punch sequence. It can be done on hit, block, or whiff and has juggle potential. This sequence gets no oki midscreen if the opponent back rises, but it has good corner carry and is Jamie's most consistent combo ender. Like the first 6P followup, there is a blockstring gap between the final 2 hits that varies based on the button timing, but this is a very unsafe gimmick for beating the opponent's attempted Rekka punish. | | The final 6P follow-up completes the Punch sequence. It can be done on hit, block, or whiff and has juggle potential. This sequence gets no oki midscreen if the opponent back rises, but it has good corner carry and is Jamie's most consistent combo ender. Like the first 6P follow-up, there is a blockstring gap between the final 2 hits that varies based on the button timing, but this is a very unsafe gimmick for beating the opponent's attempted Rekka punish. |
|
| |
|
| In the startup column, [] refers to the total startup time for 236P~6P~6P when the first 2 hits of Rekka whiff at the fastest speed. In the Damage column, the first value lists the unscaled damage; () refers to the damage at 80% scaling, which is what would normally occur when starting a combo with the first Rekka. | | In the startup column, [] refers to the total startup time for 236P~6P~6P when the first 2 hits of Rekka whiff at the fastest speed. In the Damage column, the first value lists the unscaled damage; () refers to the damage at 80% scaling, which is what would normally occur when starting a combo with the first Rekka. |
| Line 995: |
Line 995: |
| {{AttackDataCargo-SF6/Query|Jamie_236lp_6k_dl2}} | | {{AttackDataCargo-SF6/Query|Jamie_236lp_6k_dl2}} |
| * Damage DL0-DL4: 225/237/250/262/275 | | * Damage DL0-DL4: 225/237/250/262/275 |
| * '''Cancel Hitconfirm Window:''' 16f (Followup) | | * '''Cancel Hitconfirm Window:''' 16f (Follow-up) |
| * 0-3f gap between Rekka and 6K on block (DL4: 0-6f) | | * 0-3f gap between Rekka and 6K on block (DL4: 0-6f) |
| {{AttackDataCargo-SF6/Query|Jamie_236mp_6k_dl2}} | | {{AttackDataCargo-SF6/Query|Jamie_236mp_6k_dl2}} |
| * Damage DL0-DL4: 270/285/300/315/330 | | * Damage DL0-DL4: 270/285/300/315/330 |
| * '''Cancel Hitconfirm Window:''' 16f (Followup) | | * '''Cancel Hitconfirm Window:''' 16f (Follow-up) |
| * 1-6f gap between Rekka and 6K on block (DL4: 2-9f) | | * 1-6f gap between Rekka and 6K on block (DL4: 2-9f) |
| {{AttackDataCargo-SF6/Query|Jamie_236hp_6k_dl2}} | | {{AttackDataCargo-SF6/Query|Jamie_236hp_6k_dl2}} |
| * Damage DL0-DL4: 270/285/300/315/330 | | * Damage DL0-DL4: 270/285/300/315/330 |
| * '''Cancel Hitconfirm Window:''' 16f (Followup) | | * '''Cancel Hitconfirm Window:''' 16f (Follow-up) |
| * 4-9f gap between Rekka and 6K on block (DL4: 4-12f) | | * 4-9f gap between Rekka and 6K on block (DL4: 4-12f) |
| {{AttackDataCargo-SF6/Query|Jamie_236pp_6k_dl2}} | | {{AttackDataCargo-SF6/Query|Jamie_236pp_6k_dl2}} |
| * Damage DL0-DL4: 315/332/350/367/385 | | * Damage DL0-DL4: 315/332/350/367/385 |
| * '''Cancel Hitconfirm Window:''' 16f (Followup) | | * '''Cancel Hitconfirm Window:''' 16f (Follow-up) |
| * 0-4f gap between Rekka and 6K on block (DL4: 1-6f) | | * 0-4f gap between Rekka and 6K on block (DL4: 1-6f) |
| <br> | | <br> |
| The 6K followup gives less damage and worse oki than the 6P route, but allows Jamie to end with a Drink. It can only be performed on hit or block; the move will not come out if 236P whiffs. Unfortunately for Jamie, this means there is no way to safely space this move at max distance. | | The 6K follow-up gives less damage and worse oki than the 6P route, but allows Jamie to end with a Drink. It can only be performed on hit or block; the move will not come out if 236P whiffs. Unfortunately for Jamie, this means there is no way to safely space this move at max distance. |
|
| |
|
| The cancel hitconfirm window only applies to the 6K hit and does not include the first 236P hit; this is only really relevant if the initial Rekka is blocked, and you attempt to frame trap into the unsafe followup. | | The cancel hitconfirm window only applies to the 6K hit and does not include the first 236P hit; this is only really relevant if the initial Rekka is blocked, and you attempt to frame trap into the unsafe follow-up. |
| }} | | }} |
|
| |
|
| Line 1,040: |
Line 1,040: |
| * 2-6f gap before final hit on block | | * 2-6f gap before final hit on block |
| <br> | | <br> |
| The final 6K followup, like its predecessor, can only come out on hit or block. If successful, it levels up Jamie's Drink Level by 1. Because Rekkas are so easy to confirm into, this move is the primary way to level up. The meterless versions leave Jamie at a slight disadvantage after knockdown, making it slightly risky to use in the corner; to avoid this risk, use the OD version to give Jamie slightly more KD advantage. | | The final 6K follow-up, like its predecessor, can only come out on hit or block. If successful, it levels up Jamie's Drink Level by 1. Because Rekkas are so easy to confirm into, this move is the primary way to level up. The meterless versions leave Jamie at a slight disadvantage after knockdown, making it slightly risky to use in the corner; to avoid this risk, use the OD version to give Jamie slightly more KD advantage. |
|
| |
|
| The long drink animation makes the 6K ender extremely unsafe on block. The drink itself is interruptible, and any punish within the first 21f will stop Jamie's drink level from increasing (20f for the LP version). Like the other Rekka followups, it is possible to frame trap the opponent if they attempt a punish. The exact blockstring gap can change depending on the button timing. | | The long drink animation makes the 6K ender extremely unsafe on block. The drink itself is interruptible, and any punish within the first 21f will stop Jamie's drink level from increasing (20f for the LP version). Like the other Rekka follow-ups, it is possible to frame trap the opponent if they attempt a punish. The exact blockstring gap can change depending on the button timing. |
|
| |
|
| The transition from DL3 to DL4 gives Jamie much better KD advantage on the knockdown. Because of this, there is no need to use the OD version for a safe corner drink. As usual when taking a drink during DL4, Jamie restores 1 Drive bar instead of gaining a Drink Level. DL4 Jamie gets far more damage and corner carry from his Punch Rekkas, but this may be a good option if approaching Burnout; the OD version also benefits from getting an immediate 50% meter refund. | | The transition from DL3 to DL4 gives Jamie much better KD advantage on the knockdown. Because of this, there is no need to use the OD version for a safe corner drink. As usual when taking a drink during DL4, Jamie restores 1 Drive bar instead of gaining a Drink Level. DL4 Jamie gets far more damage and corner carry from his Punch Rekkas, but this may be a good option if approaching Burnout; the OD version also benefits from getting an immediate 50% meter refund. |
| Line 1,063: |
Line 1,063: |
| {{AttackDataCargo-SF6/Query|Jamie_214lp_dl2}} | | {{AttackDataCargo-SF6/Query|Jamie_214lp_dl2}} |
| * Damage DL0-DL4: 810/855/900/945/990 | | * Damage DL0-DL4: 810/855/900/945/990 |
| * '''Cancel Hitconfirm Window:''' 25f (Super/DL4 Followup) | | * '''Cancel Hitconfirm Window:''' 25f (Super/DL4 Follow-up) |
| ** 22f to confirm 6P juggle after DL4 grounded hit | | ** 22f to confirm 6P juggle after DL4 grounded hit |
| {{AttackDataCargo-SF6/Query|Jamie_214mp_dl2}} | | {{AttackDataCargo-SF6/Query|Jamie_214mp_dl2}} |
| * Damage DL0-DL4: 900/950/1000/1050/1100 | | * Damage DL0-DL4: 900/950/1000/1050/1100 |
| * '''Cancel Hitconfirm Window:''' 25f (Super/DL4 Followup) | | * '''Cancel Hitconfirm Window:''' 25f (Super/DL4 Follow-up) |
| ** 22f to confirm 6P juggle after DL4 grounded hit | | ** 22f to confirm 6P juggle after DL4 grounded hit |
| {{AttackDataCargo-SF6/Query|Jamie_214hp_dl2}} | | {{AttackDataCargo-SF6/Query|Jamie_214hp_dl2}} |
| * Damage DL0-DL4: 1080/1140/1200/1260/1320 | | * Damage DL0-DL4: 1080/1140/1200/1260/1320 |
| * '''Cancel Hitconfirm Window:''' 25f (Super/DL4 Followup) | | * '''Cancel Hitconfirm Window:''' 25f (Super/DL4 Follow-up) |
| ** 22f to confirm 6P juggle after DL4 grounded hit | | ** 22f to confirm 6P juggle after DL4 grounded hit |
| {{AttackDataCargo-SF6/Query|Jamie_214pp_dl2}} | | {{AttackDataCargo-SF6/Query|Jamie_214pp_dl2}} |
| Line 1,077: |
Line 1,077: |
| * Causes Tumble state; can OTG juggle near corner | | * Causes Tumble state; can OTG juggle near corner |
| * Punish Counter: Tumble KD +87 (+155 if the corner Wall Splat happens) | | * Punish Counter: Tumble KD +87 (+155 if the corner Wall Splat happens) |
| ** Opponent is considered standing and throwable, but becomes airborne after followup hit | | ** Opponent is considered standing and throwable, but becomes airborne after follow-up hit |
| * '''Cancel Hitconfirm Window:''' 25f (Super/DL4 Followup) | | * '''Cancel Hitconfirm Window:''' 25f (Super/DL4 Follow-up) |
| * '''SA2 Cancel Advantage:''' KD+89(103)/+15 | | * '''SA2 Cancel Advantage:''' KD+89(103)/+15 |
| <br> | | <br> |
| Swagger Step is a forward lunging palm attack that can be made safe if well-spaced. It has juggle potential and can combo on the ground, though the slow startup limits the cancel routes that are actually useful. Since Rekka can only cancel the first hit into Super, Swagger Step is the better move for high damage Super cancels. Note that the Super confirm window is quite lenient, but becomes more strict when spaced to hit on later active frames (17f window at minimum). | | Swagger Step is a forward lunging palm attack that can be made safe if well-spaced. It has juggle potential and can combo on the ground, though the slow startup limits the cancel routes that are actually useful. Since Rekka can only cancel the first hit into Super, Swagger Step is the better move for high damage Super cancels. Note that the Super confirm window is quite lenient, but becomes more strict when spaced to hit on later active frames (17f window at minimum). |
|
| |
|
| At Drink Lv.4, Jamie gains an additional [[#Swagger Hermit Punch (214P~6P)|6P Followup]] for extra damage. This can be confirmed off a raw 214P hit, but may drop if input too late. | | At Drink Lv.4, Jamie gains an additional [[#Swagger Hermit Punch (214P~6P)|6P Follow-up]] for extra damage. This can be confirmed off a raw 214P hit, but may drop if input too late. |
|
| |
|
| Grounded cancel routes: (CH = +2 Counter-hit, PC = +4 Punish Counter) | | Grounded cancel routes: (CH = +2 Counter-hit, PC = +4 Punish Counter) |
| Line 1,113: |
Line 1,113: |
| * '''SA2 Cancel Advantage:''' KD+55/+12 | | * '''SA2 Cancel Advantage:''' KD+55/+12 |
| <br> | | <br> |
| This followup to Swagger Step is only available at max Drink Level. It works in juggles or in grounded combos, adding significant damage especially when canceled into SA3. It is much more unsafe on block than the first part of Swagger Step, though it can be used as a risky frame trap if the opponent tries to punish you. The 6P can be delayed significantly, though this can cause it to drop against grounded opponents unless the Swagger Step hits meaty. | | This follow-up to Swagger Step is only available at max Drink Level. It works in juggles or in grounded combos, adding significant damage especially when canceled into SA3. It is much more unsafe on block than the first part of Swagger Step, though it can be used as a risky frame trap if the opponent tries to punish you. The 6P can be delayed significantly, though this can cause it to drop against grounded opponents unless the Swagger Step hits meaty. |
| }} | | }} |
|
| |
|
| Line 1,143: |
Line 1,143: |
| * '''Full Invuln:''' 1-9f; '''Anti-Air Invuln:''' 10-12f; '''Lower Body Strike Invuln:''' 10-21f | | * '''Full Invuln:''' 1-9f; '''Anti-Air Invuln:''' 10-12f; '''Lower Body Strike Invuln:''' 10-21f |
| <br> | | <br> |
| Jamie's most consistent anti-air and OD reversal. He kicks upward before falling back away from the opponent. On hit, this transitions into a leaping followup attack that is fully invincible during the animation. On whiff or block, Jamie does not perform the extra hit, instead standing up from his grounded position. This recovery animation can cause some attempted punishes to whiff at longer ranges, but there is plenty of time to walk or dash forward, or to use a slow ranged punish starter. | | Jamie's most consistent anti-air and OD reversal. He kicks upward before falling back away from the opponent. On hit, this transitions into a leaping follow-up attack that is fully invincible during the animation. On whiff or block, Jamie does not perform the extra hit, instead standing up from his grounded position. This recovery animation can cause some attempted punishes to whiff at longer ranges, but there is plenty of time to walk or dash forward, or to use a slow ranged punish starter. |
|
| |
|
| Arrow Kick works well in juggles, but in grounded combos it can be finicky near max range. It also has no ability to Super cancel, so its damage potential in punishes is limited. It gives Jamie great oki on hit and the followup animation provides some nice corner carry as well. In the corner, the LK version sets up a safejump. | | Arrow Kick works well in juggles, but in grounded combos it can be finicky near max range. It also has no ability to Super cancel, so its damage potential in punishes is limited. It gives Jamie great oki on hit and the follow-up animation provides some nice corner carry as well. In the corner, the LK version sets up a safejump. |
| }} | | }} |
|
| |
|
| Line 1,163: |
Line 1,163: |
| * Damage DL1-DL4: 950/1000/1050/1100 | | * Damage DL1-DL4: 950/1000/1050/1100 |
| * Forced Knockdown state until land | | * Forced Knockdown state until land |
| * KD vs. airborne opponents (no juggle followup) | | * KD vs. airborne opponents (no juggle follow-up) |
| {{AttackDataCargo-SF6/Query|Jamie_j214kk_dl2}} | | {{AttackDataCargo-SF6/Query|Jamie_j214kk_dl2}} |
| * Damage DL1-DL4: 760/800/840/880 | | * Damage DL1-DL4: 760/800/840/880 |
| Line 1,170: |
Line 1,170: |
| * Puts airborne opponents into OTG bounce state | | * Puts airborne opponents into OTG bounce state |
| * Counts as 2 hits of scaling when beginning a combo | | * Counts as 2 hits of scaling when beginning a combo |
| * If canceled from j.MP, 10% scaling penalty applies to j.214KK and followup juggles (100 -> 90 -> 70 -> 60...) | | * If canceled from j.MP, 10% scaling penalty applies to j.214KK and follow-up juggles (100 -> 90 -> 70 -> 60...) |
| <br> | | <br> |
| At Drink Lv.1, Jamie unlocks a divekick that can be used out of forward jumps. It can be done very low to the ground with a Tiger Knee input (214~9K), and connecting low on the opponents legs gives better advantage on block or on knockdown; he can even juggle after meterless divekick when spaced well enough. The angle of the meterless divekick changes depending on which button is pressed, with LK being short and steep while HK travels farther. This is a useful tool not only for pressure, but for navigating around projectiles, an area in which Jamie usually struggles. It also evades throws, so it can be used as a shimmy or to punish throw loops. | | At Drink Lv.1, Jamie unlocks a divekick that can be used out of forward jumps. It can be done very low to the ground with a Tiger Knee input (214~9K), and connecting low on the opponents legs gives better advantage on block or on knockdown; he can even juggle after meterless divekick when spaced well enough. The angle of the meterless divekick changes depending on which button is pressed, with LK being short and steep while HK travels farther. This is a useful tool not only for pressure, but for navigating around projectiles, an area in which Jamie usually struggles. It also evades throws, so it can be used as a shimmy or to punish throw loops. |
| Line 1,244: |
Line 1,244: |
| After meterless Tenshin, the opponent is in a unique grounded juggle state; grounded combos work as usual, but they are considered to have a Juggle Count of 1. This can affect any juggle route that comes afterward; for example, 2MP > DR 2KK > j.HK will not combo after Tenshin, despite normally working on grounded opponents. | | After meterless Tenshin, the opponent is in a unique grounded juggle state; grounded combos work as usual, but they are considered to have a Juggle Count of 1. This can affect any juggle route that comes afterward; for example, 2MP > DR 2KK > j.HK will not combo after Tenshin, despite normally working on grounded opponents. |
|
| |
|
| The first attack following Tenshin is unscaled, but any following attacks have a 40% scaling penalty applied (100-60-50-40...). Since the OD version gives more than enough time to go into SA3 as the first hit, this will lead to a completely unscaled super with devastating damage, dealing more damage than Zangief's CA if you have CA yourself. There is also an interesting situation after Punish Counter 214PP's tumbling wall splat: Jamie can combo into Tenshin after this, in which case the throw is scaled by 20% and any followups immediately skip to the 40% scaling penalty. | | The first attack following Tenshin is unscaled, but any following attacks have a 40% scaling penalty applied (100-60-50-40...). Since the OD version gives more than enough time to go into SA3 as the first hit, this will lead to a completely unscaled super with devastating damage, dealing more damage than Zangief's CA if you have CA yourself. There is also an interesting situation after Punish Counter 214PP's tumbling wall splat: Jamie can combo into Tenshin after this, in which case the throw is scaled by 20% and any follow-ups immediately skip to the 40% scaling penalty. |
|
| |
|
| Jamie is not point blank after the grab, but is close enough to combo into moves like 5MP, 2MP, or 5HP. While Tenshin can hit as a Counter-hit or Punish Counter, this has no effect on frame advantage (OD Tenshin does extra damage on Punish Counter only). | | Jamie is not point blank after the grab, but is close enough to combo into moves like 5MP, 2MP, or 5HP. While Tenshin can hit as a Counter-hit or Punish Counter, this has no effect on frame advantage (OD Tenshin does extra damage on Punish Counter only). |
| Line 1,320: |
Line 1,320: |
| {{MoveDataCargoImage|imageHeight=140px|Jamie_236236p_dl2|caption=}} | | {{MoveDataCargoImage|imageHeight=140px|Jamie_236236p_dl2|caption=}} |
| ---- | | ---- |
| {{MoveDataCargoImage|imageHeight=140px|Jamie_236236p_ca_dl2|caption=CA does much more damage, but no followup juggle}} | | {{MoveDataCargoImage|imageHeight=140px|Jamie_236236p_ca_dl2|caption=CA does much more damage, but no follow-up juggle}} |
| | hitboxes = | | | hitboxes = |
| {{MoveDataCargoImage|hitbox=yes|imageHeight=150px|Jamie_236236p_dl2|caption=CA does much more damage, but no followup juggle}} | | {{MoveDataCargoImage|hitbox=yes|imageHeight=150px|Jamie_236236p_dl2|caption=CA does much more damage, but no follow-up juggle}} |
| | info = | | | info = |
| {{AttackDataCargo-SF6/Query|Jamie_236236p_dl2}} | | {{AttackDataCargo-SF6/Query|Jamie_236236p_dl2}} |
| Line 1,338: |
Line 1,338: |
| ** Chip: 450,675/475,712/500,750/525,787/550,825 | | ** Chip: 450,675/475,712/500,750/525,787/550,825 |
| * '''Full Invuln:''' 1-12f; Armor Break | | * '''Full Invuln:''' 1-12f; Armor Break |
| * No juggle followup on cinematic hit | | * No juggle follow-up on cinematic hit |
| * Depletes 2 Drive bars from opponent on hit | | * Depletes 2 Drive bars from opponent on hit |
| ** Cinematic time regenerates ~2.2 Drive bars for Jamie | | ** Cinematic time regenerates ~2.2 Drive bars for Jamie |
| * 50% minimum damage scaling; available at 25% HP or below | | * 50% minimum damage scaling; available at 25% HP or below |
| <br> | | <br> |
| Jamie's Level 3 Super goes into a cinematic if the first hit connects, while the 2nd hit is extremely weak on its own. The cinematic hit ends by launching the opponent, reminiscent of Yun's You Hou Ultra 1 from USF4. As a result, the damage is quite low, instead relying on the followup juggle to make it worthwhile. The cinematic ends abruptly, so it takes practice to learn exactly when to execute the followup. Jamie has several options, like Dash + 5HP or Drive Rush~2HP into further juggles. | | Jamie's Level 3 Super goes into a cinematic if the first hit connects, while the 2nd hit is extremely weak on its own. The cinematic hit ends by launching the opponent, reminiscent of Yun's You Hou Ultra 1 from USF4. As a result, the damage is quite low, instead relying on the follow-up juggle to make it worthwhile. The cinematic ends abruptly, so it takes practice to learn exactly when to execute the follow-up. Jamie has several options, like Dash + 5HP or Drive Rush~2HP into further juggles. |
|
| |
|
| The Critical Art version lacks this ending juggle, but makes up for it with higher base damage and a cooler ending cinematic. | | The Critical Art version lacks this ending juggle, but makes up for it with higher base damage and a cooler ending cinematic. |


