|
|
| Line 544: |
Line 544: |
| * () refers to scaled damage when beginning combo with 5LP~LK | | * () refers to scaled damage when beginning combo with 5LP~LK |
| <br> | | <br> |
| Since 5LP loses much of its frame advantage at Drink Lv.1 and above, this Target Combo is the primary way to convert jab into damage. The MP ender can combo into 236LP/MP/PP, 214LP, 236LK, 623K, or Super. The only safe enders after committing to the TC followup are 236PP and Lv.2 Super. If the opponent tries to punish the TC on block, Jamie can frame trap any non-invincible reversal with 236LP or the much safer 236PP. | | Since 5LP loses much of its frame advantage at Drink Lv.1 and above, this Target Combo is the primary way to convert jab into damage. The MP ender can combo into 236LP/MP/PP, 214LP, 236LK, 623K, or Super. The only safe enders after committing to the TC followup are 236PP and SA2. If the opponent tries to punish the TC on block, Jamie can frame trap any non-invincible reversal with 236LP or the much safer 236PP. |
| }} | | }} |
|
| |
|
| Line 817: |
Line 817: |
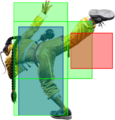
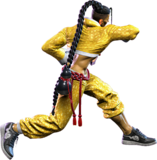
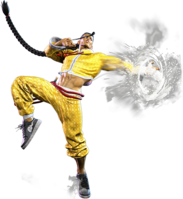
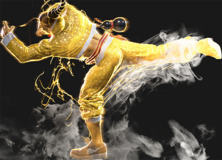
| Freeflow Strikes (or "Rekkas") are forward-moving strikes that can be confirmed into optional followups. Higher strength versions move farther but have slower startup, with the OD version gaining both speed and longer range. At Drink Lv.0 to Lv.3, each Rekka is a single hit, and only the first part of the sequence can cancel into Super. If well-spaced, the first meterless Freeflow Strike is often safe; the LP version is usually the best for this since it has less forward movement, but this can also cause it to whiff in max range cancels. The OD version is always safe. | | Freeflow Strikes (or "Rekkas") are forward-moving strikes that can be confirmed into optional followups. Higher strength versions move farther but have slower startup, with the OD version gaining both speed and longer range. At Drink Lv.0 to Lv.3, each Rekka is a single hit, and only the first part of the sequence can cancel into Super. If well-spaced, the first meterless Freeflow Strike is often safe; the LP version is usually the best for this since it has less forward movement, but this can also cause it to whiff in max range cancels. The OD version is always safe. |
|
| |
|
| When attempting to confirm into the 6P or 6K followups on hit, it's important to note that the followup speed depends on the strength of the first Rekka. Delaying the confirm too long, especially on HP Rekka, can cause the followup to come out without comboing. The 6K followup is slightly slower than 6P, which also makes the confirm slightly stricter. OD Rekka canceled into Lv.2 Super is a great option on hit or block, leading to great combos or block pressure from a mid-range poke. | | When attempting to confirm into the 6P or 6K followups on hit, it's important to note that the followup speed depends on the strength of the first Rekka. Delaying the confirm too long, especially on HP Rekka, can cause the followup to come out without comboing. The 6K followup is slightly slower than 6P, which also makes the confirm slightly stricter. OD Rekka canceled into SA2 is a great option on hit or block, leading to great combos or block pressure from a mid-range poke. |
|
| |
|
| This move and its followups can be used in juggles, but they can be very inconsistent depending on the screen position and opponent's juggle height; OD Rekkas are the most consistent overall, and the corner makes things easier as well. | | This move and its followups can be used in juggles, but they can be very inconsistent depending on the screen position and opponent's juggle height; OD Rekkas are the most consistent overall, and the corner makes things easier as well. |
| Line 1,111: |
Line 1,111: |
| * '''SA2 Cancel Advantage:''' KD+55/+12 | | * '''SA2 Cancel Advantage:''' KD+55/+12 |
| <br> | | <br> |
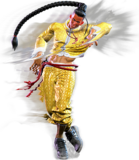
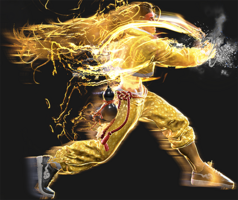
| This followup to Swagger Step is only available at max Drink Level. It works in juggles or in grounded combos, adding significant damage especially when canceled into Lv.3 Super. It is much more unsafe on block than the first part of Swagger Step, though it can be used as a risky frame trap if the opponent tries to punish you. The 6P can be delayed significantly, though this can cause it to drop against grounded opponents unless the Swagger Step hits meaty. | | This followup to Swagger Step is only available at max Drink Level. It works in juggles or in grounded combos, adding significant damage especially when canceled into SA3. It is much more unsafe on block than the first part of Swagger Step, though it can be used as a risky frame trap if the opponent tries to punish you. The 6P can be delayed significantly, though this can cause it to drop against grounded opponents unless the Swagger Step hits meaty. |
| }} | | }} |
|
| |
|
| Line 1,340: |
Line 1,340: |
| * 50% minimum damage scaling; available at 25% HP or below | | * 50% minimum damage scaling; available at 25% HP or below |
| <br> | | <br> |
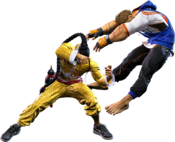
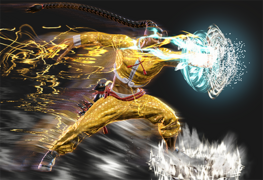
| Jamie's Lv.3 Super goes into a cinematic if the first hit connects, while the 2nd hit is extremely weak on its own. The cinematic hit ends by launching the opponent, reminiscent of Yun's You Hou Ultra 1 from USF4. As a result, the damage is quite low, instead relying on the followup juggle to make it worthwhile. The cinematic ends abruptly, so it takes practice to learn exactly when to execute the followup. Jamie has several options, like Dash + 5HP or Drive Rush~2HP into further juggles. | | Jamie's Level 3 Super goes into a cinematic if the first hit connects, while the 2nd hit is extremely weak on its own. The cinematic hit ends by launching the opponent, reminiscent of Yun's You Hou Ultra 1 from USF4. As a result, the damage is quite low, instead relying on the followup juggle to make it worthwhile. The cinematic ends abruptly, so it takes practice to learn exactly when to execute the followup. Jamie has several options, like Dash + 5HP or Drive Rush~2HP into further juggles. |
|
| |
|
| The Critical Art version lacks this ending juggle, but makes up for it with higher base damage and a cooler ending cinematic. | | The Critical Art version lacks this ending juggle, but makes up for it with higher base damage and a cooler ending cinematic. |


