|
|
| Line 49: |
Line 49: |
| {{AttackDataCargo-SF6/Query|Jamie_5lp}} | | {{AttackDataCargo-SF6/Query|Jamie_5lp}} |
| * '''Cancel Hitconfirm Window:''' 12f | | * '''Cancel Hitconfirm Window:''' 12f |
| * '''xx Lv.2 Super:''' +7/+2 | | * '''SA2 Cancel Advantage:''' +7/+2 |
| <br> | | <br> |
| Overshadowed by {{Clr|LP|2LP}} and {{Clr|LK|5LK}}, this normal doesn't see much use until Jamie has a drink. The frame data of this normal gets worse above Drink Lv.1 but makes up for it in other ways. | | Overshadowed by {{Clr|LP|2LP}} and {{Clr|LK|5LK}}, this normal doesn't see much use until Jamie has a drink. The frame data of this normal gets worse above Drink Lv.1 but makes up for it in other ways. |
| Line 56: |
Line 56: |
| * Damage DL1-DL4: 285/300/315/330 | | * Damage DL1-DL4: 285/300/315/330 |
| * '''Cancel Hitconfirm Window:''' 13f | | * '''Cancel Hitconfirm Window:''' 13f |
| * '''xx Lv.2 Super:''' +7/+2 | | * '''SA2 Cancel Advantage:''' +7/+2 |
| <br> | | <br> |
| At Drink Lv.1 and above, {{Clr|LP|5LP}} becomes Jamie's longest range light normal and has a powerful Target Combo cancel into [[{{PAGENAME}}#5LP~LK~MP|{{clr|LK|LK}}~{{clr|MP|MP}}]], which allows for very strong confirms from light normals. | | At Drink Lv.1 and above, {{Clr|LP|5LP}} becomes Jamie's longest range light normal and has a powerful Target Combo cancel into [[{{PAGENAME}}#5LP~LK~MP|{{clr|LK|LK}}~{{clr|MP|MP}}]], which allows for very strong confirms from light normals. |
| Line 94: |
Line 94: |
| * High juggle potential; final 2 hits maintain juggle state and can allow a followup juggle | | * High juggle potential; final 2 hits maintain juggle state and can allow a followup juggle |
| * '''Cancel Hitconfirm Window:''' 18f | | * '''Cancel Hitconfirm Window:''' 18f |
| * '''xx Lv.2 Super:''' +11/+5 | | * '''SA2 Cancel Advantage:''' +11/+5 |
| <br> | | <br> |
| A button notable in beating Drive Impact with its 3 hits, and being incredibly hard to interrupt as the first hit starts up in 5 frames. This is especially useful off of a Drive Rush, with 5HP > Drive Rush giving strong confirm routes, and Drive Rush into 5HP giving an easily confirmable followup link. In juggles where the last hit connects, it can be used to add free damage since it no longer requires a cancel. It's also pretty deceptive if you cancel the first two hits into Drive Impact yourself. | | A button notable in beating Drive Impact with its 3 hits, and being incredibly hard to interrupt as the first hit starts up in 5 frames. This is especially useful off of a Drive Rush, with 5HP > Drive Rush giving strong confirm routes, and Drive Rush into 5HP giving an easily confirmable followup link. In juggles where the last hit connects, it can be used to add free damage since it no longer requires a cancel. It's also pretty deceptive if you cancel the first two hits into Drive Impact yourself. |
| Line 119: |
Line 119: |
| * Chains into 5LK/2LP/2LK | | * Chains into 5LK/2LP/2LK |
| * '''Cancel Hitconfirm Window:''' 13f | | * '''Cancel Hitconfirm Window:''' 13f |
| * '''xx Lv.2 Super:''' +9/+5 | | * '''SA2 Cancel Advantage:''' +9/+5 |
| <br> | | <br> |
| Jamie's 5LK can be chained into, a property not commonly seen in 5LKs. It has quite good range for a chainable light, making it useful in light confirms and combos, all while still being a solid footsies 5LK. It has the unique ability to chain into itself infinitely on whiff, allowing Jamie to "dance" with the animation. Jamie shifts forward during the 5LK animation, so chaining out of it at the earliest timing will act as a sort of "kara-cancel" to keep him closer to the opponent. | | Jamie's 5LK can be chained into, a property not commonly seen in 5LKs. It has quite good range for a chainable light, making it useful in light confirms and combos, all while still being a solid footsies 5LK. It has the unique ability to chain into itself infinitely on whiff, allowing Jamie to "dance" with the animation. Jamie shifts forward during the 5LK animation, so chaining out of it at the earliest timing will act as a sort of "kara-cancel" to keep him closer to the opponent. |
| Line 139: |
Line 139: |
| * Damage DL0-DL4: 540/570/600/630/660 | | * Damage DL0-DL4: 540/570/600/630/660 |
| * '''Cancel Hitconfirm Window:''' 15f | | * '''Cancel Hitconfirm Window:''' 15f |
| * '''xx Lv.2 Super:''' +14/+10 | | * '''SA2 Cancel Advantage:''' +14/+10 |
| <br> | | <br> |
| 5MK is a solid mid-range poke that can be buffered into specials to score a knockdown. Compared to 2MK, it is 3f slower but hits from slightly longer range and is slightly less whiff punishable. | | 5MK is a solid mid-range poke that can be buffered into specials to score a knockdown. Compared to 2MK, it is 3f slower but hits from slightly longer range and is slightly less whiff punishable. |
| Line 159: |
Line 159: |
| * Puts airborne opponents into [[Street_Fighter_6/Glossary#Juggles|limited juggle state]] | | * Puts airborne opponents into [[Street_Fighter_6/Glossary#Juggles|limited juggle state]] |
| * '''Cancel Hitconfirm Window:''' 17f (PC: 29f) | | * '''Cancel Hitconfirm Window:''' 17f (PC: 29f) |
| * '''xx Lv.2 Super:''' +17/+11 (KD +87) | | * '''SA2 Cancel Advantage:''' +17/+11 (KD +87) |
| <br> | | <br> |
| While quite slow, 5HK has solid range due to its forward movement, making it a real threat in neutral. The long recovery on this move makes it very risky to whiff in neutral, but on block the pushback usually keeps it safe even at -5. The hitbox is quite low to the ground, making it worthless as an anti-air; the juggle properties vs. airborne only allow Jamie to safely cancel into a special when hitting the opponent's early jump frames. The crumple state from Punish Counter causes the opponent to fall backwards, making the followups a bit more limited compared to the corner. | | While quite slow, 5HK has solid range due to its forward movement, making it a real threat in neutral. The long recovery on this move makes it very risky to whiff in neutral, but on block the pushback usually keeps it safe even at -5. The hitbox is quite low to the ground, making it worthless as an anti-air; the juggle properties vs. airborne only allow Jamie to safely cancel into a special when hitting the opponent's early jump frames. The crumple state from Punish Counter causes the opponent to fall backwards, making the followups a bit more limited compared to the corner. |
| Line 180: |
Line 180: |
| * Chains into 5LK/2LP/2LK | | * Chains into 5LK/2LP/2LK |
| * '''Cancel Hitconfirm Window:''' 13f | | * '''Cancel Hitconfirm Window:''' 13f |
| * '''xx Lv.2 Super:''' +9/+3 | | * '''SA2 Cancel Advantage:''' +9/+3 |
| <br> | | <br> |
| Jamie's only 4f startup normal, making it useful in certain punishes and for pressure strings. This is the only chainable light normal that works well against Drive Impact, but the chain speed is below average, making it more susceptible to a Punish Counter. | | Jamie's only 4f startup normal, making it useful in certain punishes and for pressure strings. This is the only chainable light normal that works well against Drive Impact, but the chain speed is below average, making it more susceptible to a Punish Counter. |
| Line 198: |
Line 198: |
| * Damage DL0-DL4: 540/570/600/630/660 | | * Damage DL0-DL4: 540/570/600/630/660 |
| * '''Cancel Hitconfirm Window:''' 16f | | * '''Cancel Hitconfirm Window:''' 16f |
| * '''xx Lv.2 Super:''' +12/+9 | | * '''SA2 Cancel Advantage:''' +12/+9 |
| <br> | | <br> |
| A standard cancelable 6f medium button. Jamie can't link into it without Drive Rush, Counterhit, or Punish Counter bonus advantage, and at only +3 he also needs one of these to link out of it. Very non-committal in neutral when buffered as a counterpoke. | | A standard cancelable 6f medium button. Jamie can't link into it without Drive Rush, Counterhit, or Punish Counter bonus advantage, and at only +3 he also needs one of these to link out of it. Very non-committal in neutral when buffered as a counterpoke. |
| Line 218: |
Line 218: |
| * Only the first 2 active frames are cancelable | | * Only the first 2 active frames are cancelable |
| * '''Cancel Hitconfirm Window:''' 16f | | * '''Cancel Hitconfirm Window:''' 16f |
| * '''xx Lv.2 Super:''' +21/+13 | | * '''SA2 Cancel Advantage:''' +21/+13 |
| <br> | | <br> |
| Works fairly well as an anti-air due to its vertical reach and large number of active frames. Does not have a useful cancel when used as an anti-air, as only the early grounded frames are cancelable. | | Works fairly well as an anti-air due to its vertical reach and large number of active frames. Does not have a useful cancel when used as an anti-air, as only the early grounded frames are cancelable. |
| Line 254: |
Line 254: |
| * Applies a 20% damage scaling penalty to the next hit when used as a combo starter (100/80/70/60...) | | * Applies a 20% damage scaling penalty to the next hit when used as a combo starter (100/80/70/60...) |
| * '''Cancel Hitconfirm Window:''' 13f | | * '''Cancel Hitconfirm Window:''' 13f |
| * '''xx Lv.2 Super:''' +12/+7 | | * '''SA2 Cancel Advantage:''' +12/+7 |
| <br> | | <br> |
| Jamie's 2MK is relatively fast with decent range, and the high pushback makes it safe to poke with. If well-spaced, cancels into 236P are often safe, but the LP version can whiff at absolute max range. | | Jamie's 2MK is relatively fast with decent range, and the high pushback makes it safe to poke with. If well-spaced, cancels into 236P are often safe, but the LP version can whiff at absolute max range. |
| Line 410: |
Line 410: |
|
| |
|
| From a drive rush canceled normal on hit it's possible to link into this and do j.HK 2HK~K~P for a combo with decent wall carry and a drink while still being +4 <br> | | From a drive rush canceled normal on hit it's possible to link into this and do j.HK 2HK~K~P for a combo with decent wall carry and a drink while still being +4 <br> |
| At DL1 or higher, Jamie can anti-air with 2KK into j.MP xx j.214KK, then land and juggle his 2HK~K~P Target Combo for a free Drink Level. | | At DL1 or higher, Jamie can anti-air with 2KK into j.MP > j.214KK, then land and juggle his 2HK~K~P Target Combo for a free Drink Level. |
| }} | | }} |
|
| |
|
| Line 453: |
Line 453: |
| * Damage DL0-DL2: 720/760/800 | | * Damage DL0-DL2: 720/760/800 |
| * '''Cancel Hitconfirm Window:''' 19f (Super) | | * '''Cancel Hitconfirm Window:''' 19f (Super) |
| * '''xx Lv.2 Super:''' +15/+11 | | * '''SA2 Cancel Advantage:''' +15/+11 |
| {{AttackDataCargo-SF6/Query|Jamie_4hp_dl3}} | | {{AttackDataCargo-SF6/Query|Jamie_4hp_dl3}} |
| * Damage DL3-DL4: 840/880 | | * Damage DL3-DL4: 840/880 |
| * '''Cancel Hitconfirm Window:''' 19f (Super) / 20f (TC) | | * '''Cancel Hitconfirm Window:''' 19f (Super) / 20f (TC) |
| * '''xx Lv.2 Super:''' +14/+12 | | * '''SA2 Cancel Advantage:''' +14/+12 |
| <br> | | <br> |
| Hermit's Elbow pulls back during startup, making it a useful shimmy tool in tick throw situations. If you successfully bait the opponent's throw and land a Punish Counter, it becomes +5 and can link into 5LK or 5HP. At its max possible range, it can become +4 as a meaty and link into 2LP without a Counterhit. The super cancel window is also quite lenient, allowing for high damage confirms. | | Hermit's Elbow pulls back during startup, making it a useful shimmy tool in tick throw situations. If you successfully bait the opponent's throw and land a Punish Counter, it becomes +5 and can link into 5LK or 5HP. At its max possible range, it can become +4 as a meaty and link into 2LP without a Counterhit. The super cancel window is also quite lenient, allowing for high damage confirms. |
| Line 481: |
Line 481: |
| * Damage DL0-DL3: 810/855/900/945 | | * Damage DL0-DL3: 810/855/900/945 |
| * '''Cancel Hitconfirm Window:''' 18f (Super) | | * '''Cancel Hitconfirm Window:''' 18f (Super) |
| * '''xx Lv.2 Super:''' +19/+13 | | * '''SA2 Cancel Advantage:''' +19/+13 |
| {{AttackDataCargo-SF6/Query|Jamie_6hk_dl4}} | | {{AttackDataCargo-SF6/Query|Jamie_6hk_dl4}} |
| * '''Cancel Hitconfirm Window:''' 18f (Super) / 22f (TC) | | * '''Cancel Hitconfirm Window:''' 18f (Super) / 22f (TC) |
| ** TC confirm into 4HK must be input within 20f for a Counterhit combo into Headbutt | | ** TC confirm into 4HK must be input within 20f for a Counterhit combo into Headbutt |
| * '''xx Lv.2 Super:''' +19/+13 | | * '''SA2 Cancel Advantage:''' +19/+13 |
| <br> | | <br> |
| A long range stepkick that can be confirmed into a Super on hit. You cannot space it to connect meaty at max range, so the only followup links require Counterhit, Punish Counter, or Drive Rush (which travels nearly full screen). | | A long range stepkick that can be confirmed into a Super on hit. You cannot space it to connect meaty at max range, so the only followup links require Counterhit, Punish Counter, or Drive Rush (which travels nearly full screen). |
| Line 541: |
Line 541: |
| * Damage DL1-DL4: 475(380)/500(400)/525(420)/550(440) | | * Damage DL1-DL4: 475(380)/500(400)/525(420)/550(440) |
| * '''Cancel Hitconfirm Window:''' 52f | | * '''Cancel Hitconfirm Window:''' 52f |
| * '''xx Lv.2 Super:''' +12/+4 | | * '''SA2 Cancel Advantage:''' +12/+4 |
| * () refers to scaled damage when beginning combo with 5LP~LK | | * () refers to scaled damage when beginning combo with 5LP~LK |
| <br> | | <br> |
| Line 592: |
Line 592: |
| * Only combos on Counterhit/Punish Counter or with meaty timing; 3f gap on block | | * Only combos on Counterhit/Punish Counter or with meaty timing; 3f gap on block |
| * '''Cancel Hitconfirm Window:''' 18f / 56f (TC) | | * '''Cancel Hitconfirm Window:''' 18f / 56f (TC) |
| * '''xx Lv.2 Super:''' +18/+8 | | * '''SA2 Cancel Advantage:''' +18/+8 |
| {{AttackDataCargo-SF6/Query|Jamie_4hp_hp_hk_dl3}} | | {{AttackDataCargo-SF6/Query|Jamie_4hp_hp_hk_dl3}} |
| * Airborne 18f~ (Forced Knockdown state) | | * Airborne 18f~ (Forced Knockdown state) |
| Line 630: |
Line 630: |
| * Cancelable into any special or Super | | * Cancelable into any special or Super |
| * '''Cancel Hitconfirm Window:''' 20f (Headbutt) / 59-60f (CH 6HK + Headbutt) | | * '''Cancel Hitconfirm Window:''' 20f (Headbutt) / 59-60f (CH 6HK + Headbutt) |
| * '''xx Lv.2 Super:''' KD+39/+10 | | * '''SA2 Cancel Advantage:''' KD+39/+10 |
| {{AttackDataCargo-SF6/Query|Jamie_6hk_4hk_p_mid_dl4}} | | {{AttackDataCargo-SF6/Query|Jamie_6hk_4hk_p_mid_dl4}} |
| * Cancelable into any special or Super | | * Cancelable into any special or Super |
| * '''Cancel Hitconfirm Window:''' 60/40/17f (spin fists only, more hits allows easier confirm) | | * '''Cancel Hitconfirm Window:''' 60/40/17f (spin fists only, more hits allows easier confirm) |
| * '''xx Lv.2 Super:''' KD+42/+13 | | * '''SA2 Cancel Advantage:''' KD+42/+13 |
| {{AttackDataCargo-SF6/Query|Jamie_6hk_4hk_p_far_dl4}} | | {{AttackDataCargo-SF6/Query|Jamie_6hk_4hk_p_far_dl4}} |
| * Restores 1 Drive bar or equivalent Burnout gauge on final Drink recovery frame | | * Restores 1 Drive bar or equivalent Burnout gauge on final Drink recovery frame |
| Line 813: |
Line 813: |
| * '''Cancel Hitconfirm Window:''' 23f (Followup) / 15f (Super) | | * '''Cancel Hitconfirm Window:''' 23f (Followup) / 15f (Super) |
| ** 22f confirm window to combo into ~6K | | ** 22f confirm window to combo into ~6K |
| * '''xx Lv.2 Super:''' +17/+14 | | * '''SA2 Cancel Advantage:''' +17/+14 |
| <br> | | <br> |
| Freeflow Strikes (or "Rekkas") are forward-moving strikes that can be confirmed into optional followups. Higher strength versions move farther but have slower startup, with the OD version gaining both speed and longer range. At Drink Lv.0 to Lv.3, each Rekka is a single hit, and only the first part of the sequence can cancel into Super. If well-spaced, the first meterless Freeflow Strike is often safe; the LP version is usually the best for this since it has less forward movement, but this can also cause it to whiff in max range cancels. The OD version is always safe. | | Freeflow Strikes (or "Rekkas") are forward-moving strikes that can be confirmed into optional followups. Higher strength versions move farther but have slower startup, with the OD version gaining both speed and longer range. At Drink Lv.0 to Lv.3, each Rekka is a single hit, and only the first part of the sequence can cancel into Super. If well-spaced, the first meterless Freeflow Strike is often safe; the LP version is usually the best for this since it has less forward movement, but this can also cause it to whiff in max range cancels. The OD version is always safe. |
| Line 847: |
Line 847: |
| * '''Cancel Hitconfirm Window:''' 36f (Followup) / 27f (Super) | | * '''Cancel Hitconfirm Window:''' 36f (Followup) / 27f (Super) |
| ** 35f confirm window to combo into ~6P | | ** 35f confirm window to combo into ~6P |
| * '''xx Lv.2 Super:''' +18/+13 1st hit, +18/+12 2nd hit | | * '''SA2 Cancel Advantage:''' +18/+13 1st hit, +18/+12 2nd hit |
| <br> | | <br> |
| At max Drink Level, Freeflow Strikes becomes a 2-hit attack, gaining additional damage and making it much easier to confirm followups or Super. It also becomes safe on block for all versions, giving Jamie a great confirmable pressure tool from mid-range. In some juggle routes, it becomes harder to combo into the 6K followups due to the extra pushback, so the 6P followups are recommended for more consistency. | | At max Drink Level, Freeflow Strikes becomes a 2-hit attack, gaining additional damage and making it much easier to confirm followups or Super. It also becomes safe on block for all versions, giving Jamie a great confirmable pressure tool from mid-range. In some juggle routes, it becomes harder to combo into the 6K followups due to the extra pushback, so the 6P followups are recommended for more consistency. |
| Line 1,077: |
Line 1,077: |
| ** Opponent is considered standing and throwable, but becomes airborne after followup hit | | ** Opponent is considered standing and throwable, but becomes airborne after followup hit |
| * '''Cancel Hitconfirm Window:''' 25f (Super/DL4 Followup) | | * '''Cancel Hitconfirm Window:''' 25f (Super/DL4 Followup) |
| * '''xx Lv.2 Super:''' KD+89(103)/+15 | | * '''SA2 Cancel Advantage:''' KD+89(103)/+15 |
| <br> | | <br> |
| Swagger Step is a forward lunging palm attack that can be made safe if well-spaced. It has juggle potential and can combo on the ground, though the slow startup limits the cancel routes that are actually useful. Since Rekka can only cancel the first hit into Super, Swagger Step is the better move for high damage Super cancels. Note that the Super confirm window is quite lenient, but becomes more strict when spaced to hit on later active frames (17f window at minimum). | | Swagger Step is a forward lunging palm attack that can be made safe if well-spaced. It has juggle potential and can combo on the ground, though the slow startup limits the cancel routes that are actually useful. Since Rekka can only cancel the first hit into Super, Swagger Step is the better move for high damage Super cancels. Note that the Super confirm window is quite lenient, but becomes more strict when spaced to hit on later active frames (17f window at minimum). |
| Line 1,109: |
Line 1,109: |
| ** Can delay to create a gap up to 5f on block | | ** Can delay to create a gap up to 5f on block |
| * '''Cancel Hitconfirm Window:''' 19f (Super) | | * '''Cancel Hitconfirm Window:''' 19f (Super) |
| * '''xx Lv.2 Super:''' KD+55/+12 | | * '''SA2 Cancel Advantage:''' KD+55/+12 |
| <br> | | <br> |
| This followup to Swagger Step is only available at max Drink Level. It works in juggles or in grounded combos, adding significant damage especially when canceled into Lv.3 Super. It is much more unsafe on block than the first part of Swagger Step, though it can be used as a risky frame trap if the opponent tries to punish you. The 6P can be delayed significantly, though this can cause it to drop against grounded opponents unless the Swagger Step hits meaty. | | This followup to Swagger Step is only available at max Drink Level. It works in juggles or in grounded combos, adding significant damage especially when canceled into Lv.3 Super. It is much more unsafe on block than the first part of Swagger Step, though it can be used as a risky frame trap if the opponent tries to punish you. The 6P can be delayed significantly, though this can cause it to drop against grounded opponents unless the Swagger Step hits meaty. |
| Line 1,207: |
Line 1,207: |
| * '''Projectile Invuln:''' 3-28f | | * '''Projectile Invuln:''' 3-28f |
| * '''Cancel Hitconfirm Window:''' 74f (Super); cancels on 7th hit | | * '''Cancel Hitconfirm Window:''' 74f (Super); cancels on 7th hit |
| * '''xx Lv.2 Super:''' +14/+7 | | * '''SA2 Cancel Advantage:''' +14/+7 |
| <br> | | <br> |
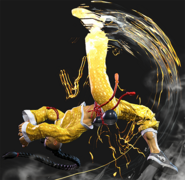
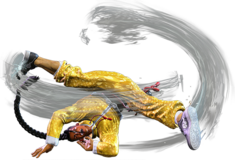
| Jamie drops to the ground and begins break dancing, slowly advancing toward the opponent. The slow startup limits this move's combo utility, though it can work in juggles when the situation arises. The high damage makes this great for super canceling, and with 2 bars the OD version can be made safe on block with an eternity to hitconfirm. In the corner (or midscreen if the opponent does not/cannot back rise) 236LK gives Jamie a safe jump with j.HP like 623LK does. | | Jamie drops to the ground and begins break dancing, slowly advancing toward the opponent. The slow startup limits this move's combo utility, though it can work in juggles when the situation arises. The high damage makes this great for super canceling, and with 2 bars the OD version can be made safe on block with an eternity to hitconfirm. In the corner (or midscreen if the opponent does not/cannot back rise) 236LK gives Jamie a safe jump with j.HP like 623LK does. |


