|
|
| Line 17: |
Line 17: |
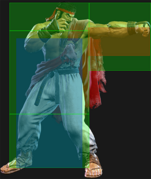
| {{AttackDataCargo-SF6/Query|ryu_5lp}} | | {{AttackDataCargo-SF6/Query|ryu_5lp}} |
| * Chains into 5LP/2LP/2LK | | * Chains into 5LP/2LP/2LK |
| * '''Cancel reaction window:''' 13f | | * '''Cancel Hitconfirm Window:''' 13f |
| <br> | | <br> |
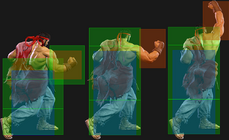
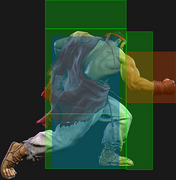
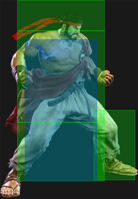
| Frame data is mostly identical to 2LP, but 5LP is the preferred chain for countering Drive Impact since it has lower recovery. Can get a 3-hit light confirm with 5LP x3. | | Frame data is mostly identical to 2LP, but 5LP is the preferred chain for countering Drive Impact since it has lower recovery. Can get a 3-hit light confirm with 5LP x3. |
| Line 33: |
Line 33: |
| | info = | | | info = |
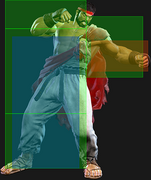
| {{AttackDataCargo-SF6/Query|ryu_5mp}} | | {{AttackDataCargo-SF6/Query|ryu_5mp}} |
| * '''Cancel reaction window:''' 16f (18f TC) | | * '''Cancel Hitconfirm Window:''' 16f (18f TC) |
| <br> | | <br> |
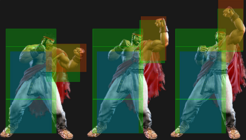
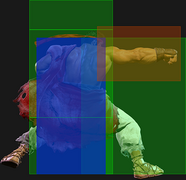
| Ryu's main combo starter, but the distance after a hit can make the followups a bit finicky. The Fuwa Triple Strike target combo is the most consistent ender and is easier to hitconfirm, but does fairly low damage. | | Ryu's main combo starter, but the distance after a hit can make the followups a bit finicky. The Fuwa Triple Strike target combo is the most consistent ender and is easier to hitconfirm, but does fairly low damage. |
| Line 52: |
Line 52: |
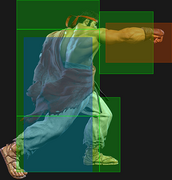
| {{AttackDataCargo-SF6/Query|ryu_5hp}} | | {{AttackDataCargo-SF6/Query|ryu_5hp}} |
| * Forces stand on hit | | * Forces stand on hit |
| * '''Cancel reaction window:''' 19f (22f TC) | | * '''Cancel Hitconfirm Window:''' 19f (22f TC) |
| <br> | | <br> |
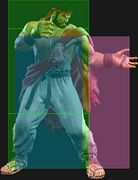
| A very useful normal due to its long hitconfirm window and cancellability. It has decent range and is safe on block, so it's fairly low-risk. Since it forces stand on hit, the HK target combo followup is guaranteed to work. At 10f startup the move is a little slow, so it's not the most useful in punishes or in combos, but if you can start a punish with 5MP this is a good button to link into. | | A very useful normal due to its long hitconfirm window and cancellability. It has decent range and is safe on block, so it's fairly low-risk. Since it forces stand on hit, the HK target combo followup is guaranteed to work. At 10f startup the move is a little slow, so it's not the most useful in punishes or in combos, but if you can start a punish with 5MP this is a good button to link into. |
| Line 68: |
Line 68: |
| | info = | | | info = |
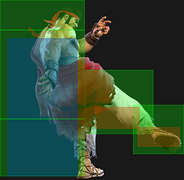
| {{AttackDataCargo-SF6/Query|ryu_5lk}} | | {{AttackDataCargo-SF6/Query|ryu_5lk}} |
| * '''Cancel reaction window:''' 13f | | * '''Cancel Hitconfirm Window:''' 13f |
| * Combos naturally into: Shoryuken, MP/HP/OD Hadoken, Denjin/OD Hadoken, LK High Blade Kick, LK/MK/OD Tatsu, LP Hashogeki, all Supers | | * Combos naturally into: Shoryuken, MP/HP/OD Hadoken, Denjin/OD Hadoken, LK High Blade Kick, LK/MK/OD Tatsu, LP Hashogeki, all Supers |
| * Punish Counter combos into: HK Tatsu, MK/OD High Blade Kick, MP/OD Hashogeki, OD Denjin Hashogeki | | * Punish Counter combos into: HK Tatsu, MK/OD High Blade Kick, MP/OD Hashogeki, OD Denjin Hashogeki |
| Line 122: |
Line 122: |
| {{AttackDataCargo-SF6/Query|ryu_2lp}} | | {{AttackDataCargo-SF6/Query|ryu_2lp}} |
| * Chains into 5LP/2LP/2LK | | * Chains into 5LP/2LP/2LK |
| * '''Cancel reaction window:''' 11f | | * '''Cancel Hitconfirm Window:''' 11f |
| <br> | | <br> |
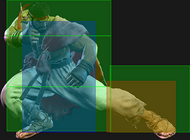
| Fast but short range chainable light normal, mainly used for hitconfirms and punishing -4 attacks. It is slightly worse than 5LP when chaining against Drive Impact armor. | | Fast but short range chainable light normal, mainly used for hitconfirms and punishing -4 attacks. It is slightly worse than 5LP when chaining against Drive Impact armor. |
| Line 138: |
Line 138: |
| | info = | | | info = |
| {{AttackDataCargo-SF6/Query|ryu_2mp}} | | {{AttackDataCargo-SF6/Query|ryu_2mp}} |
| * '''Cancel reaction window:''' 16f | | * '''Cancel Hitconfirm Window:''' 16f |
| <br> | | <br> |
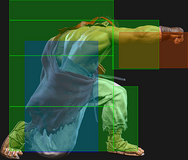
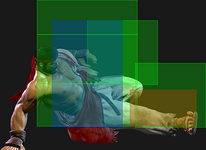
| Decent button for applying pressure. Links into 5LK consistently, and is a great button to use after Drive Rush for frame advantage on block. | | Decent button for applying pressure. Links into 5LK consistently, and is a great button to use after Drive Rush for frame advantage on block. |
| Line 156: |
Line 156: |
| * Forces stand on hit | | * Forces stand on hit |
| * Only the 1st active frame is cancellable | | * Only the 1st active frame is cancellable |
| * '''Cancel reaction window:''' 18f | | * '''Cancel Hitconfirm Window:''' 18f |
| <br> | | <br> |
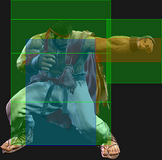
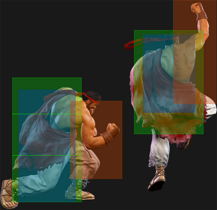
| Decent anti-air normal for situations where you don't have time to react with Shoryuken. Can be linked to after Counterhit/Punish Counter 5MP, but the short range can make this a little inconsistent. Very unsafe on block. | | Decent anti-air normal for situations where you don't have time to react with Shoryuken. Can be linked to after Counterhit/Punish Counter 5MP, but the short range can make this a little inconsistent. Very unsafe on block. |
| Line 188: |
Line 188: |
| | info = | | | info = |
| {{AttackDataCargo-SF6/Query|ryu_2mk}} | | {{AttackDataCargo-SF6/Query|ryu_2mk}} |
| * '''Cancel reaction window:''' 13f | | * '''Cancel Hitconfirm Window:''' 13f |
| * Applies a 20% damage scaling penalty to the next hit when used as a combo starter (100/80/70/60...) | | * Applies a 20% damage scaling penalty to the next hit when used as a combo starter (100/80/70/60...) |
| <br> | | <br> |
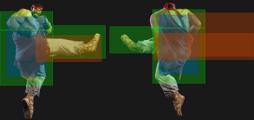
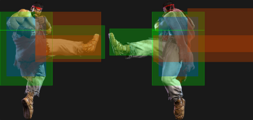
| Line 356: |
Line 356: |
| * Forces stand on hit | | * Forces stand on hit |
| * Only 1st active frame is cancellable | | * Only 1st active frame is cancellable |
| * '''Cancel reaction window:''' 17f | | * '''Cancel Hitconfirm Window:''' 17f |
| <br> | | <br> |
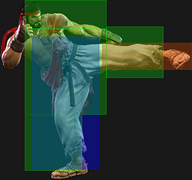
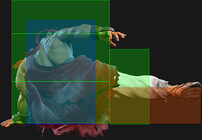
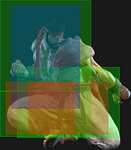
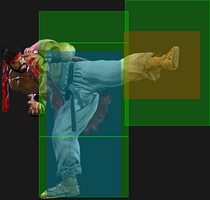
| Ryu's fastest heavy normal, but has fairly short range. Very unsafe on block, so it should primarily be used in close range hitconfirms or cancelled into a safe move like OD Hadoken/Hashogeki. Can be used as an anti-air, but the hitbox is a little inconsistent so 2HP is more reliable. | | Ryu's fastest heavy normal, but has fairly short range. Very unsafe on block, so it should primarily be used in close range hitconfirms or cancelled into a safe move like OD Hadoken/Hashogeki. Can be used as an anti-air, but the hitbox is a little inconsistent so 2HP is more reliable. |
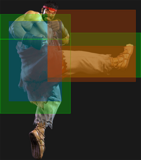
| Line 374: |
Line 374: |
| * '''Low Crush''' 13-19f | | * '''Low Crush''' 13-19f |
| * Cancellable on hit/block into OD Air Tatsu only | | * Cancellable on hit/block into OD Air Tatsu only |
| * '''Cancel reaction window:''' 19f | | * '''Cancel Hitconfirm Window:''' 19f |
| <br> | | <br> |
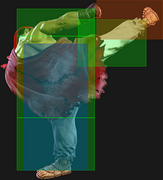
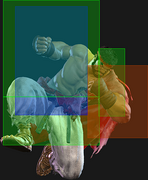
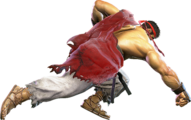
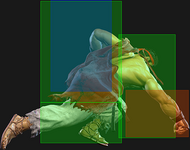
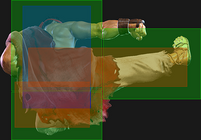
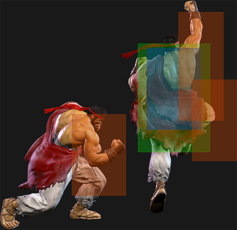
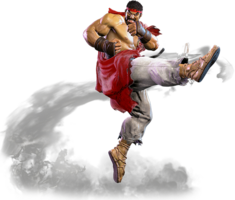
| Despite the animation, this attack is not considered airborne. It has good horizontal range and a lenient hitconfirm window for the cancel if you want to spend the meter on OD Air Tatsu. Generally safe on block with pushback. | | Despite the animation, this attack is not considered airborne. It has good horizontal range and a lenient hitconfirm window for the cancel if you want to spend the meter on OD Air Tatsu. Generally safe on block with pushback. |
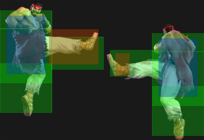
| Line 394: |
Line 394: |
| * 2nd hit knocks down vs. airborne opponents | | * 2nd hit knocks down vs. airborne opponents |
| * Counterhit/Punish Counter bonus advantage applies to both hits | | * Counterhit/Punish Counter bonus advantage applies to both hits |
| * '''Cancel reaction window:''' 37f (17f 2nd hit only) | | * '''Cancel Hitconfirm Window:''' 37f (17f 2nd hit only) |
| <br> | | <br> |
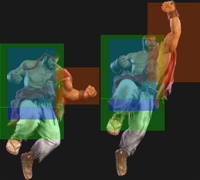
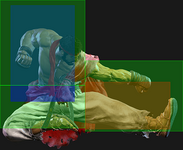
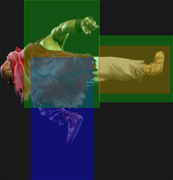
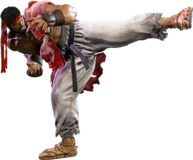
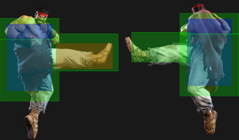
| Ryu's Axe Kick is cancellable on both hits, so it's easy to confirm an appropriate followup on hit or block. At -4 it's fairly safe most of the time due to pushback. The first hit can whiff on crouch blockers at farther ranges. The move has a lot of active frames, making it easy to time on the opponent's wakeup. | | Ryu's Axe Kick is cancellable on both hits, so it's easy to confirm an appropriate followup on hit or block. At -4 it's fairly safe most of the time due to pushback. The first hit can whiff on crouch blockers at farther ranges. The move has a lot of active frames, making it easy to time on the opponent's wakeup. |
| Line 431: |
Line 431: |
| | info = | | | info = |
| {{AttackDataCargo-SF6/Query|ryu_5mp_lk}} | | {{AttackDataCargo-SF6/Query|ryu_5mp_lk}} |
| * '''Cancel reaction window:''' 35f (TC) | | * '''Cancel Hitconfirm Window:''' 35f (TC) |
| {{AttackDataCargo-SF6/Query|ryu_5mp_lk_hk}} | | {{AttackDataCargo-SF6/Query|ryu_5mp_lk_hk}} |
| * 6f gap before final hit on block | | * 6f gap before final hit on block |
| Line 582: |
Line 582: |
| {{AttackDataCargo-SF6/Query|ryu_236lp}} | | {{AttackDataCargo-SF6/Query|ryu_236lp}} |
| * 1-hit projectile, slow speed | | * 1-hit projectile, slow speed |
| * '''Cancel reaction window:''' 4f (Super) | | * '''Cancel Hitconfirm Window:''' 4f (Super) |
| {{AttackDataCargo-SF6/Query|ryu_236mp}} | | {{AttackDataCargo-SF6/Query|ryu_236mp}} |
| * 1-hit projectile, medium speed | | * 1-hit projectile, medium speed |
| * '''Cancel reaction window:''' 4f (Super) | | * '''Cancel Hitconfirm Window:''' 4f (Super) |
| {{AttackDataCargo-SF6/Query|ryu_236hp}} | | {{AttackDataCargo-SF6/Query|ryu_236hp}} |
| * 1-hit projectile, fast speed | | * 1-hit projectile, fast speed |
| * '''Cancel reaction window:''' 4f (Super) | | * '''Cancel Hitconfirm Window:''' 4f (Super) |
| {{AttackDataCargo-SF6/Query|ryu_236pp}} | | {{AttackDataCargo-SF6/Query|ryu_236pp}} |
| * 2-hit projectile, fast speed; has juggle potential | | * 2-hit projectile, fast speed; has juggle potential |
| * Puts opponent into [[Street_Fighter_6/Glossary#Juggles|limited juggle state]] on hit | | * Puts opponent into [[Street_Fighter_6/Glossary#Juggles|limited juggle state]] on hit |
| * '''Cancel reaction window:''' 12f (Super) | | * '''Cancel Hitconfirm Window:''' 12f (Super) |
| <br> | | <br> |
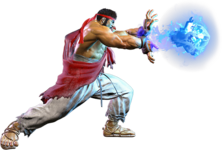
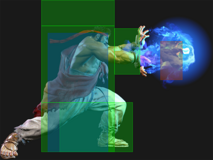
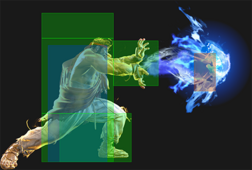
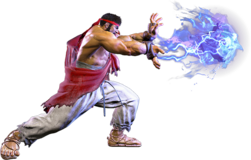
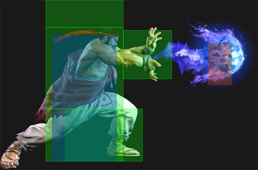
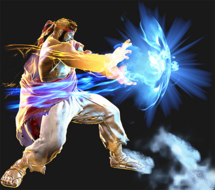
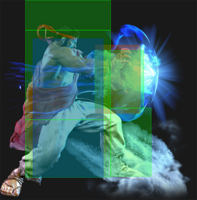
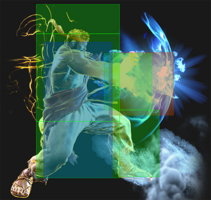
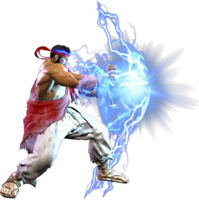
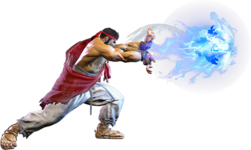
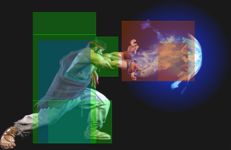
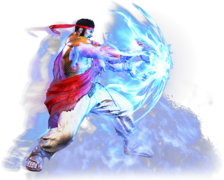
| Ryu's iconic fireball used primarily for zoning. Mixing up between the varying projectile speeds makes it harder for the opponent to navigate through the fireball game. The LP version is safest, and when used at long range it gives Ryu much more freedom to set up optimal spacing while the opponent is stuck in blockstun. The OD version is fast and higher priority, making it an important tool against other zoners, and the knockdown time lets Ryu perform a Denjin Charge. If the opponent is cornered, OD Hadoken can also juggle into Lv.1 Super on reaction. | | Ryu's iconic fireball used primarily for zoning. Mixing up between the varying projectile speeds makes it harder for the opponent to navigate through the fireball game. The LP version is safest, and when used at long range it gives Ryu much more freedom to set up optimal spacing while the opponent is stuck in blockstun. The OD version is fast and higher priority, making it an important tool against other zoners, and the knockdown time lets Ryu perform a Denjin Charge. If the opponent is cornered, OD Hadoken can also juggle into Lv.1 Super on reaction. |
| Line 613: |
Line 613: |
| {{AttackDataCargo-SF6/Query|ryu_236p(charged)}} | | {{AttackDataCargo-SF6/Query|ryu_236p(charged)}} |
| * 2-hit projectile; puts opponent into [[Street_Fighter_6/Glossary#Juggles|limited juggle state]] | | * 2-hit projectile; puts opponent into [[Street_Fighter_6/Glossary#Juggles|limited juggle state]] |
| * '''Cancel reaction window:''' 12f | | * '''Cancel Hitconfirm Window:''' 12f |
| {{AttackDataCargo-SF6/Query|ryu_236pp(charged)}} | | {{AttackDataCargo-SF6/Query|ryu_236pp(charged)}} |
| * 3-hit projectile; puts opponent into [[Street_Fighter_6/Glossary#Juggles|limited juggle state]] and has juggle potential | | * 3-hit projectile; puts opponent into [[Street_Fighter_6/Glossary#Juggles|limited juggle state]] and has juggle potential |
| * '''Cancel reaction window:''' 13f | | * '''Cancel Hitconfirm Window:''' 13f |
| <br> | | <br> |
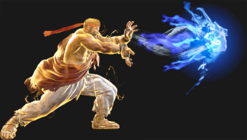
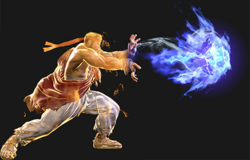
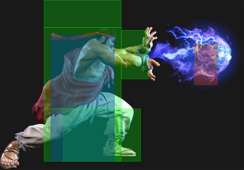
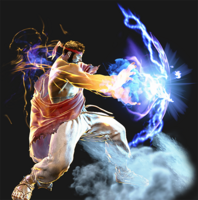
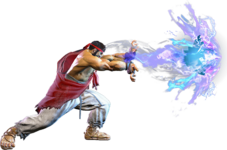
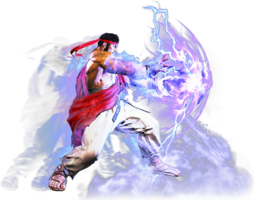
| With a Denjin charge stocked, Ryu can no longer change the speed of his fireballs. However, they all gain an extra hit and become very fast, making it hard to react to in neutral. Meterless versions do not gain extra projectile priority, so an OD or Super projectile will beat it clean. Has enough knockdown advantage to charge up another Denjin stock, and if the opponent is in the corner Ryu can juggle into Lv.1 Super on reaction! | | With a Denjin charge stocked, Ryu can no longer change the speed of his fireballs. However, they all gain an extra hit and become very fast, making it hard to react to in neutral. Meterless versions do not gain extra projectile priority, so an OD or Super projectile will beat it clean. Has enough knockdown advantage to charge up another Denjin stock, and if the opponent is in the corner Ryu can juggle into Lv.1 Super on reaction! |
| Line 638: |
Line 638: |
| * '''Anti-Air Invuln:''' 1-14f; '''Airborne''' 7-35f (Forced Knockdown state) | | * '''Anti-Air Invuln:''' 1-14f; '''Airborne''' 7-35f (Forced Knockdown state) |
| * Reduced damage on later anti-air active frames | | * Reduced damage on later anti-air active frames |
| * '''Cancel reaction window:''' 17f | | * '''Cancel Hitconfirm Window:''' 17f |
| {{AttackDataCargo-SF6/Query|ryu_623mp}} | | {{AttackDataCargo-SF6/Query|ryu_623mp}} |
| * '''Anti-Air Invuln:''' 1-9f; '''Airborne''' 8-45f (Forced Knockdown state) | | * '''Anti-Air Invuln:''' 1-9f; '''Airborne''' 8-45f (Forced Knockdown state) |
| * Reduced damage on later anti-air active frames | | * Reduced damage on later anti-air active frames |
| * '''Cancel reaction window:''' 17f | | * '''Cancel Hitconfirm Window:''' 17f |
| {{AttackDataCargo-SF6/Query|ryu_623hp}} | | {{AttackDataCargo-SF6/Query|ryu_623hp}} |
| * '''Anti-Air Invuln:''' 1-8f; '''Airborne''' 9-50f (Forced Knockdown state) | | * '''Anti-Air Invuln:''' 1-8f; '''Airborne''' 9-50f (Forced Knockdown state) |
| * Reduced damage on later anti-air active frames | | * Reduced damage on later anti-air active frames |
| * '''Cancel reaction window:''' 22f | | * '''Cancel Hitconfirm Window:''' 22f |
| {{AttackDataCargo-SF6/Query|ryu_623pp}} | | {{AttackDataCargo-SF6/Query|ryu_623pp}} |
| * '''Full Invuln:''' 1-8f; '''Airborne''' 8-52f (Forced Knockdown state) | | * '''Full Invuln:''' 1-8f; '''Airborne''' 8-52f (Forced Knockdown state) |
| Line 735: |
Line 735: |
| {{AttackDataCargo-SF6/Query|ryu_236lk}} | | {{AttackDataCargo-SF6/Query|ryu_236lk}} |
| * Puts opponent into [[Street_Fighter_6/Glossary#Juggles|limited juggle state]] | | * Puts opponent into [[Street_Fighter_6/Glossary#Juggles|limited juggle state]] |
| * '''Cancel reaction window:''' 25f | | * '''Cancel Hitconfirm Window:''' 25f |
| {{AttackDataCargo-SF6/Query|ryu_236mk}} | | {{AttackDataCargo-SF6/Query|ryu_236mk}} |
| * Puts opponent into [[Street_Fighter_6/Glossary#Juggles|limited juggle state]] | | * Puts opponent into [[Street_Fighter_6/Glossary#Juggles|limited juggle state]] |
| * '''Cancel reaction window:''' 25f | | * '''Cancel Hitconfirm Window:''' 25f |
| {{AttackDataCargo-SF6/Query|ryu_236hk}} | | {{AttackDataCargo-SF6/Query|ryu_236hk}} |
| * Puts opponent into [[Street_Fighter_6/Glossary#Juggles|limited juggle state]]; can juggle LP Shoryuken in corner | | * Puts opponent into [[Street_Fighter_6/Glossary#Juggles|limited juggle state]]; can juggle LP Shoryuken in corner |
| * Punish Counter: puts opponent into OTG tumble state (KD +95) | | * Punish Counter: puts opponent into OTG tumble state (KD +95) |
| * '''Cancel reaction window:''' 30f | | * '''Cancel Hitconfirm Window:''' 30f |
| {{AttackDataCargo-SF6/Query|ryu_236kk}} | | {{AttackDataCargo-SF6/Query|ryu_236kk}} |
| * Wall Bounces opponent on hit for a [[Street_Fighter_6/Glossary#Juggles|limited juggle state]] | | * Wall Bounces opponent on hit for a [[Street_Fighter_6/Glossary#Juggles|limited juggle state]] |
| * Gives enough time to charge Lv.2 Super when cancelled (depending on screen position) | | * Gives enough time to charge Lv.2 Super when cancelled (depending on screen position) |
| * Counts as 2 hits for scaling when cancelled into (10% scaling penalty on next hit) | | * Counts as 2 hits for scaling when cancelled into (10% scaling penalty on next hit) |
| * '''Cancel reaction window:''' 27f | | * '''Cancel Hitconfirm Window:''' 27f |
| <br> | | <br> |
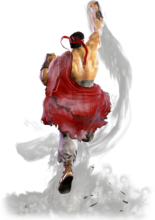
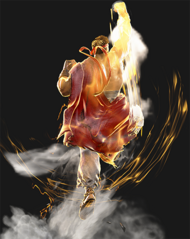
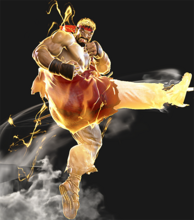
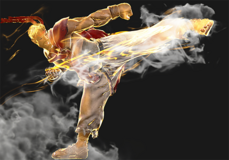
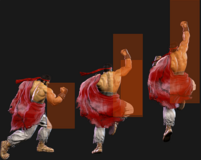
| High Blade Kick (more commonly known as "Donkey Kick") returns, and is used primarily as a juggle ender due to its high juggle potential and consistent juggle into Lv.3 Super. The HK version is exceptionally slow, but is easy to space safely against most characters. The MK version can also be spaced relatively safely, and can often set up a safe Denjin Charge when used midscreen. OD High Blade Kick is the star of the show due to its Wall Bounce, which can lead to powerful juggles; it can even combo into fully charged Lv.2 Super if cancelled (although the release must be manually timed). The OD version can be comboed into from medium attacks or from a Punish Counter 5LK. If Ryu is too close to the corner, the opponent will bounce over his head, resulting in no followup juggle. In these situations, OD Tatsu is preferred. | | High Blade Kick (more commonly known as "Donkey Kick") returns, and is used primarily as a juggle ender due to its high juggle potential and consistent juggle into Lv.3 Super. The HK version is exceptionally slow, but is easy to space safely against most characters. The MK version can also be spaced relatively safely, and can often set up a safe Denjin Charge when used midscreen. OD High Blade Kick is the star of the show due to its Wall Bounce, which can lead to powerful juggles; it can even combo into fully charged Lv.2 Super if cancelled (although the release must be manually timed). The OD version can be comboed into from medium attacks or from a Punish Counter 5LK. If Ryu is too close to the corner, the opponent will bounce over his head, resulting in no followup juggle. In these situations, OD Tatsu is preferred. |
| Line 768: |
Line 768: |
| {{AttackDataCargo-SF6/Query|ryu_214lp}} | | {{AttackDataCargo-SF6/Query|ryu_214lp}} |
| * Counterhit/Punish Counter puts opponent into Spinning juggle state (KD +57) | | * Counterhit/Punish Counter puts opponent into Spinning juggle state (KD +57) |
| * '''Cancel reaction window:''' 24f | | * '''Cancel Hitconfirm Window:''' 24f |
| {{AttackDataCargo-SF6/Query|ryu_214mp}} | | {{AttackDataCargo-SF6/Query|ryu_214mp}} |
| * Counterhit/Punish Counter puts opponent into Spinning juggle state (KD +58) | | * Counterhit/Punish Counter puts opponent into Spinning juggle state (KD +58) |
| * '''Cancel reaction window:''' 23f | | * '''Cancel Hitconfirm Window:''' 23f |
| {{AttackDataCargo-SF6/Query|ryu_214hp}} | | {{AttackDataCargo-SF6/Query|ryu_214hp}} |
| * 2 hits; puts opponent into Spinning juggle state (no CH/PC required) | | * 2 hits; puts opponent into Spinning juggle state (no CH/PC required) |
| * '''Cancel reaction window:''' 39f | | * '''Cancel Hitconfirm Window:''' 39f |
| {{AttackDataCargo-SF6/Query|ryu_214pp}} | | {{AttackDataCargo-SF6/Query|ryu_214pp}} |
| * '''Cancel reaction window:''' 22f | | * '''Cancel Hitconfirm Window:''' 22f |
| <br> | | <br> |
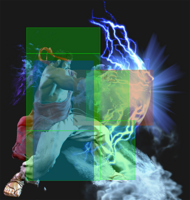
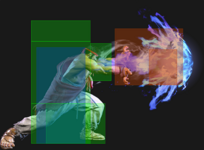
| All versions of Hashogeki have a strike hitbox, but can also nullify a 1-hit projectile of equal priority; the OD version will completely destroy meterless fireballs just like any other OD projectile. Because it has a strike hitbox, it cannot be used to stuff Lv.1 Supers; this is especially important to know when using it in a Burnout blockstring, as opponents will be looking for any gap to Super through. | | All versions of Hashogeki have a strike hitbox, but can also nullify a 1-hit projectile of equal priority; the OD version will completely destroy meterless fireballs just like any other OD projectile. Because it has a strike hitbox, it cannot be used to stuff Lv.1 Supers; this is especially important to know when using it in a Burnout blockstring, as opponents will be looking for any gap to Super through. |
| Line 807: |
Line 807: |
| {{AttackDataCargo-SF6/Query|ryu_214p(charged)}} | | {{AttackDataCargo-SF6/Query|ryu_214p(charged)}} |
| * Puts opponent into Spinning juggle state on hit (can juggle even midscreen) | | * Puts opponent into Spinning juggle state on hit (can juggle even midscreen) |
| * '''Cancel reaction window:''' 38f | | * '''Cancel Hitconfirm Window:''' 38f |
| {{AttackDataCargo-SF6/Query|ryu_214pp(charged)}} | | {{AttackDataCargo-SF6/Query|ryu_214pp(charged)}} |
| * Crumples opponent on hit (+14 before opponent becomes airborne) | | * Crumples opponent on hit (+14 before opponent becomes airborne) |
| * '''Cancel reaction window:''' 22f | | * '''Cancel Hitconfirm Window:''' 22f |
| <br> | | <br> |
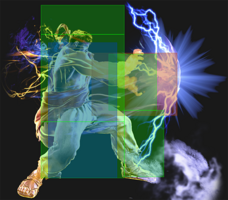
| The Denjin versions of Hashogeki are much more rewarding on hit and have additional block advantage. The meterless version is not affected by the button strength used. Just like the standard version, it is a strike hitbox with projectile-nullifying properties, but now the meterless Hashogeki can dissipate 2-hit meterless projectiles like Denjin Hadoken or Sonic Cross. The OD version surprisingly does not gain an additional hit and actually does fairly low damage, but is still very rewarding to land. | | The Denjin versions of Hashogeki are much more rewarding on hit and have additional block advantage. The meterless version is not affected by the button strength used. Just like the standard version, it is a strike hitbox with projectile-nullifying properties, but now the meterless Hashogeki can dissipate 2-hit meterless projectiles like Denjin Hadoken or Sonic Cross. The OD version surprisingly does not gain an additional hit and actually does fairly low damage, but is still very rewarding to land. |


