|
|
| Line 897: |
Line 897: |
|
| |
|
| ====<font style="visibility:hidden; float:right">Freeflow Kicks 2 (236P~6K~6K)</font>==== | | ====<font style="visibility:hidden; float:right">Freeflow Kicks 2 (236P~6K~6K)</font>==== |
| <tabber> DL0-DL2 =
| |
| {{MoveDataCargo | | {{MoveDataCargo |
| | title = Freeflow Kicks 2 | | | title = Freeflow Kicks 2 |
| | subtitle = (DL0) | | | subtitle = (DL0-DL4) |
| | input = 236P~6K~6K | | | input = 236P~6K~6K |
| | images = | | | images = |
| Line 908: |
Line 907: |
| | info = | | | info = |
| {{AttackDataCargo-SF6/Query|Jamie_236lp_6k_6k_dl2}} | | {{AttackDataCargo-SF6/Query|Jamie_236lp_6k_6k_dl2}} |
| * Damage DL0-DL2: 405(324)/427(342)/450(360) | | * Damage DL0-DL4: 405/427/450/472/495 (Scaled: 324/342/360/378/396) |
| * 2-6f gap before final hit on block | | * 2-6f gap before final hit on block |
| {{AttackDataCargo-SF6/Query|Jamie_236mp_6k_6k_dl2}} | | {{AttackDataCargo-SF6/Query|Jamie_236mp_6k_6k_dl2}} |
| * Damage DL0-DL2: 450(360)/475(380)/500(400) | | * Damage DL0-DL4: 450/475/500/525/550 (Scaled: 360/380/400/420/440) |
| * 5-9f gap before final hit on block | | * 5-9f gap before final hit on block |
| {{AttackDataCargo-SF6/Query|Jamie_236hp_6k_6k_dl2}} | | {{AttackDataCargo-SF6/Query|Jamie_236hp_6k_6k_dl2}} |
| * Damage DL0-DL2: 495(396)/522(418)/550(440) | | * Damage DL0-DL4: 495/522/550/577/605 (Scaled: 396/418/440/462/484) |
| * 8-12f gap before final hit on block | | * 8-12f gap before final hit on block |
| {{AttackDataCargo-SF6/Query|Jamie_236pp_6k_6k_dl2}} | | {{AttackDataCargo-SF6/Query|Jamie_236pp_6k_6k_dl2}} |
| * Damage DL0-DL2: 540(432)/570(456)/600(480) | | * Damage DL0-DL4: 540/570/600/630/660 (Scaled: 432/456/480/504/528) |
| * 2-6f gap before final hit on block | | * 2-6f gap before final hit on block |
| <br> | | <br> |
| Line 923: |
Line 922: |
|
| |
|
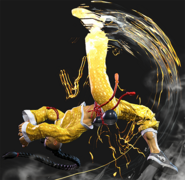
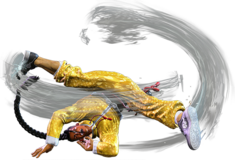
| The long drink animation makes the 6K ender extremely unsafe on block. The drink itself is interruptible, and any punish within the first 21f will stop Jamie's drink level from increasing (20f for the LP version). Like the other Rekka followups, it is possible to frame trap the opponent if they attempt a punish. The exact blockstring gap can change depending on the button timing. | | The long drink animation makes the 6K ender extremely unsafe on block. The drink itself is interruptible, and any punish within the first 21f will stop Jamie's drink level from increasing (20f for the LP version). Like the other Rekka followups, it is possible to frame trap the opponent if they attempt a punish. The exact blockstring gap can change depending on the button timing. |
| | |
| | The transition from DL3 to DL4 gives Jamie much better KD advantage on the knockdown. Because of this, there is no need to use the OD version for a safe corner drink. As usual when taking a drink during DL4, Jamie restores 1 Drive bar instead of gaining a Drink Level. DL4 Jamie gets far more damage and corner carry from his Punch Rekkas, but this may be a good option if approaching Burnout; the OD version also benefits from getting an immediate 50% meter refund. |
|
| |
|
| In the Damage column, the first value lists the unscaled damage; () refers to the damage at 80% scaling, which is what would normally occur when starting a combo with the first Rekka. | | In the Damage column, the first value lists the unscaled damage; () refers to the damage at 80% scaling, which is what would normally occur when starting a combo with the first Rekka. |
| }} | | }} |
| |-|
| |
| DL3 =
| |
| {{MoveDataCargo
| |
| | title = Freeflow Kicks 2
| |
| | subtitle = (DL3)
| |
| | input = 236P~6K~6K
| |
| | images =
| |
| {{MoveDataCargoImage|imageHeight=160px|Jamie_236lp_6k_6k_dl3|caption=}}
| |
| ----
| |
| {{MoveDataCargoImage|imageHeight=160px|Jamie_236pp_6k_6k_dl3|caption=}}
| |
| | info =
| |
| {{AttackDataCargo-SF6/Query|Jamie_236lp_6k_6k_dl3}}
| |
| * 2-6f gap before final hit on block
| |
| {{AttackDataCargo-SF6/Query|Jamie_236mp_6k_6k_dl3}}
| |
| * 5-9f gap before final hit on block
| |
| {{AttackDataCargo-SF6/Query|Jamie_236hp_6k_6k_dl3}}
| |
| * 8-12f gap before final hit on block
| |
| {{AttackDataCargo-SF6/Query|Jamie_236pp_6k_6k_dl3}}
| |
| * 2-6f gap before final hit on block
| |
| <br>
| |
| Mostly identical to the DL0-DL2 versions, except that the drink activation gives Jamie far better KD advantage. There is no longer a need to use the OD version for safety in the corner.
| |
| }}
| |
| |-|
| |
| DL4 =
| |
| {{MoveDataCargo
| |
| | title = Freeflow Kicks 2
| |
| | subtitle = (DL4)
| |
| | input = 236P~6K~6K
| |
| | images =
| |
| {{MoveDataCargoImage|imageHeight=160px|Jamie_236lp_6k_6k_dl4|caption=}}
| |
| ----
| |
| {{MoveDataCargoImage|imageHeight=160px|Jamie_236pp_6k_6k_dl4|caption=}}
| |
| | info =
| |
| {{AttackDataCargo-SF6/Query|Jamie_236lp_6k_6k_dl4}}
| |
| * 2-6f gap before final hit on block
| |
| {{AttackDataCargo-SF6/Query|Jamie_236mp_6k_6k_dl4}}
| |
| * 5-9f gap before final hit on block
| |
| {{AttackDataCargo-SF6/Query|Jamie_236hp_6k_6k_dl4}}
| |
| * 8-12f gap before final hit on block
| |
| {{AttackDataCargo-SF6/Query|Jamie_236pp_6k_6k_dl4}}
| |
| * 2-6f gap before final hit on block
| |
| <br>
| |
| Functions the same as the DL0-DL2 versions, but restores 1 bar of Drive gauge rather than a Drink Level. Jamie at DL4 gets far more damage from his Punch Rekkas, but this can be useful if he is approaching Burnout. It also makes the OD version significantly stronger, as it immediately restores half the spent Drive gauge.
| |
| }}
| |
| </tabber>
| |
|
| |
|
| ====<font style="visibility:hidden; float:right">Swagger Step (214P)</font>==== | | ====<font style="visibility:hidden; float:right">Swagger Step (214P)</font>==== |


