|
|
| Line 447: |
Line 447: |
| | info = | | | info = |
| {{AttackDataCargo-SF6/Query|Jamie_2hk_hk_dl2}} | | {{AttackDataCargo-SF6/Query|Jamie_2hk_hk_dl2}} |
| | * Damage DL0-DL4: 450/475/500/525/550 |
| * '''Cancel reaction window:''' 58f (TC Drink) | | * '''Cancel reaction window:''' 58f (TC Drink) |
| {{AttackDataCargo-SF6/Query|Jamie_2hk_hk_p_dl2}} | | {{AttackDataCargo-SF6/Query|Jamie_2hk_hk_p_dl2}} |
| * Maintains corner oki while increasing Drink Level | | * Maintains corner oki while increasing Drink Level |
| | * At DL4, drink gains 1 Drive bar |
| <br> | | <br> |
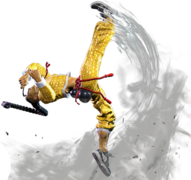
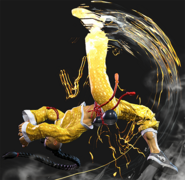
| Jamie's 2-hit 2HK gives plenty of time to confirm the Target Combo followup afterward on hit, though 2HK is unsafe on block regardless. Jamie gets no midscreen oki if the opponent back rises, so the Drink ender is generally the best option. In the corner, Jamie can Drink and still push a mixup at +3. This TC has high juggle potential, and even gains slightly more KD advantage when juggled into. | | Jamie's 2-hit 2HK gives plenty of time to confirm the Target Combo followup afterward on hit, though 2HK is unsafe on block regardless. Jamie gets no midscreen oki if the opponent back rises, so the Drink ender is generally the best option. In the corner, Jamie can Drink and still push a mixup at +3. This TC has high juggle potential, and even gains slightly more KD advantage when juggled into. |
| Line 467: |
Line 469: |
| | info = | | | info = |
| {{AttackDataCargo-SF6/Query|Jamie_5lp_lk_dl2}} | | {{AttackDataCargo-SF6/Query|Jamie_5lp_lk_dl2}} |
| | * Damage DL1-DL4: 190(170)/200(180)/210(188)/220(198) |
| * '''Cancel reaction window:''' 29f (TC) | | * '''Cancel reaction window:''' 29f (TC) |
| * () refers to scaled damage when beginning combo with 5LP | | * () refers to scaled damage when beginning combo with 5LP |
| {{AttackDataCargo-SF6/Query|Jamie_5lp_lk_mp_dl2}} | | {{AttackDataCargo-SF6/Query|Jamie_5lp_lk_mp_dl2}} |
| | * Damage DL1-DL4: 475(380)/500(400)/525(420)/550(440) |
| * '''Cancel reaction window:''' 52f | | * '''Cancel reaction window:''' 52f |
| * '''xx Lv.2 Super:''' +12/+4 | | * '''xx Lv.2 Super:''' +12/+4 |
| Line 483: |
Line 487: |
| | input = 6MK~MK~P | | | input = 6MK~MK~P |
| | images = | | | images = |
| {{MoveDataCargoImage|Jamie_6mk_mk|caption=}} | | {{MoveDataCargoImage|Jamie_6mk_mk_dl2|caption=}} |
| ---- | | ---- |
| {{MoveDataCargoImage|Jamie_6mk_mk_p|caption=}} | | {{MoveDataCargoImage|Jamie_6mk_mk_p_dl2|caption=}} |
| | info = | | | info = |
| {{AttackDataCargo-SF6/Query|Jamie_6mk_mk}} | | {{AttackDataCargo-SF6/Query|Jamie_6mk_mk_dl2}} |
| | * Damage DL2-DL4: 200x2/210x2/220x2 |
| * '''Cancel reaction window:''' 62f (TC) | | * '''Cancel reaction window:''' 62f (TC) |
| {{AttackDataCargo-SF6/Query|Jamie_6mk_mk_p}} | | {{AttackDataCargo-SF6/Query|Jamie_6mk_mk_p_dl2}} |
| * Increases Drink Level by 1 | | * Increases Drink Level by 1 |
| ** DL3: {{sf6-adv|P|KD +2}} on Hit, {{sf6-adv|VM|-43}} on Block | | ** DL3: {{sf6-adv|P|KD +2}} on Hit, {{sf6-adv|VM|-43}} on Block |
| Line 505: |
Line 510: |
| | input = 4HP~HP~HK | | | input = 4HP~HP~HK |
| | images = | | | images = |
| {{MoveDataCargoImage|imageHeight=160px|Jamie_4hp_hp|caption=}} | | {{MoveDataCargoImage|imageHeight=160px|Jamie_4hp_hp_dl3|caption=}} |
| ---- | | ---- |
| {{MoveDataCargoImage|imageHeight=140px|Jamie_4hp_hp_hk|caption=}} | | {{MoveDataCargoImage|imageHeight=140px|Jamie_4hp_hp_hk_dl3|caption=}} |
| | info = | | | info = |
| {{AttackDataCargo-SF6/Query|Jamie_4hp_hp}} | | {{AttackDataCargo-SF6/Query|Jamie_4hp_hp_dl3}} |
| | * Damage DL3-DL4: 630/660 |
| * Only combos on Counterhit/Punish Counter or with meaty timing; 3f gap on block | | * Only combos on Counterhit/Punish Counter or with meaty timing; 3f gap on block |
| * '''Cancel reaction window:''' 18f / 56f (TC) | | * '''Cancel reaction window:''' 18f / 56f (TC) |
| * '''xx Lv.2 Super:''' +18/+8 | | * '''xx Lv.2 Super:''' +18/+8 |
| {{AttackDataCargo-SF6/Query|Jamie_4hp_hp_hk}} | | {{AttackDataCargo-SF6/Query|Jamie_4hp_hp_hk_dl3}} |
| * Airborne 18f~ (Forced Knockdown state) | | * Airborne 18f~ (Forced Knockdown state) |
| * 7f gap between final 2 hits on block | | * 7f gap between final 2 hits on block |
| Line 526: |
Line 532: |
| | input = 6HK~4HK~P | | | input = 6HK~4HK~P |
| | images = | | | images = |
| {{MoveDataCargoImage|imageHeight=160px|Jamie_6hk_4hk|caption=}} | | {{MoveDataCargoImage|imageHeight=160px|Jamie_6hk_4hk_dl4|caption=}} |
| ---- | | ---- |
| {{MoveDataCargoImage|imageHeight=160px|Jamie_6hk_4hk_p_close|caption=}} | | {{MoveDataCargoImage|imageHeight=160px|Jamie_6hk_4hk_p_close_dl4|caption=}} |
| ---- | | ---- |
| {{MoveDataCargoImage|imageHeight=160px|Jamie_6hk_4hk_p_mid|caption=}} | | {{MoveDataCargoImage|imageHeight=160px|Jamie_6hk_4hk_p_mid_dl4|caption=}} |
| ---- | | ---- |
| {{MoveDataCargoImage|imageHeight=170px|Jamie_6hk_4hk_p_far|caption=}} | | {{MoveDataCargoImage|imageHeight=170px|Jamie_6hk_4hk_p_far_dl4|caption=}} |
| | info = | | | info = |
| {{AttackDataCargo-SF6/Query|Jamie_6hk_4hk}} | | {{AttackDataCargo-SF6/Query|Jamie_6hk_4hk_dl4}} |
| * Sways and walks backward; press P at different times to change followup | | * Sways and walks backward; press P at different times to change followup |
| * Earliest followup timing can be input after 25f of 6HK+Sway | | * Earliest followup timing can be input after 25f of 6HK+Sway |
| * '''Cancel reaction window:''' 25f (to combo CH 6HK into Headbutt) | | * '''Cancel reaction window:''' 25f (to combo CH 6HK into Headbutt) |
| {{AttackDataCargo-SF6/Query|Jamie_6hk_4hk_p_close}} | | {{AttackDataCargo-SF6/Query|Jamie_6hk_4hk_p_close_dl4}} |
| * Requires Counterhit/Punish Counter to combo from 6HK | | * Requires Counterhit/Punish Counter to combo from 6HK |
| * Cancellable into any special or Super | | * Cancellable into any special or Super |
| * '''Cancel reaction window:''' 20f (Headbutt) / 59-60f (CH 6HK + Headbutt) | | * '''Cancel reaction window:''' 20f (Headbutt) / 59-60f (CH 6HK + Headbutt) |
| * '''xx Lv.2 Super:''' KD+39/+10 | | * '''xx Lv.2 Super:''' KD+39/+10 |
| {{AttackDataCargo-SF6/Query|Jamie_6hk_4hk_p_mid}} | | {{AttackDataCargo-SF6/Query|Jamie_6hk_4hk_p_mid_dl4}} |
| * Cancellable into any special or Super | | * Cancellable into any special or Super |
| * '''Cancel reaction window:''' 60/40/17f (spin fists only, more hits allows easier confirm) | | * '''Cancel reaction window:''' 60/40/17f (spin fists only, more hits allows easier confirm) |
| * '''xx Lv.2 Super:''' KD+42/+13 | | * '''xx Lv.2 Super:''' KD+42/+13 |
| {{AttackDataCargo-SF6/Query|Jamie_6hk_4hk_p_far}} | | {{AttackDataCargo-SF6/Query|Jamie_6hk_4hk_p_far_dl4}} |
| * Restores 1 Drive bar or equivalent Burnout gauge on final Drink recovery frame | | * Restores 1 Drive bar or equivalent Burnout gauge on final Drink recovery frame |
| * If no button/direction is input during recovery, restores 2 Drive bars after 112f | | * If no button/direction is input during recovery, restores 2 Drive bars after 112f |


