|
|
| Line 824: |
Line 824: |
|
| |
|
| ====<font style="visibility:hidden; float:right">Freeflow Kicks 2 (236P~6K~6K)</font>==== | | ====<font style="visibility:hidden; float:right">Freeflow Kicks 2 (236P~6K~6K)</font>==== |
| | <tabber> DL0-DL2 = |
| {{MoveDataCargo | | {{MoveDataCargo |
| | title = Freeflow Kicks 2 | | | title = Freeflow Kicks 2 |
| Line 842: |
Line 843: |
| * 2-6f gap before final hit on block | | * 2-6f gap before final hit on block |
| <br> | | <br> |
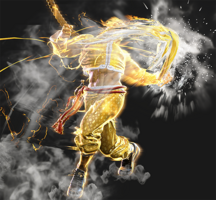
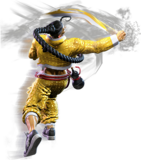
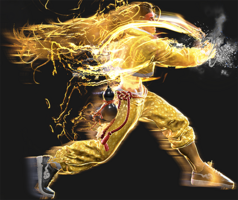
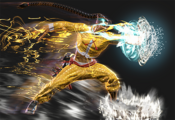
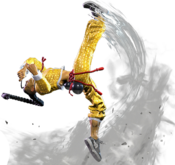
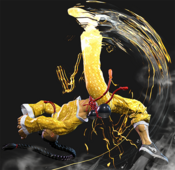
| The final 6K followup, like its predecessor, can only come out on hit or block. If successful, it levels up Jamie's Drink Level by 1. Because Rekkas are so easy to confirm into, this move is the primary way to level up. In the corner it becomes slightly risky, as the opponent has the frame advantage to force Jamie into a strike/throw mixup; it is still usually worth the risk in most cases. | | The final 6K followup, like its predecessor, can only come out on hit or block. If successful, it levels up Jamie's Drink Level by 1. Because Rekkas are so easy to confirm into, this move is the primary way to level up. The meterless versions leave Jamie at a slight disadvantage after knockdown, making it slightly risky to use in the corner; to avoid this risk, use the OD version to give Jamie slightly more KD advantage. |
| <br><br>
| | |
| The long drink animation makes the 6K ender extremely unsafe on block. The drink itself is interruptible, and any punish within the first 21f will stop Jamie's drink level from increasing (20f for the LP version). Like the other Rekka followups, it is possible to frame trap the opponent if they attempt a punish. The exact blockstring gap can change depending on the button timing. | | The long drink animation makes the 6K ender extremely unsafe on block. The drink itself is interruptible, and any punish within the first 21f will stop Jamie's drink level from increasing (20f for the LP version). Like the other Rekka followups, it is possible to frame trap the opponent if they attempt a punish. The exact blockstring gap can change depending on the button timing. |
| <br><br>
| | |
| In the Damage column, the first value lists the unscaled damage; () refers to the damage at 80% scaling, which is what would normally occur when starting a combo with the first Rekka. | | In the Damage column, the first value lists the unscaled damage; () refers to the damage at 80% scaling, which is what would normally occur when starting a combo with the first Rekka. |
| }} | | }} |
| | |-| |
| | DL3 = |
| | {{MoveDataCargo |
| | | title = Freeflow Kicks 2 |
| | | subtitle = (DL3) |
| | | input = 236P~6K~6K |
| | | images = |
| | {{MoveDataCargoImage|imageHeight=160px|Jamie_236lp_6k_6k_dl3|caption=}} |
| | ---- |
| | {{MoveDataCargoImage|imageHeight=160px|Jamie_236pp_6k_6k_dl3|caption=}} |
| | | info = |
| | {{AttackDataCargo-SF6/Query|Jamie_236lp_6k_6k_dl3}} |
| | * 2-6f gap before final hit on block |
| | {{AttackDataCargo-SF6/Query|Jamie_236mp_6k_6k_dl3}} |
| | * 5-9f gap before final hit on block |
| | {{AttackDataCargo-SF6/Query|Jamie_236hp_6k_6k_dl3}} |
| | * 8-12f gap before final hit on block |
| | {{AttackDataCargo-SF6/Query|Jamie_236pp_6k_6k_dl3}} |
| | * 2-6f gap before final hit on block |
| | <br> |
| | Mostly identical to the DL0-DL2 versions, except that the drink activation gives Jamie far better KD advantage. There is no longer a need to use the OD version for safety in the corner. |
| | }} |
| | |-| |
| | DL4 = |
| | {{MoveDataCargo |
| | | title = Freeflow Kicks 2 |
| | | subtitle = (DL4) |
| | | input = 236P~6K~6K |
| | | images = |
| | {{MoveDataCargoImage|imageHeight=160px|Jamie_236lp_6k_6k_dl4|caption=}} |
| | ---- |
| | {{MoveDataCargoImage|imageHeight=160px|Jamie_236pp_6k_6k_dl4|caption=}} |
| | | info = |
| | {{AttackDataCargo-SF6/Query|Jamie_236lp_6k_6k_dl4}} |
| | * 2-6f gap before final hit on block |
| | {{AttackDataCargo-SF6/Query|Jamie_236mp_6k_6k_dl4}} |
| | * 5-9f gap before final hit on block |
| | {{AttackDataCargo-SF6/Query|Jamie_236hp_6k_6k_dl4}} |
| | * 8-12f gap before final hit on block |
| | {{AttackDataCargo-SF6/Query|Jamie_236pp_6k_6k_dl4}} |
| | * 2-6f gap before final hit on block |
| | <br> |
| | Functions the same as the DL0-DL2 versions, but restores 1 bar of Drive gauge rather than a Drink Level. Jamie at DL4 gets far more damage from his Punch Rekkas, but this can be useful if he is approaching Burnout. It also makes the OD version significantly stronger, as it immediately restores half the spent Drive gauge. |
| | }} |
| | </tabber> |
|
| |
|
| ====<font style="visibility:hidden; float:right">Swagger Step (214P)</font>==== | | ====<font style="visibility:hidden; float:right">Swagger Step (214P)</font>==== |


