No edit summary |
No edit summary |
||
| Line 294: | Line 294: | ||
== Universal Mechanics == | == Universal Mechanics == | ||
=== Throws === | === Throws === | ||
=====<font style="visibility:hidden; float:right">Forward Throw</font>===== | =====<font style="visibility:hidden; float:right">Forward Throw (LPLK)</font>===== | ||
{{MoveDataCargo | {{MoveDataCargo | ||
| title = Forward Throw | | title = Forward Throw | ||
| Line 305: | Line 305: | ||
}} | }} | ||
=====<font style="visibility:hidden; float:right">Back Throw</font>===== | =====<font style="visibility:hidden; float:right">Back Throw (4LPLK)</font>===== | ||
{{MoveDataCargo | {{MoveDataCargo | ||
| title = Back Throw | | title = Back Throw | ||
| Line 317: | Line 317: | ||
=== Drive Moves === | === Drive Moves === | ||
=====<font style="visibility:hidden; float:right">Drive Impact</font>===== | =====<font style="visibility:hidden; float:right">Drive Impact (HPHK)</font>===== | ||
{{MoveDataCargo | {{MoveDataCargo | ||
| title = Drive Impact | | title = Drive Impact | ||
| Line 329: | Line 329: | ||
}} | }} | ||
=====<font style="visibility:hidden; float:right">Drive Reversal</font>===== | =====<font style="visibility:hidden; float:right">Drive Reversal (6HPHK)</font>===== | ||
{{MoveDataCargo | {{MoveDataCargo | ||
| title = Drive Reversal | | title = Drive Reversal | ||
| Line 341: | Line 341: | ||
}} | }} | ||
=====<font style="visibility:hidden; float:right">Drive Parry</font>===== | =====<font style="visibility:hidden; float:right">Drive Parry (MPMK)</font>===== | ||
{{MoveDataCargo | {{MoveDataCargo | ||
| title = Drive Parry | | title = Drive Parry | ||
| Line 353: | Line 353: | ||
}} | }} | ||
=====<font style="visibility:hidden; float:right">Drive Rush</font>===== | =====<font style="visibility:hidden; float:right">Drive Rush (66)</font>===== | ||
{{MoveDataCargo | {{MoveDataCargo | ||
| title = Drive Rush | | title = Drive Rush | ||
| Line 362: | Line 362: | ||
| info = | | info = | ||
{{AttackDataCargo-SF6/Query|ryu_66}} | {{AttackDataCargo-SF6/Query|ryu_66}} | ||
See [[Street_Fighter_6/Gauges#Drive_Rush|Drive Rush]]. | See [[Street_Fighter_6/Gauges#Drive_Rush|Drive Rush]]. Frame data shown in parentheses refers to the Drive Rush version used from a Parry. | ||
}} | }} | ||
=== Taunts === | === Taunts === | ||
=====<font style="visibility:hidden; float:right">Neutral Taunt</font>===== | =====<font style="visibility:hidden; float:right">Neutral Taunt (5PPPKKK)</font>===== | ||
{{MoveDataCargo | {{MoveDataCargo | ||
| title = Neutral Taunt | | title = Neutral Taunt | ||
| Line 376: | Line 376: | ||
{{AttackDataCargo-SF6/Query|Ryu_5pppkkk}} | {{AttackDataCargo-SF6/Query|Ryu_5pppkkk}} | ||
}} | }} | ||
=====<font style="visibility:hidden; float:right">Forward Taunt</font>===== | =====<font style="visibility:hidden; float:right">Forward Taunt (6PPPKKK)</font>===== | ||
{{MoveDataCargo | {{MoveDataCargo | ||
| title = Forward Taunt | | title = Forward Taunt | ||
| Line 386: | Line 386: | ||
{{AttackDataCargo-SF6/Query|Ryu_6pppkkk}} | {{AttackDataCargo-SF6/Query|Ryu_6pppkkk}} | ||
}} | }} | ||
=====<font style="visibility:hidden; float:right">Back Taunt</font>===== | =====<font style="visibility:hidden; float:right">Back Taunt (4PPPKKK)</font>===== | ||
{{MoveDataCargo | {{MoveDataCargo | ||
| title = Back Taunt | | title = Back Taunt | ||
| Line 396: | Line 396: | ||
{{AttackDataCargo-SF6/Query|Ryu_4pppkkk}} | {{AttackDataCargo-SF6/Query|Ryu_4pppkkk}} | ||
}} | }} | ||
=====<font style="visibility:hidden; float:right">Down Taunt</font>===== | =====<font style="visibility:hidden; float:right">Down Taunt (2PPPKKK)</font>===== | ||
{{MoveDataCargo | {{MoveDataCargo | ||
| title = Down Taunt | | title = Down Taunt | ||
| Line 408: | Line 408: | ||
== Special Moves == | == Special Moves == | ||
=====<font style="visibility:hidden; float:right">Denjin Charge (22P)</font>===== | |||
=====<font style="visibility:hidden; float:right">22P</font>===== | |||
{{MoveDataCargo | {{MoveDataCargo | ||
| title = Denjin Charge | | title = Denjin Charge | ||
| Line 422: | Line 421: | ||
}} | }} | ||
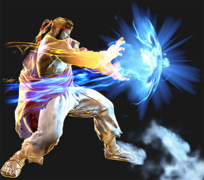
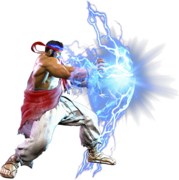
=====<font style="visibility:hidden; float:right">236P</font>===== | =====<font style="visibility:hidden; float:right">Hadoken (236P)</font>===== | ||
{{MoveDataCargo | {{MoveDataCargo | ||
| title = Hadoken | | title = Hadoken | ||
| Line 439: | Line 438: | ||
}} | }} | ||
=====<font style="visibility:hidden; float:right"> | =====<font style="visibility:hidden; float:right">Hadoken (Denjin 236P)</font>===== | ||
{{MoveDataCargo | {{MoveDataCargo | ||
| title = Denjin Charge Hadoken | | title = Denjin Charge Hadoken | ||
| Line 453: | Line 452: | ||
}} | }} | ||
=====<font style="visibility:hidden; float:right">623P</font>===== | =====<font style="visibility:hidden; float:right">Shoryuken (623P)</font>===== | ||
{{MoveDataCargo | {{MoveDataCargo | ||
| title = Shoryuken | | title = Shoryuken | ||
| Line 470: | Line 469: | ||
}} | }} | ||
=====<font style="visibility:hidden; float:right">214K</font>===== | =====<font style="visibility:hidden; float:right">Tatsumaki Senpu-kyaku (214K)</font>===== | ||
{{MoveDataCargo | {{MoveDataCargo | ||
| title = Tatsumaki Senpu-kyaku | | title = Tatsumaki Senpu-kyaku | ||
| Line 487: | Line 486: | ||
}} | }} | ||
=====<font style="visibility:hidden; float:right">j.214K</font>===== | =====<font style="visibility:hidden; float:right">Aerial Tatsumaki Senpu-kyaku (j.214K)</font>===== | ||
{{MoveDataCargo | {{MoveDataCargo | ||
| title = Aerial Tatsumaki Senpu-kyaku | | title = Aerial Tatsumaki Senpu-kyaku | ||
| Line 504: | Line 503: | ||
}} | }} | ||
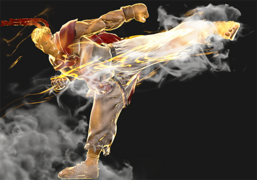
=====<font style="visibility:hidden; float:right">236K</font>===== | =====<font style="visibility:hidden; float:right">High Blade Kick (236K)</font>===== | ||
{{MoveDataCargo | {{MoveDataCargo | ||
| title = High Blade Kick | | title = High Blade Kick | ||
| Line 520: | Line 519: | ||
}} | }} | ||
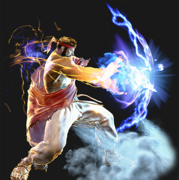
=====<font style="visibility:hidden; float:right">214P</font>===== | =====<font style="visibility:hidden; float:right">Hashogeki (214P)</font>===== | ||
{{MoveDataCargo | {{MoveDataCargo | ||
| title = Hashogeki | | title = Hashogeki | ||
| Line 536: | Line 535: | ||
}} | }} | ||
=====<font style="visibility:hidden; float:right"> | =====<font style="visibility:hidden; float:right">Hashogeki (Denjin 214P)</font>===== | ||
{{MoveDataCargo | {{MoveDataCargo | ||
| title = Denjin Charge Hashogeki | | title = Denjin Charge Hashogeki | ||
| Line 551: | Line 550: | ||
== Super Arts == | == Super Arts == | ||
=====<font style="visibility:hidden; float:right">236236P</font>===== | =====<font style="visibility:hidden; float:right">Level 1 Super (236236P)</font>===== | ||
{{MoveDataCargo | {{MoveDataCargo | ||
| title = Shinku Hadoken | | title = Shinku Hadoken | ||
| Line 566: | Line 565: | ||
}} | }} | ||
=====<font style="visibility:hidden; float:right">214214P</font>===== | =====<font style="visibility:hidden; float:right">Level 2 Super (214214P)</font>===== | ||
{{MoveDataCargo | {{MoveDataCargo | ||
| title = Shin Hashogeki | | title = Shin Hashogeki | ||
| Line 584: | Line 583: | ||
}} | }} | ||
=====<font style="visibility:hidden; float:right">236236K</font>===== | =====<font style="visibility:hidden; float:right">Level 3 Super (236236K)</font>===== | ||
{{MoveDataCargo | {{MoveDataCargo | ||
| title = Shin Shoryuken | | title = Shin Shoryuken | ||
Revision as of 18:44, 7 January 2023
| Pre-release information
This page is under construction based on pre-release data. Join the SF6 Resource Hub for info on editing. |
Introduction
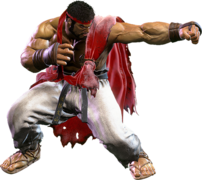
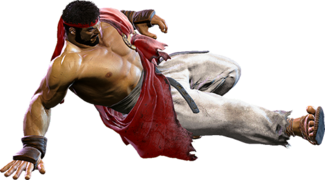
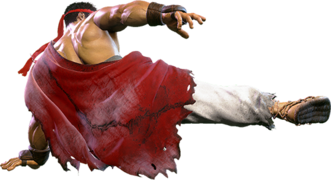
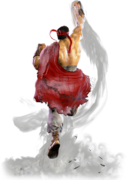
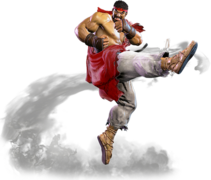
Ever training, this martial artist seeks true strength. Well-mannered and sincere, Ryu travels the globe in search of worthy opponents. Having overcome the Satsui no Hado, he now seeks yet greater heights.
Ryu is the definitive Street Fighter character, and not just because he's been the protagonist for thirty years. As the original shoto character, Ryu embodies all the meaningful aspects of Street Fighter gameplay in one concise package. Ryu emphasizes a patient playstyle with strong defensive tools.
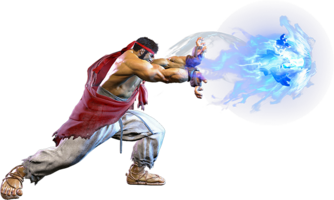
While they probably need no introduction, Ryu's signature moves are Hadoken and Shoryuken, the original fireball and DP combo. Hadoken is a good projectile with variable speeds and decent reward on hit or block, while Shoryuken is a very useful anti-air uppercut that has utility as a reversal with the OD version. From these two moves, a simple gameplan of "Hadoken or Shoryuken" emerges, informing the rest of Ryu's gameplan. Ryu pesters his opponents with his long reaching 2MK and 5HP alongside his jabs and Hadoken. When they jump in frustration, Ryu Shoryukens them back out and starts it all over again. While system mechanics have weakened this playstyle in SF6, it still retains effectiveness if Ryu can tap into system mechanics such as Drive Impact and Drive Parry.
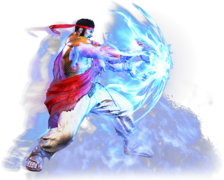
New to Ryu's kit are Denjin Charge and Hashogeki. The former allows Ryu to stock a single charge of a resource called Denjin. When Ryu uses certain specials or supers, Denjin is spent to empower them greatly, giving them added utility on block or hit. This particularly makes his fireballs very formidable, as they become faster and beat out other fireballs of the same level. Hashogeki is a combo tool and pressure tool, giving Ryu a new way to end blockstrings or even reset pressure completely especially when Denjin is spent to either give Ryu easy access to juggles or plus frames on block. Ryu also has Tatsumaki Senpu-kyaku, an advancing spinning kick that provides corner carry and some projectile invulnerability. And returning from Street Fighter 3 is Ryu's High Blade Kick, with each strength being reworked into varying forms of utility including midrange poking, getting a corner safejump, or even big damage combo extensions in the corner. All of these tools combined lend to Ryu being a well rounded character who has many useful options for different situations, and he especially rewards smart play with terrifyingly powerful corner pressure.
Ryu's only weakness is, ironically, his greatest strength: in his commitment to fundamentals, Ryu completely lacks any major gimmicks outside of Denjin (and that is barely a gimmick unto itself). This can make it somewhat difficult for him to steal rounds and effectively demands that he play to said fundamentals at all times. That said, he is still consistent in almost every aspect, getting good return out of every successful play. He does great damage, has good okizeme off of most combo routes, and his versatile kit ensures he can handle any matchup. Ryu is a formidable character that can easily show you the ropes of Street Fighter while also holding his own beyond that. If you want a fundamentals-oriented character who rewards patient and considerate play, then walk the path of student to master with Ryu.
| Pick if you like: | Avoid if you dislike: |
|---|---|
|
|
Classic & Modern Versions Comparison
| Missing Normals |
|
|---|---|
| Missing Command Normals |
|
| Shortcut-Only Specials |
|
| Assist Combos |
|
| Miscellaneous Changes |
|
| Ryu | |
|---|---|
| Vitals | |
| Life Points | 10000 |
| Ground Movement | |
| Forward Walk Speed | 0.047 |
| Backward Walk Speed | 0.032 |
| Forward Dash Speed | 19 |
| Backward Dash Speed | 23 |
| Forward Dash Distance | 1.252 |
| Backward Dash Distance | 0.923 |
| Drive Rush Min. Distance (Throw) | 0.525 |
| Drive Rush Min. Distance (Block) | 1.878 |
| Drive Rush Max Distance | 3.628 |
| Jumping | |
| Jump Speed | 4+38+3 |
| Jump Apex | 2.115 |
| Forward Jump Distance | 1.90 |
| Backward Jump Distance | 1.52 |
| Throws | |
| Throw Range | 0.8 |
| Throw Hurtbox | 0.33 |
Normals
Standing normals
5LP
| Startup | Active | Recovery | Cancel | Damage | Guard | On Hit | On Block |
|---|---|---|---|---|---|---|---|
| 4 | 3 | 7 | Chn Sp SA | 300 | LH | +4 | -1 |
- One of Ryu's 4f jabs which chain into itself. Lower recovery than 2LP makes this the best chainable option when trying to counter drive impact.
5MP
| Startup | Active | Recovery | Cancel | Damage | Guard | On Hit | On Block |
|---|---|---|---|---|---|---|---|
| 6 | 4 | 11 | Sp SA TC | 600 | LH | +7 | -1 |
- This move is primarily used for combos due to it's high frame advantage on hit and for going into Fuwa Triple Strike.
5HP
| Startup | Active | Recovery | Cancel | Damage | Guard | On Hit | On Block |
|---|---|---|---|---|---|---|---|
| 10 | 5 | 18 | Sp SA TC | 800 | LH | +4 | -2 |
- Decent range and special cancellable make this a good poke button.
5LK
| Startup | Active | Recovery | Cancel | Damage | Guard | On Hit | On Block |
|---|---|---|---|---|---|---|---|
| 5 | 3 | 11 | Sp SA | 300 | LH | +2 | -4 |
5MK
| Startup | Active | Recovery | Cancel | Damage | Guard | On Hit | On Block |
|---|---|---|---|---|---|---|---|
| 9 | 3 | 18 | - | 700 | LH | +4 | -4 |
5HK
| Startup | Active | Recovery | Cancel | Damage | Guard | On Hit | On Block |
|---|---|---|---|---|---|---|---|
| 12 | 4 | 20(22) | - | 900 | LH | +9 | +1 |
- Great for standing combos and can also serve as an anti-air tool. The main drawback of this button is that it whiffs on crouchers.
Crouching Normals
2LP
| Startup | Active | Recovery | Cancel | Damage | Guard | On Hit | On Block |
|---|---|---|---|---|---|---|---|
| 4 | 2 | 9 | Chn Sp SA | 300 | LH | +4 | -1 |
2MP
| Startup | Active | Recovery | Cancel | Damage | Guard | On Hit | On Block |
|---|---|---|---|---|---|---|---|
| 6 | 4 | 13(15) | Sp SA | 600 | LH | +5 | 0 |
2HP
| Startup | Active | Recovery | Cancel | Damage | Guard | On Hit | On Block |
|---|---|---|---|---|---|---|---|
| 9 | 6 | 21(22) | Sp SA | 800 | LH | +1 | -7 |
2LK
| Startup | Active | Recovery | Cancel | Damage | Guard | On Hit | On Block |
|---|---|---|---|---|---|---|---|
| 5 | 2 | 10 | Chn | 200 | L | +3 | -1 |
2MK
| Startup | Active | Recovery | Cancel | Damage | Guard | On Hit | On Block |
|---|---|---|---|---|---|---|---|
| 8 | 3 | 19 | Sp SA | 500 | L | +1 | -6 |
2HK
| Startup | Active | Recovery | Cancel | Damage | Guard | On Hit | On Block |
|---|---|---|---|---|---|---|---|
| 9 | 3 | 23(29) | - | 900 | L | KD +40 | -12 |
Jumping Normals
j.LP
| Startup | Active | Recovery | Cancel | Damage | Guard | On Hit | On Block |
|---|---|---|---|---|---|---|---|
| 4 | 10 | 3 land | - | 300 | H | +4(+9) | 0(+5) |
j.MP
| Startup | Active | Recovery | Cancel | Damage | Guard | On Hit | On Block |
|---|---|---|---|---|---|---|---|
| 8 | 2,3 | 3 land | Sp | 350x2 | H | +10(+13) | +6(+9) |
j.HP
| Startup | Active | Recovery | Cancel | Damage | Guard | On Hit | On Block |
|---|---|---|---|---|---|---|---|
| 9 | 6 | 3 land | - | 800 | H | +8(+15) | +4(+11) |
j.LK
| Startup | Active | Recovery | Cancel | Damage | Guard | On Hit | On Block |
|---|---|---|---|---|---|---|---|
| 6 | 10 | 3 land | - | 300 | H | +5(+10) | +1(+6) |
j.MK
| Startup | Active | Recovery | Cancel | Damage | Guard | On Hit | On Block |
|---|---|---|---|---|---|---|---|
| 7 | 6 | 3 land | - | 500 | H | +8(+13) | +4(+9) |
j.HK
Command Normals
6MP
| Startup | Active | Recovery | Cancel | Damage | Guard | On Hit | On Block |
|---|---|---|---|---|---|---|---|
| 20 | 1,3 | 19 | - | 300x2 | H,H | +3 | -1 |
6HP
| Startup | Active | Recovery | Cancel | Damage | Guard | On Hit | On Block |
|---|---|---|---|---|---|---|---|
| 20 | 2,3 | 16 | - | 400x2 | LH | +6 | +3 |
- Can be spaced to be slightly more plus on block.
- At absolute max range on a crouch blocking opponent the second hit will whiff and you'll be left at -12.
4HP
| Startup | Active | Recovery | Cancel | Damage | Guard | On Hit | On Block |
|---|---|---|---|---|---|---|---|
| 7 | 4 | 25(26) | Sp SA | 800 | LH | +1 | -13 |
6HK
| Startup | Active | Recovery | Cancel | Damage | Guard | On Hit | On Block |
|---|---|---|---|---|---|---|---|
| 16 | 4 | 20 | Sp* | 800 | LH | +2 | -4 |
4HK
Target Combos
5HP>HK
5MP>LK>HK
Universal Mechanics
Throws
Forward Throw (LPLK)
| Startup | Active | Recovery | Cancel | Damage | Guard | On Hit | On Block |
|---|---|---|---|---|---|---|---|
| 5 | 3 | 23 | - | 1200 (2040) | T | KD +17 | - |
Back Throw (4LPLK)
| Startup | Active | Recovery | Cancel | Damage | Guard | On Hit | On Block |
|---|---|---|---|---|---|---|---|
| 5 | 3 | 23 | - | 1200 (2040) | T | KD +11 | - |
Drive Moves
Drive Impact (HPHK)
| Startup | Active | Recovery | Cancel | Damage | Guard | On Hit | On Block |
|---|---|---|---|---|---|---|---|
| 26 | 2 | 35 | - | 800 | LH | KD +35 / Wall Splat KD +65 | -3 / Wall Splat HKD +72 |
See Drive Impact.
Drive Reversal (6HPHK)
| Startup | Active | Recovery | Cancel | Damage | Guard | On Hit | On Block |
|---|---|---|---|---|---|---|---|
| 20 | 3 | 26(31) | - | 500 recoverable | LH | KD +23 | -6 |
See Drive Reversal.
Drive Parry (MPMK)
| Startup | Active | Recovery | Cancel | Damage | Guard | On Hit | On Block |
|---|---|---|---|---|---|---|---|
| 1 | 12 or until released | 33(1)(11) | - | - | - | - | - |
See Drive Parry. Perfect Parrying has only 1F of recovery and disables the opponent from canceling their attack. Perfect Parrying projectiles puts you into fixed 11 frames of recovery.
Drive Rush (66)
No results
See Drive Rush. Frame data shown in parentheses refers to the Drive Rush version used from a Parry.
Taunts
Neutral Taunt (5PPPKKK)
| Startup | Active | Recovery | Cancel | Damage | Guard | On Hit | On Block |
|---|---|---|---|---|---|---|---|
| 210 (total) | - | - | - | - | - | - | - |
Forward Taunt (6PPPKKK)
| Startup | Active | Recovery | Cancel | Damage | Guard | On Hit | On Block |
|---|---|---|---|---|---|---|---|
| 124 (total) | - | - | - | - | - | - | - |
Back Taunt (4PPPKKK)
| Startup | Active | Recovery | Cancel | Damage | Guard | On Hit | On Block |
|---|---|---|---|---|---|---|---|
| 209 (total) | - | - | - | - | - | - | - |
Down Taunt (2PPPKKK)
Special Moves
Denjin Charge (22P)
| Startup | Active | Recovery | Cancel | Damage | Guard | On Hit | On Block |
|---|---|---|---|---|---|---|---|
| 50 | - | 2 | - | - | - | - | - |
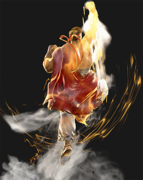
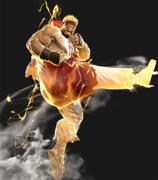
- Ryu charges himself with a lightning flavored install, powering up all his energy based attacks. Hadoken, Hashogeki, Shinku Hadoken, and Shin Hashogeki all receive additional damage and in some cases frame advantage when installed.
- Only applies for one use after installed.
Hadoken (236P)
| Startup | Active | Recovery | Cancel | Damage | Guard | On Hit | On Block |
|---|---|---|---|---|---|---|---|
| 16 | - | 31 | SA3 | 700 | LH | +2 | -5 |
| Startup | Active | Recovery | Cancel | Damage | Guard | On Hit | On Block |
|---|---|---|---|---|---|---|---|
| 14 | - | 33 | SA3 | 700 | LH | 0 | -7 |
| Startup | Active | Recovery | Cancel | Damage | Guard | On Hit | On Block |
|---|---|---|---|---|---|---|---|
| 12 | - | 35 | SA3 | 700 | LH | -2 | -9 |
| Startup | Active | Recovery | Cancel | Damage | Guard | On Hit | On Block |
|---|---|---|---|---|---|---|---|
| 12 | - | 28 | SA2 SA3 | 500x2 | LH | KD +54 | -1 |
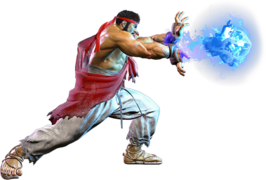
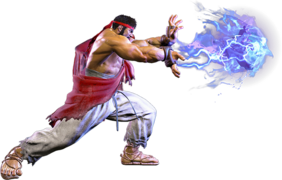
Ryu's iconic fireball which is useful for zoning and pressure. 236LP travels the slowest while 236HP travels the fastest. Due to this, 236LP will generally be used in blockstrings where all of the versions will be used for zoning
Hadoken (Denjin 236P)
| Startup | Active | Recovery | Cancel | Damage | Guard | On Hit | On Block |
|---|---|---|---|---|---|---|---|
| 12 | - | 28 | SA3 | 500x2 | LH | KD +54 | -1 |
| Startup | Active | Recovery | Cancel | Damage | Guard | On Hit | On Block |
|---|---|---|---|---|---|---|---|
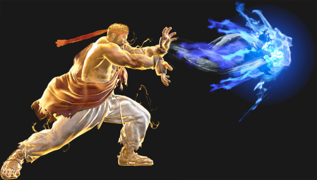
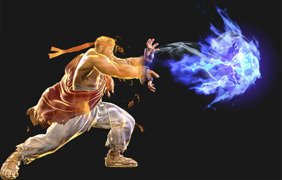
| 12 | - | 26 | SA2 SA3 | 400x3 (1200) | LH | KD +57 | +2 |
Shoryuken (623P)
| Startup | Active | Recovery | Cancel | Damage | Guard | On Hit | On Block |
|---|---|---|---|---|---|---|---|
| 5 | 10 | 21+12 land | SA3 | 1100(800) | LH | KD +38 | -23 |
| Startup | Active | Recovery | Cancel | Damage | Guard | On Hit | On Block |
|---|---|---|---|---|---|---|---|
| 6 | 10 | 30+12 land | SA3 | 1200(800) | LH | KD +34 | -32 |
| Startup | Active | Recovery | Cancel | Damage | Guard | On Hit | On Block |
|---|---|---|---|---|---|---|---|
| 7 | 10 | 34+12 land | SA3 | 1400(800) | LH | KD +37(+29) | -39 |
| Startup | Active | Recovery | Cancel | Damage | Guard | On Hit | On Block |
|---|---|---|---|---|---|---|---|
| 6 | 2,8 | 37+15 land | - | 800x2 | LH | KD +29 | -40 |
- Ryu's go-to reversal and anti-air. Each version has its own unique benefits over the others while 623PP is the strongest at the cost of drive gauge.
Tatsumaki Senpu-kyaku (214K)
| Startup | Active | Recovery | Cancel | Damage | Guard | On Hit | On Block |
|---|---|---|---|---|---|---|---|
| 12 | 3 | 14+18 land | - | 900 | LH | KD +35 | -15 |
| Startup | Active | Recovery | Cancel | Damage | Guard | On Hit | On Block |
|---|---|---|---|---|---|---|---|
| 14 | 2(13)2 | 11+20 land | - | 1000 | LH | KD +23(+38) | -13(-28) |
| Startup | Active | Recovery | Cancel | Damage | Guard | On Hit | On Block |
|---|---|---|---|---|---|---|---|
| 16 | 2(13)2(13)2 | 14+17 land | - | 1200 | LH | KD +20(+35)(+50) | -13(-28)(-43) |
| Startup | Active | Recovery | Cancel | Damage | Guard | On Hit | On Block |
|---|---|---|---|---|---|---|---|
| 13 | 2(4)2(4)2(3)2(4)2 | 10+13 land | - | 200x5 | LH | KD +57 | -14(-32) |
- For the Medium and Heavy Tatsu, all hits after the first will whiff on crouching
Aerial Tatsumaki Senpu-kyaku (j.214K)
No results
No results No results
| Startup | Active | Recovery | Cancel | Damage | Guard | On Hit | On Block |
|---|---|---|---|---|---|---|---|
| 11 | 2(1)3(1)3(1)3(2)2 | 16 land | - | 300,200x3,600 (1500) | LH | KD +45(+51) | -29(-32) |
- There is no difference between each meterless version.
High Blade Kick (236K)
| Startup | Active | Recovery | Cancel | Damage | Guard | On Hit | On Block |
|---|---|---|---|---|---|---|---|
| 14 | 6 | 22 | SA3 | 1100 | LH | KD +42~46 | -11(-7) |
| Startup | Active | Recovery | Cancel | Damage | Guard | On Hit | On Block |
|---|---|---|---|---|---|---|---|
| 18 | 9 | 19(22) | SA3 | 1200 | LH | KD +40~46 | -8(-2) |
| Startup | Active | Recovery | Cancel | Damage | Guard | On Hit | On Block |
|---|---|---|---|---|---|---|---|
| 27 | 9 | 15 | SA3 | 1300 | LH | KD +45~51 | -3(+5) |
| Startup | Active | Recovery | Cancel | Damage | Guard | On Hit | On Block |
|---|---|---|---|---|---|---|---|
| 17 | 5 | 33 | SA2 SA3 | 800 | LH | Wall Bounce +49(65) | -18 |
Hashogeki (214P)
| Startup | Active | Recovery | Cancel | Damage | Guard | On Hit | On Block |
|---|---|---|---|---|---|---|---|
| 12 | 6 | 18 | SA3 | 700 | LH | +2 | -3 |
| Startup | Active | Recovery | Cancel | Damage | Guard | On Hit | On Block |
|---|---|---|---|---|---|---|---|
| 19 | 6 | 17 | SA3 | 800 | LH | +2 | -6 |
| Startup | Active | Recovery | Cancel | Damage | Guard | On Hit | On Block |
|---|---|---|---|---|---|---|---|
| 30 | 6 | 19 | SA3 | 400x2 | LH | KD +61 Spin | +2 |
| Startup | Active | Recovery | Cancel | Damage | Guard | On Hit | On Block |
|---|---|---|---|---|---|---|---|
| 18 | 6 | 20 | SA2 SA3 | 1100 | LH | +3 | +3 |
Hashogeki (Denjin 214P)
Super Arts
Level 1 Super (236236P)
| Startup | Active | Recovery | Cancel | Damage | Guard | On Hit | On Block |
|---|---|---|---|---|---|---|---|
| 7 | - | 79 | - | 400x5 (2000) | LH | KD +26 | -24 |
No results
- Additional 400 damage and +1 frame of knockdown advantage with Denjin Charge.
Level 2 Super (214214P)
| Startup | Active | Recovery | Cancel | Damage | Guard | On Hit | On Block |
|---|---|---|---|---|---|---|---|
| 12 | 6 | 39 | - | 2800 | LH | KD +20 | -20 |
No results Can be held within 3 intervals for additional effects. Denjin Charge applies an extra 400 damage.
- Level 1 (Not Held): Invul 1-11f, 12f Startup.
- Level 2 (Held for 6f minimum): Invul 1-9f, Minimum 20f Startup, 200 Additional Damage.
- Level 3 (Held for 36f minimum): Invul 1-9f, Minimum 50f startup, 400 Additional Damage, Causes a tumble effect which allows for a followup attack or combo extension with raw drive rush.
Level 3 Super (236236K)
| Startup | Active | Recovery | Cancel | Damage | Guard | On Hit | On Block |
|---|---|---|---|---|---|---|---|
| 5(2) | 12 | 32+39 land | - | 4000 (3600) | LH | HKD +14 | -50(-54) |
| Startup | Active | Recovery | Cancel | Damage | Guard | On Hit | On Block |
|---|---|---|---|---|---|---|---|
| 5(2) | 12 | 32+39 land | - | 4500 (4400) | LH | HKD +14 | -50(-54) |
- If used as an anti-air the non cinematic version does 400*400*400*400*1000 (2600) damage.
- The Critical Art version of the non cinematic super does 4400 damage, making it an extremely powerful anti-air.


