No edit summary |
No edit summary |
||
| Line 138: | Line 138: | ||
=== Jumping Normals === | === Jumping Normals === | ||
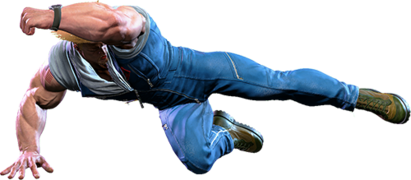
====<font style="visibility:hidden; float:right"> | ====<font style="visibility:hidden; float:right">j.LP</font>==== | ||
{{MoveDataCargo | {{MoveDataCargo | ||
| title = Jumping Light Punch | | title = Jumping Light Punch | ||
| Line 148: | Line 148: | ||
{{AttackDataCargo-SF6/Query|Guile_jlp}} | {{AttackDataCargo-SF6/Query|Guile_jlp}} | ||
}} | }} | ||
====<font style="visibility:hidden; float:right"> | |||
====<font style="visibility:hidden; float:right">j.MP</font>==== | |||
{{MoveDataCargo | {{MoveDataCargo | ||
| title = Jumping Medium Punch | | title = Jumping Medium Punch | ||
| Line 158: | Line 159: | ||
{{AttackDataCargo-SF6/Query|Guile_jmp}} | {{AttackDataCargo-SF6/Query|Guile_jmp}} | ||
}} | }} | ||
====<font style="visibility:hidden; float:right"> | |||
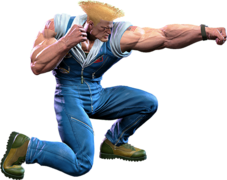
====<font style="visibility:hidden; float:right">j.HP</font>==== | |||
{{MoveDataCargo | {{MoveDataCargo | ||
| title = Jumping Heavy Punch | | title = Jumping Heavy Punch | ||
| Line 168: | Line 170: | ||
{{AttackDataCargo-SF6/Query|Guile_jhp}} | {{AttackDataCargo-SF6/Query|Guile_jhp}} | ||
}} | }} | ||
====<font style="visibility:hidden; float:right"> | |||
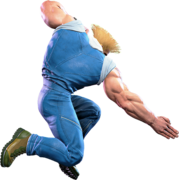
====<font style="visibility:hidden; float:right">j.LK</font>==== | |||
{{MoveDataCargo | {{MoveDataCargo | ||
| title = Jumping Light Kick | | title = Jumping Light Kick | ||
| Line 179: | Line 182: | ||
}} | }} | ||
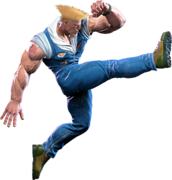
====<font style="visibility:hidden; float:right"> | ====<font style="visibility:hidden; float:right">j.MK</font>==== | ||
{{MoveDataCargo | {{MoveDataCargo | ||
| title = Jumping Medium Kick | | title = Jumping Medium Kick | ||
| Line 189: | Line 192: | ||
{{AttackDataCargo-SF6/Query|Guile_jmk}} | {{AttackDataCargo-SF6/Query|Guile_jmk}} | ||
}} | }} | ||
====<font style="visibility:hidden; float:right"> | |||
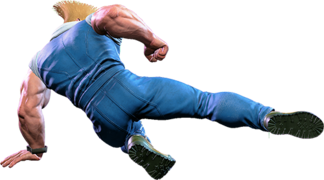
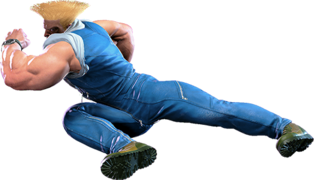
====<font style="visibility:hidden; float:right">j.HK</font>==== | |||
{{MoveDataCargo | {{MoveDataCargo | ||
| title = Jumping Heavy Kick | | title = Jumping Heavy Kick | ||
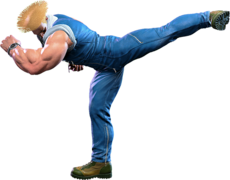
| Line 201: | Line 205: | ||
== Command Normals == | == Command Normals == | ||
====<font style="visibility:hidden; float:right"> | ====<font style="visibility:hidden; float:right">6MP</font>==== | ||
{{MoveDataCargo | {{MoveDataCargo | ||
| title = Full Bullet Magnum | | title = Full Bullet Magnum | ||
| Line 211: | Line 215: | ||
{{AttackDataCargo-SF6/Query|Guile_6mp}} | {{AttackDataCargo-SF6/Query|Guile_6mp}} | ||
}} | }} | ||
====<font style="visibility:hidden; float:right"> | |||
====<font style="visibility:hidden; float:right">6HP</font>==== | |||
{{MoveDataCargo | {{MoveDataCargo | ||
| title = Spinning Back Knuckle | | title = Spinning Back Knuckle | ||
| Line 221: | Line 226: | ||
{{AttackDataCargo-SF6/Query|Guile_6hp}} | {{AttackDataCargo-SF6/Query|Guile_6hp}} | ||
}} | }} | ||
====<font style="visibility:hidden; float:right"> | |||
====<font style="visibility:hidden; float:right">4HP</font>==== | |||
{{MoveDataCargo | {{MoveDataCargo | ||
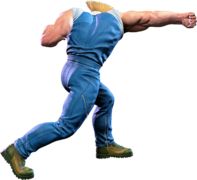
| title = Burning Straight | | title = Burning Straight | ||
| Line 231: | Line 237: | ||
{{AttackDataCargo-SF6/Query|Guile_4hp}} | {{AttackDataCargo-SF6/Query|Guile_4hp}} | ||
}} | }} | ||
====<font style="visibility:hidden; float:right"> | |||
====<font style="visibility:hidden; float:right">4LK</font>==== | |||
{{MoveDataCargo | {{MoveDataCargo | ||
| title = Knee Bazooka | | title = Knee Bazooka | ||
| Line 242: | Line 249: | ||
}} | }} | ||
====<font style="visibility:hidden; float:right"> | ====<font style="visibility:hidden; float:right">4MK or 6MK</font>==== | ||
{{MoveDataCargo | {{MoveDataCargo | ||
| title = Rolling Sobat | | title = Rolling Sobat | ||
| subtitle = | | subtitle = | ||
| input = | | input = 4MK or 6MK | ||
| images = | | images = | ||
{{MoveDataCargoImage|imageHeight=180px| | {{MoveDataCargoImage|imageHeight=180px|Guile_4mk_or_6mk|caption=}} | ||
| info = | | info = | ||
{{AttackDataCargo-SF6/Query| | {{AttackDataCargo-SF6/Query|Guile_4mk_or_6mk}} | ||
}} | }} | ||
====<font style="visibility:hidden; float:right"> | |||
====<font style="visibility:hidden; float:right">6HK</font>==== | |||
{{MoveDataCargo | {{MoveDataCargo | ||
| title = Reverse Spin Kick | | title = Reverse Spin Kick | ||
| Line 262: | Line 270: | ||
{{AttackDataCargo-SF6/Query|Guile_6hk}} | {{AttackDataCargo-SF6/Query|Guile_6hk}} | ||
}} | }} | ||
====<font style="visibility:hidden; float:right"> | |||
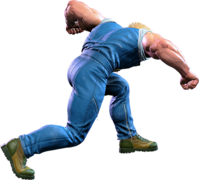
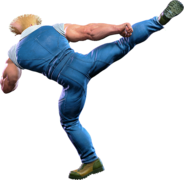
====<font style="visibility:hidden; float:right">3HK</font>==== | |||
{{MoveDataCargo | {{MoveDataCargo | ||
| title = Guile High Kick | | title = Guile High Kick | ||
| Line 274: | Line 283: | ||
== Target Combos == | == Target Combos == | ||
====<font style="visibility:hidden; float:right"> | ====<font style="visibility:hidden; float:right">5MP~4HP</font>==== | ||
{{MoveDataCargo | {{MoveDataCargo | ||
| title = Recoil Cannon | | title = Recoil Cannon | ||
| subtitle = | | subtitle = | ||
| input = 5MP | | input = 5MP~4HP | ||
| images = | | images = | ||
{{MoveDataCargoImage|imageHeight=180px|Guile_5mp_4hp|caption=}} | {{MoveDataCargoImage|imageHeight=180px|Guile_5mp_4hp|caption=}} | ||
| Line 285: | Line 294: | ||
}} | }} | ||
====<font style="visibility:hidden; float:right"> | ====<font style="visibility:hidden; float:right">2MP~2MP</font>==== | ||
{{MoveDataCargo | {{MoveDataCargo | ||
| title = Double Shot | | title = Double Shot | ||
| subtitle = | | subtitle = | ||
| input = 2MP | | input = 2MP~2MP | ||
| images = | | images = | ||
{{MoveDataCargoImage|imageHeight=180px|Guile_2mp_2mp|caption=}} | {{MoveDataCargoImage|imageHeight=180px|Guile_2mp_2mp|caption=}} | ||
| Line 295: | Line 304: | ||
{{AttackDataCargo-SF6/Query|Guile_2mp_2mp}} | {{AttackDataCargo-SF6/Query|Guile_2mp_2mp}} | ||
}} | }} | ||
====<font style="visibility:hidden; float:right"> | |||
====<font style="visibility:hidden; float:right">2MK~6MP</font>==== | |||
{{MoveDataCargo | {{MoveDataCargo | ||
| title = Drake Fang | | title = Drake Fang | ||
| subtitle = | | subtitle = | ||
| input = 2MK | | input = 2MK~6MP | ||
| images = | | images = | ||
{{MoveDataCargoImage|imageHeight=180px|Guile_6mp|caption=}} | {{MoveDataCargoImage|imageHeight=180px|Guile_6mp|caption=}} | ||
| Line 306: | Line 316: | ||
}} | }} | ||
====<font style="visibility:hidden; float:right"> | ====<font style="visibility:hidden; float:right">2HK~3HK</font>==== | ||
{{MoveDataCargo | {{MoveDataCargo | ||
| title = Phantom Cutter | | title = Phantom Cutter | ||
| subtitle = | | subtitle = | ||
| input = 2HK | | input = 2HK~3HK | ||
| images = | | images = | ||
{{MoveDataCargoImage|imageHeight=180px|Guile_3hk|caption=}} | {{MoveDataCargoImage|imageHeight=180px|Guile_3hk|caption=}} | ||
| Line 319: | Line 329: | ||
== Universal Mechanics == | == Universal Mechanics == | ||
=== Throws === | === Throws === | ||
====<font style="visibility:hidden; float:right"> | ====<font style="visibility:hidden; float:right">Forward Throw (LPLK)</font>==== | ||
{{MoveDataCargo | {{MoveDataCargo | ||
| title = Forward Throw | | title = Forward Throw | ||
| Line 329: | Line 339: | ||
{{AttackDataCargo-SF6/Query|Guile_lplk}} | {{AttackDataCargo-SF6/Query|Guile_lplk}} | ||
}} | }} | ||
====<font style="visibility:hidden; float:right"> | ====<font style="visibility:hidden; float:right">Back Throw (4LPLK)</font>==== | ||
{{MoveDataCargo | {{MoveDataCargo | ||
| title = Back Throw | | title = Back Throw | ||
| Line 339: | Line 349: | ||
{{AttackDataCargo-SF6/Query|Guile_4lplk}} | {{AttackDataCargo-SF6/Query|Guile_4lplk}} | ||
}} | }} | ||
====<font style="visibility:hidden; float:right"> | ====<font style="visibility:hidden; float:right">Air Forward Throw (LPLK Air)</font>==== | ||
{{MoveDataCargo | {{MoveDataCargo | ||
| title = Air Forward Throw | | title = Air Forward Throw | ||
| Line 349: | Line 359: | ||
{{AttackDataCargo-SF6/Query|Guile_lplk_air}} | {{AttackDataCargo-SF6/Query|Guile_lplk_air}} | ||
}} | }} | ||
====<font style="visibility:hidden; float:right"> | ====<font style="visibility:hidden; float:right">Air Back Throw (4LPLK Air)</font>==== | ||
{{MoveDataCargo | {{MoveDataCargo | ||
| title = Air Back Throw | | title = Air Back Throw | ||
| Line 361: | Line 371: | ||
=== Drive Moves === | === Drive Moves === | ||
====<font style="visibility:hidden; float:right">HPHK</font>==== | ====<font style="visibility:hidden; float:right">Drive Impact (HPHK)</font>==== | ||
{{MoveDataCargo | {{MoveDataCargo | ||
| title = Drive Impact | | title = Drive Impact | ||
| Line 373: | Line 383: | ||
}} | }} | ||
====<font style="visibility:hidden; float:right">6HPHK</font>==== | ====<font style="visibility:hidden; float:right">Drive Reversal (6HPHK)</font>==== | ||
{{MoveDataCargo | {{MoveDataCargo | ||
| title = Drive Reversal | | title = Drive Reversal | ||
| Line 385: | Line 395: | ||
}} | }} | ||
====<font style="visibility:hidden; float:right">MPMK</font>==== | ====<font style="visibility:hidden; float:right">Drive Parry (MPMK)</font>==== | ||
{{MoveDataCargo | {{MoveDataCargo | ||
| title = Drive Parry | | title = Drive Parry | ||
| Line 397: | Line 407: | ||
}} | }} | ||
====<font style="visibility:hidden; float:right">66</font>==== | ====<font style="visibility:hidden; float:right">Drive Rush (66)</font>==== | ||
{{MoveDataCargo | {{MoveDataCargo | ||
| title = Drive Rush | | title = Drive Rush | ||
| Line 410: | Line 420: | ||
=== Taunts === | === Taunts === | ||
=====<font style="visibility:hidden; float:right"> | =====<font style="visibility:hidden; float:right">Neutral Taunt (5PPPKKK)</font>===== | ||
{{MoveDataCargo | {{MoveDataCargo | ||
| title = Neutral Taunt | | title = Neutral Taunt | ||
| Line 420: | Line 430: | ||
{{AttackDataCargo-SF6/Query|Guile_5pppkkk}} | {{AttackDataCargo-SF6/Query|Guile_5pppkkk}} | ||
}} | }} | ||
=====<font style="visibility:hidden; float:right">Forward Taunt (6PPPKKK)</font>===== | |||
=====<font style="visibility:hidden; float:right"> | |||
{{MoveDataCargo | {{MoveDataCargo | ||
| title = Forward Taunt | | title = Forward Taunt | ||
| Line 431: | Line 440: | ||
{{AttackDataCargo-SF6/Query|Guile_6pppkkk}} | {{AttackDataCargo-SF6/Query|Guile_6pppkkk}} | ||
}} | }} | ||
=====<font style="visibility:hidden; float:right"> | =====<font style="visibility:hidden; float:right">Back Taunt (4PPPKKK)</font>===== | ||
{{MoveDataCargo | {{MoveDataCargo | ||
| title = Back Taunt | | title = Back Taunt | ||
| Line 441: | Line 450: | ||
{{AttackDataCargo-SF6/Query|Guile_4pppkkk}} | {{AttackDataCargo-SF6/Query|Guile_4pppkkk}} | ||
}} | }} | ||
=====<font style="visibility:hidden; float:right"> | =====<font style="visibility:hidden; float:right">Down Taunt (2PPPKKK)</font>===== | ||
{{MoveDataCargo | {{MoveDataCargo | ||
| title = Down Taunt | | title = Down Taunt | ||
| Line 453: | Line 462: | ||
== Special Moves == | == Special Moves == | ||
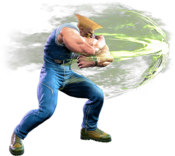
====<font style="visibility:hidden; float:right"> | ====<font style="visibility:hidden; float:right">Sonic Boom ([4]6P)</font>==== | ||
{{MoveDataCargo | {{MoveDataCargo | ||
| title = Sonic Boom | | title = Sonic Boom | ||
| Line 470: | Line 479: | ||
}} | }} | ||
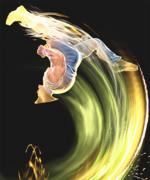
====<font style="visibility:hidden; float:right"> | ====<font style="visibility:hidden; float:right">Somersault Kick ([2]8K)</font>==== | ||
{{MoveDataCargo | {{MoveDataCargo | ||
| title = Somersault Kick | | title = Somersault Kick | ||
| Line 487: | Line 496: | ||
}} | }} | ||
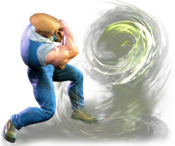
====<font style="visibility:hidden; float:right"> | ====<font style="visibility:hidden; float:right">Sonic Blade (214P)</font>==== | ||
{{MoveDataCargo | {{MoveDataCargo | ||
| title = Sonic Blade | | title = Sonic Blade | ||
| Line 504: | Line 513: | ||
}} | }} | ||
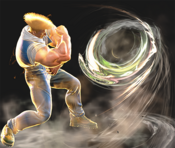
====<font style="visibility:hidden; float:right"> | ====<font style="visibility:hidden; float:right">Sonic Cross (214P_6P)</font>==== | ||
{{MoveDataCargo | {{MoveDataCargo | ||
| title = Sonic Cross | | title = Sonic Cross | ||
| Line 520: | Line 529: | ||
== Super Arts == | == Super Arts == | ||
====<font style="visibility:hidden; float:right"> | ====<font style="visibility:hidden; float:right">Level 1 Super ([4]646P)</font>==== | ||
{{MoveDataCargo | {{MoveDataCargo | ||
| title = Sonic Hurricane | | title = Sonic Hurricane | ||
| subtitle = Level 1 Super Art | | subtitle = Level 1 Super Art | ||
| input = | | input = [4]646P | ||
| images = | | images = | ||
{{MoveDataCargoImage|Guile_4646p|caption=}} | {{MoveDataCargoImage|Guile_4646p|caption=}} | ||
| Line 533: | Line 542: | ||
* HP version whiffs on crouchers, but allows followup juggles on hit | * HP version whiffs on crouchers, but allows followup juggles on hit | ||
}} | }} | ||
====<font style="visibility:hidden; float:right"> | |||
====<font style="visibility:hidden; float:right">Level 2 Super (214214P)</font>==== | |||
{{MoveDataCargo | {{MoveDataCargo | ||
| title = Solid Puncher | | title = Solid Puncher | ||
| Line 545: | Line 555: | ||
* Generally safe on block when cancelled into, can be very plus. | * Generally safe on block when cancelled into, can be very plus. | ||
}} | }} | ||
====<font style="visibility:hidden; float:right">PP</font>==== | ====<font style="visibility:hidden; float:right">Sonic Break (PP)</font>==== | ||
{{MoveDataCargo | {{MoveDataCargo | ||
| title = Sonic Break | | title = Sonic Break | ||
| Line 560: | Line 570: | ||
}} | }} | ||
====<font style="visibility:hidden; float:right"> | ====<font style="visibility:hidden; float:right">Level 3 Super ([4]646K)</font>==== | ||
{{MoveDataCargo | {{MoveDataCargo | ||
| title = Crossfire Somersault | | title = Crossfire Somersault | ||
| subtitle = Level 3 Super Art | | subtitle = Level 3 Super Art | ||
| input = | | input = [4]646K | ||
| images = | | images = | ||
{{MoveDataCargoImage|Guile_4646k|caption=}} | {{MoveDataCargoImage|Guile_4646k|caption=}} | ||
Revision as of 19:05, 7 January 2023
| Pre-release information
This page is under construction based on pre-release data. Join the SF6 Resource Hub for info on editing. |
Introduction
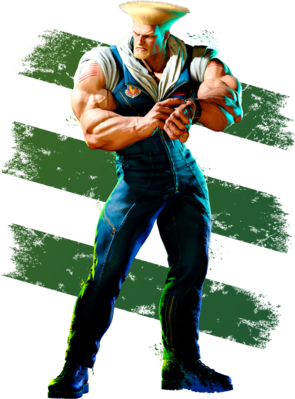
A US Air Force pilot who fights for his country, Guile succeeded in dismantling Shadaloo and avenging his friend Charlie. He enjoys living the family man life, but new battlefields await him.
Ever since his debut in 1991, Guile has been defined by his incredible projectile zoning and strong midrange presence. As the archetypal projectile zoner, Guile specializes in pestering the opponent with a barrage of projectiles before analyzing their next move and punishing accordingly.
The defining move for Guile is Sonic Boom. Easily the best projectile in the game, Sonic Boom does everything a fireball should do and more. It can be fired at variable speeds, can be used as a shield to protect Guile as he moves forward, has incredibly fast recovery, and even comes with a unique just frame version for better advantage on hit and damage. Guile's gameplan revolves entirely around throwing out Sonic Boom and observing what the opponent does in response. If they eat it, throw another one. If they block it, throw another one to chip away at their Drive Gauge. Opponents who begin using system mechanics like jumping or Drive Impact to get around Sonic Boom are where the games begin for Guile, as his strategy evolves into a classic fireball/uppercut gameplan.
Opponents who leap over Sonic Boom can be met with Flash Kick, a massive ascending uppercut with a huge hitbox. Opponents who choose to be patient and come close to Guile must contend with his incredible 5MK, 2MK, and 5HP. Guile also has a huge selection of excellent command normals, such as 4HP, 4MK and 6HK, which give him great brawling potential. Guile can also use system mechanics well, with a fast overhead and good throw reward making his Drive Rush quite strong. Opponents who try to counterzone Guile with their own fireballs give him the ability to use Sonic Blade to enhance Sonic Boom and turn it into a fireball-eating machine. Simply put, there is no real situation where Guile is at explicit disadvantage, and his strong kit makes him very scary at fullscreen and midscreen. Guile is the undisputed master of fireball wars and punishing jumpins, making him a complete wall to overcome for any opponent.
Guile has no major weaknesses that affect his gameplan, but instead must deal with several important quirks. First, Guile is a charge character, meaning he must always commit to certain actions if he wants to perform them. Flash Kick is an incredible anti-air for sure, but it requires charge and thus is impossible to be performed on reaction akin to Ryu's Shoryuken. However, Guile's 2HP gets the job done just as well, with far less reward as a tradeoff. Similarly, Guile's gameplan is highly consistent and variable, but lacks any major gimmicks to challenge wary opponents. While at low levels Guile is capable of steamrolling impatient opponents who don't understand him, high level Guiles must be very patient and equipped with nerves of steel. Lastly, Guile has some of the longest and highest execution (though rarely necessary) optimal combos in the game. Still, none of these quirks dramatically affect Guile in any negative way, making him into a very strong character overall. If you love projectile zoning, value versatility, and want a character who can punish risky plays without peer, sharpen your mind to a sonic edge with Guile.
| Pick if you like: | Avoid if you dislike: |
|---|---|
|
|
Classic & Modern Versions Comparison
| Missing Normals |
|
|---|---|
| Missing Command Normals |
|
| Shortcut-Only Specials |
|
| Assist Combos |
|
| Miscellaneous Changes |
|
| Guile | |
|---|---|
| Vitals | |
| Life Points | 10000 |
| Ground Movement | |
| Forward Walk Speed | 0.043 |
| Backward Walk Speed | 0.032 |
| Forward Dash Speed | 21 |
| Backward Dash Speed | 23 |
| Forward Dash Distance | 1.567 |
| Backward Dash Distance | 0.74 |
| Drive Rush Min. Distance (Throw) | 0.805 |
| Drive Rush Min. Distance (Block) | 1.898 |
| Drive Rush Max Distance | 3.461 |
| Jumping | |
| Jump Speed | 4+38+3 |
| Jump Apex | 2.115 |
| Forward Jump Distance | 1.90 |
| Backward Jump Distance | 1.52 |
| Throws | |
| Throw Range | 0.8 |
| Throw Hurtbox | 0.33 |
Normals
Standing Normals
5LP
| Startup | Active | Recovery | Cancel | Damage | Guard | On Hit | On Block |
|---|---|---|---|---|---|---|---|
| 5 | 3 | 7 | Chn Sp SA | 300 | LH | +4 | -2 |
5MP
| Startup | Active | Recovery | Cancel | Damage | Guard | On Hit | On Block |
|---|---|---|---|---|---|---|---|
| 7 | 3 | 15 | Sp SA TC | 600 | LH | +6 | 0 |
5HP
| Startup | Active | Recovery | Cancel | Damage | Guard | On Hit | On Block |
|---|---|---|---|---|---|---|---|
| 7 | 3 | 23 | Sp SA | 900 | LH | -1 | -6 |
5LK
| Startup | Active | Recovery | Cancel | Damage | Guard | On Hit | On Block |
|---|---|---|---|---|---|---|---|
| 5 | 2 | 12 | Sp SA | 300 | LH | +3 | -1 |
5MK
| Startup | Active | Recovery | Cancel | Damage | Guard | On Hit | On Block |
|---|---|---|---|---|---|---|---|
| 7 | 5 | 18 | - | 700 | LH | +1 | -4 |
5HK
| Startup | Active | Recovery | Cancel | Damage | Guard | On Hit | On Block |
|---|---|---|---|---|---|---|---|
| 13 | 3 | 21 | SA | 800 | LH | +3 | -4 |
Crouching Normals
2LP
| Startup | Active | Recovery | Cancel | Damage | Guard | On Hit | On Block |
|---|---|---|---|---|---|---|---|
| 4 | 3 | 8 | Chn Sp SA | 300 | LH | +5 | -2 |
2MP
| Startup | Active | Recovery | Cancel | Damage | Guard | On Hit | On Block |
|---|---|---|---|---|---|---|---|
| 6 | 3 | 13(16) | Sp SA TC | 600 | LH | +4 | -2 |
2HP
| Startup | Active | Recovery | Cancel | Damage | Guard | On Hit | On Block |
|---|---|---|---|---|---|---|---|
| 9 | 5 | 20 | - | 900 | LH | 0 | -9 |
2LK
| Startup | Active | Recovery | Cancel | Damage | Guard | On Hit | On Block |
|---|---|---|---|---|---|---|---|
| 5 | 2 | 13 | Chn | 200 | L | +1 | -5 |
2MK
| Startup | Active | Recovery | Cancel | Damage | Guard | On Hit | On Block |
|---|---|---|---|---|---|---|---|
| 8 | 3 | 18 | TC | 500 | L | +4 | -5 |
2HK
| Startup | Active | Recovery | Cancel | Damage | Guard | On Hit | On Block |
|---|---|---|---|---|---|---|---|
| 9 | 2(16)3 | 21 | TC | 450x2 | L,L | HKD +34 | -12 |
Jumping Normals
j.LP
| Startup | Active | Recovery | Cancel | Damage | Guard | On Hit | On Block |
|---|---|---|---|---|---|---|---|
| 4 | 10 | 3 land | - | 300 | H | +4(+9) | 0(+5) |
j.MP
| Startup | Active | Recovery | Cancel | Damage | Guard | On Hit | On Block |
|---|---|---|---|---|---|---|---|
| 7 | 3 | 3 land | - | 700 | H | +9(+11) | +5(+7) |
j.HP
| Startup | Active | Recovery | Cancel | Damage | Guard | On Hit | On Block |
|---|---|---|---|---|---|---|---|
| 9 | 4 | 3 land | - | 800 | H | +7(+15) | +3(+11) |
j.LK
| Startup | Active | Recovery | Cancel | Damage | Guard | On Hit | On Block |
|---|---|---|---|---|---|---|---|
| 6 | 10 | 3 land | - | 300 | H | +5(+10) | +1(+6) |
j.MK
| Startup | Active | Recovery | Cancel | Damage | Guard | On Hit | On Block |
|---|---|---|---|---|---|---|---|
| 7 | 7 | 3 land | - | 600 | H | +11(+13) | +7(+9) |
j.HK
Command Normals
6MP
| Startup | Active | Recovery | Cancel | Damage | Guard | On Hit | On Block |
|---|---|---|---|---|---|---|---|
| 20 | 3 | 19 | - | 800 | H | +2 | -3 |
6HP
| Startup | Active | Recovery | Cancel | Damage | Guard | On Hit | On Block |
|---|---|---|---|---|---|---|---|
| 16 | 3 | 20 | - | 800 | LH | +5 | +3 |
4HP
| Startup | Active | Recovery | Cancel | Damage | Guard | On Hit | On Block |
|---|---|---|---|---|---|---|---|
| 9 | 3 | 21 | Sp SA | 800 | LH | +1 | -4 |
4LK
| Startup | Active | Recovery | Cancel | Damage | Guard | On Hit | On Block |
|---|---|---|---|---|---|---|---|
| 8 | 5 | 15 | - | 500 | LH | 0(+4) | -4(0) |
4MK or 6MK
| Startup | Active | Recovery | Cancel | Damage | Guard | On Hit | On Block |
|---|---|---|---|---|---|---|---|
| 11 | 3 | 18(21) | - | 700 | LH | +3 | -6 |
6HK
| Startup | Active | Recovery | Cancel | Damage | Guard | On Hit | On Block |
|---|---|---|---|---|---|---|---|
| 17 | 3 | 26 | - | 1000 | LH | -1 | -8 |
3HK
Target Combos
5MP~4HP
| Startup | Active | Recovery | Cancel | Damage | Guard | On Hit | On Block |
|---|---|---|---|---|---|---|---|
| 16 | 3 | 26 | Sp SA kara | 600 | LH | KD +35 | -9 |
2MP~2MP
| Startup | Active | Recovery | Cancel | Damage | Guard | On Hit | On Block |
|---|---|---|---|---|---|---|---|
| 12 | 3 | 16 | Sp SA | 360 | LH | KD +44 | -6 |
2MK~6MP
| Startup | Active | Recovery | Cancel | Damage | Guard | On Hit | On Block |
|---|---|---|---|---|---|---|---|
| 20 | 3 | 21 | - | 800(640) | H | +1 | -5 |
2HK~3HK
Universal Mechanics
Throws
Forward Throw (LPLK)
| Startup | Active | Recovery | Cancel | Damage | Guard | On Hit | On Block |
|---|---|---|---|---|---|---|---|
| 5 | 3 | 23 | - | 1200 (2040) | T | KD +15 | - |
Back Throw (4LPLK)
| Startup | Active | Recovery | Cancel | Damage | Guard | On Hit | On Block |
|---|---|---|---|---|---|---|---|
| 5 | 3 | 23 | - | 1200 (2040) | T | KD +18 | - |
Air Forward Throw (LPLK Air)
| Startup | Active | Recovery | Cancel | Damage | Guard | On Hit | On Block |
|---|---|---|---|---|---|---|---|
| 5 | 3 | 3 land | - | 1200 (2040) | T | KD +21(23) | - |
Air Back Throw (4LPLK Air)
| Startup | Active | Recovery | Cancel | Damage | Guard | On Hit | On Block |
|---|---|---|---|---|---|---|---|
| 5 | 3 | 3 land | - | 1200 (2040) | T | KD +15 | - |
Drive Moves
Drive Impact (HPHK)
| Startup | Active | Recovery | Cancel | Damage | Guard | On Hit | On Block |
|---|---|---|---|---|---|---|---|
| 26 | 2 | 35 | - | 800 | LH | KD +35 / Wall Splat KD +65 | -3 / Wall Splat HKD +72 |
See Drive Impact.
Drive Reversal (6HPHK)
| Startup | Active | Recovery | Cancel | Damage | Guard | On Hit | On Block |
|---|---|---|---|---|---|---|---|
| 20 | 3 | 26(31) | - | 500 recoverable | LH | KD +23 | -6 |
See Drive Reversal.
Drive Parry (MPMK)
| Startup | Active | Recovery | Cancel | Damage | Guard | On Hit | On Block |
|---|---|---|---|---|---|---|---|
| 1 | 12 or until released | 33(1)(11) | - | - | - | - | - |
See Drive Parry. Perfect Parrying has only 1F of recovery and disables the opponent from canceling their attack. Perfect Parrying projectiles puts you into fixed 11 frames of recovery.
Drive Rush (66)
No results
See Drive Rush. Frame data shown in parentheses refers to the Drive Rush version used from a Parry.
Taunts
Neutral Taunt (5PPPKKK)
| Startup | Active | Recovery | Cancel | Damage | Guard | On Hit | On Block |
|---|---|---|---|---|---|---|---|
| 116 (total) | - | - | - | - | - | - | - |
Forward Taunt (6PPPKKK)
| Startup | Active | Recovery | Cancel | Damage | Guard | On Hit | On Block |
|---|---|---|---|---|---|---|---|
| 225 (total) | - | - | - | - | - | - | - |
Back Taunt (4PPPKKK)
| Startup | Active | Recovery | Cancel | Damage | Guard | On Hit | On Block |
|---|---|---|---|---|---|---|---|
| 325 (total) | - | - | - | - | - | - | - |
Down Taunt (2PPPKKK)
Special Moves
Sonic Boom ([4]6P)
| Startup | Active | Recovery | Cancel | Damage | Guard | On Hit | On Block |
|---|---|---|---|---|---|---|---|
| 10 | - | 30 | SA3 | 550 (600) | LH | +3(+4) | -3 |
| Startup | Active | Recovery | Cancel | Damage | Guard | On Hit | On Block |
|---|---|---|---|---|---|---|---|
| 10 | - | 30 | SA3 | 550 (600) | LH | +3(+4) | -3 |
| Startup | Active | Recovery | Cancel | Damage | Guard | On Hit | On Block |
|---|---|---|---|---|---|---|---|
| 10 | - | 30 | SA3 | 550 (600) | LH | +3(+4) | -3 |
| Startup | Active | Recovery | Cancel | Damage | Guard | On Hit | On Block |
|---|---|---|---|---|---|---|---|
| 10 | - | 28 | SA2 SA3 | 500x2 (1000) | LH | KD +48 | +3 |
- Takes 45 frames to charge.
Somersault Kick ([2]8K)
| Startup | Active | Recovery | Cancel | Damage | Guard | On Hit | On Block |
|---|---|---|---|---|---|---|---|
| 5 | 6 | 26+15 land | SA3 | 1000 (1200) | LH | KD +36 | -30 |
| Startup | Active | Recovery | Cancel | Damage | Guard | On Hit | On Block |
|---|---|---|---|---|---|---|---|
| 6 | 6 | 27+15 land | SA3 | 1100 (1300) | LH | KD +37 | -31 |
| Startup | Active | Recovery | Cancel | Damage | Guard | On Hit | On Block |
|---|---|---|---|---|---|---|---|
| 7 | 6 | 28+15 land | SA3 | 1200 (1400) | LH | KD +39 | -32 |
| Startup | Active | Recovery | Cancel | Damage | Guard | On Hit | On Block |
|---|---|---|---|---|---|---|---|
| 6 | 4,2 | 26+20 land | - | 1000(700),600 | LH | KD +29 | -33(-37) |
- Takes 45 frames to charge.
Sonic Blade (214P)
| Startup | Active | Recovery | Cancel | Damage | Guard | On Hit | On Block |
|---|---|---|---|---|---|---|---|
| 16 | [45] | 26 | SA3 | 400 | LH | -3 | -4 |
| Startup | Active | Recovery | Cancel | Damage | Guard | On Hit | On Block |
|---|---|---|---|---|---|---|---|
| 21 | [85] | 29 | SA3 | 400 | LH | -6 | -7 |
| Startup | Active | Recovery | Cancel | Damage | Guard | On Hit | On Block |
|---|---|---|---|---|---|---|---|
| 31 | [100] | 23 | SA3 | 250x2 (500) | LH | +1 | -1 |
| Startup | Active | Recovery | Cancel | Damage | Guard | On Hit | On Block |
|---|---|---|---|---|---|---|---|
| 15 | [100] | 24 | SA2 SA3 | 300x2 | LH | KD +57 | -4 |
- When used point blank the LP and MP versions are minus on block, with the MP version being punishable on hit.
Sonic Cross (214P_6P)
| Startup | Active | Recovery | Cancel | Damage | Guard | On Hit | On Block |
|---|---|---|---|---|---|---|---|
| 10 | - | 28 | SA3 | 600(800),400 | LH | KD +44~ | -1 |
| Startup | Active | Recovery | Cancel | Damage | Guard | On Hit | On Block |
|---|---|---|---|---|---|---|---|
| 10 | - | 28 | SA2 SA3 | 400x2,500 (1300) | LH | KD +48~ | +3 |
| Startup | Active | Recovery | Cancel | Damage | Guard | On Hit | On Block |
|---|---|---|---|---|---|---|---|
| 10 | - | 28 | SA2 SA3 | 400x3,500 (1700) | LH | KD Spin + Splat | +3 |
Super Arts
Level 1 Super ([4]646P)
| Startup | Active | Recovery | Cancel | Damage | Guard | On Hit | On Block |
|---|---|---|---|---|---|---|---|
| 8(11) | 51 | 81 | - | 200x6,800 (2000) | LH | KD +41 | -26 |
| Startup | Active | Recovery | Cancel | Damage | Guard | On Hit | On Block |
|---|---|---|---|---|---|---|---|
| 7 | 52 | 68 | - | 200x6,600 (1800) | LH | KD +70 | -2 |
- Takes 45 frames to charge
- HP version whiffs on crouchers, but allows followup juggles on hit
Level 2 Super (214214P)
| Startup | Active | Recovery | Cancel | Damage | Guard | On Hit | On Block |
|---|---|---|---|---|---|---|---|
| 1 | (1500) | 5 | - | - | - | - | - |
- Grants access to Sonic Break.
- Generally safe on block when cancelled into, can be very plus.
Sonic Break (PP)
| Startup | Active | Recovery | Cancel | Damage | Guard | On Hit | On Block |
|---|---|---|---|---|---|---|---|
| 11 | - | 25 | - | 600 each | LH | +2 | -2 |
No results
- Only available after Solid Puncher is activated; each Sonic Break drains the Super meter faster.
- Meterless version can be thrown without charging with PP; can also input P after Sonic Boom or Sonic Cross, which is the only way to use the OD version.
- Can throw up to 5 in quick succession, and up to 7 max during the install.
Level 3 Super ([4]646K)
| Startup | Active | Recovery | Cancel | Damage | Guard | On Hit | On Block |
|---|---|---|---|---|---|---|---|
| 9 | 6 | 30+40 land | - | 4000(3000) | LH | HKD +16 | -59 |
No results
- Takes 45 frames to charge.
