Marvel vs Capcom/System: Difference between revisions

From SuperCombo Wiki
m (→‎Basic Mechanics: Meter and Red Health details added.)
m (→‎Assists: Removed now that the Assists have their own page, so it doesn't crowd the System page dense with info.)
Line 73: Line 73:
* Characters, like Dan in MSH, have no ground magic series.


=Assists=
There are 20 Assist characters with 2 secret helper characters. Just push a button during the assist select screen and you get whichever assist the random selector was on. There is a limited amount of times you can use each assist which is dependent on how useful they are.  Assists are very useful in creating distractions among other things. You can easily connect many supers after an assist connects too. It is important to note that all assists can be knocked away if hit. All attacks from assists take chipping damage.
==How To Select An Assist==
The Assist Select grid is labeled from 1 to 20 from left to right, top to bottom. Shadow and Sentinel are 21 and 22, respectively. For instance, say you want Ton-Pooh. Since she is the first square on the 2nd row, her number is 5. To select her, before the Assist Select gird appears, simply hold down HP and LP, since 4 + 1 = 5. Below is the compilation of what buttons to use for selecting the character. In other words, it's like binary code.
{| border="1em" cellpadding="3" cellspacing="0"
| align="center"|'''LP = 1'''
| align="center"|'''MP = 2'''
| align="center"|'''HP = 4'''
| align="center"|'''LK = 8'''
| align="center"|'''MK = 16'''
| align="center"|'''HK = 32?'''
|-
|}
==List of Assists==
{| border="1em" cellpadding="3" cellspacing="0"
| align="center"|'''Helper'''
| align="center"|'''Code'''
| align="center"|'''Notes'''
|-
|01. Unknown Soldier - Forgotten World
| align="center"|LP + START
| align="center"|He shoots out some beams at your opponent covering most of the bottom half of the screen. He shoots both above and below the opponent, so at least he covers his bases. Can interrupt grounded opponents pretty well, albeit the damage is subpar. You can rely on his assist helping you out since the projectiles travel at a confortable speed to allow some good ground control.
|-
|02. Lou - Chariot
| align="center"|MP + START
| align="center"|He's an elf that shoots several arrows and flame at your opponent. With a whopping 8 uses, Lou's arrows hit low, so while it's useless for aerial opponents (unless maybe they're falling), it is an excellent pressure tool that can lead to unblockable setups if the opponent doesn't react correctly, and in general is free blockstring pressure that the opponent has to eat. Comes out very fast, too.
|-
|03. King Arthur - Ghouls n Ghosts
| align="center"|LP + MP + START
| align="center"|He throws lances at your opponent. The fun part is that if he gets hit, he loses his armor! The lances are a very bland projectile. They don't pose much threat and aren't very big with limited range to boot. A carefully timed Arthur summon is still more useful than Pure and Fur, though.
|-
|04. Saki - Nigiirochou no Kiseki
| align="center"|HP + START
| align="center"|She shoots a laser at your opponents. Not the most threatening laser, but it comes out quick, deals decent damage, there's a good amount of uses, and can catch people off guard a little. You could lead to some setups with it if you lab, since it would force the opponent to crouch to avoid chip damage, but it's not as long as Thor's assist. Still, can be useful with the right team.
|-
|05. Tong-Pooh - Strider
| align="center"|LP + HP + START
| align="center"|She does a long range kick in the middle of the screen.
|-
|06. Devilot - Cyberbots
| align="center"|MP + HP + START
| align="center"|She comes in on a mech which self-destructs after a LONG time. It's unblockable though so use her in cornering the opponent! If you can set up traps where the opponent is forced to be stuffed, it can be a very useful assist for free damage.
|-
|07. Anita - Darkstalkers
| align="center"|LP + MP + HP + START
| align="center"|Her disembodied doll heads float around her as she walks forward, making a shield of sorts. Eventually, she will release her doll heads forward. Her hitboxes don't really activate until a little while has already passed, unfortunately. She's (probably) fully invincible, though, so no one can interrupt her and they'll go right through her instead, but her projectile attack is basically just another homing-but-not-really-homing projectile attack. Fewer uses than Jubilee's assist, but at least it's a lot more consistent, so you could potentially get some blockstring pressure in with her.
|-
|08. Pure and Fur - Capcom Mascot
| align="center"|LK + START
| align="center"|She makes a whole bunch of dice rain down as far behind your character as possible. Pretty much the worst assist in the game. Although several dice fall in front of her, it barely does anything to the opponent, pushes them far back so they can't receive any real damage, and has few uses. More or less just a joke assist.
|-
|09. Michelle Heart - Wings of Ales
| align="center"|LK + LP + START
| align="center"|She appears on the same level as the opponent and shoots beams in three directions. She looks bad, but she's definitely anything but. She comes out quite fast, covers crouching, standing, and aerial approaches easily, and it's quite difficult to jump in-between the aerial shots to break free. If the opponent jumps in after their partner was KO'd, this pretty much prevents any chance for them to attack back. Overall a very useful assist to lock the opponent down as an aggressive assist, but is useless if the opponent manages to jump past her.
|-
|10. Thor - Marvel Comics
| align="center"|MP + LK + START
| align="center"|Shoot lightning at his opponent in a horizontal beam. It can be ducked, as it only hits high, but it can be a decent anti-air and is useful for locking your opponent down, preventing them from being able to move for a bit as they're forced to crouch.
|-
|11. Cyclops - X-Men
| align="center"|LP + MP + LK + START
| align="center"|Optic blasts his opponent.  Uses his low Optic Blast. Comes out fast, but also loses its hitbox fast. Simple, fast poke so it can be good to setup unblockable scenarios but there's not much else to say about it. Good assist, just not amazing.
|-
|12. Magneto - X-Men
| align="center"|LK + HP + START
| align="center"|Throws out an EM disrupter beam. It's crouchable, and knocks the opponent far away. Fairly quick, too, so there isn't much of an active hitbox. Certainly not an awful assist, but's underwhelming when similar assists do a better job at it. If you love Magneto, then there's no harm in using him, at least.
|-
|13. Storm - X-Men
| align="center"|LP + HP + LK + START
| align="center"|She throws out a vertical typhoon a bit in front of you, akin to Mega Man's Tornado Hold. If you play Mega Man regularly and know Tornado Hold setups, or how best to use the attack, it can be a helpful assist. The big issue: the range is pathetic. There's not much room for Storm to pressure with anything, unless the opponent approaches you, so while it can anti-air, at best it's a defensive assist, assuming you can catch the opponent out of the air.
|-
|14. Jubilee - X-Men
| align="center"|MP + HP + LK + START
| align="center"|Shoots out several firecrackers at different angles that slightly track the opponent, pops her gum and leaves. 8 uses at least, but each projectile deals pitiful damage, and it's likely not all of them will even hit the opponent. Not really a good anti-air either, since they'll have just enough time to react and block.
|-
|15. Rogue - X-Men
| align="center"|LP + MP + HP + LK + START
| align="center"|She does her rushing punch special from XSF. Starts from the middle of the screen and moves diagonally upward. Useless as a ground assist since Rogue only hits the opponent once if they're close. As an anti-air assist, it can be handy when they're close enough, since she can interrupt the opponent and possibly lead to an air combo, however unlikely. Hard to time, but not too bad.
|-
|16. Psylocke - X-Men
| align="center"|MK + START
| align="center"|She does a Psi-Thrust super on your opponent, dashing in from the side. The second best assist in the game, and an assist that beats out Colossus. She's easier to interrupt, but she's essentially a female Colossus assist otherwise.
|-
|17. Juggernaut - X-Men
| align="center"|LP + MK + START
| align="center"|Comes barreling toward the opponent, doing a weak version of his Juggernaut Headcrush. Fills the entire screen. One of the best assists, although you only get 3 uses. Very high priority, large hitbox, hard to interrupt, decent damage to boot. If you use Gambit, Juggernaut will allow you to do a TOD combo from midscreen to corner, albeit it uses all 3 assists.
|-
|18. Iceman - X-Men
| align="center"|MP + MK + START
| align="center"|Makes a whole bunch of ice blocks fall onto the screen. It is much more consistent than Storm or Pure and Fur, but it's still not good for pressure and should really only be used for defensive play. The opponent won't be hit by very many ice chunks, and they don't deal huge damage, and it could push the opponent away, which may prevent you from doing setups. He can still work, though.
|-
|19. Colossus - X-Men
| align="center"|LP + MP + MK + START
| align="center"|Dives in, then shoulder charges into the opponent. 5 frigging uses! Easily the best assist in the game, as he has very high priority and can truck through most attacks, but can be beat out by Psylocke, the other best assist. Multi-hit properties, too, and he's incredibly powerful for blockstring pressure, so shaking him off (if at all) will be incredibly difficult.
|-
|20. US Agent - MSH vs SF
| align="center"|HP + MK + START
| align="center"|Does a Charging Star across the screen. Not the greatest range, and even though he hits twice, he can't combo both hits with each other. Still a pretty useful assist, though. Comes out fast, has a fairly tall hitbox, and makes for a good way to shake people off of you from up close.
|-
|21. Shadow - MSH vs SF
| align="center"|LP + MK + HP + START
| align="center"|Does his Somersault Super move(the one where he does three flash kicks). Good anti-air, but not terribly useful on the ground. Very few uses, too. You could probably set up some combos with him if you get creative.
|-
|22. Sentinel – XCOTA
| align="center"|MP + MK + HP + START
| align="center"|Flies across the screen and physically attacks the opponent. Mostly fills the entire screen. How they dropped the ball so hard on Sentinel as an assist, only to become a god tier in MVC2 is something that only meteorologists could possibly hope to figure out. Anyways, he's a charging assist and he fills the entire screen! That's about it, though. Bland pressure, bland damage, not useful in the corner as he doesn't trap the opponent very long.
|-
|}


{{Navbox-MVC1}}
{{Navbox-MVC1}}
[[Category:Marvel vs Capcom]]
[[Category:Marvel vs Capcom]]

Revision as of 01:49, 19 January 2021

Game Mechanics

Basic Mechanics

Dashing: B/Fx2:

  • A slight dash across the screen for offensive or defensive purposes. Some characters have an air-dash.

Super Jump: D then U or Kx3:

  • A more extended jump with higher verticality.

Meter:

  • The super meter, just like any fighting game, gives you the ability to use super attacks, so long as you have the sufficient resources to spend. You gain meter by attacking and hitting the opponent, up to a total of 3 bars of meter. Each bar is calculated to a total of 144 points.

Red Health:

  • Red health is temporary damage you receive from being attacked. Every attack deals red damage and permanent damage in Marvel VS Capcom.
  • Permanent damage is damage that cannot be undone, but red health damage can be recovered over time. To do this, switch to your other team member, and the character with red health will slowly restore their health.
  • This will continue until either the character restores all their red health to normal health, or they are called back into action, in which case they will completely lose their red health, meaning that health is gone.

Switch Fighters: HP + HK:

  • This will only work, though, if your secondary fighter still has some energy left in their Health Meter. When you switch, the secondary character comes flying in from behind you. They start at the top of the screen and attack your opponent, coming down at them at an angle. Your secondary character is vulnerable at this time.
  • As soon as your secondary character lands, they'll do a quick little "taunt" thingee to sort of "announce" their arrival and then prepare to fight. You are also vulnerable at this time, so switch wisely. Once this is done, your secondary fighter becomes your active fighter,and the previous fighter becomes your secondary.
  • When one fighter completely loses their Health Meter, they are "dead" and your other fighter jumps in, to finish the fight... alone.

Dual Team Attack: QCF + HP + HK (requires 2 levels):

  • You can evoke a Hyper Combo, where both of your characters (if they're both still alive) come in and blast the opponent with their Hyper Combos.

Dual Combination Attack: QCB + HP + HK (requires 2-3 levels):

  • If both characters on the team are still alive, they both have a chance to go in at the same time for a short amount of time. During that time, the player controls both characters and has infinity meter until time runs out.

Guest Character: MP + MK:

  • Before the match starts, you're given the chance to choose a Guest Character for a limited amount of times during the match. Each Guest Character has their own way of attacking during the match.

Advanced Mechanics

Push Block: Px3 while blocking:

  • Every character can do a push block when they block while they're blocking. Doing this, you'll quickly give your opponent a push back so that they're out of range. This can be pretty useful when you have a quick character who's really "picking on you."

Tech-Throws: F + MP + HP before you get thrown:

  • Throws are in this game, and I'm pretty sure everybody's got one, whether it's a "true" throw, or some kind of hold. You can lighten the damage that throws take away by Tech. Hitting out of them.

Variable Counter: RDP + HP + HK (requires 1 level):

  • Your teammate (if they're still alive) will come in and help you out by smacking your opponent with one of their moves. After a Variable Counter, the teammate that helped out will be left fighting.

Wavedashing:

  • Wavedashing is a repeated dash cancel to make for faster dashes than the normal dash itself. After dashing, push down right as it starts up to cancel the dash into a crouch. This is almost always done with the 3P dash input, rather than using the left stick to dash since it's much quicker to do. You can also wavedash backwards by simply holding back before hitting the 3P input, and is only slightly harder to do.

Uncombo Glitch:

  • When performing a combo on someone, you can intentionally delay your attacks to wait until the final frame of active hitstun. When performed successfully, both the combo counter and damage scaling will reset, but the opponent will still be trapped in a combo. Note that this only works on airborne opponents, however it will work as an OTG, since OTGs register the opponent airborne. While not a real mechanic, the "uncombo" is a glitch in Marvel Super Heroes, Marvel and Super Heroes, and Marvel VS Capcom 1.
  • Thanks, Spaceman!

Magic Series

One of the things that makes MvC stand out from other fighting games is the so called "Magic Series" of each fighter. This is the ability of each fighter to link their attack buttons together while attacking. To do the series though, you have to connect with the first hit. It doesn't matter if the opponent is blocking or not. Each fighter has a ground, jumping, and super jumping magic series.

1) Hunter Series:

  • You can link all six buttons (or any other combination) together while attacking the opponent.
  • For example, Strider's ground magic series is the Hunter series. This means that if he was on the ground and hitting Ryu, he could hit LP, LK, MP, MK, HP, HK, or he could skip a few and do LP, MK, HP, HK. However, he can not cycle backwards through the buttons such as LP, MK, MP. He can only, on the ground, go from punch to kick and only by increasing strength.
  • This is essential to memorize to being a good player at this game.

2) Weakest to Strongest:

  • Basically, you can link a weak (LP or LK) to medium (MP or MK) to strong (HP or HK).
  • Remember, you can also just do LP - HK or MK - HP. You don't have to do all the buttons.

3) Weakest to Any:

  • Able to link a weak (LP or LK) to one button of stronger strength.

4) Punch to Kick:

  • You can only do one punch of any strength to one kick of any strength.
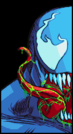
  • Venom has this ground magic series. Shuma Gorath had this ground series in MSHSF.

5) Kick to Punch:

  • One kick to only one other punch
  • I think Blackheart had this in MSHSF. Other then that, I haven't seen anybody else with this series.

6) None: You can't link any buttons together.

  • Characters, like Dan in MSH, have no ground magic series.


Game Navigation

General
Controls
Notation
HUD
Assists
System
FAQ
Capcom Characters
Captain Commando
Chun Li
Jin
Lilith
Mega Man
Morrigan
Roll
Ryu
Shadow Lady
Strider
Zangief
Marvel Characters
Captain America
Gambit
Gold War Machine
Hulk
Hyper Venom
Orange Hulk
Spider Man
Venom
War Machine
Wolverine