|
|
| (8 intermediate revisions by the same user not shown) |
| Line 163: |
Line 163: |
| | info = | | | info = |
| {{AttackDataCargo-SF6/Query|ryu_2mp}} | | {{AttackDataCargo-SF6/Query|ryu_2mp}} |
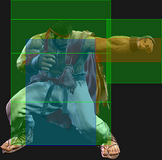
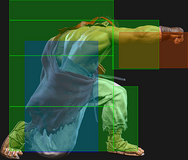
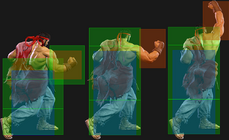
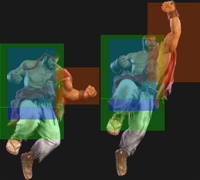
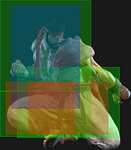
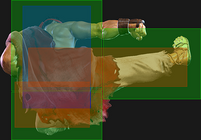
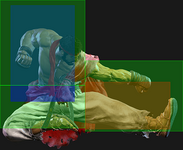
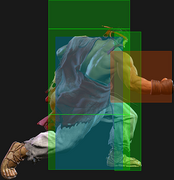
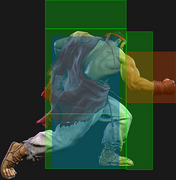
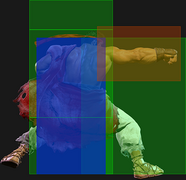
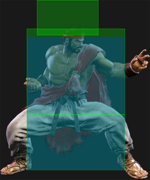
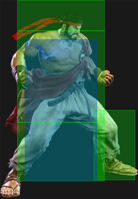
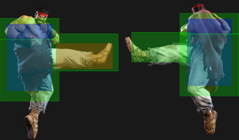
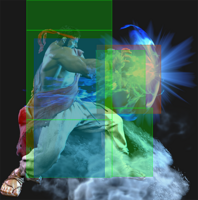
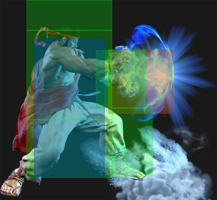
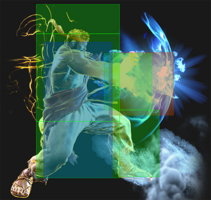
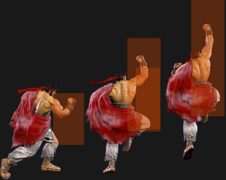
| | * 2f extra recovery on whiff (extends a wider hurtbox until end of recovery) |
| * '''Cancel Hitconfirm Window:''' 16f | | * '''Cancel Hitconfirm Window:''' 16f |
| * '''{{clr|DR|Drive Rush}} cancel advantage:''' {{sf6-adv|VP|+12}} oH / {{sf6-adv|VP|+7}} oB | | * '''{{clr|DR|Drive Rush}} cancel advantage:''' {{sf6-adv|VP|+12}} oH / {{sf6-adv|VP|+7}} oB |
| Line 205: |
Line 206: |
| * Applies 20% damage scaling to next hit when beginning a combo (100/80/70...) | | * Applies 20% damage scaling to next hit when beginning a combo (100/80/70...) |
| <br> | | <br> |
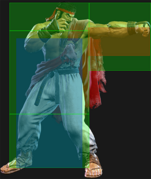
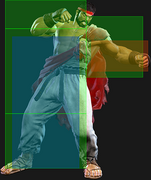
| Ryu's main low combo starter when chained into either of his light punches. Can lead to a 3-hit light confirm into {{clr|L|5LP}} or {{clr|L|2LP}}. | | Ryu's main low hitconfirm starter. Has the most pushback of his chainable lights, but will work consistently in any 3-light confirm ending in {{clr|L|5LP}} or {{clr|L|2LP}}. The opponent will have a harder time guessing a Perfect Parry direction if you mix between {{clr|L|2LK}} and {{clr|L|5LP}}/{{clr|L|2LP}} on your second light normal in the string. |
| | |
| | When used out of {{clr|DR|Drive Rush}}, Ryu can follow up with {{clr|M|5MP}}/{{clr|M|2MP}} for a combo on hit or a frame trap on block. {{clr|M|5MP}} has more combo follow-ups, while {{clr|M|2MP}} has more range for consistency. You can also link {{clr|H|4HP}} at point blank range, which will set up a trade combo on block if the opponent mashes a 4f normal. |
| }} | | }} |
|
| |
|
| Line 461: |
Line 464: |
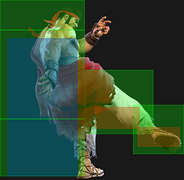
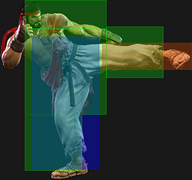
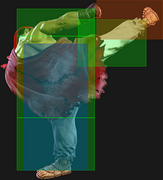
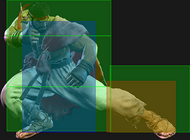
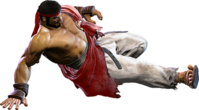
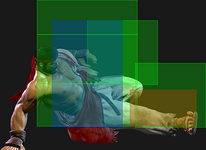
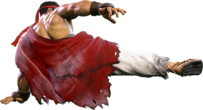
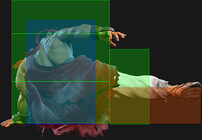
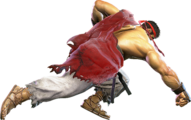
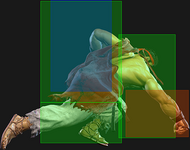
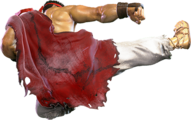
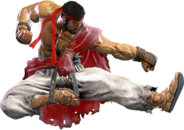
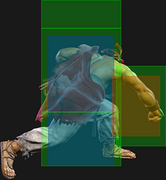
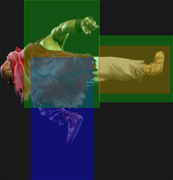
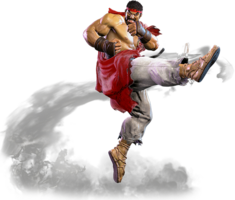
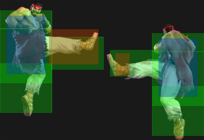
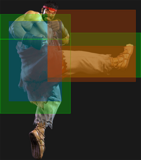
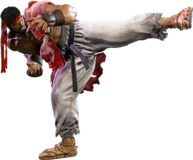
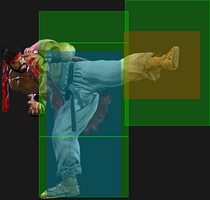
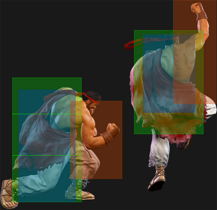
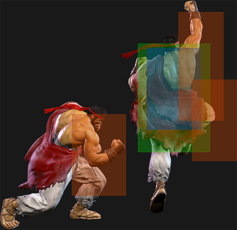
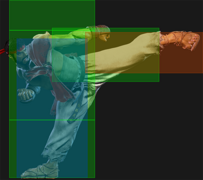
| Despite the animation, this attack is not considered airborne. It has good horizontal range and a lenient hitconfirm window for the cancel to Air Tatsu, making it a potent defensive poke and counterpoke. If you manage to beat the opponent's low poke and score a {{clr|PC|Punish Counter}}, Ryu becomes {{sf6-adv|VP|+6}} and gains a link to {{clr|M|5MP}} or {{clr|M|2MP}}. | | Despite the animation, this attack is not considered airborne. It has good horizontal range and a lenient hitconfirm window for the cancel to Air Tatsu, making it a potent defensive poke and counterpoke. If you manage to beat the opponent's low poke and score a {{clr|PC|Punish Counter}}, Ryu becomes {{sf6-adv|VP|+6}} and gains a link to {{clr|M|5MP}} or {{clr|M|2MP}}. |
|
| |
|
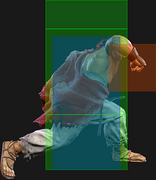
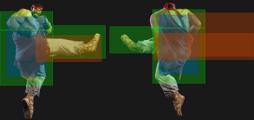
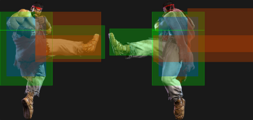
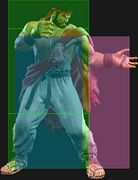
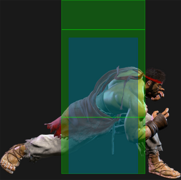
| The pushback generally keeps this move safe on block, and sets Ryu up to punish any attempts to contest his pressure. Be wary of some longer range light normals that can punish if not well spaced. | | The pushback generally keeps this move safe on block, and sets Ryu up to punish any attempts to contest his pressure. Be wary of some longer range light normals that can punish if not well spaced. {{clr|H|6HK}} extends a proximity guard box on frame 2 equal to the attack's full range, making it impossible for an opponent to walk back to avoid it once it has entered startup. |
|
| |
|
| {{clr|H|6HK}} can be juggled into, with {{clr|OD|OD High Blade Kick}} being its most useful juggle starter. It is also effective after {{clr|PC|PC}} {{clr|DR|Drive Impact}} into {{clr|H|nj.HP}}, which can give Ryu a manually timed safe jump setup that does slightly more damage than his {{clr|L|236LK}} routes while being more likely to reach the corner. | | {{clr|H|6HK}} can be juggled into, with {{clr|OD|OD High Blade Kick}} being its most useful juggle starter. It is also effective after {{clr|PC|PC}} {{clr|DR|Drive Impact}} into {{clr|H|nj.HP}}, which can give Ryu a manually timed safe jump setup that does slightly more damage than his {{clr|L|236LK}} routes while being more likely to reach the corner. |
| Line 744: |
Line 747: |
| * '''Cancel Hitconfirm Window:''' 4f (Super) | | * '''Cancel Hitconfirm Window:''' 4f (Super) |
| {{AttackDataCargo-SF6/Query|ryu_236pp}} | | {{AttackDataCargo-SF6/Query|ryu_236pp}} |
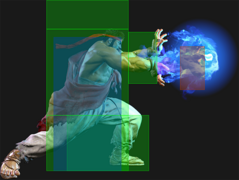
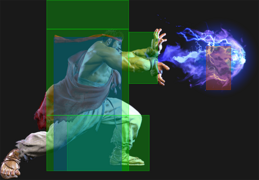
| * Fast 2-hit {{clr|OD|OD}} projectile; '''Projectile Speed:''' 0.095 | | * Fast 2-hit {{clr|OD|OD}} projectile; '''Projectile Speed:''' 0.112 |
| * Has juggle potential; puts opponents into a {{sf6-jug|limited juggle}} state | | * Has juggle potential; puts opponents into a {{sf6-jug|limited juggle}} state |
| * Allows the use of {{clr|SA|SA1}} while {{clr|OD|236PP}} is still on-screen | | * Allows the use of {{clr|SA|SA1}} while {{clr|OD|236PP}} is still on-screen |
| Line 761: |
Line 764: |
|
| |
|
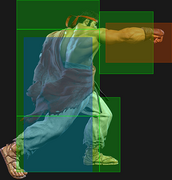
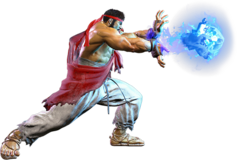
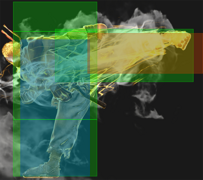
| Canceling pokes into Hadoken runs the risk of being absorbed by {{clr|DR|Drive Impact}} armor for a full crumple punish. This requires a prediction by the opponent before the poke connects, so you can shut this down by playing less predictably and countering with your own {{clr|DR|DI}} if they abuse it in neutral. When a blocked poke like {{clr|M|2MK}}/{{clr|M|2MP}}/{{clr|H|5HP}} is canceled into Hadoken, the opponent's reversal {{clr|DR|DI}} will not be fast enough to punish through any blockstring gaps. | | Canceling pokes into Hadoken runs the risk of being absorbed by {{clr|DR|Drive Impact}} armor for a full crumple punish. This requires a prediction by the opponent before the poke connects, so you can shut this down by playing less predictably and countering with your own {{clr|DR|DI}} if they abuse it in neutral. When a blocked poke like {{clr|M|2MK}}/{{clr|M|2MP}}/{{clr|H|5HP}} is canceled into Hadoken, the opponent's reversal {{clr|DR|DI}} will not be fast enough to punish through any blockstring gaps. |
| | |
| | If you have a Denjin stock, it's possible to confirm a mid-range {{clr|L|LP}}/{{clr|M|MP}} Hadoken into {{clr|SA|Denjin SA1}} on reaction, making your zoning game much more powerful. |
| }} | | }} |
|
| |
|
| Line 814: |
Line 819: |
| {{AttackDataCargo-SF6/Query|ryu_623hp}} | | {{AttackDataCargo-SF6/Query|ryu_623hp}} |
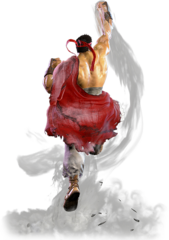
| * '''Anti-Air Invuln:''' 1-8f (cannot hit cross-up); '''Airborne''' 9-50f ({{FKD}} state) | | * '''Anti-Air Invuln:''' 1-8f (cannot hit cross-up); '''Airborne''' 9-50f ({{FKD}} state) |
| * Reduced damage (but higher Juggle Limit) on active frames 3-10 (high anti-air connect) | | * Much higher KD Advantage on active frames 1-2 |
| | * Reduced advantage/damage (but higher Juggle Limit) on active frames 3-10 |
| * '''Cancel Hitconfirm Window:''' 22f (Super) | | * '''Cancel Hitconfirm Window:''' 22f (Super) |
| * Applies 30% damage scaling to next hit when beginning a combo (Shoryuken > {{clr|SA|SA3}} starter: 40% total scaling) | | * Applies 30% damage scaling to next hit when beginning a combo (Shoryuken > {{clr|SA|SA3}} starter: 40% total scaling) |
| Line 827: |
Line 833: |
| All versions of Shoryuken have good juggle potential, which helps squeeze out extra damage from Ryu's many corner juggle situations. It's important to know which juggle routes work with each strength, as it's fairly common for a route to only allow {{clr|L|LP}} or {{clr|M|MP}}/{{clr|OD|OD}} Shoryuken as an ender. | | All versions of Shoryuken have good juggle potential, which helps squeeze out extra damage from Ryu's many corner juggle situations. It's important to know which juggle routes work with each strength, as it's fairly common for a route to only allow {{clr|L|LP}} or {{clr|M|MP}}/{{clr|OD|OD}} Shoryuken as an ender. |
|
| |
|
| On a midscreen hit, Ryu usually has to chase the opponent down with {{clr|DR|Drive Rush}} to secure any real oki. In some anti-air scenarios, it's possible to chase a Back Rise with two dashes, but this often leaves him around {{sf6-adv|E|0}} or {{sf6-adv|P|+1}} and is hard to judge by eye. {{clr|OD|OD Shoryuken}} never gives throw oki on a midscreen opponent, but Ryu can {{clr|DR|Drive Rush}} into delayed {{clr|M|2MK}}/{{clr|H|5HP}} or immediate {{clr|H|6HP}}/{{clr|H|6HK}} to keep the pressure up. | | On a midscreen hit, Ryu usually has to chase the opponent down with {{clr|DR|Drive Rush}} to secure any real oki. In some anti-air scenarios, it's possible to chase a Back Rise with two dashes, but this often leaves him around {{sf6-adv|E|0}} or {{sf6-adv|P|+1}} and is hard to judge by eye. {{clr|H|HP Shoryuken}} is better in this regard if you connect on the first 2 active frames, like in grounded combos or very late anti-air scenarios; while you can't quite reach a midscreen opponent with throw oki, you can pressure with meterless options like Dash + {{clr|H|6HP}}. {{clr|OD|OD Shoryuken}} never gives throw oki on a midscreen opponent, but Ryu can {{clr|DR|Drive Rush}} into delayed {{clr|M|2MK}}/{{clr|H|5HP}} or immediate {{clr|H|6HP}}/{{clr|H|6HK}} to keep the pressure up. |
|
| |
|
| The extra damage scaling on Shoryuken severely weakens the anti-air damage when canceled directly into {{clr|SA|SA3}}. It does not affect any other combo route ending in Shoryuken > {{clr|SA|SA3}}, however. | | The extra damage scaling on Shoryuken severely weakens the anti-air damage when canceled directly into {{clr|SA|SA3}}. It does not affect any other combo route ending in Shoryuken > {{clr|SA|SA3}}, however. |
| Line 1,051: |
Line 1,057: |
| | info = | | | info = |
| {{AttackDataCargo-SF6/Query|ryu_236236p}} | | {{AttackDataCargo-SF6/Query|ryu_236236p}} |
| | * '''Strike/Throw Invuln:''' 1-8f; Armor Break |
| | * 5-hit Super-priority projectile; '''Projectile Speed:''' 0.15 (not affected by button strength) |
| | * '''Drive Gauge Depletion:''' 0.5 bars (hit) / 0.25 bars (block) |
| | * 30% minimum damage scaling |
| {{AttackDataCargo-SF6/Query|ryu_236236p_denjin}} | | {{AttackDataCargo-SF6/Query|ryu_236236p_denjin}} |
| * '''Strike/Throw Invuln:''' 1-8f; Armor Break | | * '''Strike/Throw Invuln:''' 1-8f; Armor Break |
| * 5-hit Super-priority projectile; Denjin version consumes 1 stock | | * 8-hit Super-priority projectile; consumes 1 Denjin stock; '''Projectile Speed:''' 0.24 (not affected by button strength) |
| * '''Projectile Speed:''' 0.12
| |
| * '''Drive Gauge Depletion:''' 0.5 bars (hit) / 0.25 bars (block) | | * '''Drive Gauge Depletion:''' 0.5 bars (hit) / 0.25 bars (block) |
| * 30% minimum damage scaling | | * 30% minimum damage scaling |
| <br> | | <br> |
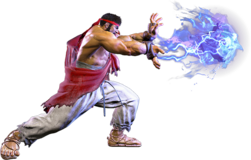
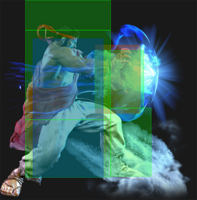
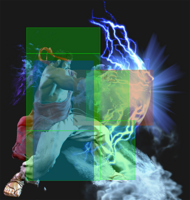
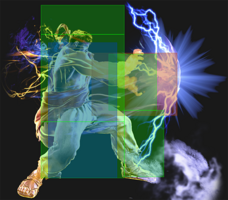
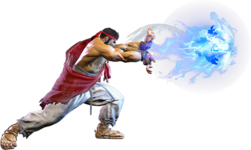
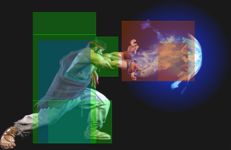
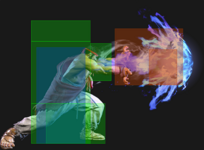
| Shinku Hadoken is Ryu's classic Super. Due to the fireball priority system, it will completely dissipate any non-Super projectile before connecting all 5 hits, although it can still be slowed down by the clash. The move has high juggle potential, making it fairly easy to land compared to many {{clr|SA|Level 1 Supers}}. This Super can be performed even when an {{clr|OD|OD Hadoken}} is on the screen, which improves Ryu's juggle routes and can also let him punish opponents jumping over fireballs at certain ranges. | | Shinku Hadoken is Ryu's classic Super. Due to the fireball priority system, it will completely dissipate any non-Super projectile before connecting all its hits, although it can still be slowed down by the clash. The move has high juggle potential, making it fairly easy to land compared to many {{clr|SA|Level 1 Supers}}. This Super can be performed even when an {{clr|OD|OD Hadoken}} is on the screen, which improves Ryu's juggle routes and can also let him punish opponents jumping over fireballs at certain ranges. |
|
| |
|
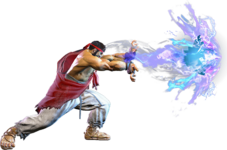
| If Ryu has a Denjin stock available, this Super does 400 extra damage and gains 1 additional frame of knockdown advantage on hit. There is no way to preserve the Denjin stock while using this Super, unlike with regular Hadoken. | | If Ryu has a Denjin stock available, the projectile travels much faster, deals 400 extra damage, and gains 1 additional frame of knockdown advantage on hit. There is no way to preserve the Denjin stock while using this Super, unlike with regular Hadoken. Denjin Shinku Hadoken acts almost like a laser beam, letting Ryu punish projectiles, install moves (like Jamie's Drink), and even whiffed normals from incredibly far away. You can even hitconfirm a {{clr|L|LP}}/{{clr|M|MP}} Hadoken from farther ranges into {{clr|SA|Denjin SA1}}, making Ryu's zoning much scarier. |
|
| |
|
| The button strength does not affect the travel speed. If the opponent is within ~1/2 screen, they will not be able to jump over the fireball after the Super freeze, though it's still easy to punish on block at this range.
| | If the opponent is within ~1/2 screen, they will not be able to jump over the fireball after the Super freeze, though it's still easy to punish on block at this range. |
| }} | | }} |
|
| |
|
| Line 1,083: |
Line 1,092: |
| {{AttackDataCargo-SF6/Query|ryu_214214p_denjin}} | | {{AttackDataCargo-SF6/Query|ryu_214214p_denjin}} |
| * '''Full Invuln:''' 1-13f; Armor Break | | * '''Full Invuln:''' 1-13f; Armor Break |
| | ** Invuln is extended to 2nd active frame (~18f) if button is held up to 5f after Super freeze |
| * '''Drive Gauge Depletion:''' 1 bar (hit) / 0.4 bars (block) | | * '''Drive Gauge Depletion:''' 1 bar (hit) / 0.4 bars (block) |
| * 40% minimum damage scaling | | * 40% minimum damage scaling |
| Line 1,109: |
Line 1,119: |
| {{AttackDataCargo-SF6/Query|ryu_214214p_lv2}} | | {{AttackDataCargo-SF6/Query|ryu_214214p_lv2}} |
| {{AttackDataCargo-SF6/Query|ryu_214214p_denjin_lv2}} | | {{AttackDataCargo-SF6/Query|ryu_214214p_denjin_lv2}} |
| * '''Full Invuln:''' 1-10f; Armor Break | | * Button must be held at least 6f after the Super freeze |
| | * '''Full Invuln:''' 1-9f; Armor Break |
| | ** Invuln ends upon button release (can be as low as 1-7f with minimum charge time) |
| * '''Drive Gauge Depletion:''' 1 bar (hit) / 0.6 bars (block) | | * '''Drive Gauge Depletion:''' 1 bar (hit) / 0.6 bars (block) |
| * 40% minimum damage scaling | | * {{clr|SA|Denjin Lv.2}} version causes a {{sf6-jug|limited juggle}} tumbling OTG knockdown |
| * Button must be held for 6f after the Super freeze
| | * 40% minimum damage scaling; {{clr|SA|Denjin}} version counts as 2 hits for damage scaling when comboed into |
| <br> | | <br> |
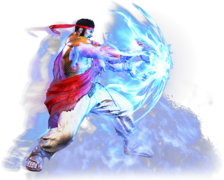
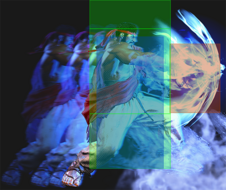
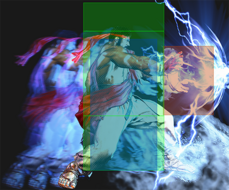
| A powered up version of Hashogeki that can be charged to a higher level by holding the Punch button. Unlike the original Hashogeki, this Super cannot clash with projectiles. Higher level versions do more damage and drain more Drive gauge on block, but do not deal additional Chip damage against opponents in Burnout. | | A powered up version of Hashogeki that can be charged by holding the Punch button. Unlike the original Hashogeki, this Super cannot clash with projectiles. Higher level versions do more damage and drain more Drive gauge on block, but do not deal additional Chip damage against opponents in Burnout. |
|
| |
|
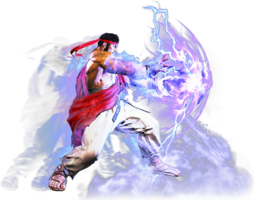
| The Denjin Charge version of each level consumes 1 stock and deals 400 extra damage on hit (but again, no extra Chip). There is no way to preserve the Denjin stock while using this Super, unlike with regular Hashogeki. | | The Denjin Charge version of each level consumes 1 stock and deals 400 extra damage on hit (but again, no extra Chip). There is no way to preserve the Denjin stock while using this Super, unlike with regular Hashogeki. The {{clr|SA|Lv.2 Denjin SA2}} gains the knockdown properties usually reserved for the Lv.3 version, allowing Ryu to pick up a juggle on the tumbling opponent. |
|
| |
|
| While this Super has some invincibility, the slower startup makes it a poor option compared to {{clr|SA|SA1}} or {{clr|SA|SA3}}. If attempting this, be aware that holding the button results in 3f less invincibility. | | While this Super has some invincibility, the slower startup makes it a poor reversal option compared to {{clr|SA|SA1}} or {{clr|SA|SA3}}. The charged versions also lose some invincibility compared to the uncharged one. |
|
| |
|
| Some things that combo into Level 2 charge are {{clr|H|4HP}} and {{clr|OD|OD Hashogeki (non-Denjin)}}.
| | With good timing, all medium and heavy normals can cancel into the Level 2 charge; you can also squeeze extra damage from a non-Denjin {{clr|OD|OD Hashogeki}} by canceling into {{clr|SA|Lv.2 SA2}}. |
| }} | | }} |
| |-| | | |-| |
| Line 1,139: |
Line 1,151: |
| {{AttackDataCargo-SF6/Query|ryu_214214p_lv3}} | | {{AttackDataCargo-SF6/Query|ryu_214214p_lv3}} |
| {{AttackDataCargo-SF6/Query|ryu_214214p_denjin_lv3}} | | {{AttackDataCargo-SF6/Query|ryu_214214p_denjin_lv3}} |
| * '''Full Invuln:''' 1-10f; Armor Break | | * Button must be held at least 36f after the Super freeze |
| | * '''Full Invuln:''' 1-9f; Armor Break |
| * '''Drive Gauge Depletion:''' 1 bar (hit) / 1 bar (block) | | * '''Drive Gauge Depletion:''' 1 bar (hit) / 1 bar (block) |
| | * Causes a {{sf6-jug|limited juggle}} tumbling OTG knockdown |
| * 40% minimum damage scaling | | * 40% minimum damage scaling |
| * Button must be held for 36f after the Super freeze
| |
| * Gives a tumbling OTG knockdown that can be followed up with a raw {{clr|DR|Drive Rush}} combo
| |
| <br> | | <br> |
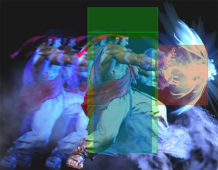
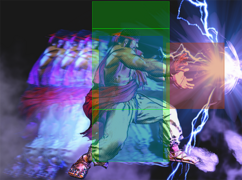
| A powered up version of Hashogeki that can be charged to a higher level by holding the Punch button. Unlike the original Hashogeki, this Super cannot clash with projectiles. Higher level versions do more damage and drain more Drive gauge on block, but do not deal additional Chip damage against opponents in Burnout. | | A powered up version of Hashogeki that can be charged by holding the Punch button. Unlike the original Hashogeki, this Super cannot clash with projectiles. Higher level versions do more damage and drain more Drive gauge on block, but do not deal additional Chip damage against opponents in Burnout. |
|
| |
|
| The Denjin Charge version of each level consumes 1 stock and deals 400 extra damage on hit (but again, no extra Chip). There is no way to preserve the Denjin stock while using this Super, unlike with regular Hashogeki. | | The Denjin Charge version of each level consumes 1 stock and deals 400 extra damage on hit (but again, no extra Chip). There is no way to preserve the Denjin stock while using this Super, unlike with regular Hashogeki. |
|
| |
|
| While this Super has some invincibility, the slower startup makes it a poor option compared to {{clr|SA|SA1}} or {{clr|SA|SA3}}. If attempting this, be aware that holding the button results in 3f less invincibility. | | While this Super has some invincibility, the slower startup makes it a poor reversal option compared to {{clr|SA|SA1}} or {{clr|SA|SA3}}. The charged versions also lose some invincibility compared to the uncharged one. |
|
| |
|
| Some things that can combo into Level 3 charge are {{clr|OD|OD High Blade Kick}} and {{clr|OD|OD Denjin Hashogeki}}. The pushback on block is extremely high on this version, and may require the opponent to hold Parry and use a {{clr|DR|Drive Rush}} punish starter if blocked. | | Some things that can combo into Level 3 charge are {{clr|OD|OD High Blade Kick}} (midscreen) and {{clr|OD|OD Denjin Hashogeki}}. The pushback on block is extremely high on this version, and may require the opponent to hold Parry and use a {{clr|DR|Drive Rush}} punish starter if blocked. |
| }} | | }} |
| </tabber> | | </tabber> |


