|
|
| (15 intermediate revisions by the same user not shown) |
| Line 1: |
Line 1: |
| {{New Character Warning SF6}}
| |
| {{Character Top SF6 | chara={{SUBPAGENAME}} }} | | {{Character Top SF6 | chara={{SUBPAGENAME}} }} |
|
| |
|
| Line 42: |
Line 41: |
| <br> | | <br> |
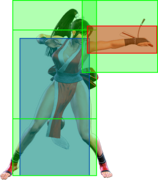
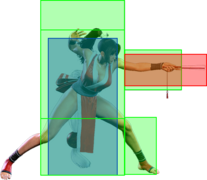
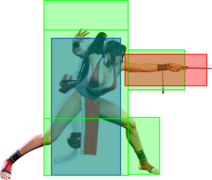
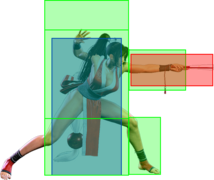
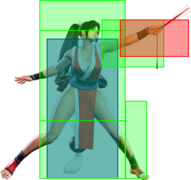
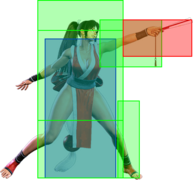
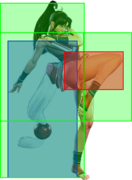
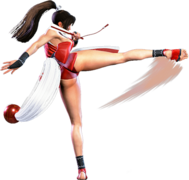
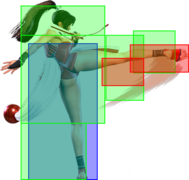
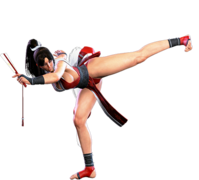
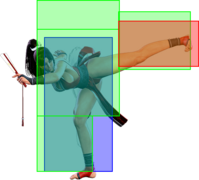
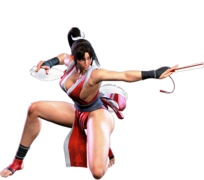
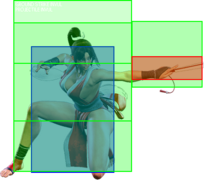
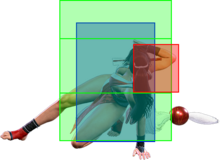
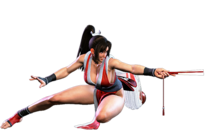
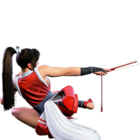
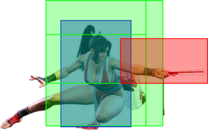
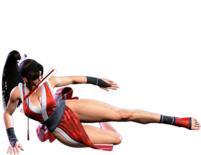
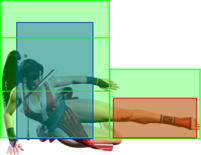
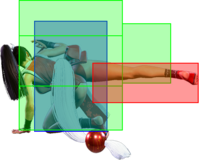
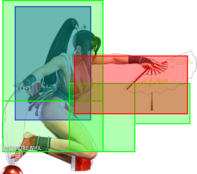
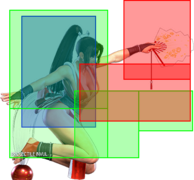
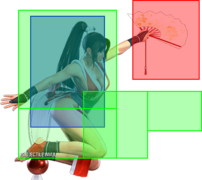
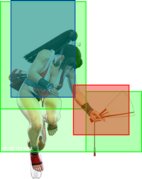
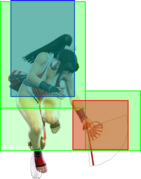
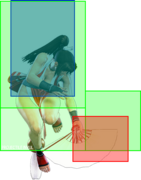
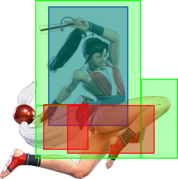
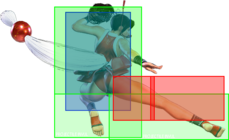
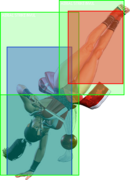
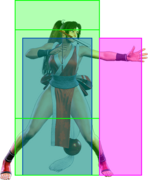
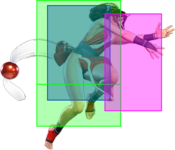
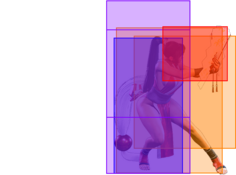
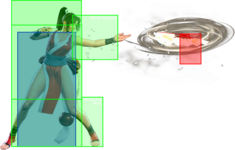
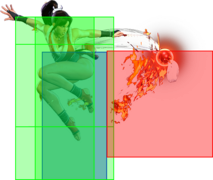
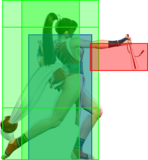
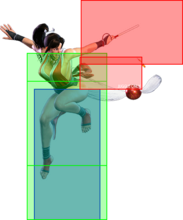
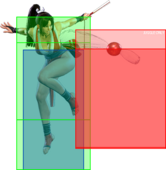
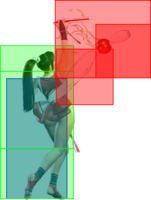
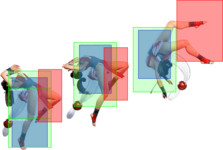
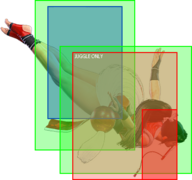
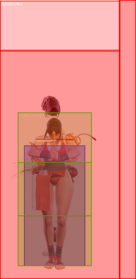
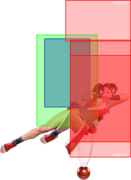
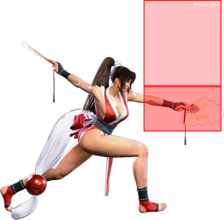
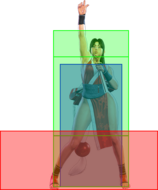
| A special cancelable poke with excellent range. Has a disjointed hitbox, but the extended hurtbox during recovery makes it fairly whiff punishable. Important combo tool after a max range {{clr|PC|Punish Counter}} {{clr|L|2LP}}, canceling into {{clr|M|214MP}}, {{clr|H|236HK}}, or {{clr|OD|236KK}}. | | A special cancelable poke with excellent range. Has a disjointed hitbox, but the extended hurtbox during recovery makes it fairly whiff punishable. Important combo tool after a max range {{clr|PC|Punish Counter}} {{clr|L|2LP}}, canceling into {{clr|M|214MP}}, {{clr|H|236HK}}, or {{clr|OD|236KK}}. |
| | |
| | On block, a max range cancel into {{clr|L|LP Ryuuenbu}} is safe against characters without great 4f jab range. Delaying the cancel also creates a small frame gap that can punish opponents trying to walk or hit a button. |
| }} | | }} |
|
| |
|
| Line 227: |
Line 228: |
|
| |
|
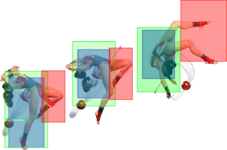
| Canceling {{clr|M|2MK}} into {{clr|DR|Drive Rush}}, as with many characters, is a great way to begin her offense. On block, you can form a true blockstring into {{clr|L|2LP}} for solid pressure while avoiding {{clr|OD|OD reversals}}. On hit, you can instead link to {{clr|H|4HK}}, {{clr|M|2MP}} > {{clr|H|214HP}} as a hitconfirm that conveniently forces stand if necessary. | | Canceling {{clr|M|2MK}} into {{clr|DR|Drive Rush}}, as with many characters, is a great way to begin her offense. On block, you can form a true blockstring into {{clr|L|2LP}} for solid pressure while avoiding {{clr|OD|OD reversals}}. On hit, you can instead link to {{clr|H|4HK}}, {{clr|M|2MP}} > {{clr|H|214HP}} as a hitconfirm that conveniently forces stand if necessary. |
| | |
| | On block, a max range cancel into {{clr|L|LP Ryuuenbu}} is safe, even against characters with good 4f jab range. Delaying the cancel also creates a small frame gap that can punish opponents trying to walk or hit a button. |
| }} | | }} |
|
| |
|
| Line 475: |
Line 478: |
| * Applies 20% immediate damage scaling when comboed into (e.g. after Crumple) | | * Applies 20% immediate damage scaling when comboed into (e.g. after Crumple) |
| <br> | | <br> |
| After a corner side switch, Mai can only pressure with a spaced meaty normal or a {{clr|DR|Drive Rush}}. Attempting a {{clr|DR|DR~}}Throw requires strict timing to beat reversal normals, and allows the opponent to react with an invincible reversal that Mai cannot block.
| | Midscreen, Mai's oki is very limited; {{clr|DR|DR~}}{{clr|H|5HP}} can be hitconfirmed while {{clr|DR|DR~}}{{clr|M|5MK}} links to {{clr|SA|SA2}} on hit. Neither option is very powerful on block, and runs the risk of being Perfect Parried. |
|
| |
|
| {{clr|DR|DR~}}{{clr|L|2LK}} is probably Mai's strongest option for oki, as it leaves her {{sf6-adv|VP|+8 oH}} / {{sf6-adv|VP|+4 oB}}; Mai has several options afterward, including {{clr|H|4HK}} which sets up a TC corner juggle on hit, and a strong trade combo if the opponent mashes a 4f on block. {{clr|DR|DR~}}{{clr|L|2LK}} is also an auto-timed safejab setup vs. 10f or slower reversals, making it very hard to deal with for some characters. | | After a corner side switch, Mai's only meterless options are spaced-out pokes or {{clr|L|LP Ryuuenbu}}. {{clr|DR|Drive Rush}} can give better pressure, but allows the opponent to react with an {{clr|OD|OD}} reversal for a punish. The following are Mai's most common oki tools after a corner side switch: |
| | * {{clr|DR|DR~}}Throw: requires strict timing to beat 4f jabs |
| | * {{clr|DR|DR~}}{{clr|L|2LK}} ({{sf6-adv|VP|+8 oH}} / {{sf6-adv|VP|+4 oB}}): links to {{clr|H|4HK}} on hit, setting up a strong corner juggle |
| | ** Auto-timed safejab vs. 10f or slower reversals |
| | ** On block, hit {{clr|H|4HK}} anyway; single-hit confirmable and will link into itself if it trades with a 4f jab |
| | ** Only {{sf6-adv|VM|-7}} vs. wakeup Perfect Parry, potentially resulting in a weaker punish |
| | * {{clr|DR|DR~}}{{clr|H|4HK}} ({{sf6-adv|VP|+7 oH}} / {{sf6-adv|P|+3 oB}}): links to {{clr|M|2MP}} on hit and guarantees a {{clr|H|214HP}} juggle |
| | ** Hits slightly later, making it less likely to be Perfect Parried; leaves Mai in Throw range |
| | * {{clr|DR|DR~}}{{clr|M|2MP}} ({{sf6-adv|VP|+10 oH}} / {{sf6-adv|P|+2 oB}}): links to {{clr|H|5HP}} on hit |
| | ** Mai is left outside her Throw range and has generally weaker frame trap options |
| | * {{clr|L|LP Ryuuenbu}} ({{sf6-adv|VP|+7 oB}} / {{sf6-adv|E|0 oB}}): high pushback and safe, but can only link to {{clr|SA|SA2}} on hit |
| | ** Flame Stock version can juggle into {{clr|OD|623KK}} or {{clr|3|F.}}{{clr|SA|SA1}} instead |
| }} | | }} |
|
| |
|
| Line 493: |
Line 507: |
| * {{clr|PC|Punish Counter}}: HKD +20 | | * {{clr|PC|Punish Counter}}: HKD +20 |
| <br> | | <br> |
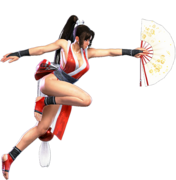
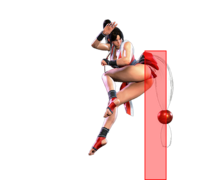
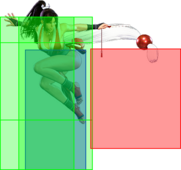
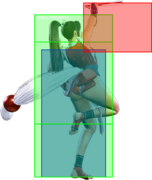
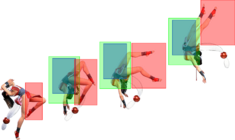
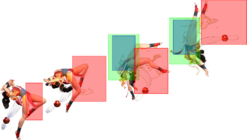
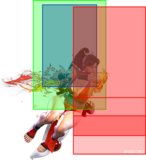
| A great air-to-air option against close range jumps, especially attempted corner escapes. Mai does not get any meaningful oki midscreen, but in the corner she can dash to become {{sf6-adv|P|+2}} or {{clr|DR|Drive Rush}} for stronger pressure options. | | A great air-to-air option against close range jumps, especially attempted corner escapes. Mai can pressure with {{clr|DR|DR~}}{{clr|H|4HK}}, which just barely reaches midscreen leaving her {{sf6-adv|VP|+9}}/{{sf6-adv|VP|+5}}. On hit, this links to {{clr|H|5HP}}, while on block you can frame trap with another {{clr|H|4HK}} (or stick with {{clr|H|5HP}} for a potential trade combo). In the corner, Mai can forward dash to become {{sf6-adv|P|+2}} for simple strike/throw oki. |
| }} | | }} |
| <br> | | <br> |
| Line 527: |
Line 541: |
| * '''Marisa (214K)''', frame 3 armor | | * '''Marisa (214K)''', frame 3 armor |
| * '''Zangief ({{clr|H|5[HP]}})''', frame 4 armor | | * '''Zangief ({{clr|H|5[HP]}})''', frame 4 armor |
| It's important to use a blockstring that cannot be absorbed by their armor/counter moves. Ideally, the string should also not be a true combo, or it will cause a Lock and prevent Stun.<br>{{clr|OD|*}} Denotes a move that causes Lock on Counter-hit, allowing the opponent to escape a Stun by mashing on wakeup. | | It's important to use a blockstring that cannot be absorbed by their armor/counter moves. Ideally, the string should also not be a true combo, or it will cause a Lock and prevent Stun.<br>{{clr|OD|*}} Denotes a move that causes Lock on {{clr|PC|Counter-hit}}, allowing the opponent to escape a Stun by mashing on wakeup. |
| * {{clr|H|5HP}}{{clr|OD|*}} > {{clr|DR|DI}}: 2f blockstring gap prevents opponent from absorbing the hit | | * {{clr|H|5HP}}{{clr|OD|*}} > {{clr|DR|DI}}: 2f blockstring gap prevents opponent from absorbing the hit |
| * {{clr|DR|DR~}}{{clr|M|2MP}}{{clr|OD|*}} > {{clr|DR|DI}}: 3f blockstring gap will work vs. Zangief {{clr|H|5[HP]}} | | * {{clr|DR|DR~}}{{clr|M|2MP}}{{clr|OD|*}} > {{clr|DR|DI}}: 3f blockstring gap will work vs. Zangief {{clr|H|5[HP]}} |
| Line 639: |
Line 653: |
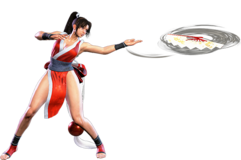
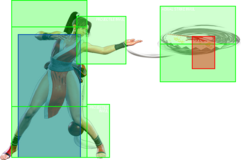
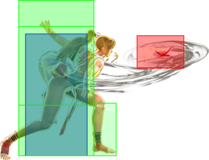
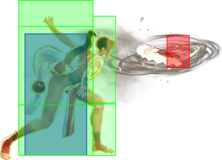
| A unique projectile that requires Flame Stocks or charge time to become a real threat. Kachousen is unsafe on block, so fireball cancels must be spaced out to avoid giving the opponent a free turn. The default version of Kachousen has the lowest possible priority, meaning it loses completely to other standard projectiles, and can even be swatted away with any strike hitbox. If an airborne opponent is about to land on a fan, they can come down with an air normal to harmlessly destroy it. Swatting the fan counts as whiffing the attack, so the opponent cannot cancel a clashed normal (with the exception of light normals canceled into a 3-bar {{clr|DR|Drive Rush}}). | | A unique projectile that requires Flame Stocks or charge time to become a real threat. Kachousen is unsafe on block, so fireball cancels must be spaced out to avoid giving the opponent a free turn. The default version of Kachousen has the lowest possible priority, meaning it loses completely to other standard projectiles, and can even be swatted away with any strike hitbox. If an airborne opponent is about to land on a fan, they can come down with an air normal to harmlessly destroy it. Swatting the fan counts as whiffing the attack, so the opponent cannot cancel a clashed normal (with the exception of light normals canceled into a 3-bar {{clr|DR|Drive Rush}}). |
|
| |
|
| {{clr|OD|OD Kachousen}} is one of Mai's most important tools, offering her a safer way to start offense; it is much less risky than the held version while losing most of the weaknesses of her meterless fans. Because it is only one hit, it isn't a great counter to zoning characters who generally have 2-hit {{clr|OD|OD}} projectiles. On contact with the opponent, the {{clr|OD|OD Fan}} bounces upward before dropping down for a follow-up hit. This gives Mai time to move in and force a mixup if she throws it from longer ranges; from a close range cancel, Mai is negative and the opponent can safely press a button before blocking the descending fan. | | {{clr|OD|OD Kachousen}} is one of Mai's most important tools, offering her a safer way to start offense; it is much less risky than the held version while losing most of the weaknesses of her meterless fans. Because it is only one hit, it isn't a great counter to zoning characters who generally have 2-hit {{clr|OD|OD}} projectiles. On contact with the opponent, the {{clr|OD|OD Fan}} bounces upward before dropping down for a follow-up hit. This gives Mai time to move in and force a mixup if she throws it from longer ranges; from a close range cancel, Mai is negative and the opponent can safely press a button before blocking the descending fan. The bouncing fan locks the opponent into proximity guard, preventing them from walking back, but they may be able dash or avoid it with an attack that shifts their hurtbox. It also counts as an air attack similar to Akuma's air fireball, so characters with air-invuln specials can punish Mai for attempting a jump-in behind the descending fan. |
|
| |
|
| Holding the button for 19 frames results in a fully charged version with improved properties. If the button is released early, Mai throws the uncharged version but with extra startup time. The maximum startup for a partially held Kachousen is {{clr|L|23f (L)}} / {{clr|M|22f (M)}} / {{clr|H|20f (H)}} / {{clr|OD|21f (OD)}}. | | Holding the button for 19 frames results in a fully charged version with improved properties. If the button is released early, Mai throws the uncharged version but with extra startup time. The maximum startup for a partially held Kachousen is {{clr|L|23f (L)}} / {{clr|M|22f (M)}} / {{clr|H|20f (H)}} / {{clr|OD|21f (OD)}}. |
| Line 684: |
Line 698: |
|
| |
|
| {{clr|OD|Flame OD Kachousen}} is much stronger as a pressure tool since it always has advantage on block after the first hit, making it easier to force mixups. The timing of the bouncing fans is a bit different than the non-Flame version, and will require different setups to maximize your offense. | | {{clr|OD|Flame OD Kachousen}} is much stronger as a pressure tool since it always has advantage on block after the first hit, making it easier to force mixups. The timing of the bouncing fans is a bit different than the non-Flame version, and will require different setups to maximize your offense. |
| | |
| | Flame fireballs can juggle after {{clr|H|Flame 214HP}} (except the {{clr|L|LP}} version which is too slow). This allows for midscreen extensions after {{clr|OD|Flame 236P}} and a corner extension using {{clr|M|Flame 236MP}} for optimal {{clr|SA|Super}} gauge build. |
|
| |
|
| Holding the button for 19 frames results in a fully charged version with improved properties. If the button is released early, Mai throws the uncharged version but with extra startup time. The maximum startup for a partially held Kachousen is {{clr|L|23f (L)}} / {{clr|M|22f (M)}} / {{clr|H|20f (H)}} / {{clr|OD|21f (OD)}}. | | Holding the button for 19 frames results in a fully charged version with improved properties. If the button is released early, Mai throws the uncharged version but with extra startup time. The maximum startup for a partially held Kachousen is {{clr|L|23f (L)}} / {{clr|M|22f (M)}} / {{clr|H|20f (H)}} / {{clr|OD|21f (OD)}}. |
| Line 733: |
Line 749: |
| The held version of Kachousen acts as a true projectile, interacting normally with other fireballs and losing its weakness to strikes. The increased startup time makes it easier for the opponent to react, making it especially risky in cancels or against characters with good anti-projectile tools. | | The held version of Kachousen acts as a true projectile, interacting normally with other fireballs and losing its weakness to strikes. The increased startup time makes it easier for the opponent to react, making it especially risky in cancels or against characters with good anti-projectile tools. |
|
| |
|
| Much like the regular {{clr|OD|OD Kachousen}}, all meterless held versions bounce upward on hit or block. The bounce height of the fan depends on which strength was used, with {{clr|L|LP}} having a very short bounce and {{clr|H|HP}} bouncing the highest. These bounce differences allow for different mixups and pressure sequences, and when used from closer ranges the opponent will have little time to react to which strength was used. While Mai is lightly minus on block after the held fan connects, many setups give her the advantage to pursue stronger block pressure. | | Much like the regular {{clr|OD|OD Kachousen}}, all meterless held versions bounce upward on hit or block. The bounce height of the fan depends on which strength was used, with {{clr|L|LP}} having a very short bounce and {{clr|H|HP}} bouncing the highest. These bounce differences allow for different mixups and pressure sequences, and when used from closer ranges the opponent will have little time to react to which strength was used. While Mai is lightly minus on block after the held fan connects, many setups give her the advantage to pursue stronger block pressure. The bouncing fan locks the opponent into proximity guard, preventing them from walking back, but they may be able dash or avoid it with an attack that shifts their hurtbox. It also counts as an air attack similar to Akuma's air fireball, so characters with air-invuln specials can punish Mai for attempting a jump-in behind the descending fan. |
|
| |
|
| {{clr|OD|Held OD Kachousen}} works a bit differently; Mai throws two single-hit fans which do NOT bounce on contact with the opponent. These fans grant massive frame advantage on their own, and can lead to a powerful Midare Kachousen follow-up at no additional cost. At close range, this has an interruptible gap, so it may be better to skip the follow-up if the opponent has a reversal. | | {{clr|OD|Held OD Kachousen}} works a bit differently; Mai throws two single-hit fans which do NOT bounce on contact with the opponent. These fans grant massive frame advantage on their own, and can lead to a powerful Midare Kachousen follow-up at no additional cost. At close range, this has an interruptible gap, so it may be better to skip the follow-up if the opponent has a reversal. |
| Line 794: |
Line 810: |
| {{MoveDataCargo | | {{MoveDataCargo |
| | title = Ryuuenbu | | | title = Ryuuenbu |
| | subtitle = | | | subtitle = Fire Spin |
| | input = {{classic_sf6}} 214P<br>{{Modern_sf6}} 214X or 4S (L) | | | input = {{classic_sf6}} 214P<br>{{Modern_sf6}} 214X or 4S (L) |
| | images = | | | images = |
| Line 822: |
Line 838: |
| * '''Cancel Hitconfirm Window:''' 17f (Super) | | * '''Cancel Hitconfirm Window:''' 17f (Super) |
| * Applies 20% damage scaling to next hit when beginning a combo; counts as 2 hits for damage scaling when comboed into (applies to next hit) | | * Applies 20% damage scaling to next hit when beginning a combo; counts as 2 hits for damage scaling when comboed into (applies to next hit) |
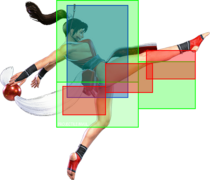
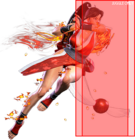
| An incredibly disjointed poke that leaves Mai safe when spaced in neutral. While it can clash with fireballs, this is usually impractical due to its startup and forward movement. A blocked cancel into {{clr|L|LP Ryuuenbu}} is punishable by most characters unless it's very well spaced; a max-range {{clr|M|2MK}} is the best option due to its pushback and lack of forward movement. For characters with [[Street_Fighter_6/Game_Data#4f_Normals-1|short range 4-frame normals]], you may be able to abuse this more often in pressure strings. | | An incredibly disjointed poke that leaves Mai safe when spaced in neutral. While it can clash with fireballs, this is usually impractical due to its startup and forward movement. A blocked cancel into {{clr|L|LP Ryuuenbu}} is punishable by most characters unless it's very well spaced; a max-range {{clr|M|2MK}} is the best option due to its pushback and lack of forward movement; this also creates a small frame trap if the cancel is delayed. For characters with [[Street_Fighter_6/Game_Data#4f_Normals-1|short range 4-frame normals]], you may be able to abuse this more often in pressure strings. |
|
| |
|
| As a combo tool, {{clr|L|LP Ryuuenbu}} leaves Mai {{sf6-adv|P|+3}} just outside of throw range, forcing her to walk at least 1-2 frames for throw pressure. It can only combo from {{clr|L|5LP}} in light strings, though you would usually rather have {{clr|M|214MP}} or {{clr|L|236LK}} instead. In long range cancels (particularly whiff punishes), the {{clr|L|214LP}} is the safest version, as other strengths can whiff the first hit and drop the combo. | | As a combo tool, {{clr|L|LP Ryuuenbu}} leaves Mai {{sf6-adv|P|+3}} just outside of throw range, forcing her to walk at least 1-2 frames for throw pressure. It can only combo from {{clr|L|5LP}} in light strings, though you would usually rather have {{clr|M|214MP}} or {{clr|L|236LK}} instead. In long range cancels (particularly whiff punishes), the {{clr|L|214LP}} is the safest version, as other strengths can whiff the first hit and drop the combo. |
| Line 837: |
Line 853: |
| As a neutral option, {{clr|M|214MP}} is harder to use effectively than the {{clr|L|LP}} version, but it can still be spaced safely at max range against every character (except vs. Ken {{clr|SA|SA2}}). | | As a neutral option, {{clr|M|214MP}} is harder to use effectively than the {{clr|L|LP}} version, but it can still be spaced safely at max range against every character (except vs. Ken {{clr|SA|SA2}}). |
| {{AttackDataCargo-SF6/Query|mai_214hp}} | | {{AttackDataCargo-SF6/Query|mai_214hp}} |
| * Whiffs on crouching opponents | | * Whiffs on crouching opponents unless they extend a vertical hurtbox (unsafe if 1st hit connects like this) |
| * 2 hits; 2nd hit is a strike hitbox that can dissipate standard 1-hit projectiles | | * 2 hits; 2nd hit is a strike hitbox that can dissipate standard 1-hit projectiles |
| * Head hurtbox is '''Anti-Air Invuln''' on frames 6-17; cannot hit cross-up (slow but rewarding anti-air) | | * Head hurtbox is '''Anti-Air Invuln''' on frames 6-17; cannot hit cross-up (slow but rewarding anti-air) |
| Line 860: |
Line 876: |
| {{MoveDataCargo | | {{MoveDataCargo |
| | title = Ryuuenbu (Flame) | | | title = Ryuuenbu (Flame) |
| | subtitle = | | | subtitle = Fire Spin |
| | input = {{classic_sf6}} 214P<br>{{Modern_sf6}} 214X or 4S (L) | | | input = {{classic_sf6}} 214P<br>{{Modern_sf6}} 214X or 4S (L) |
| | images = | | | images = |
| Line 898: |
Line 914: |
| The hitbox expands on the 2nd hit's 3rd active frame, allowing it to be spaced more safely on block ({{sf6-adv|VM|-4}} and well outside of punish range). However, be aware that Mai loses the safe jump at this spacing. Despite the forward movement, {{clr|M|Flame 214MP}} can still drop in some whiff punish scenarios. | | The hitbox expands on the 2nd hit's 3rd active frame, allowing it to be spaced more safely on block ({{sf6-adv|VM|-4}} and well outside of punish range). However, be aware that Mai loses the safe jump at this spacing. Despite the forward movement, {{clr|M|Flame 214MP}} can still drop in some whiff punish scenarios. |
| {{AttackDataCargo-SF6/Query|mai_214hp_flame}} | | {{AttackDataCargo-SF6/Query|mai_214hp_flame}} |
| * Whiffs on crouching opponents | | * Whiffs on crouching opponents unless they extend a vertical hurtbox (unsafe if 1st hit connects like this) |
| * 2 hits; 2nd hit is a strike hitbox that can dissipate standard 1-hit projectiles | | * 2 hits; 2nd hit is a strike hitbox that can dissipate standard 1-hit projectiles |
| * Head hurtbox is '''Anti-Air Invuln''' on frames 6-17; cannot hit cross-up (slow but rewarding anti-air) | | * Head hurtbox is '''Anti-Air Invuln''' on frames 6-17; cannot hit cross-up (slow but rewarding anti-air) |
| Line 940: |
Line 956: |
| * '''Cancel Hitconfirm Window:''' 41f both hits / 15-20f 2nd hit (Super) | | * '''Cancel Hitconfirm Window:''' 41f both hits / 15-20f 2nd hit (Super) |
| * Only the first 6 active frames of 2nd hit are cancelable | | * Only the first 6 active frames of 2nd hit are cancelable |
| * 2nd hit: active frames 7-13 whiff vs. crouching (at least {{sf6-adv|P|+3}} vs. crouch block) | | * 2nd hit: active frames 7-13 whiff vs. crouching unless they extend a vertical hurtbox (at least {{sf6-adv|P|+3}} vs. crouch block) |
| {{AttackDataCargo-SF6/Query|mai_236mk}} | | {{AttackDataCargo-SF6/Query|mai_236mk}} |
| * ~99% screen length; combos from {{clr|M|Medium}}/{{clr|H|Heavy}} normals and {{clr|PC|Punish Counter}} {{clr|L|Lights}} | | * ~99% screen length; combos from {{clr|M|Medium}}/{{clr|H|Heavy}} normals and {{clr|PC|Punish Counter}} {{clr|L|Lights}} |
| Line 946: |
Line 962: |
| * '''Cancel Hitconfirm Window:''' 38f both hits / 15-17f 2nd hit (Super) | | * '''Cancel Hitconfirm Window:''' 38f both hits / 15-17f 2nd hit (Super) |
| * Only the first 3 active frames of 2nd hit are cancelable | | * Only the first 3 active frames of 2nd hit are cancelable |
| * 2nd hit: active frames 7-15 whiff vs. crouching (at least {{sf6-adv|P|+3}} vs. crouch block) | | * 2nd hit: active frames 7-15 whiff vs. crouching unless they extend a vertical hurtbox (at least {{sf6-adv|P|+3}} vs. crouch block) |
| {{AttackDataCargo-SF6/Query|mai_236hk}} | | {{AttackDataCargo-SF6/Query|mai_236hk}} |
| * > 100% screen length; combos from {{clr|M|Medium}}/{{clr|H|Heavy}} normals and {{clr|PC|Punish Counter}} {{clr|L|5LP}} | | * > 100% screen length; combos from {{clr|M|Medium}}/{{clr|H|Heavy}} normals and {{clr|PC|Punish Counter}} {{clr|L|5LP}} |
| Line 952: |
Line 968: |
| * '''Cancel Hitconfirm Window:''' 38f both hits / 15-17f 2nd hit (Super) | | * '''Cancel Hitconfirm Window:''' 38f both hits / 15-17f 2nd hit (Super) |
| * Only the first 3 active frames of 2nd hit are cancelable | | * Only the first 3 active frames of 2nd hit are cancelable |
| * 2nd hit: active frames 7-15 whiff vs. crouching (at least {{sf6-adv|P|+2}} vs. crouch block) | | * 2nd hit: active frames 7-15 whiff vs. crouching unless they extend a vertical hurtbox (at least {{sf6-adv|P|+2}} vs. crouch block) |
| {{AttackDataCargo-SF6/Query|mai_236kk}} | | {{AttackDataCargo-SF6/Query|mai_236kk}} |
| * '''Airborne''' 31-74f ({{FKD}} state) on hit/whiff; stops at 2nd hit on block | | * '''Airborne''' 31-74f ({{FKD}} state) on hit/whiff; stops at 2nd hit on block |
| Line 1,001: |
Line 1,017: |
| * '''Cancel Hitconfirm Window:''' 42f both hits / 15-20f 2nd hit (Super) | | * '''Cancel Hitconfirm Window:''' 42f both hits / 15-20f 2nd hit (Super) |
| * Only the first 7 active frames of 2nd hit are cancelable | | * Only the first 7 active frames of 2nd hit are cancelable |
| * 2nd hit: active frames 7-13 whiff vs. crouching (at least {{sf6-adv|P|+3}} vs. crouch block) | | * 2nd hit: active frames 7-13 whiff vs. crouching unless they extend a vertical hurtbox (at least {{sf6-adv|P|+3}} vs. crouch block) |
| {{AttackDataCargo-SF6/Query|mai_236mk_flame}} | | {{AttackDataCargo-SF6/Query|mai_236mk_flame}} |
| * ~99% screen length; combos from {{clr|M|Medium}}/{{clr|H|Heavy}} normals and {{clr|PC|Punish Counter}} {{clr|L|Lights}} | | * ~99% screen length; combos from {{clr|M|Medium}}/{{clr|H|Heavy}} normals and {{clr|PC|Punish Counter}} {{clr|L|Lights}} |
| Line 1,007: |
Line 1,023: |
| * '''Cancel Hitconfirm Window:''' 42f both hits / 15-21f 2nd hit (Super) | | * '''Cancel Hitconfirm Window:''' 42f both hits / 15-21f 2nd hit (Super) |
| * Only the first 7 active frames of 2nd hit are cancelable | | * Only the first 7 active frames of 2nd hit are cancelable |
| * 2nd hit: active frames 7-15 whiff vs. crouching (at least {{sf6-adv|P|+3}} vs. crouch block) | | * 2nd hit: active frames 7-15 whiff vs. crouching unless they extend a vertical hurtbox (at least {{sf6-adv|P|+3}} vs. crouch block) |
| {{AttackDataCargo-SF6/Query|mai_236hk_flame}} | | {{AttackDataCargo-SF6/Query|mai_236hk_flame}} |
| * > 100% screen length; combos from {{clr|M|Medium}}/{{clr|H|Heavy}} normals and {{clr|PC|Punish Counter}} {{clr|L|5LP}} | | * > 100% screen length; combos from {{clr|M|Medium}}/{{clr|H|Heavy}} normals and {{clr|PC|Punish Counter}} {{clr|L|5LP}} |
| Line 1,013: |
Line 1,029: |
| * '''Cancel Hitconfirm Window:''' 42f both hits / 15-21f 2nd hit (Super) | | * '''Cancel Hitconfirm Window:''' 42f both hits / 15-21f 2nd hit (Super) |
| * Only the first 7 active frames of 2nd hit are cancelable | | * Only the first 7 active frames of 2nd hit are cancelable |
| * 2nd hit: active frames 7-15 whiff vs. crouching (at least {{sf6-adv|P|+2}} vs. crouch block) | | * 2nd hit: active frames 7-15 whiff vs. crouching unless they extend a vertical hurtbox (at least {{sf6-adv|P|+2}} vs. crouch block) |
| {{AttackDataCargo-SF6/Query|mai_236kk_flame}} | | {{AttackDataCargo-SF6/Query|mai_236kk_flame}} |
| * '''Airborne''' 31-74f ({{FKD}} state) on hit/whiff; stops at 2nd hit on block | | * '''Airborne''' 31-74f ({{FKD}} state) on hit/whiff; stops at 2nd hit on block |
| Line 1,092: |
Line 1,108: |
| <br> | | <br> |
| The Flame-enhanced Ryuuenjin offers slightly more damage and knockdown advantage, which can affect Mai's oki options. Due to how the damage is distributed, it can actually deal less damage on an early anti-air attempt where only the final hit connects. The Flame uppercuts also have a higher juggle limit, ensuring they will work with Mai's other Flame juggle routes such as {{clr|OD|236KK}}, {{clr|M|j.MP}} > {{clr|OD|j.214PP}} OTG bounce. | | The Flame-enhanced Ryuuenjin offers slightly more damage and knockdown advantage, which can affect Mai's oki options. Due to how the damage is distributed, it can actually deal less damage on an early anti-air attempt where only the final hit connects. The Flame uppercuts also have a higher juggle limit, ensuring they will work with Mai's other Flame juggle routes such as {{clr|OD|236KK}}, {{clr|M|j.MP}} > {{clr|OD|j.214PP}} OTG bounce. |
| | |
| | {{clr|3|F.}}{{clr|M|623MK}} can pop the opponent high enough for a follow-up {{clr|SA|SA1}} to replenish stocks in certain juggle routes, such as {{clr|L|5LK}}~{{clr|L|LK}}~{{clr|L|LK}} > {{clr|3|F.}}{{clr|OD|j.214PP}}, {{clr|3|F.}}{{clr|OD|236KK}}, {{clr|M|j.MP}}, {{clr|3|F.}}{{clr|M|623MK}}. |
|
| |
|
| {{clr|OD|OD Ryuuenjin}} gets the most benefit from the extra knockdown advantage, allowing her to get true strike/throw oki from {{clr|DR|Drive Rush}} (unless it connects from farther away, in which case she won't run far enough for a throw to connect). Even without meter, she can use Dash + {{clr|H|5HP}} for safe, semi-confirmable block pressure. | | {{clr|OD|OD Ryuuenjin}} gets the most benefit from the extra knockdown advantage, allowing her to get true strike/throw oki from {{clr|DR|Drive Rush}} (unless it connects from farther away, in which case she won't run far enough for a throw to connect). Even without meter, she can use Dash + {{clr|H|5HP}} for safe, semi-confirmable block pressure. |
| Line 1,179: |
Line 1,197: |
| * '''Strike/Throw Invuln:''' 1-8f; '''Upper Body Anti-Air Invuln''' 9-39f; Armor Break | | * '''Strike/Throw Invuln:''' 1-8f; '''Upper Body Anti-Air Invuln''' 9-39f; Armor Break |
| * Mai builds 5 Flame Stocks on frame 6 that enhance her special moves and Supers | | * Mai builds 5 Flame Stocks on frame 6 that enhance her special moves and Supers |
| | * 8-hit Super projectile (but Perfect Parry only incurs 1 recovery frame per hit) |
| | * KD Advantage refers to grounded hit; greater advantage vs. airborne opponents (highly variable) |
| * '''Drive Gauge Depletion:''' 0.5 bars (hit) / 0.25 bars (block) | | * '''Drive Gauge Depletion:''' 0.5 bars (hit) / 0.25 bars (block) |
| * 30% minimum damage scaling | | * 30% minimum damage scaling |
| <br> | | <br> |
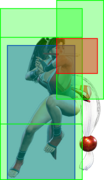
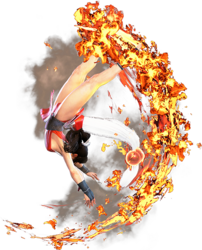
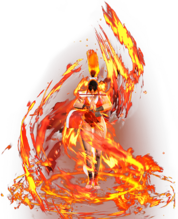
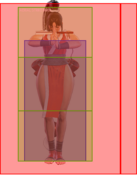
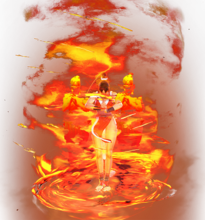
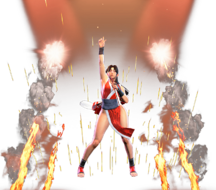
| | Mai summons a fire pillar around her body that reaches high into the air, building 5 Flame Stocks to power up her moveset. The attack has very short horizontal range like the animation suggests. {{clr|SA|SA1}} works exceptionally well as a close range anti-air, even against cross-ups, but it doesn't play well in most midscreen juggles; even canceling from a normal doesn't guarantee it will reach. {{clr|SA|SA1}} has fast startup, making it consistent as a corner juggle ender and as a reversal unless the opponent uses a meaty projectile. When stuffed by a projectile, Mai will not build any Flame stocks. |
| | |
| | On a successful hit, Mai's midscreen oki is fairly limited, with ranged {{clr|DR|Drive Rush}} buttons like {{clr|M|2MK}} or {{clr|H|5HP}} being her best options. Her {{clr|DR|DR}} momentum doesn't carry her far enough for a meaty throw unless she is close to the corner. On an anti-air hit, the extra KD advantage improves her oki slightly, but the momentum still isn't great for getting into throw range. It does give much more time for a safe Held Kachousen, however. |
| | |
| | The utility of Flame Stocks means that Mai has to put more thought into her use of {{clr|SA|Super}} meter than most characters. Instead of saving 3 bars for the damage and Drive properties of {{clr|SA|SA3}}, Mai often has more to gain from a full set of enhanced moves. This is especially true in matchups where her enhanced {{clr|SA|SA2}} can shut down projectile zoners. On the other hand, ending a round with {{clr|SA|SA1}} can feel like a waste since the stocks don't carry over between rounds. |
|
| |
|
| | Because {{clr|SA|SA1}} has a projectile hitbox, it can lose or trade with some projectile invuln attacks. For example, Lily can use a meaty {{clr|OD|Windclad OD Condor Spire}} for plus frames on block while being completely immune to a reversal {{clr|SA|SA1}}. |
| }} | | }} |
| |-| | | |-| |
| Line 1,199: |
Line 1,225: |
| * '''Strike/Throw Invuln:''' 1-6f; '''Upper Body Anti-Air Invuln''' 7-77f; Armor Break | | * '''Strike/Throw Invuln:''' 1-6f; '''Upper Body Anti-Air Invuln''' 7-77f; Armor Break |
| * Mai refills up to 5 Flame Stocks on frame 6 that enhance her special moves and Supers | | * Mai refills up to 5 Flame Stocks on frame 6 that enhance her special moves and Supers |
| | * 12-hit Super projectile (but Perfect Parry only incurs 1 recovery frame per hit) |
| | * Puts the opponent into a {{sf6-jug|limited juggle}} state |
| | * KD Advantage refers to grounded hit; greater advantage vs. airborne opponents (highly variable) |
| * '''Drive Gauge Depletion:''' 0.5 bars (hit) / 0.25 bars (block) | | * '''Drive Gauge Depletion:''' 0.5 bars (hit) / 0.25 bars (block) |
| * 30% minimum damage scaling | | * 30% minimum damage scaling |
| <br> | | <br> |
| | Functions just like a regular {{clr|SA|SA1}}, but has slightly enhanced horizontal range in both directions. This opens up some more combo opportunities midscreen and makes it nearly impossible for airborne opponents to avoid. The Flame Stocks are refilled up to 5 regardless of how many she started with. |
| | |
| | The knockdown advantage is improved on hit, making it much easier to reach the opponent for midscreen oki or set up a Held Kachousen. It also pops the opponent much higher into the air; on a high air connect, she can follow up with {{clr|SA|Flame SA2}} for huge damage. The juggle potential of {{clr|SA|Flame SA1}} itself is lower than the original in order to prevent looping juggles. |
|
| |
|
| | If the attack whiffs, {{clr|SA|Flame SA1}} has an incredibly long active and recovery period that allows the opponent to set up installs; Jamie can even take 2 drinks and still get an easy punish afterward. At the same time, opponents who haven't practiced this scenario may find themselves walking or jumping into the flame pillar. |
| }} | | }} |
| </tabber> | | </tabber> |
| Line 1,223: |
Line 1,256: |
| {{AttackDataCargo-SF6/Query|mai_236236k}} | | {{AttackDataCargo-SF6/Query|mai_236236k}} |
| * '''Full Invuln:''' 1-8f; Armor Break | | * '''Full Invuln:''' 1-8f; Armor Break |
| | * 11f extra recovery on block |
| * '''Drive Gauge Depletion:''' 1 bar (hit) / 0.5 bars (block) | | * '''Drive Gauge Depletion:''' 1 bar (hit) / 0.5 bars (block) |
| * 40% minimum damage scaling | | * 40% minimum damage scaling |
| * Applies 40% damage scaling to next hit when beginning a combo; counts as 2 hits for damage scaling when comboed into (applies to next hit) | | * Applies 40% damage scaling to next hit when beginning a combo; counts as 2 hits for damage scaling when comboed into (applies to next hit) |
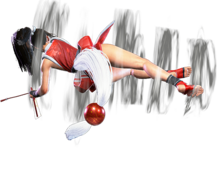
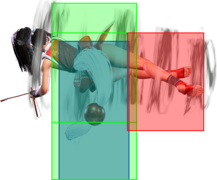
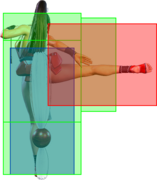
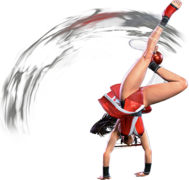
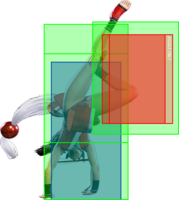
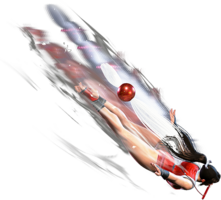
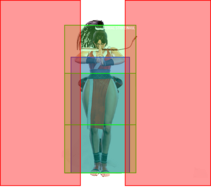
| | Mai performs an invincible cartwheel before launching forward fullscreen. It can be used as a reversal due to its fast startup and full invincibility, and at some ranges it can be effective against fireballs (though the {{clr|SA|Flame version}} is much more consistent at this). |
| | |
| | {{clr|SA|SA2}} is a great juggle ender that pushes the opponent toward the corner and gives enough knockdown advantage for oki anywhere on the screen. You can usually charge up a Held Kachousen safely if the opponent doesn't have a long range anti-fireball {{clr|SA|Super}} stocked. It's important to juggle manually into {{clr|SA|SA2}} rather than canceling from {{clr|OD|OD}} specials, as it will usually whiff or lose several hits of damage. Just be aware that some juggle starters, such as {{clr|H|4HK}}~{{clr|H|HK}}, don't launch high enough to juggle into 7-frame moves. |
| {{AttackDataCargo-SF6/Query|mai_j236236k}} | | {{AttackDataCargo-SF6/Query|mai_j236236k}} |
| * Armor Break; no invincibility; {{FKD}} state until landing | | * Armor Break; no invincibility; {{FKD}} state until landing |
| * Can be input during Forward/Neutral Jump only | | * Can be input during Forward/Neutral Jump only; cannot hit cross-up |
| * '''Drive Gauge Depletion:''' 1 bar (hit) / 0.5 bars (block) | | * '''Drive Gauge Depletion:''' 1 bar (hit) / 0.5 bars (block) |
| * 40% minimum damage scaling | | * 40% minimum damage scaling |
| * Counts as 2 hits for damage scaling when comboed into (applies to next hit) | | * Counts as 2 hits for damage scaling when comboed into (applies to next hit) |
| <br>
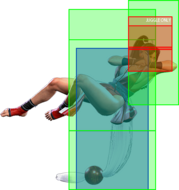
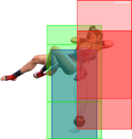
| | {{clr|SA|Air SA2}} is primarily used as a combo tool from {{clr|M|j.MP}} as an air-to-air or after a {{clr|OD|236KK}} launch. It also links after {{clr|L|5LK}}~{{clr|L|LK}}~{{clr|L|LK}}; on a blocked Target Combo, it can also help Mai escape some punishes on reaction (though this is generally a poor use of resources). On hit, Mai generally gets poor oki outside the corner, though the exact knockdown advantage depends on how it connects. |
| | |
| | While a bit tricky to use, {{clr|SA|Air SA2}} can actually be a better anti-projectile tool than the grounded version, especially at longer ranges where the invincibility runs out. If you buffer your 236236 motion in neutral, you can react to a midrange fireball with 9+K to complete the Tiger Knee input (2362369K) for a minimum-height {{clr|SA|Super}}. This may take opponents by surprise if they assume you need a Flame Stock to punish their projectiles. |
|
| |
|
| | If blocked, Mai is likely to fly over the opponent. If done from very close range, this may be difficult to punish for some characters. From mid range (such as a poorly-predicted Tiger Knee {{clr|SA|Air SA2}}), she will land close enough that most characters can reach with one forward dash. |
| }} | | }} |
| |-| | | |-| |
| Line 1,252: |
Line 1,292: |
| {{AttackDataCargo-SF6/Query|mai_236236k_flame}} | | {{AttackDataCargo-SF6/Query|mai_236236k_flame}} |
| * '''Full Invuln:''' 1-8f; '''Projectile Invuln''' 9-12f ; Armor Break | | * '''Full Invuln:''' 1-8f; '''Projectile Invuln''' 9-12f ; Armor Break |
| | * Puts opponents into a {{sf6-jug|limited juggle}} state |
| | * 6f extra recovery on block |
| * '''Drive Gauge Depletion:''' 1 bar (hit) / 0.5 bars (block) | | * '''Drive Gauge Depletion:''' 1 bar (hit) / 0.5 bars (block) |
| * 40% minimum damage scaling | | * 40% minimum damage scaling |
| * Applies 40% damage scaling to next hit when beginning a combo; counts as 2 hits for damage scaling when comboed into (applies to next hit) | | * Applies 40% damage scaling to next hit when beginning a combo; counts as 2 hits for damage scaling when comboed into (applies to next hit) |
| | The Flame version of {{clr|SA|SA2}} skips the initial cartwheel, causing Mai to launch herself across the screen at lightning speed. Combined with its additional projectile invincibility, zoners will have to treat Mai the way they treat a Cammy with {{clr|SA|SA3}} ready to go. It works similarly well as a whiff punish tool or as a fast reversal, but the fast movement speed causes it to whiff under most jumps when used as an anti-air. Activating from longer ranges can cause Mai to whiff some of the earlier hits, resulting in less damage. |
| | |
| | {{clr|SA|Flame SA2}} is a great combo ender with a ton of juggle potential and corner carry. If it reaches the corner, Mai can always follow up with {{clr|L|623LK}}, and higher juggle connects allow even more. If you have 3 Flame Stocks and want to dump some meter, you can even get a midscreen juggle with {{clr|OD|214PP}}, {{clr|SA|Flame SA2}}, {{clr|OD|623KK}} for big damage. Just like the non-Flame version, it's always better to manually juggle into this {{clr|SA|Super}} rather than canceling into it from {{clr|OD|OD}} specials, as it will usually whiff most or all of its hits. |
| {{AttackDataCargo-SF6/Query|mai_j236236k_flame}} | | {{AttackDataCargo-SF6/Query|mai_j236236k_flame}} |
| * Armor Break; no invincibility; {{FKD}} state until landing | | * Armor Break; no invincibility; {{FKD}} state until landing |
| * Can be input during Forward/Neutral Jump only | | * Can be input during Forward/Neutral Jump only; cannot hit cross-up |
| * '''Drive Gauge Depletion:''' 1 bar (hit) / 0.5 bars (block) | | * '''Drive Gauge Depletion:''' 1 bar (hit) / 0.5 bars (block) |
| * 40% minimum damage scaling | | * 40% minimum damage scaling |
| * Counts as 2 hits for damage scaling when comboed into (applies to next hit) | | * Counts as 2 hits for damage scaling when comboed into (applies to next hit) |
| <br>
| | The enhanced {{clr|SA|Flame Air SA2}} doesn't offer much over the regular version aside from the extra 200 damage. As a long range air-to-air, the faster movement speed can guarantee more hits connect, but this isn't a very common occurrence. It's also slightly better against fireballs when input with a Tiger Knee motion (2362369K), but there's little reason to attempt this when a grounded {{clr|SA|Flame SA2}} works just as well. |
|
| |
|
| | {{clr|SA|Flame Air SA2}} can still be worthwhile after air-to-air {{clr|M|j.MP}} or {{clr|L|5LK}}~{{clr|L|LK}}~{{clr|L|LK}}, but the grounded version is a better use of a Flame Stock in any scenario that allows it. |
| }} | | }} |
| </tabber> | | </tabber> |
|
| |
|
| |
|
| =====<font style="visibility:hidden; float:right">Level 3 Super (214214P)</font>===== | | =====<font style="visibility:hidden; float:right">Level 3 Super (214214P)</font>===== |
| Line 1,281: |
Line 1,326: |
| {{AttackDataCargo-SF6/Query|mai_214214p}} | | {{AttackDataCargo-SF6/Query|mai_214214p}} |
| * '''Full Invuln:''' 1-11f; Armor Break | | * '''Full Invuln:''' 1-11f; Armor Break |
| | * 2nd-4th hits are non-cinematic (less damage/Drive depletion) and put opponent into {{sf6-jug|limited juggle}} state |
| | * 3f startup only when canceled from 236K/{{clr|OD|236KK}} for juggle consistency |
| * '''Drive Gauge Depletion:''' 1.5 bars (hit) / 0.75 bars (block) | | * '''Drive Gauge Depletion:''' 1.5 bars (hit) / 0.75 bars (block) |
| | ** Non-cinematic version only depletes up to 1 bar on hit (0.3 + 0.3 + 0.4) |
| ** Cinematic time regenerates ~2 Drive bars for Mai | | ** Cinematic time regenerates ~2 Drive bars for Mai |
| * 50% minimum damage scaling; applies 10% immediate damage scaling when canceled from special moves | | * 50% minimum damage scaling; applies 10% immediate damage scaling when canceled from special moves |
| {{AttackDataCargo-SF6/Query|mai_214214p(ca)}} | | {{AttackDataCargo-SF6/Query|mai_214214p(ca)}} |
| * '''Full Invuln:''' 1-11f; Armor Break | | * '''Full Invuln:''' 1-11f; Armor Break |
| | * 2nd-4th hits are non-cinematic (less damage/Drive depletion) and put opponent into {{sf6-jug|limited juggle}} state |
| | * 3f startup only when canceled from 236K/{{clr|OD|236KK}} for juggle consistency |
| * Available at 25% HP or below | | * Available at 25% HP or below |
| * '''Drive Gauge Depletion:''' 2 bars (hit) / 1 bar (block) | | * '''Drive Gauge Depletion:''' 2 bars (hit) / 1 bar (block) |
| | ** Non-cinematic version only depletes up to 1 bar on hit (0.3 + 0.3 + 0.4) |
| ** Cinematic time regenerates ~2.1 Drive bars for Mai | | ** Cinematic time regenerates ~2.1 Drive bars for Mai |
| * 50% minimum damage scaling; applies 10% immediate damage scaling when canceled from special moves | | * 50% minimum damage scaling; applies 10% immediate damage scaling when canceled from special moves |
| <br> | | <br> |
| | Mai takes a small step forward and attacks with her fan, entering a cinematic on hit. If the first hit whiffs, she performs a small forward-moving uppercut that launches the opponent upward. If all 3 non-cinematic hits connect, Mai will be close enough to juggle {{clr|H|623HK}} afterward to make up for some of its lost damage. |
| | |
| | Like most {{clr|SA|SA3s}}, this can be used as a powerful combo ender while helping to win the Drive Gauge war. It can often be juggled into directly, but the most common way to land it is to cancel the 2nd hit of a 236K Cartwheel; it will come out even if the cancelable cartwheel frames whiff mid-combo. Unlike most characters, however, saving meter for a Level 3 is not a foregone conclusion, as this locks her out of using her Flame-enhanced moveset. Deciding how to best use her {{clr|SA|Super Gauge}} is one of the main factors that differentiates Mai players. |
| | |
| | At 10 frames of startup, {{clr|SA|SA3}} is not usually worth attempting as a reversal. Her other invincible moves cover every possible scenario without having to worry about safejab setups that beat slower reversals. It does work pretty well as a long range anti-air, but it should be input right as the opponent starts descending or else they might safely land with an empty jump. |
| | |
| | Mai gets fairly strong oki after both {{clr|SA|SA3}}/{{clr|SA|CA}} even midscreen. At KD +19, {{clr|SA|SA3}} + Forward Dash leaves her {{sf6-adv|P|+1}} within throw range; while the opponent can mash a 4-frame to beat throw, Mai gets an easy 2-hit light confirm to counter this. Other options include cancels from ranged {{clr|H|5HP}}, chasing with {{clr|DR|DR~}}{{clr|M|2MP}} ({{sf6-adv|VP|+12}}/{{sf6-adv|VP|+4}} out of throw range), or {{clr|DR|DR~}}{{clr|H|4HK}} ({{sf6-adv|VP|+8}}/{{sf6-adv|VP|+4}} in throw range). |
|
| |
|
| | After {{clr|SA|CA}}, Mai is left {{sf6-adv|P|+2}} after a Forward Dash but slightly farther away. She can still pressure with {{clr|L|2LK}}, {{clr|L|2LP}} to punish walking back while beating 4-frame normals. Mai requires a microwalk in order to throw most characters here, but wide characters are more susceptible; Marisa, Blanka, and E. Honda can be thrown unless they back walk, and Zangief has to take a true strike/throw mixup. Spending meter for {{clr|DR|DR~}}{{clr|H|4HK}} leaves Mai at {{sf6-adv|VP|+9}}/{{sf6-adv|VP|+5}}, setting up a frame trap or microwalk throw on block or a {{clr|H|5HP}} confirm on hit. |
| }} | | }} |
| <br> | | <br> |

