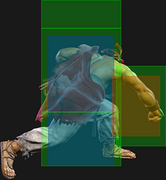
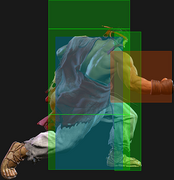
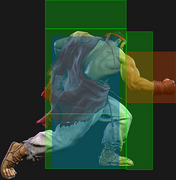
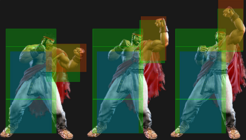
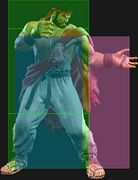
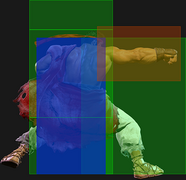
|
|
| (43 intermediate revisions by 7 users not shown) |
| Line 41: |
Line 41: |
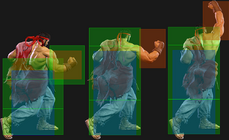
| Ryu's main combo starter, but the distance after a hit can make the follow-ups a bit finicky. The Fuwa Triple Strike target combo is the most consistent ender and is easier to hitconfirm, but does fairly low damage. | | Ryu's main combo starter, but the distance after a hit can make the follow-ups a bit finicky. The Fuwa Triple Strike target combo is the most consistent ender and is easier to hitconfirm, but does fairly low damage. |
|
| |
|
| The link into {{clr|H|4HP}} only works from absolute point blank, and even starting with a jumpin can prevent it from working. The link into {{clr|M|5MP}} or {{clr|M|2MP}} works from slightly farther out. On Counter-hit, {{clr|M|5MP}} can link into {{clr|H|2HP}} if close enough (for example, blocked {{clr|DR|DR~}}{{clr|L|5LP}}, {{clr|M|CH 5MP}} links into {{clr|H|2HP}}, but without the {{clr|DR|Drive Rush}} Ryu will be too far away). | | The link into {{clr|H|4HP}} only works from absolute point blank, and even starting with a jumpin can prevent it from working. The link into {{clr|M|5MP}} or {{clr|M|2MP}} works from slightly farther out. On {{clr|PC|Counter-hit}}, {{clr|M|5MP}} can link into {{clr|H|2HP}} if close enough (for example, blocked {{clr|DR|DR~}}{{clr|L|5LP}}, {{clr|M|CH 5MP}} links into {{clr|H|2HP}}, but without the {{clr|DR|Drive Rush}} Ryu will be too far away). |
| }} | | }} |
|
| |
|
| Line 85: |
Line 85: |
|
| |
|
| Optimal cancel routes from {{clr|L|5LK}} depend on spacing and how the move connects: | | Optimal cancel routes from {{clr|L|5LK}} depend on spacing and how the move connects: |
| * Combos naturally: Shoryuken (close range), {{clr|OD|Denjin/OD Hadoken}}, {{clr|L|LK High Blade Kick}}, {{clr|L|LK}}/{{clr|M|MK}}/{{clr|OD|OD}} Tatsu, {{clr|L|LP Hashogeki}}, any Super | | * Combos naturally: Shoryuken (close range), {{clr|OD|Denjin/OD Hadoken}}, {{clr|L|LK High Blade Kick}}, {{clr|L|LK}}/{{clr|M|MK}}/{{clr|OD|OD}} Tatsu, {{clr|L|LP Hashogeki}}, any {{clr|SA|Super}} |
| * Counter Hit only: {{clr|OD|OD}} High Blade Kick | | * {{clr|PC|Counter-hit}} only: {{clr|OD|OD High Blade Kick}} |
| * Punish Counter only: {{clr|H|HK Tatsu}}, {{clr|M|MK}} High Blade Kick, {{clr|M|MP}}/{{clr|OD|OD}} Hashogeki, {{clr|OD|OD Denjin Hashogeki}} | | * {{clr|PC|Punish Counter}} only: {{clr|H|HK Tatsu}}, {{clr|M|MK}} High Blade Kick, {{clr|M|MP}}/{{clr|OD|OD}} Hashogeki, {{clr|OD|OD Denjin Hashogeki}} |
|
| |
|
| The Punish Counter conversion into {{clr|OD|OD High Blade Kick}} or {{clr|OD|OD Denjin Hashogeki}} are particularly noteworthy due to the high damage potential afterwards. | | The {{clr|PC|Punish Counter}} conversion into {{clr|OD|OD High Blade Kick}} or {{clr|OD|OD Denjin Hashogeki}} are particularly noteworthy due to the high damage potential afterwards. |
| }} | | }} |
|
| |
|
| Line 121: |
Line 121: |
| * {{clr|PC|Punish Counter}}: KD +84 Crumple ({{sf6-adv|VP|+11}} before becoming airborne) | | * {{clr|PC|Punish Counter}}: KD +84 Crumple ({{sf6-adv|VP|+11}} before becoming airborne) |
| * Puts airborne opponents into {{sf6-jug|limited juggle}} state | | * Puts airborne opponents into {{sf6-jug|limited juggle}} state |
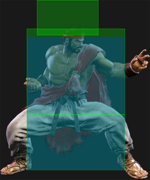
| * Whiffs on crouching opponents (unless they extend an upwards hurtbox) | | * Whiffs on crouching opponents unless they extend a vertical hurtbox |
| * 2f extra recovery on block | | * 2f extra recovery on block |
| * Extends a hurtbox 1f before active that is vulnerable to projectiles | | * Extends a hurtbox 1f before active that is vulnerable to projectiles |
| Line 134: |
Line 134: |
| | title = Crouching Light Punch | | | title = Crouching Light Punch |
| | subtitle = | | | subtitle = |
| | input = {{Classic_sf6}} 2LP<br>{{Modern_sf6}} 2L~L | | | input = {{Classic_sf6}} 2LP<br>{{Modern_sf6}} 5/2L~2L |
| | images = | | | images = |
| {{MoveDataCargoImage|imageHeight=140px|ryu_2lp|caption=}} | | {{MoveDataCargoImage|imageHeight=140px|ryu_2lp|caption=}} |
| Line 147: |
Line 147: |
| * Topmost hurtbox on frames 1-5 is vulnerable only to aerial attacks, preventing its use as an anti-air | | * Topmost hurtbox on frames 1-5 is vulnerable only to aerial attacks, preventing its use as an anti-air |
| <br> | | <br> |
| A fast light normal similar to {{clr|L|5LP}}; in comparison, {{clr|L|2LP}} has less range and fewer active frames. It is also slightly worse than {{clr|L|5LP}} when chaining against {{clr|DR|Drive Impact}} armor. Its only real advantage is that it has slightly less pushback, which could affect Ryu's follow-ups at some specific ranges. Since Ryu is crouching during the animation, it could also cause certain attacks to whiff, such as Guile attempting a meaty {{clr|H|6HP}} on your wakeup. | | A fast light normal similar to {{clr|L|5LP}}; in comparison, {{clr|L|2LP}} has less range and fewer active frames. It is also slightly worse than {{clr|L|5LP}} when chaining against {{clr|DR|Drive Impact}} armor. Its advantages are that it has slightly less pushback and more hitstun which allow for combos into {{clr|M|Medium Tatsu}} and {{clr|L|Light High Blade Kick}}. Since Ryu is crouching during the animation, it could also cause certain attacks to whiff, such as Guile attempting a meaty {{clr|H|6HP}} on your wakeup. |
|
| |
|
| Works in any 3-light confirm regardless of what order the buttons are chained; when starting with a {{clr|DR|Drive Rush}} light, this chain can be up to 4 hits. | | Works in any 3-light confirm regardless of what order the buttons are chained; when starting with a {{clr|DR|Drive Rush}} light, this chain can be up to 4 hits. |
| Line 156: |
Line 156: |
| | title = Crouching Medium Punch | | | title = Crouching Medium Punch |
| | subtitle = | | | subtitle = |
| | input = {{Classic_sf6}} 5HP<br>{{Modern_sf6}} A[M] | | | input = {{Classic_sf6}} 2MP<br>{{Modern_sf6}} A[M] |
| | images = | | | images = |
| {{MoveDataCargoImage|imageHeight=140px|ryu_2mp|caption=}} | | {{MoveDataCargoImage|imageHeight=140px|ryu_2mp|caption=}} |
| Line 188: |
Line 188: |
| * '''{{clr|DR|Drive Rush}} cancel advantage:''' {{sf6-adv|VP|+17}} oH / {{sf6-adv|VP|+9}} oB | | * '''{{clr|DR|Drive Rush}} cancel advantage:''' {{sf6-adv|VP|+17}} oH / {{sf6-adv|VP|+9}} oB |
| <br> | | <br> |
| Decent anti-air normal for situations where you don't have time to react with Shoryuken. Can be linked to after Counter-hit/Punish Counter {{clr|M|5MP}}, but the short range can make this a little inconsistent. Very unsafe on block. | | Decent anti-air normal for situations where you don't have time to react with Shoryuken. Can be linked to after {{clr|PC|Counter-hit/Punish Counter}} {{clr|M|5MP}}, but the short range can make this a little inconsistent. Very unsafe on block. |
| }} | | }} |
|
| |
|
| Line 220: |
Line 220: |
| {{AttackDataCargo-SF6/Query|ryu_2mk}} | | {{AttackDataCargo-SF6/Query|ryu_2mk}} |
| * '''Cancel Hitconfirm Window:''' 13f | | * '''Cancel Hitconfirm Window:''' 13f |
| ** Special/{{clr|DR|DR}} cancel is delayed until after active frames | | ** {{clr|DR|DR}} cancel is delayed until after active frames |
| * '''{{clr|DR|Drive Rush}} cancel advantage:''' {{sf6-adv|VP|+11}} oH / {{sf6-adv|VP|+4}} oB | | * '''{{clr|DR|Drive Rush}} cancel advantage:''' {{sf6-adv|VP|+11}} oH / {{sf6-adv|VP|+4}} oB |
| * Applies 20% damage scaling to next hit when beginning a combo (100/80/70...) | | * Applies 20% damage scaling to next hit when beginning a combo (100/80/70...) |
| <br> | | <br> |
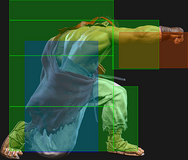
| The quintessential Shoto-style cancelable low poke, as versatile as the user wants it to be. Many characters share a nearly identical button with subtle differences, such as Ken's being 1 frame faster while having slightly less range or Cammy's having 1 less frame of recovery. Overall, Ryu's has good range for keeping the opponent at bay while canceling into fireballs to safely maintain mid-range. | | The quintessential Shoto-style cancelable low poke, as versatile as the user wants it to be. Many characters share a nearly identical button with subtle differences, such as Ken's being 1 frame faster while having slightly less range or Cammy's having 1 less frame of recovery. Overall, Ryu's has good range for keeping the opponent at bay while canceling into fireballs to safely maintain mid-range. Canceling into {{clr|DR|Drive Rush}} lets Ryu transition from neutral to offense, leading to solid damage and corner carry on hit or a strike/throw mixup on block. |
|
| |
|
| Some particularly useful cancel routes are: | | Some other useful cancel routes are: |
| * 236P - low risk, low reward poking tool; vulnerable to {{clr|DR|Drive Impact}} if too predictable | | * 236P - low risk, low reward poking tool; safe if the opponent tries to {{clr|DR|Drive Impact}} between the hits |
| * {{clr|M|236MK}} - relatively safe at max range (depending on opponent's punish tools) and good knockdown ender | | * {{clr|M|236MK}} - relatively safe at max range (depending on opponent's punish tools) and good knockdown ender |
| * {{clr|H|Denjin 214HP}} - rewarding on hit and great advantage on block; interruptible unless starting with {{clr|DR|Drive Rush}}, but not on reaction | | * {{clr|H|Denjin 214HP}} - rewarding on hit and great advantage on block; interruptible unless starting with {{clr|DR|Drive Rush}}, but not on reaction |
| Line 249: |
Line 249: |
| A sweep with very good range but high punishability on block. It punishes other sweeps very well and compliments Ryu's mid-range playstyle. The range can still spare you from punishes if well spaced, but the pushback being low makes this all the more challenging. It can also be used on occasion to end Hashogeki juggles midscreen, where a Shoryuken would whiff. | | A sweep with very good range but high punishability on block. It punishes other sweeps very well and compliments Ryu's mid-range playstyle. The range can still spare you from punishes if well spaced, but the pushback being low makes this all the more challenging. It can also be used on occasion to end Hashogeki juggles midscreen, where a Shoryuken would whiff. |
|
| |
|
| Gives enough advantage on Punish counter to go for a Denjin charge and be only {{sf6-adv|VM|-5}}; whether this is useful depends on your positioning and the opponent's 5f attack range. | | Gives enough advantage on {{clr|PC|Punish Counter}} to go for a Denjin charge and be only {{sf6-adv|VM|-5}}; whether this is useful depends on your positioning and the opponent's 5f attack range. |
| }} | | }} |
| <br> | | <br> |
| Line 258: |
Line 258: |
| | title = Jumping Light Punch | | | title = Jumping Light Punch |
| | subtitle = | | | subtitle = |
| | input = {{Classic_sf6}} j.LP<br>{{Modern_sf6}} -- | | | input = {{Classic_sf6}} j.LP<br>{{Modern_sf6}} j.L |
| | images = | | | images = |
| {{MoveDataCargoImage|imageHeight=140px|ryu_jlp|caption=}} | | {{MoveDataCargoImage|imageHeight=140px|ryu_jlp|caption=}} |
| Line 276: |
Line 276: |
| | title = Jumping Medium Punch | | | title = Jumping Medium Punch |
| | subtitle = | | | subtitle = |
| | input = {{Classic_sf6}} j.MP<br>{{Modern_sf6}} -- | | | input = {{Classic_sf6}} j.MP<br>{{Modern_sf6}} j.M |
| | images = | | | images = |
| {{MoveDataCargoImage|imageHeight=200px|ryu_jmp|caption=}} | | {{MoveDataCargoImage|imageHeight=200px|ryu_jmp|caption=}} |
| Line 293: |
Line 293: |
| | title = Jumping Heavy Punch | | | title = Jumping Heavy Punch |
| | subtitle = | | | subtitle = |
| | input = {{Classic_sf6}} j.HP<br>{{Modern_sf6}} j.H | | | input = {{Classic_sf6}} j.HP<br>{{Modern_sf6}} j.A[H] |
| | images = | | | images = |
| {{MoveDataCargoImage|imageHeight=120px|ryu_jhp|caption=}} | | {{MoveDataCargoImage|imageHeight=120px|ryu_jhp|caption=}} |
| Line 300: |
Line 300: |
| | info = | | | info = |
| {{AttackDataCargo-SF6/Query|ryu_jhp}} | | {{AttackDataCargo-SF6/Query|ryu_jhp}} |
| * Spike knockdown on Counter-hit/Punish Counter vs. airborne opponents | | * Spike knockdown on {{clr|PC|Counter-hit/Punish Counter}} vs. airborne opponents |
| <br> | | <br> |
| Jump-in with a good downward reaching hitbox for closer range jumps and throw baits. | | Jump-in with a good downward reaching hitbox for closer range jumps and throw baits. |
| Line 309: |
Line 309: |
| | title = Jumping Light Kick | | | title = Jumping Light Kick |
| | subtitle = | | | subtitle = |
| | input = {{Classic_sf6}} j.LK<br>{{Modern_sf6}} j.L | | | input = {{Classic_sf6}} j.LK<br>{{Modern_sf6}} j.A[L] |
| | images = | | | images = |
| {{MoveDataCargoImage|imageHeight=140px|ryu_jlk|caption=}} | | {{MoveDataCargoImage|imageHeight=140px|ryu_jlk|caption=}} |
| Line 325: |
Line 325: |
| | title = Jumping Medium Kick | | | title = Jumping Medium Kick |
| | subtitle = | | | subtitle = |
| | input = {{Classic_sf6}} j.MK<br>{{Modern_sf6}} j.M | | | input = {{Classic_sf6}} j.MK<br>{{Modern_sf6}} j.A[M] |
| | images = | | | images = |
| {{MoveDataCargoImage|imageHeight=120px|ryu_jmk|caption=}} | | {{MoveDataCargoImage|imageHeight=120px|ryu_jmk|caption=}} |
| Line 342: |
Line 342: |
| | title = Jumping Heavy Kick | | | title = Jumping Heavy Kick |
| | subtitle = | | | subtitle = |
| | input = {{Classic_sf6}} j.HK<br>{{Modern_sf6}} -- | | | input = {{Classic_sf6}} j.HK<br>{{Modern_sf6}} j.H |
| | images = | | | images = |
| {{MoveDataCargoImage|imageHeight=130px|ryu_jhk|caption=}} | | {{MoveDataCargoImage|imageHeight=130px|ryu_jhk|caption=}} |
| Line 369: |
Line 369: |
| * {{clr|PC|Counter-hit/Punish Counter}} bonus advantage applies to both hits | | * {{clr|PC|Counter-hit/Punish Counter}} bonus advantage applies to both hits |
| <br> | | <br> |
| A fast overhead that allows follow-up combos when used after {{clr|DR|Drive Rush}}. Ryu can also link into light normals after a Counter-hit or with perfect meaty timing, such as after {{clr|L|214LK}} + whiff {{clr|L|5LP}} in the corner. | | A fast overhead that allows follow-up combos when used after {{clr|DR|Drive Rush}}. Ryu can also link into light normals after a {{clr|PC|Counter-hit}} or with perfect meaty timing, such as after {{clr|L|214LK}} + whiff {{clr|L|5LP}} in the corner. |
|
| |
|
| While Ryu is {{sf6-adv|P|+3}} when the opponent blocks {{clr|DR|DR~}}{{clr|M|6MP}}, he is out of throw range making it hard to press a real mixup. When hitting a crouching opponent at point blank, he can link into {{clr|H|4HP}} for a powerful combo extension that forces the opponent to stand. However, if the opponent somehow gets hit while standing, {{clr|H|4HP}} will whiff; for a more guaranteed combo ender, you can instead use {{clr|M|2MP}} > {{clr|M|236MK}} or {{clr|M|5MP}}~{{clr|L|LK}}~{{clr|H|HK}} for a Denjin stock. | | While Ryu is {{sf6-adv|P|+3}} when the opponent blocks {{clr|DR|DR~}}{{clr|M|6MP}}, he is out of throw range making it hard to press a real mixup. When hitting a crouching opponent at point blank, he can link into {{clr|H|4HP}} for a powerful combo extension that forces the opponent to stand. However, if the opponent somehow gets hit while standing, {{clr|H|4HP}} will whiff; for a more guaranteed combo ender, you can instead use {{clr|M|2MP}} > {{clr|M|236MK}} or {{clr|M|5MP}}~{{clr|L|LK}}~{{clr|H|HK}} for a Denjin stock. |
| Line 395: |
Line 395: |
| The {{sf6-adv|P|+3}} block advantage is enough to continue your pressure with a {{clr|M|5MP}} or {{clr|M|2MP}} without being interrupted by an non invulnerable option, but the move leaves you too far away to initiate a throw mixup without walking. It can be up to {{sf6-adv|VP|+5}} on block if spaced out, but this also results in more pushback. After a {{clr|DR|DR~}}{{clr|H|6HP}} at point blank, Ryu can microwalk for a throw that beats 4f normals, but the timing is very strict. | | The {{sf6-adv|P|+3}} block advantage is enough to continue your pressure with a {{clr|M|5MP}} or {{clr|M|2MP}} without being interrupted by an non invulnerable option, but the move leaves you too far away to initiate a throw mixup without walking. It can be up to {{sf6-adv|VP|+5}} on block if spaced out, but this also results in more pushback. After a {{clr|DR|DR~}}{{clr|H|6HP}} at point blank, Ryu can microwalk for a throw that beats 4f normals, but the timing is very strict. |
|
| |
|
| Can combo into to {{clr|M|5MP}} or {{clr|M|2MP}} on hit, and on Counter-hit/Punish Counter you can easily react with a stronger combo route. It is very susceptible to {{clr|DR|Drive Impact}}, however, so it shouldn't be overly relied upon. | | Can combo into to {{clr|M|5MP}} or {{clr|M|2MP}} on hit, and on {{clr|PC|Counter-hit/Punish Counter}} you can easily react with a stronger combo route. It is very susceptible to {{clr|DR|Drive Impact}}, however, so it shouldn't be overly relied upon. |
| }} | | }} |
|
| |
|
| Line 404: |
Line 404: |
| | input = {{Classic_sf6}} 4HP<br>{{Modern_sf6}} -- | | | input = {{Classic_sf6}} 4HP<br>{{Modern_sf6}} -- |
| | images = | | | images = |
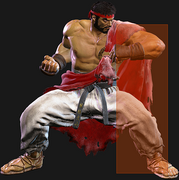
| {{MoveDataCargoImage|imageHeight=180px|ryu_4hp|caption=}} | | {{MoveDataCargoImage|imageHeight=180px|ryu_4hp|caption=Your key to corner damage}} |
| | hitboxes = | | | hitboxes = |
| {{MoveDataCargoImage|hitbox=yes|imageHeight=140px|ryu_4hp|caption=}} | | {{MoveDataCargoImage|hitbox=yes|imageHeight=140px|ryu_4hp|caption=}} |
| Line 418: |
Line 418: |
|
| |
|
| Can be used as an anti-air, but the hitbox makes it a little inconsistent against strong air normals; stick with {{clr|H|2HP}} for a more reliable normal. | | Can be used as an anti-air, but the hitbox makes it a little inconsistent against strong air normals; stick with {{clr|H|2HP}} for a more reliable normal. |
| | }} |
| | |
| | =====<font style="visibility:hidden; float:right">4HK</font>===== |
| | {{MoveDataCargo |
| | | title = Axe Kick |
| | | subtitle = |
| | | input = {{Classic_sf6}} 4HK<br>{{Modern_sf6}} 4H |
| | | images = |
| | {{MoveDataCargoImage|imageHeight=180px|ryu_4hk|caption=}} |
| | | hitboxes = |
| | {{MoveDataCargoImage|hitbox=yes|imageHeight=180px|ryu_4hk|1|caption=}} |
| | {{MoveDataCargoImage|hitbox=yes|imageHeight=90px|ryu_4hk|2|caption=}} |
| | | info = |
| | {{AttackDataCargo-SF6/Query|ryu_4hk}} |
| | * 2 hits; () refers to startup of 2nd hit only |
| | * 1st hit forces stand, puts airborne opponents into {{sf6-jug|limited juggle}} state |
| | * 2nd hit puts airborne opponents into OTG Bounce state |
| | * {{clr|PC|Counter-hit/Punish Counter}} bonus advantage applies to both hits |
| | * '''Cancel Hitconfirm Window:''' 37f / 17f (2nd hit) |
| | * '''{{clr|DR|Drive Rush}} cancel advantage:''' 1st hit {{sf6-adv|VP|+10}} oH / {{sf6-adv|VP|+4}} oB, 2nd hit {{sf6-adv|VP|+14}} oH / {{sf6-adv|VP|+10}} oB |
| | <br> |
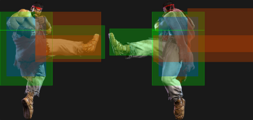
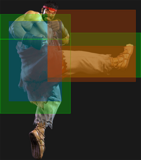
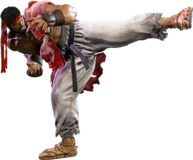
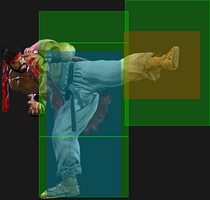
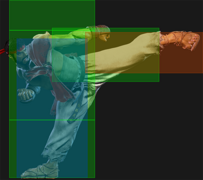
| | Ryu's Axe Kick is cancelable on both hits, so it's easy to confirm an appropriate follow-up on hit or block. At {{sf6-adv|VM|-4}} it's fairly safe most of the time due to pushback. The first hit can whiff on crouch blockers at farther ranges. The move has a lot of active frames, making it easy to time on the opponent's wakeup. |
| | |
| | Though risky, using it as an AA has decent reward due to the 2nd hit's ground bounce, which can juggle into a move like {{clr|H|HP Shoryuken}} or {{clr|M|MK High Blade Kick}}. In some rare cases, a high connect only allows the 1st hit to juggle; in this case, an immediate cancel into Shoryuken or a Tatsu will also work. |
| }} | | }} |
|
| |
|
| Line 426: |
Line 450: |
| | input = {{Classic_sf6}} 6HK<br>{{Modern_sf6}} 6H | | | input = {{Classic_sf6}} 6HK<br>{{Modern_sf6}} 6H |
| | images = | | | images = |
| {{MoveDataCargoImage|imageHeight=160px|ryu_6hk|caption=Automated shimmy.}} | | {{MoveDataCargoImage|imageHeight=160px|ryu_6hk|caption=}} |
| | hitboxes = | | | hitboxes = |
| {{MoveDataCargoImage|hitbox=yes|imageHeight=180px|ryu_6hk|caption=}} | | {{MoveDataCargoImage|hitbox=yes|imageHeight=180px|ryu_6hk|caption=}} |
| Line 433: |
Line 457: |
| * '''Low Crush''' 13-20f (not airborne) | | * '''Low Crush''' 13-20f (not airborne) |
| * Puts airborne opponents into {{sf6-jug|limited juggle}} state | | * Puts airborne opponents into {{sf6-jug|limited juggle}} state |
| * '''Cancel Hitconfirm Window:''' 19f ({{clr|OD|OD Air Tatsu}} only) | | * '''Cancel Hitconfirm Window:''' 19f (Air Tatsu only) |
| <br> | | <br> |
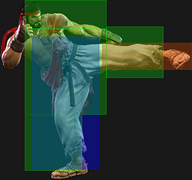
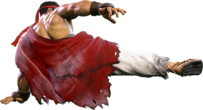
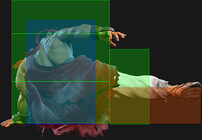
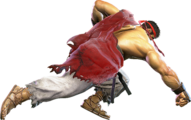
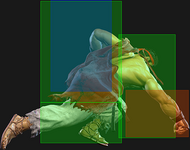
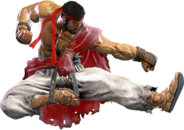
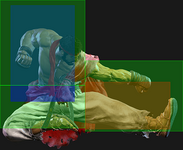
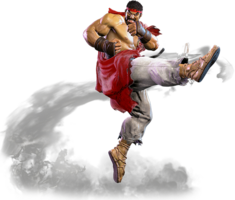
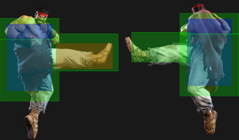
| Despite the animation, this attack is not considered airborne. It has good horizontal range and a lenient hitconfirm window for the cancel if you want to spend the meter on {{clr|OD|OD Air Tatsu}}. If you manage to beat the opponent's low poke and score a Punish Counter, Ryu becomes {{sf6-adv|VP|+6}} and gains a link to {{clr|M|5MP}} or {{clr|M|2MP}}. | | Despite the animation, this attack is not considered airborne. It has good horizontal range and a lenient hitconfirm window for the cancel to Air Tatsu, making it a potent defensive poke and counterpoke. If you manage to beat the opponent's low poke and score a {{clr|PC|Punish Counter}}, Ryu becomes {{sf6-adv|VP|+6}} and gains a link to {{clr|M|5MP}} or {{clr|M|2MP}}. |
|
| |
|
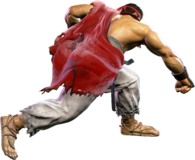
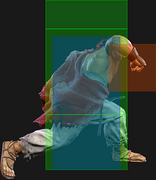
| The pushback generally keeps this move safe on block, and sets Ryu up to punish any attempts to contest his pressure. Be wary of some longer range light normals that can punish if not well spaced. | | The pushback generally keeps this move safe on block, and sets Ryu up to punish any attempts to contest his pressure. Be wary of some longer range light normals that can punish if not well spaced. |
| | |
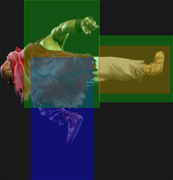
| | {{clr|H|6HK}} can be juggled into, with {{clr|OD|OD High Blade Kick}} being its most useful juggle starter. It is also effective after {{clr|PC|PC}} {{clr|DR|Drive Impact}} into {{clr|H|nj.HP}}, which can give Ryu a manually timed safe jump setup that does slightly more damage than his {{clr|L|236LK}} routes while being more likely to reach the corner. |
| }} | | }} |
|
| |
|
| =====<font style="visibility:hidden; float:right">4HK</font>===== | | ======<font style="visibility:hidden; float:right">6HK~214K</font>====== |
| {{MoveDataCargo | | {{MoveDataCargo |
| | title = Axe Kick | | | title = Aerial Tatsumaki Senpu-kyaku |
| | subtitle = | | | subtitle = (6HK cancel) |
| | input = {{Classic_sf6}} 4HK<br>{{Modern_sf6}} 4H | | | input = {{Classic_sf6}} 6HK~214K<br>{{Modern_sf6}} 6H~S |
| | images = | | | images = |
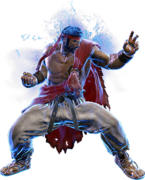
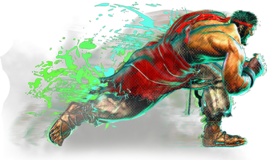
| {{MoveDataCargoImage|imageHeight=180px|ryu_4hk|caption=}} | | {{MoveDataCargoImage|imageHeight=200px|ryu_214lk|caption=Shades of Evil Ryu}} |
| | hitboxes = | | | hitboxes = |
| {{MoveDataCargoImage|hitbox=yes|imageHeight=180px|ryu_4hk|1|caption=}} | | {{MoveDataCargoImage|hitbox=yes|imageHeight=140px|ryu_j214k|caption=}} |
| {{MoveDataCargoImage|hitbox=yes|imageHeight=90px|ryu_4hk|2|caption=}} | | ---- |
| | {{MoveDataCargoImage|hitbox=yes|imageHeight=120px|ryu_214kk|caption=}} |
| | {{MoveDataCargoImage|hitbox=yes|imageHeight=120px|ryu_214kk|2|caption=}} |
| | {{MoveDataCargoImage|hitbox=yes|imageHeight=160px|ryu_214kk|3|caption=}} |
| | info = | | | info = |
| {{AttackDataCargo-SF6/Query|ryu_4hk}} | | {{AttackDataCargo-SF6/Query|ryu_6hk_214k}} |
| * 2 hits; () refers to startup of 2nd hit only | | * '''Airborne''' 1-26f ({{FKD}} state); the last frame of landing recovery is in a crouching state |
| * 1st hit forces stand, puts airborne opponents into {{sf6-jug|limited juggle}} state | | * Does not lead to follow-up juggles like regular Air Tatsu |
| * 2nd hit puts airborne opponents into OTG Bounce state
| | {{AttackDataCargo-SF6/Query|ryu_6hk_214kk}} |
| * Counter-hit/Punish Counter bonus advantage applies to both hits
| | * '''Airborne''' 1-40f ({{FKD}} state); the last frame of landing recovery is in a crouching state |
| * '''Cancel Hitconfirm Window:''' 37f / 17f (2nd hit) | | * Puts opponent into {{sf6-jug|limited juggle}} state; can lead to juggles near the corner |
| * '''{{clr|DR|Drive Rush}} cancel advantage:''' 1st hit {{sf6-adv|VP|+10}} oH / {{sf6-adv|VP|+4}} oB, 2nd hit {{sf6-adv|VP|+14}} oH / {{sf6-adv|VP|+10}} oB
| | * Can hit crouching opponents unlike regular {{clr|OD|OD Air Tatsu}} |
| | * Applies an extra 15% damage scaling to next attack when comboed into |
| <br> | | <br> |
| Ryu's Axe Kick is cancelable on both hits, so it's easy to confirm an appropriate follow-up on hit or block. At {{sf6-adv|VM|-4}} it's fairly safe most of the time due to pushback. The first hit can whiff on crouch blockers at farther ranges. The move has a lot of active frames, making it easy to time on the opponent's wakeup.
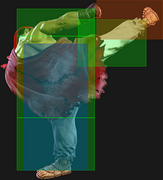
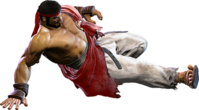
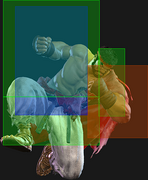
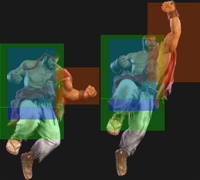
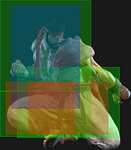
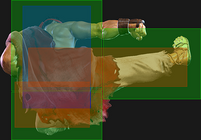
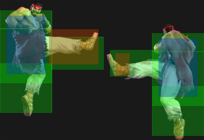
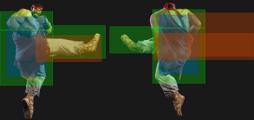
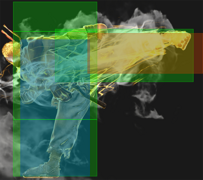
| | These unique versions of Air Tatsu only exist as a cancel from {{clr|H|6HK}}, and in practice they function more like a grounded Tatsu. It can be hitconfirmed into fairly reliably, especially if you see the opponent stick out a low poke during your Whirlwind Kick startup. It is very unsafe if blocked, leaving Ryu point blank for a huge punish. |
|
| |
|
| Though risky, using it as an AA has decent reward due to the 2nd hit's ground bounce, which can juggle into a move like {{clr|H|HP Shoryuken}} or {{clr|M|MK High Blade Kick}}. In some rare cases, a high connect only allows the 1st hit to juggle; in this case, an immediate cancel into Shoryuken or a Tatsu will also work.
| | This move's primary use is to end juggles, most notably after a midscreen {{clr|OD|OD High Blade Kick}}. Juggling {{clr|H|6HK}} into the meterless Tatsu gives great corner carry and decent oki after a double dash. The {{clr|OD|OD Air Tatsu}} ender generally leads to the same juggle follow-ups as the non-{{clr|H|6HK}} version, and should only be used near the corner unless the extra damage is enough to secure the round. |
| }} | | }} |
| <br> | | <br> |
| Line 508: |
Line 538: |
| A relatively weak target combo, but it's easier to confirm from {{clr|M|5MP}} than a special move. Also has some utility near max {{clr|M|5MP}} range where other follow-ups can whiff. However, the {{clr|L|LK}} can whiff if {{clr|M|5MP}} hits on an extended limb hurtbox. | | A relatively weak target combo, but it's easier to confirm from {{clr|M|5MP}} than a special move. Also has some utility near max {{clr|M|5MP}} range where other follow-ups can whiff. However, the {{clr|L|LK}} can whiff if {{clr|M|5MP}} hits on an extended limb hurtbox. |
|
| |
|
| At close range, Ryu is punishable after {{clr|M|5MP}}~{{clr|L|LK}}, but it's fairly easy to space safely against most characters. For example, about half the cast cannot punish the blocked sequence {{clr|DR|DR~}}{{clr|M|5MP}}, {{clr|M|5MP}}~{{clr|L|LK}} with their 4f normal, and the sequence {{clr|H|6HP}}, {{clr|M|5MP}}~{{clr|L|LK}} cannot be punished by anyone. Opponents unaware of this fact can be baited into a spacing trap as they whiff their attempted punish. | | At close range, Ryu is punishable after {{clr|M|5MP}}~{{clr|L|LK}}, but it's fairly easy to space safely against most characters. For example, about half the cast cannot punish the blocked sequence {{clr|DR|DR~}}{{clr|M|5MP}}, {{clr|M|5MP}}~{{clr|L|LK}} with their 4f normal, and the sequence {{clr|H|6HP}}, {{clr|M|5MP}}~{{clr|L|LK}} cannot be punished by anyone (although it is vulnerable to DI). Opponents unaware of this fact can be baited into a spacing trap as they whiff their attempted punish. |
|
| |
|
| On hit, the {{clr|H|HK}} ender can be canceled in order to stock a Denjin Charge; doing so sacrifices oki unless Ryu is in the corner. If blocked, the charge will not come out. | | On hit, the {{clr|H|HK}} ender can be canceled in order to stock a Denjin Charge; doing so sacrifices oki unless Ryu is in the corner. If blocked, the charge will not come out. |
| Line 568: |
Line 598: |
| * On Hit/PC: Applies 20% damage scaling to next hit when beginning a combo | | * On Hit/PC: Applies 20% damage scaling to next hit when beginning a combo |
| * On Block: Applies 20% scaling multiplier to all follow-up hits after Wall Splat; the next attack can incur additional Starter Scaling | | * On Block: Applies 20% scaling multiplier to all follow-up hits after Wall Splat; the next attack can incur additional Starter Scaling |
| * Combos when canceled from {{clr|H|5HP}}/{{clr|H|2HP}}/{{clr|H|4HP}} or Punish Counter {{clr|H|4HK (2nd)}} (no corner wallsplat; useful for depleting Drive gauge, especially after Perfect Parry) | | * Combos when canceled from {{clr|H|5HP}}/{{clr|H|2HP}}/{{clr|H|4HP}} or {{clr|PC|Punish Counter}} {{clr|H|4HK (2nd)}} (no corner wallsplat; useful for depleting Drive gauge, especially after Perfect Parry) |
| * A blocked {{clr|DR|DI}} can combo into another {{clr|DR|DI}} if opponent is not fully cornered (Stuns if opponent has less than 1.5 Drive bars) | | * A blocked {{clr|DR|DI}} can combo into another {{clr|DR|DI}} if opponent is not fully cornered (Stuns if opponent has less than 1.5 Drive bars) |
| ** This happens because a blocked {{clr|DR|DI}} is not considered a "hit" for combo purposes | | ** This happens because a blocked {{clr|DR|DI}} is not considered a "hit" for combo purposes |
| Line 588: |
Line 618: |
| * '''Zangief ({{clr|H|5[HP]}})''', frame 4 armor | | * '''Zangief ({{clr|H|5[HP]}})''', frame 4 armor |
|
| |
|
| It's important to use a blockstring that cannot be absorbed by their armor/counter moves. Ideally, the string should also not be a true combo, or it will cause a Lock and prevent Stun.<br>{{clr|OD|*}} Denotes a move that causes Lock on Counter-hit, allowing the opponent to escape a Stun by mashing on wakeup. | | It's important to use a blockstring that cannot be absorbed by their armor/counter moves. Ideally, the string should also not be a true combo, or it will cause a Lock and prevent Stun.<br>{{clr|OD|*}} Denotes a move that causes Lock on {{clr|PC|Counter-hit}}, allowing the opponent to escape a Stun by mashing on wakeup. |
| * {{clr|H|5HP}}{{clr|OD|*}} > {{clr|DR|DI}}: 2f blockstring gap prevents opponent from absorbing the hit | | * {{clr|H|5HP}}{{clr|OD|*}} > {{clr|DR|DI}}: 2f blockstring gap prevents opponent from absorbing the hit |
| * {{clr|H|4HK (2nd)}} > {{clr|DR|DI}}: 3f blockstring gap will work vs. Zangief {{clr|H|5[HP]}} | | * {{clr|H|4HK (2nd)}} > {{clr|DR|DI}}: 3f blockstring gap will work vs. Zangief {{clr|H|5[HP]}} |
| Line 678: |
Line 708: |
| * Charges up the next [[#Hadoken (Denjin 236HP)|{{clr|H|HP}}/{{clr|OD|OD}} Hadoken]], [[#Hashogeki (Denjin 214HP)|{{clr|H|HP}}/{{clr|OD|OD}} Hashogeki]], [[#Level 1 Super (236236P)|{{clr|SA|SA1}}]], or [[#Level 2 Super (214214P)|{{clr|SA|SA2}}]] into a more powerful Denjin version | | * Charges up the next [[#Hadoken (Denjin 236HP)|{{clr|H|HP}}/{{clr|OD|OD}} Hadoken]], [[#Hashogeki (Denjin 214HP)|{{clr|H|HP}}/{{clr|OD|OD}} Hashogeki]], [[#Level 1 Super (236236P)|{{clr|SA|SA1}}]], or [[#Level 2 Super (214214P)|{{clr|SA|SA2}}]] into a more powerful Denjin version |
| * Increases damage, and may change frame advantage, knockdown advantage, or number of hits | | * Increases damage, and may change frame advantage, knockdown advantage, or number of hits |
| * Can be performed after {{clr|H|5HK}}~{{clr|H|HP}} or {{clr|M|5MP}}~{{clr|L|LK}}~{{clr|H|HK}} by inputting 2P on hit only | | * Can be performed after {{clr|H|5HP}}~{{clr|H|HK}} or {{clr|M|5MP}}~{{clr|L|LK}}~{{clr|H|HK}} by inputting 2P on hit only |
| | * Denjin stock is granted on frame 50; Ryu is in a {{clr|PC|Counter-hit}} state for the entire duration |
| * Can only store 1 Denjin stock at a time, and is depleted after use; does not persist between rounds | | * Can only store 1 Denjin stock at a time, and is depleted after use; does not persist between rounds |
| <br> | | <br> |
| Ryu's Denjin install is an important part of his fireball game, but it's risky to charge it up in neutral unless you're at full screen. You can also make the opponent block a slow, long range fireball to get a semi-safe charge, but be weary of fast long range Supers that could punish this. There are also some knockdowns that make it easy to safely charge up, such as {{clr|OD|OD Denjin Charge Hadoken}}, {{clr|OD|OD Tatsu}}, or {{clr|H|HK High Blade Kick}}. It's usually safe against midscreen {{clr|M|MK High Blade Kick}} too. | | Ryu's Denjin install is an important part of his fireball game, but it's risky to charge it up in neutral unless you're at full screen. You can also make the opponent block a slow, long range fireball to get a semi-safe charge, but be wary of fast long range Supers that could punish this. There are also some knockdowns that make it easy to safely charge up, such as {{clr|OD|OD Denjin Charge Hadoken}}, {{clr|OD|OD Tatsu}}, or {{clr|H|HK High Blade Kick}}. It's usually safe against midscreen {{clr|M|MK High Blade Kick}} too. |
|
| |
|
| Both of Ryu's Target Combos give him the option to end in a Denjin Charge on hit with a different input (2P). This sacrifices any possible midscreen oki, but in the corner he can gain the Denjin stock while still maintaining his offense. | | Both of Ryu's Target Combos give him the option to end in a Denjin Charge on hit with a different input (2P). This sacrifices any possible midscreen oki, but in the corner he can gain the Denjin stock while still maintaining his offense. |
| Line 689: |
Line 720: |
| {{MoveDataCargo | | {{MoveDataCargo |
| | title = Hadoken | | | title = Hadoken |
| | subtitle = | | | subtitle = Fireball |
| | input = {{Classic_sf6}} 236P<br>{{Modern_sf6}} 236X or 5S (H) | | | input = {{Classic_sf6}} 236P<br>{{Modern_sf6}} 236X or 5S (H) |
| | images = | | | images = |
| Line 698: |
Line 729: |
| {{AttackDataCargo-SF6/Query|ryu_236lp}} | | {{AttackDataCargo-SF6/Query|ryu_236lp}} |
| * Slow 1-hit projectile; '''Projectile Speed:''' 0.055 | | * Slow 1-hit projectile; '''Projectile Speed:''' 0.055 |
| | * Puts airborne opponents into a {{sf6-jug|limited juggle}} state |
| * '''Cancel Hitconfirm Window:''' 4f (Super) | | * '''Cancel Hitconfirm Window:''' 4f (Super) |
| {{AttackDataCargo-SF6/Query|ryu_236mp}} | | {{AttackDataCargo-SF6/Query|ryu_236mp}} |
| * Medium-speed 1-hit projectile; '''Projectile Speed:''' 0.070 | | * Medium-speed 1-hit projectile; '''Projectile Speed:''' 0.070 |
| | * Puts airborne opponents into a {{sf6-jug|limited juggle}} state |
| * '''Cancel Hitconfirm Window:''' 4f (Super) | | * '''Cancel Hitconfirm Window:''' 4f (Super) |
| {{AttackDataCargo-SF6/Query|ryu_236hp}} | | {{AttackDataCargo-SF6/Query|ryu_236hp}} |
| * Fast 1-hit projectile; '''Projectile Speed:''' 0.085 | | * Fast 1-hit projectile; '''Projectile Speed:''' 0.085 |
| | * Puts airborne opponents into a {{sf6-jug|limited juggle}} state |
| * '''Cancel Hitconfirm Window:''' 4f (Super) | | * '''Cancel Hitconfirm Window:''' 4f (Super) |
| {{AttackDataCargo-SF6/Query|ryu_236pp}} | | {{AttackDataCargo-SF6/Query|ryu_236pp}} |
| * Fast 2-hit OD projectile; '''Projectile Speed:''' 0.095 | | * Fast 2-hit {{clr|OD|OD}} projectile; '''Projectile Speed:''' 0.095 |
| * Has juggle potential; puts opponent into {{sf6-jug|limited juggle}} state on hit | | * Has juggle potential; puts opponents into a {{sf6-jug|limited juggle}} state |
| | * Allows the use of {{clr|SA|SA1}} while {{clr|OD|236PP}} is still on-screen |
| * '''Cancel Hitconfirm Window:''' 12f (Super) | | * '''Cancel Hitconfirm Window:''' 12f (Super) |
| * Applies 20% damage scaling to next hit when beginning a combo; counts as 2 hits for damage scaling when comboed into (applies to next hit) | | * Applies 20% damage scaling to next hit when beginning a combo; counts as 2 hits for damage scaling when comboed into (applies to next hit) |
| Line 717: |
Line 752: |
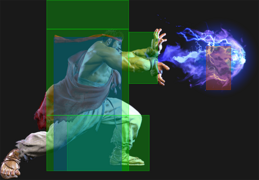
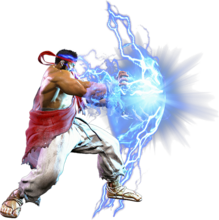
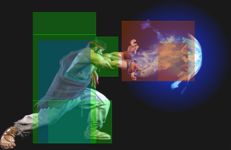
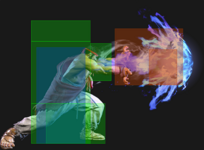
| {{clr|H|HP Hadoken}} is the fastest meterless version and the most unsafe on block if too close to the opponent. It is best used at longer ranges to prevent the opponent from walking forward, or to prevent an install move like Jamie's Drink or Kimberly's Spraycan reload. This version turns into {{clr|H|Denjin Hadoken}} when Ryu has a stock. | | {{clr|H|HP Hadoken}} is the fastest meterless version and the most unsafe on block if too close to the opponent. It is best used at longer ranges to prevent the opponent from walking forward, or to prevent an install move like Jamie's Drink or Kimberly's Spraycan reload. This version turns into {{clr|H|Denjin Hadoken}} when Ryu has a stock. |
|
| |
|
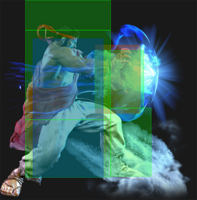
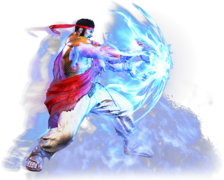
| {{clr|OD|OD Hadoken}} is fast and higher priority, making it an important tool against other zoners. The knockdown time lets Ryu perform a Denjin Charge, and in the corner he can juggle into {{clr|SA|SA1}} on reaction. He can also {{clr|DR|Drive Rush}} into a juggled normal against cornered opponents when starting from about 1/3 to 1/2 screen away. Unlike his other fireballs, Ryu is allowed to use {{clr|SA|SA1}} when {{clr|OD|OD Hadoken}} is still on the screen. | | {{clr|OD|OD Hadoken}} is fast and higher priority, making it an important tool against other zoners. The faster recovery makes it extremely hard for opponents to jump over, even as a prediction. On hit, the knockdown time lets Ryu perform a Denjin Charge or move forward for oki. If the opponent is cornered and ~1/3 screen away, Ryu can pick up {{clr|DR|Drive Rush}} juggles into light normals; from a bit farther away, he can get medium and heavy normals as well. He can also juggle into {{clr|SA|SA1}} on reaction against cornered opponents, and even midscreen opponents under certain conditions. In general, a 2-light confirm or a {{clr|PC|Counter-hit}} light into medium confirm leaves Ryu close enough for this juggle. Additionally, {{clr|M|2MK}} and {{clr|H|5HP}} move forward during the cancel window, allowing the {{clr|OD|236PP}} > {{clr|SA|SA1}} juggle to work more consistently. |
| | |
| | A ranged cancel from {{clr|M|2MK}}, {{clr|M|2MP}}, or {{clr|H|5HP}} into {{clr|H|HP Hadoken}} will always be a true blockstring, while {{clr|M|MP Hadoken}} can leave small gaps; {{clr|L|LP Hadoken}} leaves much larger gaps in ranged cancels that can allow more armored or anti-projectile moves to be effective. |
| | |
| | Canceling pokes into Hadoken runs the risk of being absorbed by {{clr|DR|Drive Impact}} armor for a full crumple punish. This requires a prediction by the opponent before the poke connects, so you can shut this down by playing less predictably and countering with your own {{clr|DR|DI}} if they abuse it in neutral. When a blocked poke like {{clr|M|2MK}}/{{clr|M|2MP}}/{{clr|H|5HP}} is canceled into Hadoken, the opponent's reversal {{clr|DR|DI}} will not be fast enough to punish through any blockstring gaps. |
| }} | | }} |
|
| |
|
| Line 723: |
Line 762: |
| {{MoveDataCargo | | {{MoveDataCargo |
| | title = Denjin Charge Hadoken | | | title = Denjin Charge Hadoken |
| | subtitle = | | | subtitle = Denjin Fireball |
| | input = {{Classic_sf6}} 236P<br>{{Modern_sf6}} 236X or 5S | | | input = {{Classic_sf6}} 236{{clr|H|HP}}<br>{{Modern_sf6}} 236{{clr|H|H}} or 5S |
| | images = | | | images = |
| {{MoveDataCargoImage|imageHeight=160px|ryu_236p(charged)|caption=}} | | {{MoveDataCargoImage|imageHeight=160px|ryu_236p(charged)|caption=}} |
| Line 732: |
Line 771: |
| {{AttackDataCargo-SF6/Query|ryu_236p(charged)}} | | {{AttackDataCargo-SF6/Query|ryu_236p(charged)}} |
| * Fast 2-hit projectile; '''Projectile Speed:''' 0.12 | | * Fast 2-hit projectile; '''Projectile Speed:''' 0.12 |
| * Has juggle potential; puts opponent into {{sf6-jug|limited juggle}} state | | * Has juggle potential; puts opponents into a {{sf6-jug|limited juggle}} state |
| * '''Cancel Hitconfirm Window:''' 12f (Super) | | * '''Cancel Hitconfirm Window:''' 12f (Super) |
| * Applies 20% damage scaling to next hit when beginning a combo; counts as 2 hits for damage scaling when comboed into (applies to next hit) | | * Applies 20% damage scaling to next hit when beginning a combo; counts as 2 hits for damage scaling when comboed into (applies to next hit) |
| {{AttackDataCargo-SF6/Query|ryu_236pp(charged)}} | | {{AttackDataCargo-SF6/Query|ryu_236pp(charged)}} |
| * Fast 3-hit OD projectile; '''Projectile Speed:''' 0.145 | | * Fast 3-hit {{clr|OD|OD}} projectile; '''Projectile Speed:''' 0.145 |
| * Has juggle potential; puts opponent into {{sf6-jug|limited juggle}} state | | * Has juggle potential; puts opponents into a {{sf6-jug|limited juggle}} state |
| * '''Cancel Hitconfirm Window:''' 13f (Super) | | * '''Cancel Hitconfirm Window:''' 13f (Super) |
| * Applies 20% damage scaling to next hit when beginning a combo; counts as 2 hits for damage scaling when comboed into (applies to next hit) | | * Applies 20% damage scaling to next hit when beginning a combo; counts as 2 hits for damage scaling when comboed into (applies to next hit) |
| Line 749: |
Line 788: |
| {{MoveDataCargo | | {{MoveDataCargo |
| | title = Shoryuken | | | title = Shoryuken |
| | subtitle = | | | subtitle = Dragon Punch |
| | input = {{Classic_sf6}} 623P<br>{{Modern_sf6}} 623X or 6S (H) | | | input = {{Classic_sf6}} 623P<br>{{Modern_sf6}} 623X or 6S (H) |
| | images = | | | images = |
| Line 759: |
Line 798: |
| | info = | | | info = |
| {{AttackDataCargo-SF6/Query|ryu_623lp}} | | {{AttackDataCargo-SF6/Query|ryu_623lp}} |
| * '''Anti-Air Invuln:''' 1-14f; '''Airborne''' 7-35f ({{FKD}} state) | | * '''Anti-Air Invuln:''' 1-14f (cannot hit cross-up); '''Airborne''' 7-35f ({{FKD}} state) |
| * Reduced damage on active frames 4-10 (high anti-air connect) | | * Reduced damage on active frames 4-10 (high anti-air connect) |
| | * Puts opponents into {{sf6-jug|limited juggle}} state; can get follow-ups after high corner anti-air |
| * '''Cancel Hitconfirm Window:''' 17f (Super) | | * '''Cancel Hitconfirm Window:''' 17f (Super) |
| * Applies 30% damage scaling to next hit when beginning a combo (Shoryuken > {{clr|SA|SA3}} starter: 40% total scaling) | | * Applies 30% damage scaling to next hit when beginning a combo (Shoryuken > {{clr|SA|SA3}} starter: 40% total scaling) |
| {{AttackDataCargo-SF6/Query|ryu_623mp}} | | {{AttackDataCargo-SF6/Query|ryu_623mp}} |
| * '''Anti-Air Invuln:''' 1-9f; '''Airborne''' 8-45f ({{FKD}} state) | | * '''Anti-Air Invuln:''' 1-9f (cannot hit cross-up); '''Airborne''' 8-45f ({{FKD}} state) |
| * Reduced damage on active frames 4-10 (high anti-air connect) | | * Reduced damage on active frames 4-10 (high anti-air connect) |
| * '''Cancel Hitconfirm Window:''' 17f (Super) | | * '''Cancel Hitconfirm Window:''' 17f (Super) |
| * Applies 30% damage scaling to next hit when beginning a combo (Shoryuken > {{clr|SA|SA3}} starter: 40% total scaling) | | * Applies 30% damage scaling to next hit when beginning a combo (Shoryuken > {{clr|SA|SA3}} starter: 40% total scaling) |
| {{AttackDataCargo-SF6/Query|ryu_623hp}} | | {{AttackDataCargo-SF6/Query|ryu_623hp}} |
| * '''Anti-Air Invuln:''' 1-8f; '''Airborne''' 9-50f ({{FKD}} state) | | * '''Anti-Air Invuln:''' 1-8f (cannot hit cross-up); '''Airborne''' 9-50f ({{FKD}} state) |
| * Reduced damage on active frames 3-10 (high anti-air connect) | | * Reduced damage (but higher Juggle Limit) on active frames 3-10 (high anti-air connect) |
| * '''Cancel Hitconfirm Window:''' 22f (Super) | | * '''Cancel Hitconfirm Window:''' 22f (Super) |
| * Applies 30% damage scaling to next hit when beginning a combo (Shoryuken > {{clr|SA|SA3}} starter: 40% total scaling) | | * Applies 30% damage scaling to next hit when beginning a combo (Shoryuken > {{clr|SA|SA3}} starter: 40% total scaling) |
| {{AttackDataCargo-SF6/Query|ryu_623pp}} | | {{AttackDataCargo-SF6/Query|ryu_623pp}} |
| * '''Full Invuln:''' 1-8f; '''Airborne''' 8-52f ({{FKD}} state) | | * '''Full Invuln:''' 1-8f (cannot hit cross-up); '''Airborne''' 8-52f ({{FKD}} state) |
| * Ryu's primary invincible reversal option | | * Ryu's primary invincible reversal option |
| <br> | | <br> |
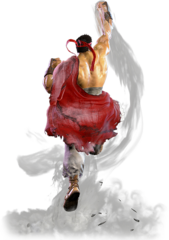
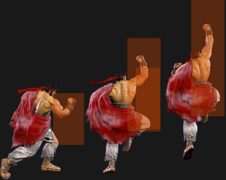
| As always, Shoryuken is a great anti-air special and the {{clr|OD|OD}} version has a lot of invincibility to blow through the opponent's attacks. It's best to use as late as possible against jumping opponents, or else it will have its damage reduced and will no longer be cancelable into {{clr|SA|SA3}}. It cannot anti-air cross-ups, so if the opponent is too close Ryu will have to walk forward and input a cross-cut Shoryuken in the opposite direction (6321P input). All versions have good juggle potential, which helps squeeze out extra damage from Ryu's many corner juggle situations.
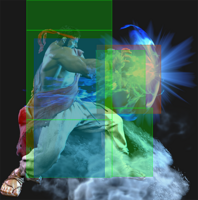
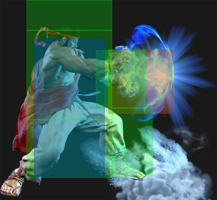
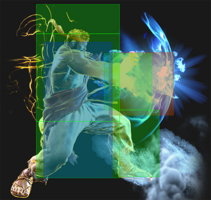
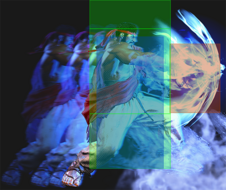
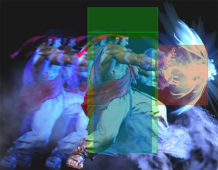
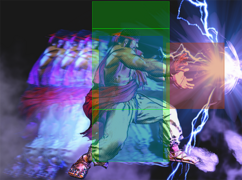
| | Shoryuken is, as always, a great anti-air special and juggle ender. Higher strengths have slower startup in exchange for additional damage and range. The {{clr|L|LP}} version is the best overall for anti-air purposes, but {{clr|M|MP}}/{{clr|H|HP}} are less likely to whiff against moves like Divekicks that stop forward air momentum. It's best to use Shoryuken as late as possible against jumping opponents, or else it will have its damage reduced and will no longer be cancelable into {{clr|SA|SA3}}. It cannot anti-air cross-ups, so if the opponent is too close Ryu will have to walk forward and input a cross-cut Shoryuken in the opposite direction (6321P input). |
| | |
| | {{clr|OD|OD Shoryuken}} has full invincibility to blow through the opponent's attacks, though it doesn't last long enough to plow through most other invincible moves (especially {{clr|SA|Supers}}). While it's possible to use this version in juggles and anti-airs, it's only worthwhile if it will secure a guaranteed kill over the other strengths. |
| | |
| | All versions of Shoryuken have good juggle potential, which helps squeeze out extra damage from Ryu's many corner juggle situations. It's important to know which juggle routes work with each strength, as it's fairly common for a route to only allow {{clr|L|LP}} or {{clr|M|MP}}/{{clr|OD|OD}} Shoryuken as an ender. |
| | |
| | On a midscreen hit, Ryu usually has to chase the opponent down with {{clr|DR|Drive Rush}} to secure any real oki. In some anti-air scenarios, it's possible to chase a Back Rise with two dashes, but this often leaves him around {{sf6-adv|E|0}} or {{sf6-adv|P|+1}} and is hard to judge by eye. {{clr|OD|OD Shoryuken}} never gives throw oki on a midscreen opponent, but Ryu can {{clr|DR|Drive Rush}} into delayed {{clr|M|2MK}}/{{clr|H|5HP}} or immediate {{clr|H|6HP}}/{{clr|H|6HK}} to keep the pressure up. |
|
| |
|
| The extra damage scaling on Shoryuken severely weakens the anti-air damage when canceled directly into {{clr|SA|SA3}}. It does not affect any other combo route ending in Shoryuken > {{clr|SA|SA3}}, however. | | The extra damage scaling on Shoryuken severely weakens the anti-air damage when canceled directly into {{clr|SA|SA3}}. It does not affect any other combo route ending in Shoryuken > {{clr|SA|SA3}}, however. |
| Line 803: |
Line 849: |
| {{AttackDataCargo-SF6/Query|ryu_214hk}} | | {{AttackDataCargo-SF6/Query|ryu_214hk}} |
| * '''Lower Body Projectile Invuln:''' 10-61f; '''Airborne''' 10-61f ({{FKD}} state) | | * '''Lower Body Projectile Invuln:''' 10-61f; '''Airborne''' 10-61f ({{FKD}} state) |
| * Puts opponent into {{sf6-jug|limited juggle}} state; can juggle afterward if 3rd hit connects | | * Puts opponent into {{sf6-jug|limited juggle}} state; can juggle afterward if only 3rd hit connects |
| * 2nd and 3rd hits whiff on crouching (stand blocking any hit forces block on the following hit) | | * 2nd and 3rd hits whiff on crouching (stand blocking any hit forces block on the following hit) |
| {{AttackDataCargo-SF6/Query|ryu_214kk}} | | {{AttackDataCargo-SF6/Query|ryu_214kk}} |
| Line 810: |
Line 856: |
| * Puts opponent into {{sf6-jug|limited juggle}} state; later hits have more juggle potential | | * Puts opponent into {{sf6-jug|limited juggle}} state; later hits have more juggle potential |
| <br> | | <br> |
| Tatsu is a good move for getting corner carry while still allowing oki afterward. | | Tatsu is a good move for getting oki and corner carry with only a small damage sacrifice. |
|
| |
|
| The {{clr|L|LK}} version leaves opponents the closest to Ryu on any grounded combo, allowing Ryu to easily get either a meaty {{clr|L|LP Hashogeki}} or a basic strike throw mixup after one dash unless he canceled into it from medium and heavy buttons from longer ranges. {{clr|M|MK Tatsu}} primarily sees usage as a combo ender in juggles where it gives Ryu some of his best corner carry, while the {{clr|H|HK}} version is Ryu's primary meterless option to switch sides in a combo.
| | {{clr|L|LK Tatsu}} leaves opponents the closest to Ryu on any grounded combo, allowing him to easily get either a meaty {{clr|L|LP Hashogeki}}, or dash into a basic strike/throw mixup. If it was canceled from a ranged medium/heavy poke, the opponent may recover too far away for point blank oki. {{clr|M|MK Tatsu}} primarily sees usage as a juggle ender, where it gives Ryu some of his best corner carry, while {{clr|H|HK Tatsu}} gives Ryu a meterless side switch when comboed into. |
|
| |
|
| Both the {{clr|M|MK}} and {{clr|H|HK}} versions can be used predictively against most projectiles due to the lower body invincibility, and they also get better frame advantage when the later hits connect as opposed to the first hit. | | Both the {{clr|M|MK}} and {{clr|H|HK}} versions can be used predictively against most projectiles due to the lower body invincibility, though this is a very high risk option for its meager reward. They also get better knockdown advantage when connecting on later hits from long range. If you manage to land the 3rd hit of {{clr|H|HK Tatsu}} (a tall order, considering the startup is functionally 46 frames), you can even juggle into {{clr|H|2HK}}, {{clr|H|HP Shoryuken}}, {{clr|SA|SA1}}, or {{clr|SA|SA3}}. |
|
| |
|
| {{clr|OD|OD Tatsu}} is a great juggle starter in the corner, and will always hit consistently due to its vacuum effect. Using this version against an already airborne opponent is less effective because it uses up a significant amount of juggle points, which severely limits Ryu's follow-up options. | | {{clr|OD|OD Tatsu}} is a great juggle starter in the corner, essentially replacing {{clr|OD|OD High Blade Kick}} at that range. It will always hit consistently due to its vacuum effect as long as one hit connects. Using {{clr|OD|OD Tatsu}} against an already airborne opponent is less effective, as it uses up a significant amount of juggle points, severely limiting Ryu's follow-up options. |
|
| |
|
| Tatsu is pretty combo-friendly, but some strengths do not combo from all normal cancels. {{clr|L|5LP}} cannot naturally combo into {{clr|M|MK}}/{{clr|H|HK}} Tatsu, and {{clr|L|2LP}}/{{clr|L|5LK}} cannot naturally combo into {{clr|H|HK Tatsu}} outside of a Punish Counter scenario. | | Tatsu is pretty combo-friendly, but some strengths do not combo from all normal cancels. {{clr|L|5LP}} cannot naturally combo into {{clr|M|MK}}/{{clr|H|HK}} Tatsu, and {{clr|L|2LP}}/{{clr|L|5LK}} cannot naturally combo into {{clr|H|HK Tatsu}} outside of a {{clr|PC|Punish Counter}} scenario. They all work on crouching opponents on the first hit, and even when whiff punishing this hit will almost always connect. |
| }} | | }} |
|
| |
|
| Line 824: |
Line 870: |
| {{MoveDataCargo | | {{MoveDataCargo |
| | title = Aerial Tatsumaki Senpu-kyaku | | | title = Aerial Tatsumaki Senpu-kyaku |
| | subtitle = | | | subtitle = Air Tatsu |
| | input = {{Classic_sf6}} j.214K<br>{{Modern_sf6}} j.214X or j.S | | | input = {{Classic_sf6}} j.214K<br>{{Modern_sf6}} j.214X or j.S |
| | images = | | | images = |
| Line 836: |
Line 882: |
| | info = | | | info = |
| {{AttackDataCargo-SF6/Query|ryu_j214k}} | | {{AttackDataCargo-SF6/Query|ryu_j214k}} |
| * {{FKD}} state until landing; the last 11f of landing recovery is in a crouching state | | * During Forward Jump only; button strength does not affect trajectory |
| * Can hit Cross-up | | * {{FKD}} state until landing; the last 13f of landing recovery is in a crouching state |
| | * Can hit Cross-up (blockstun is reduced by 4f) |
| * Puts opponent into {{sf6-jug|limited juggle}} state ({{clr|H|2HK}} and {{clr|SA|SA1}} are most consistent follow-ups) | | * Puts opponent into {{sf6-jug|limited juggle}} state ({{clr|H|2HK}} and {{clr|SA|SA1}} are most consistent follow-ups) |
| * Applies 30% damage scaling to next hit when beginning a combo (100/70/60...) | | * Applies 30% damage scaling to next hit when beginning a combo (100/70/60...) |
| {{AttackDataCargo-SF6/Query|ryu_j214kk}} | | {{AttackDataCargo-SF6/Query|ryu_j214kk}} |
| * {{FKD}} state until landing; the last 11f of landing recovery is in a crouching state | | * {{FKD}} state until landing; the last 13f of landing recovery is in a crouching state |
| | * Cannot hit cross-up; whiffs on crouching opponents unless they extend a vertical hurtbox |
| * Puts opponent into {{sf6-jug|limited juggle}} state | | * Puts opponent into {{sf6-jug|limited juggle}} state |
| * Applies an extra 15% damage scaling to next attack when comboed into | | * Applies an extra 15% damage scaling to next attack when comboed into |
| <br> | | <br> |
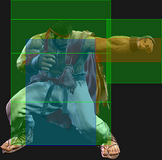
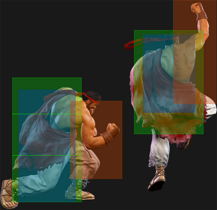
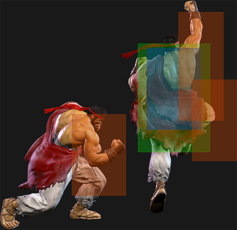
| The meterless versions of Air Tatsu are not affected by which button strength is used. The timing to connect it on a grounded opponent is a little strict and can whiff if mistimed; the frame advantage also varies significantly depending on the exact timing. If the opponent crouch blocks it will always be at least {{sf6-adv|P|+3}} on block, although most players will instinctively stand block when they see a jump.
| | Air Tatsu is primarily used as a cancel from air-to-air {{clr|M|j.MP}} to increase Ryu's damage. The {{clr|OD|OD}} version can pick up an extra juggle after landing near the corner. |
| | |
| | When used as a jump-in, the meterless version can slightly alter Ryu's jump timing and trajectory, making it possible to avoid anti-airs. It can also hit cross-up on a grounded opponent, though the timing is a bit strict; the exact block advantage can vary significantly with even a small variation in timing (unless the opponent crouch blocks, in which case Ryu is always {{sf6-adv|P|+3}}). Ryu can usually pick up a juggle into {{clr|SA|SA1}} on a successful hit, but a meterless {{clr|H|2HK}} also works near the corner or after a cross-up. |
| | |
| | {{clr|OD|OD Air Tatsu}} cannot be used as an aerial approach in the same way, since Ryu hovers mid-air and stops his momentum. In fact, it won't even hit standing opponents unless input within the final few frames of Ryu's descent. While uncommon, there are some situations in which Ryu can purposely stall mid-air to bait something like an anti-air {{clr|SA|Super}}. |
|
| |
|
| Cancels from air-to-air {{clr|M|j.MP}} if Ryu jumps forward, which is especially useful for {{clr|OD|OD Air Tatsu}} since it can lead to a strong juggles near the corner.
| | ''Note: for the version of Air Tatsu canceled from {{clr|H|6HK}}, see [[#6HK~214K|6HK~214K]]'' |
| }} | | }} |
|
| |
|
| Line 864: |
Line 916: |
| {{AttackDataCargo-SF6/Query|ryu_236lk}} | | {{AttackDataCargo-SF6/Query|ryu_236lk}} |
| * Puts opponent into {{sf6-jug|limited juggle}} state | | * Puts opponent into {{sf6-jug|limited juggle}} state |
| | * Can be spaced to hit up to active frame 5; final 2 active frames have identical range |
| * '''Cancel Hitconfirm Window:''' 22f (Super) | | * '''Cancel Hitconfirm Window:''' 22f (Super) |
| {{AttackDataCargo-SF6/Query|ryu_236mk}} | | {{AttackDataCargo-SF6/Query|ryu_236mk}} |
| * Puts opponent into {{sf6-jug|limited juggle}} state | | * Puts opponent into {{sf6-jug|limited juggle}} state |
| * 3f extra recovery on whiff | | * 3f extra recovery on whiff |
| | * Can be spaced to hit up to active frame 7; final 3 active frames have identical range |
| * '''Cancel Hitconfirm Window:''' 25f (Super) | | * '''Cancel Hitconfirm Window:''' 25f (Super) |
| {{AttackDataCargo-SF6/Query|ryu_236hk}} | | {{AttackDataCargo-SF6/Query|ryu_236hk}} |
| * Puts opponent into {{sf6-jug|limited juggle}} state; can juggle {{clr|L|623LP}}/{{clr|SA|SA3}} in corner | | * Puts opponent into {{sf6-jug|limited juggle}} state; can juggle {{clr|M|MP}}/{{clr|OD|OD}} Shoryuken or {{clr|SA|SA3}} in the corner |
| * {{clr|PC|Punish Counter}}: KD +95 (OTG Tumble state) | | * {{clr|PC|Punish Counter}}: KD +96~102 (OTG Tumble state) |
| | * Can be spaced to hit up to active frame 7; final 3 active frames have identical range |
| * '''Cancel Hitconfirm Window:''' 30f (Super) | | * '''Cancel Hitconfirm Window:''' 30f (Super) |
| {{AttackDataCargo-SF6/Query|ryu_236kk}} | | {{AttackDataCargo-SF6/Query|ryu_236kk}} |
| Line 883: |
Line 938: |
| The {{clr|L|LK}} version is a quick combo ender that sets up an auto-timed safe jump in the corner against grounded opponents. It combos naturally from both {{clr|L|2LP}} and {{clr|L|5LK}}, making it a great ender for light strings. It has fewer active frames than other versions, making it hard to space safely in neutral against most characters. | | The {{clr|L|LK}} version is a quick combo ender that sets up an auto-timed safe jump in the corner against grounded opponents. It combos naturally from both {{clr|L|2LP}} and {{clr|L|5LK}}, making it a great ender for light strings. It has fewer active frames than other versions, making it hard to space safely in neutral against most characters. |
|
| |
|
| The {{clr|M|MK}} version can be spaced relatively safely, and often can set up a safe Denjin Charge when used midscreen. It is great for harassing the opponent's Drive gauge unless they have an unusually fast and long-range punish option. It combos from all medium normals, as well as Punish Counter {{clr|L|5LK}}/{{clr|L|2LP}}. | | The {{clr|M|MK}} version can be spaced relatively safely, and often can set up a safe Denjin Charge when used midscreen. It is great for harassing the opponent's Drive gauge unless they have an unusually fast and long-range punish option. It combos from all medium normals, as well as {{clr|PC|Punish Counter}} {{clr|L|5LK}}/{{clr|L|2LP}}. |
|
| |
|
| The {{clr|H|HK}} version is very slow, but the high pushback makes it much safer than other versions. Only {{clr|H|4HP}} can naturally combo into it; other buttons require {{clr|DR|Drive Rush}}, Punish Counter, or juggle routes to combo successfully. Juggling into {{clr|H|236HK}} (e.g. {{clr|H|214HP}}, {{clr|DR|DR~}}{{clr|H|5HP}} > {{clr|H|236HK}}) usually leaves the opponent at +42, setting up an auto-timed corner safe jump. Be careful when throwing this out in neutral, as the opponent can react with {{clr|DR|Drive Impact}} unless you cancel into {{clr|SA|SA3}} on reaction. It is also a great punish starter if you know your routing. | | The {{clr|H|HK}} version is very slow, but the high pushback makes it much safer than other versions. Only {{clr|H|4HP}} can naturally combo into it; other buttons require {{clr|DR|Drive Rush}}, {{clr|PC|Punish Counter}}, or juggle routes to combo successfully. Juggling into {{clr|H|236HK}} (e.g. {{clr|H|214HP}}, {{clr|DR|DR~}}{{clr|H|5HP}} > {{clr|H|236HK}}) usually leaves the Ryu at +42, setting up an auto-timed corner safe jump. Be careful when throwing this out in neutral, as the opponent can react with {{clr|DR|Drive Impact}} unless you cancel into {{clr|SA|SA3}} on reaction. It can also be a great punish starter after blocking a cornered opponent's reversal, especially if you have a stock to follow up with {{clr|H|Denjin 214HP}}. |
|
| |
|
| {{clr|OD|OD High Blade Kick}} is the star of the show due to its Wall Bounce, which can lead to powerful juggles; it can even combo into fully charged {{clr|SA|SA2}} when canceled (although the release must be manually timed). The {{clr|OD|OD}} version can be comboed into from medium attacks or from a Punish Counter {{clr|L|5LK}}. If Ryu is too close to the corner, the opponent will bounce over his head, resulting in no follow-up juggle. In these situations, {{clr|OD|OD Tatsu}} is preferred. | | {{clr|OD|OD High Blade Kick}} can get some powerful juggles due to its Wall Bounce; it can even combo into fully charged {{clr|SA|SA2}} when canceled (although the release must be manually timed). {{clr|OD|236KK}} can be comboed into from medium attacks or from a {{clr|PC|Punish Counter}} {{clr|L|5LK}}. The most common follow-up juggles are {{clr|H|6HK}} > Air Tatsu, or {{clr|H|4HK (2nd hit)}} > {{clr|H|HP Shoryuken}}. The first route gives good corner carry, while the second can cancel into {{clr|SA|SA3}} for great midscreen damage. If Ryu is too close to the corner, the opponent will bounce over his head, resulting in no follow-up juggle. In these situations, {{clr|OD|OD Tatsu}} is preferred. |
| }} | | }} |
|
| |
|
| Line 893: |
Line 948: |
| {{MoveDataCargo | | {{MoveDataCargo |
| | title = Hashogeki | | | title = Hashogeki |
| | subtitle = | | | subtitle = Hado Palm |
| | input = {{Classic_sf6}} 214P<br>{{Modern_sf6}} 214X | | | input = {{Classic_sf6}} 214P<br>{{Modern_sf6}} 214X |
| | images = | | | images = |
| {{MoveDataCargoImage|imageHeight=200px|ryu_214lp|caption=The light version be used as a faint fireball to bait jump-ins.}} | | {{MoveDataCargoImage|imageHeight=200px|ryu_214lp|caption=Frame trap or plus frames? Don't mind if I do...}} |
| | hitboxes = | | | hitboxes = |
| {{MoveDataCargoImage|hitbox=yes|imageHeight=200px|ryu_214lp|caption=LP Version}} | | {{MoveDataCargoImage|hitbox=yes|imageHeight=200px|ryu_214lp|caption=LP Version}} |
| Line 907: |
Line 962: |
| | info = | | | info = |
| {{AttackDataCargo-SF6/Query|ryu_214lp}} | | {{AttackDataCargo-SF6/Query|ryu_214lp}} |
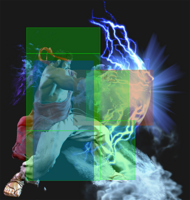
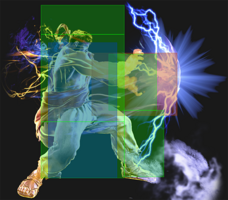
| * {{clr|PC|Counter-hit/Punish Counter}}: KD +59 (spinning {{sf6-jug|limited juggle}} state) | | * 1 hit; strike hitbox that can dissipate 1-hit meterless projectiles |
| | * {{clr|PC|Counter-hit/Punish Counter}}: KD +57/+59 (spinning {{sf6-jug|limited juggle}} state) |
| * Increased pushback on block vs. opponents in Burnout | | * Increased pushback on block vs. opponents in Burnout |
| * '''Cancel Hitconfirm Window:''' 24f (Super) | | * '''Cancel Hitconfirm Window:''' 24f (Super) |
| {{AttackDataCargo-SF6/Query|ryu_214mp}} | | {{AttackDataCargo-SF6/Query|ryu_214mp}} |
| | * 1 hit; strike hitbox that can dissipate 1-hit meterless projectiles |
| * {{clr|PC|Counter-hit/Punish Counter}}: KD +58 (spinning {{sf6-jug|limited juggle}} state) | | * {{clr|PC|Counter-hit/Punish Counter}}: KD +58 (spinning {{sf6-jug|limited juggle}} state) |
| * '''Cancel Hitconfirm Window:''' 23f (Super) | | * '''Cancel Hitconfirm Window:''' 23f (Super) |
| {{AttackDataCargo-SF6/Query|ryu_214hp}} | | {{AttackDataCargo-SF6/Query|ryu_214hp}} |
| * 2 hits; puts opponent into Spinning juggle state (no CH/PC required) | | * 2 hits (even when connecting on the final active frame); strike hitbox that can dissipate 2-hit meterless projectiles |
| | * Puts opponents into a spinning {{sf6-jug|limited juggle}} state (no {{clr|PC|CH/PC}} required) |
| * '''Cancel Hitconfirm Window:''' 39f (Super) | | * '''Cancel Hitconfirm Window:''' 39f (Super) |
| {{AttackDataCargo-SF6/Query|ryu_214pp}} | | {{AttackDataCargo-SF6/Query|ryu_214pp}} |
| | * 1 hit; can dissipate meterless or 1-hit {{clr|OD|OD}} projectiles |
| * '''Cancel Hitconfirm Window:''' 22f (Super) | | * '''Cancel Hitconfirm Window:''' 22f (Super) |
| * Counts as 2 hits for damage scaling when comboed into (applies to next hit) | | * Counts as 2 hits for damage scaling when comboed into (applies to next hit) |
| <br> | | <br> |
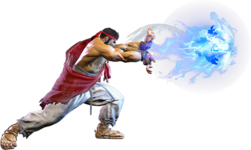
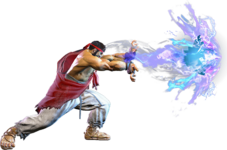
| All versions of Hashogeki have a strike hitbox, but can also nullify a 1-hit projectile of equal priority; the {{clr|OD|OD}} version will completely destroy meterless fireballs just like any other {{clr|OD|OD}} projectile. Because it has a strike hitbox, it cannot be used to stuff Level 1 Supers; this is especially important to know when using it in a Burnout blockstring, as opponents will be looking for any gap to Super through.
| | Hashogeki acts as a strike that can nullify equal-priority projectiles; the {{clr|OD|OD}} version will completely destroy meterless fireballs just like any other {{clr|OD|OD}} projectile. This strike property means that it cannot be used to stuff reversal {{clr|SA|Level 1 Supers}}; this is especially important to know when using it in a Burnout blockstring, as opponents will be looking for any gap to {{clr|SA|Super}} through. The opponent is left standing after being hit by the {{clr|L|LP}}/{{clr|M|MP}}/{{clr|OD|OD}} versions, but too far away for Ryu to immediately land a throw. He can use his frame advantage to press a medium button, beating reversal 4-frame normals and preventing a jump or backdash; the threat of this can allow him to walk in for the "fake" throw pressure. |
|
| |
|
| Hashogeki has juggle potential on all versions; the {{clr|L|LP}} and {{clr|M|MP}} versions allow for high damage juggle routes, especially in the corner. This is most commonly achieved by launching with {{clr|OD|236KK}} or {{clr|OD|214KK}}, then following up with a juggled {{clr|DR|Drive Rush}} normal into 214P. On a grounded hit, the opponent is left standing after the {{clr|L|LP}}/{{clr|M|MP}}/{{clr|OD|OD}} versions; Ryu is left too far away for an immediate throw mixup in the non-{{clr|OD|OD}} versions, but the opponent can still be punished for attempting to escape or hit a defensive button.
| | {{clr|L|LP Hashogeki}} has short range and low pushback but is safe on block. Its fast whiff animation also makes it useful as a fireball feint, baiting people into using jump, parry, or anti-projectile moves on reaction while leaving time for Ryu to respond. The slower {{clr|M|MP Hashogeki}} is technically unsafe, but the spacing often makes it more difficult to punish. With specific setups, the {{clr|L|LP}}/{{clr|M|MP}} versions are useful as meaty tools on the opponent's wakeup. When scoring a {{clr|PC|Counter-hit/Punish Counter}}, both versions launch the opponent with plenty of time to react. Ryu can pick up the juggle anywhere on-screen with {{clr|DR|DR~}}{{clr|M|5MP}}/{{clr|M|2MP}}; you can also get {{clr|DR|DR~}}{{clr|H|4HP}} if {{clr|M|214MP}} hits from close range. |
|
| |
|
| {{clr|L|214LP}} has short range and low pushback but is safe; {{clr|M|214MP}} is technically unsafe but the spacing often makes it more difficult to punish. With specific setups, the {{clr|L|LP}}/{{clr|M|MP}} versions are useful as meaty tools on the opponent's wakeup. | | {{clr|H|HP Hashogeki}} gives Ryu frame advantage on block and keeps them inside throw range, but canceling into it leaves him vulnerable during its long startup. If you condition the opponent to expect a {{clr|H|214HP}} cancel, you can punish their light normal mash by ending with the {{clr|L|LP}} or {{clr|M|MP}} versions instead, creating an intentional gap of 1-4 frames; this allows you to use the aforementioned {{clr|PC|Counter-hit}} launch juggle routes, even if he trades with the opponent's normal. |
|
| |
|
| {{clr|H|214HP}} gives Ryu frame advantage, but canceling into it leaves Ryu vulnerable during its long startup. If you condition the opponent to expect a {{clr|H|214HP}} cancel, you can punish their light normal mash by ending with the {{clr|L|LP}} or {{clr|M|MP}} versions instead, creating an intentional gap of 1-4 frames in the blockstring. Since a Counter-hit puts the opponent into a juggle state, Ryu can juggle even if he trades hits with the opponent. | | {{clr|OD|OD Hashogeki}} is also plus on block, but has little reward on hit without a counter hit or Denjin stock. Due to it's high damage and ability to be linked out of, using it as a {{clr|PC|PC}} starter is great; the damage scaling only kicks in when comboing '''into''' the {{clr|OD|214PP}}. It's serviceable as a round closer or to keep certain buttons safe for punishment. |
|
| |
|
| {{clr|OD|214PP}} is also plus on block but has little to no reward on hit. It's serviceable as a round closer or to keep certain buttons safe for punishment. | | All versions of Hashogeki can be juggled into in some capacity. The {{clr|L|LP}} and {{clr|M|MP}} versions are used in some high-damage corner juggle routes, usually by using {{clr|DR|Drive Rush}} buttons after {{clr|OD|OD Tatsu}} or {{clr|H|HP Hashogeki}}. See the [[Street_Fighter_6/Ryu/Combos|Combos page]] for details about specific routes with their damage and resource cost. |
|
| |
|
| Against opponents in Burnout, {{clr|L|214LP}} can be used for extended pressure sequences; however, Burnout increases the pushback on block, so Ryu must spend meter to force his way back in or take a risk with a pressure reset like {{clr|H|214HP}}, {{clr|H|5HP}} > {{clr|L|214LP}}, or something else. Looping {{clr|M|2MP}} > {{clr|OD|214PP}} creates a true blockstring that can create easy checkmate scenarios with either chip or DI ({{clr|H|5HP}} > {{clr|PC|DI}} after a {{clr|OD|214PP}} will create a blockstring most characters can't escape). | | Against opponents in Burnout, {{clr|L|214LP}} can be used for extended pressure sequences; however, Burnout increases the pushback on block, so Ryu must spend meter to force his way back in or take a risk with a pressure reset like {{clr|H|214HP}}, {{clr|H|5HP}} > {{clr|L|214LP}}, or something else. Looping {{clr|M|2MP}} > {{clr|OD|214PP}} creates a true blockstring that can create easy checkmate scenarios with either chip or {{clr|DR|DI}}; for example, {{clr|H|5HP}} > {{clr|DR|DI}} after a {{clr|OD|214PP}} will create a blockstring most characters can't escape. |
|
| |
|
| The following are some common blockstring gaps; all examples assume Ryu cancels at the fastest possible timing, though a longer gap can be created by delaying the cancel: | | The following are some common blockstring gaps; all examples assume Ryu cancels at the fastest possible timing, though a longer gap can be created by delaying the cancel: |
| Line 942: |
Line 1,001: |
| {{MoveDataCargo | | {{MoveDataCargo |
| | title = Denjin Charge Hashogeki | | | title = Denjin Charge Hashogeki |
| | subtitle = | | | subtitle = Denjin Hado Palm |
| | input = {{Classic_sf6}} 214P<br>{{Modern_sf6}} 214X | | | input = {{Classic_sf6}} 214{{clr|H|HP}}<br>{{Modern_sf6}} 214{{clr|H|H}} |
| | images = | | | images = |
| {{MoveDataCargoImage|imageHeight=220px|ryu_214p(charged)|caption=}} | | {{MoveDataCargoImage|imageHeight=220px|ryu_214p(charged)|caption=}} |
| Line 952: |
Line 1,011: |
| | info = | | | info = |
| {{AttackDataCargo-SF6/Query|ryu_214p(charged)}} | | {{AttackDataCargo-SF6/Query|ryu_214p(charged)}} |
| * Puts opponent into Spinning juggle state on hit (can juggle even midscreen) | | * Strike hitbox that can nullify 2-hit meterless projectiles |
| | * Puts opponent into spinning {{sf6-jug|limited juggle}} state on hit (can juggle even midscreen) |
| | * () refers to recovery on Block only |
| * '''Cancel Hitconfirm Window:''' 38f (Super) | | * '''Cancel Hitconfirm Window:''' 38f (Super) |
| {{AttackDataCargo-SF6/Query|ryu_214pp(charged)}} | | {{AttackDataCargo-SF6/Query|ryu_214pp(charged)}} |
| * Crumples opponent on hit (+14 before opponent becomes airborne) | | * Strike hitbox that can nullify 1-hit of an {{clr|OD|OD}} projectile |
| | * Crumples opponent on hit ({{sf6-adv|VP|+14}} before opponent becomes airborne, or {{sf6-adv|VP|+18}} on {{clr|PC|Punish Counter}}) |
| * '''Cancel Hitconfirm Window:''' 22f (Super) | | * '''Cancel Hitconfirm Window:''' 22f (Super) |
| <br> | | <br> |
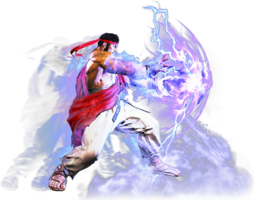
| The Denjin version of Hashogeki are much more rewarding on hit and have additional block advantage. The meterless version is only used when using the {{clr|H|HP}} version of a regular Hashogeki while having Denjin, the {{clr|L|LP}} and {{clr|M|MP}} versions will be unchanged. Just like the standard version, it is a strike hitbox with projectile-nullifying properties, but now the meterless Hashogeki can dissipate 2-hit meterless projectiles like Denjin Hadoken or Sonic Cross. The {{clr|OD|OD}} version surprisingly does not gain an additional hit, but is still very rewarding to land due to its high damage and crumple state. | | The Denjin versions of Hashogeki are much more rewarding on hit and have additional block advantage. The meterless version is only used when using the {{clr|H|HP}} version of a regular Hashogeki while having Denjin, the {{clr|L|LP}} and {{clr|M|MP}} versions will be unchanged. It retains the projectile nullifying properties of the standard version, but can now dissipate 2-hit meterless projectiles like Denjin Hadoken or Sonic Cross. The {{clr|OD|OD}} version surprisingly does not gain an additional hit, but is still very rewarding to land due to its high damage and crumple state. |
|
| |
|
| Despite usually forming a true blockstring, you can delay cancel {{clr|H|5HP}} to {{clr|H|Denjin 214HP}} on block creating a frametrap. | | Despite usually forming a true blockstring, you can delay cancel {{clr|H|5HP}} to {{clr|H|Denjin 214HP}} on block creating a frame trap. |
|
| |
|
| There are some blockstrings that can create frame traps on block: | | There are some blockstrings that can create frame traps on block: |
| Line 1,024: |
Line 1,086: |
| The Denjin Charge version of each level consumes 1 stock and deals 400 extra damage on hit (but again, no extra Chip). There is no way to preserve the Denjin stock while using this Super, unlike with regular Hashogeki. | | The Denjin Charge version of each level consumes 1 stock and deals 400 extra damage on hit (but again, no extra Chip). There is no way to preserve the Denjin stock while using this Super, unlike with regular Hashogeki. |
|
| |
|
| While this Super has some invincibility, the slower startup makes it a poor option compared to {{clr|SA|SA1}} or {{clr|SA|SA3}}. If attempting this, be aware that holding the button results in 3f less invincibility. | | While this Super has some invincibility, the slower startup makes it a poor reversal compared to {{clr|SA|SA1}} or {{clr|SA|SA3}}. If attempting this, be aware that holding the button results in 3f less invincibility. However, the motion of the super does make it a bit easier to use when reacting to drive impact. |
| }} | | }} |
| |-| | | |-| |
| Line 1,130: |
Line 1,192: |
| | title = Neutral Taunt | | | title = Neutral Taunt |
| | subtitle = | | | subtitle = |
| | input = {{Classic_sf6}} 5PPPKKK<br>{{Modern_sf6}} 5LMHS | | | input = {{Classic_sf6}} 5PPPKKK<br>{{Modern_sf6}} 5LMHS+DP+A |
| | images = | | | images = |
| {{MoveDataCargoImage|imageHeight=180px|ryu_5pppkkk|caption= '' "Come on!" ''}} | | {{MoveDataCargoImage|imageHeight=180px|ryu_5pppkkk|caption= '' "Come on!" ''}} |
| Line 1,140: |
Line 1,202: |
| | title = Forward Taunt | | | title = Forward Taunt |
| | subtitle = | | | subtitle = |
| | input = {{Classic_sf6}} 6PPPKKK<br>{{Modern_sf6}} 6LMHS | | | input = {{Classic_sf6}} 6PPPKKK<br>{{Modern_sf6}} 6LMHS+DP+A |
| | images = | | | images = |
| {{MoveDataCargoImage|imageHeight=180px|ryu_6pppkkk|caption= '' "..." ''}} | | {{MoveDataCargoImage|imageHeight=180px|ryu_6pppkkk|caption= '' "..." ''}} |
| Line 1,150: |
Line 1,212: |
| | title = Back Taunt | | | title = Back Taunt |
| | subtitle = | | | subtitle = |
| | input = {{Classic_sf6}} 4PPPKKK<br>{{Modern_sf6}} 4LMHS | | | input = {{Classic_sf6}} 4PPPKKK<br>{{Modern_sf6}} 4LMHS+DP+A |
| | images = | | | images = |
| {{MoveDataCargoImage|imageHeight=180px|ryu_4pppkkk|caption= '' "Your footwork's sloppy." ''}} | | {{MoveDataCargoImage|imageHeight=180px|ryu_4pppkkk|caption= '' "Your footwork's sloppy." ''}} |
| Line 1,160: |
Line 1,222: |
| | title = Down Taunt | | | title = Down Taunt |
| | subtitle = | | | subtitle = |
| | input = {{Classic_sf6}} 2PPPKKK<br>{{Modern_sf6}} 2LMHS | | | input = {{Classic_sf6}} 2PPPKKK<br>{{Modern_sf6}} 2LMHS+DP+A |
| | images = | | | images = |
| {{MoveDataCargoImage|imageHeight=180px|ryu_2pppkkk|caption= '' "Come!" ''}} | | {{MoveDataCargoImage|imageHeight=180px|ryu_2pppkkk|caption= '' "Come!" ''}} |


