|
|
| (4 intermediate revisions by the same user not shown) |
| Line 448: |
Line 448: |
| |+ style="text-align: center | Drive Rush Cancel - Blockstring Gaps | | |+ style="text-align: center | Drive Rush Cancel - Blockstring Gaps |
| |- | | |- |
| ! !! {{clr|L|5LK}}/{{clr|L|2LP}} !! {{clr|L|5LP}}/{{clr|L|2LK}} !! {{clr|M|5MP}} !! {{clr|M|2MK}} !! {{clr|M|5MK}}/{{clr|M|2MP}} !! {{clr|H|5HK}} !! {{clr|H|2HP}}/{{clr|H|2HK}} !! {{clr|H|5HP}} !! {{clr|H|6HK}} !! {{clr|H|6HP}} !! {{clr|M|3MP}} | | ! !! {{clr|L|5LK}}/{{clr|L|2LP}} !! {{clr|L|5LP}}/{{clr|L|2LK}} !! {{clr|M|5MP}} !! {{clr|M|2MP}}/{{clr|M|2MK}} !! {{clr|M|5MK}} !! {{clr|H|5HK}} !! {{clr|H|2HP}}/{{clr|H|2HK}} !! {{clr|H|5HP}} !! {{clr|H|6HK}} !! {{clr|H|6HP}} !! {{clr|M|3MP}} |
| |- style="text-align: center | | |- style="text-align: center |
| ! {{clr|L|5LP}}{{clr|DR|~DRC}} | | ! {{clr|L|5LP}}{{clr|DR|~DRC}} |
| | {{SF6-Gap|L|6}} || {{SF6-Gap|L|7}} || {{SF6-Gap|L|8}} || {{SF6-Gap|L|9}} || {{SF6-Gap|L|10}} || {{SF6-Gap|L|11}} || {{SF6-Gap|L|12}} || {{SF6-Gap|L|14}} || {{SF6-Gap|L|16}} || {{SF6-Gap|L|18}} || {{SF6-Gap|L|26}} | | | {{SF6-Gap|L|6}} || {{SF6-Gap|L|7}} || {{SF6-Gap|L|8}} || {{SF6-Gap|L|9}} || {{SF6-Gap|L|10}} || {{SF6-Gap|L|11}} || {{SF6-Gap|L|12}} || {{SF6-Gap|L|14}} || {{SF6-Gap|L|16}} || {{SF6-Gap|L|18}} || {{SF6-Gap|L|26}} |
| |- style="text-align: center
| |
| ! {{clr|M|5MP}}{{clr|DR|~DRC}}
| |
| | {{SF6-Gap|N|0}} || {{SF6-Gap|N|0}} || {{SF6-Gap|S|1}} || {{SF6-Gap|S|2}} || {{SF6-Gap|S|3}} || {{SF6-Gap|S|4}} || {{SF6-Gap|L|5}} || {{SF6-Gap|L|7}} || {{SF6-Gap|L|9}} || {{SF6-Gap|L|11}} || {{SF6-Gap|L|19}}
| |
| |- style="text-align: center | | |- style="text-align: center |
| ! {{clr|L|5LK}}{{clr|DR|~DRC}} | | ! {{clr|L|5LK}}{{clr|DR|~DRC}} |
| | {{SF6-Gap|L|5}} || {{SF6-Gap|L|6}} || {{SF6-Gap|L|7}} || {{SF6-Gap|L|8}} || {{SF6-Gap|L|9}} || {{SF6-Gap|L|10}} || {{SF6-Gap|L|11}} || {{SF6-Gap|L|13}} || {{SF6-Gap|L|15}} || {{SF6-Gap|L|17}} || {{SF6-Gap|L|25}} | | | {{SF6-Gap|L|5}} || {{SF6-Gap|L|6}} || {{SF6-Gap|L|7}} || {{SF6-Gap|L|8}} || {{SF6-Gap|L|9}} || {{SF6-Gap|L|10}} || {{SF6-Gap|L|11}} || {{SF6-Gap|L|13}} || {{SF6-Gap|L|15}} || {{SF6-Gap|L|17}} || {{SF6-Gap|L|25}} |
| |- style="text-align: center
| |
| ! {{clr|H|5HK}}{{clr|DR|~DRC}}
| |
| | {{SF6-Gap|N|0}} || {{SF6-Gap|N|0}} || {{SF6-Gap|N|0}} || {{SF6-Gap|N|0}} || {{SF6-Gap|N|0}} || {{SF6-Gap|N|0}} || {{SF6-Gap|S|1}} || {{SF6-Gap|S|3}} || {{SF6-Gap|L|5}} || {{SF6-Gap|L|7}} || {{SF6-Gap|L|15}}
| |
| |- style="text-align: center | | |- style="text-align: center |
| ! {{clr|L|2LP}}{{clr|DR|~DRC}} | | ! {{clr|L|2LP}}{{clr|DR|~DRC}} |
| | {{SF6-Gap|S|4}} || {{SF6-Gap|L|5}} || {{SF6-Gap|L|6}} || {{SF6-Gap|L|7}} || {{SF6-Gap|L|8}} || {{SF6-Gap|L|9}} || {{SF6-Gap|L|10}} || {{SF6-Gap|L|12}} || {{SF6-Gap|L|14}} || {{SF6-Gap|L|16}} || {{SF6-Gap|L|24}} | | | {{SF6-Gap|S|4}} || {{SF6-Gap|L|5}} || {{SF6-Gap|L|6}} || {{SF6-Gap|L|7}} || {{SF6-Gap|L|8}} || {{SF6-Gap|L|9}} || {{SF6-Gap|L|10}} || {{SF6-Gap|L|12}} || {{SF6-Gap|L|14}} || {{SF6-Gap|L|16}} || {{SF6-Gap|L|24}} |
| | |- style="text-align: center |
| | ! {{clr|L|5LP}}~{{clr|L|LP}}{{clr|DR|~DRC}} |
| | | {{SF6-Gap|N|0}} || {{SF6-Gap|S|1}} || {{SF6-Gap|S|2}} || {{SF6-Gap|S|3}} || {{SF6-Gap|S|4}} || {{SF6-Gap|L|5}} || {{SF6-Gap|L|6}} || {{SF6-Gap|L|8}} || {{SF6-Gap|L|10}} || {{SF6-Gap|L|12}} || {{SF6-Gap|L|20}} |
| | |- style="text-align: center |
| | ! {{clr|M|5MP}}{{clr|DR|~DRC}} |
| | | {{SF6-Gap|N|0}} || {{SF6-Gap|N|0}} || {{SF6-Gap|N|0}} || {{SF6-Gap|N|0}} || {{SF6-Gap|S|1}} || {{SF6-Gap|S|2}} || {{SF6-Gap|S|3}} || {{SF6-Gap|L|5}} || {{SF6-Gap|L|7}} || {{SF6-Gap|L|9}} || {{SF6-Gap|L|17}} |
| |- style="text-align: center | | |- style="text-align: center |
| ! {{clr|M|2MP}}{{clr|DR|~DRC}} | | ! {{clr|M|2MP}}{{clr|DR|~DRC}} |
| | {{SF6-Gap|N|0}} || {{SF6-Gap|N|0}} || {{SF6-Gap|N|0}} || {{SF6-Gap|N|0}} || {{SF6-Gap|N|0}} || {{SF6-Gap|S|1}} || {{SF6-Gap|S|2}} || {{SF6-Gap|S|4}} || {{SF6-Gap|L|6}} || {{SF6-Gap|L|8}} || {{SF6-Gap|L|16}} | | | {{SF6-Gap|N|0}} || {{SF6-Gap|N|0}} || {{SF6-Gap|N|0}} || {{SF6-Gap|N|0}} || {{SF6-Gap|N|0}} || {{SF6-Gap|S|1}} || {{SF6-Gap|S|2}} || {{SF6-Gap|S|4}} || {{SF6-Gap|L|6}} || {{SF6-Gap|L|8}} || {{SF6-Gap|L|16}} |
| |- style="text-align: center | | |- style="text-align: center |
| ! {{clr|L|5LP}}~{{clr|L|LP}}{{clr|DR|~DRC}} | | ! {{clr|H|5HK}}{{clr|DR|~DRC}} |
| | {{SF6-Gap|N|0}} || {{SF6-Gap|S|1}} || {{SF6-Gap|S|2}} || {{SF6-Gap|S|3}} || {{SF6-Gap|S|4}} || {{SF6-Gap|L|5}} || {{SF6-Gap|L|6}} || {{SF6-Gap|L|8}} || {{SF6-Gap|L|10}} || {{SF6-Gap|L|12}} || {{SF6-Gap|L|20}} | | | {{SF6-Gap|N|0}} || {{SF6-Gap|N|0}} || {{SF6-Gap|N|0}} || {{SF6-Gap|N|0}} || {{SF6-Gap|N|0}} || {{SF6-Gap|N|0}} || {{SF6-Gap|S|1}} || {{SF6-Gap|S|3}} || {{SF6-Gap|L|5}} || {{SF6-Gap|L|7}} || {{SF6-Gap|L|15}} |
| |} | | |} |
|
| |
|
| Line 804: |
Line 804: |
|
| |
|
|
| |
|
| ===== <big>{{clr|SA|SA1}} into Meaty {{clr|L|214LP}}</big> ===== | | ===== <big>SA1 into Meaty 214LP</big> ===== |
|
| |
|
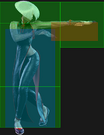
| A.K.I.'s Level 1 Super sends the opponent flying far away if used midscreen, and around 1/3 screen away if used on a cornered opponent. A common oki setup after {{clr|SA|SA1}} is to lock down the opponent with Nightshade Pulse ({{clr|L|214LP}}). This puts A.K.I. at around {{sf6-adv|VP|+12 on Block}} in the corner, and severely limits the opponents movements midscreen (though it gives plenty of time for them to reposition before the projectile connects). However, some characters can punish this projectile on reaction, especially near the corner. | | A.K.I.'s {{clr|SA|Level 1 Super}} sends the opponent flying far away if used midscreen, and around 1/3 screen away if used on a cornered opponent. A common oki setup after {{clr|SA|SA1}} is to lock down the opponent with Nightshade Pulse ({{clr|L|214LP}}). This puts A.K.I. at around {{sf6-adv|VP|+12 on Block}} in the corner, and severely limits the opponents movements midscreen (though it gives plenty of time for them to reposition before the projectile connects). However, some characters can punish this projectile on reaction, especially near the corner. |
|
| |
|
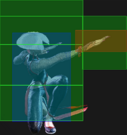
| A.K.I. can cancel the end of her {{clr|L|214LP}} into OD Snake Step (236KK), which is strike and projectile invincible. If the opponent tries to punish your meaty fireball with a Super, this will usually keep A.K.I. safe or even allow a punish, though there are some exceptions. The following table lists all wakeup reversals that can punish a meaty {{clr|L|214LP}}, and whether or not OD Snake Step can keep A.K.I. safe. | | A.K.I. can cancel the end of her {{clr|L|214LP}} into {{clr|OD|OD Snake Step}} ({{clr|OD|236KK}}), which is strike and projectile invincible. If the opponent tries to punish your meaty fireball with a {{clr|SA|Super}}, this will usually keep A.K.I. safe or even allow a punish, though there are some exceptions. The following table lists all wakeup reversals that can punish a meaty {{clr|L|214LP}}, and whether or not {{clr|OD|OD Snake Step}} can keep A.K.I. safe. |
|
| |
|
|
| |
|
| {| class="wikitable" | | {| class="wikitable" |
| ! Opponent's<br>Character !! Wakeup<br>Special/Super !! Location !! 236KK Avoids<br>Reversal Punish? !! Notes | | ! Opponent's<br>Character !! Wakeup<br>Special/Super !! Location !! {{clr|OD|236KK}} Avoids<br>Reversal Punish? !! Notes |
| |- | | |- |
| | rowspan="3" | A.K.I. || {{clr|SA|SA2}} {{clr|H|(HP)}} || Midscreen || 🟩 Yes || {{clr|SA|SA2}} (HP) whiffs against A.K.I. if too close to the corner | | | rowspan="3" | A.K.I. || {{clr|SA|SA2}} {{clr|H|(HP)}} || Midscreen || 🟩 Yes || {{clr|SA|SA2}} ({{clr|H|HP}}) whiffs against A.K.I. if too close to the corner |
| |- | | |- |
| | {{clr|SA|SA2}} {{clr|L|(LP)}} || rowspan="2" | Corner || 🟥 No || 236KK recovers directly into LP Super active frames | | | {{clr|SA|SA2}} {{clr|L|(LP)}} || rowspan="2" | Corner || 🟥 No || {{clr|OD|236KK}} recovers directly into {{clr|L|LP}} {{clr|SA|Super}} active frames |
| |- | | |- |
| | {{clr|SA|SA3}} || 🟩 Yes || - | | | {{clr|SA|SA3}} || 🟩 Yes || - |
| |- | | |- |
| | rowspan="4" | Akuma || {{clr|OD|623PP}} || rowspan="4" | Corner || 🟨 Yes* || No Super freeze to react to (236KK to avoid reversal is a risky hard read)<br>Trades hits, with A.K.I. having +3 KD Advantage after wakeup | | | rowspan="4" | Akuma || {{clr|OD|623PP}} || rowspan="4" | Corner || 🟨 Yes* || No Super freeze to react to ({{clr|OD|236KK}} to avoid reversal is a risky hard read)<br>Trades hits, with A.K.I. having +3 KD Advantage after wakeup |
| |- | | |- |
| | {{clr|SA|SA2}} || 🟩 Yes || Akuma is only {{sf6-adv|VM|-8}} after A.K.I.'s 236KK (stricter punish timing) | | | {{clr|SA|SA2}} || 🟩 Yes || Akuma is only {{sf6-adv|VM|-8}} after A.K.I.'s {{clr|OD|236KK}} (stricter punish timing) |
| |- | | |- |
| | {{clr|SA|SA3}} || rowspan="2" | 🟥 No || Akuma gets hit by projectile, and can '''Throw''' punish A.K.I. 236KK in the corner {{sf6-adv|VM|(-7)}} | | | {{clr|SA|SA3}} || rowspan="2" | 🟥 No || Akuma gets hit by projectile, and can '''Throw''' punish A.K.I. {{clr|OD|236KK}} in the corner {{sf6-adv|VM|(-7)}} |
| |- | | |- |
| | {{clr|SA|CA (Demon)}} || A.K.I. cannot jump out or escape Demon with 236KK | | | {{clr|SA|CA (Demon)}} || A.K.I. cannot jump out or escape Demon with {{clr|OD|236KK}} |
| |- | | |- |
| | Blanka || {{clr|SA|SA3}} || Corner || 🟩 Yes || - | | | Blanka || {{clr|SA|SA3}} || Corner || 🟩 Yes || - |
| Line 832: |
Line 832: |
| | rowspan="2" | Cammy || {{clr|SA|SA2}} || rowspan="2" | Corner || rowspan="2" | 🟩 Yes || A.K.I. cannot punish Cammy's {{clr|SA|SA2}} escape | | | rowspan="2" | Cammy || {{clr|SA|SA2}} || rowspan="2" | Corner || rowspan="2" | 🟩 Yes || A.K.I. cannot punish Cammy's {{clr|SA|SA2}} escape |
| |- | | |- |
| | {{clr|SA|SA3}} || A.K.I. cannot punish Cammy's {{clr|SA|SA3}} escape;<br>If Cammy attempts {{clr|SA|SA3}} midscreen, gets hit by projectile (can be juggled with Drive Rush > delayed 2HP) | | | {{clr|SA|SA3}} || A.K.I. cannot punish Cammy's {{clr|SA|SA3}} escape;<br>If Cammy attempts {{clr|SA|SA3}} midscreen, gets hit by projectile (can be juggled with {{clr|DR|DR~}}delayed {{clr|H|2HP}}) |
| |- | | |- |
| | rowspan="2" | Chun-Li || {{clr|SA|SA2}} || rowspan="2" | Corner || 🟩 Yes || - | | | rowspan="2" | Chun-Li || {{clr|SA|SA2}} || rowspan="2" | Corner || 🟩 Yes || - |
| |- | | |- |
| | {{clr|SA|SA3}} || 🟥 No || Chun-Li gets hit by projectile, and can punish A.K.I. 236KK in the corner {{sf6-adv|VM|(-9)}} | | | {{clr|SA|SA3}} || 🟥 No || Chun-Li gets hit by projectile, and can '''Throw''' punish A.K.I. {{clr|OD|236KK}} in the corner {{sf6-adv|VM|(-9)}} |
| |- | | |- |
| | rowspan="2" | Dee Jay || {{clr|SA|SA2}} || rowspan="2" | Corner || rowspan="2" | 🟩 Yes || A.K.I. cannot punish Dee Jay's {{clr|SA|SA2}} escape | | | rowspan="2" | Dee Jay || {{clr|SA|SA2}} || rowspan="2" | Corner || rowspan="2" | 🟩 Yes || A.K.I. cannot punish Dee Jay's {{clr|SA|SA2}} escape |
| |- | | |- |
| | {{clr|SA|SA3}} || Dee Jay is only {{sf6-adv|VM|-8}} after A.K.I.'s 236KK (less optimal punish) | | | {{clr|SA|SA3}} || Dee Jay is only {{sf6-adv|VM|-8}} after A.K.I.'s {{clr|OD|236KK}} (less optimal punish) |
| |- | | |- |
| | Ed || {{clr|SA|SA3}} || Corner || 🟩 Yes || - | | | Ed || {{clr|SA|SA3}} || Corner || 🟩 Yes || - |
| |- | | |- |
| | rowspan="2" | E. Honda || {{clr|SA|SA2}} || rowspan="2" | Corner || rowspan="2" | 🟩 Yes || A.K.I. can only punish with her own {{clr|SA|SA2}} (HP) | | | rowspan="2" | E. Honda || {{clr|SA|SA2}} || rowspan="2" | Corner || rowspan="2" | 🟩 Yes || A.K.I. can only punish with her own {{clr|SA|SA2}} ({{clr|H|HP}}) |
| |- | | |- |
| | {{clr|SA|SA3}} || - | | | {{clr|SA|SA3}} || - |
| |- | | |- |
| | rowspan="2" | Guile || {{clr|OD|[2]8KK}} || rowspan="2" | Corner || 🟨 Yes* || No Super freeze to react to (236KK to avoid reversal is a risky hard read);<br>Even on a successful read, A.K.I. is cornered at only +4 with an awkward punish timing | | | rowspan="2" | Elena || {{clr|SA|SA2}} || rowspan="2" | Corner || 🟩 Yes || Elena is {{sf6-adv|VM|-26}} after A.K.I.'s {{clr|OD|236KK}}<br>Can {{clr|DR|DR~}}{{clr|H|6HK}} or Microwalk {{clr|H|5HK}} punish |
| | |- |
| | | {{clr|SA|SA3}} || 🟥 No || Elena gets hit by projectile, and can '''Throw''' punish A.K.I. {{clr|OD|236KK}} in the corner {{sf6-adv|VM|(-7)}} |
| | |- |
| | | rowspan="2" | Guile || {{clr|OD|[2]8KK}} || rowspan="2" | Corner || 🟨 Yes* || No Super freeze to react to ({{clr|OD|236KK}} to avoid reversal is a risky hard read);<br>Even on a successful read, A.K.I. is cornered at only {{sf6-adv|VP|+4}} with an awkward punish timing |
| |- | | |- |
| | {{clr|SA|SA3}} || 🟩 Yes || - | | | {{clr|SA|SA3}} || 🟩 Yes || - |
| |- | | |- |
| | rowspan="2" | Jamie || {{clr|OD|236KK}} (DL2) || rowspan="2" | Corner || 🟨 Yes* || No Super freeze to react to (236KK to avoid reversal is a risky hard read) | | | rowspan="2" | Jamie || {{clr|OD|236KK}} (DL2) || rowspan="2" | Corner || 🟨 Yes* || No Super freeze to react to ({{clr|OD|236KK}} to avoid reversal is a risky hard read) |
| |- | | |- |
| | {{clr|SA|SA3}} || 🟩 Yes || After A.K.I. 236KK, the spacing makes the punish slightly awkward;<br>A.K.I. can reach with a punish 5HP~HP launch, 6HK > 2MP, or Drive Rush 5MP > 5HK | | | {{clr|SA|SA3}} || 🟩 Yes || After A.K.I. {{clr|OD|236KK}}, the spacing makes the punish slightly awkward;<br>A.K.I. can reach with a punish {{clr|H|5HP}}~{{clr|H|HP}} launch, {{clr|H|6HK}} > {{clr|M|2MP}}, or {{clr|DR|DR~}}{{clr|M|5MP}} > {{clr|H|5HK}} |
| |- | | |- |
| | JP || {{clr|SA|SA3}} || Anywhere || 🟩 Yes || - | | | JP || {{clr|SA|SA3}} || Anywhere || 🟩 Yes || - |
| Line 860: |
Line 864: |
| | Juri || {{clr|SA|SA3}} || Corner || 🟩 Yes || - | | | Juri || {{clr|SA|SA3}} || Corner || 🟩 Yes || - |
| |- | | |- |
| | rowspan="2" | Ken || {{clr|H|623HP}} || rowspan="2" | Corner || rowspan="2" | 🟨 Yes* || rowspan="2" | No Super freeze to react to (236KK to avoid reversal is a risky hard read) | | | rowspan="2" | Ken || {{clr|H|623HP}} || rowspan="2" | Corner || rowspan="2" | 🟨 Yes* || rowspan="2" | No Super freeze to react to ({{clr|OD|236KK}} to avoid reversal is a risky hard read) |
| |- | | |- |
| | {{clr|OD|623PP}} | | | {{clr|OD|623PP}} |
| Line 868: |
Line 872: |
| | {{clr|SA|SA3}} || - | | | {{clr|SA|SA3}} || - |
| |- | | |- |
| | rowspan="2" | Lily || {{clr|OD|236KK}} (Windclad) || rowspan="2" | Corner || 🟨 Yes* || No Super freeze to react to (236KK to avoid reversal is a risky hard read);<br>A.K.I. cannot punish Lily's Windclad OD Condor Spire escape;<br>Midscreen, Lily will fly through projectile but won't reach AKI ({{sf6-adv|VM|-24}} on whiff) | | | rowspan="2" | Lily || {{clr|OD|236KK}} (Windclad) || rowspan="2" | Corner || 🟨 Yes* || No Super freeze to react to ({{clr|OD|236KK}} to avoid reversal is a risky hard read);<br>A.K.I. cannot punish Lily's Windclad {{clr|OD|OD Condor Spire}} escape;<br>Midscreen, Lily will fly through projectile but won't reach A.K.I. ({{sf6-adv|VM|-24}} on whiff) |
| |- | | |- |
| | {{clr|SA|SA2}} (Windclad) || 🟩 Yes || Without Windclad stock, hitbox does not reach far enough to punish A.K.I. | | | {{clr|SA|SA2}} (Windclad) || 🟩 Yes || Without Windclad stock, hitbox does not reach far enough to punish A.K.I. |
| Line 874: |
Line 878: |
| | Luke || {{clr|SA|SA3}} || Corner || 🟩 Yes || - | | | Luke || {{clr|SA|SA3}} || Corner || 🟩 Yes || - |
| |- | | |- |
| | M. Bison || {{clr|SA|SA3}} || Corner || 🟩 Yes || M. Bison is {{sf6-adv|VM|-27}} after 236KK but recovers a little far away<br>Microwalk + {{clr|H|5HK}} > 2PP~P for a strong crumple punish, or {{clr|4|Drive Rush}} for a closer start | | | M. Bison || {{clr|SA|SA3}} || Corner || 🟩 Yes || M. Bison is {{sf6-adv|VM|-27}} after {{clr|OD|236KK}} but recovers a little far away<br>Microwalk + {{clr|H|5HK}} > 2PP~P for a strong crumple punish, or {{clr|DR|Drive Rush}} for a closer start |
| | |- |
| | | rowspan="3" | Mai || {{clr|OD|623PP}} || rowspan="3" | Corner || 🟨 Yes* || No Super freeze to react to ({{clr|OD|236KK}} to avoid reversal is a risky hard read) |
| | |- |
| | | {{clr|SA|SA2}} || 🟩 Yes || Mai is left fullscreen at {{sf6-adv|VM|-15}} (too far to punish with anything) |
| | |- |
| | | {{clr|SA|SA3}} || 🟥 No* || Fireball hits Mai; A.K.I. is left cornered at {{sf6-adv|VM|-7}} when dodging with {{clr|OD|236KK}} |
| |- | | |- |
| | Manon || {{clr|SA|SA2}} || Corner || 🟥 No* || Manon trades with projectile, landing only 1 hit of {{clr|SA|SA2}}<br>If A.K.I. cancels to 236KK, she is cornered and punishable at -9 | | | Manon || {{clr|SA|SA2}} || Corner || 🟥 No* || Manon trades with projectile, landing only 1 hit of {{clr|SA|SA2}}<br>If A.K.I. cancels to {{clr|OD|236KK}}, she is cornered and '''Throw/Command Throw''' punishable at {{sf6-adv|VM|-9}} |
| |- | | |- |
| | Marisa || {{clr|SA|SA3}} || Corner || 🟩 Yes || - | | | Marisa || {{clr|SA|SA3}} || Corner || 🟩 Yes || - |
| |- | | |- |
| | rowspan="2" | Rashid || {{clr|OD|236PP}} || rowspan="2" | Corner || 🟨 Yes* || No Super freeze to react to (236KK to avoid reversal is a risky hard read);<br>Trades with projectile for only 1 hit, so it's better to accept this small risk than to attempt a 236KK cancel | | | rowspan="2" | Rashid || {{clr|OD|236PP}} || rowspan="2" | Corner || 🟨 Yes* || No Super freeze to react to ({{clr|OD|236KK}} to avoid reversal is a risky hard read);<br>Trades with projectile for only 1 hit, so it's better to accept this small risk than to attempt a {{clr|OD|236KK}} cancel |
| |- | | |- |
| | {{clr|SA|SA3}} || 🟩 Yes || - | | | {{clr|SA|SA3}} || 🟩 Yes || - |
| |- | | |- |
| | rowspan="2" | Terry || {{clr|SA|SA2}} || rowspan="2" | Corner || rowspan="2" | 🟩 Yes || Terry is {{sf6-adv|VM|-26}} after A.K.I.'s 236KK<br>If {{clr|SA|SA2}} hits, he can continue with Double/Triple Geyser | | | rowspan="2" | Terry || {{clr|SA|SA2}} || rowspan="2" | Corner || rowspan="2" | 🟩 Yes || Terry is {{sf6-adv|VM|-26}} after A.K.I.'s {{clr|OD|236KK}}<br>If {{clr|SA|SA2}} hits, he can continue with Double/Triple Geyser |
| |- | | |- |
| | {{clr|SA|SA3}} || After 236KK, Terry is {{sf6-adv|VM|-38}}; A.K.I. can cross-up {{clr|H|j.2HP}} to retake the corner and punish<br>If {{clr|SA|SA3}} hits, A.K.I. only takes 350 damage and recovers point blank to punish Terry's landing {{sf6-adv|VM|(-6)}} | | | {{clr|SA|SA3}} || After {{clr|OD|236KK}}, Terry is {{sf6-adv|VM|-38}}; A.K.I. can cross-up {{clr|H|j.2HP}} to retake the corner and punish<br>If {{clr|SA|SA3}} hits, A.K.I. only takes 350 damage and recovers point blank to punish Terry's landing {{sf6-adv|VM|(-6)}} |
| |- | | |- |
| | Zangief || {{clr|SA|SA2}} || Corner || 🟩 Yes || - | | | Zangief || {{clr|SA|SA2}} || Corner || 🟩 Yes || - |