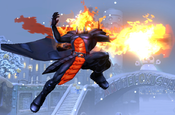
|
|
| (42 intermediate revisions by 4 users not shown) |
| Line 1: |
Line 1: |
| {{Infobox Character UMVC3 | | <div style="display: flex; flex-wrap:wrap-reverse;"> |
| |name=Dormammu | | <div style="display: flex;flex-direction: column;flex:5;min-width:300px;padding: 10px;"> |
| |image=Umvc3_dormammu_face.jpg
| | {{Character Subnav UMVC3|name=Dormammu}} |
| |health=1,000,000
| |
| |magicseries=Stronger
| |
| |airchain=Three
| |
| |forwarddash=19
| |
| |backdash=33
| |
| |jump=42
| |
| |superjump=81
| |
| |walljump=No
| |
| |doublejump=No
| |
| |airdash=8-Way
| |
| |xfactordamage1=30
| |
| |xfactordamage2=55
| |
| |xfactordamage3=80
| |
| |xfactorspeed1=10
| |
| |xfactorspeed2=15
| |
| |xfactorspeed3=20
| |
| |minimumdamagenormal=20
| |
| |minimumdamagehyper=40
| |
| |minimumdamagexfactor=35
| |
| |content=
| |
| ==Introduction== | | ==Introduction== |
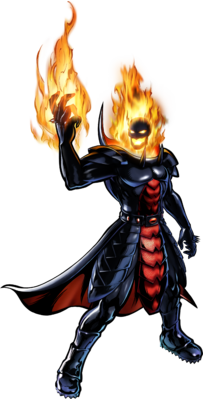
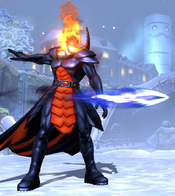
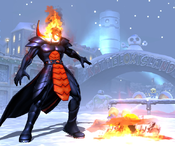
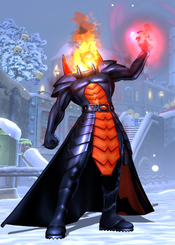
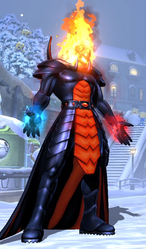
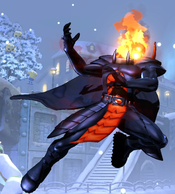
| Dormammu hails from another dimension, the Dark Dimension, where he rules and is nearly omnipotent. Although he is made purely of energy, Dorm was able to construct a metal body for himself, allowing him to invade this dimension in some capacity. Although he doesn't have access to his full powers in this world, he still represents a catastrophic threat. | | Dormammu hails from another dimension, the Dark Dimension, where he rules and is nearly omnipotent. Although he is made purely of energy, Dorm was able to construct a metal body for himself, allowing him to invade this dimension in some capacity. Although he doesn't have access to his full powers in this world, he still represents a catastrophic threat. |
| Line 38: |
Line 18: |
| *'''Bad at Close Range:''' Lacks close range options, as his normals are below-average speed and many of his zoning tools have a dead-zone near Dormammu. | | *'''Bad at Close Range:''' Lacks close range options, as his normals are below-average speed and many of his zoning tools have a dead-zone near Dormammu. |
| *'''Assist Range:''' Assist lacks coverage which makes it harder to use in neutral than more typical projectiles | | *'''Assist Range:''' Assist lacks coverage which makes it harder to use in neutral than more typical projectiles |
| *'''Poor Ground Mobility:''' Dormammu's ground dash is slow and cannot be cancelled into jumps, crouches, or attacks(meaning he cannot plink or wavedash). This makes him dependent on his aerial movement tools and teleport in order to stay mobile. | | *'''Poor Ground Mobility:''' Dormammu's ground dash is slow and cannot be cancelled into crouches or attacks(meaning he cannot plink or wavedash) - though he can cancel it into a jump. This makes him dependent on his aerial movement tools and teleport in order to stay mobile. |
| }} | | }} |
|
| |
|
| === Unique Mechanics === | | |
| | === Unique Movement === |
|
| |
|
| Dormammu's grounded dash is a fixed duration "hop"-style dash. Unlike most characters, Dormammu can not cancel his dash with attacks or by crouching, and thus he can not Plink Dash or Wavedash. He can, however, cancel his dash into a jump, and thus can indirectly cancel his dash into Special Moves with a Tiger Knee motion. Dormammu can circumvent his inability to plinkdash or wavedash by performing Tri-dashing, utilizing his very fast diagonal airdashes. Jump forward and then airdash down-forward - or jump back and then airdash down-back - to quickly travel horizontally across the stage. | | Dormammu's grounded dash is a fixed duration "hop"-style dash. Unlike most characters, Dormammu can not cancel his dash with attacks or by crouching, and thus he can not Plink Dash or Wavedash. He can, however, cancel his dash into a jump, and thus can indirectly cancel his dash into Special Moves with a Tiger Knee motion. Dormammu can circumvent his inability to plinkdash or wavedash by performing Tri-dashing, utilizing his very fast diagonal airdashes. Jump forward and then airdash down-forward - or jump back and then airdash down-back - to quickly travel horizontally across the stage. |
| | | </div> |
| }} | | <div style="display: flex;flex-direction: column;flex:2;min-width:350px;padding: 10px;">{{UMVC3_Character_Query|reversals=623XX}}</div></div> |
|
| |
|
| == Move List == | | == Move List == |
| Line 67: |
Line 48: |
| |properties={{strk}}, Priority: Low, Beam Durability: 3 per frame for 10 frames | | |properties={{strk}}, Priority: Low, Beam Durability: 3 per frame for 10 frames |
| |description= | | |description= |
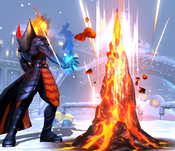
| THC Hyper: Chaotic Flame. Recommended assist. Dormammu produces a large, stationary projectile a short distance in front of himself. Dark Hole is active for a fairly long time, producing a sizeable amount of hitstun and blockstun. It is fairly easy to use in combo extensions, although it scales damage heavily by virute of hitting several times. It also has some of the highest total projectile durability of any assist in the game, allowing it to act as a defensive wall against an opponent's projectiles. | | THC Hyper: Chaotic Flame. Recommended assist. Dormammu produces a large, stationary projectile a short distance in front of himself. Dark Hole is active for a fairly long time, producing a sizeable amount of hitstun and blockstun. It is fairly easy to use in combo extensions, although it scales damage heavily by virtue of hitting several times. It also has some of the highest total projectile durability of any assist in the game, allowing it to act as a defensive wall against an opponent's projectiles. |
| }} | | }} |
| }} | | }} |
| Line 368: |
Line 349: |
| |onhit=- | | |onhit=- |
| |onblock=-3 | | |onblock=-3 |
| |properties={{wallbounce}}, {{chipdamage}} Priority: Low, Durability: 1 | | |properties={{wallbounce}}, {{chipdamage}} Priority: Low, Durability: 1, scales by 0.9 |
| |description= | | |description= |
| Dormammu fires a small projectile, which travels horizontally across the screen. It initially starts moving slowly, but quickly accelerates to full speed. This is Dormammu's only "normal" projectile, and is a core part of his gameplan due to his ability to cancel it into special moves. | | Dormammu fires a small projectile, which travels horizontally across the screen. It initially starts moving slowly, but quickly accelerates to full speed. This is Dormammu's only "normal" projectile, and is a core part of his gameplan due to his ability to cancel it into special moves. |
|
| |
|
| 6H canceled into 421X Teleport allows Dormammu to perform a simple Left/Right mixup so long as both he and his opponent are on the ground. On hit, 6H causes a large Wall Bounce, which Dormammu can easily follow up by canceling into either Flight or Teleport. | | 6H canceled into 421X Teleport allows Dormammu to perform a simple Left/Right mixup so long as both he and his opponent are on the ground. On hit, 6H causes a large Wall Bounce, which Dormammu can easily follow up by canceling into either Flight or Teleport. |
| | |
| | 6H is not subject to hitstun deterioration. |
| }} | | }} |
| }} | | }} |
| Line 392: |
Line 375: |
| |onhit=+5 | | |onhit=+5 |
| |onblock=+4 | | |onblock=+4 |
| |properties={{otg}}, {{chipdamage}}, {{nocancel}}, Priority: Low, Beam Durability: 1 per frame for 5 frames | | |properties={{otg}}, {{chipdamage}}, {{nocancel}}, Priority: Low, Beam Durability: 1 per frame for 5 frames, scales by 0.9 |
| |description= | | |description= |
| Dormammu places a small "carpet" of fire on the ground a short distance ahead of himself. The fire will remain for 180 frames, or until hit hits 5 times, or until Dormammu is hit by an attack, or until another Flame Carpet is created. | | Dormammu places a small "carpet" of fire on the ground a short distance ahead of himself. The fire will remain for 180 frames, or until hit hits 5 times, or until Dormammu is hit by an attack. |
| | |
| | Normally, only one carpet can be active at a time; attempting to place another before the first has expired will result in a 2H. However, it is possible to place additional carpets by chaining into it from a normal. |
|
| |
|
| Flame Carpet can be awkward for Dormammu to use by himself due to being uncancelable. However, it does create some unique support capabilities where Dormammu places the carpet and then tags out for another character who can utilize the lockdown and Low hit. Dormammu can also place the carpet after killing an opponent to provide some extra coverage while attacking the Oncoming character. | | Flame Carpet can be awkward for Dormammu to use by himself due to being uncancelable. However, it does create some unique support capabilities where Dormammu places the carpet and then tags out for another character who can utilize the lockdown and Low hit. Dormammu can also place the carpet after killing an opponent to provide some extra coverage while attacking the Oncoming character. |
|
| |
|
| Normally if a character is hit by Flame Carpet, all five hits will occur in quick succession. However, it is possible to space the carpet so that the opponent "bounces" on top of it, causing the hits to be more spread out. This causes 3H to have significantly better advantage on hit than listed, turning it into a combo extension tool. | | Normally if a character is hit by Flame Carpet, all five hits will occur in quick succession. However, it is possible to space the carpet so that the opponent "bounces" on top of it, causing the hits to be more spread out. This causes 3H to have significantly better advantage on hit than listed, turning it into a combo extension tool. |
| | |
| | 3H is not subject to hitstun deterioration. |
| }} | | }} |
| }} | | }} |
|
| |
|
| |
|
| === Special Moves === | | === Special Moves === |
| Line 425: |
Line 411: |
| |properties={{airok}}, {{strk}}, Priority: Low, Beam Durability: 3 per frame for 10 frames. | | |properties={{airok}}, {{strk}}, Priority: Low, Beam Durability: 3 per frame for 10 frames. |
| |description= | | |description= |
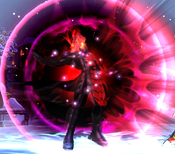
| Dormammu channels, creating a stationary projetile which hits several times. The projectile disappears if Dormammu is hit by an attack. Button strength determines the location of the Dark Hole, and has no other effect: | | Dormammu channels, creating a stationary projectile which hits several times. The projectile disappears if Dormammu is hit by an attack. Button strength determines the location of the Dark Hole, and has no other effect: |
| *L version appears immediately in front of Dormammu. | | *L version appears immediately in front of Dormammu. |
| *M version appears just short of halfscreen distance. | | *M version appears just short of halfscreen distance. |
| *H version appears just short of fullscreen distance. | | *H version appears just short of fullscreen distance. |
|
| |
|
| Dark Hole can be used as a zoning tool, but it is fairly commital due to its long total duration. | | Dark Hole can be used as a zoning tool, but it is fairly committal due to its long total duration. |
|
| |
|
| If performed in the air normally, Dormammu does not recover until he reaches the ground, making him extremely vulnerable. However, if Dark Hole is performed while in Flight Mode, Dormammu recovers normally and can continue to act in the air. It is strongly recommended to avoid using Air Dark Hole outside of Flight. | | If performed in the air normally, Dormammu does not recover until he reaches the ground, making him extremely vulnerable. However, if Dark Hole is performed while in Flight Mode, Dormammu recovers normally and can continue to act in the air. It is strongly recommended to avoid using Air Dark Hole outside of Flight. |
| Line 466: |
Line 452: |
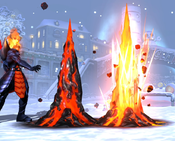
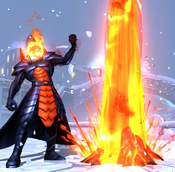
| Purification is a powerful zoning and neutral tool, as its vertical reach prevents opponents from attempting to maneuver above or below it. The pillar has a tendency to create awkward situations where an airborne opponent blocks Purification and, although they recover from blockstun, have no movement option fast enough to escape the next Purification. This causes them to have to block several beams in sequence, piling on large amounts of chip damage. | | Purification is a powerful zoning and neutral tool, as its vertical reach prevents opponents from attempting to maneuver above or below it. The pillar has a tendency to create awkward situations where an airborne opponent blocks Purification and, although they recover from blockstun, have no movement option fast enough to escape the next Purification. This causes them to have to block several beams in sequence, piling on large amounts of chip damage. |
|
| |
|
| The beam hits OTG, and is thus an important combo tool for Dormammu. It can easily be used as a combo ender by canceling the OTG hit into either Chaotic Flame (236XX) for direct damage or Stalking Flare (214XX) for further pressure. Be careful when performing this sequence, as it is possible to hyper cancel too early. If Purification is kara-canceled, the beam will not come out, and your hyper will whiff disasterously on the knocked down opponent. | | The beam hits OTG, and is thus an important combo tool for Dormammu. It can easily be used as a combo ender by canceling the OTG hit into either Chaotic Flame (236XX) for direct damage or Stalking Flare (214XX) for further pressure. Be careful when performing this sequence, as it is possible to hyper cancel too early. If Purification is kara-canceled, the beam will not come out, and your hyper will whiff disastrously on the knocked down opponent. |
| }} | | }} |
| }} | | }} |
| Line 585: |
Line 571: |
| |onhit=+5 | | |onhit=+5 |
| |onblock=-3 | | |onblock=-3 |
| |properties={{airok}}, {{strk}}, Priority: Low, Durability: 5 | | |properties={{airok}}, Fixed Hitstun, Priority: Low, Durability: 5 |
| |description= | | |description= |
| Dormammu's default 214H special performed if he has no charges stored. Creates a short-range, short-duration shockwave around Dormammu, that knocks opponents up on hit. Is mostly unremakrable, with no special properties. | | Dormammu's default 214H special performed if he has no charges stored. Creates a short-range, short-duration shockwave around Dormammu, that knocks opponents up on hit. Is mostly unremarkable, with no special properties. |
| }} | | }} |
| }} | | }} |
| Line 639: |
Line 625: |
| |data= | | |data= |
| {{AttackData-UMVC3 | | {{AttackData-UMVC3 |
| |damage=35,000 x10 | | |damage=30,000 x10 |
| |guard=Mid | | |guard=Mid |
| |startup=15 (38 in air) | | |startup=15 (38 in air) |
| Line 712: |
Line 698: |
| Final version of Dormammu's Creation magic. Has nothing to do with the other pure-Creation spells. Dormammu causes a carpet of dark energy to cover the entire stage. The carpet can be blocked, but must be blocked crouching. It can not connect on airborne opponents at all and does not hit OTG. | | Final version of Dormammu's Creation magic. Has nothing to do with the other pure-Creation spells. Dormammu causes a carpet of dark energy to cover the entire stage. The carpet can be blocked, but must be blocked crouching. It can not connect on airborne opponents at all and does not hit OTG. |
|
| |
|
| On hit, this attack deals no damage. Instead, it places a debuff on the opponent for 300 frames (5 seconds), indicated by dark energy covering their legs. While debuffed, the opponent is unable to jump. This would make the opponent extremely vulnerable to command grabs, if Dormammu had any. It does give Dormammu a limited opportunity to mix up the opponent while they can not retreat to the relative safety of the air. | | On hit, this attack deals no damage. Instead, it places a debuff on the opponent for 300 frames (5 seconds), indicated by dark energy covering their legs. While debuffed, the opponent is unable to jump. This gives Dormammu a limited opportunity to mix up the opponent while they can not retreat to the relative safety of the air. The debuff will also stop attempts to fly or teleport into the air, however other moves that carry the character into the air(many DPs, and Strider's wallcling) can escape. If the opponent uses one of these moves to get into the air, they will still be unable to double jump. |
| }} | | }} |
| }} | | }} |
| Line 757: |
Line 743: |
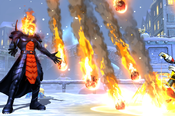
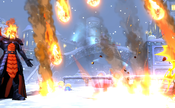
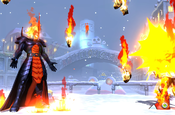
| Enhanced version of the 1-Destruction and 1-Creation spell. Dormammu calls forth a much larger Meteor Shower. They spread out semi-randomly in a similar vein to the small version, concentrated around halfscreen with a rare chance for some meteors to fall at fullscreen or right next to Dormammu. The shower lasts long enough that Dormammu can start a combo afterwards on hit with little effort. If it is blocked, he can use the blockstun caused to recharge his spells. By combining the lockdown from the meteors with additional lockdown from an assist, Dormammu can recharge all three of his spells after a successful Meteor cast, and repeat the process. | | Enhanced version of the 1-Destruction and 1-Creation spell. Dormammu calls forth a much larger Meteor Shower. They spread out semi-randomly in a similar vein to the small version, concentrated around halfscreen with a rare chance for some meteors to fall at fullscreen or right next to Dormammu. The shower lasts long enough that Dormammu can start a combo afterwards on hit with little effort. If it is blocked, he can use the blockstun caused to recharge his spells. By combining the lockdown from the meteors with additional lockdown from an assist, Dormammu can recharge all three of his spells after a successful Meteor cast, and repeat the process. |
|
| |
|
| Once begun, the Meteors will still fall even if the startup of the attack in interupted. Thus, this spell can act as a pseudo-reversal. If Dormammu gets even one frame of freedom to act, he can call down meteors, which will (hopefully) protect him from punishment. | | Once begun, the Meteors will still fall even if the startup of the attack is interrupted. Thus, this spell can act as a pseudo-reversal. If Dormammu gets even one frame of freedom to act, he can call down meteors, which will (hopefully) protect him from punishment. |
| }} | | }} |
| }} | | }} |
| Line 781: |
Line 767: |
| }} | | }} |
| }} | | }} |
|
| |
|
| |
|
| |
|
| === Hyper Combos === | | === Hyper Combos === |
| Line 800: |
Line 784: |
| |onhit=+8 | | |onhit=+8 |
| |onblock=-21 | | |onblock=-21 |
| |properties={{strk}} (last hit), mashable, Priority: High, Beam Durability: 1 per frame for 30 frames. | | |properties={{strk}} (last hit), mashable, Priority: High, Beam Durability: 1 per frame for 30 frames, scales by 0.965. |
| |description= | | |description= |
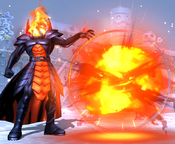
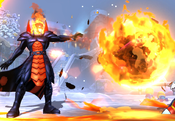
| Dormammu unleashes a huge stream of flames, acting as a beam hyper. This is Dormammu's standard combo ender. Due to its high speed and damage, it can also be used to snipe assist calls and slower grounded attacks from the opponent, or one reaction to an opponeent's projectile hypers in order to stuff them. | | Dormammu unleashes a huge stream of flames, acting as a beam hyper. This is Dormammu's standard combo ender. Due to its high speed and damage, it can also be used to snipe assist calls and slower grounded attacks from the opponent, or on reaction to an opponent's projectile hypers in order to stuff them. |
|
| |
|
| Chaotic Flame is advantageous on hit, enough that Dormammu can link normals afterward if done at close range. This is most commonly done as a 5L linked after a combo-ending hyper for slightly better damage and to force an air tech. It's actually possible to link 5M > 5S afterwards if the hyper is done early enough in a combo. | | Chaotic Flame is advantageous on hit, enough that Dormammu can link normals afterward if done at close range. This is most commonly done as a 5L/5M linked after a combo-ending hyper for slightly better damage and to force an air tech. It's actually possible to link 5M > 5S afterwards if the hyper is done early enough in a combo. |
| }} | | }} |
| }} | | }} |
| Line 825: |
Line 809: |
| |properties=Priority: High, Beam Durability: 5 per frame for 20 frames | | |properties=Priority: High, Beam Durability: 5 per frame for 20 frames |
| |description= | | |description= |
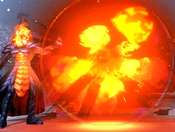
| Dormammu unleashes a large, floating ball of fire. The flare slowly tracks the opponent to any screen position. Stalking Flare never expires due to time, and has basically insurmountable durability. The only way for the opponent to avoid having to take the Flare once out is to somehow hit Dormammu, which causes Stalking Flare to immediately disappear. | | Dormammu unleashes a large, floating ball of fire. The flare slowly tracks the opponent to any screen position. Stalking Flare never expires due to time, and has basically insurmountable durability. The only way for the opponent to avoid having to take the Flare once out is to somehow hit Dormammu, which causes Stalking Flare to immediately disappear. This can be rendered impossible by tagging Dormammu out(and then not calling his assist). |
|
| |
|
| Because Stalking Flare remains active for so long and effectively forces the opponent to stay locked down, it can be used to cover Dormammu while he casts spells or Hard Tags to a teammate. There also is not a limit on having multiple Flares on screen at once, if you have the meter and feel like throwing out several. The chip damage adds up quickly. | | Because Stalking Flare remains active for so long and effectively forces the opponent to stay locked down, it can be used to cover Dormammu while he casts spells or Hard Tags to a teammate. There also is not a limit on having multiple Flares on screen at once, if you have the meter and feel like throwing out several. The chip damage adds up quickly. |
| Line 856: |
Line 840: |
|
| |
|
| You have enough time to charge once before and once after your level 3. This means that if you have a combo that you can charge during, you can guarantee a 3D0C after the level 3. | | You have enough time to charge once before and once after your level 3. This means that if you have a combo that you can charge during, you can guarantee a 3D0C after the level 3. |
| | |
| | If combo'ing after a throw, using this Hyper will remove the grab penalty. |
| | |
| | Due to a glitch, this Hyper is unable to hit opponents properly during pre-jump frames, unless they are glued to the floor by his 3C spell; this may cause unexpected whiffs when using it raw. |
| }} | | }} |
| }} | | }} |
| Line 916: |
Line 904: |
| |onhit=- | | |onhit=- |
| |onblock=-3 | | |onblock=-3 |
| |properties=Snapback | | |properties=Snapback, {{projnull}} |
| |description= | | |description= |
| Animation and hitbox based on 5H. | | Animation and hitbox based on 5H. |
| Line 930: |
Line 918: |
| |data= | | |data= |
| {{AttackData-UMVC3 | | {{AttackData-UMVC3 |
| |damage=27,000 | | |damage=30,000 |
| |guard=OH | | |guard=OH |
| |startup=- | | |startup=- |
| Line 943: |
Line 931: |
| }} | | }} |
|
| |
|
| | ==Team Position== |
|
| |
|
| == Team Position ==
| | Dormammu is almost invariably played '''Second.''' This enables his unique gameplan of coming onto the screen from a DHC and cleaning up for the point character, either via his exceptional control tools or his disgusting incoming mixups. Dormammu can also be a very powerful '''Anchor''', using X-factor and meter extremely well. He can also be a challenging but rewarding '''Point''', as demonstrated by Noel Brown at Evo 2024. |
|
| |
|
| Dormammu is most commonly played in the '''Second''' position. He provides good backline support with a strong assist, and has two very useful DHCs in Chaotic Flame and Stalking Flare, which are most easily accessed from the second slot. Dormammu's 8-way airdash and teleport give him an edge in escaping Oncoming mixups. This makes him less of a liability to have brought in from a dead Point character than most other picks. With access to Level 2 or 3 X-Factor, Dormammu's chip damage and sniping game become a very serious threat. Opponents basically can not call assists when Dormammu is on the ground for fear of eating Chaotic Flame -> X-Factor -> Chaotic Flame, which will quickly kill them. | | == Notable Shells == |
| | <tabber> |
| | |-| Dormammu + Doctor Doom = |
| | [[File:UMVC3 Doctor Doom Icon.png|center|100px]] |
| | <center>[[File:Alpha.png|20px]][[File:Beta.png|20px]][[File:Gamma.png|20px]]</center> |
| | Doctor Doom is arguably Dormammu's single best friend, and provides incredible unique utility to the Lord of the Dark Dimension. All three of Doctor Doom's assists are useful and helpful to Dormammu, with Hidden Missiles being a standout. As such, any point who can utilize Hidden Missiles and Dark Hole is a great fit for a team with a Dormammu/Doom shell. But that is by no means the only use case for the shell. With Plasma Beam, it enables such diverse points as Taskmaster, Spider-man, Wesker, and Felicia. While Molecular Shield has a more limited use case - not least due to it changing Doom's THC to Sphere Flame - were it not competing for real estate, it would still be a top 5 assist in the game. Dormammu additionally supports Doctor Doom very well, with Doom using Dark Hole well in neutral and combos. Finally, THC Chaotic Flame for 2 meters is a very potent tool in a Doom's arsenal. |
|
| |
|
| === Notable Synergies === | | [https://replaytheater.app/?game=umvc3&c1=Dormammu&p1c2=Doctor+Doom Replay Theater Footage] |
|
| |
|
| '''Haggar:''' Dark Hole assist has a huge amount of duration and projectile durability, which can help Haggar get in on keepaway style characters. Additionally, Dorm's Stalking Flare hyper provides a lot of synergy potential. Haggar can DHC to it if a reversal Lariat or 236XX attempt fails in order to avoid punishment. Also, Dorm can call out Stalking Flare and Flame Carpet (3H) then tag in Haggar. The opponent, especially on incoming, will have to block both of Dorm's attacks, giving Haggar time to attack.
| |
|
| |
|
| '''Players to Watch:''' Paradigm (Haggar/Dorm/Doom), Ranmasama (Haggar/Dorm/Magneto), Dragoomba (Skrull/Dorm/Haggar), JasonKido (Magneto/Dorm/Haggar)
| | === Players to Watch === |
| | {{PlayersToWatchTableHeader-UMVC3}} |
| | {{PlayersToWatchTableRow-UMVC3 |
| | | name = Noel B. Hungry |
| | | charaColorOne = {{CharaColor-UMVC3|Dormammu|1}} |
| | | charaColorTwo = {{CharaColor-UMVC3|Doctor_Doom|1}} |
| | | charaColorThree = {{CharaColor-UMVC3|Phoenix|1}} |
| | | region = East Coast |
| | | status = Active |
| | | notes = |
| | | replaysLink = [https://replaytheater.app/?game=umvc3&p1=noelbhungry Replay Theater]<br>[https://youtu.be/_ur0APyI__g?t=779 vs. Nolife @ CEO 2024]<br>[https://www.youtube.com/watch?v=uXt7AXukzIg&t=1813s vs. Rayray @ CEO 2024] |
| | }} |
| | {{PlayersToWatchTableRow-UMVC3 |
| | | name = Paradiggm |
| | | charaColorOne = {{CharaColor-UMVC3|Haggar|2}} |
| | | charaColorTwo = {{CharaColor-UMVC3|Dormammu|2}} |
| | | charaColorThree = {{CharaColor-UMVC3|Doctor_Doom|2}} |
| | | region = East Coast |
| | | status = Active |
| | | notes = |
| | | replaysLink = [https://replaytheater.app/?game=umvc3&p1=paradigm Replay Theater]<br>[https://youtu.be/P-eW689OWwU vs. Kellen @ X-factory #34] |
| | }} |
| | {{PlayersToWatchTableRow-UMVC3 |
| | | name = FilipinoChamp |
| | | charaColorOne = {{CharaColor-UMVC3|Magneto|3}} |
| | | charaColorTwo = {{CharaColor-UMVC3|Dormammu|3}} |
| | | charaColorThree = {{CharaColor-UMVC3|Doctor_Doom|3}} |
| | | region = West Coast |
| | | status = Inactive |
| | | notes = |
| | | replaysLink = [https://replaytheater.app/?game=umvc3&p1=FilipinoChamp Replay Theater]<br>[https://youtu.be/CrzUTXPFdJk vs TerryBogard @ Final Round 18] |
| | }} |
| | |} |
|
| |
|
| '''Magneto:''' Magneto often relies on DHCs to secure kills, since his own Level 1 Hypers do poor damage. Dormammu offers some fantastic DHC options to secure a kill - Chaotic Flame (236XX) deals great damage and is easy to DHC into, while Stalking Flare (214XX) lasts an extremely long time, giving Magneto time to tag back in and prepare a mixup for the next character. In general, Dorm provides lots of tools to lock down opponents for Magneto via Stalking Flare, Flame Carpet (3H) and Dark Hole assist. Since both Dorm and Magneto have practical TAC infinites, they can also always score a kill by TACing to each other.
| | |-| Dormammu + Magneto = |
|
| |
|
| '''Players to Watch:''' FChamp (Magneto/Dorm/Doom), Wentinel (Wesker/Dorm/Magneto), Ranmasama (Magneto/Dorm/Haggar), JasonKido (Magneto/Dorm/Haggar), Aces Return (Nova/Dorm/Magneto)
| | [[File:UMVC3 Magneto Icon.png|center|100px]] |
| | <center>[[File:Alpha.png|20px]]</center> |
|
| |
|
| '''Other Players to Watch:''' Angelic (Wolverine/Dorm/Shuma), SalutexMO (Shuma/Dorm/Rocket), Spartan Throne (Wolverine/Dorm/Iron Fist), iDom (Dante/Dorm/Strange) | | The Master of Magnetism and the Lord of the Dark Dimension are a tried-and-true pair, and work together in either order. When placed in front of Dormammu, Magneto is a capable point character who can compensate for Dorm's weaknesses whilst offering unique strengths of his own and benefiting from Dormammu's unique support. When placed behind Dorm, Magneto enables nasty teleport mixes and corner follow-ups that pump Dormammu's damage into the stratosphere. The "masta-CJ" - Call Disruptor and Teleport - is an iconic maneuver for a reason. S tier pair. |
|
| |
|
| == Combos == | | [https://replaytheater.app/?game=umvc3&c1=Dormammu&p1c2=Magneto Replay Theater Footage] |
|
| |
|
| === Solo Combos ===
| |
|
| |
|
| ==== No Starting Spell Charges ==== | | === Players to Watch === |
| | {{PlayersToWatchTableHeader-UMVC3}} |
| | {{PlayersToWatchTableRow-UMVC3 |
| | | name = FilipinoChamp |
| | | charaColorOne = {{CharaColor-UMVC3|Magneto|1}} |
| | | charaColorTwo = {{CharaColor-UMVC3|Dormammu|1}} |
| | | charaColorThree = {{CharaColor-UMVC3|Doctor_Doom|1}} |
| | | region = West Coast |
| | | status = Inactive |
| | | notes = |
| | | replaysLink = [https://replaytheater.app/?game=umvc3&p1=FilipinoChamp Replay Theater]<br>[https://youtu.be/CrzUTXPFdJk vs TerryBogard @ Final Round 18] |
| | }} |
| | {{PlayersToWatchTableRow-UMVC3 |
| | | name = JasonKido |
| | | charaColorOne = {{CharaColor-UMVC3|Haggar|2}} |
| | | charaColorTwo = {{CharaColor-UMVC3|Dormammu|2}} |
| | | charaColorThree = {{CharaColor-UMVC3|Magneto|2}} |
| | | region = East Coast |
| | | status = Active |
| | | notes = |
| | | replaysLink = [https://replaytheater.app/?game=umvc3&p1=JasonKido Replay Theater]<br>[https://youtu.be/LMW5px6R1VU?t=461 vs ChrisG @ Texas Showdown 2022] |
| | }} |
| | {{PlayersToWatchTableRow-UMVC3 |
| | | name = AcesReturn |
| | | charaColorOne = {{CharaColor-UMVC3|Nova|3}} |
| | | charaColorTwo = {{CharaColor-UMVC3|Dormammu|3}} |
| | | charaColorThree = {{CharaColor-UMVC3|Magneto|3}} |
| | | region = East Coast |
| | | status = Active |
| | | notes = |
| | | replaysLink = [https://replaytheater.app/?game=umvc3&p1=AcesReturn Replay Theater] |
| | }} |
| | |} |
|
| |
|
| <code><nowiki>j.5S, land, 2L > 5M > 5H > 6H xx 421H (switches sides), j.5H > j.5S, rejump, j.5M > j.5H > j.5S, rejump, j.5M > j.5H > j.5S, land, 5M > 5S sjc. j.5M > j.5M > j.5H > j.5S, land, 623X xx 236XX, 5M (815,000 for 1 bar, builds ~1.25 bars of meter)</nowiki></code> <br> | | |-| Dormammu + Shuma-Gorath = |
| | [[File:UMVC3 Shuma-Gorath Icon.png|center|100px]] |
| | <center>[[File:Alpha.png|20px]]</center> |
| | The Lord of the Dark Dimension works quite well with the Great One Who Slumbers. This pairing is iconic, and enables some fun shenanigans such as OTG THC chaotic flame, or following up after a DHC into Dormammu from Shuma-Gorath using eyes. The pair support one another exceptionally well and are considered best friends for a reason. S-tier pair. |
|
| |
|
| [https://youtu.be/Al8MV9iDba0?t=29 Video Timestamp]. Basic jump loop confirm off a midscreen hit. Switches sides, so it is useful if Dormammu is closer to the corner. <br> | | [https://replaytheater.app/?game=umvc3&c1=Dormammu&p1c2=Shuma-Gorath Replay Theater Footage] |
|
| |
|
| <code><nowiki>j.5S, land, 2L > 5M > 5H > 6H xx 214S, 9XX > 3XX xx j.5M > j.5H > j.5S (whiff), rejump, j.5M > j.5H > j.5S, rejump, j.5M > j.5H > j.5S, land, 5M > 5S sjc. j.5M > j.5M > j.5H > j.5S, land 623X xx 236XX (785,000 for 1 bar, builds 1.25 bars of meter)</nowiki></code> <br>
| |
|
| |
|
| [https://youtu.be/Al8MV9iDba0?t=15 Video Timestamp]. Alternate midscreen jump loop BnB. The only difference is you use Flight and airdashes to catch the opponent instead of teleport, so you do not switch sides. Flight does not automatically put you above minimum airdash height, so this requires some manual adjustment and is somewhat difficult. <br> | | === Players to Watch === |
| | {{PlayersToWatchTableHeader-UMVC3}} |
| | {{PlayersToWatchTableRow-UMVC3 |
| | | name = Angelic |
| | | charaColorOne = {{CharaColor-UMVC3|Wolverine|1}} |
| | | charaColorTwo = {{CharaColor-UMVC3|Dormammu|1}} |
| | | charaColorThree = {{CharaColor-UMVC3|Shuma-Gorath|1}} |
| | | region = West Coast |
| | | status = Active |
| | | notes = |
| | | replaysLink = [https://replaytheater.app/?game=umvc3&p1=Angelic Replay Theater] |
| | }} |
| | {{PlayersToWatchTableRow-UMVC3 |
| | | name = Spiral |
| | | charaColorOne = {{CharaColor-UMVC3|Dante|2}} |
| | | charaColorTwo = {{CharaColor-UMVC3|Dormammu|2}} |
| | | charaColorThree = {{CharaColor-UMVC3|Shuma-Gorath|2}} |
| | | region = East Coast |
| | | status = Active |
| | | notes = |
| | | replaysLink = [https://replaytheater.app/?game=umvc3&p1=Spiral Replay Theater] |
| | }} |
| | {{PlayersToWatchTableRow-UMVC3 |
| | | name = SickAbyss |
| | | charaColorOne = {{CharaColor-UMVC3|M.O.D.O.K.|3}} |
| | | charaColorTwo = {{CharaColor-UMVC3|Dormammu|3}} |
| | | charaColorThree = {{CharaColor-UMVC3|Shuma-Gorath|3}} |
| | | region = |
| | | status = Inactive |
| | | notes = |
| | | replaysLink = [https://replaytheater.app/?game=umvc3&p1=SickAbyss Replay Theater] |
| | }} |
| | |} |
|
| |
|
| <code><nowiki>2L > 2M > 5H > 6H xx 214S, j.5M > j.5H > j.5S, rejump, j.5M > j.5H > j.5S, rejump, j.5M > j.5H > j.5S, land, 5M > 5S sjc. j.5M > j.5M > j.5H > j.5S, land, 623L xx 236XX, 5M (777,000 for 1 bar, builds ~1.3 bars of meter)</nowiki></code> <br>
| | |-| Dormammu + Haggar= |
|
| |
|
| [https://youtu.be/Al8MV9iDba0?t=43 Video Timestamp]. Corner route. Do not use teleport, because the corner Wall Bounce is shorter and Teleport takes too long. <br> | | [[File:UMVC3 Haggar Icon.png|center|100px]] |
| | <center>[[File:Alpha.png|20px]]</center> |
|
| |
|
| <code><nowiki>j.5S, land, 2L > 2M > 2H > 5S sjc. j.5H xx j.214S, j.5L > j.5H xx j.236L, j.5H > j.5S, land, 623X xx 236XX (691,000 for 1 bar, builds 0.9 bars of meter)</nowiki></code> <br>
| | The Mayor of Metro City is a very strong partner for Dormammu, who can utilize Double Lariat to make himself significantly safer from rushdown. Lariat is one of Dormammu's single best assists, in both neutral and in combos, and Dormammu likewise elevates Haggar in return. The pair exhibit strong two-way synergy and elevate one another into better characters. |
|
| |
|
| [https://youtu.be/Al8MV9iDba0?t=81 Video Timestamp]. Basic Flight mode route. <br> | | [https://replaytheater.app/?game=umvc3&c1=Dormammu&p1c2=Haggar Replay Theater Footage] |
|
| |
|
| <code><nowiki>j.5S, land, 5M > 5H > 6H xx 421H, 2XX, j.5H, rejump, j.5M > j.5H > j.5S, rejump, j.5M > j.5H > j.5S, land, 2M > 5S sjc. j.5M > j.5M > j.5H > j.5S, land 623X xx 236XX, 5L (808,000 for 1 bar, builds ~1.25 bars of meter)</nowiki></code> <br> | | === Players to Watch === |
| | {{PlayersToWatchTableHeader-UMVC3}} |
| | {{PlayersToWatchTableRow-UMVC3 |
| | | name = JasonKido |
| | | charaColorOne = {{CharaColor-UMVC3|Haggar|1}} |
| | | charaColorTwo = {{CharaColor-UMVC3|Dormammu|1}} |
| | | charaColorThree = {{CharaColor-UMVC3|Magneto|1}} |
| | | region = East Coast |
| | | status = Active |
| | | notes = |
| | | replaysLink = [https://replaytheater.app/?game=umvc3&p1=JasonKido Replay Theater]<br>[https://youtu.be/LMW5px6R1VU?t=461 vs ChrisG @ Texas Showdown 2022] |
| | }} |
| | {{PlayersToWatchTableRow-UMVC3 |
| | | name = Ranmasama |
| | | charaColorOne = {{CharaColor-UMVC3|Haggar|2}} |
| | | charaColorTwo = {{CharaColor-UMVC3|Dormammu|2}} |
| | | charaColorThree = {{CharaColor-UMVC3|Magneto|2}} |
| | | region = East Coast |
| | | status = Active |
| | | notes = |
| | | replaysLink = [https://replaytheater.app/?game=umvc3&p1=Ranmasama Replay Theater]<br>[https://www.youtube.com/watch?v=baCmT3_AgJs&t=3341s vs RonanHealy@ CEOtaku 2022] |
| | }} |
| | {{PlayersToWatchTableRow-UMVC3 |
| | | name = Paradiggm |
| | | charaColorOne = {{CharaColor-UMVC3|Haggar|3}} |
| | | charaColorTwo = {{CharaColor-UMVC3|Dormammu|3}} |
| | | charaColorThree = {{CharaColor-UMVC3|Doctor_Doom|3}} |
| | | region = East Coast |
| | | status = Active |
| | | notes = |
| | | replaysLink = [https://replaytheater.app/?game=umvc3&p1=paradigm Replay Theater]<br>[https://youtu.be/P-eW689OWwU vs. Kellen @ X-factory #34] |
| | }} |
| | |} |
|
| |
|
| [https://youtu.be/E8JV4Vl93n8 Video Timestamp].
| | |-| Dormammu + Dante = |
|
| |
|
| <code><nowiki>j.5H, land, 2L > 5M > 5H > 6H xx 214L, 5M > 5H > 6H xx 214M xx 236XX, 5M > 5S sjc. 2147H, 623L xx 236XX, 5M (1,020,000 for 2 bars, builds ~1.1 bars of meter) </nowiki></code> <br> | | [[File:UMVC3 Dante Icon.png|center|100px]] |
| | <center>[[File:Alpha.png|20px]]</center> |
| | Dormammu/Dante is an interesting pairing that doesn't get as much play as it arguably should. There are two archetypical users of this shell and both play it with Dante on point and Dormammu behind. One of the benefits of this order is that Dante can actually kill off nearly any touch, in addition to building oodles of meter thanks to Dark Hole extensions. However, the real fun of the shell comes from putting Dante behind Dormammu, which unlocks insane THC tech - if you're willing to blow X-factor, too. All in all, Dormammu with Jam Session alone makes this pairing worth your time. |
|
| |
|
| [https://youtu.be/Al8MV9iDba0?t=120 Video Timestamp]. Corner only Spell route building and consuming two stacks mid-combo. <br> | | [https://replaytheater.app/?game=umvc3&c1=Dormammu&p1c2=Dante Replay Theater Footage] |
|
| |
|
| <code><nowiki>5H > 6H xx 214L, 5H > 6H xx 214L xx 236XX, 5M > 5S sjc. j.5M > j.5M > j.5H > j.5S, land, 214L, 214H, 6H xx 236L xx 236XX, 5L (1,008,000 for 2 bar, builds ~1.1 bars of meter) </nowiki></code> <br>
| | === Players to Watch === |
| | {{PlayersToWatchTableHeader-UMVC3}} |
| | {{PlayersToWatchTableRow-UMVC3 |
| | | name = Spiral |
| | | charaColorOne = {{CharaColor-UMVC3|Dante|1}} |
| | | charaColorTwo = {{CharaColor-UMVC3|Dormammu|1}} |
| | | charaColorThree = {{CharaColor-UMVC3|Shuma-Gorath|1}} |
| | | region = East Coast |
| | | status = Active |
| | | notes = |
| | | replaysLink = [https://replaytheater.app/?game=umvc3&p1=Spiral Replay Theater] |
| | }} |
| | {{PlayersToWatchTableRow-UMVC3 |
| | | name = iDom |
| | | charaColorOne = {{CharaColor-UMVC3|Dante|2}} |
| | | charaColorTwo = {{CharaColor-UMVC3|Dormammu|2}} |
| | | charaColorThree = {{CharaColor-UMVC3|Doctor_Strange|2}} |
| | | region = East Coast |
| | | status = Active |
| | | notes = |
| | | replaysLink = [https://replaytheater.app/?game=umvc3&p1=iDom Replay Theater] |
| | }} |
|
| |
|
| [https://youtu.be/Al8MV9iDba0?t=135 Video Timestamp]. Corner only Spell route buiilds and consuming three stacks mid-combo. <br>
| | </tabber> |
|
| |
|
| ==== With Starting Spell Charges ====
| | For more detailed information check out Dormammu's Teambuilding Page: https://wiki.supercombo.gg/w/UMVC3/Dormammu/Team_Building |
|
| |
|
| TBW
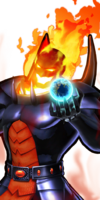
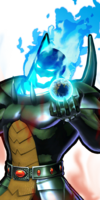
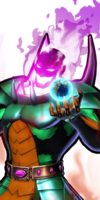
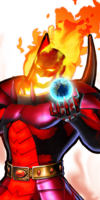
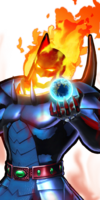
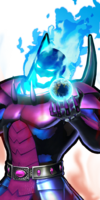
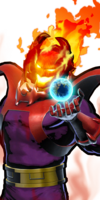
| | == Alternate Colors == |
| | |
| === X-Factor Combos === | |
| | |
| <code><nowiki>236XX xx X-Factor (Level 1+), 6H xx 421L, j.5H > j.5S, rejump, j.5M > j.5H > j.5S, rejump, j.5M > j.5H > j.5S, land, 2H > 5S sjc. j.5M > j.5M > j.5H > j.5S, land, 623X xx 236XX</nowiki></code> <br>
| |
|
| |
|
| [https://youtu.be/oZTMFs6raxg Video Guide]. X-Factor confirm off sniping an opponent with fullscreen Chaotic Flame.
| | {{Chara-Colors-UMVC3}} |
|
| |
|
| === Sample Team Combos ===
| |
|
| |
|
| [https://youtu.be/-PbeFbpZXDY Deadpool/Dorm/Strider] <br>
| | == Hitspheres and Hurtspheres == |
| [https://youtu.be/u9Nye7i6jpc Deadpool/Dorm/Taskmaster] <br>
| | {{#ev:youtube|VBxtNOTQtkI}} |
|
| |
|
| [https://youtu.be/EUv1cPN7T_M Dorm/Dante/Strange] <br>
| |
|
| |
| [https://youtu.be/5d14yzjTgKo Dorm Hard Tag to Doom] <br>
| |
|
| |
| [https://youtu.be/Rm7lC4GKAnk Dorm synergies with Doom, X-23, Trish, and Strider] <br>
| |
|
| |
| [https://youtu.be/BlP6nqaex9A Thor/Dorm/Doom] <br>
| |
|
| |
| === TAC Infinites ===
| |
|
| |
| [https://youtu.be/7SvZpeOjVrM All sides/spacings Tutorial] <br>
| |
|
| |
| [https://youtu.be/eQbJ0AvSW5g Alternate route] <br>
| |
|
| |
| == Alternate Colors ==
| |
|
| |
|
| [[File:Dorm_colors.jpg]]
| |
| {{Content Box|content= | | {{Content Box|content= |
| {{Navbox-UMVC3}} | | {{Navbox-UMVC3}} |
| }} | | }} |

