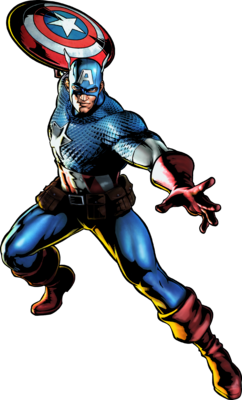
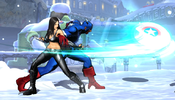
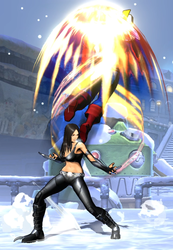
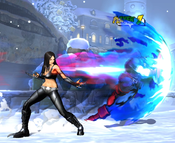
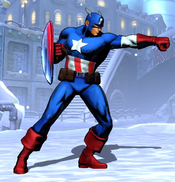
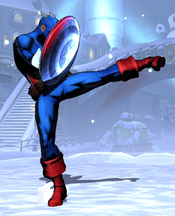
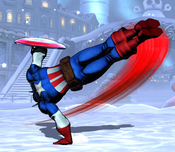
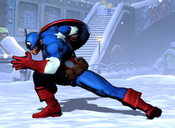
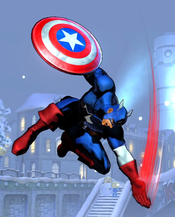
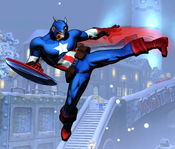
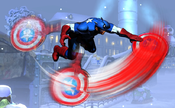
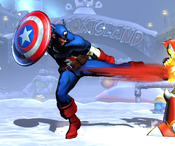
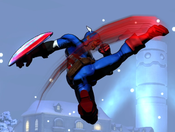
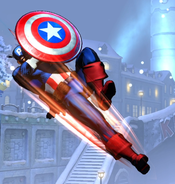
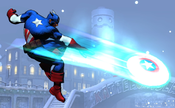
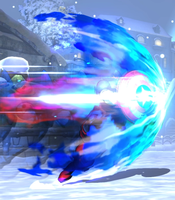
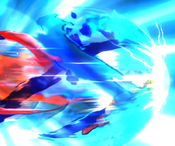
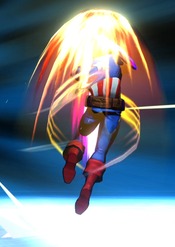
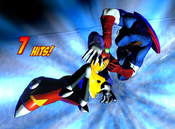
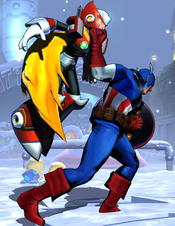
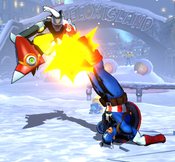
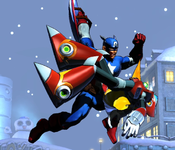
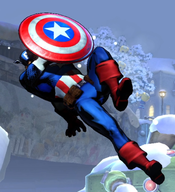
To no one's surprise, Doctor Doom is one of Captain America's best partners. Cap makes excellent use of Doctor Doom's capacity as a damage engine on 2nd, and with Hidden Missiles assist, Cap can act as his own damage engine by looping his incredibly damaging Hyper Charging Star. However, Plasma Beam and Molecular Shield are both also incredibly useful in neutral and in combos. With Doctor Doom 2nd, Cap gains access to incredibly damaging TACs that can win you a game. All in all, you can't go wrong picking Doom to slot behind Cap, on 2nd or 3rd.
Introduction
Gifted with an experimental "Super Soldier" serum during World War 2, Captain America has access to peak human strength, endurance, reflexes, and a genius tactical mind. Near the end of the war, he was frozen in ice, allowing him to be discovered and thawed in the present day. Captain America fights with his iconic vibranium-adamantium shield, which is considered indestructible.
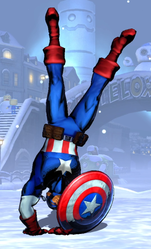
In UMvC3, Captain America is a basic "shoto" style character with simple but effective special moves. On the ground and in the air, he controls space using his "Shield Slash" 236X specials, which often lead to combos on hit. Meanwhile, he avoids his opponent's attacks using his double-jump, Cartwheel command dodge, and projectile-immune Charging Star 214X.
| Strengths | Weaknesses |
|---|---|
|
|
Move List
Assists
| Damage | Startup | Active | Recovery |
|---|---|---|---|
| 50,000 x2 | 41 | 51 | 131, 101 |
| On Hit | On Block | Guard | Properties |
| - | - | Mid | Priority: Low, Durability: 5 |
|
THC Hyper: Hyper Charging Star. Cap throws his shield, which travels horizontally at regular projectile height. After roughly 25 frames, the shield turns around and flies back to Cap. Both the initial throw and the return trip are separate attacks, with their own hit and durability. The shield travels just short of fullscreen distance. The gap between the two hits of this assist is dependent on spacing, as the second hit can only connect on the first hit. At long range, these two hits form a true blockstring, but a gap can exist if used at closer range. This can be used to create ambiguous mixups where the point character throws an opponent in the gap between the two hits. | |||
| Damage | Startup | Active | Recovery |
|---|---|---|---|
| 50,000 x3 | 29 | 12 | 145, 115 |
| On Hit | On Block | Guard | Properties |
| - | - | Mid | Invuln (as Crossover Counter) frames 1 - ???, Fixed Hitstun |
|
THC Hyper: Hyper Stars and Stripes. Has no invincibility as an assist, limited range and provides poor lockdown. It also uses a generally worse Team Hyper, and on hit tends to knock opponents too high in the air to be useful for combos. Notable mainly for being an invincible Crossover Counter, but Cap can not start a combo off this hit, except by simply canceling directly into Hyper Charging Star. | |||
| Damage | Startup | Active | Recovery |
|---|---|---|---|
| 53,000 x3 | 29 | 11 | 138, 108 |
| On Hit | On Block | Guard | Properties |
| - | - | Mid | |
|
THC Hyper: Hyper Charging Star. Recommended assist. Cap charges forward behind his shield, covering about half of fullscreen distance. The charge will nullify low and medium priority projectiles it comes into contact with while active (frames 28-36). It can be used to blow through an opponent's zoning, or as a counter-call to a projectile assist. Charging Star knocks the opponent very far away on hit, which makes it difficult to confirm off, and awkward to use in combos, except in the corner. | |||
Ground Normals
| Damage | Startup | Active | Recovery |
|---|---|---|---|
| 46,000 | 5 | 3 | 12 |
| On Hit | On Block | Guard | Properties |
| 0 | -2 | Mid | |
|
Rapid-fire high-aimed jab. Mashed 5L is useful as a low-risk anti-air or as a way to confirm juggles from jump height. Although it can hit normal-sized crouching opponents, it has slightly worse horizontal range against them. | |||
| Damage | Startup | Active | Recovery |
|---|---|---|---|
| 68,000 | 10 | 2 | 20 |
| On Hit | On Block | Guard | Properties |
| -2 | -4 | Mid | - |
|
Mainly notable for have the 5M > M follow-up Command Normal. | |||
| Damage | Startup | Active | Recovery |
|---|---|---|---|
| 80,000 | 16 | 4 | 24 |
| On Hit | On Block | Guard | Properties |
| -4 | -6 | Mid | - |
|
Has great range and a hefty amount of hitstun. Useful for juggling airborne opponents and confirming Shield Slash (236X) hits, although it is fairly slow. At the very edge of 5H's range, a chained 5S will whiff. | |||
| Damage | Startup | Active | Recovery |
|---|---|---|---|
| 30,000 | 4 | 3 | 15 |
| On Hit | On Block | Guard | Properties |
| -3 | -5 | Low | - |
|
Cap has an exceptional 2L. It has great range for a light normal, and is very fast at 4f startup. Can be thrown out to fish for hits with relative safety. 2L lowers Cap's hurtbox very slightly compared to just crouching, although it is not low enough profile to evade under projectiles. This move can be used as a gimmicky anti-air, since it will bring Cap low enough that some air attacks will whiff, and Cap can then catch the opponent with a trip guard. Note that 2L is not Rapid Fire - even though 5L is - and 2L is fairly negative on block. Staggered 2Ls that try to bait pushblock will lose to mashed L attacks from most characters. | |||
| Damage | Startup | Active | Recovery |
|---|---|---|---|
| 48,000 | 9 | 4 | 19 |
| On Hit | On Block | Guard | Properties |
| -3 | -5 | Mid | - |
|
Note: Not a low. Mainly used as chain filler. | |||
| Damage | Startup | Active | Recovery |
|---|---|---|---|
| 75,000 | 13 | 4 | 26 |
| On Hit | On Block | Guard | Properties |
| - | -8 | Low | |
|
Standard sweep attack. Can be used to get an opponent airborne for Shield Slash juggles. | |||
| Damage | Startup | Active | Recovery |
|---|---|---|---|
| 90,000 | 10 | 4 | 22 |
| On Hit | On Block | Guard | Properties |
| Launch | -4 | Mid | |
|
Cap's launcher is fairly fast and has good range. | |||
Aerial Normals
| Damage | Startup | Active | Recovery |
|---|---|---|---|
| 50,000 | 5 | 3 | 14 |
| On Hit | On Block | Guard | Properties |
| +12 | +10 | OH | Jump Cancellable |
|
- | |||
| Damage | Startup | Active | Recovery |
|---|---|---|---|
| 65,000 | 9 | 4 | 20 |
| On Hit | On Block | Guard | Properties |
| +17 | +15 | OH | Jump Cancellable |
|
- | |||
| Damage | Startup | Active | Recovery |
|---|---|---|---|
| 70,000 | 12 | 10 | 16 |
| On Hit | On Block | Guard | Properties |
| +19 | +17 | OH | Jump Cancellable |
|
Part of a set of three aerial heavy attacks, along with Air-Raid Kick and Anti-Ground Kick (8H and 2H, see Command Normals). j.5H is directed horizontally forward, and causes the largest amount of hitstun of the three. | |||
| Damage | Startup | Active | Recovery |
|---|---|---|---|
| 85,000 | 15 | 5 | 21 |
| On Hit | On Block | Guard | Properties |
| +19 | +17 | OH | |
|
Cap swings his shield in a wide arc underneath him. j.5S is a great jump-in with a deep cross-up hitbox. | |||
Command Normals
| Damage | Startup | Active | Recovery |
|---|---|---|---|
| 60,000 | 9 | 4 | 19 |
| On Hit | On Block | Guard | Properties |
| -2 | -5 | Mid | - |
|
Cap can perform a follow-up attack to his 5M if it hits or is blocked. The extra attack does not have any notable properties, and is mainly chain filler. | |||
| Damage | Startup | Active | Recovery |
|---|---|---|---|
| 73,000 | 10 | 3 | 23 |
| On Hit | On Block | Guard | Properties |
| +19 | +17 | OH | - |
|
Cap performs a kick with similar range and strength to his j.5H, but angled slightly upwards. Juggles opponents slightly higher than j.5H or j.2H, so it can be used to slightly adjust the opponents height in air combos. Cap can also just chain j.5H to this attack as combo filler. | |||
| Damage | Startup | Active | Recovery |
|---|---|---|---|
| 70,000 | 11 | 5 | 16 |
| On Hit | On Block | Guard | Properties |
| +19 | +17 | OH | - |
|
Cap performs a kick with similar range and strength to his j.5H, but angled downwards. This attack is a strong choice for an Airthrow OS (input as j.1H) - it will stuff opponents who try to jump up in pursuit of Cap with its solid hitbox, and then tech the airthrow if done too slowly. j.2H juggles opponents slightly lower than j.5H or j.8H, so it can be used to slightly adjust an opponent's height in air combos. Cap can also just chain j.5H to this attack as combo filler. | |||
Special Moves
| L |
Damage | Startup | Active | Recovery |
|---|---|---|---|---|
| 60,000 x2 | 21 | - | 30 | |
| On Hit | On Block | Guard | Properties | |
| - | - | Mid | ||
| M |
Damage | Startup | Active | Recovery |
| 60,000 x2 | 17 | - | 34 | |
| On Hit | On Block | Guard | Properties | |
| - | - | Mid | ||
| H |
Damage | Startup | Active | Recovery |
| 60,000 x2 | 13 | - | 38 | |
| On Hit | On Block | Guard | Properties | |
| - | - | Mid | ||
|
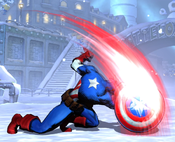
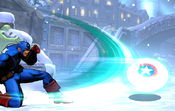
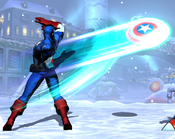
Cap throws his shield which acts as a regular projectile with average durability. Button strength alters the shield's trajectory. L version runs along the ground, and can hit OTG. M version travels horizontally above the ground, at a more standard projectile height. H version is tossed at a slight upwards angle. After ~25 frames, the shield will change direction and start to fly back towards Cap. The return trip is a separate hit with its own damage and durability. Shield Slash doubles as both a zoning and combo tool. L Shield Slash is Cap's OTG attack. If used from far enough away, the opponent will be comboed by both the initial hit and the return hit, allowing Cap to solo relaunch from a Hard Knockdown. Even point blank, Cap can use an OTG 236L and then cancel into Hyper Charging Star to finish combos. H Shield Slash will juggle airborne opponents with both hits even at close range, allowing Cap to confirm into more complex juggles. Despite not having exceptional coverage or durability, opponents have to respect Shield Slash in neutral due to how easy it is to confirm from. A raw shield slash will almost always hit twice, giving Cap ample time to dash up and begin a combo on hit. Cap can also use Shield Slash to confirm air-to-air hits, even at superjump height.
| ||||
| Damage | Startup | Active | Recovery |
|---|---|---|---|
| 60,000 x2 | 15 | - | Until Grounded |
| On Hit | On Block | Guard | Properties |
| - | - | Mid | |
|
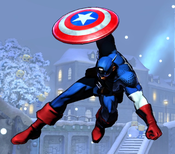
Air version of Shield Slash. Cap floats in the air while throwing his shield. It has roughly identical properties to the grounded version. It remains a useful zoning and combo tool. Button strength alters the shield's trajectory. H version is tossed at an upward angle, and M version is tossed directly horizontally forward, similar to how they work on the ground. L Air Shield Slash is thrown at a slight downwards angle, mirroring the Air H version. j.236L can also be used as an OTG, but it is more awkward and difficult to use than the grounded version, although it can be useful for juggling assist characters. | |||
| L |
Damage | Startup | Active | Recovery |
|---|---|---|---|---|
| 80,000 | 5 | 5 | 44 | |
| On Hit | On Block | Guard | Properties | |
| -12 | -27 | Mid | Invuln until frame 4, | |
| M |
Damage | Startup | Active | Recovery |
| 55,000 x2 | 5 | 11 | 50 | |
| On Hit | On Block | Guard | Properties | |
| -21 | -39 | Mid | Invuln until frame 6, | |
| H |
Damage | Startup | Active | Recovery |
| 50,000 x3 | 5 | 12 | 57 | |
| On Hit | On Block | Guard | Properties | |
| -26 | -47 | Mid | Invuln until frame 9, | |
|
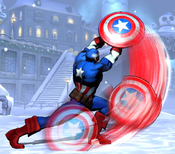
Very traditional dragon-punch style reversal. Is notable for being one of the few meterless invincible attacks in the game. Stars and Stripes has very poor risk/reward. It has no cancel options outside of canceling the very early frames before it becomes airborne into a hyper, (or activating X-Factor). On a successful hit, Cap gets only a small amount of damage from the uppercut itself, and gains no meaningful follow-up. In fact, Stars and Stripes is very negative on hit, and can even be punishable on hit by certain characters. | ||||
| L |
Damage | Startup | Active | Recovery |
|---|---|---|---|---|
| 100,000 | 5 | 9 | 30 | |
| On Hit | On Block | Guard | Properties | |
| +13 | -17 | Mid | ||
| M |
Damage | Startup | Active | Recovery |
| 65,000 x2 | 5 | 11 | 35 | |
| On Hit | On Block | Guard | Properties | |
| +4 | -22 | Mid | ||
| H |
Damage | Startup | Active | Recovery |
| 53,000 x3 | 5 | 13 | 43 | |
| On Hit | On Block | Guard | Properties | |
| -3 | -17 | Mid | ||
|
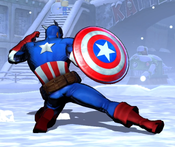
Cap charges forward behind his shield. Button strength increases the number of hits, duration of the move, and distance traveled. L version travels about 25% of fullscreen distance, M version travels just over half of fullscreen, and H version travels just short of fullscreen. Charging Star (or the threat of it) is what allows Cap to compete in zoning battles with other projectile heavy characters. All versions of Charging Star nullify low and medium priority projectiles for the duration of the attack. As long as Cap is on the ground, he can react to projectiles or assist calls from the opponent with Charging Star to quickly close the distance and punish. A Charging Star canceled into Hyper Charging Star will easily reach across the whole screen, and deals enough damage to heavily discourage opponents from trying to contest it. As a bonus, Charging Star also has a fairly good hitbox. Despite not being invincible to non-projectile hits, it still has a fairly good chance of beating an opponent's physical attacks as well. If L Charging Star hits an airborne opponent on the very top of its hitbox, the opponent will be juggled long enough for Cap to link another Charging Star. This can be an infinite when performed in X-Factor, but can also be used to a small bit of extra damage near the end of certain combos. Despite what the animation might suggest, Cap can perform this attack even if he is not currently holding his shield, and suffers no penalty from doing so. | ||||
| Damage | Startup | Active | Recovery |
|---|---|---|---|
| - | - | 34 | - |
| On Hit | On Block | Guard | Properties |
| - | - | - | Invuln until frame 13, passthrough |
|
Cap performs an acrobatic flip, traveling about half of fullscreen distance. During this time, he can pass through opponents. This can be used to escape the corner, or to perform simple, ambiguous cross-ups when used alongside an assist call. Backflip also has a respectable amount of invincibility. It is frame 1 invuln, and actually has more total invincibility than Stars and Stripes. This invincibility does wear off fairly early into the long duration of the move, but the raw distance covered by Backflip can make it surprisingly difficult to punish. Please note that Backflip is vulnerable to being thrown, even during its invincibility frames. | |||
Hyper Combos
| Damage | Startup | Active | Recovery |
|---|---|---|---|
| 30,000 x10 ~ x20 | 5+2 | 11 | 45 |
| On Hit | On Block | Guard | Properties |
| - | -23 | Mid | |
|
Enhanced version of Charging Star. It features a much larger hitbox, can now also destroy high priority projectiles, and deals very impressive damage. It can be used as a threatening counter-call in neutral in mostly the same way as a regular Charging Star, although keep in mind that this hyper does not have any non-projectile invincibility, and can be stuffed by fast attacks. This is Cap's primary combo ender, usually canceled into from an OTG 236L or from any version of regular Charging Star. | |||
| Damage | Startup | Active | Recovery |
|---|---|---|---|
| 70,000 x2 + 60,000 x3 | 12+0 | 11(7)12(7)13 | 38 |
| On Hit | On Block | Guard | Properties |
| +11 | -26 | Mid | Invuln until frame 24, |
|
Enhanced version of Stars and Stripes. It is an invincible reversal hyper, usually activated in response to a hyper from the opponent, or as a desperation act to escape an opponent's offense. It knocks the opponent fairly high into the air on hit, which makes it awkward to DHC out of. This hyper has zero frames of post-flash startup. This means that - at point blank range - if an opponent is not already holding block when the superflash begins, the attack can not be blocked. It also prevents an opponent from activating X-Factor or DHCing in order to protect themselves in response to the super flash. | |||
| Damage | Startup | Active | Recovery |
|---|---|---|---|
| 440,000 | 22+2 | 16 | 18 |
| On Hit | On Block | Guard | Properties |
| - | -12 | Mid | Invuln frames 16-36, |
|
Cinematic level 3 hyper. Although it has invincibility, the move does not become invincible until fairly late, and so it is difficult to use except as a combo ender. As a level 3 hyper, it ignores damage scaling, allowing it to be used to secure a kill. Final Justice is much slower to start up than Cap's other hypers, and also has a smaller hitbox than Hyper Charging Star. Cap can not simply replace a level 1 hyper ender with his level 3 in standard combos, the way many other characters can. | |||
Universal Mechanics
| Damage | Startup | Active | Recovery |
|---|---|---|---|
| 80,000 | 1 | 1 | - |
| On Hit | On Block | Guard | Properties |
| - | - | Throw | |
|
Standard ground throw that results in the opponent knocked down next to Cap. Forward throw places the opponent on the ground immediately in front of him. Backthrow sends the opponent a good distance away, but also causes Cap to roll in the direction of the opponent, so he still ends up fairly close. Cap can follow up either of these with an OTG Shield Slash, but both throws place the opponent too close for both hits of Shield Slash to combo. | |||
| Damage | Startup | Active | Recovery |
|---|---|---|---|
| 80,000 | 1 | 1 | - |
| On Hit | On Block | Guard | Properties |
| - | - | Airthrow | |
|
Cap spikes his opponent down towards the ground immediately below him, then starts to fall down himself. Regardless of the height performed, it is always just barely possible to land and perform an OTG 236L. | |||
| Damage | Startup | Active | Recovery |
|---|---|---|---|
| 50,000 | 2 | 4 | 24 |
| On Hit | On Block | Guard | Properties |
| - | -6 | Mid | Snapback |
|
Animation and hitbox based on 5H. | |||
| Damage | Startup | Active | Recovery |
|---|---|---|---|
| 30,000 | - | 22 | 36 |
| On Hit | On Block | Guard | Properties |
| - | -17 | OH | |
|
- | |||
Team Position
Cap is most commonly picked as a Point character, where he can more easily utilize multiple assists to help with his zoning game, and where his own below-average assists are less relevant. He sometimes also takes the Second spot, especially on teams where character order is intended to be more fluid, or where he may be DHC'd in early.
Although he can be quite threatening with assists backing him up, Cap makes for a poor anchor. He has very limited offensive options, and limited ways to deal significant safe chip damage.
Notable Supports
Likewise, Vergil's appearance on this list should not surprise you. The Son of Sparda is an incredible partner for Captain America, especially when placed directly behind him on Second position. Captain America can DHC directly from Charging Star into Spiral Swords for incredibly damaging extensions that secure kills which he might otherwise struggle with. Furthermore, Captain America's Shield Slash assist allows Vergil to pick up off High Time, making this a uniquely utilitarian pairing. Rapid Slash is an incredible assist in neutral for Captain America, as he can throw out a charging star to catch the opponent pressing and, if he is blocked or whiffs, make it safe with Rapid Slash. S-tier pairing.
Spencer, like other damage engines, is quite useful for Captain America. Cap doesn't use bounces, so Spencer gets full looped Maneuvers after Hyper Charging Star. This combined with a good beam on third and Spencer incomings can make this a truly nasty pair. Additionally, cartwheel + slant shot is a very potent neutral and incoming tool. Spencer compliments Cap very well, and will usually be placed directly behind him on the Second position.
Iron Mans Unibeam is, arguably, the single best assist in the game for Captain America. However, it is attached to the albatross that is Iron Man. Struggle Doom can do everything that the Lord of Latveria can do, but he has to work a lot harder to get there. Still, if you really like the character, he's an excellent choice to back up the Captain, especially when paired with the likes of Doom's hidden missiles or Sentinel's drones.
Cap/Sentinel is a time-tested pairing with a surprisingly high ceiling. Cap makes great use of drones in neutral between cartwheel and anti-ground kick. He gets unique extensions, such as looping charging stars with proper spacing. Plasma Storm is a very damaging DHC and Hyper Sentinel Force is a safe one, making Sentinel a capable 2nd or 3rd behind Cap.
Rocket Raccoon is arguably the third best support character in the game. This is just as true for Captain America, who makes great use of his Spitfire or Log Trap assists in neutral and in combos. Rocket 2nd gives Cap a damaging DHC in Rock n Roll and a safe one in Mad Hopper. Especially when paired with Doctor Strange's Bolts of Balthakk, this is a very tricksy and powerful pair.
Bolts of Balthakk has a case for Captain America's single best assist in neutral and combos. It allows for unique extensions that build oodles of meter and for uniquely powerful cartwheel mixups. Doctor Strange makes a powerful Anchor behind Captain America and strong mid such as Doctor Doom, Rocket Racoon, or Vergil. Having Doctor Strange on third means that Captain America can take advantage of Spell of Vishanti THC. The knockdown off of Hyper Charging Star lasts long enough to link an OTG THC afterward - if you're willing to spend 4 bars.
Daggers is another of Cap's best assists in neutral, and Arthur backs up the captain very well. Goddess Bracelet is a highly-damaging DHC and King's Armor is a safe one. Cap backed up by gold daggers is truly belligerent, though he can do work even with the unempowered ones. Arthur thus makes an excellent 2nd or 3rd behind Cap when paired with the likes of Doctor Doom or Vergil.
Last but not least, Strider Hiryu is a very powerful partner for Cap, with his strong OTG game and lack of anti-air options. Captain America backed by Vergil and Strider in particular is a very nasty team with surprisingly strong anti-meta capabilities. Vajra combined with Cartwheel is very strong, and Cap is one of the best characters in the game at converting off of it. Great pair.
Alternate Colors
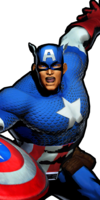
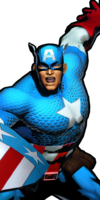
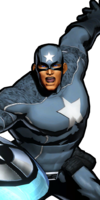
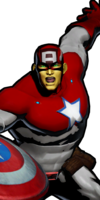
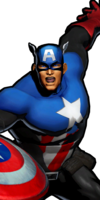
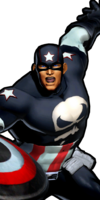
| Color 1 | Color 2 | Color 3 | Color 4 | Color 5 | Color 6 | Alt Color |
|---|---|---|---|---|---|---|
|
|
|
|
|
|
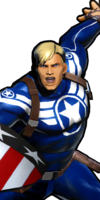
|

