|
|
| (775 intermediate revisions by 26 users not shown) |
| Line 1: |
Line 1: |
| {{Character Top SF6 | chara={{SUBPAGENAME}} }} | | {{Character Top SF6 | chara={{SUBPAGENAME}} }} |
|
| |
|
| | |
| | ===Drink Levels=== |
| | {| class="wikitable" |
| | |- |
| | |+ style="text-align:center" | Jamie's Drink Levels (DL) Effects |
| | ! !! Damage Scaling !! Target Combo !! Specials !! Normals |
| | |- style="text-align: center |
| | ! Drink Level 0 |
| | |90% || [[Street_Fighter_6/Jamie#2HK~HK~P|Phantom Sway]] ({{clr|HK|2HK}}~{{clr|HK|HK}}~P) || [[Street_Fighter_6/Jamie#The_Devil_Inside_(22P)|The Devil Inside]] (22P) / [[Street_Fighter_6/Jamie#Freeflow_Strikes_(236P)|Freeflow Strikes]] (236P) / [[Street_Fighter_6/Jamie#Swagger_Step_(214P)|Swagger Step]] (214P) / [[Street_Fighter_6/Jamie#Arrow_Kick_(623K)|Arrow Kick]] (623K) || Default normals |
| | |- style="text-align: center |
| | ! Drink Level 1 |
| | | 95% || [[Street_Fighter_6/Jamie#5LP~LK~MP|Bitter Strikes]] ({{clr|LP|5LP}}~{{clr|LK|LK}}~{{clr|MP|MP}}) || [[Street_Fighter_6/Jamie#Luminous_Dive_Kick_(j.214K)|Luminous Dive Kick]] (j.214K) || Increased range on {{clr|LP|5LP}} |
| | |- style="text-align: center |
| | ! Drink Level 2 |
| | | 100% || [[Street_Fighter_6/Jamie#6MK~MK~P|Full Moon Kick]] ({{clr|MK|6MK}}~{{clr|MK|MK}}~P) || [[Street_Fighter_6/Jamie#Bakkai_(236K)|Bakkai]] (236K) || Increased range on {{clr|MK|6MK}} |
| | |- style="text-align: center |
| | ! Drink Level 3 |
| | | 105% || [[Street_Fighter_6/Jamie#4HP~HP~HK|Intoxicated Assault]] ({{clr|HP|4HP}}~{{clr|HP|HP}}~{{clr|HK|HK}}) || [[Street_Fighter_6/Jamie#Tenshin_(63214K)|Tenshin]] (63214K) || Increased pushback on {{clr|HP|4HP}} |
| | |- style="text-align: center |
| | ! Drink Level 4 |
| | | 110% || [[Street_Fighter_6/Jamie#6HK~4HK~P|Ransui Haze]] ({{clr|HK|6HK}}~{{clr|HK|4HK}}~P) || [[Street_Fighter_6/Jamie#Swagger_Hermit_Punch_(214P~6P)|Swagger Hermit Punch]] (214P~6P) <br> |
| | Enhanced [[Street_Fighter_6/Jamie#Freeflow_Strikes_(236P)|Freeflow Strikes]] (236P) |
| | | Increased range on {{clr|HK|6HK}} |
| | |- style="text-align: center |
| | ! The Devils Song (SA 2) |
| | | 105% || All Target Combos || All Specials || All Normals |
| | |- |
| | ! Colspan="5" | Unless otherwise specified, most moves will display their DL2 version, making it easy to calculate damage values for other Drink Levels.<br>For moves that only exist at DL3 or DL4, the lowest possible Drink Level version will be displayed by default. |
| | |} |
| | |
| | |
| | <center>{{FrameDataKey-SF6}}</center> |
| == Normals == | | == Normals == |
| === Standing Normals === | | === Standing Normals === |
| ====<font style="visibility:hidden; float:right">5lp</font>==== | | ====<font style="visibility:hidden; float:right">5LP</font>==== |
| {{MoveDataCargo | | {{MoveDataCargo |
| | title = Stand LP | | | title = Standing Light Punch |
| | subtitle = | | | subtitle = |
| | input = 5LP | | | input = {{classic_sf6}} 5LP<br>{{modern_sf6}} 5L |
| | images = | | | images = |
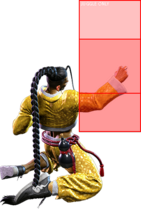
| {{MoveDataCargoImage|Jamie_5lp|caption=}} | | {{MoveDataCargoImage|imageHeight=160px|Jamie_5lp|caption=DL0}} |
| | info = | | ---- |
| | {{MoveDataCargoImage|imageHeight=160px|Jamie_5lp_dl2|caption=DL1+}} |
| | | hitboxes = |
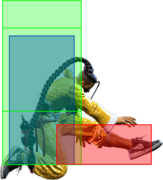
| | {{MoveDataCargoImage|hitbox=yes|imageHeight=160px|Jamie_5lp|caption=DL0}} |
| | ---- |
| | {{MoveDataCargoImage|hitbox=yes|imageHeight=160px|Jamie_5lp_dl2|caption=DL1+}} |
| | | info = |
| {{AttackDataCargo-SF6/Query|Jamie_5lp}} | | {{AttackDataCargo-SF6/Query|Jamie_5lp}} |
| | * '''Cancel Hitconfirm Window:''' 12f |
| | * '''{{clr|DR|Drive Rush}} cancel advantage:''' {{sf6-adv|VP|+4}} oH / {{sf6-adv|M|-1}} oB |
| | * '''{{clr|SA|SA2}} cancel advantage:''' {{sf6-adv|VP|+7}} oH / {{sf6-adv|P|+2}} oB |
| | * '''Drink cancel advantage:''' {{sf6-adv|VM|-37}} oH / {{sf6-adv|VM|-42}} oB |
| | * Applies 20% damage scaling to next hit when beginning a combo (100/80/70...) |
| | <br> |
| | Overshadowed by {{clr|L|2LP}} and {{clr|L|5LK}}, this normal doesn't see much use until Jamie has a drink. The frame data of this normal gets worse above Drink Lv.1 but makes up for it in other ways. |
| | |
| | {{AttackDataCargo-SF6/Query|Jamie_5lp_dl2}} |
| | * Damage DL1-DL4: 285/300/315/330 |
| | * '''Cancel Hitconfirm Window:''' 13f |
| | * '''{{clr|DR|Drive Rush}} cancel advantage:''' {{sf6-adv|VP|+4}} oH / {{sf6-adv|M|-1}} oB |
| | * '''{{clr|SA|SA2}} cancel advantage:''' {{sf6-adv|VP|+7}} oH / {{sf6-adv|P|+2}} oB |
| | * '''Drink cancel advantage:''' {{sf6-adv|VM|-37}} oH / {{sf6-adv|VM|-42}} oB |
| | * Applies 20% damage scaling to next hit when beginning a combo (100/80/70...) |
| | <br> |
| | At Drink Lv.1 and above, {{clr|L|5LP}} becomes Jamie's longest range light normal and has a powerful Target Combo cancel into [[{{PAGENAME}}#5LP~LK~MP|{{clr|L|LK}}~{{clr|M|MP}}]], which allows for strong confirms from light normals. The range is slightly worse against crouching opponents. |
| }} | | }} |
| ====<font style="visibility:hidden; float:right">5lp</font>==== | | |
| | ====<font style="visibility:hidden; float:right">5MP</font>==== |
| {{MoveDataCargo | | {{MoveDataCargo |
| | title = Stand LP (DR1) | | | title = Standing Medium Punch |
| | subtitle = | | | subtitle = |
| | input = 5LP | | | input = {{classic_sf6}} 5MP<br>{{modern_sf6}} 5M |
| | images = | | | images = |
| {{MoveDataCargoImage|Jamie_5lp|caption=}} | | {{MoveDataCargoImage|imageHeight=180px|Jamie_5mp_dl2|caption=}} |
| | info = | | | hitboxes = |
| {{AttackDataCargo-SF6/Query|Jamie_5lp}} | | {{MoveDataCargoImage|hitbox=yes|imageHeight=190px|Jamie_5mp_dl2|caption=}} |
| | | info = |
| | {{AttackDataCargo-SF6/Query|Jamie_5mp_dl2}} |
| | * Damage DL0-DL4: 540/570/600/630/660 |
| | <br> |
| | Jamie's only plus on block normal, {{clr|M|5MP}} can link to {{clr|L|5LK}} or Drink Lv.1 {{clr|L|5LP}} at close range. Despite this, it is often awkward to use for pressure as it leaves Jamie outside of normal throw range. This normal is best used in {{clr|DR|Drive Rush}} confirms, as it gains a link to {{clr|H|2HP}}; at Drink Lv.3 or higher, {{clr|DR|DR~}}{{clr|M|5MP}} gives enough block advantage for a tick command throw that beats any non-invincible reversal. |
| | |
| | While much stubbier than {{clr|M|2MK}} or {{clr|M|5MK}}, this move holds more value as a counter-poke than one might think. On top of having a decent disjoint, a {{clr|PC|Punish Counter}} becomes {{sf6-adv|VP|+9}}, just enough advantage to link into {{clr|H|2HK}}, or {{clr|SA|SA1}} from even farther out. |
| }} | | }} |
| ====<font style="visibility:hidden; float:right">5mp</font>==== | | |
| | ====<font style="visibility:hidden; float:right">5HP</font>==== |
| {{MoveDataCargo | | {{MoveDataCargo |
| | title = Stand MP | | | title = Standing Heavy Punch |
| | subtitle = | | | subtitle = |
| | input = 5MP | | | input = {{classic_sf6}} 5HP<br>{{modern_sf6}} 5H |
| | images = | | | images = |
| {{MoveDataCargoImage|Jamie_5mp|caption=}} | | {{MoveDataCargoImage|imageHeight=180px|Jamie_5hp_dl2|caption=''Neutral is a myth, and footsies are a scam.''}} |
| | info = | | | hitboxes = |
| {{AttackDataCargo-SF6/Query|Jamie_5mp}} | | {{MoveDataCargoImage|hitbox=yes|imageHeight=100px|Jamie_5hp_dl2|caption=}} |
| | | info = |
| | {{AttackDataCargo-SF6/Query|Jamie_5hp_dl2}} |
| | * Damage DL0-DL4: 810/855/900/945/990 |
| | * {{clr|PC|Counter-hit/Punish Counter}} bonus frame advantage carries through all 3 hits |
| | ** {{clr|PC|Punish Counter}} Drive damage only applies to 3rd hit (no Drive Dmg if canceled) |
| | * High juggle potential; puts airborne opponents into {{sf6-jug|limited juggle}} state |
| | ** Last 2 hits maintain juggle state and allow for a follow-up juggle |
| | * '''Cancel Hitconfirm Window:''' 18f |
| | ** Special/{{clr|DR|DR}} cancel is delayed until after 3rd recovery frame of 2nd hit |
| | * '''{{clr|DR|Drive Rush}} cancel advantage:''' {{sf6-adv|VP|+8}} oH / {{sf6-adv|P|+2}} oB |
| | * '''{{clr|SA|SA2}} cancel advantage:''' {{sf6-adv|VP|+11}} oH / {{sf6-adv|VP|+5}} oB |
| | * '''Drink cancel advantage:''' {{sf6-adv|VM|-33}} oH / {{sf6-adv|VM|-39}} oB |
| | <br> |
| | The fastest heavy normal in the game at 5f startup, this button can break {{clr|DR|Drive Impact}} armor with its 3 hits. This is especially useful out of {{clr|DR|Drive Rush}}, which gives Jamie a combo on hit or {{sf6-adv|P|+1}} pressure on block. The 2nd hit can be canceled into {{clr|DR|Drive Rush}} for a {{clr|M|5MP}} > {{clr|H|2HP}} confirm, but this is susceptible to reversals since the cancel is only {{sf6-adv|P|+2}} on block. |
| | |
| | The first 2 hits have finicky range and low damage; since the cancel happens before the 3rd hit, this means that it's usually weaker and less consistent than {{clr|L|5LK}} in hitconfirm combos. In juggles where the last hit connects, it can be used to add free damage since it no longer requires a cancel. Canceling the first 2 hits into {{clr|DR|Drive Impact}}, while leaving a large blockstring gap, can be tricky to react to since the opponent is expecting the 3rd hit to connect. |
| | |
| | From longer ranges where only the 3rd hit connects, {{clr|H|5HP}} is functionally a 12f advancing non-cancelable poke. This is great for approaching a burned out opponent, or if you want to attempt a Perfect Parry when the opponent takes their turn back. It also creates a spacing trap where most characters can only press one light normal; blocking once and then mashing another immediate {{clr|H|5HP}} can often {{clr|PC|Counter-hit}} opponents who aren't aware of this trap. The advantage on hit/block can be up to 2f better when spaced at max range. |
| }} | | }} |
| ====<font style="visibility:hidden; float:right">5hp</font>==== | | |
| | ====<font style="visibility:hidden; float:right">5LK</font>==== |
| {{MoveDataCargo | | {{MoveDataCargo |
| | title = Stand HP | | | title = Standing Light Kick |
| | subtitle = | | | subtitle = |
| | input = 5HP | | | input = {{classic_sf6}} 5LK<br>{{modern_sf6}} -- |
| | images = | | | images = |
| {{MoveDataCargoImage|Jamie_5hp|caption=}} | | {{MoveDataCargoImage|imageHeight=150px|Jamie_5lk_dl2|1|caption=}} |
| | info = | | ---- |
| {{AttackDataCargo-SF6/Query|Jamie_5hp}} | | {{MoveDataCargoImage|imageHeight=150px|Jamie_5lk_dl2|2|caption=}} |
| | | hitboxes = |
| | {{MoveDataCargoImage|hitbox=yes|imageHeight=140px|Jamie_5lk_dl2|1|caption=}} |
| | ---- |
| | {{MoveDataCargoImage|hitbox=yes|imageHeight=140px|Jamie_5lk_dl2|2|caption=}} |
| | | info = |
| | {{AttackDataCargo-SF6/Query|Jamie_5lk_dl2}} |
| | * Damage DL0-DL4: 270/285/300/315/330 |
| | * Chains into {{clr|L|5LK}}/{{clr|L|2LP}}/{{clr|L|2LK}} |
| | * '''Cancel Hitconfirm Window:''' 13f |
| | ** {{clr|DR|DR}} cancel is delayed until after 2nd active frame |
| | * '''{{clr|DR|Drive Rush}} cancel advantage:''' {{sf6-adv|VP|+5}} oH / {{sf6-adv|P|+1}} oB |
| | * '''{{clr|SA|SA2}} cancel advantage:''' {{sf6-adv|VP|+9}} oH / {{sf6-adv|VP|+5}} oB |
| | * '''Drink cancel advantage:''' {{sf6-adv|VM|-35}} oH / {{sf6-adv|VM|-39}} oB |
| | * Applies 20% damage scaling to next hit when beginning a combo (100/80/70...) |
| | <br> |
| | Jamie's {{clr|L|5LK}} can be chained into, making it more similar to a standard {{clr|L|5LP}}. It has quite good range for footsies and light chain confirms. It has the unique ability to chain into itself infinitely on whiff, allowing Jamie to "dance" with the animation. Jamie shifts forward during the {{clr|L|5LK}} animation, so chaining out of it at the earliest timing will act as a sort of "kara-cancel" to keep him closer to the opponent. |
| | |
| | {{clr|L|5LK}} can combo into {{clr|L|LP}} or {{clr|OD|OD}} Freeflow Strikes, any Arrow Kick, or {{clr|SA|SA1}}/{{clr|SA|SA3}}. Slower specials like Bakkai or Swagger Step (both of which are far stronger in Super cancels) require stronger combo routes. |
| }} | | }} |
| ====<font style="visibility:hidden; float:right">5lk</font>==== | | |
| | ====<font style="visibility:hidden; float:right">5MK</font>==== |
| {{MoveDataCargo | | {{MoveDataCargo |
| | title = Stand LK | | | title = Standing Medium Kick |
| | subtitle = | | | subtitle = |
| | input = 5LK | | | input = {{classic_sf6}} 5MK<br>{{modern_sf6}} A[M] |
| | images = | | | images = |
| {{MoveDataCargoImage|Jamie_5lk|caption=}} | | {{MoveDataCargoImage|imageHeight=170px|Jamie_5mk_dl2|caption=}} |
| | info = | | | hitboxes = |
| {{AttackDataCargo-SF6/Query|Jamie_5lk}} | | {{MoveDataCargoImage|hitbox=yes|imageHeight=170px|Jamie_5mk_dl2|caption=}} |
| | | info = |
| | {{AttackDataCargo-SF6/Query|Jamie_5mk_dl2}} |
| | * Damage DL0-DL4: 540/570/600/630/660 |
| | * '''Cancel Hitconfirm Window:''' 15f |
| | * Leg hurtbox is raised on frames 4-12 (can avoid low pokes) |
| | * '''{{clr|DR|Drive Rush}} cancel advantage:''' {{sf6-adv|VP|+12}} oH / {{sf6-adv|VP|+7}} oB |
| | * '''{{clr|SA|SA2}} cancel advantage:''' {{sf6-adv|VP|+15}} oH / {{sf6-adv|VP|+10}} oB |
| | * '''Drink cancel advantage:''' {{sf6-adv|VM|-29}} oH / {{sf6-adv|VM|-34}} oB |
| | <br> |
| | {{clr|M|5MK}} is Jamie's premiere mid-range poke. A {{clr|DR|Drive Rush}} buffer can be used to start your block pressure or hitconfirm into a combo. It can combo naturally into {{clr|M|214MP}}/{{clr|OD|214PP}}, and is Jamie's only medium normal that can combo into {{clr|H|214HP}} on {{clr|PC|Punish Counter}}. |
| | |
| | The raised leg hurtbox allows {{clr|M|5MK}} to interact favorably with many low pokes in neutral, which is important for dealing with characters that have a longer range {{clr|M|2MK}}. This button is 3f slower than his own {{clr|M|2MK}}, but hits from slightly longer range and is much less whiff punishable. |
| }} | | }} |
| ====<font style="visibility:hidden; float:right">5mk</font>==== | | |
| | ====<font style="visibility:hidden; float:right">5HK</font>==== |
| {{MoveDataCargo | | {{MoveDataCargo |
| | title = Stand MK | | | title = Standing Heavy Kick |
| | subtitle = | | | subtitle = |
| | input = 5MK | | | input = {{classic_sf6}} 5HK<br>{{modern_sf6}} A[H] |
| | images = | | | images = |
| {{MoveDataCargoImage|Jamie_5mk|caption=}} | | {{MoveDataCargoImage|imageHeight=210px|Jamie_5hk_dl2|caption=''"You pressed on -5? You fool, you goon, you absolute cretin."''}} |
| | info = | | | hitboxes = |
| {{AttackDataCargo-SF6/Query|Jamie_5mk}} | | {{MoveDataCargoImage|hitbox=yes|imageHeight=180px|Jamie_5hk_dl2|caption=Active Frame 1}} |
| }} | | {{MoveDataCargoImage|hitbox=yes|imageHeight=180px|Jamie_5hk_dl2|2|caption=Active Frames 2-3}} |
| ====<font style="visibility:hidden; float:right">5hk</font>====
| | | info = |
| {{MoveDataCargo | | {{AttackDataCargo-SF6/Query|Jamie_5hk_dl2}} |
| | title = Stand HK | | * Damage DL0-DL4: 720/760/800/840/880 |
| | subtitle = | | * {{clr|PC|Punish Counter}}: KD +71 Crumple (+8 before opponent becomes airborne) |
| | input = 5HK | | * Puts airborne opponents into {{sf6-jug|limited juggle}} state |
| | images =
| | * '''Cancel Hitconfirm Window:''' 17f (PC: 29f) |
| {{MoveDataCargoImage|Jamie_5hk|caption=}} | | ** Special/{{clr|DR|DR}} cancel is delayed until after 2nd active frame |
| | info = | | * '''{{clr|DR|Drive Rush}} cancel advantage:''' {{sf6-adv|VP|+14}} oH / {{sf6-adv|VP|+8}} oB |
| {{AttackDataCargo-SF6/Query|Jamie_5hk}} | | * '''{{clr|SA|SA2}} cancel advantage:''' {{sf6-adv|VP|+17}} oH (PC: KD +87)) / {{sf6-adv|VP|+11}} oB |
| | * '''Drink cancel advantage:''' {{sf6-adv|VM|-27}} oH (PC: KD +43) / {{sf6-adv|VM|-33}} oB |
| | <br> |
| | While quite slow, {{clr|H|5HK}} has solid range due to its forward movement, making it a real threat in neutral. The long recovery on this move makes it very risky to whiff in neutral, but on block the pushback usually keeps it safe even at {{sf6-adv|VM|-5}}. The hitbox is quite low to the ground, making it worthless as an anti-air; the juggle properties vs. airborne only allow Jamie to safely cancel into a special when hitting the opponent's early jump frames. |
| | |
| | The crumple state from {{clr|PC|Punish Counter}} causes the opponent to fall backwards, making midscreen follow-ups a bit more limited compared to the corner. Jamie can safely cancel a midscreen crumple into 2 Drinks, though this sacrifices a fair bit of damage and oki. In the corner, he can get 1 drink and juggle {{clr|L|2LP}} > {{clr|OD|214PP}} into the Sweep TC for damage and a second drink; your meter and drink situation will determine whether this route is worthwhile over optimizing for damage/oki. |
| }} | | }} |
| | <br> |
|
| |
|
| === Crouching Normals === | | === Crouching Normals === |
| ====<font style="visibility:hidden; float:right">2lp</font>==== | | ====<font style="visibility:hidden; float:right">2LP</font>==== |
| {{MoveDataCargo | | {{MoveDataCargo |
| | title = Crouch LP | | | title = Crouching Light Punch |
| | subtitle = | | | subtitle = |
| | input = 2LP | | | input = {{classic_sf6}} 2LP<br>{{modern_sf6}} 2L |
| | images = | | | images = |
| {{MoveDataCargoImage|Jamie_2lp|caption=}} | | {{MoveDataCargoImage|imageHeight=170px|Jamie_2lp_dl2|caption=}} |
| | info = | | | hitboxes = |
| {{AttackDataCargo-SF6/Query|Jamie_2lp}} | | {{MoveDataCargoImage|hitbox=yes|imageHeight=170px|Jamie_2lp_dl2|caption=}} |
| | | info = |
| | {{AttackDataCargo-SF6/Query|Jamie_2lp_dl2}} |
| | * Damage DL0-DL4: 225/237/250/262/275 |
| | * Chains into {{clr|L|5LK}}/{{clr|L|2LP}}/{{clr|L|2LK}} |
| | * '''Cancel Hitconfirm Window:''' 13f |
| | ** {{clr|DR|DR}} cancel is delayed until after 2nd active frame |
| | * '''{{clr|DR|Drive Rush}} cancel advantage:''' {{sf6-adv|VP|+5}} oH / {{sf6-adv|M|-1}} oB |
| | * '''{{clr|SA|SA2}} cancel advantage:''' {{sf6-adv|VP|+9}} oH / {{sf6-adv|P|+3}} oB |
| | * '''Drink cancel advantage:''' {{sf6-adv|VM|-35}} oH / {{sf6-adv|VM|-41}} oB |
| | * Applies 20% damage scaling to next hit when beginning a combo (100/80/70...) |
| | <br> |
| | Jamie's only 4f startup normal, making it useful in certain punishes and for pressure strings. This is the only chainable light normal that works well against {{clr|DR|Drive Impact}}, but the chain speed is below average, making it more susceptible to a {{clr|PC|Punish Counter}}. |
| }} | | }} |
| ====<font style="visibility:hidden; float:right">2mp</font>==== | | |
| | ====<font style="visibility:hidden; float:right">2MP</font>==== |
| {{MoveDataCargo | | {{MoveDataCargo |
| | title = Crouch MP | | | title = Crouching Medium Punch |
| | subtitle = | | | subtitle = |
| | input = 2MP | | | input = {{classic_sf6}} 2MP<br>{{modern_sf6}} -- |
| | images = | | | images = |
| {{MoveDataCargoImage|Jamie_2mp|caption=}} | | {{MoveDataCargoImage|imageHeight=170px|Jamie_2mp_dl2|caption=}} |
| | info = | | | hitboxes = |
| {{AttackDataCargo-SF6/Query|Jamie_2mp}} | | {{MoveDataCargoImage|hitbox=yes|imageHeight=170px|Jamie_2mp_dl2|caption=}} |
| | | info = |
| | {{AttackDataCargo-SF6/Query|Jamie_2mp_dl2}} |
| | * Damage DL0-DL4: 540/570/600/630/660 |
| | * '''Cancel Hitconfirm Window:''' 16f |
| | * '''{{clr|DR|Drive Rush}} cancel advantage:''' {{sf6-adv|VP|+11}} oH / {{sf6-adv|VP|+5}} oB |
| | * '''{{clr|SA|SA2}} cancel advantage:''' {{sf6-adv|VP|+14}} oH / {{sf6-adv|VP|+8}} oB |
| | * '''Drink cancel advantage:''' {{sf6-adv|VM|-30}} oH / {{sf6-adv|VM|-36}} oB |
| | <br> |
| | A useful normal, despite having the lowest range of any {{clr|M|2MP}}. Used in many combo routes, as a non-committal counterpoke, and as Jamie's go-to Drive Reversal punish. At {{sf6-adv|VP|+5}} on hit, Jamie can link into any of his light attacks on regular hit, and from {{clr|DR|Drive Rush}} it links into {{clr|H|2HP}}. When canceled, it also links naturally into {{clr|M|214MP}}/{{clr|OD|214PP}}. |
| }} | | }} |
| ====<font style="visibility:hidden; float:right">2hp</font>==== | | |
| | ====<font style="visibility:hidden; float:right">2HP</font>==== |
| {{MoveDataCargo | | {{MoveDataCargo |
| | title = Crouch HP | | | title = Crouching Heavy Punch |
| | subtitle = | | | subtitle = |
| | input = 2HP | | | input = {{classic_sf6}} 2HP<br>{{modern_sf6}} 2H |
| | images = | | | images = |
| {{MoveDataCargoImage|Jamie_2hp|caption=}} | | {{MoveDataCargoImage|imageHeight=180px|Jamie_2hp_dl2|caption=}} |
| | info = | | | hitboxes = |
| {{AttackDataCargo-SF6/Query|Jamie_2hp}} | | {{MoveDataCargoImage|hitbox=yes|imageHeight=110px|Jamie_2hp_dl2|caption=}} |
| | | info = |
| | {{AttackDataCargo-SF6/Query|Jamie_2hp_dl2}} |
| | * Damage DL0-DL4: 810/855/900/945/990 |
| | * Head hurtbox is '''Anti-Air Invuln''' 9-33f; cannot hit cross-up |
| | * Forces stand on hit |
| | * '''Cancel Hitconfirm Window:''' 16f; only the first 2 active frames are cancelable |
| | * '''{{clr|DR|Drive Rush}} cancel advantage:''' {{sf6-adv|VP|+18}} oH / {{sf6-adv|VP|+10}} oB |
| | * '''{{clr|SA|SA2}} cancel advantage:''' {{sf6-adv|VP|+21}} oH / {{sf6-adv|VP|+13}} oB |
| | * '''Drink cancel advantage:''' {{sf6-adv|VM|-23}} oH / {{sf6-adv|VM|-31}} oB |
| | <br> |
| | Works fairly well as a mid-range anti-air due to its vertical reach and large number of active frames. Does not have a useful cancel when used as an anti-air, as only the early grounded frames are cancelable. Useful in many {{clr|PC|Punish Counter}} and {{clr|DR|Drive Rush}} combo routes as it combos into Jamie's strongest special moves. |
| }} | | }} |
| ====<font style="visibility:hidden; float:right">2lk</font>==== | | |
| | ====<font style="visibility:hidden; float:right">2LK</font>==== |
| {{MoveDataCargo | | {{MoveDataCargo |
| | title = Crouch LK | | | title = Crouching Light Kick |
| | subtitle = | | | subtitle = |
| | input = 2LK | | | input = {{classic_sf6}} 2LK<br>{{modern_sf6}} A[L] |
| | images = | | | images = |
| {{MoveDataCargoImage|Jamie_2lk|caption=}} | | {{MoveDataCargoImage|imageHeight=170px|Jamie_2lk_dl2|caption=}} |
| | info = | | | hitboxes = |
| {{AttackDataCargo-SF6/Query|Jamie_2lk}} | | {{MoveDataCargoImage|hitbox=yes|imageHeight=170px|Jamie_2lk_dl2|caption=}} |
| | | info = |
| | {{AttackDataCargo-SF6/Query|Jamie_2lk_dl2}} |
| | * Damage DL0-DL4: 180/190/200/210/220 |
| | * Chains into {{clr|L|5LK}}/{{clr|L|2LP}}/{{clr|L|2LK}} |
| | * Applies 20% damage scaling to next hit when beginning a combo (100/80/70...) |
| | <br> |
| | A generic low 5f confirm starter. For a 3-hit light confirm, use {{clr|L|2LK}}~{{clr|L|2LP}}~{{clr|L|5LK}}, as this is the only confirm route that beats reversal 4f light normals. |
| }} | | }} |
| ====<font style="visibility:hidden; float:right">2mk</font>==== | | |
| | ====<font style="visibility:hidden; float:right">2MK</font>==== |
| {{MoveDataCargo | | {{MoveDataCargo |
| | title = Crouch MK | | | title = Crouching Medium Kick |
| | subtitle = | | | subtitle = |
| | input = 2MK | | | input = {{classic_sf6}} 2MK<br>{{modern_sf6}} 2M |
| | images = | | | images = |
| {{MoveDataCargoImage|Jamie_2mk|caption=}} | | {{MoveDataCargoImage|imageHeight=120px|Jamie_2mk_dl2|caption=}} |
| | info = | | | hitboxes = |
| {{AttackDataCargo-SF6/Query|Jamie_2mk}} | | {{MoveDataCargoImage|hitbox=yes|imageHeight=180px|Jamie_2mk_dl2|caption=}} |
| | | info = |
| | {{AttackDataCargo-SF6/Query|Jamie_2mk_dl2}} |
| | * Damage DL0-DL4: 450/475/500/525/550 |
| | * '''Cancel Hitconfirm Window:''' 13f |
| | ** Special/{{clr|DR|DR}} cancel is delayed until after 2nd active frame |
| | * '''{{clr|DR|Drive Rush}} cancel advantage:''' {{sf6-adv|VP|+9}} oH / {{sf6-adv|VP|+4}} oB |
| | * '''{{clr|SA|SA2}} cancel advantage:''' {{sf6-adv|VP|+12}} oH / {{sf6-adv|VP|+7}} oB |
| | * '''Drink cancel advantage:''' {{sf6-adv|VM|-32}} oH / {{sf6-adv|VM|-37}} oB |
| | * Applies 20% damage scaling to next hit when beginning a combo (100/80/70...) |
| | * Extends a hurtbox on whiff until end of recovery |
| | <br> |
| | Jamie's {{clr|M|2MK}} is fast for a cancelable low poke, but the range is a bit lower than most similar buttons. The high pushback makes it safer to poke with and can lead to spacing traps. If well-spaced, a cancel into 236P is often safe, though {{clr|L|236LP}} can whiff at absolute max range. |
| }} | | }} |
| ====<font style="visibility:hidden; float:right">2hk</font>==== | | |
| | ====<font style="visibility:hidden; float:right">2HK</font>==== |
| {{MoveDataCargo | | {{MoveDataCargo |
| | title = Crouch HK | | | title = Crouching Heavy Kick |
| | subtitle = | | | subtitle = |
| | input = 2HK | | | input = {{classic_sf6}} 2HK<br>{{modern_sf6}} 3H |
| | images = | | | images = |
| {{MoveDataCargoImage|Jamie_2hk|caption=}} | | {{MoveDataCargoImage|imageHeight=120px|Jamie_2hk_dl2|caption=}} |
| | info = | | | hitboxes = |
| {{AttackDataCargo-SF6/Query|Jamie_2hk}} | | {{MoveDataCargoImage|hitbox=yes|imageHeight=120px|Jamie_2hk_dl2|caption=}} |
| | | info = |
| | {{AttackDataCargo-SF6/Query|Jamie_2hk_dl2}} |
| | * Damage DL0-DL4: 360x2/380x2/400x2/420x2/440x2 |
| | * {{clr|PC|Counter-hit/Punish Counter}}: HKD +48 |
| | * 1f extra recovery on block; 2nd hit can be stand blocked if 1st hit is blocked |
| | * Has high juggle potential; not a Hard Knockdown when juggled into |
| | * First active frame of 2nd hit only connects in juggles; vs. grounded opponents, active period is 2(3)2 |
| | * '''TC Cancel Hitconfirm Window:''' 33f (PC 43f) / 22f (1-hit) |
| | <br> |
| | A long-range 2-hit sweep that is great for punishing other sweeps while being difficult for most other characters to punish in return. When well-spaced, some characters have no punish at all, or must rely on reversal Supers to reach. Both hits are lows, but if the first hit is crouch blocked, the second hit loses its low-hitting property. Because the second hit has extra range, it's still possible to catch a back-walking opponent low when the first hit whiffs. Oddly, Jamie is actually safer if the edge of the first hit is blocked, as the pushback on the second hit alone is less than the combined pushback of each hit. |
| | |
| | {{clr|H|2HK}} has a lot of juggle potential, and leads to a Target Combo follow-up into {{clr|H|HK}} that is great for increasing his Drink Level without sacrificing corner oki. This follow-up can be hitconfirmed even if only the second hit connects, though it's much easier if both hits connect. |
| }} | | }} |
| | <br> |
|
| |
|
| === Jumping Normals === | | === Jumping Normals === |
| ====<font style="visibility:hidden; float:right">j.LP</font>==== | | ====<font style="visibility:hidden; float:right">j.LP</font>==== |
| {{MoveDataCargo | | {{MoveDataCargo |
| | title = Jump LP | | | title = Jumping Light Punch |
| | subtitle = | | | subtitle = |
| | input = j.LP | | | input = {{classic_sf6}} j.LP<br>{{modern_sf6}} j.A[L] |
| | images = | | | images = |
| {{MoveDataCargoImage|Jamie_jlp|caption=}} | | {{MoveDataCargoImage|imageHeight=140px|Jamie_jlp_dl2|caption=}} |
| | info = | | | hitboxes = |
| {{AttackDataCargo-SF6/Query|Jamie_jlp}} | | {{MoveDataCargoImage|hitbox=yes|imageHeight=140px|Jamie_jlp_dl2|caption=}} |
| | | info = |
| | {{AttackDataCargo-SF6/Query|Jamie_jlp_dl2}} |
| | * Damage DL0-DL4: 270/285/300/315/330 |
| | * Can hit Cross-up |
| | * Can be used as a fuzzy instant overhead |
| | <br> |
| | As a cross-up, {{clr|L|j.LP}} is far inferior to {{clr|M|j.MK}} due to its narrow hitbox and low hitstun/blockstun. The instant overhead property allows Jamie to close out a round by making the opponent block a deep jump-in; as they transition to a crouch block, they will be stuck in a standing state for a few frames, allowing the {{clr|L|j.LP}} to connect. This is high risk and should only ever be attempted if it is certain to end the round. |
| }} | | }} |
| | |
| ====<font style="visibility:hidden; float:right">j.MP</font>==== | | ====<font style="visibility:hidden; float:right">j.MP</font>==== |
| {{MoveDataCargo | | {{MoveDataCargo |
| | title = Jump MP | | | title = Jumping Medium Punch |
| | subtitle = | | | subtitle = |
| | input = j.MP | | | input = {{classic_sf6}} j.MP<br>{{modern_sf6}} j.M |
| | images = | | | images = |
| {{MoveDataCargoImage|Jamie_jmp|caption=}} | | {{MoveDataCargoImage|imageHeight=160px|Jamie_jmp_dl2|caption=}} |
| | info = | | | hitboxes = |
| {{AttackDataCargo-SF6/Query|Jamie_jmp}} | | {{MoveDataCargoImage|hitbox=yes|imageHeight=160px|Jamie_jmp_dl2|caption=}} |
| | | info = |
| | {{AttackDataCargo-SF6/Query|Jamie_jmp_dl2}} |
| | * Damage DL0-DL4: 630/665/700/735/770 |
| | * Puts airborne opponents into {{sf6-jug|limited juggle}} state |
| | * Cancels into j.214K Divekick (DL1+, forward jump only); cancel can be delayed significantly (up to 24f) |
| | * Shifts Jamie's hurtbox upward during startup |
| | <br> |
| | The knockdown makes this useful as an air-to-air. The hitbox reaches quite high above Jamie, so it will whiff if you try to delay it too long in juggle combos. The cancel into j.214K only works against airborne opponents, as Jamie will be too low to the ground against standing characters. |
| }} | | }} |
| | |
| ====<font style="visibility:hidden; float:right">j.HP</font>==== | | ====<font style="visibility:hidden; float:right">j.HP</font>==== |
| {{MoveDataCargo | | {{MoveDataCargo |
| | title = Jump HP | | | title = Jumping Heavy Punch |
| | subtitle = | | | subtitle = |
| | input = j.HP | | | input = {{classic_sf6}} j.HP<br>{{modern_sf6}} j.A[H] |
| | images = | | | images = |
| {{MoveDataCargoImage|Jamie_jhp|caption=}} | | {{MoveDataCargoImage|imageHeight=140px|Jamie_jhp_dl2|caption=}} |
| | info = | | | hitboxes = |
| {{AttackDataCargo-SF6/Query|Jamie_jhp}} | | {{MoveDataCargoImage|hitbox=yes|imageHeight=140px|Jamie_jhp_dl2|caption=}} |
| | | info = |
| | {{AttackDataCargo-SF6/Query|Jamie_jhp_dl2}} |
| | * Damage DL0-DL4: 720/760/800/840/880 |
| | * Spike knockdown vs. airborne opponents |
| | <br> |
| | Has high juggle potential. Against grounded opponents, this is stronger than {{clr|H|j.HK}} since all the damage is done on a single hit. |
| }} | | }} |
| | |
| ====<font style="visibility:hidden; float:right">j.LK</font>==== | | ====<font style="visibility:hidden; float:right">j.LK</font>==== |
| {{MoveDataCargo | | {{MoveDataCargo |
| | title = Jump LK | | | title = Jumping Light Kick |
| | subtitle = | | | subtitle = |
| | input = j.LK | | | input = {{classic_sf6}} j.LK<br>{{modern_sf6}} j.L |
| | images = | | | images = |
| {{MoveDataCargoImage|Jamie_jlk|caption=}} | | {{MoveDataCargoImage|imageHeight=140px|Jamie_jlk_dl2|caption=}} |
| | info = | | | hitboxes = |
| {{AttackDataCargo-SF6/Query|Jamie_jlk}} | | {{MoveDataCargoImage|hitbox=yes|imageHeight=140px|Jamie_jlk_dl2|caption=}} |
| | | info = |
| | {{AttackDataCargo-SF6/Query|Jamie_jlk_dl2}} |
| | * Damage DL0-DL4: 270/285/300/315/330 |
| | <br> |
| | Has the longest horizontal range out of all Jamie's air normals, but the low hitstun makes it fairly useless near its max range except as an air-to-air. |
| }} | | }} |
| | |
| ====<font style="visibility:hidden; float:right">j.MK</font>==== | | ====<font style="visibility:hidden; float:right">j.MK</font>==== |
| {{MoveDataCargo | | {{MoveDataCargo |
| | title = Jump MK | | | title = Jumping Medium Kick |
| | subtitle = | | | subtitle = |
| | input = j.MK | | | input = {{classic_sf6}} j.MK<br>{{modern_sf6}} j.A[M] |
| | images = | | | images = |
| {{MoveDataCargoImage|Jamie_jmk|caption=}} | | {{MoveDataCargoImage|imageHeight=140px|Jamie_jmk_dl2|caption=}} |
| | info = | | | hitboxes = |
| {{AttackDataCargo-SF6/Query|Jamie_jmk}} | | {{MoveDataCargoImage|hitbox=yes|imageHeight=140px|Jamie_jmk_dl2|caption=}} |
| | | info = |
| | {{AttackDataCargo-SF6/Query|Jamie_jmk_dl2}} |
| | * Damage DL0-DL4: 450/475/500/525/550 |
| | * Can hit Cross-up |
| | <br> |
| | A better cross-up than {{clr|L|j.LP}} due to its higher damage and wider hitbox. |
| }} | | }} |
| | |
| ====<font style="visibility:hidden; float:right">j.HK</font>==== | | ====<font style="visibility:hidden; float:right">j.HK</font>==== |
| {{MoveDataCargo | | {{MoveDataCargo |
| | title = Jump HK | | | title = Jumping Heavy Kick |
| | subtitle = | | | subtitle = |
| | input = j.HK | | | input = {{classic_sf6}} j.HK<br>{{modern_sf6}} j.H |
| | images = | | | images = |
| {{MoveDataCargoImage|Jamie_jhk|caption=}} | | {{MoveDataCargoImage|imageHeight=140px|Jamie_jhk_dl2|1|caption=}} |
| | info = | | ---- |
| {{AttackDataCargo-SF6/Query|Jamie_jhk}} | | {{MoveDataCargoImage|imageHeight=140px|Jamie_jhk_dl2|2|caption=}} |
| | | hitboxes = |
| | {{MoveDataCargoImage|hitbox=yes|imageHeight=140px|Jamie_jhk_dl2|1|caption=}} |
| | ---- |
| | {{MoveDataCargoImage|hitbox=yes|imageHeight=140px|Jamie_jhk_dl2|2|caption=}} |
| | | info = |
| | {{AttackDataCargo-SF6/Query|Jamie_jhk_dl2}} |
| | * Damage DL0-DL4: 360x2/380x2/400x2/420x2/440x2 |
| | * Both hits put airborne opponents into {{sf6-jug|limited juggle}} state |
| | * Shifts Jamie's hurtbox upward during startup |
| | <br> |
| | As an air-to-air, {{clr|H|j.HK}} hits twice for an air knockdown. Jamie always has enough advantage to land and follow up with a grounded juggle like Arrow Kick, but he can get stronger juggles if the opponent is juggled high enough. When used mid-juggle (like after [[#2KK|anti-air 2KK]]), the first hit will whiff; {{clr|M|j.MP}} actually does more damage in these juggle scenarios. |
| | |
| | As a jump-in, only one hit will connect on grounded opponents, making it weaker than {{clr|M|j.HP}} or {{clr|M|j.MK}}. It doesn't have a particularly good hitbox, so stick with those normals for your aerial approach. |
| }} | | }} |
| | <br> |
|
| |
|
| == Command Normals == | | == Command Normals == |
| ====<font style="visibility:hidden; float:right">2kk</font>==== | | ====<font style="visibility:hidden; float:right">2KK</font>==== |
| {{MoveDataCargo | | {{MoveDataCargo |
| | title = Tensei Kick | | | title = Tensei Kick |
| | subtitle = | | | subtitle = |
| | input = 2KK | | | input = {{classic_sf6}} 2KK<br>{{modern_sf6}} 2MH |
| | images = | | | images = |
| {{MoveDataCargoImage|Jamie_2kk|caption=}} | | {{MoveDataCargoImage|imageHeight=180px|Jamie_2kk_dl2|caption={{clr|L|'''''AIR COMBO!'''''}}}} |
| | info = | | | hitboxes = |
| {{AttackDataCargo-SF6/Query|Jamie_2kk}} | | {{MoveDataCargoImage|hitbox=yes|imageHeight=180px|Jamie_2kk_dl2|caption=}} |
| | | info = |
| | {{AttackDataCargo-SF6/Query|Jamie_2kk_dl2}} |
| | * Damage DL0-DL4: 540/570/600/630/660 |
| | * Head/Leg hurtbox is '''anti-air invuln''' on frames 9-11 (cannot hit cross-up) |
| | * Puts opponent into {{sf6-jug|limited juggle}} state; ({{sf6-jug|free juggle}} if performed from {{clr|DR|Drive Rush}}) |
| | * '''Cancel Hitconfirm Window:''' 17f (forward jump, hit only) |
| | * Applies 20% damage scaling to next hit when beginning a combo (100/80/70...) |
| | <br> |
| | Tensei Kick is a launcher used in many of Jamie's combo routes. As an anti-air, the move is harder to use than Arrow Kick but leads to much greater reward with its jump cancel on hit. The jump cancel will always go forward regardless of which direction is held, and it cannot cancel to a grounded special move during prejump frames. |
| | |
| | The free juggle state caused by {{clr|DR|DR~}}2KK gives Jamie much better juggle routes than the standard version. All medium/heavy {{clr|DR|DR}} canceled pokes besides {{clr|H|5HP}} can lead to {{clr|DR|DR~}}2KK, {{clr|H|j.HK}} (2-hit), then land with {{clr|H|2HK}}~{{clr|H|HK}}~P for corner carry, a drink, and +4 knockdown advantage. At DL1, an anti-air Tensei Kick can achieve similar results with {{clr|M|j.MP}} > {{clr|OD|j.214KK}} before ending in the same sweep Target Combo. |
| }} | | }} |
| ====<font style="visibility:hidden; float:right">6mk</font>==== | | |
| | ====<font style="visibility:hidden; float:right">6MK</font>==== |
| {{MoveDataCargo | | {{MoveDataCargo |
| | title = Falling Star Kick | | | title = Falling Star Kick |
| | subtitle = | | | subtitle = |
| | input = 6MK | | | input = {{classic_sf6}} 6MK<br>{{modern_sf6}} 6M |
| | images = | | | images = |
| {{MoveDataCargoImage|Jamie_6mk|caption=}} | | {{MoveDataCargoImage|imageHeight=170px|Jamie_6mk|caption=}} |
| | info = | | | hitboxes = |
| | {{MoveDataCargoImage|hitbox=yes|imageHeight=140px|Jamie_6mk|caption=}} |
| | | info = |
| {{AttackDataCargo-SF6/Query|Jamie_6mk}} | | {{AttackDataCargo-SF6/Query|Jamie_6mk}} |
| | * Damage DL0-DL1: 540/570 |
| | * '''Low Crush''' 10-19f (not airborne) |
| | * Spike knockdown vs. airborne opponents |
| | {{AttackDataCargo-SF6/Query|Jamie_6mk_dl2}} |
| | * Damage DL2-DL4: 600/630/660 |
| | * '''Low Crush''' 10-19f (not airborne) |
| | * Spike knockdown vs. airborne opponents |
| | * '''Cancel Hitconfirm Window:''' 17f (TC) |
| | <br> |
| | A hopping overhead that can counter mid-range low pokes. With precise spacing, it can hit later in its active frames, resulting in better frame advantage. When used out of {{clr|DR|Drive Rush}}, Jamie can link light normals or {{clr|H|5HP}} afterward. |
| | |
| | At Drink Lv.2 and above, {{clr|M|6MK}} has about 25% more range and gains a ([[#6MK~MK~P|Target Combo follow-up]]) for a knockdown and an optional Drink level increase. While difficult, this extension can be hitconfirmed with good reactions. |
| }} | | }} |
| ====<font style="visibility:hidden; float:right">4hp</font>==== | | |
| | ====<font style="visibility:hidden; float:right">4HP</font>==== |
| {{MoveDataCargo | | {{MoveDataCargo |
| | title = Hermit's Elbow | | | title = Hermit's Elbow |
| | subtitle = | | | subtitle = |
| | input = 4HP | | | input = {{classic_sf6}} 4HP<br>{{modern_sf6}} 4H |
| | images = | | | images = |
| {{MoveDataCargoImage|Jamie_4hp|caption=}} | | {{MoveDataCargoImage|imageHeight=180px|Jamie_4hp_dl2|caption=DL0-DL2}} |
| | info = | | ---- |
| {{AttackDataCargo-SF6/Query|Jamie_4hp}} | | {{MoveDataCargoImage|imageHeight=210px|Jamie_4hp_dl3|caption=DL3+ |
| | ''*Somewhat similar animation to his 214P, can bait DI's from those expecting Palm}} |
| | | hitboxes = |
| | {{MoveDataCargoImage|hitbox=yes|imageHeight=180px|Jamie_4hp_dl2|caption=DL0-DL2}} |
| | ---- |
| | {{MoveDataCargoImage|hitbox=yes|imageHeight=160px|Jamie_4hp_dl3|caption=DL3+}} |
| | | info = |
| | {{AttackDataCargo-SF6/Query|Jamie_4hp_dl2}} |
| | * Damage DL0-DL2: 720/760/800 |
| | * Throw hurtbox retracts on frames 4-14; strike hurtbox retracts on frames 5-12 |
| | ** Afterwards, foot hurtbox is extended on frames 13-20 (weak to delayed lows) |
| | * '''Cancel Hitconfirm Window:''' 19f (Super) |
| | ** Super cancel is delayed until after active frames |
| | * '''{{clr|SA|SA2}} cancel advantage:''' {{sf6-adv|VP|+15}} oH / {{sf6-adv|VP|+11}} oB |
| | {{AttackDataCargo-SF6/Query|Jamie_4hp_dl3}} |
| | * Damage DL3-DL4: 840/880; has ~11% extra range |
| | * Throw hurtbox retracts on frames 4-14; strike hurtbox retracts on frames 5-12 |
| | * 2f less recovery on hit |
| | * '''Cancel Hitconfirm Window:''' 19f (Super) / 20f (TC) |
| | ** Super cancel is delayed until after active frames |
| | * '''{{clr|SA|SA2}} cancel advantage:''' {{sf6-adv|VP|+14}} oH / {{sf6-adv|VP|+12}} oB |
| | <br> |
| | Hermit's Elbow pulls back during startup, making it a useful shimmy tool in tick throw situations. If you successfully bait the opponent's throw and land a {{clr|PC|Punish Counter}}, it becomes {{sf6-adv|VP|+5}} and can link into {{clr|L|5LK}} or {{clr|H|5HP}}. At its max possible range, it can become {{sf6-adv|VP|+4}} as a meaty and link into {{clr|L|2LP}} without a {{clr|PC|Counter-hit}}. The Super cancel window is also quite lenient, allowing for high damage confirms. |
| | |
| | At Drink Lv.3, {{clr|H|4HP}} gains a Target Combo follow-up into {{clr|H|HP}}. This TC will only combo if the {{clr|H|4HP}} hits meaty or with extra frame advantage from {{clr|PC|Counter-hit}}. In order to confirm the TC as late as possible on reaction, a {{clr|PC|Punish Counter}}, {{clr|DR|Drive Rush}} start, or final-frame meaty timing is required. However, Jamie gets more damage by simply linking {{clr|L|5LP}}~{{clr|L|LK}}~{{clr|M|MP}}, since the {{clr|H|4HP}} becomes {{sf6-adv|VP|+5}} in these scenarios. Note that due to increased pushback, the DL3 version can no longer link to {{clr|H|5HP}} even at {{sf6-adv|VP|+5}}. Instead, link to {{clr|L|5LK}} or {{clr|L|5LK}} at close range if you don't want to use the TC ender. |
| }} | | }} |
| ====<font style="visibility:hidden; float:right">4hp_dr3</font>====
| | |
| {{MoveDataCargo
| | ====<font style="visibility:hidden; float:right">6HK</font>==== |
| | title = Hermit's Elbow (DR3)
| |
| | subtitle =
| |
| | input = 4HP (DR3)
| |
| | images =
| |
| {{MoveDataCargoImage|Jamie_4hp_dr3|caption=}}
| |
| | info =
| |
| {{AttackDataCargo-SF6/Query|Jamie_4hp_dr3}}
| |
| }}
| |
| ====<font style="visibility:hidden; float:right">6hk</font>==== | |
| {{MoveDataCargo | | {{MoveDataCargo |
| | title = Senei Kick | | | title = Senei Kick |
| | subtitle = | | | subtitle = |
| | input = 6HK | | | input = {{classic_sf6}} 6HK<br>{{modern_sf6}} 6H |
| | images = | | | images = |
| {{MoveDataCargoImage|Jamie_6hk|caption=}} | | {{MoveDataCargoImage|imageHeight=160px|Jamie_6hk_dl2|caption=DL0-DL3}} |
| | info = | | ---- |
| {{AttackDataCargo-SF6/Query|Jamie_6hk}} | | {{MoveDataCargoImage|imageHeight=160px|Jamie_6hk_dl4|caption=DL4}} |
| }} | | | hitboxes = |
| ====<font style="visibility:hidden; float:right">6hk_level 4</font>====
| | {{MoveDataCargoImage|hitbox=yes|imageHeight=160px|Jamie_6hk_dl2|caption=DL0-DL3}} |
| {{MoveDataCargo | | ---- |
| | title = Senei Kick (DR4)
| | {{MoveDataCargoImage|hitbox=yes|imageHeight=140px|Jamie_6hk_dl4|caption=DL4}} |
| | subtitle = | | | info = |
| | input = 6HK (level 4) | | {{AttackDataCargo-SF6/Query|Jamie_6hk_dl2}} |
| | images = | | * Damage DL0-DL3: 810/855/900/945 |
| {{MoveDataCargoImage|Jamie_6hk_level 4|caption=}} | | * '''Cancel Hitconfirm Window:''' 18f (Super) |
| | info =
| | * '''{{clr|SA|SA2}} cancel advantage:''' {{sf6-adv|VP|+19}} oH / {{sf6-adv|VP|+13}} oB |
| {{AttackDataCargo-SF6/Query|Jamie_6hk_level 4}} | | {{AttackDataCargo-SF6/Query|Jamie_6hk_dl4}} |
| | * Has ~6% extra range and a new Target Combo follow-up |
| | * '''Cancel Hitconfirm Window:''' 18f (Super) / 22f (TC) |
| | ** TC confirm into {{clr|H|4HK}} must be input within 20f for a {{clr|PC|Counter-hit}} combo into Headbutt |
| | * '''{{clr|SA|SA2}} cancel advantage:''' {{sf6-adv|VP|+19}} oH / {{sf6-adv|VP|+13}} oB |
| | <br> |
| | A long range stepkick that can be confirmed into a Super on hit. You cannot space it to connect meaty at max range, so the only follow-up links require {{clr|PC|Counter-hit}}, {{clr|PC|Punish Counter}}, or {{clr|DR|Drive Rush}} (which travels nearly full screen). |
| | |
| | At Drink Lv.4, the move gains extra range and some new Target Combo follow-ups. Even if the confirm into the TC is missed, the follow-ups are cancelable themselves, allowing Jamie to end with a safe option like {{clr|OD|236PP}} even on a failed hitconfirm. |
| }} | | }} |
| | <br> |
|
| |
|
| == Target Combos == | | == Target Combos == |
| ====<font style="visibility:hidden; float:right">5lp_5lk</font>==== | | ====<font style="visibility:hidden; float:right">2HK~HK~P</font>==== |
| {{MoveDataCargo | | {{MoveDataCargo |
| | title = Bitter Strikes 1 (DR1) | | | title = Phantom Sway |
| | subtitle = | | | subtitle = (DL0) |
| | input = 5LP > 5LK | | | input = {{classic_sf6}} 2HK~HK~P<br>{{modern_sf6}} 3H~H~H |
| | images = | | | images = |
| {{MoveDataCargoImage|Jamie_5lp_5lk|caption=}} | | {{MoveDataCargoImage|imageHeight=160px|Jamie_2hk_hk_dl2|caption=}} |
| | info = | | ---- |
| {{AttackDataCargo-SF6/Query|Jamie_5lp_5lk}} | | {{MoveDataCargoImage|imageHeight=160px|Jamie_2hk_hk_p_dl2|caption=}} |
| | | hitboxes = |
| | {{MoveDataCargoImage|hitbox=yes|imageHeight=160px|Jamie_2hk_hk_dl2|caption=}} |
| | ---- |
| | {{MoveDataCargoImage|hitbox=yes|imageHeight=160px|Jamie_2hk_hk_p_dl2|caption=}} |
| | | info = |
| | {{AttackDataCargo-SF6/Query|Jamie_2hk_hk_dl2}} |
| | * Damage DL0-DL4: 450/475/500/525/550 |
| | * '''Cancel Hitconfirm Window:''' 58f (TC Drink) |
| | {{AttackDataCargo-SF6/Query|Jamie_2hk_hk_p_dl2}} |
| | * Maintains corner oki while increasing Drink Level |
| | * Refills 0.25 Drive bars; at DL4, refills 1 full Drive bar |
| | <br> |
| | Target Combo with high juggle potential that can be easily confirmed into. Excellent juggle ender after Tensei Kick or {{clr|OD|214PP}}. |
| | |
| | {{clr|H|2HK}}~{{clr|H|HK}} leaves him at {{sf6-adv|VP|+22}} (up to {{sf6-adv|VP|+24}} when juggled into). Midscreen, he can either dash forward, leaving him at {{sf6-adv|P|+3}} and in range for {{clr|M|5MK}}, or he can {{clr|DR|Drive Rush}} and get full okizeme. In the corner, the forward travel on the second kick leaves Jamie at point-blank range, so it's probably always worth it to at least confirm into the second hit. |
| | |
| | The full combo, {{clr|H|2HK}}~{{clr|H|HK}}~P, ends with Jamie taking a drink and usually leaves him at {{sf6-adv|P|+4}}, even when reaching DL4. This sacrifices Jamie's midscreen oki for a drink level. In the corner, Jamie is left at point-blank range in one of his most ideal scenarios. When combined with the corner carry from Jamie's [[#2KK|Tensei Kick]] combo routes, Jamie can even set up his win condition from midscreen given the right opportunity. Can rarely be up to {{sf6-adv|P|+6}} when juggled into. |
| }} | | }} |
| ====<font style="visibility:hidden; float:right">5lp_5lk_5mp</font>==== | | |
| | ====<font style="visibility:hidden; float:right">5LP~LK~MP</font>==== |
| {{MoveDataCargo | | {{MoveDataCargo |
| | title = Bitter Strikes 2 (DR1) | | | title = Bitter Strikes |
| | subtitle = | | | subtitle = (DL1) |
| | input = 5LP > 5LK > 5MP | | | input = {{classic_sf6}} 5LP~LK~MP<br>{{modern_sf6}} 5L~L~L |
| | images = | | | images = |
| {{MoveDataCargoImage|Jamie_5lp_5lk_5mp|caption=}} | | {{MoveDataCargoImage|imageHeight=160px|Jamie_5lp_lk_dl2|caption=}} |
| | info = | | ---- |
| {{AttackDataCargo-SF6/Query|Jamie_5lp_5lk_5mp}} | | {{MoveDataCargoImage|imageHeight=160px|Jamie_5lp_lk_mp_dl2|caption=}} |
| | | hitboxes = |
| | {{MoveDataCargoImage|hitbox=yes|imageHeight=160px|Jamie_5lp_lk_dl2|caption=}} |
| | ---- |
| | {{MoveDataCargoImage|hitbox=yes|imageHeight=160px|Jamie_5lp_lk_mp_dl2|caption=}} |
| | | info = |
| | {{AttackDataCargo-SF6/Query|Jamie_5lp_lk_dl2}} |
| | * Damage DL1-DL4: 190/200/210/220 (170/180/188/198) |
| | * () refers to scaled damage when beginning combo with {{clr|L|5LP}} |
| | * '''Cancel Hitconfirm Window:''' 29f (TC) |
| | {{AttackDataCargo-SF6/Query|Jamie_5lp_lk_mp_dl2}} |
| | * Damage DL1-DL4: 475/500/525/550 (380/400/420/440) |
| | * () refers to scaled damage when beginning combo with {{clr|L|5LP}}~{{clr|L|LK}} |
| | * 2f extra recovery on block |
| | * '''Cancel Hitconfirm Window:''' 52f |
| | ** Special cancel is delayed until after 1st recovery frame; {{clr|DR|DR}} cancel is delayed until after active frames |
| | * '''{{clr|DR|Drive Rush}} cancel advantage:''' {{sf6-adv|VP|+10}} oH / {{sf6-adv|VP|+4}} oB |
| | * '''{{clr|SA|SA2}} cancel advantage:''' {{sf6-adv|VP|+12}} oH / {{sf6-adv|VP|+6}} oB |
| | * '''Drink cancel advantage:''' {{sf6-adv|VM|-32}} oH / {{sf6-adv|VM|-38}} oB |
| | <br> |
| | Since {{clr|L|5LP}} loses much of its frame advantage at Drink Lv.1 and above, this Target Combo is the primary way to convert a jab into damage, even from max range. The {{clr|M|MP}} ender can combo into 236{{clr|L|LP}}/{{clr|M|MP}}/{{clr|OD|PP}}, {{clr|L|214LP}}, {{clr|L|236LK}}, any 623K, or any {{clr|SA|Super}}. |
| | |
| | After committing to the TC follow-up, the only safe enders are {{clr|OD|236PP}}, {{clr|DR|Drive Rush}}, and {{clr|SA|SA2}}. If the opponent tries to punish the TC on block, Jamie can frame trap any non-invincible reversal with {{clr|L|236LP}} or the much safer {{clr|OD|236PP}}. A blocked {{clr|DR|Drive Rush cancel}} can create a true blockstring into {{clr|L|2LP}}, but anything else leaves a gap that can be interrupted with a reversal. |
| }} | | }} |
| ====<font style="visibility:hidden; float:right">5lk_mash</font>==== | | |
| | ====<font style="visibility:hidden; float:right">6MK~MK~P</font>==== |
| {{MoveDataCargo | | {{MoveDataCargo |
| | title = Jamie's Jig | | | title = Full Moon Kick |
| | subtitle = | | | subtitle = (DL2) |
| | input = 5LK (mash) | | | input = {{classic_sf6}} 6MK~MK~P<br>{{modern_sf6}} 6M~M~M |
| | images = | | | images = |
| {{MoveDataCargoImage|Jamie_5lk_mash|caption=}} | | {{MoveDataCargoImage|Jamie_6mk_mk_dl2|caption=}} |
| | info = | | ---- |
| {{AttackDataCargo-SF6/Query|Jamie_5lk_mash}} | | {{MoveDataCargoImage|Jamie_6mk_mk_p_dl2|caption=}} |
| | | hitboxes = |
| | {{MoveDataCargoImage|hitbox=yes|imageHeight=140px|Jamie_6mk_mk_dl2|caption=}} |
| | ---- |
| | {{MoveDataCargoImage|hitbox=yes|Jamie_6mk_mk_p_dl2|caption=}} |
| | | info = |
| | {{AttackDataCargo-SF6/Query|Jamie_6mk_mk_dl2}} |
| | * Damage DL2-DL4: 200x2/210x2/220x2 |
| | * '''Cancel Hitconfirm Window:''' 62f (TC) |
| | {{AttackDataCargo-SF6/Query|Jamie_6mk_mk_p_dl2}} |
| | * Increases Drink Level by 1 |
| | * Drink Lv.3: KD +2 / {{sf6-adv|VM|-43}} oB |
| | * Refills 0.5 Drive bars; at DL4, refills 1 Drive bar |
| | <br> |
| | Confirming this TC directly from {{clr|M|6MK}} is strict, but possible with very good reactions. It's hard to chase down the opponent for midscreen oki, so ending with a Drink is usually worthwhile. |
| | |
| | In the corner, ending with a Drink puts Jamie at {{sf6-adv|M|-1}}, making it a little risky; if going from DL3 to DL4, he instead gets slight KD advantage to apply pressure. Jamie can apply much better corner pressure by skipping the drink. {{clr|M|6MK}}~{{clr|M|MK}} sets up the perfect timing for a meaty {{clr|H|214HP}} to become {{sf6-adv|P|+2}} on block while remaining safe against {{clr|DR|Drive Impact}}. Many opponents will instinctively press a button here, giving Jamie a free {{clr|PC|Counter-hit}}. |
| }} | | }} |
| ====<font style="visibility:hidden; float:right">6mk_5mk</font>==== | | |
| | ====<font style="visibility:hidden; float:right">4HP~HP~HK</font>==== |
| {{MoveDataCargo | | {{MoveDataCargo |
| | title = Full Moon Kick (DR2) | | | title = Intoxicated Assault |
| | subtitle = | | | subtitle = (DL3) |
| | input = 6MK > 5MK | | | input = {{classic_sf6}} 4HP~HP~HK<br>{{modern_sf6}} 4H~H~H |
| | images = | | | images = |
| {{MoveDataCargoImage|Jamie_6mk_5mk|caption=}} | | {{MoveDataCargoImage|imageHeight=160px|Jamie_4hp_hp_dl3|caption=}} |
| | info = | | ---- |
| {{AttackDataCargo-SF6/Query|Jamie_6mk_5mk}} | | {{MoveDataCargoImage|imageHeight=140px|Jamie_4hp_hp_hk_dl3|caption=}} |
| | | hitboxes = |
| | {{MoveDataCargoImage|hitbox=yes|imageHeight=160px|Jamie_4hp_hp_dl3|caption=}} |
| | ---- |
| | {{MoveDataCargoImage|hitbox=yes|imageHeight=140px|Jamie_4hp_hp_hk_dl3|caption=}} |
| | | info = |
| | {{AttackDataCargo-SF6/Query|Jamie_4hp_hp_dl3}} |
| | * Damage DL3-DL4: 630/660 |
| | * Leaves a 3f blockstring gap after {{clr|H|4HP}} (beats non-invincible reversals) |
| | * Requires extra frame advantage to combo from {{clr|H|4HP}} ({{clr|PC|Counter-hit}}, {{clr|PC|Punish Counter}}, {{clr|DR|Drive Rush}}, meaty timing) |
| | * '''Cancel Hitconfirm Window:''' 18f / 56f (from CH {{clr|H|4HP}}~{{clr|H|HP}}) |
| | * '''{{clr|SA|SA2}} cancel advantage:''' {{sf6-adv|VP|+18}} oH / {{sf6-adv|VP|+6}} oB |
| | {{AttackDataCargo-SF6/Query|Jamie_4hp_hp_hk_dl3}} |
| | * Damage DL3-DL4: 840(672)/880(704) |
| | * () refers to scaled damage when beginning combo with {{clr|H|CH 4HP}}~{{clr|H|HP}} |
| | * Leaves a 9f blockstring gap after {{clr|H|4HP}}~{{clr|H|HP}} |
| | <br> |
| | This Target Combo sequence is most useful when performing {{clr|H|4HP}} as a shimmy to bait a throw tech, since it guarantees a {{clr|PC|Punish Counter}} if successful. If the 2nd hit of the Target Combo begins the combo, it is possible to confirm it directly into this ender. While the {{clr|H|HP}} follow-up is unsafe, it can be used to frame trap an opponent that predictably hits buttons after blocking {{clr|H|4HP}}. |
| | |
| | If the final {{clr|H|HK}} is performed on block, the opponent can interrupt with any attack 8f or faster for a full punish, so it cannot be used to frame trap an opponent in the same way. Jamie is not airborne despite the animation, so he can't hop over low-angled buttons or make a throw whiff. |
| }} | | }} |
| ====<font style="visibility:hidden; float:right">6mk_5mk_p</font>==== | | |
| | ====<font style="visibility:hidden; float:right">6HK~4HK~P</font>==== |
| {{MoveDataCargo | | {{MoveDataCargo |
| | title = Full Moon Kick + Drink (DR2) | | | title = Ransui Haze |
| | subtitle = | | | subtitle = (DL4) |
| | input = 6MK > 5MK > P | | | input = {{classic_sf6}} 6HK~4HK~P<br>{{modern_sf6}} 6H~4H~H |
| | images = | | | images = |
| {{MoveDataCargoImage|Jamie_6mk_5mk_p|caption=}} | | {{MoveDataCargoImage|imageHeight=180px|Jamie_6hk_4hk_dl4|caption=}} |
| | info = | | ---- |
| {{AttackDataCargo-SF6/Query|Jamie_6mk_5mk_p}} | | {{MoveDataCargoImage|imageHeight=160px|Jamie_6hk_4hk_p_close_dl4|caption=}} |
| | ---- |
| | {{MoveDataCargoImage|imageHeight=110px|Jamie_6hk_4hk_p_mid_dl4|caption=}} |
| | ---- |
| | {{MoveDataCargoImage|imageHeight=200px|Jamie_6hk_4hk_p_far_dl4|caption=}} |
| | | hitboxes = |
| | {{MoveDataCargoImage|hitbox=yes|imageHeight=160px|Jamie_6hk_4hk_dl4|caption=}} |
| | ---- |
| | {{MoveDataCargoImage|hitbox=yes|imageHeight=160px|Jamie_6hk_4hk_p_close_dl4|caption=}} |
| | ---- |
| | {{MoveDataCargoImage|hitbox=yes|imageHeight=85px|Jamie_6hk_4hk_p_mid_dl4|caption=}} |
| | ---- |
| | {{MoveDataCargoImage|hitbox=yes|imageHeight=170px|Jamie_6hk_4hk_p_far_dl4|caption=}} |
| | | info = |
| | {{AttackDataCargo-SF6/Query|Jamie_6hk_4hk_dl4}} |
| | * Sways and walks backward; press P at different times to change follow-up |
| | * Earliest follow-up timing can be input after 25f of {{clr|H|6HK}}~Sway |
| | * '''Cancel Hitconfirm Window:''' 25f (total time including {{clr|H|6HK}} and Sway) |
| | ** For successful combo, must input {{clr|H|4HK}} within 18f |
| | {{AttackDataCargo-SF6/Query|Jamie_6hk_4hk_p_close_dl4}} |
| | * Cancelable into any special or Super |
| | * '''Cancel Hitconfirm Window:''' 20f (Headbutt only) / 58f ({{clr|H|6HK}}~Headbutt) |
| | ** Special/{{clr|DR|DR}} cancel is delayed until after active frames |
| | * '''{{clr|DR|Drive Rush}} cancel advantage:''' KD +51 oH / {{sf6-adv|VP|+7}} oB |
| | * '''{{clr|SA|SA2}} cancel advantage:''' KD +54 oH / {{sf6-adv|VP|+10}} oB |
| | * '''Drink cancel advantage:''' KD +10 oH / {{sf6-adv|VM|-34}} oB |
| | * Counts as 2 hits for damage scaling when comboed into (applies to next hit) |
| | {{AttackDataCargo-SF6/Query|Jamie_6hk_4hk_p_mid_dl4}} |
| | * Cancelable into any special or Super |
| | * '''Cancel Hitconfirm Window:''' 60/40/17f (more hits = more hitconfirm time) |
| | * '''{{clr|DR|Drive Rush}} cancel advantage:''' KD +54 oH / {{sf6-adv|VP|+10}} oB |
| | * '''{{clr|SA|SA2}} cancel advantage:''' KD +57 oH / {{sf6-adv|VP|+13}} oB |
| | * '''Drink cancel advantage:''' KD +13 oH / {{sf6-adv|VM|-31}} oB |
| | {{AttackDataCargo-SF6/Query|Jamie_6hk_4hk_p_far_dl4}} |
| | * Restores 1 Drive bar (or equivalent Burnout gauge) on final Drink recovery frame |
| | * If no input is performed during recovery, restores a second Drive bar after 112f |
| | <br> |
| | Every part of this Target Combo can be input on hit, block, or whiff from {{clr|H|6HK}}. The {{clr|H|4HK}} causes Jamie to stumble away from the opponent, and the timing of Jamie's P input changes which follow-up occurs. All listed startups include the {{clr|H|6HK}} plus the minimum/maximum delay before hitting P during the Sway animation. |
| | |
| | The close Headbutt follow-up is fairly easy to confirm on hit. The minimum gap between {{clr|H|6HK}} and Headbutt is 5f on block, making it a poor frame trap option unless done from {{clr|DR|DR~}}{{clr|H|6HK}}. |
| | |
| | The Spinning Fists cannot be comboed into, but are useful for stopping an opponent from chasing down the Sway. It will usually only hit twice unless the opponent moves forward into the startup. |
| | |
| | The Drink ender causes Jamie to continue stumbling backwards, making it harder to chase down without a projectile. This does give up a lot of ground and is risky to attempt, but it may be worth the Drive build depending on the circumstances. |
| }} | | }} |
| ====<font style="visibility:hidden; float:right">4hp_5hp</font>==== | | <br> |
| | |
| | == Throws == |
| | ====<font style="visibility:hidden; float:right">Forward Throw (LPLK)</font>==== |
| {{MoveDataCargo | | {{MoveDataCargo |
| | title = Intoxicated Assault 1 (DR3) | | | title = Forward Throw |
| | subtitle = | | | subtitle = |
| | input = 4HP > 5HP | | | input = {{classic_sf6}} LPLK<br>{{modern_sf6}} LM |
| | images = | | | images = |
| {{MoveDataCargoImage|Jamie_4hp_5hp|caption=}} | | {{MoveDataCargoImage|imageHeight=160px|Jamie_lplk_dl2|caption=}} |
| | info = | | ---- |
| {{AttackDataCargo-SF6/Query|Jamie_4hp_5hp}} | | {{MoveDataCargoImage|imageHeight=160px|Jamie_lplk_dl2_hold|caption=}} |
| | | hitboxes = |
| | {{MoveDataCargoImage|hitbox=yes|imageHeight=180px|Jamie_lplk_dl2|caption=}} |
| | | info = |
| | {{AttackDataCargo-SF6/Query|Jamie_lplk_dl2}} |
| | * Damage DL0-DL4: 1080/1139/1200/1259/1320 |
| | ** {{clr|PC|Punish Counter}}: HKD +23; 1836/1937/2040/2141/2244 |
| | * Applies 20% immediate damage scaling when comboed into (e.g. after Crumple) |
| | {{AttackDataCargo-SF6/Query|Jamie_lplk_dl2_hold}} |
| | * Holding the buttons performs a Drink, but sacrifices corner oki |
| | * Refills 0.5 Drive bars (or 1 Drive bar at DL4) |
| | <br> |
| | Allows for strong corner throw loops that are easily auto-timed with a forward dash, leaving Jamie at {{sf6-adv|VP|+4}}. This also works midscreen after a {{clr|PC|Punish Counter}}, or if the opponent chooses not to Back Rise. |
| | |
| | Holding the Throw input causes Jamie to end with a Drink in exchange for worse oki, making it a valuable tool for leveling up. In the corner, he still has enough advantage to pressure with {{clr|M|5MK}}. This can be safely canceled into {{clr|M|236MP}} against most characters; only extremely fast long-range moves like Ken's {{clr|SA|SA2}} can punish Jamie on block. Even moves like Ken's {{clr|OD|OD Shoryuken}}, Cammy's {{clr|OD|OD Cannon Spike}}, and Luke's {{clr|SA|SA1}} cannot punish at this range. |
| }} | | }} |
| ====<font style="visibility:hidden; float:right">4hp_5hp_5hk</font>==== | | |
| | ====<font style="visibility:hidden; float:right">Back Throw (4LPLK)</font>==== |
| {{MoveDataCargo | | {{MoveDataCargo |
| | title = Intoxicated Assault 2 (DR3) | | | title = Back Throw |
| | subtitle = | | | subtitle = |
| | input = 4HP > 5HP > 5HK | | | input = {{classic_sf6}} 4LPLK<br>{{modern_sf6}} 4LM |
| | images =
| | | images = |
| {{MoveDataCargoImage|Jamie_4hp_5hp_5hk|caption=}} | | {{MoveDataCargoImage|Jamie_4lplk_dl2|imageHeight=160px|caption=}} |
| | info =
| | | hitboxes = |
| {{AttackDataCargo-SF6/Query|Jamie_4hp_5hp_5hk}} | | {{MoveDataCargoImage|hitbox=yes|imageHeight=180px|Jamie_4lplk_dl2|caption=}} |
| }} | | | info = |
| ====<font style="visibility:hidden; float:right">6hk_4hk</font>====
| | {{AttackDataCargo-SF6/Query|Jamie_4lplk_dl2}} |
| {{MoveDataCargo
| | * Damage DL0-DL4: 1080/1139/1200/1259/1320 |
| | title = Ransui Haze (DR4)
| | ** {{clr|PC|Punish Counter}}: HKD +38; 1836/1937/2040/2141/2244 |
| | subtitle =
| | * Side switch |
| | input = 6HK > 4HK
| | * Applies 20% immediate damage scaling when comboed into (e.g. after Crumple) |
| | images = | | <br> |
| {{MoveDataCargoImage|Jamie_6hk_4hk|caption=}} | | After throwing the opponent back into the corner, Jamie does not have a true meterless strike/throw mixup. His best option is to {{clr|DR|Drive Rush}} and manually time his oki; this also gives him time to bait a reversal if the opponent is itching to react to the green flash. Another good option is immediate {{clr|M|214MP}}; this is {{sf6-adv|P|+1 oB}} and leads to a {{clr|L|623LK}} juggle on hit, though it runs the risk of being Perfect Parried. The only way to bait this parry is to whiff {{clr|L|214LP}}, which leaves Jamie very unsafe if the opponent doesn't bite. |
| | info = | | |
| {{AttackDataCargo-SF6/Query|Jamie_6hk_4hk}} | | Jamie's KD advantage is +7 after a corner Back Throw into forward dash; attempting to walk up for another throw will always lose to a reversal 4f normal even on wide characters. To dissuade the opponent from hitting a button, an immediate {{clr|M|5MP}} will link to {{clr|M|2MK}} on {{clr|PC|Counter-hit}}. If the opponent respects your pressure, this opens up the door for Jamie to walk a few frames to get back into throw range. |
| }}
| |
| ====<font style="visibility:hidden; float:right">6hk_4hk_5p</font>====
| |
| {{MoveDataCargo
| |
| | title = Ransui Haze Headbutt (DR4) | |
| | subtitle = | |
| | input = 6HK > 4HK > 5P
| |
| | images =
| |
| {{MoveDataCargoImage|Jamie_6hk_4hk_5p|caption=}}
| |
| | info = | |
| {{AttackDataCargo-SF6/Query|Jamie_6hk_4hk_5p}} | |
| }}
| |
| ====<font style="visibility:hidden; float:right">6hk_4hk_5p</font>====
| |
| {{MoveDataCargo
| |
| | title = Ransui Haze Triple Fist (DR4)
| |
| | subtitle =
| |
| | input = 6HK > 4HK > 5P
| |
| | images =
| |
| {{MoveDataCargoImage|Jamie_6hk_4hk_5p|caption=}} | |
| | info =
| |
| {{AttackDataCargo-SF6/Query|Jamie_6hk_4hk_5p}}
| |
| }} | |
| ====<font style="visibility:hidden; float:right">6hk_4hk_5p</font>====
| |
| {{MoveDataCargo
| |
| | title = Ransui Haze Drink (DR4)
| |
| | subtitle =
| |
| | input = 6HK > 4HK > 5P
| |
| | images =
| |
| {{MoveDataCargoImage|Jamie_6hk_4hk_5p|caption=}} | |
| | info =
| |
| {{AttackDataCargo-SF6/Query|Jamie_6hk_4hk_5p}} | |
| }} | |
| ====<font style="visibility:hidden; float:right">2hk_hk</font>====
| |
| {{MoveDataCargo | |
| | title = Phantom Sway | |
| | subtitle = | |
| | input = 2HK > HK
| |
| | images =
| |
| {{MoveDataCargoImage|Jamie_2hk_hk|caption=}} | |
| | info =
| |
| {{AttackDataCargo-SF6/Query|Jamie_2hk_hk}} | |
| }}
| |
| ====<font style="visibility:hidden; float:right">2hk_hk_p</font>====
| |
| {{MoveDataCargo | |
| | title = Phantom Sway + Drink | |
| | subtitle = | |
| | input = 2HK > HK > P
| |
| | images =
| |
| {{MoveDataCargoImage|Jamie_2hk_hk_p|caption=}} | |
| | info =
| |
| {{AttackDataCargo-SF6/Query|Jamie_2hk_hk_p}} | |
| }} | |
|
| |
|
| == Universal Mechanics ==
| | Midscreen, the opponent recovers much too far away for Jamie to apply any pressure, even with {{clr|DR|Drive Rush}}. If the opponent decides not to back rise, it's possible to meaty with {{clr|DR|DR~}}{{clr|H|6HK}} or a manually timed {{clr|DR|DR~}}{{clr|M|5MP}}, but these don't give great pressure and the meter is wasted if the opponent does back rise. A neutral rise is fairly likely to happen if the opponent wants to ensure you don't have time for a Drink, so pay attention to your opponent's habits and decide if it's worth attempting. |
| === Throws ===
| |
| ====<font style="visibility:hidden; float:right">lplk</font>====
| |
| {{MoveDataCargo | |
| | title = Back Shaver | |
| | subtitle = | |
| | input = LPLK
| |
| | images =
| |
| {{MoveDataCargoImage|Jamie_lplk|caption=}} | |
| | info =
| |
| {{AttackDataCargo-SF6/Query|Jamie_lplk}} | |
| }} | |
| ====<font style="visibility:hidden; float:right">4lplk</font>====
| |
| {{MoveDataCargo
| |
| | title = Wheel Punch
| |
| | subtitle =
| |
| | input = 4LPLK
| |
| | images =
| |
| {{MoveDataCargoImage|Jamie_4lplk|caption=}} | |
| | info =
| |
| {{AttackDataCargo-SF6/Query|Jamie_4lplk}} | |
| }} | | }} |
| | <br> |
|
| |
|
| === Drive Moves ===
| | == Drive System == |
| ====<font style="visibility:hidden; float:right">hphk</font>==== | | ====<font style="visibility:hidden; float:right">Drive Impact (HPHK)</font>==== |
| {{MoveDataCargo | | {{MoveDataCargo |
| | title = Drive Impact | | | title = Drive Impact |
| | subtitle = | | | subtitle = |
| | input = HPHK | | | input = {{Classic_sf6}} HPHK<br>{{Modern_sf6}} DI |
| | images = | | | images = |
| {{MoveDataCargoImage|Jamie_hphk|caption=}} | | {{MoveDataCargoImage|imageHeight=180px|Jamie_hphk_dl2|caption=}} |
| | info = | | | hitboxes = |
| {{AttackDataCargo-SF6/Query|Jamie_hphk}} | | {{MoveDataCargoImage|hitbox=yes|imageHeight=200px|Jamie_hphk_dl2|caption=}} |
| | | info = |
| | {{AttackDataCargo-SF6/Query|imageHeight=200px|Jamie_hphk_dl2}} |
| | * Damage DL0-DL4: 720/760/800/840/880 |
| | * '''Armor (2-hit):''' 1-27f; '''Range:''' 2.490 (1.670 movement + 0.82 hitbox) |
| | * On Hit/PC: Applies 20% damage scaling to next hit when beginning a combo |
| | * On Block: Applies 20% scaling multiplier to all follow-up hits after Wall Splat; the next attack can incur additional Starter Scaling |
| | * Combos when canceled from {{clr|H|2HP}} or {{clr|PC|Punish Counter}} {{clr|H|5HK}} (no corner wallsplat; useful for depleting Drive gauge, especially after Perfect Parry) |
| | * A blocked {{clr|DR|DI}} can combo into another {{clr|DR|DI}} if opponent is not fully cornered (Stuns if opponent has less than 1.5 Drive bars) |
| | ** This happens because a blocked {{clr|DR|DI}} is not considered a "hit" for combo purposes |
| | ** Causes both the 20% Starter and 20% Multiplier scaling to apply to the follow-up combo |
| | See [[Street_Fighter_6/Gauges#Drive_Impact|Drive Impact]] on the Gauges page for more details. |
| | |
| | When canceled from a normal, these are the important '''blockstring gaps'''; a gap of N will trade with an N-frame startup attack; [] = Burnout |
| | * {{clr|H|2HP}}, {{clr|H|6HK}}~{{clr|H|4HK}}~{{clr|H|Spin}}: 7[3] |
| | * {{clr|H|5HK}}: 9[5] |
| | * {{clr|M|5MK}}, {{clr|H|6HK}}~{{clr|H|4HK}}~{{clr|H|Headbutt}}: 10[6] |
| | * {{clr|M|2MP}}: 12[8] |
| | * {{clr|M|2MK}}: 13[9] |
| | * {{clr|L|5LP}}~{{clr|L|LK}}~{{clr|M|MP}}: 14[10] |
| | * {{clr|H|5HP}}: 15[11] |
| | * Note: A gap ≥ 6f can be thrown, and a gap ≥ 9f can be jumped out of by most characters |
| | |
| | Against the following characters in Burnout: |
| | * '''JP (22K)''', frame 3 counter |
| | * '''Marisa (214K)''', frame 3 armor |
| | * '''Zangief ({{clr|H|5[HP]}})''', frame 4 armor |
| | |
| | It's important to use a blockstring that cannot be absorbed by their armor/counter moves. Ideally, the string should also not be a true combo, or it will cause a Lock and prevent Stun.<br>{{clr|OD|*}} Denotes a move that causes Lock on {{clr|PC|Counter-hit}}, allowing the opponent to escape a Stun by mashing on wakeup. |
| | * {{clr|H|2HP}}{{clr|OD|*}} > {{clr|DR|DI}}: 3f blockstring gap will work vs. Zangief {{clr|H|5[HP]}} |
| | * {{clr|DR|DR~}}{{clr|H|5HK}}{{clr|OD|*}} > {{clr|DR|DI}}: 1f blockstring gap prevents opponent from absorbing the hit |
| | * {{clr|DR|DR~}}{{clr|M|5MK}}{{clr|OD|*}} > {{clr|DR|DI}}: 2f blockstring gap prevents opponent from absorbing the hit |
| }} | | }} |
| ====<font style="visibility:hidden; float:right">6hphk</font>==== | | |
| | ====<font style="visibility:hidden; float:right">Drive Reversal (6HPHK)</font>==== |
| {{MoveDataCargo | | {{MoveDataCargo |
| | title = Drive Reversal | | | title = Drive Reversal |
| | subtitle = | | | subtitle = |
| | input = 6HPHK | | | input = {{classic_sf6}} 6HPHK<br>{{modern_sf6}} 6DI |
| | images = | | | images = |
| {{MoveDataCargoImage|Jamie_6hphk|caption=}} | | {{MoveDataCargoImage|imageHeight=160px|Jamie_6hphk_dl2|caption=}} |
| | info = | | | hitboxes = |
| {{AttackDataCargo-SF6/Query|Jamie_6hphk}} | | {{MoveDataCargoImage|hitbox=yes|imageHeight=180px|Jamie_6hphk_dl2|caption=}} |
| | | info = |
| | {{AttackDataCargo-SF6/Query|Jamie_6hphk_dl2}} |
| | * Damage DL0-DL4: 450/475/500/525/550 Recoverable |
| | * '''Full Invuln:''' 1-22f; '''Range:''' 2.003; Armor Break |
| | * 5f extra recovery on hit; 4f screen freeze during startup |
| | {{AttackDataCargo-SF6/Query|Jamie_6hphk_dl2_recovery}} |
| | * Damage DL0-DL4: 450/475/500/525/550 Recoverable |
| | * '''Full Invuln:''' 1-20f; '''Range:''' 1.898; Armor Break |
| | ** Jamie is the only character whose Drive Reversals have different ranges |
| | * 5f extra recovery on hit; no screen freeze |
| | See [[Street_Fighter_6/Gauges#Drive_Reversal|Drive Reversal]] on the Gauges page for more details. |
| }} | | }} |
| ====<font style="visibility:hidden; float:right">mpmk</font>==== | | |
| | ====<font style="visibility:hidden; float:right">Drive Parry (MPMK)</font>==== |
| {{MoveDataCargo | | {{MoveDataCargo |
| | title = Drive Parry | | | title = Drive Parry |
| | subtitle = | | | subtitle = |
| | input = MPMK | | | input = {{classic_sf6}} MPMK<br>{{modern_sf6}} DP |
| | images = | | | images = |
| {{MoveDataCargoImage|Jamie_mpmk|caption=}} | | {{MoveDataCargoImage|imageHeight=180px|Jamie_mpmk|caption=}} |
| | info = | | | hitboxes = |
| | {{MoveDataCargoImage|hitbox=yes|imageHeight=175px|Jamie_mpmk|caption=}} |
| | | info = |
| {{AttackDataCargo-SF6/Query|Jamie_mpmk}} | | {{AttackDataCargo-SF6/Query|Jamie_mpmk}} |
| | See [[Street_Fighter_6/Gauges#Drive_Parry|Drive Parry]] on the Gauges page for more details. |
| | * Perfect Parry: |
| | ** Applies a 50% damage scaling multiplier to any punish afterwards |
| | ** vs. strikes, has only 1f recovery and prevents the opponent from canceling their attack |
| | ** vs. projectiles, puts you into a fixed 11f recovery |
| }} | | }} |
| ====<font style="visibility:hidden; float:right">66</font>==== | | |
| | ====<font style="visibility:hidden; float:right">Drive Rush (MPMK~66)</font>==== |
| {{MoveDataCargo | | {{MoveDataCargo |
| | title = Drive Rush | | | title = Drive Rush |
| | subtitle = | | | subtitle = |
| | input = 66 | | | input = {{Classic_sf6}} MPMK~66<br>{{Modern_sf6}} DP~66 |
| | images = | | | images = |
| {{MoveDataCargoImage|Jamie_66|caption=}} | | {{MoveDataCargoImage|imageHeight=160px|jamie_mpmk_66_pdr|caption=}} |
| | info = | | | hitboxes = |
| {{AttackDataCargo-SF6/Query|Jamie_66}} | | {{MoveDataCargoImage|hitbox=yes|imageHeight=180px|jamie_mpmk_66_pdr|caption=}} |
| }} | | | info = |
| ====<font style="visibility:hidden; float:right">5pppkkk</font>====
| | {{AttackDataCargo-SF6/Query|jamie_mpmk_66_pdr}} |
| {{MoveDataCargo | | * 1-bar version performed out of Parry |
| | title = Taunt
| | * Startup is 1+8 immediately after successful Parry |
| | subtitle =
| | {{AttackDataCargo-SF6/Query|jamie_mpmk_66_drc}} |
| | input = 5PPPKKK
| | * 3-bar version performed on hit/block from a cancelable normal |
| | images =
| | ** Can also be performed from whiffed cancelable light normals |
| {{MoveDataCargoImage|Jamie_5pppkkk|caption=}} | | |
| | info =
| | See [[Street_Fighter_6/Gauges#Drive_Rush|Drive Rush]] on the Gauges page for more details. See Strategy page for [[Street_Fighter_6/Jamie/Strategy#Drive_Rush|Blockstring Gaps and Combo Routes]] |
| {{AttackDataCargo-SF6/Query|Jamie_5pppkkk}} | | * Startup refers to minimum time before an attack can cancel the {{clr|DR|Drive Rush}} animation |
| | * The first 15 recovery frames are cancelable into any attack |
| | * The final 22 recovery frames are cancelable into any attack or movement option or blocking (except Parry) |
| | * Only Normal and Command Normal attacks are enhanced with '''+4''' frame advantage and improved juggle properties |
| | * Applies 15% damage scaling multiplier to any follow-up hits when used mid-combo |
| | ** Only applies scaling once per combo; does not apply when a {{clr|DR|Drive Rush}} enhanced attack starts the combo |
| | |
| | Distance: |
| | * 0.988 (min, cancel into immediate Throw) |
| | * 2.030 (min, earliest blocking/movement frame) |
| | * 3.002 (max, final {{clr|DR|DR}} frame) |
| }} | | }} |
| | <br> |
|
| |
|
| == Special Moves == | | == Special Moves == |
| === The Devil Inside ===
| | ====<font style="visibility:hidden; float:right">The Devil Inside (22P)</font>==== |
| ====<font style="visibility:hidden; float:right">22p</font>==== | |
| {{MoveDataCargo | | {{MoveDataCargo |
| | title = The Devil Inside | | | title = The Devil Inside |
| | subtitle = | | | subtitle = Drink (DL0) |
| | input = 22P | | | input = {{classic_sf6}} 22P<br>{{modern_sf6}} 22X |
| | images = | | | images = |
| {{MoveDataCargoImage|Jamie_22p|caption=}} | | {{MoveDataCargoImage|Jamie_22p|caption=}} |
| | info = | | ---- |
| | {{MoveDataCargoImage|imageHeight=200px|Jamie_22p_activation|caption= ''Don't Drink and Drive (Rush)''}} |
| | | hitboxes = |
| | {{MoveDataCargoImage|hitbox=yes|Jamie_22p|caption=}} |
| | ---- |
| | {{MoveDataCargoImage|hitbox=yes|imageHeight=200px|Jamie_22p_activation|caption=}} |
| | | info = |
| {{AttackDataCargo-SF6/Query|Jamie_22p}} | | {{AttackDataCargo-SF6/Query|Jamie_22p}} |
| }}
| | {{AttackDataCargo-SF6/Query|Jamie_22p_2}} |
| ====<font style="visibility:hidden; float:right">22p_hold</font>====
| | {{AttackDataCargo-SF6/Query|Jamie_22p_3}} |
| {{MoveDataCargo
| | {{AttackDataCargo-SF6/Query|Jamie_22p_4}} |
| | title = The Devil Inside (2 drinks)
| | * Increases Drink Level by 1-4 depending on how long button is held; Startup represents the time it takes to build each Drink |
| | subtitle =
| | * Refills 0.25 Drive bars per level increase; at DL4, this is doubled to 0.5 Drive bars per level |
| | input = 22P (hold)
| | * Drink Level from 0-4 affects moveset and base damage scaling (90/95/100/105/110% respectively) |
| | images =
| | * Entire animation is in a {{clr|PC|Counter-hit}} state |
| {{MoveDataCargoImage|Jamie_22p_hold|caption=}}
| |
| | info =
| |
| {{AttackDataCargo-SF6/Query|Jamie_22p_hold}} | |
| }}
| |
| ====<font style="visibility:hidden; float:right">22p_hold level 2</font>====
| |
| {{MoveDataCargo
| |
| | title = The Devil Inside (3 drinks)
| |
| | subtitle =
| |
| | input = 22P (hold level 2)
| |
| | images =
| |
| {{MoveDataCargoImage|Jamie_22p_hold level 2|caption=}}
| |
| | info =
| |
| {{AttackDataCargo-SF6/Query|Jamie_22p_hold level 2}} | |
| }}
| |
| ====<font style="visibility:hidden; float:right">22p_hold level 3</font>====
| |
| {{MoveDataCargo
| |
| | title = The Devil Inside (4 drinks)
| |
| | subtitle =
| |
| | input = 22P (hold level 3)
| |
| | images =
| |
| {{MoveDataCargoImage|Jamie_22p_hold level 3|caption=}}
| |
| | info =
| |
| {{AttackDataCargo-SF6/Query|Jamie_22p_hold level 3}} | |
| }}
| |
| ====<font style="visibility:hidden; float:right">22p_activation</font>====
| |
| {{MoveDataCargo
| |
| | title = The Devil Inside (DR4 activation)
| |
| | subtitle =
| |
| | input = 22P (activation)
| |
| | images =
| |
| {{MoveDataCargoImage|Jamie_22p_activation|caption=}} | |
| | info =
| |
| {{AttackDataCargo-SF6/Query|Jamie_22p_activation}} | | {{AttackDataCargo-SF6/Query|Jamie_22p_activation}} |
| | * Happens automatically upon reaching DL4; Drink recovers more quickly, potentially giving stronger oki |
| | * Screen freezes for 25f (1f full invincibility on the frame this occurs) |
| | * The 4 vulnerable post-freeze frames put Jamie in a {{clr|PC|Counter-hit}} state |
| }} | | }} |
|
| |
|
| === Freeflow Strikes ===
| | ====<font style="visibility:hidden; float:right">Freeflow Strikes (236P)</font>==== |
| ====<font style="visibility:hidden; float:right">236lp</font>==== | | <tabber> DL0-DL3 = |
| {{MoveDataCargo | | {{MoveDataCargo |
| | title = LP Freeflow Strikes | | | title = Freeflow Strikes |
| | subtitle = | | | subtitle = Rekka (DL0) |
| | input = 236LP | | | input = {{classic_sf6}} 236P<br>{{modern_sf6}} 236X or 5S (M) |
| | images = | | | images = |
| {{MoveDataCargoImage|Jamie_236lp|caption=}} | | {{MoveDataCargoImage|imageHeight=240px|Jamie_236lp_dl2|caption=}} |
| | info = | | | hitboxes = |
| {{AttackDataCargo-SF6/Query|Jamie_236lp}} | | {{MoveDataCargoImage|hitbox=yes|imageHeight=220px|Jamie_236lp_dl2|caption=}} |
| | | info = |
| | {{AttackDataCargo-SF6/Query|Jamie_236lp_dl2}} |
| | * Damage DL0-DL3: 315/332/350/367 |
| | * '''Cancel Hitconfirm Window:''' 19f (Follow-up) / 14f (Super) |
| | {{AttackDataCargo-SF6/Query|Jamie_236mp_dl2}} |
| | * Damage DL0-DL3: 360/380/400/420 |
| | * '''Cancel Hitconfirm Window:''' 19f (Follow-up) / 14f (Super) |
| | ** 18f confirm window to combo into ~6K |
| | {{AttackDataCargo-SF6/Query|Jamie_236hp_dl2}} |
| | * Damage DL0-DL3: 405/427/450/472 |
| | * '''Cancel Hitconfirm Window:''' 19f (Follow-up) / 14f (Super) |
| | ** 16f confirm window to combo into ~6P, 15f to combo into ~6K |
| | {{AttackDataCargo-SF6/Query|Jamie_236pp_dl2}} |
| | * Damage DL0-DL3: 405/427/450/472 |
| | * '''Cancel Hitconfirm Window:''' 23f (Follow-up) / 15f (Super) |
| | ** 22f confirm window to combo into ~6K |
| | * '''{{clr|SA|SA2}} cancel advantage:''' {{sf6-adv|VP|+17}} oH / {{sf6-adv|VP|+14}} oB |
| | * Both 6P follow-ups do not count as separate hits for damage scaling |
| | <br> |
| | Freeflow Strikes (or "Rekkas") are forward-moving strikes that can be confirmed into optional follow-ups. Higher strength versions move farther but have slower startup, with the {{clr|OD|OD}} version gaining both speed and longer range. At Drink Lv.0 to Lv.3, each Rekka is a single hit, and only the first part of the sequence can cancel into Super. If well-spaced, the first meterless Freeflow Strike is often safe; the {{clr|L|LP}} version is usually the best for this since it has less forward movement, but this can also cause it to whiff in max range cancels. The {{clr|OD|OD}} version is always safe. |
| | |
| | When attempting to confirm into the 6P or 6K follow-ups on hit, it's important to note that the follow-up speed depends on the strength of the first Rekka. Delaying the confirm too long, especially on {{clr|H|HP Rekka}}, can cause the follow-up to come out without comboing. The 6K follow-up is slightly slower than 6P, which also makes the confirm slightly stricter. {{clr|OD|OD Rekka}} canceled into {{clr|SA|SA2}} is a great option on hit or block, leading to great combos or block pressure from a mid-range poke. |
| | |
| | This move and its follow-ups can be used in juggles, but they can be very inconsistent depending on the screen position and opponent's juggle height; {{clr|OD|OD Rekkas}} are the most consistent overall, and the corner makes things easier as well. They also can lead to significantly more damage due to the unique scaling rules on the {{clr|OD|OD}} 6P follow-ups. |
| }} | | }} |
| ====<font style="visibility:hidden; float:right">236lp_6p</font>====
| | |-| |
| | DL4 = |
| {{MoveDataCargo | | {{MoveDataCargo |
| | title = LP Freeflow Strikes 2 (Punch) | | | title = Freeflow Strikes |
| | subtitle = | | | subtitle = Rekka (DL4) |
| | input = 236LP > 6P | | | input = {{classic_sf6}} 236P<br>{{modern_sf6}} 236X or 5S (M) |
| | images = | | | images = |
| {{MoveDataCargoImage|Jamie_236lp_6p|caption=}} | | {{MoveDataCargoImage|imageHeight=200px|Jamie_236lp_dl4|caption=}} |
| | info = | | ---- |
| {{AttackDataCargo-SF6/Query|Jamie_236lp_6p}} | | {{MoveDataCargoImage|imageHeight=200px|Jamie_236lp_dl4|2|caption=}} |
| | | hitboxes = |
| | {{MoveDataCargoImage|hitbox=yes|imageHeight=200px|Jamie_236lp_dl4|caption=}} |
| | {{MoveDataCargoImage|hitbox=yes|imageHeight=200px|Jamie_236lp_dl4|2|caption=}} |
| | | info = |
| | {{AttackDataCargo-SF6/Query|Jamie_236lp_dl4}} |
| | * '''Cancel Hitconfirm Window:''' 36f (Follow-up) / 29f (Super) |
| | ** 33f confirm window to combo into ~6P, 34f to combo into ~6K |
| | {{AttackDataCargo-SF6/Query|Jamie_236mp_dl4}} |
| | * '''Cancel Hitconfirm Window:''' 36f (Follow-up) / 29f (Super) |
| | ** 33f confirm window to combo into ~6P, 31f to combo into ~6K |
| | {{AttackDataCargo-SF6/Query|Jamie_236hp_dl4}} |
| | * '''Cancel Hitconfirm Window:''' 36f (Follow-up) / 29f (Super) |
| | ** 33f confirm window to combo into ~6P, 28f to combo into ~6K |
| | {{AttackDataCargo-SF6/Query|Jamie_236pp_dl4}} |
| | * '''Cancel Hitconfirm Window:''' 36f (Follow-up) / 27f (Super) |
| | ** 35f confirm window to combo into ~6P |
| | * '''{{clr|SA|SA2}} cancel advantage:''' {{sf6-adv|VP|+18}} oH / {{sf6-adv|VP|+13}} (1st hit), {{sf6-adv|VP|+12}} (2nd hit) oB |
| | * Both 6P follow-ups do not count as separate hits for damage scaling |
| | <br> |
| | At max Drink Level, Freeflow Strikes becomes a 2-hit attack, gaining additional damage and making it much easier to confirm follow-ups or Super. It also becomes safe on block for all versions, giving Jamie a great confirmable pressure tool from mid-range. In some juggle routes, it becomes harder to combo into the 6K follow-ups due to the extra pushback, so the 6P follow-ups are recommended for more consistency. |
| }} | | }} |
| ====<font style="visibility:hidden; float:right">236lp_6p_6p</font>==== | | </tabber> |
| | |
| | =====<font style="visibility:hidden; float:right">Freeflow Strikes Punch 1 (236P~6P)</font>===== |
| | <tabber> DL0-DL3 = |
| {{MoveDataCargo | | {{MoveDataCargo |
| | title = LP Freeflow Strikes 3 (Punch) | | | title = Freeflow Strikes Punch 1 |
| | subtitle = | | | subtitle = Rekka Punch 1 (DL0) |
| | input = 236LP > 6P > 6P | | | input = {{classic_sf6}} 236P~6P<br>{{modern_sf6}} 236X~6X or 5S~5S (M) |
| | images = | | | images = |
| {{MoveDataCargoImage|Jamie_236lp_6p_6p|caption=}} | | {{MoveDataCargoImage|imageHeight=240px|Jamie_236lp_6p_dl2|caption=}} |
| | info = | | | hitboxes = |
| {{AttackDataCargo-SF6/Query|Jamie_236lp_6p_6p}} | | {{MoveDataCargoImage|hitbox=yes|imageHeight=220px|Jamie_236lp_6p_dl2|caption=}} |
| | | info = |
| | {{AttackDataCargo-SF6/Query|Jamie_236lp_6p_dl2}} |
| | * Damage DL0-DL3: 315/332/350/367 |
| | * '''Cancel Hitconfirm Window:''' 18f (Follow-up) |
| | * 0-2f gap between Rekka and 6P on block |
| | {{AttackDataCargo-SF6/Query|Jamie_236mp_6p_dl2}} |
| | * Damage DL0-DL3: 360/380/400/420 |
| | * '''Cancel Hitconfirm Window:''' 18f (Follow-up) |
| | * 0-5f gap between Rekka and 6P on block |
| | {{AttackDataCargo-SF6/Query|Jamie_236hp_6p_dl2}} |
| | * Damage DL0-DL3: 405/427/450/472 |
| | * '''Cancel Hitconfirm Window:''' 18f (Follow-up) |
| | * 3-8f gap between Rekka and 6P on block |
| | {{AttackDataCargo-SF6/Query|Jamie_236pp_6p_dl2}} |
| | * Damage DL0-DL3: 405/427/450/472 |
| | * '''Cancel Hitconfirm Window:''' 19f (Follow-up) |
| | * 0-3f gap between Rekka and 6P on block |
| | * Does not count as a separate hit for damage scaling |
| | <br> |
| | The Punch follow-ups are the preferred route for damage, juggles, and oki; they can be performed on hit, block, or whiff. The {{clr|L|LP}}, {{clr|M|MP}}, and {{clr|OD|OD}} Rekka starters require a manual delay to create a blockstring gap, while {{clr|H|HP Rekka}} can automatically frame trap with a 3f gap at the fastest timing. While risky, this frame trap can be used against an opponent that tries to punish your first Rekka on block. On hit, stopping after the first 6P puts Jamie at a slight disadvantage; an unaware opponent may be caught off guard with a quick throw reset, but attempting this is sacrificing guaranteed damage and a knockdown. |
| | |
| | The cancel hitconfirm window applies to the 6P hit only and does not include the first 236P hit. In the startup column, [] refers to the total startup time for 236P~6P when the first Rekka whiffs, which can be useful for certain long-range punishes. |
| }} | | }} |
| ====<font style="visibility:hidden; float:right">236lp_6k</font>====
| | |-| |
| | DL4 = |
| {{MoveDataCargo | | {{MoveDataCargo |
| | title = LP Freeflow Strikes 2 (Kick) | | | title = Freeflow Strikes Punch 1 |
| | subtitle = | | | subtitle = Rekka Punch 1 (DL4) |
| | input = 236LP > 6K | | | input = {{classic_sf6}} 236P~6P<br>{{modern_sf6}} 236X~6X or 5S~5S (M) |
| | images = | | | images = |
| {{MoveDataCargoImage|Jamie_236lp_6k|caption=}} | | {{MoveDataCargoImage|imageHeight=200px|Jamie_236lp_6p_dl4|caption=}} |
| | info = | | ---- |
| {{AttackDataCargo-SF6/Query|Jamie_236lp_6k}} | | {{MoveDataCargoImage|imageHeight=180px|Jamie_236lp_6p_dl4|2|caption=}} |
| | | hitboxes = |
| | {{MoveDataCargoImage|hitbox=yes|imageHeight=180px|Jamie_236lp_6p_dl4|caption=}} |
| | {{MoveDataCargoImage|hitbox=yes|imageHeight=180px|Jamie_236lp_6p_dl4|2|caption=}} |
| | | info = |
| | {{AttackDataCargo-SF6/Query|Jamie_236lp_6p_dl4}} |
| | * '''Cancel Hitconfirm Window:''' 28f (Follow-up) |
| | * 2-7f gap between Rekka and 6P on block |
| | {{AttackDataCargo-SF6/Query|Jamie_236mp_6p_dl4}} |
| | * '''Cancel Hitconfirm Window:''' 28f (Follow-up) |
| | * 2-7f gap between Rekka and 6P on block |
| | {{AttackDataCargo-SF6/Query|Jamie_236hp_6p_dl4}} |
| | * '''Cancel Hitconfirm Window:''' 28f (Follow-up) |
| | * 2-7f gap between Rekka and 6P on block |
| | {{AttackDataCargo-SF6/Query|Jamie_236pp_6p_dl4}} |
| | * '''Cancel Hitconfirm Window:''' 28f (Follow-up) |
| | * 2-7f gap between Rekka and 6P on block |
| | * Does not count as a separate hit for damage scaling |
| | <br> |
| | The Punch follow-ups are the preferred route for damage, juggles, and oki; they can be performed on hit, block, or whiff. Like the initial Rekka, this follow-up is 2 hits when at max Drink Level. All strengths of Rekka lead to the same 2-7f gap between hits on block, which can be used to frame trap the opponent. However, this frame gap is not very useful for two reasons: the initial Rekka is safe (meaning the opponent is less likely to hit a button while attempting a punish), and a {{clr|PC|Counter-hit}} does not give Jamie the bonus frame advantage when both hits of the follow-up connect. |
| | |
| | The cancel hitconfirm window applies to the 6P hit only and does not include the first 236P hit. In the startup column, [] refers to the total startup time for 236P~6P when the first Rekka whiffs, which can be useful for certain long-range punishes. |
| }} | | }} |
| ====<font style="visibility:hidden; float:right">236lp_6k_6k</font>==== | | </tabber> |
| | |
| | =====<font style="visibility:hidden; float:right">Freeflow Strikes Punch 2 (236P~6P~6P)</font>===== |
| | <tabber> DL0-DL3 = |
| {{MoveDataCargo | | {{MoveDataCargo |
| | title = LP Freeflow Strikes 3 (Kick) | | | title = Freeflow Strikes Punch 2 |
| | subtitle = | | | subtitle = Rekka Punch 2 (DL0) |
| | input = 236LP > 6K > 6K | | | input = {{classic_sf6}} 236P~6P~6P<br>{{modern_sf6}} 236X~6X~6X or 5S~5S~5S (M) |
| | images = | | | images = |
| {{MoveDataCargoImage|Jamie_236lp_6k_6k|caption=}} | | {{MoveDataCargoImage|imageHeight=240px|Jamie_236lp_6p_6p_dl2|caption=}} |
| | info = | | | hitboxes = |
| {{AttackDataCargo-SF6/Query|Jamie_236lp_6k_6k}} | | {{MoveDataCargoImage|hitbox=yes|imageHeight=220px|Jamie_236lp_6p_6p_dl2|caption=}} |
| | | info = |
| | {{AttackDataCargo-SF6/Query|Jamie_236lp_6p_6p_dl2}} |
| | * Damage DL0-DL3: 495(396)/522(418)/550(440)/577(462) |
| | * 1-5f gap before final hit on block |
| | {{AttackDataCargo-SF6/Query|Jamie_236mp_6p_6p_dl2}} |
| | * Damage DL0-DL3: 540(432)/570(456)/600(480)/630(504) |
| | * 2-6f gap before final hit on block |
| | {{AttackDataCargo-SF6/Query|Jamie_236hp_6p_6p_dl2}} |
| | * Damage DL0-DL3: 585(468)/617(494)/650(520)/682(546) |
| | * 3-7f gap before final hit on block |
| | {{AttackDataCargo-SF6/Query|Jamie_236pp_6p_6p_dl2}} |
| | * Damage DL0-DL3: 675(540)/712(570)/750(600)/787(630) |
| | * 0-2f gap before final hit on block |
| | * Does not count as a separate hit for damage scaling |
| | <br> |
| | The final 6P follow-up completes the Punch sequence. It can be done on hit, block, or whiff and has juggle potential. This sequence gets no oki midscreen if the opponent back rises, but it has good corner carry and is Jamie's most consistent combo ender. Like the first 6P follow-up, there is a blockstring gap between the final 2 hits that varies based on the button timing, but this is a very unsafe gimmick for beating the opponent's attempted Rekka punish. |
| | |
| | In the startup column, [] refers to the total startup time for 236P~6P~6P when the first 2 hits of Rekka whiff at the fastest speed. In the Damage column, the first value lists the unscaled damage; () refers to the damage at 80% scaling, which is what would normally occur when starting a combo with the first Rekka. |
| }} | | }} |
| ====<font style="visibility:hidden; float:right">236mp</font>====
| | |-| |
| | DL4 = |
| {{MoveDataCargo | | {{MoveDataCargo |
| | title = MP Freeflow Strikes | | | title = Freeflow Strikes Punch 2 |
| | subtitle = | | | subtitle = Rekka Punch 2 (DL4) |
| | input = 236MP | | | input = {{classic_sf6}} 236P~6P~6P<br>{{modern_sf6}} 236X~6X~6X or 5S~5S~5S (M) |
| | images = | | | images = |
| {{MoveDataCargoImage|Jamie_236mp|caption=}} | | {{MoveDataCargoImage|imageHeight=200px|Jamie_236lp_6p_6p_dl4|caption=}} |
| | info = | | {{MoveDataCargoImage|imageHeight=180px|Jamie_236lp_6p_6p_dl4|2|caption=}} |
| {{AttackDataCargo-SF6/Query|Jamie_236mp}} | | {{MoveDataCargoImage|imageHeight=180px|Jamie_236lp_6p_6p_dl4|3|caption=}} |
| | | hitboxes = |
| | {{MoveDataCargoImage|hitbox=yes|imageHeight=120px|Jamie_236lp_6p_6p_dl4|caption=}} |
| | {{MoveDataCargoImage|hitbox=yes|imageHeight=160px|Jamie_236lp_6p_6p_dl4|2|caption=}} |
| | | info = |
| | {{AttackDataCargo-SF6/Query|Jamie_236lp_6p_6p_dl4}} |
| | * 2-6f gap before final hit on block |
| | {{AttackDataCargo-SF6/Query|Jamie_236mp_6p_6p_dl4}} |
| | * 2-6f gap before final hit on block |
| | {{AttackDataCargo-SF6/Query|Jamie_236hp_6p_6p_dl4}} |
| | * 2-6f gap before final hit on block |
| | {{AttackDataCargo-SF6/Query|Jamie_236pp_6p_6p_dl4}} |
| | * 2-6f gap before final hit on block |
| | * Does not count as a separate hit for damage scaling |
| | <br> |
| | At max Drink Level, the Rekka Punch ender does 3 hits. Other than some minor changes to the frame data and blockstring gaps, it functions the same as the DL0-DL3 versions. |
| }} | | }} |
| ====<font style="visibility:hidden; float:right">236mp_6p</font>==== | | </tabber> |
| | |
| | =====<font style="visibility:hidden; float:right">Freeflow Kicks 1 (236P~6K)</font>===== |
| {{MoveDataCargo | | {{MoveDataCargo |
| | title = MP Freeflow Strikes 2 (Punch) | | | title = Freeflow Kicks 1 |
| | subtitle = | | | subtitle = Rekka Kick 1 (DL0) |
| | input = 236MP > 6P | | | input = {{classic_sf6}} 236P~6K<br>{{modern_sf6}} 236X~4X or 5S~4S (M) |
| | images = | | | images = |
| {{MoveDataCargoImage|Jamie_236mp_6p|caption=}} | | {{MoveDataCargoImage|imageHeight=190px|Jamie_236lp_6k_dl2|caption=}} |
| | info = | | | hitboxes = |
| {{AttackDataCargo-SF6/Query|Jamie_236mp_6p}} | | {{MoveDataCargoImage|hitbox=yes|imageHeight=180px|Jamie_236lp_6k_dl2|caption=}} |
| | | info = |
| | {{AttackDataCargo-SF6/Query|Jamie_236lp_6k_dl2}} |
| | * Damage DL0-DL4: 225/237/250/262/275 |
| | * '''Cancel Hitconfirm Window:''' 16f (Follow-up) |
| | * 0-3f gap between Rekka and 6K on block (DL4: 0-6f) |
| | {{AttackDataCargo-SF6/Query|Jamie_236mp_6k_dl2}} |
| | * Damage DL0-DL4: 270/285/300/315/330 |
| | * '''Cancel Hitconfirm Window:''' 16f (Follow-up) |
| | * 1-6f gap between Rekka and 6K on block (DL4: 2-9f) |
| | {{AttackDataCargo-SF6/Query|Jamie_236hp_6k_dl2}} |
| | * Damage DL0-DL4: 270/285/300/315/330 |
| | * '''Cancel Hitconfirm Window:''' 16f (Follow-up) |
| | * 4-9f gap between Rekka and 6K on block (DL4: 4-12f) |
| | {{AttackDataCargo-SF6/Query|Jamie_236pp_6k_dl2}} |
| | * Damage DL0-DL4: 315/332/350/367/385 |
| | * '''Cancel Hitconfirm Window:''' 16f (Follow-up) |
| | * 0-4f gap between Rekka and 6K on block (DL4: 1-6f) |
| | <br> |
| | The 6K follow-up gives less damage and worse oki than the 6P route, but allows Jamie to end with a Drink. It can only be performed on hit or block; the move will not come out if 236P whiffs. Unfortunately for Jamie, this means there is no way to safely space this move at max distance. |
| | |
| | The cancel hitconfirm window only applies to the 6K hit and does not include the first 236P hit; this is only really relevant if the initial Rekka is blocked, and you attempt to frame trap into the unsafe follow-up. |
| }} | | }} |
| ====<font style="visibility:hidden; float:right">236mp_6p_6p</font>==== | | |
| | =====<font style="visibility:hidden; float:right">Freeflow Kicks 2 (236P~6K~6K)</font>===== |
| {{MoveDataCargo | | {{MoveDataCargo |
| | title = MP Freeflow Strikes 3 (Punch) | | | title = Freeflow Kicks 2 |
| | subtitle = | | | subtitle = Rekka Kick 2 (DL0) |
| | input = 236MP > 6P > 6P | | | input = {{classic_sf6}} 236P~6K~6K<br>{{modern_sf6}}236X~4X~4X or 5S~4S~4S (M) |
| | images = | | | images = |
| {{MoveDataCargoImage|Jamie_236mp_6p_6p|caption=}} | | {{MoveDataCargoImage|imageHeight=180px|Jamie_236lp_6k_6k_dl2|caption=}} |
| | info = | | | hitboxes = |
| {{AttackDataCargo-SF6/Query|Jamie_236mp_6p_6p}} | | {{MoveDataCargoImage|hitbox=yes|imageHeight=190px|Jamie_236lp_6k_6k_dl2|caption=}} |
| | | info = |
| | {{AttackDataCargo-SF6/Query|Jamie_236lp_6k_6k_dl2}} |
| | * Damage DL0-DL4: 405/427/450/472/495 (Scaled: 324/342/360/378/396) |
| | * 2-6f gap before final hit on block |
| | * Refill 0.5 Drive bars; at DL4, refills 1 Drive bar |
| | {{AttackDataCargo-SF6/Query|Jamie_236mp_6k_6k_dl2}} |
| | * Damage DL0-DL4: 450/475/500/525/550 (Scaled: 360/380/400/420/440) |
| | * 5-9f gap before final hit on block |
| | * Refill 0.5 Drive bars; at DL4, refills 1 Drive bar |
| | {{AttackDataCargo-SF6/Query|Jamie_236hp_6k_6k_dl2}} |
| | * Damage DL0-DL4: 495/522/550/577/605 (Scaled: 396/418/440/462/484) |
| | * 8-12f gap before final hit on block |
| | * Refill 0.5 Drive bars; at DL4, refills 1 Drive bar |
| | {{AttackDataCargo-SF6/Query|Jamie_236pp_6k_6k_dl2}} |
| | * Damage DL0-DL4: 540/570/600/630/660 (Scaled: 432/456/480/504/528) |
| | * 2-6f gap before final hit on block |
| | * Refill 0.5 Drive bars; at DL4, refills 1 Drive bar |
| | <br> |
| | The final 6K follow-up, like its predecessor, can only come out on hit or block. If successful, it levels up Jamie's Drink Level by 1. Because Rekkas are so easy to confirm into, this move is the primary way to level up. The meterless versions leave Jamie at a slight disadvantage after knockdown, making it slightly risky to use in the corner; to avoid this risk, use the {{clr|OD|OD}} version to give Jamie slightly more KD advantage. |
| | |
| | The long drink animation makes the 6K ender extremely unsafe on block. The drink itself is interruptible, and any punish within the first 21f will stop Jamie's drink level from increasing (20f for the {{clr|L|LP}} version). Like the other Rekka follow-ups, it is possible to frame trap the opponent if they attempt a punish. The exact blockstring gap can change depending on the button timing. |
| | |
| | The transition from DL3 to DL4 gives Jamie much better KD advantage on the knockdown. Because of this, there is no need to use the {{clr|OD|OD}} version for a safe corner drink. As with all drinks, Jamie refills some Drive meter alongside his level-up, and even more when already at DL4. DL4 Jamie gets far more damage and corner carry from his Punch Rekkas, but this may be a good option if approaching Burnout; the {{clr|OD|OD}} version also benefits from refunding some of its initial meter cost. |
| | |
| | In the Damage column, the first value lists the unscaled damage; () refers to the damage at 80% scaling, which is what would normally occur when starting a combo with the first Rekka. |
| }} | | }} |
| ====<font style="visibility:hidden; float:right">236mp_6k</font>==== | | |
| | ====<font style="visibility:hidden; float:right">Swagger Step (214P)</font>==== |
| {{MoveDataCargo | | {{MoveDataCargo |
| | title = MP Freeflow Strikes 2 (Kick) | | | title = Swagger Step |
| | subtitle = | | | subtitle = Palm (DL0) |
| | input = 236MP > 6K | | | input = {{classic_sf6}} 214P<br>{{modern_sf6}} 214X |
| | images = | | | images = |
| {{MoveDataCargoImage|Jamie_236mp_6k|caption=}} | | {{MoveDataCargoImage|imageHeight=180px|Jamie_214lp_dl2|caption='''F**k it-'''}} |
| | info = | | | hitboxes = |
| {{AttackDataCargo-SF6/Query|Jamie_236mp_6k}} | | {{MoveDataCargoImage|hitbox=yes|imageHeight=200px|Jamie_214lp_dl2|caption=}} |
| | | info = |
| | {{AttackDataCargo-SF6/Query|Jamie_214lp_dl2}} |
| | * Damage DL0-DL4: 810/855/900/945/990 |
| | * '''Cancel Hitconfirm Window:''' 25f (Super/DL4 Follow-up) |
| | ** 22f to confirm 6P juggle after DL4 grounded hit |
| | {{AttackDataCargo-SF6/Query|Jamie_214mp_dl2}} |
| | * Damage DL0-DL4: 900/950/1000/1050/1100 |
| | * '''Cancel Hitconfirm Window:''' 25f (Super/DL4 Follow-up) |
| | ** 22f to confirm 6P juggle after DL4 grounded hit |
| | {{AttackDataCargo-SF6/Query|Jamie_214hp_dl2}} |
| | * Damage DL0-DL4: 1080/1140/1200/1260/1320 |
| | * {{clr|PC|Punish Counter}}: puts opponent in {{sf6-jug|free juggle}} state (no change to KD/juggle height) |
| | ** Serves little practical purpose, as Jamie will usually juggle 623K after meaty corner {{clr|H|214HP}} regardless |
| | * '''Cancel Hitconfirm Window:''' 25f (Super/DL4 Follow-up) |
| | ** 22f to confirm 6P juggle after DL4 grounded hit |
| | {{AttackDataCargo-SF6/Query|Jamie_214pp_dl2}} |
| | * Damage DL0-DL4: 990/1045/1100/1155/1210 |
| | * Causes Tumble state; can OTG juggle near corner |
| | * {{clr|PC|Punish Counter}}: Tumble KD +87 (+155 if the corner Wall Splat happens) |
| | ** Opponent is considered standing and throwable, but becomes airborne after follow-up hit |
| | * '''Cancel Hitconfirm Window:''' 25f (Super/DL4 Follow-up) |
| | * '''{{clr|SA|SA2}} cancel advantage:''' KD +89(+103) oH / {{sf6-adv|VP|+15}} oB |
| | * Applies 20% damage scaling to next hit when beginning a combo (100/80/70...) |
| | <br> |
| | A forward lunging palm attack that travels a farther distance on stronger versions. With its high number of active frames, the {{clr|L|LP}}/{{clr|M|MP}} versions can be made safe on block if spaced well, and the {{clr|H|HP}}/{{clr|OD|OD}} versions are safe at any range. |
| | |
| | The slow startup limits the number of useful cancel routes; no version can cancel directly from lights without a {{clr|DR|Drive Rush}} or {{clr|PC|Punish Counter}} starter, and Jamie struggles to get useful links into mediums and heavies without spending meter. Palm works well in juggle routes, like after a wallsplat, {{clr|OD|OD Tenshin}} crumple, or {{clr|PC|Punish Counter}} {{clr|H|5HK}}. It also does much more damage in {{clr|SA|SA3}} cancels than 236P, though once Jamie gets 2 Drinks it's better to cancel 236K instead. Note that the Super confirm window is quite lenient, but becomes more strict when spaced to hit on later active frames (17f window at minimum). |
| | |
| | After a knockdown, meterless Palm allows Jamie to double dash for point blank oki (+1 after {{clr|L|LP}}/{{clr|M|MP}}, +4 after {{clr|H|HP}}). The {{clr|H|HP}} version also sets up perfect safe jump timing against cornered opponents if it connects on the ground, making it a good alternative to {{clr|L|623LK}}. It is sometimes possible for Jamie to take a Drink instead of going for midscreen oki, but some characters can punish this if they don't back rise on wakeup; {{clr|H|HP Palm}} is notably safer in this regard, as most characters can't reach Jamie with an 8f midscreen punish. |
| | |
| | {{clr|OD|OD Palm}} gives a much better knockdown situation than the meterless versions, and combos in any situation where {{clr|M|MP Palm}} works. The tumble state sends opponents flying far away, and lets Jamie combo into several moves (most notably his {{clr|H|2HK}}~{{clr|H|HK}} TC) in the corner. While it's tempting to try to sneak in 2 Drinks after a midscreen {{clr|OD|OD Palm}}, many characters can punish this if they don't back rise. If {{clr|OD|OD Palm}} lands as a {{clr|PC|Punish Counter}}, Jamie gets absurdly high KD advantage, especially if the opponent tumbles into the wall. This wallsplat lets Jamie take a drink before starting his juggle, or take 3 drinks while still retaining corner oki (which can reasonably end the round with the next mixup). |
| | |
| | At Drink Lv.4, Jamie gains an additional [[#Swagger Hermit Punch (214P~6P)|6P Follow-up]] for extra damage. This can be confirmed off a raw 214P hit, but may drop if input too late. |
| | |
| | Grounded cancel routes: ({{clr|PC|CH}} = +2 {{clr|PC|Counter-hit}}, {{clr|PC|PC}} = +4 {{clr|PC|Punish Counter}}) |
| | * {{clr|H|214HP}}: {{clr|H|2HP}}, {{clr|PC|CH}} {{clr|H|5HP}} |
| | * {{clr|M|214MP}}/{{clr|OD|214PP}}: {{clr|M|5MK}}, {{clr|M|2MP}}, {{clr|H|5HK}}, {{clr|PC|CH}} {{clr|M|2MK}}, {{clr|PC|PC}} {{clr|H|5HP}} (+ all above) |
| | * {{clr|L|214LP}}: {{clr|H|5HP}}, {{clr|M|2MK}}, {{clr|L|5LP}}~{{clr|L|LK}}~{{clr|M|MP}}, {{clr|PC|CH}} {{clr|L|2LP}}, {{clr|PC|CH}} {{clr|L|5LK}} (+ all above) |
| }} | | }} |
| ====<font style="visibility:hidden; float:right">236mp_6k_6k</font>==== | | |
| | =====<font style="visibility:hidden; float:right">Swagger Hermit Punch (214P~6P)</font>===== |
| {{MoveDataCargo | | {{MoveDataCargo |
| | title = MP Freeflow Strikes 3 (Kick) | | | title = Swagger Hermit Punch |
| | subtitle = | | | subtitle = Palm Follow-up (DL4) |
| | input = 236MP > 6K > 6K | | | input = {{classic_sf6}} 214P~6P<br>{{modern_sf6}} 214X~6X |
| | images = | | | images = |
| {{MoveDataCargoImage|Jamie_236mp_6k_6k|caption=}} | | {{MoveDataCargoImage|imageHeight=180px|Jamie_214p_6p|caption='''''We Palm'''''}} |
| | info = | | | hitboxes = |
| {{AttackDataCargo-SF6/Query|Jamie_236mp_6k_6k}} | | {{MoveDataCargoImage|hitbox=yes|imageHeight=200px|Jamie_214p_6p|caption=}} |
| | | info = |
| | {{AttackDataCargo-SF6/Query|Jamie_214p_6p}} |
| | * Can be delayed significantly after 214P |
| | ** After {{clr|L|214LP}}/{{clr|M|214MP}}: 1-8f gap on block |
| | ** After {{clr|H|214HP}}: 0-6f gap on block |
| | * '''Cancel Hitconfirm Window:''' 19f (Super) |
| | * Applies 20% damage scaling to next hit when beginning a combo (after blocked 214P) |
| | {{AttackDataCargo-SF6/Query|Jamie_214pp_6p}} |
| | * Forms a true blockstring after {{clr|OD|214PP}} (can delay to create up to a 5f blockstring gap) |
| | * '''Cancel Hitconfirm Window:''' 19f (Super) |
| | * '''{{clr|SA|SA2}} cancel advantage:''' KD +55(+57) oH / {{sf6-adv|VP|+12}} oB; 2f better if 6P hits grounded |
| | * Applies 20% damage scaling to next hit when beginning a combo (after blocked 214PP) |
| | <br> |
| | This follow-up to Swagger Step is only available at max Drink Level. It works in juggles or in grounded combos, adding significant damage especially when canceled into {{clr|SA|SA3}}. It is much more unsafe on block than the first part of Swagger Step, though it can be used as a risky frame trap if the opponent tries to punish you (requiring a manual delay if starting with {{clr|H|214HP}}). Be careful when delaying the 6P follow-up, as a long delay can cause it to whiff against grounded opponents unless the initial 214P hits meaty. |
| }} | | }} |
| ====<font style="visibility:hidden; float:right">236hp</font>==== | | |
| | ====<font style="visibility:hidden; float:right">Arrow Kick (623K)</font>==== |
| {{MoveDataCargo | | {{MoveDataCargo |
| | title = HP Freeflow Strikes | | | title = Arrow Kick |
| | subtitle = | | | subtitle = Uppercut (DL0) |
| | input = 236HP | | | input = {{classic_sf6}} 623K<br>{{modern_sf6}}623X or 6S (H) |
| | images = | | | images = |
| {{MoveDataCargoImage|Jamie_236hp|caption=}} | | {{MoveDataCargoImage|imageHeight=220px|Jamie_623lk_dl2|caption=}} |
| | info = | | ---- |
| {{AttackDataCargo-SF6/Query|Jamie_236hp}} | | {{MoveDataCargoImage|imageHeight=200px|Jamie_623lk_dl2|2|caption=''Works 30% of the time.'' |
| | |
| | ''Everytime.''}} |
| | | hitboxes = |
| | {{MoveDataCargoImage|hitbox=yes|imageHeight=160px|Jamie_623lk_dl2|caption=}} |
| | ---- |
| | {{MoveDataCargoImage|hitbox=yes|imageHeight=160px|Jamie_623kk_dl2|caption=}} |
| | | info = |
| | {{AttackDataCargo-SF6/Query|Jamie_623lk_dl2}} |
| | * Damage DL0-DL4: 900/950/1000/1050/1100 |
| | * '''Anti-Air Invuln:''' 1-11f (cannot hit cross-up); '''Low Crush:''' 5-22f |
| | * Applies 30% damage scaling to next hit when beginning a combo (100/70/60...) |
| | {{AttackDataCargo-SF6/Query|Jamie_623mk_dl2}} |
| | * Damage DL0-DL4: 1080/1140/1200/1260/1320 |
| | * '''Anti-Air Invuln:''' 1-14f (cannot hit cross-up); '''Low Crush:''' 8-23f |
| | {{AttackDataCargo-SF6/Query|Jamie_623hk_dl2}} |
| | * Damage DL0-DL4: 1260/1330/1400/1470/1540 |
| | * '''Anti-Air Invuln:''' 1-16f (cannot hit cross-up); '''Low Crush:''' 10-25f |
| | {{AttackDataCargo-SF6/Query|Jamie_623kk_dl2}} |
| | * Damage DL0-DL4: 1350/1424/1500/1574/1650 |
| | * '''Full Invuln:''' 1-9f |
| | * '''Anti-Air Invuln:''' 10-12f (cannot hit cross-up); '''Low Crush:''' 10-21f |
| | <br> |
| | Jamie's most consistent anti-air and {{clr|OD|OD}} reversal. He kicks upward before falling back away from the opponent. {{clr|L|LK Arrow Kick}} is generally the best anti-air due to its fast startup; at 5f startup, it will beat any safe jump setup that isn't frame-perfect and is great for cross-cut DPs when walking under the opponent's jump. However, the poor vertical reach makes it hard to anti-air an opponent that can alter their air trajectory. Against divekick characters, the {{clr|M|MK}}/{{clr|H|HK}} versions can be a bit more consistent, as it gives the opponent more time to descend into the stationary hitbox while still retaining its invincibility. |
| | |
| | On hit, Arrow Kick transitions into a leaping follow-up attack that is fully invincible during the animation. There is a small window before this follow-up that can lose to projectiles, but this rarely comes into play. On whiff or block, Jamie does not perform the extra hit, instead standing up from his grounded position. This recovery animation can cause the opponent's attempted punish to whiff at longer ranges, but the opponent still has plenty of time to recognize this and walk forward for a full punish. |
| | |
| | Arrow Kick works well in juggles, but in grounded combos it can be finicky near max range. It also has no ability to Super cancel, so its damage potential in punishes is limited. It gives Jamie great oki on hit, and the follow-up animation provides some nice corner carry as well. In the corner, the {{clr|L|LK}} version sets up a safe jump, making it an important combo ender until Drink Lv.2 when it becomes outclassed by {{clr|L|236LK}}. |
| | |
| | On a very high connect, both the {{clr|L|LK}} and {{clr|H|HK}} versions have possible follow-up juggles. {{clr|L|LK Arrow Kick}} can juggle into {{clr|SA|SA1}}/{{clr|SA|SA3}}, or {{clr|OD|623KK}} in the corner; keep in mind that Jamie incurs significant damage scaling when doing this. {{clr|H|HK Arrow Kick}} has more restrictive follow-up timing, only allowing {{clr|SA|SA1}} or {{clr|OD|623KK}} in the corner. In exchange for the added difficulty, Jamie does not suffer a damage scaling penalty. |
| }} | | }} |
| ====<font style="visibility:hidden; float:right">236hp_6p</font>==== | | |
| | ====<font style="visibility:hidden; float:right">Luminous Dive Kick (j.214K)</font>==== |
| {{MoveDataCargo | | {{MoveDataCargo |
| | title = HP Freeflow Strikes 2 (Punch) | | | title = Luminous Dive Kick |
| | subtitle = | | | subtitle = Divekick (DL1) |
| | input = 236HP > 6P | | | input = {{classic_sf6}} j.214K<br>{{modern_sf6}} j.214X or j.S |
| | images = | | | images = |
| {{MoveDataCargoImage|Jamie_236hp_6p|caption=}} | | {{MoveDataCargoImage|imageHeight=220px|Jamie_j214k_dl2|caption=''Nice Delay Tech ya got there''}} |
| | info = | | | hitboxes = |
| {{AttackDataCargo-SF6/Query|Jamie_236hp_6p}} | | {{MoveDataCargoImage|hitbox=yes|imageHeight=200px|Jamie_j214k_dl2|caption=}} |
| | | info = |
| | {{AttackDataCargo-SF6/Query|Jamie_j214k_dl2}} |
| | * Damage DL1-DL4: 950/1000/1050/1100 |
| | * Forward jump only; button strength determines angle ({{clr|L|LK}} short, {{clr|M|MK}} mid, {{clr|H|HK}} far) |
| | * Spike knockdown vs. airborne opponents (no juggle follow-up) |
| | * {{FKD}} state until land; final recovery frame is in a crouching state with a standing-sized hurtbox |
| | ** [[Street_Fighter_6/Glossary#IASA_/_Actionable_Recovery|IASA]]: this tall crouching hurtbox lasts up to 39 more frames when holding any crouch direction |
| | {{AttackDataCargo-SF6/Query|Jamie_j214kk_dl2}} |
| | * Damage DL1-DL4: 760/800/840/880 |
| | * Puts opponents into {{sf6-jug|limited juggle}} state |
| | ** Airborne opponents are put into a shorter OTG bounce state with stricter follow-up timing |
| | * Applies 20% damage scaling to next hit when beginning a combo; applies 10% immediate damage scaling when comboed into |
| | * {{FKD}} state until land; final recovery frame is in a crouching state with a standing-sized hurtbox |
| | ** [[Street_Fighter_6/Glossary#IASA_/_Actionable_Recovery|IASA]]: this tall crouching hurtbox lasts up to 39 more frames when holding any crouch direction |
| | <br> |
| | At Drink Lv.1, Jamie unlocks a divekick that can be used out of forward jumps. It can be done very low to the ground with a Tiger Knee input (214~9K), and connecting low on the opponents legs gives better advantage on block or on knockdown; he can even juggle after meterless divekick when spaced well enough. Can be canceled into from a forward {{clr|M|j.MP}} in juggle routes or air-to-air conversions, with the {{clr|OD|OD}} version leading to a small follow-up juggle. |
| | |
| | Luminous Dive Kick is a useful tool not only for pressure, but for navigating around projectiles, an area in which Jamie usually struggles. However, Jamie extends a hurtbox downward early in his startup that can make it harder to avoid a projectile, particularly slower ones. It also evades throws, so it can be used as a pseudo-shimmy or as a punish against corner throw loops. |
| | |
| | The slight mid-air pause before Jamie descends can bait the opponent's anti-air attempt or cause an uppercut to whiff at close range. The downward hurtbox on the later active frames sticks out a bit below Jamie's foot, which can cause him to lose or trade with moves that are not normally anti-airs, so it's most effective if you think the opponent will stick out a low poke like {{clr|M|2MK}}. |
| }} | | }} |
| ====<font style="visibility:hidden; float:right">236hp_6p_6p</font>==== | | |
| | ====<font style="visibility:hidden; float:right">Bakkai (236K)</font>==== |
| {{MoveDataCargo | | {{MoveDataCargo |
| | title = HP Freeflow Strikes 3 (Punch) | | | title = Bakkai |
| | subtitle = | | | subtitle = Breakdance (DL2) |
| | input = 236HP > 6P > 6P | | | input = {{classic_sf6}} 236K<br>{{modern_sf6}} 2S (M) |
| | images = | | | images = |
| {{MoveDataCargoImage|Jamie_236hp_6p_6p|caption=}} | | {{MoveDataCargoImage|imageHeight=170px|Jamie_236lk_dl2|caption=}} |
| | info = | | ---- |
| {{AttackDataCargo-SF6/Query|Jamie_236hp_6p_6p}} | | {{MoveDataCargoImage|imageHeight=180px|Jamie_236kk_dl2|caption=''{{clr|H|Ysaar's HATE him!}}'' |
| | Bypass neutral skips using this '''[ONE WEIRD TRICK]'''}} |
| | | hitboxes = |
| | {{MoveDataCargoImage|hitbox=yes|imageHeight=130px|Jamie_236lk_dl2|caption=[[Street_Fighter_6/Jamie/Data#236LK|Full LK Hitbox Data]]}} |
| | ---- |
| | {{MoveDataCargoImage|hitbox=yes|imageHeight=130px|Jamie_236mk_dl2|caption=[[Street_Fighter_6/Jamie/Data#236MK|Full MK Hitbox Data]]}} |
| | ---- |
| | {{MoveDataCargoImage|hitbox=yes|imageHeight=130px|Jamie_236hk_dl2|caption=[[Street_Fighter_6/Jamie/Data#236HK|Full HK Hitbox Data]]}} |
| | ---- |
| | {{MoveDataCargoImage|hitbox=yes|imageHeight=130px|Jamie_236kk_dl2|caption=[[Street_Fighter_6/Jamie/Data#236KK|Full OD Hitbox Data]]}} |
| | | info = |
| | {{AttackDataCargo-SF6/Query|Jamie_236lk_dl2}} |
| | * Damage DL2-DL4: 1400/1468/1540 |
| | * '''Projectile Invuln:''' 3-43f (until end of active frames) |
| | * '''Cancel Hitconfirm Window:''' 47f (Super) |
| | {{AttackDataCargo-SF6/Query|Jamie_236mk_dl2}} |
| | * Damage DL2-DL4: 1600/1677/1760 |
| | * '''Projectile Invuln:''' 4-59f (until end of active frames) |
| | * '''Cancel Hitconfirm Window:''' 63f (Super) |
| | {{AttackDataCargo-SF6/Query|Jamie_236hk_dl2}} |
| | * Damage DL2-DL4: 1800/1887/1980 |
| | * '''Projectile Invuln:''' 5-92f (until end of active frames) |
| | * '''Cancel Hitconfirm Window:''' 94f (Super) |
| | {{AttackDataCargo-SF6/Query|Jamie_236kk_dl2}} |
| | * Damage DL2-DL4: 2000/2100/2200 |
| | * '''Projectile Invuln:''' 3-100f (until end of active frames) |
| | * '''Cancel Hitconfirm Window:''' 74f (Super); cancels on 7th hit |
| | * '''{{clr|SA|SA2}} cancel advantage:''' {{sf6-adv|VP|+14}} oH / {{sf6-adv|VP|+7}} oB |
| | <br> |
| | Jamie drops to the ground and begins break dancing, slowly advancing toward the opponent. The high damage makes this great for Super canceling, and the {{clr|OD|OD}} version can be made plus on block by canceling into {{clr|SA|SA2}}. The {{clr|L|LK}} version gives Jamie a safe jump and mid-screen oki, so it's important to end your combos with this instead of the lower-damage {{clr|L|623LK}} when you're at Drink Lv.2 or higher. |
| | |
| | Bakkai is Jamie's primary anti-fireball move, but in practice it can be difficult to use in this way. The move has slow startup and takes extra time to reach its full range, so faster projectiles like Guile's Sonic Boom will almost certainly recover if attempted as a reaction punish. The {{clr|H|HK}} version has enough forward movement to be consistent against shoto projectiles, but the forward movement and later invincibility window can cause Jamie to get hit out of startup unless input early. {{clr|OD|OD Bakkai}} has the best combination of forward movement, speed, and invincibility for countering projectiles, and can be kept safe with {{clr|SA|SA2}} if blocked. |
| | |
| | The projectile invincibility window lasts unusually long on Bakkai, extending all the way to the end of the active frames. This makes it more effective against slow projectiles like A.K.I.'s {{clr|L|214LP}}, and more importantly it serves as a hard counter to {{clr|SA|SA2}} from Ed and Rashid when performed in neutral. This forces them to activate their Supers from very long range or while Jamie is knocked down, making it harder to use as a neutral-skipping tool. |
| | |
| | Grounded cancel routes: ({{clr|PC|CH}} = +2 {{clr|PC|Counter-hit}}, {{clr|PC|PC}} = +4 {{clr|PC|Punish Counter}}) |
| | * {{clr|H|236HK}}: {{clr|H|2HP}}, {{clr|PC|PC}} {{clr|H|5HK}} |
| | * {{clr|M|236MK}}: {{clr|H|5HK}}, {{clr|PC|CH}} {{clr|M|5MK}} (+ all above) |
| | * {{clr|OD|236KK}}: {{clr|PC|PC}} {{clr|H|5HP}}, {{clr|PC|PC}} {{clr|M|5MK}}, {{clr|PC|PC}} {{clr|M|2MP}}, {{clr|PC|PC}} {{clr|M|2MK}} (+ all above) |
| | * {{clr|L|236LK}}: {{clr|M|5MK}}, {{clr|M|2MP}}, {{clr|M|2MK}}, {{clr|L|5LP}}~{{clr|L|LK}}~{{clr|M|MP}}, {{clr|PC|PC}} {{clr|L|5LK}}, {{clr|PC|PC}} {{clr|L|2LP}} (+ all above) |
| }} | | }} |
| ====<font style="visibility:hidden; float:right">236hp_6k</font>==== | | |
| | ====<font style="visibility:hidden; float:right">Tenshin (63214K)</font>==== |
| {{MoveDataCargo | | {{MoveDataCargo |
| | title = HP Freeflow Strikes 2 (Kick) | | | title = Tenshin |
| | subtitle = | | | subtitle = Command Grab (DL3) |
| | input = 236HP > 6K | | | input = {{classic_sf6}} 63214K<br>{{modern_sf6}} 4S |
| | images = | | | images = |
| {{MoveDataCargoImage|Jamie_236hp_6k|caption=}} | | {{MoveDataCargoImage|imageHeight=200px|Jamie_63214k_dl3|caption="Come back here!"}} |
| | info = | | ---- |
| {{AttackDataCargo-SF6/Query|Jamie_236hp_6k}} | | {{MoveDataCargoImage|imageHeight=160px|Jamie_63214k_dl3|2|caption=Regular Follow-up}} |
| | ---- |
| | {{MoveDataCargoImage|imageHeight=200px|Jamie_63214k_dl3|3|caption=OD Follow-up}} |
| | | hitboxes = |
| | {{MoveDataCargoImage|hitbox=yes|imageHeight=200px|Jamie_63214k_dl3|caption=}} |
| | | info = |
| | {{AttackDataCargo-SF6/Query|Jamie_63214k_dl3}} |
| | * Applies 20% damage scaling to 3rd hit when beginning a combo (100/100/60...) |
| | * Applies 20% immediate damage scaling when comboed into (e.g. after Crumple) |
| | * Range: 0.96 (slight forward movement on during startup) |
| | {{AttackDataCargo-SF6/Query|Jamie_63214kk_dl3}} |
| | * Damage DL3-DL4: 682/715 |
| | * Crumple state; Jamie is +28 before the opponent goes airborne |
| | * Applies 30% damage scaling to next hit when beginning a combo (100/70/60...) |
| | * Range: 0.96 (slight forward movement on during startup) |
| | <br> |
| | Tenshin is a unique command grab that allows a follow-up combo on hit, reminiscent of Yun, Yang, and Fei Long's similar grab from previous games but without the side switch. The speed and range is not quite as good as most command grabs, but the combo utility more than makes up for these faults and greatly boosts Jamie's close range mixup game. Tenshin allows Jamie the freedom to route his follow-up combo for oki, corner carry, or damage depending on what resources are spent; the {{clr|OD|OD}} version in particular gives him some of the highest command grab damage in the entire game. This also means that Jamie can get looping command grab oki, something extremely rare in SF6. |
| | |
| | The damage scaling of meterless Tenshin doesn't apply to the immediate follow-up, but instead to the 3rd hit of the combo. This allows Jamie to link directly into an unscaled {{clr|SA|SA1}} for some easy damage and corner carry. The {{clr|OD|OD}} version has more standard starter scaling, which prevents Jamie from having a more damaging command grab than Zangief's {{clr|SA|CA}}. Despite this scaling, {{clr|OD|OD Tenshin}} can lead to incredible damage when dumping resources. Both versions can actually be comboed into after a corner {{clr|PC|Punish Counter}} {{clr|OD|214PP}} wall splat; when comboed into, meterless Tenshin immediately applies an extra 20% scaling on the 0-damage hit before the scaling resumes as normal. |
| | |
| | Jamie is not point blank after the grab, but is close enough to combo into moves like {{clr|M|5MP}}, {{clr|M|2MP}}, or {{clr|H|5HP}}. Landing as a {{clr|PC|Counter-hit}} or {{clr|PC|Punish Counter}} does not increase Jamie's frame advantage, but a {{clr|PC|Punish Counter}} {{clr|OD|OD Tenshin}} does get a little extra damage. |
| | |
| | Sometimes, Jamie will say a naughty word when he whiffs the grab. Be careful when playing Jamie with small children nearby. |
| }} | | }} |
| ====<font style="visibility:hidden; float:right">236hp_6k_6k</font>==== | | <br> |
| | |
| | == Super Arts == |
| | ====<font style="visibility:hidden; float:right">Level 1 Super (236236K)</font>==== |
| {{MoveDataCargo | | {{MoveDataCargo |
| | title = HP Freeflow Strikes 3 (Kick) | | | title = Breakin' |
| | subtitle = | | | subtitle = Level 1 Super Art |
| | input = 236HP > 6K > 6K | | | input = {{classic_sf6}} 236236K<br>{{modern_sf6}} 236236L or 5HS or 6HS |
| | images = | | | images = |
| {{MoveDataCargoImage|Jamie_236hp_6k_6k|caption=}} | | {{MoveDataCargoImage|imageHeight=180px|Jamie_236236k_dl2|caption=''Let it Rip''}} |
| | info = | | | hitboxes = |
| {{AttackDataCargo-SF6/Query|Jamie_236hp_6k_6k}} | | {{MoveDataCargoImage|hitbox=yes|imageHeight=90px|Jamie_236236k_dl2|caption=}} |
| | {{MoveDataCargoImage|hitbox=yes|imageHeight=95px|Jamie_236236k_dl2|2|caption=}} |
| | {{MoveDataCargoImage|hitbox=yes|imageHeight=95px|Jamie_236236k_dl2|3|caption=}} |
| | {{MoveDataCargoImage|hitbox=yes|imageHeight=90px|Jamie_236236k_dl2|4|caption=}} |
| | | info = |
| | {{AttackDataCargo-SF6/Query|Jamie_236236k_dl2}} |
| | * Damage DL0-DL4: 1980 / 2084 / 2200 / 2304 / 2420 |
| | ** Chip: 450 / 472 / 500 / 522 / 550 |
| | * '''Strike/Throw Invuln:''' 1-12f; Armor Break |
| | * '''Drive Gauge Depletion:''' 0.5 bars (hit) / 0.25 bars (block) |
| | * 30% minimum damage scaling |
| | {{AttackDataCargo-SF6/Query|Jamie_236236k_drink_dl2}} |
| | * Damage DL0-DL4: 1665 / 1753 / 1850 / 1938 / 2035 |
| | ** Chip: 360 / 380 / 400 / 420 / 440 |
| | * '''Strike/Throw Invuln:''' 1-12f; Armor Break |
| | * '''Drive Gauge Depletion:''' 0.5 bars (hit) / 0.25 bars (block) |
| | * 30% minimum damage scaling |
| | * Ends in a Drink in exchange for reduced Damage and KD Advantage |
| | * Drink refills 0.5 Drive bars; at DL4, refills 1 Drive bar |
| | <br> |
| | A breakdance super that looks similar to Bakkai, mostly used as a combo ender or a reversal during Burnout. It connects after a cancel from any normal, and has a few ways of juggling into it, like high connect {{clr|L|623LK}}or 2KK. At 8f startup, it can also be linked raw after a meterless Tenshin where its damage is unscaled, which is a good alternative to {{clr|OD|OD Tenshin}}. It is important to note that this super has no hitbox for jumping opponents, only for juggled opponents. |
| | |
| | {{clr|SA|SA1}} is extremely unsafe on block, even allowing some characters to charge up an install move before starting their max damage punish. A little over halfway through the animation, there is a 16f gap on block (12f in Burnout); the opponent can jump or hit Jamie out of this to prevent additional Drive/Chip damage, but a mistimed button can also result in the opponent getting hit by the second half of the Super. |
| | |
| | During the Super animation, you can hold Down to increase your Drink Level by 1. This eliminates the blockstring gap, and on block Jamie can easily be punished before gaining the Drink Level. Jamie sacrifices some damage and knockdown advantage for using this version, but he still has enough advantage to pressure a cornered opponent; however, reversal 4f normals will beat Tenshin and trade with {{clr|M|5MP}}. If your Drive gauge is a concern, use this version to restore a little meter and avoid Burnout. |
| | |
| | At DL3, ending with a Drink activation changes the recovery to 86, making it {{sf6-adv|VM|-72}} on block. |
| | |
| | At DL4, the Drink restores twice as much Drive gauge, allowing Jamie exchange some Super meter for Drive meter in his combo routes. |
| }} | | }} |
| ====<font style="visibility:hidden; float:right">236pp</font>==== | | |
| | ====<font style="visibility:hidden; float:right">Level 2 Super (214214P)</font>==== |
| {{MoveDataCargo | | {{MoveDataCargo |
| | title = OD Rekka | | | title = The Devil's Song |
| | subtitle = | | | subtitle = Level 2 Super Art |
| | input = 236PP | | | input = {{classic_sf6}} 214214P<br>{{modern_sf6}} 214214M or 4HS |
| | images =
| | | images = |
| {{MoveDataCargoImage|Jamie_236pp|caption=}} | | {{MoveDataCargoImage|imageHeight=140px|Jamie_214214p|caption= ''Ok but like IMAGINE if this was Genei Jin''}} |
| | info =
| | | hitboxes = |
| {{AttackDataCargo-SF6/Query|Jamie_236pp}} | | {{MoveDataCargoImage|hitbox=yes|imageHeight=200px|Jamie_214214p|caption=}} |
| }} | | | info = |
| ====<font style="visibility:hidden; float:right">236pp_6p</font>====
| | {{AttackDataCargo-SF6/Query|Jamie_214214p}} |
| {{MoveDataCargo
| | * Puts Jamie at Drink Lv.4 until the install timer runs out (then returns to previous level) |
| | title = OD Freeflow Strikes 2 (Punch)
| | * Jamie's damage scaling is only set to 105%, rather than the usual 110% |
| | subtitle =
| | * Refills 1 Drive bar upon activation; at DL4, refills 3 Drive bars (with no install timer) |
| | input = 236PP > 6P
| | * Can be useful as a cancel from {{clr|OD|OD}} specials for safety or combo extensions |
| | images = | | <br> |
| {{MoveDataCargoImage|Jamie_236pp_6p|caption=}} | | A useful install that gives Jamie access to his entire moveset without needing to slowly accumulate drinks. The Super activation itself is good for applying pressure to force a mixup, or for extending a combo. It also allows Jamie to use {{clr|OD|OD Bakkai}} as a read against the opponent's projectile, while keeping himself safe on block. |
| | info = | | |
| {{AttackDataCargo-SF6/Query|Jamie_236pp_6p}} | | The timer lasts 15 seconds (900f) and freezes when the opponent is in hitstop or blockstop, after which Jamie returns to his previous Drink Level. He does not build any additional Super meter while the install timer is active. |
| }}
| |
| ====<font style="visibility:hidden; float:right">236pp_6p_6p</font>====
| |
| {{MoveDataCargo
| |
| | title = OD Freeflow Strikes 3 (Punch)
| |
| | subtitle =
| |
| | input = 236PP > 6P > 6P | |
| | images = | |
| {{MoveDataCargoImage|Jamie_236pp_6p_6p|caption=}}
| |
| | info = | |
| {{AttackDataCargo-SF6/Query|Jamie_236pp_6p_6p}} | |
| }}
| |
| ====<font style="visibility:hidden; float:right">236pp_6k</font>====
| |
| {{MoveDataCargo
| |
| | title = OD Freeflow Strikes 2 (Kick)
| |
| | subtitle =
| |
| | input = 236PP > 6K
| |
| | images =
| |
| {{MoveDataCargoImage|Jamie_236pp_6k|caption=}} | |
| | info =
| |
| {{AttackDataCargo-SF6/Query|Jamie_236pp_6k}}
| |
| }} | |
| ====<font style="visibility:hidden; float:right">236pp_6k_6k</font>====
| |
| {{MoveDataCargo | |
| | title = OD Freeflow Strikes 3 (Kick) | |
| | subtitle = | |
| | input = 236PP > 6K > 6K
| |
| | images =
| |
| {{MoveDataCargoImage|Jamie_236pp_6k_6k|caption=}}
| |
| | info =
| |
| {{AttackDataCargo-SF6/Query|Jamie_236pp_6k_6k}}
| |
| }}
| |
|
| |
|
| === Freeflow Strikes (DR4) ===
| | If Jamie is already at Drink Lv.4, he can still use this Super for its cancel properties in order to get easy frame advantage. He can also treat his Super meter as a reserve tank for his Drive gauge, restoring 3 Drive for the cost of 2 Super bars whenever he wants. This is a great way to reduce the risk of being in Burnout, as the opponent will have very little time to set up a corner {{clr|DR|Drive Impact}} or apply chip damage. The Drive gain is much more modest before Drink Lv.4, but may still be enough to give Jamie a combo extension or save him from Burnout. |
| ====<font style="visibility:hidden; float:right">236lp</font>====
| |
| {{MoveDataCargo
| |
| | title = DR4 LP Freeflow Strikes
| |
| | subtitle =
| |
| | input = 236LP
| |
| | images =
| |
| {{MoveDataCargoImage|Jamie_236lp|caption=}}
| |
| | info =
| |
| {{AttackDataCargo-SF6/Query|Jamie_236lp}}
| |
| }}
| |
| ====<font style="visibility:hidden; float:right">236lp_6p</font>====
| |
| {{MoveDataCargo
| |
| | title = DR4 LP Freeflow Strikes 2 (Punch)
| |
| | subtitle =
| |
| | input = 236LP > 6P
| |
| | images =
| |
| {{MoveDataCargoImage|Jamie_236lp_6p|caption=}}
| |
| | info =
| |
| {{AttackDataCargo-SF6/Query|Jamie_236lp_6p}}
| |
| }}
| |
| ====<font style="visibility:hidden; float:right">236lp_6p_6p</font>====
| |
| {{MoveDataCargo
| |
| | title = DR4 LP Freeflow Strikes 3 (Punch)
| |
| | subtitle =
| |
| | input = 236LP > 6P > 6P
| |
| | images =
| |
| {{MoveDataCargoImage|Jamie_236lp_6p_6p|caption=}}
| |
| | info =
| |
| {{AttackDataCargo-SF6/Query|Jamie_236lp_6p_6p}}
| |
| }}
| |
| ====<font style="visibility:hidden; float:right">236lp_6k</font>====
| |
| {{MoveDataCargo
| |
| | title = DR4 LP Freeflow Strikes 2 (Kick)
| |
| | subtitle =
| |
| | input = 236LP > 6K
| |
| | images =
| |
| {{MoveDataCargoImage|Jamie_236lp_6k|caption=}}
| |
| | info =
| |
| {{AttackDataCargo-SF6/Query|Jamie_236lp_6k}}
| |
| }}
| |
| ====<font style="visibility:hidden; float:right">236lp_6k_6k</font>====
| |
| {{MoveDataCargo
| |
| | title = DR4 LP Freeflow Strikes 3 (Kick)
| |
| | subtitle =
| |
| | input = 236LP > 6K > 6K
| |
| | images =
| |
| {{MoveDataCargoImage|Jamie_236lp_6k_6k|caption=}}
| |
| | info =
| |
| {{AttackDataCargo-SF6/Query|Jamie_236lp_6k_6k}}
| |
| }}
| |
| ====<font style="visibility:hidden; float:right">236mp</font>====
| |
| {{MoveDataCargo
| |
| | title = MP Freeflow Strikes (DR4)
| |
| | subtitle =
| |
| | input = 236MP
| |
| | images =
| |
| {{MoveDataCargoImage|Jamie_236mp|caption=}}
| |
| | info =
| |
| {{AttackDataCargo-SF6/Query|Jamie_236mp}}
| |
| }}
| |
| ====<font style="visibility:hidden; float:right">236mp_6p</font>====
| |
| {{MoveDataCargo
| |
| | title = MP Freeflow Strikes 2 Punch (DR4)
| |
| | subtitle =
| |
| | input = 236MP > 6P
| |
| | images =
| |
| {{MoveDataCargoImage|Jamie_236mp_6p|caption=}}
| |
| | info =
| |
| {{AttackDataCargo-SF6/Query|Jamie_236mp_6p}}
| |
| }}
| |
| ====<font style="visibility:hidden; float:right">236mp_6p_6p</font>====
| |
| {{MoveDataCargo
| |
| | title = MP Freeflow Strikes 3 Punch (DR4)
| |
| | subtitle =
| |
| | input = 236MP > 6P > 6P
| |
| | images =
| |
| {{MoveDataCargoImage|Jamie_236mp_6p_6p|caption=}}
| |
| | info =
| |
| {{AttackDataCargo-SF6/Query|Jamie_236mp_6p_6p}}
| |
| }}
| |
| ====<font style="visibility:hidden; float:right">236mp_6k</font>====
| |
| {{MoveDataCargo
| |
| | title = MP Freeflow Strikes 2 Kick (DR4)
| |
| | subtitle =
| |
| | input = 236MP > 6K
| |
| | images =
| |
| {{MoveDataCargoImage|Jamie_236mp_6k|caption=}}
| |
| | info =
| |
| {{AttackDataCargo-SF6/Query|Jamie_236mp_6k}}
| |
| }}
| |
| ====<font style="visibility:hidden; float:right">236mp_6k_6k</font>====
| |
| {{MoveDataCargo
| |
| | title = MP Freeflow Strikes 3 Kick (DR4)
| |
| | subtitle =
| |
| | input = 236MP > 6K > 6K
| |
| | images =
| |
| {{MoveDataCargoImage|Jamie_236mp_6k_6k|caption=}}
| |
| | info =
| |
| {{AttackDataCargo-SF6/Query|Jamie_236mp_6k_6k}}
| |
| }}
| |
| ====<font style="visibility:hidden; float:right">236hp</font>====
| |
| {{MoveDataCargo
| |
| | title = HP Freeflow Strikes (DR4)
| |
| | subtitle =
| |
| | input = 236HP
| |
| | images =
| |
| {{MoveDataCargoImage|Jamie_236hp|caption=}}
| |
| | info =
| |
| {{AttackDataCargo-SF6/Query|Jamie_236hp}}
| |
| }}
| |
| ====<font style="visibility:hidden; float:right">236hp_6p</font>====
| |
| {{MoveDataCargo
| |
| | title = HP Freeflow Strikes 2 Punch (DR4)
| |
| | subtitle =
| |
| | input = 236HP > 6P
| |
| | images =
| |
| {{MoveDataCargoImage|Jamie_236hp_6p|caption=}}
| |
| | info =
| |
| {{AttackDataCargo-SF6/Query|Jamie_236hp_6p}}
| |
| }}
| |
| ====<font style="visibility:hidden; float:right">236hp_6p_6p</font>====
| |
| {{MoveDataCargo
| |
| | title = HP Freeflow Strikes 3 Punch (DR4)
| |
| | subtitle =
| |
| | input = 236HP > 6P > 6P
| |
| | images =
| |
| {{MoveDataCargoImage|Jamie_236hp_6p_6p|caption=}}
| |
| | info =
| |
| {{AttackDataCargo-SF6/Query|Jamie_236hp_6p_6p}}
| |
| }}
| |
| ====<font style="visibility:hidden; float:right">236hp_6k</font>====
| |
| {{MoveDataCargo
| |
| | title = HP Freeflow Strikes 2 Kick (DR4)
| |
| | subtitle =
| |
| | input = 236HP > 6K
| |
| | images =
| |
| {{MoveDataCargoImage|Jamie_236hp_6k|caption=}} | |
| | info = | |
| {{AttackDataCargo-SF6/Query|Jamie_236hp_6k}}
| |
| }}
| |
| ====<font style="visibility:hidden; float:right">236hp_6k_6k</font>====
| |
| {{MoveDataCargo
| |
| | title = HP Freeflow Strikes 3 Kick (DR4)
| |
| | subtitle =
| |
| | input = 236HP > 6K > 6K
| |
| | images =
| |
| {{MoveDataCargoImage|Jamie_236hp_6k_6k|caption=}}
| |
| | info =
| |
| {{AttackDataCargo-SF6/Query|Jamie_236hp_6k_6k}}
| |
| }}
| |
| ====<font style="visibility:hidden; float:right">236pp</font>====
| |
| {{MoveDataCargo
| |
| | title = OD Rekka (DR4)
| |
| | subtitle =
| |
| | input = 236PP
| |
| | images =
| |
| {{MoveDataCargoImage|Jamie_236pp|caption=}}
| |
| | info =
| |
| {{AttackDataCargo-SF6/Query|Jamie_236pp}}
| |
| }}
| |
| ====<font style="visibility:hidden; float:right">236pp_6p</font>====
| |
| {{MoveDataCargo
| |
| | title = OD Freeflow Strikes 2 Punch (DR4)
| |
| | subtitle =
| |
| | input = 236PP > 6P
| |
| | images =
| |
| {{MoveDataCargoImage|Jamie_236pp_6p|caption=}}
| |
| | info =
| |
| {{AttackDataCargo-SF6/Query|Jamie_236pp_6p}}
| |
| }}
| |
| ====<font style="visibility:hidden; float:right">236pp_6p_6p</font>====
| |
| {{MoveDataCargo
| |
| | title = OD Freeflow Strikes 3 Punch (DR4)
| |
| | subtitle =
| |
| | input = 236PP > 6P > 6P
| |
| | images =
| |
| {{MoveDataCargoImage|Jamie_236pp_6p_6p|caption=}}
| |
| | info =
| |
| {{AttackDataCargo-SF6/Query|Jamie_236pp_6p_6p}}
| |
| }}
| |
| ====<font style="visibility:hidden; float:right">236pp_6k</font>====
| |
| {{MoveDataCargo
| |
| | title = OD Freeflow Strikes 2 Kick (DR4)
| |
| | subtitle =
| |
| | input = 236PP > 6K
| |
| | images =
| |
| {{MoveDataCargoImage|Jamie_236pp_6k|caption=}}
| |
| | info =
| |
| {{AttackDataCargo-SF6/Query|Jamie_236pp_6k}}
| |
| }}
| |
| ====<font style="visibility:hidden; float:right">236pp_6k_6k</font>====
| |
| {{MoveDataCargo
| |
| | title = OD Freeflow Strikes 3 Kick (DR4)
| |
| | subtitle =
| |
| | input = 236PP > 6K > 6K
| |
| | images =
| |
| {{MoveDataCargoImage|Jamie_236pp_6k_6k|caption=}}
| |
| | info =
| |
| {{AttackDataCargo-SF6/Query|Jamie_236pp_6k_6k}}
| |
| }} | | }} |
|
| |
|
| === Swagger Step ===
| | ====<font style="visibility:hidden; float:right">Level 3 Super (236236P)</font>==== |
| ====<font style="visibility:hidden; float:right">214lp</font>====
| |
| {{MoveDataCargo
| |
| | title = LP Swagger Step
| |
| | subtitle =
| |
| | input = 214LP
| |
| | images =
| |
| {{MoveDataCargoImage|Jamie_214lp|caption=}}
| |
| | info =
| |
| {{AttackDataCargo-SF6/Query|Jamie_214lp}}
| |
| }}
| |
| ====<font style="visibility:hidden; float:right">214mp</font>====
| |
| {{MoveDataCargo
| |
| | title = MP Swagger Step
| |
| | subtitle =
| |
| | input = 214MP
| |
| | images =
| |
| {{MoveDataCargoImage|Jamie_214mp|caption=}}
| |
| | info =
| |
| {{AttackDataCargo-SF6/Query|Jamie_214mp}}
| |
| }}
| |
| ====<font style="visibility:hidden; float:right">214hp</font>====
| |
| {{MoveDataCargo
| |
| | title = HP Swagger Step
| |
| | subtitle =
| |
| | input = 214HP
| |
| | images =
| |
| {{MoveDataCargoImage|Jamie_214hp|caption=}}
| |
| | info =
| |
| {{AttackDataCargo-SF6/Query|Jamie_214hp}}
| |
| }}
| |
| ====<font style="visibility:hidden; float:right">214pp</font>==== | |
| {{MoveDataCargo | | {{MoveDataCargo |
| | title = OD Swagger Step | | | title = Getsuga Saiho |
| | subtitle = | | | subtitle = Level 3 Super Art |
| | input = 214PP | | | input = {{classic_sf6}} 236236P<br>{{modern_sf6}} 236236H or 2HS |
| | images = | | | images = |
| {{MoveDataCargoImage|Jamie_214pp|caption=}} | | {{MoveDataCargoImage|imageHeight=140px|Jamie_236236p_dl2|caption= '''''"Curtain call!"'''''}} |
| | info = | | ---- |
| {{AttackDataCargo-SF6/Query|Jamie_214pp}} | | {{MoveDataCargoImage|imageHeight=140px|Jamie_236236p(ca)_dl2|caption=CA does much more damage, but no follow-up juggle}} |
| }} | | | hitboxes = |
| | {{MoveDataCargoImage|hitbox=yes|imageHeight=210px|Jamie_236236p_dl2|caption=}} |
| | {{MoveDataCargoImage|hitbox=yes|imageHeight=180px|Jamie_236236p_dl2|2|caption=Fun Fact: If Jamie kills with CA, the text "終劇" will appear. This translates to "End of Film" in Chinese.}} |
| | | info = |
| | {{AttackDataCargo-SF6/Query|Jamie_236236p_dl2}} |
| | * Damage DL0-DL4: 2340 / 2469 / 2600 / 2729 / 2860 |
| | ** Non-Cinematic Hit: 450 / 475 / 500 / 525 / 550 |
| | ** Chip: 450x2 / 475x2 / 500x2 / 525x2 / 550x2 |
| | * '''Full Invuln:''' 1-12f; Armor Break |
| | * Launches opponent into {{sf6-jug|free juggle}} state on cinematic hit |
| | * '''Drive Gauge Depletion:''' 1.5 bars (hit) / 0.75 bars (block) |
| | ** Cinematic time regenerates ~1.8 Drive bars for Jamie |
| | * 50% minimum damage scaling; applies 10% immediate damage scaling when canceled from special moves |
| | {{AttackDataCargo-SF6/Query|Jamie_236236p(ca)_dl2}} |
| | * Damage DL0-DL4: 4050 / 4274 / 4500 / 4724 / 4950 |
| | ** Non-Cinematic Hit: 450 / 475 / 500 / 525 / 550 |
| | ** Chip: 450,675 / 475,712 / 500,750 / 525,787 / 550,825 |
| | * '''Full Invuln:''' 1-12f; Armor Break |
| | * Available at 25% HP or below |
| | * '''Drive Gauge Depletion:''' 2 bars (hit) / 1 bar (block) |
| | ** Cinematic time regenerates ~2.2 Drive bars for Jamie |
| | * 50% minimum damage scaling; applies 10% immediate damage scaling when canceled from special moves |
| | <br> |
| | Jamie's {{clr|SA|SA3}} goes into a cinematic if the first hit connects, while the 2nd hit is extremely weak on its own. The cinematic hit ends by launching the opponent, reminiscent of Yun's You Hou Ultra 1 from USF4. As a result, the damage is quite low, instead relying on the follow-up juggle to make it worthwhile; this unfortunately means that the damage potential is quite low in highly scaled combos. The cinematic ends abruptly, so it takes practice to learn exactly when to execute the follow-up. Jamie has several options, like {{clr|H|214HP}}, Dash {{clr|H|5HP}}, or {{clr|DR|DR~}}2KK into further juggles. |
|
| |
|
| === Swagger Hermit Punch ===
| | The {{clr|SA|Critical Art}} version lacks this ending juggle, but makes up for it with higher base damage and a cooler ending cinematic, and it can be comboed into after longer combos from {{clr|OD|OD Tenshin}}, making it the most damaging throw mixup in the game. |
| ====<font style="visibility:hidden; float:right">214lp_6p</font>====
| |
| {{MoveDataCargo | |
| | title = LP Swagger Hermit Punch (DR4) | |
| | subtitle = | |
| | input = 214LP > 6P
| |
| | images =
| |
| {{MoveDataCargoImage|Jamie_214lp_6p|caption=}}
| |
| | info =
| |
| {{AttackDataCargo-SF6/Query|Jamie_214lp_6p}} | |
| }}
| |
| ====<font style="visibility:hidden; float:right">214mp_f+p</font>====
| |
| {{MoveDataCargo
| |
| | title = MP Swagger Hermit Punch (DR4) | |
| | subtitle =
| |
| | input = 214MP > f+P
| |
| | images =
| |
| {{MoveDataCargoImage|Jamie_214mp_f+p|caption=}}
| |
| | info =
| |
| {{AttackDataCargo-SF6/Query|Jamie_214mp_f+p}}
| |
| }}
| |
| ====<font style="visibility:hidden; float:right">214hp_f+p</font>====
| |
| {{MoveDataCargo
| |
| | title = HP Swagger Hermit Punch (DR4)
| |
| | subtitle =
| |
| | input = 214HP > f+P
| |
| | images =
| |
| {{MoveDataCargoImage|Jamie_214hp_f+p|caption=}}
| |
| | info =
| |
| {{AttackDataCargo-SF6/Query|Jamie_214hp_f+p}}
| |
| }}
| |
| ====<font style="visibility:hidden; float:right">214pp_f+p</font>====
| |
| {{MoveDataCargo
| |
| | title = OD Swagger Hermit Punch (DR4)
| |
| | subtitle =
| |
| | input = 214PP > f+P
| |
| | images =
| |
| {{MoveDataCargoImage|Jamie_214pp_f+p|caption=}}
| |
| | info =
| |
| {{AttackDataCargo-SF6/Query|Jamie_214pp_f+p}}
| |
| }} | |
|
| |
|
| === Arrow Kick ===
| | Because {{clr|SA|SA3}} hits twice on block, the first hit can be used to put the opponent into Burnout before chipping out with the 2nd hit. Opponents can Drive Reversal to prevent this if Jamie uses a blockstring into {{clr|SA|SA3}}, but this requires them to be aware of the gimmick and to have full awareness of the health and Drive meter situation. |
| ====<font style="visibility:hidden; float:right">623lk</font>====
| |
| {{MoveDataCargo | |
| | title = LK Arrow Kick | |
| | subtitle = | |
| | input = 623LK
| |
| | images =
| |
| {{MoveDataCargoImage|Jamie_623lk|caption=}}
| |
| | info =
| |
| {{AttackDataCargo-SF6/Query|Jamie_623lk}}
| |
| }}
| |
| ====<font style="visibility:hidden; float:right">623mk</font>====
| |
| {{MoveDataCargo
| |
| | title = MK Arrow Kick
| |
| | subtitle =
| |
| | input = 623MK
| |
| | images =
| |
| {{MoveDataCargoImage|Jamie_623mk|caption=}}
| |
| | info =
| |
| {{AttackDataCargo-SF6/Query|Jamie_623mk}}
| |
| }} | |
| ====<font style="visibility:hidden; float:right">623hk</font>====
| |
| {{MoveDataCargo | |
| | title = HK Arrow Kick | |
| | subtitle =
| |
| | input = 623HK
| |
| | images =
| |
| {{MoveDataCargoImage|Jamie_623hk|caption=}}
| |
| | info =
| |
| {{AttackDataCargo-SF6/Query|Jamie_623hk}}
| |
| }}
| |
| ====<font style="visibility:hidden; float:right">623kk</font>====
| |
| {{MoveDataCargo
| |
| | title = OD Arrow Kick
| |
| | subtitle =
| |
| | input = 623KK
| |
| | images =
| |
| {{MoveDataCargoImage|Jamie_623kk|caption=}}
| |
| | info =
| |
| {{AttackDataCargo-SF6/Query|Jamie_623kk}}
| |
| }} | | }} |
| | <br> |
|
| |
|
| === Luminous Dive === | | == Taunts == |
| ====<font style="visibility:hidden; float:right">214lk_air</font>==== | | ====<font style="visibility:hidden; float:right">Neutral Taunt (5PPPKKK)</font>==== |
| | <tabber> DL0-DL3 = |
| {{MoveDataCargo | | {{MoveDataCargo |
| | title = LK Luminous Dive Kick (DR1) | | | title = Neutral Taunt |
| | subtitle = | | | subtitle = (DL0-DL3) |
| | input = 214LK (air) | | | input = {{classic_sf6}} 5PPPKKK<br>{{Modern_sf6}} 5LMHS+DP+A |
| | images =
| | | images = |
| {{MoveDataCargoImage|Jamie_214lk_air|caption=}} | | {{MoveDataCargoImage|imageHeight=180px|Jamie_5pppkkk|caption= ''"Where's my bed? You're putting me to sleep man..."''}} |
| | info =
| | | info = |
| {{AttackDataCargo-SF6/Query|Jamie_214lk_air}} | | {{AttackDataCargo-SF6/Query|Jamie_5pppkkk}} |
| }}
| | * Has a unique variation at Drink Lv.4 |
| ====<font style="visibility:hidden; float:right">214mk_air</font>====
| | * Can low-profile Projectiles and certain Normals |
| {{MoveDataCargo
| |
| | title = MK Luminous Dive Kick (DR1)
| |
| | subtitle =
| |
| | input = 214MK (air)
| |
| | images = | |
| {{MoveDataCargoImage|Jamie_214mk_air|caption=}} | |
| | info = | |
| {{AttackDataCargo-SF6/Query|Jamie_214mk_air}} | |
| }}
| |
| ====<font style="visibility:hidden; float:right">214hk_air</font>====
| |
| {{MoveDataCargo
| |
| | title = HK Luminous Dive Kick (DR1)
| |
| | subtitle =
| |
| | input = 214HK (air)
| |
| | images =
| |
| {{MoveDataCargoImage|Jamie_214hk_air|caption=}}
| |
| | info =
| |
| {{AttackDataCargo-SF6/Query|Jamie_214hk_air}}
| |
| }} | | }} |
| ====<font style="visibility:hidden; float:right">214kk_air</font>====
| | |-| |
| | DL4 = |
| {{MoveDataCargo | | {{MoveDataCargo |
| | title = OD Luminous Dive Kick (DR1) | | | title = Neutral Taunt |
| | subtitle = | | | subtitle = (DL4) |
| | input = 214KK (air) | | | input = {{classic_sf6}} 5PPPKKK<br>{{Modern_sf6}} 5LMHS+DP+A |
| | images = | | | images = |
| {{MoveDataCargoImage|Jamie_214kk_air|caption=}} | | {{MoveDataCargoImage|imageHeight=180px|Jamie_5pppkkk_dl4|caption= ''"You're still here? This... is your last chance."''}} |
| | info = | | | info = |
| {{AttackDataCargo-SF6/Query|Jamie_214kk_air}} | | {{AttackDataCargo-SF6/Query|Jamie_5pppkkk_dl4}} |
| }} | | }} |
| | </tabber> |
|
| |
|
| === Bakkai ===
| | ====<font style="visibility:hidden; float:right">Forward Taunt (6PPPKKK)</font>==== |
| ====<font style="visibility:hidden; float:right">236lk</font>==== | | <tabber> DL0 = |
| {{MoveDataCargo | | {{MoveDataCargo |
| | title = LK Bakkai (DR2) | | | title = Forward Taunt |
| | subtitle = | | | subtitle = (DL0) |
| | input = 236LK | | | input = {{classic_sf6}} 6PPPKKK<br>{{Modern_sf6}} 6LMHS+DP+A |
| | images = | | | images = |
| {{MoveDataCargoImage|Jamie_236lk|caption=}} | | {{MoveDataCargoImage|imageHeight=180px|Jamie_6pppkkk|caption= ''"Bring it!"''}} |
| | info = | | | info = |
| {{AttackDataCargo-SF6/Query|Jamie_236lk}} | | {{AttackDataCargo-SF6/Query|Jamie_6pppkkk}} |
| | * Changes with each Drink level |
| }} | | }} |
| ====<font style="visibility:hidden; float:right">236mk</font>====
| | |-| |
| | DL1 = |
| {{MoveDataCargo | | {{MoveDataCargo |
| | title = MK Bakkai (DR2) | | | title = Forward Taunt |
| | subtitle = | | | subtitle = (DL1) |
| | input = 236MK | | | input = {{classic_sf6}} 6PPPKKK<br>{{Modern_sf6}} 6LMHS+DP+A |
| | images = | | | images = |
| {{MoveDataCargoImage|Jamie_236mk|caption=}} | | {{MoveDataCargoImage|imageHeight=180px|Jamie_6pppkkk_dl1|caption= ''"Come on, let me see your sick flow!"''}} |
| | info = | | | info = |
| {{AttackDataCargo-SF6/Query|Jamie_236mk}} | | {{AttackDataCargo-SF6/Query|Jamie_6pppkkk_dl1}} |
| | * Changes with each Drink level |
| }} | | }} |
| ====<font style="visibility:hidden; float:right">236hk</font>====
| | |-| |
| | DL2 = |
| {{MoveDataCargo | | {{MoveDataCargo |
| | title = HK Bakkai (DR2) | | | title = Forward Taunt |
| | subtitle = | | | subtitle = (DL2) |
| | input = 236HK | | | input = {{classic_sf6}} 6PPPKKK<br>{{Modern_sf6}} 6LMHS+DP+A |
| | images = | | | images = |
| {{MoveDataCargoImage|Jamie_236hk|caption=}} | | {{MoveDataCargoImage|imageHeight=170px|Jamie_6pppkkk_dl2|caption= ''"You gonna show me some moves? Don't screw up! Heh!"'' |
| | info =
| |
| {{AttackDataCargo-SF6/Query|Jamie_236hk}}
| |
| }} | | }} |
| ====<font style="visibility:hidden; float:right">236kk</font>====
| | | info = |
| {{MoveDataCargo
| | {{AttackDataCargo-SF6/Query|Jamie_6pppkkk_dl2}} |
| | title = OD Bakkai (DR2)
| | * Changes with each Drink level |
| | subtitle =
| |
| | input = 236KK
| |
| | images =
| |
| {{MoveDataCargoImage|Jamie_236kk|caption=}}
| |
| | info = | |
| {{AttackDataCargo-SF6/Query|Jamie_236kk}} | |
| }} | | }} |
| | | |-| |
| === Tenshin ===
| | DL3 = |
| ====<font style="visibility:hidden; float:right">63214k</font>====
| |
| {{MoveDataCargo | | {{MoveDataCargo |
| | title = Tenshin (DR3) | | | title = Forward Taunt |
| | subtitle = | | | subtitle = (DL3) |
| | input = 63214K | | | input = {{classic_sf6}} 6PPPKKK<br>{{Modern_sf6}} 6LMHS+DP+A |
| | images = | | | images = |
| {{MoveDataCargoImage|Jamie_63214k|caption=}} | | {{MoveDataCargoImage|imageHeight=160px|Jamie_6pppkkk_dl3|caption= ''"You think you knew what I'm gonna do next?"''}} |
| | info = | | | info = |
| {{AttackDataCargo-SF6/Query|Jamie_63214k}} | | {{AttackDataCargo-SF6/Query|Jamie_6pppkkk_dl3}} |
| | * Changes with each Drink level |
| }} | | }} |
| ====<font style="visibility:hidden; float:right">63214kk</font>====
| | |-| |
| | DL4 = |
| {{MoveDataCargo | | {{MoveDataCargo |
| | title = OD Tenshin (DR3) | | | title = Forward Taunt |
| | subtitle = | | | subtitle = (DL4) |
| | input = 63214KK | | | input = {{classic_sf6}} 6PPPKKK<br>{{Modern_sf6}} 6LMHS+DP+A |
| | images = | | | images = |
| {{MoveDataCargoImage|Jamie_63214kk|caption=}} | | {{MoveDataCargoImage|imageHeight=140px|Jamie_6pppkkk_dl4|caption= ''"I ain't through with you...! Zzz .... oh man, oh man."''}} |
| | info = | | | info = |
| {{AttackDataCargo-SF6/Query|Jamie_63214kk}} | | {{AttackDataCargo-SF6/Query|Jamie_6pppkkk_dl4}} |
| | * Changes with each Drink level |
| }} | | }} |
| | </tabber> |
|
| |
|
| == Super Moves ==
| | ====<font style="visibility:hidden; float:right">Back Taunt (4PPPKKK)</font>==== |
| ====<font style="visibility:hidden; float:right">236236k</font>====
| |
| {{MoveDataCargo
| |
| | title = Breakin'
| |
| | subtitle =
| |
| | input = 236236K
| |
| | images =
| |
| {{MoveDataCargoImage|Jamie_236236k|caption=}}
| |
| | info =
| |
| {{AttackDataCargo-SF6/Query|Jamie_236236k}}
| |
| }}
| |
| ====<font style="visibility:hidden; float:right">214214p</font>====
| |
| {{MoveDataCargo
| |
| | title = The Devil's Song
| |
| | subtitle =
| |
| | input = 214214P
| |
| | images =
| |
| {{MoveDataCargoImage|Jamie_214214p|caption=}}
| |
| | info =
| |
| {{AttackDataCargo-SF6/Query|Jamie_214214p}}
| |
| }}
| |
| ====<font style="visibility:hidden; float:right">236236p</font>====
| |
| {{MoveDataCargo
| |
| | title = Getsugo Saiho
| |
| | subtitle =
| |
| | input = 236236P
| |
| | images =
| |
| {{MoveDataCargoImage|Jamie_236236p|caption=}}
| |
| | info =
| |
| {{AttackDataCargo-SF6/Query|Jamie_236236p}}
| |
| }}
| |
| ====<font style="visibility:hidden; float:right">236236p</font>==== | |
| {{MoveDataCargo | | {{MoveDataCargo |
| | title = Getsugo Saiho (Critical Art) | | | title = Back Taunt |
| | subtitle = | | | subtitle = |
| | input = 236236P_CA | | | input = {{classic_sf6}} 4PPPKKK<br>{{Modern_sf6}} 4LMHS+DP+A |
| | images = | | | images = |
| {{MoveDataCargoImage|Jamie_236236p_ca|caption=}} | | {{MoveDataCargoImage|imageHeight=160px|Jamie_4pppkkk|caption= ''"Listen! Da na, da na da na, da da da... That's right!''}} |
| | info = | | | info = |
| {{AttackDataCargo-SF6/Query|Jamie_236236p_ca}} | | {{AttackDataCargo-SF6/Query|Jamie_4pppkkk}} |
| }} | | }} |
| | <br> |
|
| |
|
| {{Character Subnav SF6|chara={{SUBPAGENAME}}|discord={{{discord|}}} }} | | {{Character Subnav SF6|chara={{SUBPAGENAME}}|discord={{{discord|}}} }} |


