No edit summary |
No edit summary |
||
| (3 intermediate revisions by the same user not shown) | |||
| Line 4: | Line 4: | ||
|header= | |header= | ||
|content= | |content= | ||
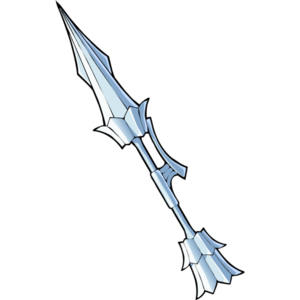
[[File:Rocket_Lance_IconBH|180x200px|frameless|]] | [[File:Rocket_Lance_IconBH.png|180x200px|frameless|]] | ||
==Rocket Lance== | ==Rocket Lance== | ||
| Line 12: | Line 12: | ||
[[File:BHLance.png|frameless|center|Hammer]] | [[File:BHLance.png|frameless|center|Hammer]] | ||
| pros = | | pros = | ||
* | *Very easy to pickup | ||
* | *Great Air Mobility | ||
* | *Very simple 0 to death | ||
* | *Great Range | ||
* | *Great Recovery | ||
| cons = | | cons = | ||
* | *Recovery makes you a sitting duck | ||
* | *Ground Pound is very telegraphed | ||
* | *If you whiff an attack it feels like forever til you're able to move again | ||
* | * | ||
}} | }} | ||
| Line 41: | Line 41: | ||
|Var. Force= | |Var. Force= | ||
|Fix. Force= | |Fix. Force= | ||
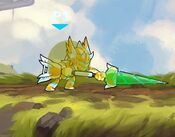
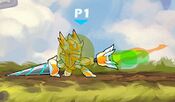
|description= | |description= Nlight is 3 hitting normal, where the 3rd hit only hits when the 2nd one does. This normal is best used at somewhat close range and you dont feel like using Slight, also viable for edge guarding with a rotation of Dlight. | ||
}} | }} | ||
}} | }} | ||
| Line 59: | Line 59: | ||
|Var. Force= | |Var. Force= | ||
|Fix. Force= | |Fix. Force= | ||
|description= | |description= Side Light is the best normal for starting combos, after landing the move it should give you enough time to jump and followup. | ||
}} | }} | ||
}} | }} | ||
| Line 78: | Line 78: | ||
|Var. Force= | |Var. Force= | ||
|Fix. Force= | |Fix. Force= | ||
|description= | |description= Dlight is the closest thing you have to a close range jab. However it does not really push the opponent back, it leads into a proper 50/50, potentially going into to nlight or slight, either way you have to predict the dodge or if there's even a dodge at all. | ||
}} | }} | ||
}} | }} | ||
| Line 98: | Line 98: | ||
|Var. Force= | |Var. Force= | ||
|Fix. Force= | |Fix. Force= | ||
|description= | |description= Naturally, Nair doesnt lead into anything depending on where they dodge. It's a nice hitbox since it hits mostly all around you. | ||
}} | }} | ||
}} | }} | ||
| Line 117: | Line 117: | ||
|Var. Force= | |Var. Force= | ||
|Fix. Force= | |Fix. Force= | ||
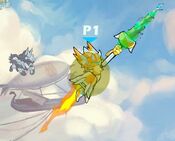
|description= | |description= Sair is the most used move in Lance's kit and for good reason, this move does a lot. It kills, it leads into a mixup, and is the start to potential 0 to death if you get a dodge read. There's rarely a bad time to use this move. | ||
}} | }} | ||
}} | }} | ||
| Line 136: | Line 136: | ||
|Var. Force= | |Var. Force= | ||
|Fix. Force= | |Fix. Force= | ||
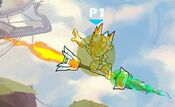
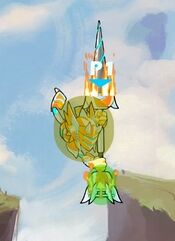
|description= | |description= Dair is another move that often used in Lance's kit. You want to focus on using this when you are edgeguarding or trying to hit the opponent while you are in the air and they are right below you. | ||
}} | }} | ||
}} | }} | ||
| Line 155: | Line 155: | ||
|Var. Force= | |Var. Force= | ||
|Fix. Force= | |Fix. Force= | ||
|description= | |description= Lance Ground Pound is disjointed so is a safe move to possibly throw out while edge guarding, however that's really it for this move because you don't want to be using this move a lot compared to something like Sair. | ||
}} | }} | ||
}} | }} | ||
| Line 174: | Line 174: | ||
|Var. Force= | |Var. Force= | ||
|Fix. Force= | |Fix. Force= | ||
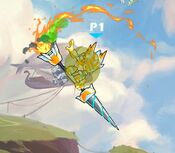
|description= | |description= Lance Recovery definitely does it's job when getting you back to stage, however the issue with it mainly comes from not being able to do much while in the recovery animation. So a smart opponent will try to punish you when they see this with something like a weapon throw. However, unlike most Recoveries, you can hold and release whenever during the startup, so you can press and release for a short boost or hold it for the full duration for a far boost and since you don't freefall after recoveries in this game, you can do something like Sair to continue back to stage. | ||
}} | }} | ||
}} | }} | ||
Latest revision as of 19:50, 3 June 2021
Grounded Normals
5A
| Damage | Startup | Active | Recovery | Var. Force | Fix. Force |
|---|---|---|---|---|---|
| - | - | - | - | - | - |
|
Nlight is 3 hitting normal, where the 3rd hit only hits when the 2nd one does. This normal is best used at somewhat close range and you dont feel like using Slight, also viable for edge guarding with a rotation of Dlight. | |||||
5A
| Damage | Startup | Active | Recovery | Var. Force | Fix. Force |
|---|---|---|---|---|---|
| - | - | - | - | - | - |
|
Side Light is the best normal for starting combos, after landing the move it should give you enough time to jump and followup. | |||||
5A
| Damage | Startup | Active | Recovery | Var. Force | Fix. Force |
|---|---|---|---|---|---|
| - | - | - | - | - | - |
|
Dlight is the closest thing you have to a close range jab. However it does not really push the opponent back, it leads into a proper 50/50, potentially going into to nlight or slight, either way you have to predict the dodge or if there's even a dodge at all. | |||||
Aerial Normals
5A
| Damage | Startup | Active | Recovery | Var. Force | Fix. Force |
|---|---|---|---|---|---|
| - | - | - | - | - | - |
|
Naturally, Nair doesnt lead into anything depending on where they dodge. It's a nice hitbox since it hits mostly all around you. | |||||
5A
| Damage | Startup | Active | Recovery | Var. Force | Fix. Force |
|---|---|---|---|---|---|
| - | - | - | - | - | - |
|
Sair is the most used move in Lance's kit and for good reason, this move does a lot. It kills, it leads into a mixup, and is the start to potential 0 to death if you get a dodge read. There's rarely a bad time to use this move. | |||||
5A
| Damage | Startup | Active | Recovery | Var. Force | Fix. Force |
|---|---|---|---|---|---|
| - | - | - | - | - | - |
|
Dair is another move that often used in Lance's kit. You want to focus on using this when you are edgeguarding or trying to hit the opponent while you are in the air and they are right below you. | |||||
5A
| Damage | Startup | Active | Recovery | Var. Force | Fix. Force |
|---|---|---|---|---|---|
| - | - | - | - | - | - |
|
Lance Ground Pound is disjointed so is a safe move to possibly throw out while edge guarding, however that's really it for this move because you don't want to be using this move a lot compared to something like Sair. | |||||
5A
| Damage | Startup | Active | Recovery | Var. Force | Fix. Force |
|---|---|---|---|---|---|
| - | - | - | - | - | - |
|
Lance Recovery definitely does it's job when getting you back to stage, however the issue with it mainly comes from not being able to do much while in the recovery animation. So a smart opponent will try to punish you when they see this with something like a weapon throw. However, unlike most Recoveries, you can hold and release whenever during the startup, so you can press and release for a short boost or hold it for the full duration for a far boost and since you don't freefall after recoveries in this game, you can do something like Sair to continue back to stage. | |||||
Combos
5A
[[File:|frameless|left]]
'
insert explanation here
5A
[[File:|frameless|left]]
'
insert
5A
[[File:|frameless|left]]
'
insert
5A
[[File:|frameless|left]]
Insert
5A
[[File:|frameless|left]]
'
Insert
Basic Gameplan
Insert explanation here
Edge Guarding
Insert explanation here
