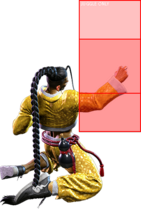
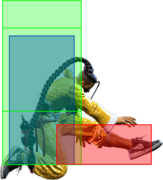
|
|
| (29 intermediate revisions by 3 users not shown) |
| Line 39: |
Line 39: |
| | title = Standing Light Punch | | | title = Standing Light Punch |
| | subtitle = | | | subtitle = |
| | input = {{classic_sf6}} 5LP<br> | | | input = {{classic_sf6}} 5LP<br>{{modern_sf6}} 5L |
| {{modern_sf6}} 5L | |
| | images = | | | images = |
| {{MoveDataCargoImage|imageHeight=160px|Jamie_5lp|caption=DL0}} | | {{MoveDataCargoImage|imageHeight=160px|Jamie_5lp|caption=DL0}} |
| Line 74: |
Line 73: |
| | title = Standing Medium Punch | | | title = Standing Medium Punch |
| | subtitle = | | | subtitle = |
| | input = {{classic_sf6}} 5MP<br> | | | input = {{classic_sf6}} 5MP<br>{{modern_sf6}} 5M |
| {{modern_sf6}} 5M | |
| | images = | | | images = |
| {{MoveDataCargoImage|imageHeight=180px|Jamie_5mp_dl2|caption=}} | | {{MoveDataCargoImage|imageHeight=180px|Jamie_5mp_dl2|caption=}} |
| Line 84: |
Line 82: |
| * Damage DL0-DL4: 540/570/600/630/660 | | * Damage DL0-DL4: 540/570/600/630/660 |
| <br> | | <br> |
| Jamie's only plus on block normal, {{clr|M|5MP}} can link to {{clr|L|5LK}} or Drink Lv.1 {{clr|L|5LP}} at close range. Despite this, it is often awkward to use for pressure as it leaves Jamie outside of normal throw range. This normal is best used in {{clr|DR|Drive Rush}} confirms, as it gains a link to {{clr|H|2HP}}; at Drink Lv.3 or higher, {{clr|DR|DR~}}{{clr|M|5MP}} gives enough block advantage for a tick command throw that beats any non-invincible reversal. | | Jamie's only plus on block normal, {{clr|M|5MP}} can link to {{clr|M|2MP}} at close range, {{clr|L|5LK}} from slightly farther, or Drink Lv.1 {{clr|L|5LP}} for a much more consistent follow-up. It leaves Jamie outside of throw range, forcing him to either start with {{clr|DR|Drive Rush}} or risk a forward walk to open up a blocking opponent. At Drink Lv.3 or higher, {{clr|DR|DR~}}{{clr|M|5MP}} gives enough block advantage for a tick command throw that beats any non-invincible reversal. |
|
| |
|
| While much stubbier than {{clr|M|2MK}} or {{clr|M|5MK}}, this move holds more value as a counter-poke than one might think. On top of having a decent disjoint, a {{clr|PC|Punish Counter}} becomes {{sf6-adv|VP|+9}}, just enough advantage to link into {{clr|H|2HK}}, or {{clr|SA|SA1}} from even farther out.
| | The disjointed hitbox and short recovery make this button a useful counter-poke in neutral. On {{clr|PC|Counter-hit}}, there is enough time to confirm into {{clr|H|2HP}} at close range for high damage, or {{clr|M|2MK}} from much farther out for consistency. {{clr|PC|Punish Counters}} beyond point blank will usually link into {{clr|M|5MK}} over {{clr|M|2MK}} for its extra range and damage; when used as a ranged whiff punish he can also link into {{clr|H|2HK}} or {{clr|SA|SA3}}. The hitbox of {{clr|M|5MP}} does not interact well with the extended hurtboxes of most low pokes, but any high or mid extended hurtbox can usually be whiff punished on reaction with this move. |
| }} | | }} |
|
| |
|
| Line 93: |
Line 91: |
| | title = Standing Heavy Punch | | | title = Standing Heavy Punch |
| | subtitle = | | | subtitle = |
| | input = {{classic_sf6}} 5HP<br> | | | input = {{classic_sf6}} 5HP<br>{{modern_sf6}} 5H |
| {{modern_sf6}} 5H | |
| | images = | | | images = |
| {{MoveDataCargoImage|imageHeight=180px|Jamie_5hp_dl2|caption=''Neutral is a myth, and footsies are a scam.''}} | | {{MoveDataCargoImage|imageHeight=180px|Jamie_5hp_dl2|caption=''Neutral is a myth, and footsies are a scam.''}} |
| Line 123: |
Line 120: |
| | title = Standing Light Kick | | | title = Standing Light Kick |
| | subtitle = | | | subtitle = |
| | input = {{classic_sf6}} 5LK<br> | | | input = {{classic_sf6}} 5LK<br>{{modern_sf6}} --** |
| {{modern_sf6}} --- | |
| | images = | | | images = |
| {{MoveDataCargoImage|imageHeight=150px|Jamie_5lk_dl2|1|caption=}} | | {{MoveDataCargoImage|imageHeight=150px|Jamie_5lk_dl2|1|caption=}} |
| ---- | | ---- |
| {{MoveDataCargoImage|imageHeight=150px|Jamie_5lk_dl2|2|caption=}} | | {{MoveDataCargoImage|imageHeight=150px|Jamie_5lk_dl2|2|caption= ''**5LK only available to Modern via Chain Cancelling'' |
| | ''E.G. "2L > [A]2L > [A]2L"'' |
| | ''(last [A]2L becomes 5LK)''}} |
| | hitboxes = | | | hitboxes = |
| {{MoveDataCargoImage|hitbox=yes|imageHeight=140px|Jamie_5lk_dl2|1|caption=}} | | {{MoveDataCargoImage|hitbox=yes|imageHeight=140px|Jamie_5lk_dl2|1|caption=}} |
| Line 153: |
Line 151: |
| | title = Standing Medium Kick | | | title = Standing Medium Kick |
| | subtitle = | | | subtitle = |
| | input = {{classic_sf6}} 5MK<br> | | | input = {{classic_sf6}} 5MK<br>{{modern_sf6}} A[M] |
| {{modern_sf6}} [A]M | |
| | images = | | | images = |
| {{MoveDataCargoImage|imageHeight=170px|Jamie_5mk_dl2|caption=}} | | {{MoveDataCargoImage|imageHeight=170px|Jamie_5mk_dl2|caption=}} |
| Line 163: |
Line 160: |
| * Damage DL0-DL4: 540/570/600/630/660 | | * Damage DL0-DL4: 540/570/600/630/660 |
| * '''Cancel Hitconfirm Window:''' 15f | | * '''Cancel Hitconfirm Window:''' 15f |
| | * 1f extra recovery on whiff and extends a wider hurtbox until the end of recovery |
| * Leg hurtbox is raised on frames 4-12 (can avoid low pokes) | | * Leg hurtbox is raised on frames 4-12 (can avoid low pokes) |
| * '''{{clr|DR|Drive Rush}} cancel advantage:''' {{sf6-adv|VP|+12}} oH / {{sf6-adv|VP|+7}} oB | | * '''{{clr|DR|Drive Rush}} cancel advantage:''' {{sf6-adv|VP|+12}} oH / {{sf6-adv|VP|+7}} oB |
| Line 170: |
Line 168: |
| {{clr|M|5MK}} is Jamie's premiere mid-range poke. A {{clr|DR|Drive Rush}} buffer can be used to start your block pressure or hitconfirm into a combo. It can combo naturally into {{clr|M|214MP}}/{{clr|OD|214PP}}, and is Jamie's only medium normal that can combo into {{clr|H|214HP}} on {{clr|PC|Punish Counter}}. | | {{clr|M|5MK}} is Jamie's premiere mid-range poke. A {{clr|DR|Drive Rush}} buffer can be used to start your block pressure or hitconfirm into a combo. It can combo naturally into {{clr|M|214MP}}/{{clr|OD|214PP}}, and is Jamie's only medium normal that can combo into {{clr|H|214HP}} on {{clr|PC|Punish Counter}}. |
|
| |
|
| The raised leg hurtbox allows {{clr|M|5MK}} to interact favorably with many low pokes in neutral, which is important for dealing with characters that have a longer range {{clr|M|2MK}}. This button is 3f slower than his own {{clr|M|2MK}}, but hits from slightly longer range and is much less whiff punishable. | | The raised leg hurtbox allows {{clr|M|5MK}} to interact favorably with many low pokes in neutral, which is important for dealing with characters that have a longer range {{clr|M|2MK}}. This button is 2 frames slower than his own {{clr|M|2MK}}, but hits from slightly longer range and is a bit harder to whiff punish even with its extended hurtbox. |
| }} | | }} |
|
| |
|
| Line 177: |
Line 175: |
| | title = Standing Heavy Kick | | | title = Standing Heavy Kick |
| | subtitle = | | | subtitle = |
| | input = {{classic_sf6}} 5HK<br> | | | input = {{classic_sf6}} 5HK<br>{{modern_sf6}} A[H] |
| {{modern_sf6}} [A]H | |
| | images = | | | images = |
| {{MoveDataCargoImage|imageHeight=210px|Jamie_5hk_dl2|caption=''"You pressed on -5? You fool, you goon, you absolute cretin."''}} | | {{MoveDataCargoImage|imageHeight=210px|Jamie_5hk_dl2|caption=''"You pressed on -5? You fool, you goon, you absolute cretin."''}} |
| Line 187: |
Line 184: |
| {{AttackDataCargo-SF6/Query|Jamie_5hk_dl2}} | | {{AttackDataCargo-SF6/Query|Jamie_5hk_dl2}} |
| * Damage DL0-DL4: 720/760/800/840/880 | | * Damage DL0-DL4: 720/760/800/840/880 |
| * {{clr|PC|Punish Counter}}: KD +71 Crumple (+8 before opponent becomes airborne) | | * {{clr|PC|Punish Counter}}: KD +71 Crumple ({{sf6-adv|VP|+9}} before opponent becomes airborne) |
| * Puts airborne opponents into {{sf6-jug|limited juggle}} state | | * Puts airborne opponents into {{sf6-jug|limited juggle}} state |
| * '''Cancel Hitconfirm Window:''' 17f (PC: 29f) | | * '''Cancel Hitconfirm Window:''' 17f (PC: 29f) |
| ** Special/{{clr|DR|DR}} cancel is delayed until after 2nd active frame | | ** Special/{{clr|DR|DR}} cancel is delayed until after 2nd active frame |
| * '''{{clr|DR|Drive Rush}} cancel advantage:''' {{sf6-adv|VP|+14}} oH / {{sf6-adv|VP|+8}} oB | | * '''{{clr|DR|Drive Rush}} cancel advantage:''' {{sf6-adv|VP|+16}} oH / {{sf6-adv|VP|+8}} oB |
| * '''{{clr|SA|SA2}} cancel advantage:''' {{sf6-adv|VP|+17}} oH (PC: KD +87)) / {{sf6-adv|VP|+11}} oB | | * '''{{clr|SA|SA2}} cancel advantage:''' {{sf6-adv|VP|+19}} oH (PC: KD +87)) / {{sf6-adv|VP|+11}} oB |
| * '''Drink cancel advantage:''' {{sf6-adv|VM|-27}} oH (PC: KD +43) / {{sf6-adv|VM|-33}} oB | | * '''Drink cancel advantage:''' {{sf6-adv|VM|-25}} oH (PC: KD +43) / {{sf6-adv|VM|-33}} oB |
| <br> | | <br> |
| While quite slow, {{clr|H|5HK}} has solid range due to its forward movement, making it a real threat in neutral. The long recovery on this move makes it very risky to whiff in neutral, but on block the pushback usually keeps it safe even at {{sf6-adv|VM|-5}}. The hitbox is quite low to the ground, making it worthless as an anti-air; the juggle properties vs. airborne only allow Jamie to safely cancel into a special when hitting the opponent's early jump frames. | | While quite slow, {{clr|H|5HK}} has solid range due to its forward movement, making it a real threat in neutral. The long recovery on this move makes it very risky to whiff in neutral, but on block the pushback usually keeps it safe even at {{sf6-adv|VM|-5}}. This pushback also makes it impossible to follow up a {{clr|PC|Counter-hit}} with a link at most ranges, making it more important to hitconfirm a special cancel. The hitbox is quite low to the ground, making it worthless as an anti-air; the juggle properties vs. airborne only allow Jamie to safely cancel into a special when hitting the opponent's early jump frames. |
|
| |
|
| The crumple state from {{clr|PC|Punish Counter}} causes the opponent to fall backwards, making midscreen follow-ups a bit more limited compared to the corner. Jamie can safely cancel a midscreen crumple into 2 Drinks, though this sacrifices a fair bit of damage and oki. In the corner, he can get 1 drink and juggle {{clr|L|2LP}} > {{clr|OD|214PP}} into the Sweep TC for damage and a second drink; your meter and drink situation will determine whether this route is worthwhile over optimizing for damage/oki. | | The crumple state from {{clr|PC|Punish Counter}} causes the opponent to fall backwards, making midscreen follow-ups a bit more limited compared to the corner. Jamie can safely cancel a midscreen crumple into 2 Drinks, though this sacrifices a fair bit of damage and oki. In the corner, he can get 1 drink and juggle {{clr|L|2LP}} > {{clr|OD|214PP}} into the Sweep TC for damage and a second drink; your meter and drink situation will determine whether this route is worthwhile over optimizing for damage/oki. |
| Line 206: |
Line 203: |
| | title = Crouching Light Punch | | | title = Crouching Light Punch |
| | subtitle = | | | subtitle = |
| | input = {{classic_sf6}} 2LP<br> | | | input = {{classic_sf6}} 2LP<br>{{modern_sf6}} 2L |
| {{modern_sf6}} 2L | |
| | images = | | | images = |
| {{MoveDataCargoImage|imageHeight=170px|Jamie_2lp_dl2|caption=}} | | {{MoveDataCargoImage|imageHeight=170px|Jamie_2lp_dl2|caption=}} |
| Line 230: |
Line 226: |
| | title = Crouching Medium Punch | | | title = Crouching Medium Punch |
| | subtitle = | | | subtitle = |
| | input = {{classic_sf6}} 2MP<br> | | | input = {{classic_sf6}} 2MP<br>{{modern_sf6}} -- |
| {{modern_sf6}} --- | |
| | images = | | | images = |
| {{MoveDataCargoImage|imageHeight=170px|Jamie_2mp_dl2|caption=}} | | {{MoveDataCargoImage|imageHeight=170px|Jamie_2mp_dl2|caption=}} |
| Line 239: |
Line 234: |
| {{AttackDataCargo-SF6/Query|Jamie_2mp_dl2}} | | {{AttackDataCargo-SF6/Query|Jamie_2mp_dl2}} |
| * Damage DL0-DL4: 540/570/600/630/660 | | * Damage DL0-DL4: 540/570/600/630/660 |
| | * 2f extra recovery on whiff and extends a hurtbox until the end of recovery |
| * '''Cancel Hitconfirm Window:''' 16f | | * '''Cancel Hitconfirm Window:''' 16f |
| * '''{{clr|DR|Drive Rush}} cancel advantage:''' {{sf6-adv|VP|+11}} oH / {{sf6-adv|VP|+5}} oB | | * '''{{clr|DR|Drive Rush}} cancel advantage:''' {{sf6-adv|VP|+11}} oH / {{sf6-adv|VP|+5}} oB |
| Line 244: |
Line 240: |
| * '''Drink cancel advantage:''' {{sf6-adv|VM|-30}} oH / {{sf6-adv|VM|-36}} oB | | * '''Drink cancel advantage:''' {{sf6-adv|VM|-30}} oH / {{sf6-adv|VM|-36}} oB |
| <br> | | <br> |
| A useful normal, despite having the lowest range of any {{clr|M|2MP}}. Used in many combo routes, as a non-committal counterpoke, and as Jamie's go-to Drive Reversal punish. At {{sf6-adv|VP|+5}} on hit, Jamie can link into any of his light attacks on regular hit, and from {{clr|DR|Drive Rush}} it links into {{clr|H|2HP}}. When canceled, it also links naturally into {{clr|M|214MP}}/{{clr|OD|214PP}}. | | A useful normal, despite having the lowest range of any {{clr|M|2MP}}. Used in many combo routes, as a non-committal counterpoke, and as Jamie's go-to {{clr|DR|Drive Reversal}} punish (usually linked into {{clr|M|5MK}}). At {{sf6-adv|VP|+5}} on hit, Jamie can link into any of his light attacks on regular hit, and from {{clr|DR|Drive Rush}} it links into {{clr|H|2HP}} or {{clr|M|5MK}}. When canceled, it also links naturally into {{clr|M|214MP}}/{{clr|OD|214PP}}. |
| }} | | }} |
|
| |
|
| Line 251: |
Line 247: |
| | title = Crouching Heavy Punch | | | title = Crouching Heavy Punch |
| | subtitle = | | | subtitle = |
| | input = {{classic_sf6}} 2HP<br> | | | input = {{classic_sf6}} 2HP<br>{{modern_sf6}} 2H |
| {{modern_sf6}} 2H | |
| | images = | | | images = |
| {{MoveDataCargoImage|imageHeight=180px|Jamie_2hp_dl2|caption=}} | | {{MoveDataCargoImage|imageHeight=180px|Jamie_2hp_dl2|caption=}} |
| Line 260: |
Line 255: |
| {{AttackDataCargo-SF6/Query|Jamie_2hp_dl2}} | | {{AttackDataCargo-SF6/Query|Jamie_2hp_dl2}} |
| * Damage DL0-DL4: 810/855/900/945/990 | | * Damage DL0-DL4: 810/855/900/945/990 |
| * Head hurtbox is '''Anti-Air Invuln''' 9-33f; cannot hit cross-up | | * Head hurtbox is '''Anti-Air Invuln''' 8-32f; cannot hit cross-up |
| * Forces stand on hit | | * Forces stand on hit |
| * '''Cancel Hitconfirm Window:''' 16f; only the first 2 active frames are cancelable | | * '''Cancel Hitconfirm Window:''' 16f; only the first 2 active frames are cancelable |
| Line 267: |
Line 262: |
| * '''Drink cancel advantage:''' {{sf6-adv|VM|-23}} oH / {{sf6-adv|VM|-31}} oB | | * '''Drink cancel advantage:''' {{sf6-adv|VM|-23}} oH / {{sf6-adv|VM|-31}} oB |
| <br> | | <br> |
| Works fairly well as a mid-range anti-air due to its vertical reach and large number of active frames. Does not have a useful cancel when used as an anti-air, as only the early grounded frames are cancelable. Useful in many {{clr|PC|Punish Counter}} and {{clr|DR|Drive Rush}} combo routes as it combos into Jamie's strongest special moves. | | Works fairly well as a mid-range anti-air due to its vertical reach and large number of active frames. Does not have a useful cancel when used as an anti-air, as only the early grounded frames are cancelable. Useful in many {{clr|PC|Punish Counter}} and {{clr|DR|Drive Rush}} combo routes as it combos into Jamie's strongest special moves. Also works after Tenshin, making it his strongest command grab follow-up. |
| }} | | }} |
|
| |
|
| Line 274: |
Line 269: |
| | title = Crouching Light Kick | | | title = Crouching Light Kick |
| | subtitle = | | | subtitle = |
| | input = {{classic_sf6}} 2LK<br> | | | input = {{classic_sf6}} 2LK<br>{{modern_sf6}} A[L] |
| {{modern_sf6}} [A]L | |
| | images = | | | images = |
| {{MoveDataCargoImage|imageHeight=170px|Jamie_2lk_dl2|caption=}} | | {{MoveDataCargoImage|imageHeight=170px|Jamie_2lk_dl2|caption=}} |
| Line 293: |
Line 287: |
| | title = Crouching Medium Kick | | | title = Crouching Medium Kick |
| | subtitle = | | | subtitle = |
| | input = {{classic_sf6}} 2MK<br> | | | input = {{classic_sf6}} 2MK<br>{{modern_sf6}} 2M |
| {{modern_sf6}} 2M | |
| | images = | | | images = |
| {{MoveDataCargoImage|imageHeight=120px|Jamie_2mk_dl2|caption=}} | | {{MoveDataCargoImage|imageHeight=120px|Jamie_2mk_dl2|caption=}} |
| Line 317: |
Line 310: |
| | title = Crouching Heavy Kick | | | title = Crouching Heavy Kick |
| | subtitle = | | | subtitle = |
| | input = {{classic_sf6}} 2HK<br> | | | input = {{classic_sf6}} 2HK<br>{{modern_sf6}} 3H |
| {{modern_sf6}} 3H | |
| | images = | | | images = |
| {{MoveDataCargoImage|imageHeight=120px|Jamie_2hk_dl2|caption=}} | | {{MoveDataCargoImage|imageHeight=120px|Jamie_2hk_dl2|caption=}} |
| Line 326: |
Line 318: |
| {{AttackDataCargo-SF6/Query|Jamie_2hk_dl2}} | | {{AttackDataCargo-SF6/Query|Jamie_2hk_dl2}} |
| * Damage DL0-DL4: 360x2/380x2/400x2/420x2/440x2 | | * Damage DL0-DL4: 360x2/380x2/400x2/420x2/440x2 |
| * {{clr|PC|Counter-hit/Punish Counter}}: HKD +48 | | * {{clr|PC|Punish Counter}}: HKD +48 |
| * 1f extra recovery on block; 2nd hit can be stand blocked if 1st hit is blocked | | * 1f extra recovery on block; 2nd hit can be stand blocked if 1st hit is blocked |
| * Has high juggle potential; not a Hard Knockdown when juggled into | | * Has high juggle potential |
| * First active frame of 2nd hit only connects in juggles; vs. grounded opponents, active period is 2(3)2 | | * First active frame of 2nd hit only connects in juggles; vs. grounded opponents, active period is 2(3)2 |
| * '''TC Cancel Hitconfirm Window:''' 33f (PC 43f) / 22f (1-hit) | | * '''TC Cancel Hitconfirm Window:''' 33f (PC 43f) / 22f (1-hit) |
| Line 343: |
Line 335: |
| | title = Jumping Light Punch | | | title = Jumping Light Punch |
| | subtitle = | | | subtitle = |
| | input = {{classic_sf6}} j.LP<br> | | | input = {{classic_sf6}} j.LP<br>{{modern_sf6}} j.A[L] |
| {{modern_sf6}} j.L | |
| | images = | | | images = |
| {{MoveDataCargoImage|imageHeight=140px|Jamie_jlp_dl2|caption=}} | | {{MoveDataCargoImage|imageHeight=140px|Jamie_jlp_dl2|caption=}} |
| Line 362: |
Line 353: |
| | title = Jumping Medium Punch | | | title = Jumping Medium Punch |
| | subtitle = | | | subtitle = |
| | input = {{classic_sf6}} j.MP<br> | | | input = {{classic_sf6}} j.MP<br>{{modern_sf6}} j.M |
| {{modern_sf6}} --- | |
| | images = | | | images = |
| {{MoveDataCargoImage|imageHeight=160px|Jamie_jmp_dl2|caption=}} | | {{MoveDataCargoImage|imageHeight=160px|Jamie_jmp_dl2|caption=}} |
| Line 373: |
Line 363: |
| * Puts airborne opponents into {{sf6-jug|limited juggle}} state | | * Puts airborne opponents into {{sf6-jug|limited juggle}} state |
| * Cancels into j.214K Divekick (DL1+, forward jump only); cancel can be delayed significantly (up to 24f) | | * Cancels into j.214K Divekick (DL1+, forward jump only); cancel can be delayed significantly (up to 24f) |
| * Shifts Jamie's hurtbox upward during startup | | * '''Lower Body Projectile Invuln''' 7-22f |
| | ** If input immediately during ascent, can avoid the 2nd hit of JP's {{clr|OD|OD Amnesia}} bombs |
| <br> | | <br> |
| The knockdown makes this useful as an air-to-air. The hitbox reaches quite high above Jamie, so it will whiff if you try to delay it too long in juggle combos. The cancel into j.214K only works against airborne opponents, as Jamie will be too low to the ground against standing characters. | | The knockdown makes this useful as an air-to-air. The hitbox reaches quite high above Jamie, so it will whiff if you try to delay it too long in juggle combos. The cancel into j.214K only works against airborne opponents, as Jamie will be too low to the ground against standing characters. |
| Line 382: |
Line 373: |
| | title = Jumping Heavy Punch | | | title = Jumping Heavy Punch |
| | subtitle = | | | subtitle = |
| | input = {{classic_sf6}} j.HP<br> | | | input = {{classic_sf6}} j.HP<br>{{modern_sf6}} j.A[H] |
| {{modern_sf6}} j.H | |
| | images = | | | images = |
| {{MoveDataCargoImage|imageHeight=140px|Jamie_jhp_dl2|caption=}} | | {{MoveDataCargoImage|imageHeight=140px|Jamie_jhp_dl2|caption=}} |
| Line 392: |
Line 382: |
| * Damage DL0-DL4: 720/760/800/840/880 | | * Damage DL0-DL4: 720/760/800/840/880 |
| * Spike knockdown vs. airborne opponents | | * Spike knockdown vs. airborne opponents |
| | * '''Lower Body Projectile Invuln''' 10-23f (except around the attack hitbox) |
| | ** Cannot be used to avoid the 2nd hit of JP's {{clr|OD|OD Amnesia}} bombs |
| <br> | | <br> |
| Has high juggle potential. Against grounded opponents, this is stronger than {{clr|H|j.HK}} since all the damage is done on a single hit. | | Has high juggle potential. Against grounded opponents, this is stronger than {{clr|H|j.HK}} since all the damage is done on a single hit. |
| Line 400: |
Line 392: |
| | title = Jumping Light Kick | | | title = Jumping Light Kick |
| | subtitle = | | | subtitle = |
| | input = {{classic_sf6}} j.LK<br> | | | input = {{classic_sf6}} j.LK<br>{{modern_sf6}} j.L |
| {{modern_sf6}} --- | |
| | images = | | | images = |
| {{MoveDataCargoImage|imageHeight=140px|Jamie_jlk_dl2|caption=}} | | {{MoveDataCargoImage|imageHeight=140px|Jamie_jlk_dl2|caption=}} |
| Line 417: |
Line 408: |
| | title = Jumping Medium Kick | | | title = Jumping Medium Kick |
| | subtitle = | | | subtitle = |
| | input = {{classic_sf6}} j.MK<br> | | | input = {{classic_sf6}} j.MK<br>{{modern_sf6}} j.A[M] |
| {{modern_sf6}} j.M | |
| | images = | | | images = |
| {{MoveDataCargoImage|imageHeight=140px|Jamie_jmk_dl2|caption=}} | | {{MoveDataCargoImage|imageHeight=140px|Jamie_jmk_dl2|caption=}} |
| Line 427: |
Line 417: |
| * Damage DL0-DL4: 450/475/500/525/550 | | * Damage DL0-DL4: 450/475/500/525/550 |
| * Can hit Cross-up | | * Can hit Cross-up |
| | * '''Lower Body Projectile Invuln''' 7-20f (except around the attack hitbox) |
| | ** Cannot be used to avoid the 2nd hit of JP's {{clr|OD|OD Amnesia}} bombs |
| <br> | | <br> |
| A better cross-up than {{clr|L|j.LP}} due to its higher damage and wider hitbox. | | A better cross-up than {{clr|L|j.LP}} due to its higher damage and wider hitbox. |
| Line 435: |
Line 427: |
| | title = Jumping Heavy Kick | | | title = Jumping Heavy Kick |
| | subtitle = | | | subtitle = |
| | input = {{classic_sf6}} j.HK<br> | | | input = {{classic_sf6}} j.HK<br>{{modern_sf6}} j.H |
| {{modern_sf6}} --- | |
| | images = | | | images = |
| {{MoveDataCargoImage|imageHeight=140px|Jamie_jhk_dl2|1|caption=}} | | {{MoveDataCargoImage|imageHeight=140px|Jamie_jhk_dl2|1|caption=}} |
| Line 449: |
Line 440: |
| * Damage DL0-DL4: 360x2/380x2/400x2/420x2/440x2 | | * Damage DL0-DL4: 360x2/380x2/400x2/420x2/440x2 |
| * Both hits put airborne opponents into {{sf6-jug|limited juggle}} state | | * Both hits put airborne opponents into {{sf6-jug|limited juggle}} state |
| * Shifts Jamie's hurtbox upward during startup | | * '''Lower Body Projectile Invuln''' 8-25f |
| | ** If input immediately during ascent, can avoid the 2nd hit of JP's {{clr|OD|OD Amnesia}} bombs |
| <br> | | <br> |
| As an air-to-air, {{clr|H|j.HK}} hits twice for an air knockdown. Jamie always has enough advantage to land and follow up with a grounded juggle like Arrow Kick, but he can get stronger juggles if the opponent is juggled high enough. When used mid-juggle (like after [[#2KK|anti-air 2KK]]), the first hit will whiff; {{clr|M|j.MP}} actually does more damage in these juggle scenarios. | | As an air-to-air, {{clr|H|j.HK}} hits twice for an air knockdown. Jamie always has enough advantage to land and follow up with a grounded juggle like Arrow Kick, but he can get stronger juggles if the opponent is juggled high enough. When used mid-juggle (like after [[#2KK|anti-air 2KK]]), the first hit will whiff; {{clr|M|j.MP}} actually does more damage in these juggle scenarios. |
| Line 462: |
Line 454: |
| | title = Tensei Kick | | | title = Tensei Kick |
| | subtitle = | | | subtitle = |
| | input = {{classic_sf6}} 2KK<br> | | | input = {{classic_sf6}} 2KK<br>{{modern_sf6}} 2MH |
| {{modern_sf6}} 2MH | |
| | images = | | | images = |
| {{MoveDataCargoImage|imageHeight=180px|Jamie_2kk_dl2|caption={{clr|L|'''''AIR COMBO!'''''}}}} | | {{MoveDataCargoImage|imageHeight=180px|Jamie_2kk_dl2|caption={{clr|L|'''''AIR COMBO!'''''}}}} |
| Line 485: |
Line 476: |
| | title = Falling Star Kick | | | title = Falling Star Kick |
| | subtitle = | | | subtitle = |
| | input = {{classic_sf6}} 6MK<br> | | | input = {{classic_sf6}} 6MK<br>{{modern_sf6}} 6M |
| {{modern_sf6}} 6M | |
| | images = | | | images = |
| {{MoveDataCargoImage|imageHeight=170px|Jamie_6mk|caption=}} | | {{MoveDataCargoImage|imageHeight=170px|Jamie_6mk|caption=}} |
| Line 511: |
Line 501: |
| | title = Hermit's Elbow | | | title = Hermit's Elbow |
| | subtitle = | | | subtitle = |
| | input = {{classic_sf6}} 4HP<br> | | | input = {{classic_sf6}} 4HP<br>{{modern_sf6}} 4H |
| {{modern_sf6}} 4H | |
| | images = | | | images = |
| {{MoveDataCargoImage|imageHeight=180px|Jamie_4hp_dl2|caption=DL0-DL2}} | | {{MoveDataCargoImage|imageHeight=180px|Jamie_4hp_dl2|caption=DL0-DL2}} |
| Line 547: |
Line 536: |
| | title = Senei Kick | | | title = Senei Kick |
| | subtitle = | | | subtitle = |
| | input = {{classic_sf6}} 6HK<br> | | | input = {{classic_sf6}} 6HK<br>{{modern_sf6}} 6H |
| {{modern_sf6}} 6H | |
| | images = | | | images = |
| {{MoveDataCargoImage|imageHeight=160px|Jamie_6hk_dl2|caption=DL0-DL3}} | | {{MoveDataCargoImage|imageHeight=160px|Jamie_6hk_dl2|caption=DL0-DL3}} |
| Line 579: |
Line 567: |
| | title = Phantom Sway | | | title = Phantom Sway |
| | subtitle = (DL0) | | | subtitle = (DL0) |
| | input = {{classic_sf6}} 2HK~HK~P<br> | | | input = {{classic_sf6}} 2HK~HK~P<br>{{modern_sf6}} 3H~H~H |
| {{modern_sf6}} 3H~H~H | |
| | images = | | | images = |
| {{MoveDataCargoImage|imageHeight=160px|Jamie_2hk_hk_dl2|caption=}} | | {{MoveDataCargoImage|imageHeight=160px|Jamie_2hk_hk_dl2|caption=}} |
| Line 608: |
Line 595: |
| | title = Bitter Strikes | | | title = Bitter Strikes |
| | subtitle = (DL1) | | | subtitle = (DL1) |
| | input = {{classic_sf6}} 5LP~LK~MP<br> | | | input = {{classic_sf6}} 5LP~LK~MP<br>{{modern_sf6}} 5L~L~L |
| {{modern_sf6}} 5L~L~L | |
| | images = | | | images = |
| {{MoveDataCargoImage|imageHeight=160px|Jamie_5lp_lk_dl2|caption=}} | | {{MoveDataCargoImage|imageHeight=160px|Jamie_5lp_lk_dl2|caption=}} |
| Line 629: |
Line 615: |
| * '''Cancel Hitconfirm Window:''' 52f | | * '''Cancel Hitconfirm Window:''' 52f |
| ** Special cancel is delayed until after 1st recovery frame; {{clr|DR|DR}} cancel is delayed until after active frames | | ** Special cancel is delayed until after 1st recovery frame; {{clr|DR|DR}} cancel is delayed until after active frames |
| * '''{{clr|DR|Drive Rush}} cancel advantage:''' {{sf6-adv|VP|+10}} oH / {{sf6-adv|VP|+4}} oB | | * '''{{clr|DR|Drive Rush}} cancel advantage:''' {{sf6-adv|VP|+11}} oH / {{sf6-adv|VP|+4}} oB |
| * '''{{clr|SA|SA2}} cancel advantage:''' {{sf6-adv|VP|+12}} oH / {{sf6-adv|VP|+6}} oB | | * '''{{clr|SA|SA2}} cancel advantage:''' {{sf6-adv|VP|+13}} oH / {{sf6-adv|VP|+6}} oB |
| * '''Drink cancel advantage:''' {{sf6-adv|VM|-32}} oH / {{sf6-adv|VM|-38}} oB | | * '''Drink cancel advantage:''' {{sf6-adv|VM|-31}} oH / {{sf6-adv|VM|-38}} oB |
| <br> | | <br> |
| Since {{clr|L|5LP}} loses much of its frame advantage at Drink Lv.1 and above, this Target Combo is the primary way to convert a jab into damage, even from max range. The {{clr|M|MP}} ender can combo into 236{{clr|L|LP}}/{{clr|M|MP}}/{{clr|OD|PP}}, {{clr|L|214LP}}, {{clr|L|236LK}}, any 623K, or any {{clr|SA|Super}}. | | Since {{clr|L|5LP}} loses much of its frame advantage at Drink Lv.1 and above, this Target Combo is the primary way to convert a jab into damage, even from max range. The {{clr|M|MP}} ender can combo into any 236P or 623K, {{clr|L|214LP}}, {{clr|L|236LK}}, or any {{clr|SA|Super}}. |
|
| |
|
| After committing to the TC follow-up, the only safe enders are {{clr|OD|236PP}}, {{clr|DR|Drive Rush}}, and {{clr|SA|SA2}}. If the opponent tries to punish the TC on block, Jamie can frame trap any non-invincible reversal with {{clr|L|236LP}} or the much safer {{clr|OD|236PP}}. A blocked {{clr|DR|Drive Rush cancel}} can create a true blockstring into {{clr|L|2LP}}, but anything else leaves a gap that can be interrupted with a reversal. | | After committing to the TC follow-up, the only safe enders are {{clr|OD|236PP}}, {{clr|DR|Drive Rush}}, and {{clr|SA|SA2}}. If the opponent tries to punish the TC on block, Jamie can frame trap any non-invincible reversal with {{clr|L|236LP}} or the much safer {{clr|OD|236PP}}. A blocked {{clr|DR|Drive Rush cancel}} can create a true blockstring into {{clr|L|2LP}}, but anything else leaves a gap that can be interrupted with a reversal. |
| Line 642: |
Line 628: |
| | title = Full Moon Kick | | | title = Full Moon Kick |
| | subtitle = (DL2) | | | subtitle = (DL2) |
| | input = {{classic_sf6}} 6MK~MK~P<br> | | | input = {{classic_sf6}} 6MK~MK~P<br>{{modern_sf6}} 6M~M~M |
| {{modern_sf6}} 6M~M~M | |
| | images = | | | images = |
| {{MoveDataCargoImage|Jamie_6mk_mk_dl2|caption=}} | | {{MoveDataCargoImage|Jamie_6mk_mk_dl2|caption=}} |
| Line 660: |
Line 645: |
| * Drink Lv.3: KD +2 / {{sf6-adv|VM|-43}} oB | | * Drink Lv.3: KD +2 / {{sf6-adv|VM|-43}} oB |
| * Refills 0.5 Drive bars; at DL4, refills 1 Drive bar | | * Refills 0.5 Drive bars; at DL4, refills 1 Drive bar |
| | * Does not come out if holding a Kick button after {{clr|M|6MK}}~{{clr|M|MK}} |
| <br> | | <br> |
| Confirming this TC directly from {{clr|M|6MK}} is strict, but possible with very good reactions. It's hard to chase down the opponent for midscreen oki, so ending with a Drink is usually worthwhile. | | Confirming this TC directly from {{clr|M|6MK}} is strict, but possible with very good reactions. It's hard to chase down the opponent for midscreen oki, so ending with a Drink is usually worthwhile. |
| Line 670: |
Line 656: |
| | title = Intoxicated Assault | | | title = Intoxicated Assault |
| | subtitle = (DL3) | | | subtitle = (DL3) |
| | input = {{classic_sf6}} 4HP~HP~HK<br> | | | input = {{classic_sf6}} 4HP~HP~HK<br>{{modern_sf6}} 4H~H~H |
| {{modern_sf6}} 4H~H~H | |
| | images = | | | images = |
| {{MoveDataCargoImage|imageHeight=160px|Jamie_4hp_hp_dl3|caption=}} | | {{MoveDataCargoImage|imageHeight=160px|Jamie_4hp_hp_dl3|caption=}} |
| Line 701: |
Line 686: |
| | title = Ransui Haze | | | title = Ransui Haze |
| | subtitle = (DL4) | | | subtitle = (DL4) |
| | input = {{classic_sf6}} 6HK~4HK~P<br> | | | input = {{classic_sf6}} 6HK~4HK~P<br>{{modern_sf6}} 6H~4H~H |
| {{modern_sf6}} 6H~4H~H | |
| | images = | | | images = |
| {{MoveDataCargoImage|imageHeight=180px|Jamie_6hk_4hk_dl4|caption=}} | | {{MoveDataCargoImage|imageHeight=180px|Jamie_6hk_4hk_dl4|caption=}} |
| Line 758: |
Line 742: |
| | title = Forward Throw | | | title = Forward Throw |
| | subtitle = | | | subtitle = |
| | input = {{classic_sf6}} LPLK<br> | | | input = {{classic_sf6}} LPLK<br>{{modern_sf6}} LM |
| {{modern_sf6}} LM | |
| | images = | | | images = |
| {{MoveDataCargoImage|imageHeight=160px|Jamie_lplk_dl2|caption=}} | | {{MoveDataCargoImage|imageHeight=160px|Jamie_lplk_dl2|caption=}} |
| Line 771: |
Line 754: |
| ** {{clr|PC|Punish Counter}}: HKD +23; 1836/1937/2040/2141/2244 | | ** {{clr|PC|Punish Counter}}: HKD +23; 1836/1937/2040/2141/2244 |
| * Applies 20% immediate damage scaling when comboed into (e.g. after Crumple) | | * Applies 20% immediate damage scaling when comboed into (e.g. after Crumple) |
| | * Successful Throw Escape builds {{clr|DR|1 Drive Gauge}} and {{clr|SA|10% Super Gauge}} for defender |
| | ** Awarded to random player if Throws are input simultaneously |
| {{AttackDataCargo-SF6/Query|Jamie_lplk_dl2_hold}} | | {{AttackDataCargo-SF6/Query|Jamie_lplk_dl2_hold}} |
| * Holding the buttons performs a Drink, but sacrifices corner oki | | * Holding the buttons performs a Drink, but sacrifices corner oki |
| Line 784: |
Line 769: |
| | title = Back Throw | | | title = Back Throw |
| | subtitle = | | | subtitle = |
| | input = {{classic_sf6}} 4LPLK<br> | | | input = {{classic_sf6}} 4LPLK<br>{{modern_sf6}} 4LM |
| {{modern_sf6}} 4LM | |
| | images = | | | images = |
| {{MoveDataCargoImage|Jamie_4lplk_dl2|imageHeight=160px|caption=}} | | {{MoveDataCargoImage|Jamie_4lplk_dl2|imageHeight=160px|caption=}} |
| Line 796: |
Line 780: |
| * Side switch | | * Side switch |
| * Applies 20% immediate damage scaling when comboed into (e.g. after Crumple) | | * Applies 20% immediate damage scaling when comboed into (e.g. after Crumple) |
| | * Successful Throw Escape builds {{clr|DR|1 Drive Gauge}} and {{clr|SA|10% Super Gauge}} for defender |
| | ** Awarded to random player if Throws are input simultaneously |
| <br> | | <br> |
| After throwing the opponent back into the corner, Jamie does not have a true meterless strike/throw mixup. His best option is to {{clr|DR|Drive Rush}} and manually time his oki; this also gives him time to bait a reversal if the opponent is itching to react to the green flash. Another good option is immediate {{clr|M|214MP}}; this is {{sf6-adv|P|+1 oB}} and leads to a {{clr|L|623LK}} juggle on hit, though it runs the risk of being Perfect Parried. The only way to bait this parry is to whiff {{clr|L|214LP}}, which leaves Jamie very unsafe if the opponent doesn't bite. | | After throwing the opponent back into the corner, Jamie does not have a true meterless strike/throw mixup. His best option is to {{clr|DR|Drive Rush}} and manually time his oki; this also gives him time to bait a reversal if the opponent is itching to react to the green flash. Another good option is immediate {{clr|M|214MP}}; this is {{sf6-adv|P|+1 oB}} and leads to a {{clr|L|623LK}} juggle on hit, though it runs the risk of being Perfect Parried. The only way to bait this parry is to whiff {{clr|L|214LP}}, which leaves Jamie very unsafe if the opponent doesn't bite. |
| Line 874: |
Line 860: |
| | title = Drive Parry | | | title = Drive Parry |
| | subtitle = | | | subtitle = |
| | input = {{classic_sf6}} MPMK<br> | | | input = {{classic_sf6}} MPMK<br>{{modern_sf6}} DP |
| {{modern_sf6}} DP | |
| | images = | | | images = |
| {{MoveDataCargoImage|imageHeight=180px|Jamie_mpmk|caption=}} | | {{MoveDataCargoImage|imageHeight=180px|Jamie_mpmk|caption=}} |
| Line 925: |
Line 910: |
| {{MoveDataCargo | | {{MoveDataCargo |
| | title = The Devil Inside | | | title = The Devil Inside |
| | subtitle = (DL0) | | | subtitle = Drink (DL0) |
| | input = {{classic_sf6}} 22P<br> | | | input = {{classic_sf6}} 22P<br>{{modern_sf6}} 22X |
| {{modern_sf6}} 22X | |
| | images = | | | images = |
| {{MoveDataCargoImage|Jamie_22p|caption=}} | | {{MoveDataCargoImage|Jamie_22p|caption=}} |
| Line 955: |
Line 939: |
| {{MoveDataCargo | | {{MoveDataCargo |
| | title = Freeflow Strikes | | | title = Freeflow Strikes |
| | subtitle = (DL0) | | | subtitle = Rekka (DL0) |
| | input = {{classic_sf6}} 236P<br> | | | input = {{classic_sf6}} 236P<br>{{modern_sf6}} 236X or 5S (M) |
| {{modern_sf6}} 5S | |
| | images = | | | images = |
| {{MoveDataCargoImage|imageHeight=240px|Jamie_236lp_dl2|caption=}} | | {{MoveDataCargoImage|imageHeight=240px|Jamie_236lp_dl2|caption=}} |
| Line 980: |
Line 963: |
| * '''{{clr|SA|SA2}} cancel advantage:''' {{sf6-adv|VP|+17}} oH / {{sf6-adv|VP|+14}} oB | | * '''{{clr|SA|SA2}} cancel advantage:''' {{sf6-adv|VP|+17}} oH / {{sf6-adv|VP|+14}} oB |
| * Both 6P follow-ups do not count as separate hits for damage scaling | | * Both 6P follow-ups do not count as separate hits for damage scaling |
| | * Applies 25% damage scaling when beginning a combo; counts as 2 hits for damage scaling when comboed into |
| | ** This scaling affects any follow-ups after the 1st or 3rd Rekka due to a {{clr|SA|Super}} cancel, not the Rekka follow-ups themselves |
| <br> | | <br> |
| Freeflow Strikes (or "Rekkas") are forward-moving strikes that can be confirmed into optional follow-ups. Higher strength versions move farther but have slower startup, with the {{clr|OD|OD}} version gaining both speed and longer range. At Drink Lv.0 to Lv.3, each Rekka is a single hit, and only the first part of the sequence can cancel into Super. If well-spaced, the first meterless Freeflow Strike is often safe; the {{clr|L|LP}} version is usually the best for this since it has less forward movement, but this can also cause it to whiff in max range cancels. The {{clr|OD|OD}} version is always safe. | | Freeflow Strikes (or "Rekkas") are forward-moving strikes that can be confirmed into optional follow-ups. Higher strength versions move farther but have slower startup, with the {{clr|OD|OD}} version gaining both speed and longer range. At Drink Lv.0 to Lv.3, each Rekka is a single hit, and you can cancel either the first or third hit into a {{clr|SA|SA3}}. If well-spaced, the first meterless Freeflow Strike is often safe; the {{clr|L|LP}} version is usually the best for this since it has less forward movement, but this can also cause it to whiff in max range cancels. The {{clr|OD|OD}} version is always safe. |
|
| |
|
| When attempting to confirm into the 6P or 6K follow-ups on hit, it's important to note that the follow-up speed depends on the strength of the first Rekka. Delaying the confirm too long, especially on {{clr|H|HP Rekka}}, can cause the follow-up to come out without comboing. The 6K follow-up is slightly slower than 6P, which also makes the confirm slightly stricter. {{clr|OD|OD Rekka}} canceled into {{clr|SA|SA2}} is a great option on hit or block, leading to great combos or block pressure from a mid-range poke. | | When attempting to confirm into the 6P or 6K follow-ups on hit, it's important to note that the follow-up speed depends on the strength of the first Rekka. Delaying the confirm too long, especially on {{clr|H|HP Rekka}}, can cause the follow-up to come out without comboing. The 6K follow-up is slightly slower than 6P, which also makes the confirm slightly stricter. {{clr|OD|OD Rekka}} canceled into {{clr|SA|SA2}} is a great option on hit or block, leading to great combos or block pressure from a mid-range poke. |
| Line 991: |
Line 976: |
| {{MoveDataCargo | | {{MoveDataCargo |
| | title = Freeflow Strikes | | | title = Freeflow Strikes |
| | subtitle = (DL4) | | | subtitle = Rekka (DL4) |
| | input = 236P | | | input = {{classic_sf6}} 236P<br>{{modern_sf6}} 236X or 5S (M) |
| | images = | | | images = |
| {{MoveDataCargoImage|imageHeight=200px|Jamie_236lp_dl4|caption=}} | | {{MoveDataCargoImage|imageHeight=200px|Jamie_236lp_dl4|caption=}} |
| Line 1,015: |
Line 1,000: |
| * '''{{clr|SA|SA2}} cancel advantage:''' {{sf6-adv|VP|+18}} oH / {{sf6-adv|VP|+13}} (1st hit), {{sf6-adv|VP|+12}} (2nd hit) oB | | * '''{{clr|SA|SA2}} cancel advantage:''' {{sf6-adv|VP|+18}} oH / {{sf6-adv|VP|+13}} (1st hit), {{sf6-adv|VP|+12}} (2nd hit) oB |
| * Both 6P follow-ups do not count as separate hits for damage scaling | | * Both 6P follow-ups do not count as separate hits for damage scaling |
| | * Applies 25% damage scaling when beginning a combo; counts as 2 hits for damage scaling when comboed into |
| | ** This scaling affects any follow-ups after the 1st or 3rd Rekka due to a {{clr|SA|Super}} cancel, not the Rekka follow-ups themselves |
| <br> | | <br> |
| At max Drink Level, Freeflow Strikes becomes a 2-hit attack, gaining additional damage and making it much easier to confirm follow-ups or Super. It also becomes safe on block for all versions, giving Jamie a great confirmable pressure tool from mid-range. In some juggle routes, it becomes harder to combo into the 6K follow-ups due to the extra pushback, so the 6P follow-ups are recommended for more consistency. | | At max Drink Level, Freeflow Strikes becomes a 2-hit attack, gaining additional damage and making it much easier to confirm follow-ups or {{clr|SA|Super}}. It also becomes safe on block for all versions, giving Jamie a great confirmable pressure tool from mid-range. In some juggle routes, it becomes harder to combo into the 6K follow-ups due to the extra pushback, so the 6P follow-ups are recommended for more consistency. |
| }} | | }} |
| </tabber> | | </tabber> |
| Line 1,024: |
Line 1,011: |
| {{MoveDataCargo | | {{MoveDataCargo |
| | title = Freeflow Strikes Punch 1 | | | title = Freeflow Strikes Punch 1 |
| | subtitle = (DL0) | | | subtitle = Rekka Punch 1 (DL0) |
| | input = {{classic_sf6}} 236P~6LP<br> | | | input = {{classic_sf6}} 236P~6P<br>{{modern_sf6}} 236X~6X or 5S~5S (M) |
| {{modern_sf6}} 5S~6X | |
| | images = | | | images = |
| {{MoveDataCargoImage|imageHeight=240px|Jamie_236lp_6p_dl2|caption=}} | | {{MoveDataCargoImage|imageHeight=240px|Jamie_236lp_6p_dl2|caption=}} |
| Line 1,049: |
Line 1,035: |
| * 0-3f gap between Rekka and 6P on block | | * 0-3f gap between Rekka and 6P on block |
| * Does not count as a separate hit for damage scaling | | * Does not count as a separate hit for damage scaling |
| | * Applies 25% damage scaling when beginning a combo into {{clr|SA|SA2}}/{{clr|SA|SA3}} (stacks with 10% {{clr|SA|SA3}} cancel scaling) |
| | ** This scaling affects the canceled move after the final ~6P (3rd Rekka) |
| <br> | | <br> |
| The Punch follow-ups are the preferred route for damage, juggles, and oki; they can be performed on hit, block, or whiff. The {{clr|L|LP}}, {{clr|M|MP}}, and {{clr|OD|OD}} Rekka starters require a manual delay to create a blockstring gap, while {{clr|H|HP Rekka}} can automatically frame trap with a 3f gap at the fastest timing. While risky, this frame trap can be used against an opponent that tries to punish your first Rekka on block. On hit, stopping after the first 6P puts Jamie at a slight disadvantage; an unaware opponent may be caught off guard with a quick throw reset, but attempting this is sacrificing guaranteed damage and a knockdown. | | The Punch follow-ups are the preferred route for damage, juggles, and oki; they can be performed on hit, block, or whiff. The {{clr|L|LP}}, {{clr|M|MP}}, and {{clr|OD|OD}} Rekka starters require a manual delay to create a blockstring gap, while {{clr|H|HP Rekka}} can automatically frame trap with a 3f gap at the fastest timing. While risky, this frame trap can be used against an opponent that tries to punish your first Rekka on block, which can be very rewarding with {{clr|SA|SA3}} stocked; when doing this on the {{clr|OD|OD version}}, the {{clr|SA|SA3}} receives extra damage scaling sine the {{clr|OD|OD rekkas}} do not scale separately themselves. |
| | |
| | On hit, stopping after the first 6P puts Jamie at a slight disadvantage; an unaware opponent may be caught off guard with a quick throw reset, but attempting this is sacrificing guaranteed damage and a knockdown. |
|
| |
|
| The cancel hitconfirm window applies to the 6P hit only and does not include the first 236P hit. In the startup column, [] refers to the total startup time for 236P~6P when the first Rekka whiffs, which can be useful for certain long-range punishes. | | The cancel hitconfirm window applies to the 6P hit only and does not include the first 236P hit. In the startup column, [] refers to the total startup time for 236P~6P when the first Rekka whiffs, which can be useful for certain long-range punishes. |
| Line 1,058: |
Line 1,048: |
| {{MoveDataCargo | | {{MoveDataCargo |
| | title = Freeflow Strikes Punch 1 | | | title = Freeflow Strikes Punch 1 |
| | subtitle = (DL4) | | | subtitle = Rekka Punch 1 (DL4) |
| | input = 236P~6P | | | input = {{classic_sf6}} 236P~6P<br>{{modern_sf6}} 236X~6X or 5S~5S (M) |
| | images = | | | images = |
| {{MoveDataCargoImage|imageHeight=200px|Jamie_236lp_6p_dl4|caption=}} | | {{MoveDataCargoImage|imageHeight=200px|Jamie_236lp_6p_dl4|caption=}} |
| Line 1,081: |
Line 1,071: |
| * 2-7f gap between Rekka and 6P on block | | * 2-7f gap between Rekka and 6P on block |
| * Does not count as a separate hit for damage scaling | | * Does not count as a separate hit for damage scaling |
| | * Applies 25% damage scaling when beginning a combo into {{clr|SA|SA2}}/{{clr|SA|SA3}} (stacks with 10% {{clr|SA|SA3}} cancel scaling) |
| | ** This scaling affects the canceled move after the final ~6P (3rd Rekka) |
| <br> | | <br> |
| The Punch follow-ups are the preferred route for damage, juggles, and oki; they can be performed on hit, block, or whiff. Like the initial Rekka, this follow-up is 2 hits when at max Drink Level. All strengths of Rekka lead to the same 2-7f gap between hits on block, which can be used to frame trap the opponent. However, this frame gap is not very useful for two reasons: the initial Rekka is safe (meaning the opponent is less likely to hit a button while attempting a punish), and a {{clr|PC|Counter-hit}} does not give Jamie the bonus frame advantage when both hits of the follow-up connect. | | The Punch follow-ups are the preferred route for damage, juggles, and oki; they can be performed on hit, block, or whiff. Like the initial Rekka, this follow-up is 2 hits when at max Drink Level. All strengths of Rekka lead to the same 2-7f gap between hits on block, which can be used to frame trap the opponent. However, this frame gap is not very useful for two reasons: the initial Rekka is safe (meaning the opponent is less likely to hit a button while attempting a punish), and a {{clr|PC|Counter-hit}} does not give Jamie the bonus frame advantage when both hits of the follow-up connect. |
| Line 1,092: |
Line 1,084: |
| {{MoveDataCargo | | {{MoveDataCargo |
| | title = Freeflow Strikes Punch 2 | | | title = Freeflow Strikes Punch 2 |
| | subtitle = (DL0) | | | subtitle = Rekka Punch 2 (DL0) |
| | input = {{classic_sf6}} 236P~6P~6P<br> | | | input = {{classic_sf6}} 236P~6P~6P<br>{{modern_sf6}} 236X~6X~6X or 5S~5S~5S (M) |
| {{modern_sf6}} 5S~6X~6X | |
| | images = | | | images = |
| {{MoveDataCargoImage|imageHeight=240px|Jamie_236lp_6p_6p_dl2|caption=}} | | {{MoveDataCargoImage|imageHeight=240px|Jamie_236lp_6p_6p_dl2|caption=}} |
| Line 1,103: |
Line 1,094: |
| * Damage DL0-DL3: 495(396)/522(418)/550(440)/577(462) | | * Damage DL0-DL3: 495(396)/522(418)/550(440)/577(462) |
| * 1-5f gap before final hit on block | | * 1-5f gap before final hit on block |
| | * '''Cancel Hitconfirm Window:''' 17f (Super, single-hit confirm) |
| | * Applies 20% damage scaling to next hit when beginning a combo into {{clr|SA|SA3}} (stacks with 10% {{clr|SA|SA3}} cancel scaling) |
| {{AttackDataCargo-SF6/Query|Jamie_236mp_6p_6p_dl2}} | | {{AttackDataCargo-SF6/Query|Jamie_236mp_6p_6p_dl2}} |
| * Damage DL0-DL3: 540(432)/570(456)/600(480)/630(504) | | * Damage DL0-DL3: 540(432)/570(456)/600(480)/630(504) |
| * 2-6f gap before final hit on block | | * 2-6f gap before final hit on block |
| | * '''Cancel Hitconfirm Window:''' 17f (Super, single-hit confirm) |
| | * Applies 20% damage scaling to next hit when beginning a combo into {{clr|SA|SA3}} (stacks with 10% {{clr|SA|SA3}} cancel scaling) |
| {{AttackDataCargo-SF6/Query|Jamie_236hp_6p_6p_dl2}} | | {{AttackDataCargo-SF6/Query|Jamie_236hp_6p_6p_dl2}} |
| * Damage DL0-DL3: 585(468)/617(494)/650(520)/682(546) | | * Damage DL0-DL3: 585(468)/617(494)/650(520)/682(546) |
| * 3-7f gap before final hit on block | | * 3-7f gap before final hit on block |
| | * '''Cancel Hitconfirm Window:''' 17f (Super, single-hit confirm) |
| | * Applies 20% damage scaling to next hit when beginning a combo into {{clr|SA|SA3}} (stacks with 10% {{clr|SA|SA3}} cancel scaling) |
| {{AttackDataCargo-SF6/Query|Jamie_236pp_6p_6p_dl2}} | | {{AttackDataCargo-SF6/Query|Jamie_236pp_6p_6p_dl2}} |
| * Damage DL0-DL3: 675(540)/712(570)/750(600)/787(630) | | * Damage DL0-DL3: 675(540)/712(570)/750(600)/787(630) |
| * 0-2f gap before final hit on block | | * 0-2f gap before final hit on block |
| | * '''Cancel Hitconfirm Window:''' 17f (Super, single-hit confirm) |
| * Does not count as a separate hit for damage scaling | | * Does not count as a separate hit for damage scaling |
| | * Applies 25% damage scaling to next hit when beginning a combo into {{clr|SA|SA2}}/{{clr|SA|SA3}} (stacks with 10% {{clr|SA|SA3}} cancel scaling) |
| <br> | | <br> |
| The final 6P follow-up completes the Punch sequence. It can be done on hit, block, or whiff and has juggle potential. This sequence gets no oki midscreen if the opponent back rises, but it has good corner carry and is Jamie's most consistent combo ender. Like the first 6P follow-up, there is a blockstring gap between the final 2 hits that varies based on the button timing, but this is a very unsafe gimmick for beating the opponent's attempted Rekka punish. | | The final 6P follow-up completes the Punch sequence. It can be done on hit, block, or whiff and has juggle potential. This sequence gets no oki midscreen if the opponent back rises, but it has good corner carry and is Jamie's most consistent combo ender. Cancel into {{clr|SA|SA3}} for more damage, or into {{clr|SA|SA2}} from the {{clr|OD|OD}} version (though any follow-up hits will have significant scaling). |
| | |
| | Like the first 6P follow-up, there is a blockstring gap between the final 2 hits that varies based on the button timing, but this is a very unsafe gimmick for beating the opponent's attempted Rekka punish. |
|
| |
|
| In the startup column, [] refers to the total startup time for 236P~6P~6P when the first 2 hits of Rekka whiff at the fastest speed. In the Damage column, the first value lists the unscaled damage; () refers to the damage at 80% scaling, which is what would normally occur when starting a combo with the first Rekka. | | In the startup column, [] refers to the total startup time for 236P~6P~6P when the first 2 hits of Rekka whiff at the fastest speed. In the Damage column, the first value lists the unscaled damage; () refers to the damage at 80% scaling, which is what would normally occur when starting a combo with the first Rekka. |
| Line 1,122: |
Line 1,123: |
| {{MoveDataCargo | | {{MoveDataCargo |
| | title = Freeflow Strikes Punch 2 | | | title = Freeflow Strikes Punch 2 |
| | subtitle = (DL4) | | | subtitle = Rekka Punch 2 (DL4) |
| | input = 236P~6P~6P | | | input = {{classic_sf6}} 236P~6P~6P<br>{{modern_sf6}} 236X~6X~6X or 5S~5S~5S (M) |
| | images = | | | images = |
| {{MoveDataCargoImage|imageHeight=200px|Jamie_236lp_6p_6p_dl4|caption=}} | | {{MoveDataCargoImage|imageHeight=200px|Jamie_236lp_6p_6p_dl4|caption=}} |
| Line 1,134: |
Line 1,135: |
| {{AttackDataCargo-SF6/Query|Jamie_236lp_6p_6p_dl4}} | | {{AttackDataCargo-SF6/Query|Jamie_236lp_6p_6p_dl4}} |
| * 2-6f gap before final hit on block | | * 2-6f gap before final hit on block |
| | * '''Cancel Hitconfirm Window:''' 46f (Super, single-hit confirm) |
| | * Applies 20% damage scaling to next hit when beginning a combo into {{clr|SA|SA3}} (stacks with 10% {{clr|SA|SA3}} cancel scaling) |
| {{AttackDataCargo-SF6/Query|Jamie_236mp_6p_6p_dl4}} | | {{AttackDataCargo-SF6/Query|Jamie_236mp_6p_6p_dl4}} |
| * 2-6f gap before final hit on block | | * 2-6f gap before final hit on block |
| | * '''Cancel Hitconfirm Window:''' 46f (Super, single-hit confirm) |
| | * Applies 20% damage scaling to next hit when beginning a combo into {{clr|SA|SA3}} (stacks with 10% {{clr|SA|SA3}} cancel scaling) |
| {{AttackDataCargo-SF6/Query|Jamie_236hp_6p_6p_dl4}} | | {{AttackDataCargo-SF6/Query|Jamie_236hp_6p_6p_dl4}} |
| * 2-6f gap before final hit on block | | * 2-6f gap before final hit on block |
| | * '''Cancel Hitconfirm Window:''' 46f (Super, single-hit confirm) |
| | * Applies 20% damage scaling to next hit when beginning a combo into {{clr|SA|SA3}} (stacks with 10% {{clr|SA|SA3}} cancel scaling) |
| {{AttackDataCargo-SF6/Query|Jamie_236pp_6p_6p_dl4}} | | {{AttackDataCargo-SF6/Query|Jamie_236pp_6p_6p_dl4}} |
| * 2-6f gap before final hit on block | | * 2-6f gap before final hit on block |
| | * '''Cancel Hitconfirm Window:''' 44f (Super, single-hit confirm) |
| * Does not count as a separate hit for damage scaling | | * Does not count as a separate hit for damage scaling |
| | * Applies 25% damage scaling to next hit when beginning a combo into {{clr|SA|SA2}}/{{clr|SA|SA3}} (stacks with 10% {{clr|SA|SA3}} cancel scaling) |
| <br> | | <br> |
| At max Drink Level, the Rekka Punch ender does 3 hits. Other than some minor changes to the frame data and blockstring gaps, it functions the same as the DL0-DL3 versions. | | At max Drink Level, the Rekka Punch ender does 3 hits. Other than some minor changes to the frame data and blockstring gaps, it functions the same as the DL0-DL3 versions. |
| Line 1,149: |
Line 1,158: |
| {{MoveDataCargo | | {{MoveDataCargo |
| | title = Freeflow Kicks 1 | | | title = Freeflow Kicks 1 |
| | subtitle = (DL0) | | | subtitle = Rekka Kick 1 (DL0) |
| | input = {{classic_sf6}} 236P~6K<br> | | | input = {{classic_sf6}} 236P~6K<br>{{modern_sf6}} 236X~4X or 5S~4S (M) |
| {{modern_sf6}} 5S~4X | |
| | images = | | | images = |
| {{MoveDataCargoImage|imageHeight=190px|Jamie_236lp_6k_dl2|caption=}} | | {{MoveDataCargoImage|imageHeight=190px|Jamie_236lp_6k_dl2|caption=}} |
| Line 1,182: |
Line 1,190: |
| {{MoveDataCargo | | {{MoveDataCargo |
| | title = Freeflow Kicks 2 | | | title = Freeflow Kicks 2 |
| | subtitle = (DL0-DL4) | | | subtitle = Rekka Kick 2 (DL0) |
| | input = {{classic_sf6}} 236P~6K~6K<br> | | | input = {{classic_sf6}} 236P~6K~6K<br>{{modern_sf6}}236X~4X~4X or 5S~4S~4S (M) |
| {{modern_sf6}} 5S~4X~4X | |
| | images = | | | images = |
| {{MoveDataCargoImage|imageHeight=180px|Jamie_236lp_6k_6k_dl2|caption=}} | | {{MoveDataCargoImage|imageHeight=180px|Jamie_236lp_6k_6k_dl2|caption=}} |
| Line 1,219: |
Line 1,226: |
| {{MoveDataCargo | | {{MoveDataCargo |
| | title = Swagger Step | | | title = Swagger Step |
| | subtitle = (DL0) | | | subtitle = Palm (DL0) |
| | input = {{classic_sf6}} 214P<br> | | | input = {{classic_sf6}} 214P<br>{{modern_sf6}} 214X |
| {{modern_sf6}} 214L/M/H | |
| | images = | | | images = |
| {{MoveDataCargoImage|imageHeight=180px|Jamie_214lp_dl2|caption='''F**k it-'''}} | | {{MoveDataCargoImage|imageHeight=180px|Jamie_214lp_dl2|caption='''F**k it-'''}} |
| Line 1,269: |
Line 1,275: |
| {{MoveDataCargo | | {{MoveDataCargo |
| | title = Swagger Hermit Punch | | | title = Swagger Hermit Punch |
| | subtitle = (DL4) | | | subtitle = Palm Follow-up (DL4) |
| | input = {{classic_sf6}} 214P~6P<br> | | | input = {{classic_sf6}} 214P~6P<br>{{modern_sf6}} 214X~6X |
| {{modern_sf6}} 214L/M/H~6L/M/H | |
| | images = | | | images = |
| {{MoveDataCargoImage|imageHeight=180px|Jamie_214p_6p|caption='''''We Palm'''''}} | | {{MoveDataCargoImage|imageHeight=180px|Jamie_214p_6p|caption='''''We Palm'''''}} |
| Line 1,295: |
Line 1,300: |
| {{MoveDataCargo | | {{MoveDataCargo |
| | title = Arrow Kick | | | title = Arrow Kick |
| | subtitle = (DL0) | | | subtitle = Uppercut (DL0) |
| | input = {{classic_sf6}} 623K<br> | | | input = {{classic_sf6}} 623K<br>{{modern_sf6}}623X or 6S (H) |
| {{modern_sf6}} 6S | |
| | images = | | | images = |
| {{MoveDataCargoImage|imageHeight=220px|Jamie_623lk_dl2|caption=}} | | {{MoveDataCargoImage|imageHeight=220px|Jamie_623lk_dl2|caption=}} |
| Line 1,336: |
Line 1,340: |
| {{MoveDataCargo | | {{MoveDataCargo |
| | title = Luminous Dive Kick | | | title = Luminous Dive Kick |
| | subtitle = (DL1) | | | subtitle = Divekick (DL1) |
| | input = {{classic_sf6}} j.214K<br> | | | input = {{classic_sf6}} j.214K<br>{{modern_sf6}} j.214X or j.S |
| {{modern_sf6}} j.S | |
| | images = | | | images = |
| {{MoveDataCargoImage|imageHeight=220px|Jamie_j214k_dl2|caption=''Nice Delay Tech ya got there''}} | | {{MoveDataCargoImage|imageHeight=220px|Jamie_j214k_dl2|caption=''Nice Delay Tech ya got there''}} |
| Line 1,368: |
Line 1,371: |
| {{MoveDataCargo | | {{MoveDataCargo |
| | title = Bakkai | | | title = Bakkai |
| | subtitle = (DL2) | | | subtitle = Breakdance (DL2) |
| | input = {{classic_sf6}} 236K<br> | | | input = {{classic_sf6}} 236K<br>{{modern_sf6}} 2S (M) |
| {{modern_sf6}} 2S | |
| | images = | | | images = |
| {{MoveDataCargoImage|imageHeight=170px|Jamie_236lk_dl2|caption=}} | | {{MoveDataCargoImage|imageHeight=170px|Jamie_236lk_dl2|caption=}} |
| Line 1,396: |
Line 1,398: |
| * Damage DL2-DL4: 1800/1887/1980 | | * Damage DL2-DL4: 1800/1887/1980 |
| * '''Projectile Invuln:''' 5-92f (until end of active frames) | | * '''Projectile Invuln:''' 5-92f (until end of active frames) |
| * '''Cancel Hitconfirm Window:''' 94f (Super) | | * '''Cancel Hitconfirm Window:''' 95f (Super) |
| {{AttackDataCargo-SF6/Query|Jamie_236kk_dl2}} | | {{AttackDataCargo-SF6/Query|Jamie_236kk_dl2}} |
| * Damage DL2-DL4: 2000/2100/2200 | | * Damage DL2-DL4: 2000/2100/2200 |
| Line 1,410: |
Line 1,412: |
|
| |
|
| Grounded cancel routes: ({{clr|PC|CH}} = +2 {{clr|PC|Counter-hit}}, {{clr|PC|PC}} = +4 {{clr|PC|Punish Counter}}) | | Grounded cancel routes: ({{clr|PC|CH}} = +2 {{clr|PC|Counter-hit}}, {{clr|PC|PC}} = +4 {{clr|PC|Punish Counter}}) |
| * {{clr|H|236HK}}: {{clr|H|2HP}}, {{clr|PC|PC}} {{clr|H|5HK}} | | * {{clr|H|236HK}}: {{clr|H|5HK}}, {{clr|H|2HP}} |
| * {{clr|M|236MK}}: {{clr|H|5HK}}, {{clr|PC|CH}} {{clr|M|5MK}} (+ all above)
| | * {{clr|M|236MK}}: {{clr|PC|CH}} {{clr|M|5MK}}, {{clr|PC|CH}} {{clr|M|2MP}} (+ all above) |
| * {{clr|OD|236KK}}: {{clr|PC|PC}} {{clr|H|5HP}}, {{clr|PC|PC}} {{clr|M|5MK}}, {{clr|PC|PC}} {{clr|M|2MP}}, {{clr|PC|PC}} {{clr|M|2MK}} (+ all above) | | * {{clr|OD|236KK}}: {{clr|M|5MK}}, {{clr|PC|PC}} {{clr|H|5HP}}, {{clr|PC|PC}} {{clr|M|2MK}} (+ all above) |
| * {{clr|L|236LK}}: {{clr|M|5MK}}, {{clr|M|2MP}}, {{clr|M|2MK}}, {{clr|L|5LP}}~{{clr|L|LK}}~{{clr|M|MP}}, {{clr|PC|PC}} {{clr|L|5LK}}, {{clr|PC|PC}} {{clr|L|2LP}} (+ all above) | | * {{clr|L|236LK}}: {{clr|M|2MP}}, {{clr|M|2MK}}, {{clr|L|5LP}}~{{clr|L|LK}}~{{clr|M|MP}}, {{clr|PC|PC}} {{clr|L|5LK}}, {{clr|PC|PC}} {{clr|L|2LP}} (+ all above) |
| }} | | }} |
|
| |
|
| Line 1,419: |
Line 1,421: |
| {{MoveDataCargo | | {{MoveDataCargo |
| | title = Tenshin | | | title = Tenshin |
| | subtitle = (DL3) | | | subtitle = Command Grab (DL3) |
| | input = {{classic_sf6}} 63214K<br> | | | input = {{classic_sf6}} 63214K<br>{{modern_sf6}} 4S |
| {{modern_sf6}} 4S | |
| | images = | | | images = |
| {{MoveDataCargoImage|imageHeight=200px|Jamie_63214k_dl3|caption="Come back here!"}} | | {{MoveDataCargoImage|imageHeight=200px|Jamie_63214k_dl3|caption="Come back here!"}} |
| Line 1,456: |
Line 1,457: |
| | title = Breakin' | | | title = Breakin' |
| | subtitle = Level 1 Super Art | | | subtitle = Level 1 Super Art |
| | input = {{classic_sf6}} 236236K<br> | | | input = {{classic_sf6}} 236236K<br>{{modern_sf6}} 236236L or 5HS or 6HS |
| {{modern_sf6}} 236236L or 5HS or 6HS | |
| | images = | | | images = |
| {{MoveDataCargoImage|imageHeight=180px|Jamie_236236k_dl2|caption=''Let it Rip''}} | | {{MoveDataCargoImage|imageHeight=180px|Jamie_236236k_dl2|caption=''Let it Rip''}} |
| Line 1,481: |
Line 1,481: |
| * Drink refills 0.5 Drive bars; at DL4, refills 1 Drive bar | | * Drink refills 0.5 Drive bars; at DL4, refills 1 Drive bar |
| <br> | | <br> |
| A breakdance super that looks similar to Bakkai, mostly used as a combo ender or a reversal during Burnout. It connects after a cancel from any normal, and has a few ways of juggling into it, like high connect {{clr|L|623LK}}or 2KK. At 8f startup, it can also be linked raw after a meterless Tenshin where its damage is unscaled, which is a good alternative to {{clr|OD|OD Tenshin}}. | | A breakdance super that looks similar to Bakkai, mostly used as a combo ender or a reversal during Burnout. It connects after a cancel from any normal, and has a few ways of juggling into it, like high connect {{clr|L|623LK}}or 2KK. At 8f startup, it can also be linked raw after a meterless Tenshin where its damage is unscaled, which is a good alternative to {{clr|OD|OD Tenshin}}. It is important to note that this super has no hitbox for jumping opponents, only for juggled opponents. |
|
| |
|
| {{clr|SA|SA1}} is extremely unsafe on block, even allowing some characters to charge up an install move before starting their max damage punish. A little over halfway through the animation, there is a 16f gap on block (12f in Burnout); the opponent can jump or hit Jamie out of this to prevent additional Drive/Chip damage, but a mistimed button can also result in the opponent getting hit by the second half of the Super. | | {{clr|SA|SA1}} is extremely unsafe on block, even allowing some characters to charge up an install move before starting their max damage punish. A little over halfway through the animation, there is a 16f gap on block (12f in Burnout); the opponent can jump or hit Jamie out of this to prevent additional Drive/Chip damage, but a mistimed button can also result in the opponent getting hit by the second half of the Super. |
| Line 1,496: |
Line 1,496: |
| | title = The Devil's Song | | | title = The Devil's Song |
| | subtitle = Level 2 Super Art | | | subtitle = Level 2 Super Art |
| | input = {{classic_sf6}} 214214P<br> | | | input = {{classic_sf6}} 214214P<br>{{modern_sf6}} 214214M or 4HS |
| {{modern_sf6}} 214214M or 4HS | |
| | images = | | | images = |
| {{MoveDataCargoImage|imageHeight=140px|Jamie_214214p|caption= ''Ok but like IMAGINE if this was Genei Jin''}} | | {{MoveDataCargoImage|imageHeight=140px|Jamie_214214p|caption= ''Ok but like IMAGINE if this was Genei Jin''}} |
| Line 1,520: |
Line 1,519: |
| | title = Getsuga Saiho | | | title = Getsuga Saiho |
| | subtitle = Level 3 Super Art | | | subtitle = Level 3 Super Art |
| | input = {{classic_sf6}} 236236P<br> | | | input = {{classic_sf6}} 236236P<br>{{modern_sf6}} 236236H or 2HS |
| {{modern_sf6}} 236236H or 2HS | |
| | images = | | | images = |
| {{MoveDataCargoImage|imageHeight=140px|Jamie_236236p_dl2|caption= '''''"Curtain call!"'''''}} | | {{MoveDataCargoImage|imageHeight=140px|Jamie_236236p_dl2|caption= '''''"Curtain call!"'''''}} |


