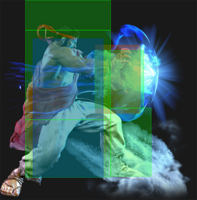
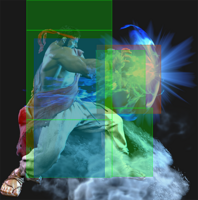
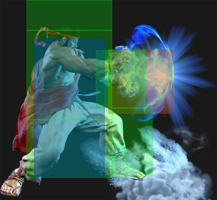
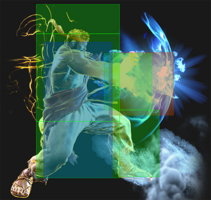
|
|
| (9 intermediate revisions by 2 users not shown) |
| Line 134: |
Line 134: |
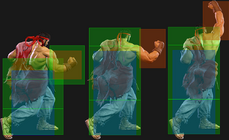
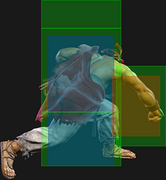
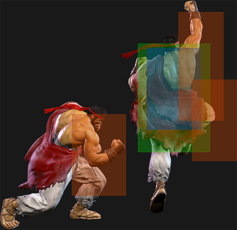
| | title = Crouching Light Punch | | | title = Crouching Light Punch |
| | subtitle = | | | subtitle = |
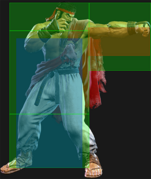
| | input = {{Classic_sf6}} 2LP<br>{{Modern_sf6}} 2L~L | | | input = {{Classic_sf6}} 2LP<br>{{Modern_sf6}} 5/2L~2L |
| | images = | | | images = |
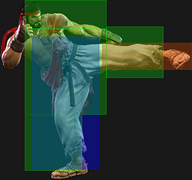
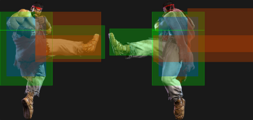
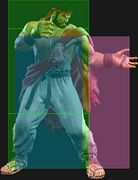
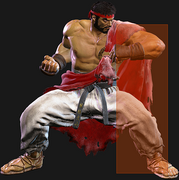
| {{MoveDataCargoImage|imageHeight=140px|ryu_2lp|caption=}} | | {{MoveDataCargoImage|imageHeight=140px|ryu_2lp|caption=}} |
| Line 404: |
Line 404: |
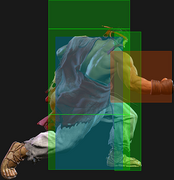
| | input = {{Classic_sf6}} 4HP<br>{{Modern_sf6}} -- | | | input = {{Classic_sf6}} 4HP<br>{{Modern_sf6}} -- |
| | images = | | | images = |
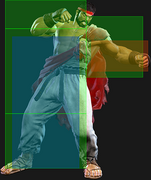
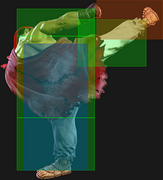
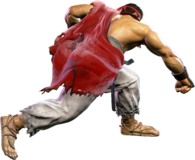
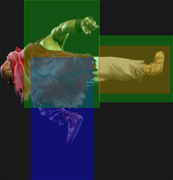
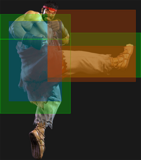
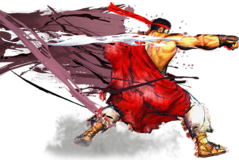
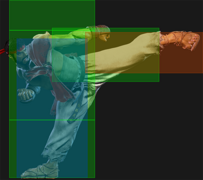
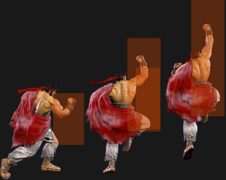
| {{MoveDataCargoImage|imageHeight=180px|ryu_4hp|caption=Your key to corner damage.}} | | {{MoveDataCargoImage|imageHeight=180px|ryu_4hp|caption=Your key to corner damage}} |
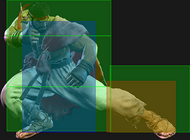
| | hitboxes = | | | hitboxes = |
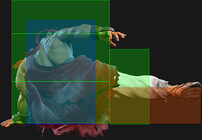
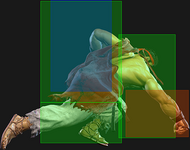
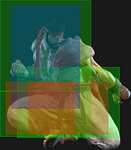
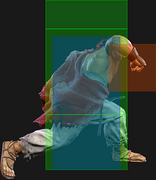
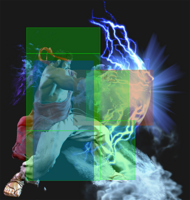
| {{MoveDataCargoImage|hitbox=yes|imageHeight=140px|ryu_4hp|caption=}} | | {{MoveDataCargoImage|hitbox=yes|imageHeight=140px|ryu_4hp|caption=}} |
| Line 472: |
Line 472: |
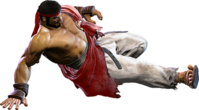
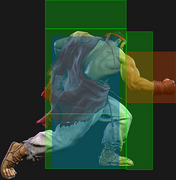
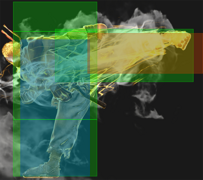
| | input = {{Classic_sf6}} 6HK~214K<br>{{Modern_sf6}} 6H~S | | | input = {{Classic_sf6}} 6HK~214K<br>{{Modern_sf6}} 6H~S |
| | images = | | | images = |
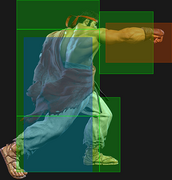
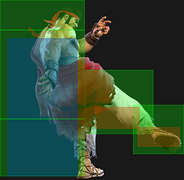
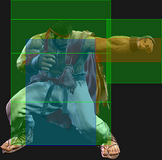
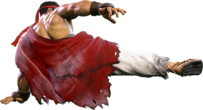
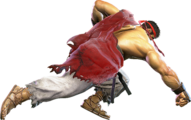
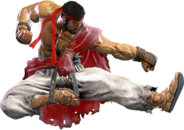
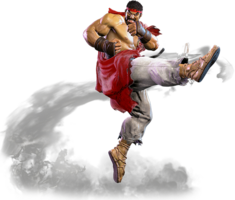
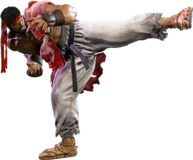
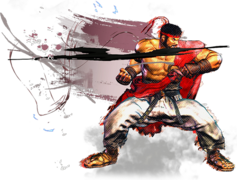
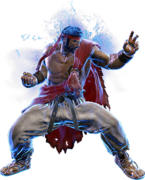
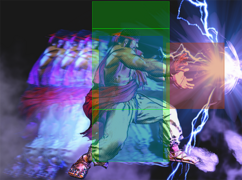
| {{MoveDataCargoImage|imageHeight=200px|ryu_214lk|caption=Shades of Evil Ryu.}} | | {{MoveDataCargoImage|imageHeight=200px|ryu_214lk|caption=Shades of Evil Ryu}} |
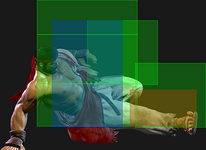
| | hitboxes = | | | hitboxes = |
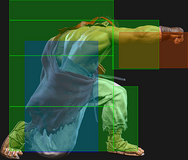
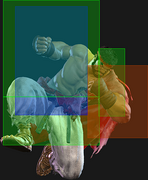
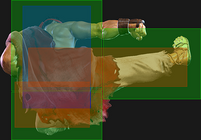
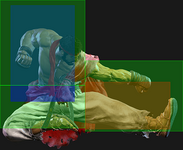
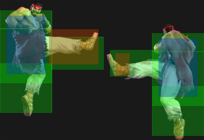
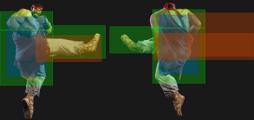
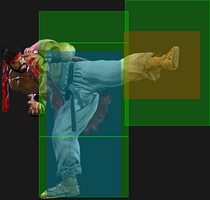
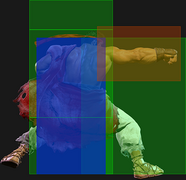
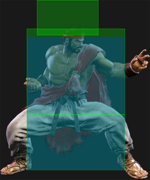
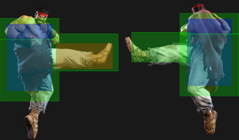
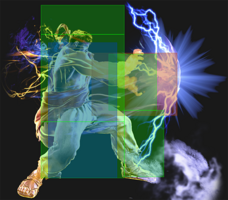
| {{MoveDataCargoImage|hitbox=yes|imageHeight=140px|ryu_j214k|caption=}} | | {{MoveDataCargoImage|hitbox=yes|imageHeight=140px|ryu_j214k|caption=}} |
| Line 720: |
Line 720: |
| {{MoveDataCargo | | {{MoveDataCargo |
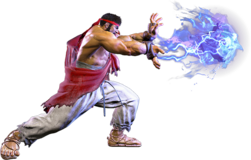
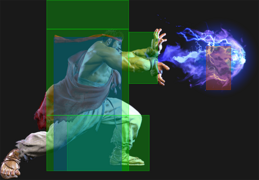
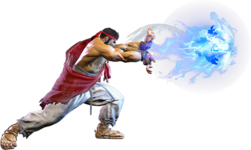
| | title = Hadoken | | | title = Hadoken |
| | subtitle = | | | subtitle = Fireball |
| | input = {{Classic_sf6}} 236P<br>{{Modern_sf6}} 236X or 5S (H) | | | input = {{Classic_sf6}} 236P<br>{{Modern_sf6}} 236X or 5S (H) |
| | images = | | | images = |
| Line 729: |
Line 729: |
| {{AttackDataCargo-SF6/Query|ryu_236lp}} | | {{AttackDataCargo-SF6/Query|ryu_236lp}} |
| * Slow 1-hit projectile; '''Projectile Speed:''' 0.055 | | * Slow 1-hit projectile; '''Projectile Speed:''' 0.055 |
| | * Puts airborne opponents into a {{sf6-jug|limited juggle}} state |
| * '''Cancel Hitconfirm Window:''' 4f (Super) | | * '''Cancel Hitconfirm Window:''' 4f (Super) |
| {{AttackDataCargo-SF6/Query|ryu_236mp}} | | {{AttackDataCargo-SF6/Query|ryu_236mp}} |
| * Medium-speed 1-hit projectile; '''Projectile Speed:''' 0.070 | | * Medium-speed 1-hit projectile; '''Projectile Speed:''' 0.070 |
| | * Puts airborne opponents into a {{sf6-jug|limited juggle}} state |
| * '''Cancel Hitconfirm Window:''' 4f (Super) | | * '''Cancel Hitconfirm Window:''' 4f (Super) |
| {{AttackDataCargo-SF6/Query|ryu_236hp}} | | {{AttackDataCargo-SF6/Query|ryu_236hp}} |
| * Fast 1-hit projectile; '''Projectile Speed:''' 0.085 | | * Fast 1-hit projectile; '''Projectile Speed:''' 0.085 |
| | * Puts airborne opponents into a {{sf6-jug|limited juggle}} state |
| * '''Cancel Hitconfirm Window:''' 4f (Super) | | * '''Cancel Hitconfirm Window:''' 4f (Super) |
| {{AttackDataCargo-SF6/Query|ryu_236pp}} | | {{AttackDataCargo-SF6/Query|ryu_236pp}} |
| * Fast 2-hit OD projectile; '''Projectile Speed:''' 0.095 | | * Fast 2-hit {{clr|OD|OD}} projectile; '''Projectile Speed:''' 0.095 |
| * Has juggle potential; puts opponent into {{sf6-jug|limited juggle}} state on hit | | * Has juggle potential; puts opponents into a {{sf6-jug|limited juggle}} state |
| | * Allows the use of {{clr|SA|SA1}} while {{clr|OD|236PP}} is still on-screen |
| * '''Cancel Hitconfirm Window:''' 12f (Super) | | * '''Cancel Hitconfirm Window:''' 12f (Super) |
| * Applies 20% damage scaling to next hit when beginning a combo; counts as 2 hits for damage scaling when comboed into (applies to next hit) | | * Applies 20% damage scaling to next hit when beginning a combo; counts as 2 hits for damage scaling when comboed into (applies to next hit) |
| Line 748: |
Line 752: |
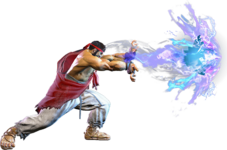
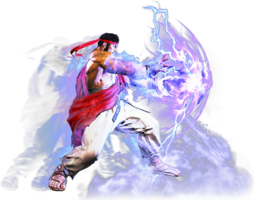
| {{clr|H|HP Hadoken}} is the fastest meterless version and the most unsafe on block if too close to the opponent. It is best used at longer ranges to prevent the opponent from walking forward, or to prevent an install move like Jamie's Drink or Kimberly's Spraycan reload. This version turns into {{clr|H|Denjin Hadoken}} when Ryu has a stock. | | {{clr|H|HP Hadoken}} is the fastest meterless version and the most unsafe on block if too close to the opponent. It is best used at longer ranges to prevent the opponent from walking forward, or to prevent an install move like Jamie's Drink or Kimberly's Spraycan reload. This version turns into {{clr|H|Denjin Hadoken}} when Ryu has a stock. |
|
| |
|
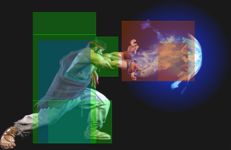
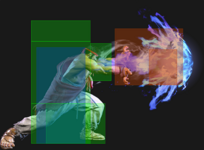
| {{clr|OD|OD Hadoken}} is fast and higher priority, making it an important tool against other zoners. The knockdown time lets Ryu perform a Denjin Charge, and in the corner he can juggle into {{clr|SA|SA1}} on reaction. He can also {{clr|DR|Drive Rush}} into a juggled normal against cornered opponents when starting from about 1/3 to 1/2 screen away. Unlike his other fireballs, Ryu is allowed to use {{clr|SA|SA1}} when {{clr|OD|OD Hadoken}} is still on the screen. | | {{clr|OD|OD Hadoken}} is fast and higher priority, making it an important tool against other zoners. The faster recovery makes it extremely hard for opponents to jump over, even as a prediction. On hit, the knockdown time lets Ryu perform a Denjin Charge or move forward for oki. If the opponent is cornered and ~1/3 screen away, Ryu can pick up {{clr|DR|Drive Rush}} juggles into light normals; from a bit farther away, he can get medium and heavy normals as well. He can also juggle into {{clr|SA|SA1}} on reaction against cornered opponents, and even midscreen opponents under certain conditions. In general, a 2-light confirm or a {{clr|PC|Counter-hit}} light into medium confirm leaves Ryu close enough for this juggle. Additionally, {{clr|M|2MK}} and {{clr|H|5HP}} move forward during the cancel window, allowing the {{clr|OD|236PP}} > {{clr|SA|SA1}} juggle to work more consistently. |
| | |
| | A ranged cancel from {{clr|M|2MK}}, {{clr|M|2MP}}, or {{clr|H|5HP}} into {{clr|H|HP Hadoken}} will always be a true blockstring, while {{clr|M|MP Hadoken}} can leave small gaps; {{clr|L|LP Hadoken}} leaves much larger gaps in ranged cancels that can allow more armored or anti-projectile moves to be effective. |
| | |
| | Canceling pokes into Hadoken runs the risk of being absorbed by {{clr|DR|Drive Impact}} armor for a full crumple punish. This requires a prediction by the opponent before the poke connects, so you can shut this down by playing less predictably and countering with your own {{clr|DR|DI}} if they abuse it in neutral. When a blocked poke like {{clr|M|2MK}}/{{clr|M|2MP}}/{{clr|H|5HP}} is canceled into Hadoken, the opponent's reversal {{clr|DR|DI}} will not be fast enough to punish through any blockstring gaps. |
| }} | | }} |
|
| |
|
| Line 754: |
Line 762: |
| {{MoveDataCargo | | {{MoveDataCargo |
| | title = Denjin Charge Hadoken | | | title = Denjin Charge Hadoken |
| | subtitle = | | | subtitle = Denjin Fireball |
| | input = {{Classic_sf6}} 236{{clr|H|HP}}<br>{{Modern_sf6}} 236X or 5S | | | input = {{Classic_sf6}} 236{{clr|H|HP}}<br>{{Modern_sf6}} 236{{clr|H|H}} or 5S |
| | images = | | | images = |
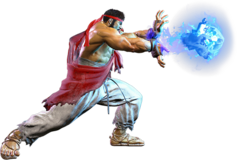
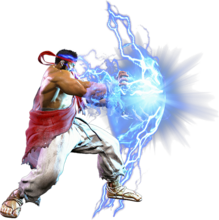
| {{MoveDataCargoImage|imageHeight=160px|ryu_236p(charged)|caption=}} | | {{MoveDataCargoImage|imageHeight=160px|ryu_236p(charged)|caption=}} |
| Line 763: |
Line 771: |
| {{AttackDataCargo-SF6/Query|ryu_236p(charged)}} | | {{AttackDataCargo-SF6/Query|ryu_236p(charged)}} |
| * Fast 2-hit projectile; '''Projectile Speed:''' 0.12 | | * Fast 2-hit projectile; '''Projectile Speed:''' 0.12 |
| * Has juggle potential; puts opponent into {{sf6-jug|limited juggle}} state | | * Has juggle potential; puts opponents into a {{sf6-jug|limited juggle}} state |
| * '''Cancel Hitconfirm Window:''' 12f (Super) | | * '''Cancel Hitconfirm Window:''' 12f (Super) |
| * Applies 20% damage scaling to next hit when beginning a combo; counts as 2 hits for damage scaling when comboed into (applies to next hit) | | * Applies 20% damage scaling to next hit when beginning a combo; counts as 2 hits for damage scaling when comboed into (applies to next hit) |
| {{AttackDataCargo-SF6/Query|ryu_236pp(charged)}} | | {{AttackDataCargo-SF6/Query|ryu_236pp(charged)}} |
| * Fast 3-hit OD projectile; '''Projectile Speed:''' 0.145 | | * Fast 3-hit {{clr|OD|OD}} projectile; '''Projectile Speed:''' 0.145 |
| * Has juggle potential; puts opponent into {{sf6-jug|limited juggle}} state | | * Has juggle potential; puts opponents into a {{sf6-jug|limited juggle}} state |
| * '''Cancel Hitconfirm Window:''' 13f (Super) | | * '''Cancel Hitconfirm Window:''' 13f (Super) |
| * Applies 20% damage scaling to next hit when beginning a combo; counts as 2 hits for damage scaling when comboed into (applies to next hit) | | * Applies 20% damage scaling to next hit when beginning a combo; counts as 2 hits for damage scaling when comboed into (applies to next hit) |
| Line 780: |
Line 788: |
| {{MoveDataCargo | | {{MoveDataCargo |
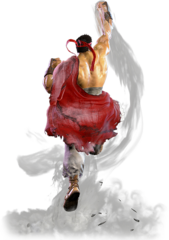
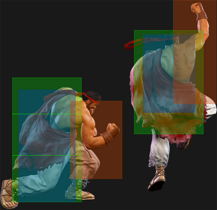
| | title = Shoryuken | | | title = Shoryuken |
| | subtitle = | | | subtitle = Dragon Punch |
| | input = {{Classic_sf6}} 623P<br>{{Modern_sf6}} 623X or 6S (H) | | | input = {{Classic_sf6}} 623P<br>{{Modern_sf6}} 623X or 6S (H) |
| | images = | | | images = |
| Line 790: |
Line 798: |
| | info = | | | info = |
| {{AttackDataCargo-SF6/Query|ryu_623lp}} | | {{AttackDataCargo-SF6/Query|ryu_623lp}} |
| * '''Anti-Air Invuln:''' 1-14f; '''Airborne''' 7-35f ({{FKD}} state) | | * '''Anti-Air Invuln:''' 1-14f (cannot hit cross-up); '''Airborne''' 7-35f ({{FKD}} state) |
| * Reduced damage on active frames 4-10 (high anti-air connect) | | * Reduced damage on active frames 4-10 (high anti-air connect) |
| | * Puts opponents into {{sf6-jug|limited juggle}} state; can get follow-ups after high corner anti-air |
| * '''Cancel Hitconfirm Window:''' 17f (Super) | | * '''Cancel Hitconfirm Window:''' 17f (Super) |
| * Applies 30% damage scaling to next hit when beginning a combo (Shoryuken > {{clr|SA|SA3}} starter: 40% total scaling) | | * Applies 30% damage scaling to next hit when beginning a combo (Shoryuken > {{clr|SA|SA3}} starter: 40% total scaling) |
| {{AttackDataCargo-SF6/Query|ryu_623mp}} | | {{AttackDataCargo-SF6/Query|ryu_623mp}} |
| * '''Anti-Air Invuln:''' 1-9f; '''Airborne''' 8-45f ({{FKD}} state) | | * '''Anti-Air Invuln:''' 1-9f (cannot hit cross-up); '''Airborne''' 8-45f ({{FKD}} state) |
| * Reduced damage on active frames 4-10 (high anti-air connect) | | * Reduced damage on active frames 4-10 (high anti-air connect) |
| * '''Cancel Hitconfirm Window:''' 17f (Super) | | * '''Cancel Hitconfirm Window:''' 17f (Super) |
| * Applies 30% damage scaling to next hit when beginning a combo (Shoryuken > {{clr|SA|SA3}} starter: 40% total scaling) | | * Applies 30% damage scaling to next hit when beginning a combo (Shoryuken > {{clr|SA|SA3}} starter: 40% total scaling) |
| {{AttackDataCargo-SF6/Query|ryu_623hp}} | | {{AttackDataCargo-SF6/Query|ryu_623hp}} |
| * '''Anti-Air Invuln:''' 1-8f; '''Airborne''' 9-50f ({{FKD}} state) | | * '''Anti-Air Invuln:''' 1-8f (cannot hit cross-up); '''Airborne''' 9-50f ({{FKD}} state) |
| * Reduced damage on active frames 3-10 (high anti-air connect) | | * Reduced damage (but higher Juggle Limit) on active frames 3-10 (high anti-air connect) |
| * '''Cancel Hitconfirm Window:''' 22f (Super) | | * '''Cancel Hitconfirm Window:''' 22f (Super) |
| * Applies 30% damage scaling to next hit when beginning a combo (Shoryuken > {{clr|SA|SA3}} starter: 40% total scaling) | | * Applies 30% damage scaling to next hit when beginning a combo (Shoryuken > {{clr|SA|SA3}} starter: 40% total scaling) |
| {{AttackDataCargo-SF6/Query|ryu_623pp}} | | {{AttackDataCargo-SF6/Query|ryu_623pp}} |
| * '''Full Invuln:''' 1-8f; '''Airborne''' 8-52f ({{FKD}} state) | | * '''Full Invuln:''' 1-8f (cannot hit cross-up); '''Airborne''' 8-52f ({{FKD}} state) |
| * Ryu's primary invincible reversal option | | * Ryu's primary invincible reversal option |
| <br> | | <br> |
| As always, Shoryuken is a great anti-air special and the {{clr|OD|OD}} version has a lot of invincibility to blow through the opponent's attacks. It's best to use as late as possible against jumping opponents, or else it will have its damage reduced and will no longer be cancelable into {{clr|SA|SA3}}. It cannot anti-air cross-ups, so if the opponent is too close Ryu will have to walk forward and input a cross-cut Shoryuken in the opposite direction (6321P input). All versions have good juggle potential, which helps squeeze out extra damage from Ryu's many corner juggle situations.
| | Shoryuken is, as always, a great anti-air special and juggle ender. Higher strengths have slower startup in exchange for additional damage and range. The {{clr|L|LP}} version is the best overall for anti-air purposes, but {{clr|M|MP}}/{{clr|H|HP}} are less likely to whiff against moves like Divekicks that stop forward air momentum. It's best to use Shoryuken as late as possible against jumping opponents, or else it will have its damage reduced and will no longer be cancelable into {{clr|SA|SA3}}. It cannot anti-air cross-ups, so if the opponent is too close Ryu will have to walk forward and input a cross-cut Shoryuken in the opposite direction (6321P input). |
| | |
| | {{clr|OD|OD Shoryuken}} has full invincibility to blow through the opponent's attacks, though it doesn't last long enough to plow through most other invincible moves (especially {{clr|SA|Supers}}). While it's possible to use this version in juggles and anti-airs, it's only worthwhile if it will secure a guaranteed kill over the other strengths. |
| | |
| | All versions of Shoryuken have good juggle potential, which helps squeeze out extra damage from Ryu's many corner juggle situations. It's important to know which juggle routes work with each strength, as it's fairly common for a route to only allow {{clr|L|LP}} or {{clr|M|MP}}/{{clr|OD|OD}} Shoryuken as an ender. |
| | |
| | On a midscreen hit, Ryu usually has to chase the opponent down with {{clr|DR|Drive Rush}} to secure any real oki. In some anti-air scenarios, it's possible to chase a Back Rise with two dashes, but this often leaves him around {{sf6-adv|E|0}} or {{sf6-adv|P|+1}} and is hard to judge by eye. {{clr|OD|OD Shoryuken}} never gives throw oki on a midscreen opponent, but Ryu can {{clr|DR|Drive Rush}} into delayed {{clr|M|2MK}}/{{clr|H|5HP}} or immediate {{clr|H|6HP}}/{{clr|H|6HK}} to keep the pressure up. |
|
| |
|
| The extra damage scaling on Shoryuken severely weakens the anti-air damage when canceled directly into {{clr|SA|SA3}}. It does not affect any other combo route ending in Shoryuken > {{clr|SA|SA3}}, however. | | The extra damage scaling on Shoryuken severely weakens the anti-air damage when canceled directly into {{clr|SA|SA3}}. It does not affect any other combo route ending in Shoryuken > {{clr|SA|SA3}}, however. |
| Line 834: |
Line 849: |
| {{AttackDataCargo-SF6/Query|ryu_214hk}} | | {{AttackDataCargo-SF6/Query|ryu_214hk}} |
| * '''Lower Body Projectile Invuln:''' 10-61f; '''Airborne''' 10-61f ({{FKD}} state) | | * '''Lower Body Projectile Invuln:''' 10-61f; '''Airborne''' 10-61f ({{FKD}} state) |
| * Puts opponent into {{sf6-jug|limited juggle}} state; can juggle afterward if 3rd hit connects | | * Puts opponent into {{sf6-jug|limited juggle}} state; can juggle afterward if only 3rd hit connects |
| * 2nd and 3rd hits whiff on crouching (stand blocking any hit forces block on the following hit) | | * 2nd and 3rd hits whiff on crouching (stand blocking any hit forces block on the following hit) |
| {{AttackDataCargo-SF6/Query|ryu_214kk}} | | {{AttackDataCargo-SF6/Query|ryu_214kk}} |
| Line 841: |
Line 856: |
| * Puts opponent into {{sf6-jug|limited juggle}} state; later hits have more juggle potential | | * Puts opponent into {{sf6-jug|limited juggle}} state; later hits have more juggle potential |
| <br> | | <br> |
| Tatsu is a good move for getting corner carry while still allowing oki afterward. | | Tatsu is a good move for getting oki and corner carry with only a small damage sacrifice. |
|
| |
|
| The {{clr|L|LK}} version leaves opponents the closest to Ryu on any grounded combo, allowing Ryu to easily get either a meaty {{clr|L|LP Hashogeki}} or a basic strike throw mixup after one dash unless he canceled into it from medium and heavy buttons from longer ranges. {{clr|M|MK Tatsu}} primarily sees usage as a combo ender in juggles where it gives Ryu some of his best corner carry, while the {{clr|H|HK}} version is Ryu's primary meterless option to switch sides in a combo.
| | {{clr|L|LK Tatsu}} leaves opponents the closest to Ryu on any grounded combo, allowing him to easily get either a meaty {{clr|L|LP Hashogeki}}, or dash into a basic strike/throw mixup. If it was canceled from a ranged medium/heavy poke, the opponent may recover too far away for point blank oki. {{clr|M|MK Tatsu}} primarily sees usage as a juggle ender, where it gives Ryu some of his best corner carry, while {{clr|H|HK Tatsu}} gives Ryu a meterless side switch when comboed into. |
|
| |
|
| Both the {{clr|M|MK}} and {{clr|H|HK}} versions can be used predictively against most projectiles due to the lower body invincibility, and they also get better frame advantage when the later hits connect as opposed to the first hit. | | Both the {{clr|M|MK}} and {{clr|H|HK}} versions can be used predictively against most projectiles due to the lower body invincibility, though this is a very high risk option for its meager reward. They also get better knockdown advantage when connecting on later hits from long range. If you manage to land the 3rd hit of {{clr|H|HK Tatsu}} (a tall order, considering the startup is functionally 46 frames), you can even juggle into {{clr|H|2HK}}, {{clr|H|HP Shoryuken}}, {{clr|SA|SA1}}, or {{clr|SA|SA3}}. |
|
| |
|
| {{clr|OD|OD Tatsu}} is a great juggle starter in the corner, and will always hit consistently due to its vacuum effect. Using this version against an already airborne opponent is less effective because it uses up a significant amount of juggle points, which severely limits Ryu's follow-up options. | | {{clr|OD|OD Tatsu}} is a great juggle starter in the corner, essentially replacing {{clr|OD|OD High Blade Kick}} at that range. It will always hit consistently due to its vacuum effect as long as one hit connects. Using {{clr|OD|OD Tatsu}} against an already airborne opponent is less effective, as it uses up a significant amount of juggle points, severely limiting Ryu's follow-up options. |
|
| |
|
| Tatsu is pretty combo-friendly, but some strengths do not combo from all normal cancels. {{clr|L|5LP}} cannot naturally combo into {{clr|M|MK}}/{{clr|H|HK}} Tatsu, and {{clr|L|2LP}}/{{clr|L|5LK}} cannot naturally combo into {{clr|H|HK Tatsu}} outside of a {{clr|PC|Punish Counter}} scenario. | | Tatsu is pretty combo-friendly, but some strengths do not combo from all normal cancels. {{clr|L|5LP}} cannot naturally combo into {{clr|M|MK}}/{{clr|H|HK}} Tatsu, and {{clr|L|2LP}}/{{clr|L|5LK}} cannot naturally combo into {{clr|H|HK Tatsu}} outside of a {{clr|PC|Punish Counter}} scenario. They all work on crouching opponents on the first hit, and even when whiff punishing this hit will almost always connect. |
| }} | | }} |
|
| |
|
| Line 855: |
Line 870: |
| {{MoveDataCargo | | {{MoveDataCargo |
| | title = Aerial Tatsumaki Senpu-kyaku | | | title = Aerial Tatsumaki Senpu-kyaku |
| | subtitle = | | | subtitle = Air Tatsu |
| | input = {{Classic_sf6}} j.214K<br>{{Modern_sf6}} j.214X or j.S | | | input = {{Classic_sf6}} j.214K<br>{{Modern_sf6}} j.214X or j.S |
| | images = | | | images = |
| Line 933: |
Line 948: |
| {{MoveDataCargo | | {{MoveDataCargo |
| | title = Hashogeki | | | title = Hashogeki |
| | subtitle = | | | subtitle = Hado Palm |
| | input = {{Classic_sf6}} 214P<br>{{Modern_sf6}} 214X | | | input = {{Classic_sf6}} 214P<br>{{Modern_sf6}} 214X |
| | images = | | | images = |
| Line 970: |
Line 985: |
| {{clr|H|HP Hashogeki}} gives Ryu frame advantage on block and keeps them inside throw range, but canceling into it leaves him vulnerable during its long startup. If you condition the opponent to expect a {{clr|H|214HP}} cancel, you can punish their light normal mash by ending with the {{clr|L|LP}} or {{clr|M|MP}} versions instead, creating an intentional gap of 1-4 frames; this allows you to use the aforementioned {{clr|PC|Counter-hit}} launch juggle routes, even if he trades with the opponent's normal. | | {{clr|H|HP Hashogeki}} gives Ryu frame advantage on block and keeps them inside throw range, but canceling into it leaves him vulnerable during its long startup. If you condition the opponent to expect a {{clr|H|214HP}} cancel, you can punish their light normal mash by ending with the {{clr|L|LP}} or {{clr|M|MP}} versions instead, creating an intentional gap of 1-4 frames; this allows you to use the aforementioned {{clr|PC|Counter-hit}} launch juggle routes, even if he trades with the opponent's normal. |
|
| |
|
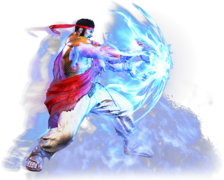
| {{clr|OD|OD Hashogeki}} is also plus on block, but has little reward on hit without a Denjin stock. Due to it's high damage and ability to be linked out of, using it as a {{clr|PC|PC}} starter is great; the damage scaling only kicks in when comboing '''into''' the {{clr|OD|214PP}}. It's serviceable as a round closer or to keep certain buttons safe for punishment. | | {{clr|OD|OD Hashogeki}} is also plus on block, but has little reward on hit without a counter hit or Denjin stock. Due to it's high damage and ability to be linked out of, using it as a {{clr|PC|PC}} starter is great; the damage scaling only kicks in when comboing '''into''' the {{clr|OD|214PP}}. It's serviceable as a round closer or to keep certain buttons safe for punishment. |
|
| |
|
| All versions of Hashogeki can be juggled into in some capacity. The {{clr|L|LP}} and {{clr|M|MP}} versions are used in some high-damage corner juggle routes, usually by using {{clr|DR|Drive Rush}} buttons after {{clr|OD|OD Tatsu}} or {{clr|H|HP Hashogeki}}. See the [[Street_Fighter_6/Ryu/Combos|Combos page]] for details about specific routes with their damage and resource cost. | | All versions of Hashogeki can be juggled into in some capacity. The {{clr|L|LP}} and {{clr|M|MP}} versions are used in some high-damage corner juggle routes, usually by using {{clr|DR|Drive Rush}} buttons after {{clr|OD|OD Tatsu}} or {{clr|H|HP Hashogeki}}. See the [[Street_Fighter_6/Ryu/Combos|Combos page]] for details about specific routes with their damage and resource cost. |
| Line 986: |
Line 1,001: |
| {{MoveDataCargo | | {{MoveDataCargo |
| | title = Denjin Charge Hashogeki | | | title = Denjin Charge Hashogeki |
| | subtitle = | | | subtitle = Denjin Hado Palm |
| | input = {{Classic_sf6}} 214{{clr|H|HP}}<br>{{Modern_sf6}} 214X | | | input = {{Classic_sf6}} 214{{clr|H|HP}}<br>{{Modern_sf6}} 214{{clr|H|H}} |
| | images = | | | images = |
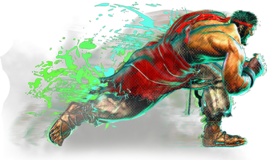
| {{MoveDataCargoImage|imageHeight=220px|ryu_214p(charged)|caption=}} | | {{MoveDataCargoImage|imageHeight=220px|ryu_214p(charged)|caption=}} |
| Line 1,071: |
Line 1,086: |
| The Denjin Charge version of each level consumes 1 stock and deals 400 extra damage on hit (but again, no extra Chip). There is no way to preserve the Denjin stock while using this Super, unlike with regular Hashogeki. | | The Denjin Charge version of each level consumes 1 stock and deals 400 extra damage on hit (but again, no extra Chip). There is no way to preserve the Denjin stock while using this Super, unlike with regular Hashogeki. |
|
| |
|
| While this Super has some invincibility, the slower startup makes it a poor option compared to {{clr|SA|SA1}} or {{clr|SA|SA3}}. If attempting this, be aware that holding the button results in 3f less invincibility. | | While this Super has some invincibility, the slower startup makes it a poor reversal compared to {{clr|SA|SA1}} or {{clr|SA|SA3}}. If attempting this, be aware that holding the button results in 3f less invincibility. However, the motion of the super does make it a bit easier to use when reacting to drive impact. |
| }} | | }} |
| |-| | | |-| |


