< Street Fighter 6 | Mai
| (7 intermediate revisions by 3 users not shown) | |||
| Line 5: | Line 5: | ||
{{ ReasonsToPick | {{ ReasonsToPick | ||
| pick= | | pick= | ||
* A | * A zoning game that can be converted into a strong offense when executed correctly | ||
* Oppressive and simple damage routes that can be generally started halfway through any given round | * Oppressive and simple damage routes that can be generally started halfway through any given round | ||
* Forcing opponents to respect your fireball game when you have a chance to charge them up | * Forcing opponents to respect your fireball game when you have a chance to charge them up | ||
* A fast divekick | * A fast divekick for clearing fireballs and changing midair trajectory | ||
* Easy-to-manage multipurpose normal moves | * Easy-to-manage multipurpose normal moves | ||
* | * Low-resource corner carry off of hitconfirms or otherwise, and even better corner carry when you're willing to dump resources | ||
| avoid= | | avoid= | ||
* | * Committing to your fireball game to apply pressure safely | ||
* Lacking large damage | * Lacking large damage cash outs without access to empowered specials | ||
* Lacking plus frames on block without | * Lacking plus frames on block without Drive Rush | ||
}} | }} | ||
<br> | <br> | ||
| Line 28: | Line 25: | ||
! style="text-align:left;" | Missing Normals | ! style="text-align:left;" | Missing Normals | ||
| | | | ||
* | * Standing Medium Punch {{clr|M|(5MP)}} | ||
* Jumping Light Punch {{clr|L|(j.LP)}} | |||
* Jumping Medium Kick {{clr|M|(j.MK)}} | |||
* Jumping Heavy Punch {{clr|H|(j.HP)}} | |||
|- | |- | ||
! style="text-align:left;" | Missing Command Normals | ! style="text-align:left;" | Missing Command Normals | ||
| | | | ||
* | * N/A | ||
|- | |- | ||
! style="text-align:left;" | Shortcut-Only Specials | ! style="text-align:left;" | Shortcut-Only Specials | ||
| | | | ||
* | * Hissatsu Shinobi Bachi {{clr|DR|(2S)}} | ||
** {{clr|L|Light}}/{{clr|OD|OD}} Only | |||
|- | |||
! style="text-align:left;" | Assist Combos | |||
| | |||
* A[{{clr|L|L}}~{{clr|L|L}}~{{clr|L|L}}]: {{clr|L|2LK}} ~ {{clr|L|5LP}} ~ {{clr|L|LK Hissatsu Shinobi Bachi}} | |||
** On Block: stops at {{clr|L|5LP}} | |||
* A[{{clr|M|M}}~{{clr|M|M}}~{{clr|M|M}}]: {{clr|M|2MP}} ~ {{clr|OD|OD Ryuuenbu}} ~ {{clr|SA|SA1}} | |||
** No {{clr|SA|SA1}}: {{clr|M|2MP}} ~ {{clr|OD|OD Ryuuenbu}} ~ {{clr|M|M Hissatsu Shinobi Bachi}} | |||
** On Block: stops at {{clr|OD|OD Ryuuenbu}} (very unsafe at {{sf6-adv|VM|-12}}) | |||
** Burnout: {{clr|M|2MP}} ~ {{clr|L|L Ryuuenbu}} (relatively safe at {{sf6-adv|VM|-4 oB}} with high pushback) | |||
* A[{{clr|H|H}}~{{clr|H|H}}~{{clr|H|H}}~{{clr|H|H}}~{{clr|H|H}}]: {{clr|H|5HP}} ~ {{clr|OD|OD Hissatsu Shinobi Bachi}} ~ {{clr|M|j.MP}} ~ {{clr|L|L Ryuuenbu}} ~ {{clr|SA|SA3}} | |||
** Burnout: {{clr|H|5HP}} ~ {{clr|H|H Hissatsu Shinobi Bachi}} ~ {{clr|SA|SA3}} | |||
** On Block: stops at {{clr|OD|OD Ryuuenbu}} / {{clr|H|H Hissatsu Shinobi Bachi}} | |||
|- | |- | ||
! style="text-align:left;" | Miscellaneous Changes | ! style="text-align:left;" | Miscellaneous Changes | ||
| | | | ||
* | * {{clr|L|5LP}} is only available as the 2nd hit of {{clr|L|L Assist Combo}} | ||
|} | |} | ||
<br> | |||
=== Flame Stocks === | |||
{| | |||
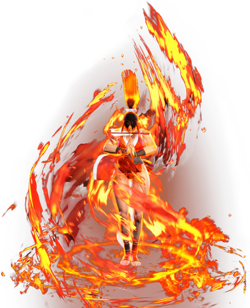
| style="width: 50%" | After activating her {{clr|SA|Level 1 Super Art}}, Mai builds 5 Flame Stocks. These stocks are automatically consumed when using a special move or {{clr|SA|SA1}}/{{clr|SA|SA2}}, giving Mai increased damage and improved move properties. Activating a {{clr|SA|Flame-enhanced SA1}} will refill the stocks to 5 regardless of how many she started with. Flame Stocks do not carry over between rounds. | |||
<br> | |||
To take advantage of these Flame-enhanced attacks, your gameplan should consider how to incorporate her {{clr|SA|Super}}. Midscreen combo routes are very limited, requiring either {{clr|OD|OD Ryuuenbu}} or a direct cancel from close-range normals. Corner juggles can tack on {{clr|SA|SA1}} without making major sacrifices, assuming you can win the screen position battle first. You can use {{clr|SA|SA1}} defensively as an anti-air or a reversal, but this is a less solid strategy that depends entirely on your opponent's decisions. Note that if Mai's {{clr|SA|SA1}} is interrupted before the active frames (such as with a meaty projectile), she will not build any Flame Stocks. | |||
<br><br> | |||
The most important Flame enhancements are to Mai's Kachousen projectile and her {{clr|SA|SA2}}. Kachousen becomes a 2-hit projectile that cannot be swatted away, making it much better in projectile wars. The held and {{clr|OD|OD}} versions become especially strong in combos and oki scenarios. {{clr|SA|Flame-enhanced SA2}} is one of the game's best anti-projectile tools, and can single-handedly flip the script against characters like Guile and Akuma. | |||
| style="width: 50%"| [[File:SF6_Mai_236236p.png|250px]] | |||
|} | |||
<br> | |||
<noinclude> | <noinclude> | ||
Latest revision as of 14:19, 20 March 2025
Introduction
The successor of Shiranui-style ninja arts. A charming kunoichi who is as dedicated to love as she is to training. Loves cooking, Japanese dressmaking, flower arrangement, and traditional Japanese dance.
| Pick if you like: | Avoid if you dislike: |
|---|---|
|
|
Classic & Modern Versions Comparison
| Missing Normals |
|
|---|---|
| Missing Command Normals |
|
| Shortcut-Only Specials |
|
| Assist Combos |
|
| Miscellaneous Changes |
|
Flame Stocks
