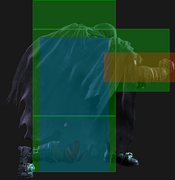
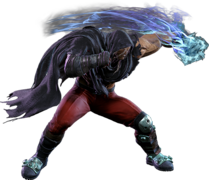
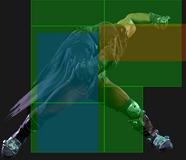
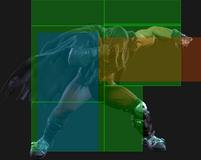
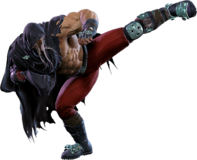
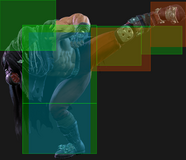
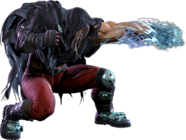
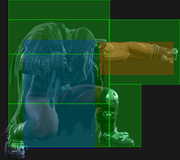
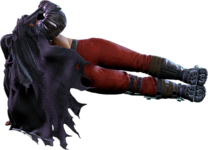
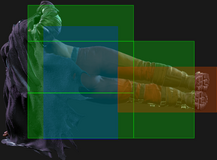
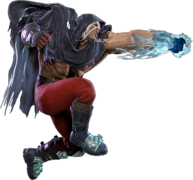
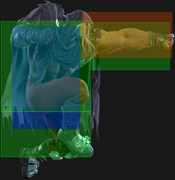
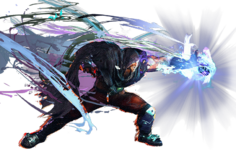
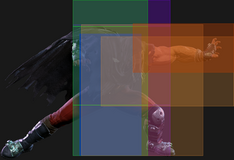
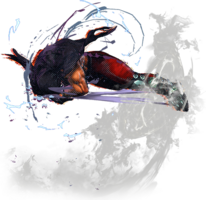
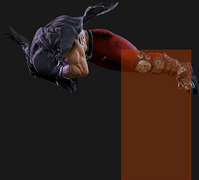
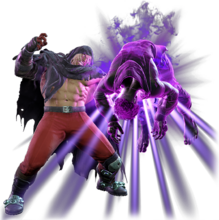
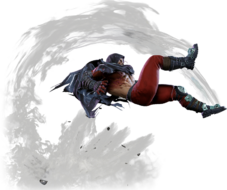
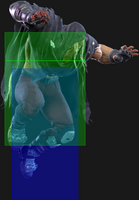
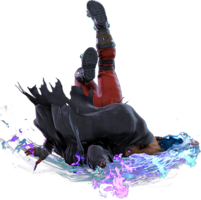
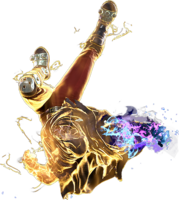
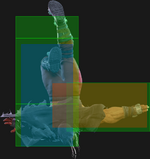
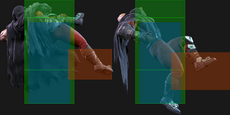
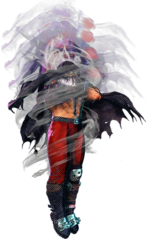
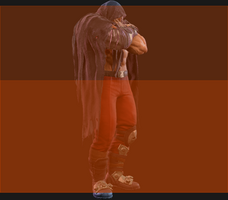
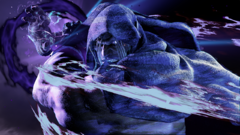
|
|
| (55 intermediate revisions by 5 users not shown) |
| Line 1: |
Line 1: |
| {{New Character Warning SF6}}
| | {{Character Top SF6 | chara={{SUBPAGENAME}}| tag=Bison }} |
| {{Character Top SF6 | chara={{SUBPAGENAME}}| tag=Mbison }} | |
|
| |
|
| <center>{{FrameDataKey-SF6}}</center> | | <center>{{FrameDataKey-SF6}}</center> |
| Line 18: |
Line 17: |
| * Chains into {{clr|L|5LP}}/{{clr|L|2LP}}/{{clr|L|2LK}} | | * Chains into {{clr|L|5LP}}/{{clr|L|2LP}}/{{clr|L|2LK}} |
| * '''Cancel Hitconfirm Window:''' 13f | | * '''Cancel Hitconfirm Window:''' 13f |
| | ** {{clr|DR|DR}} cancel is delayed until after 2nd active frame |
| * '''{{clr|DR|Drive Rush}} cancel advantage:''' {{sf6-adv|VP|+5}} oH / {{sf6-adv|M|-1}} oB | | * '''{{clr|DR|Drive Rush}} cancel advantage:''' {{sf6-adv|VP|+5}} oH / {{sf6-adv|M|-1}} oB |
| * Applies 20% damage scaling to next hit when beginning a combo (100/80/70...) | | * Applies 20% damage scaling to next hit when beginning a combo (100/80/70...) |
| Line 70: |
Line 70: |
| | title = Standing Light Kick | | | title = Standing Light Kick |
| | subtitle = | | | subtitle = |
| | input = 5LK | | | input = {{classic_sf6}} 5LK<br>{{modern_sf6}} -- |
| | images = | | | images = |
| {{MoveDataCargoImage|imageHeight=180px|m.bison_5lk|caption=}} | | {{MoveDataCargoImage|imageHeight=180px|m.bison_5lk|caption=}} |
| Line 104: |
Line 104: |
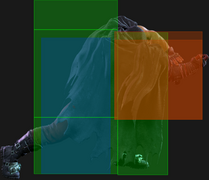
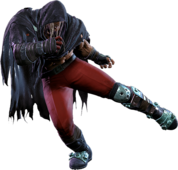
| | title = Standing Heavy Kick | | | title = Standing Heavy Kick |
| | subtitle = | | | subtitle = |
| | input = 5HK | | | input = {{classic_sf6}} 5HK<br>{{modern_sf6}} -- |
| | images = | | | images = |
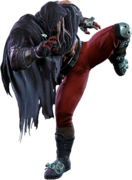
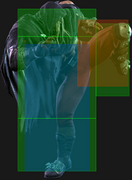
| {{MoveDataCargoImage|imageHeight=160px|m.bison_5hk|caption=}} | | {{MoveDataCargoImage|imageHeight=160px|m.bison_5hk|caption=}} |
| Line 137: |
Line 137: |
| * Chains into {{clr|L|5LP}}/{{clr|L|2LP}}/{{clr|L|2LK}} | | * Chains into {{clr|L|5LP}}/{{clr|L|2LP}}/{{clr|L|2LK}} |
| * '''Cancel Hitconfirm Window:''' 12f | | * '''Cancel Hitconfirm Window:''' 12f |
| | ** {{clr|DR|DR}} cancel is delayed until after active frames |
| * '''{{clr|DR|Drive Rush}} cancel advantage:''' {{sf6-adv|VP|+5}} oH / {{sf6-adv|M|-1}} oB | | * '''{{clr|DR|Drive Rush}} cancel advantage:''' {{sf6-adv|VP|+5}} oH / {{sf6-adv|M|-1}} oB |
| * Applies 20% damage scaling to next hit when beginning a combo (100/80/70...) | | * Applies 20% damage scaling to next hit when beginning a combo (100/80/70...) |
| Line 194: |
Line 195: |
| | info = | | | info = |
| {{AttackDataCargo-SF6/Query|m.bison_2lk}} | | {{AttackDataCargo-SF6/Query|m.bison_2lk}} |
| * Chains into {{clr|L|5LP}}/{{clr|L|2LP}}/{{clr|L|2LK}} | | * Chains into {{clr|L|5LP}}/{{clr|L|2LP}}/{{clr|L|2LK}} (4f gap when chained to {{clr|L|5LP}}/{{clr|L|2LK}}) |
| * Applies 20% damage scaling to next hit when beginning a combo (100/80/70...) | | * Applies 20% damage scaling to next hit when beginning a combo (100/80/70...) |
| <br> | | <br> |
| Line 212: |
Line 213: |
| {{AttackDataCargo-SF6/Query|m.bison_2mk}} | | {{AttackDataCargo-SF6/Query|m.bison_2mk}} |
| * '''Cancel Hitconfirm Window:''' 13f | | * '''Cancel Hitconfirm Window:''' 13f |
| | ** {{clr|DR|DR}} cancel is delayed until after active frames |
| * '''{{clr|DR|Drive Rush}} cancel advantage:''' {{sf6-adv|VP|+8}} oH / {{sf6-adv|VP|+4}} oB | | * '''{{clr|DR|Drive Rush}} cancel advantage:''' {{sf6-adv|VP|+8}} oH / {{sf6-adv|VP|+4}} oB |
| * Applies 20% damage scaling to next hit when beginning a combo (100/80/70...) | | * Applies 20% damage scaling to next hit when beginning a combo (100/80/70...) |
| Line 245: |
Line 247: |
| | title = Jumping Light Punch | | | title = Jumping Light Punch |
| | subtitle = | | | subtitle = |
| | input = j.LP | | | input = {{classic_sf6}} j.LP<br>{{modern_sf6}} -- |
| | images = | | | images = |
| {{MoveDataCargoImage|imageHeight=180px|m.bison_jlp|caption=}} | | {{MoveDataCargoImage|imageHeight=180px|m.bison_jlp|caption=}} |
| Line 276: |
Line 278: |
| | title = Jumping Heavy Punch | | | title = Jumping Heavy Punch |
| | subtitle = | | | subtitle = |
| | input = j.HP | | | input = {{classic_sf6}} j.HP<br>{{modern_sf6}} -- |
| | images = | | | images = |
| {{MoveDataCargoImage|imageHeight=170px|m.bison_jhp|caption=}} | | {{MoveDataCargoImage|imageHeight=170px|m.bison_jhp|caption=}} |
| Line 301: |
Line 303: |
| * Can hit Cross-up | | * Can hit Cross-up |
| <br> | | <br> |
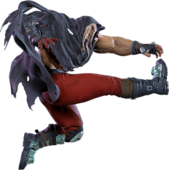
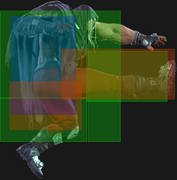
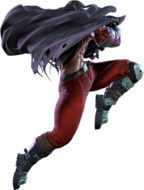
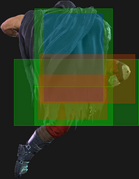
| Can be used as an air-to-air or as a cross-up approach tool, though it's generally worse than {{clr|L|j.LP}} and {{clr|M|j.MK}} respectively. The one advantage of {{clr|L|j.LK}} is that it can still work as an air-to-air during a forward jump if the opponent crosses behind Bison.
| | An air-to-air that's worse than {{clr|L|j.LP}}, and a cross-up with the same backwards hitbox as {{clr|M|j.MK}} but less damage. The only real use for {{clr|L|j.LK}} is to set up a quick tick throw after landing from a cross-up, or as a faster air-to-air against moves that can cross behind Bison like E. Honda's Sumo Smash. |
| }} | | }} |
|
| |
|
| Line 308: |
Line 310: |
| | title = Jumping Medium Kick | | | title = Jumping Medium Kick |
| | subtitle = | | | subtitle = |
| | input = j.MK | | | input = {{classic_sf6}} j.MK<br>{{modern_sf6}} -- |
| | images = | | | images = |
| {{MoveDataCargoImage|imageHeight=190px|m.bison_jmk|caption=}} | | {{MoveDataCargoImage|imageHeight=190px|m.bison_jmk|caption=}} |
| Line 370: |
Line 372: |
| * Forces stand | | * Forces stand |
| * '''Cancel Hitconfirm Window:''' 18f | | * '''Cancel Hitconfirm Window:''' 18f |
| * '''{{clr|4|Drive Rush}} cancel advantage:''' {{sf6-adv|VP|+15}} oH / {{sf6-adv|VP|+12}} oB | | * '''{{clr|DR|Drive Rush}} cancel advantage:''' {{sf6-adv|VP|+15}} oH / {{sf6-adv|VP|+12}} oB |
| <br> | | <br> |
| Bison's main pressure tool up close with very low pushback, granting him advantage on block without the massive startup of {{clr|H|5HP}}. It can lead to powerful combos on {{clr|PC|Punish Counter}} or out of a {{clr|DR|Drive Rush}} starter. If the opponent respects your block pressure, you can drain an entire bar of Drive meter with {{clr|DR|DR~}}{{clr|H|4HK}}, {{clr|H|4HK}}; just be sure not to overuse this sequence, as it can be interrupted with a 4f normal. | | Bison's main pressure tool up close with very low pushback, granting him advantage on block without the massive startup of {{clr|H|5HP}}. It can lead to powerful combos on {{clr|PC|Punish Counter}} or out of a {{clr|DR|Drive Rush}} starter. If the opponent respects your block pressure, you can drain almost 2/3 of a Drive bar with {{clr|DR|DR~}}{{clr|H|4HK}}, {{clr|H|4HK}}; just be sure not to overuse this sequence, as it can be interrupted with a 4f normal. |
|
| |
|
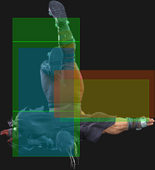
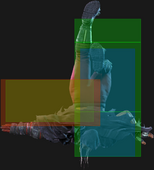
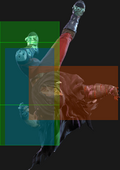
| One of Bison's best cancelable normals, it can combo into his slower and stronger special moves. However, {{clr|H|2HP}} is stronger if you intend to cancel directly into a special move, and has the same startup. When canceled into {{clr|DR|Drive Rush}}, {{clr|H|4HK}} can form a true blockstring into itself, or can be manually delayed to set up a frame trap. | | One of Bison's best cancelable normals, it can combo into his slower and stronger special moves. However, {{clr|H|2HP}} is stronger if you intend to cancel directly into a special move, and has the same startup. When canceled into {{clr|DR|Drive Rush}}, {{clr|H|4HK}} can form a true blockstring into itself, or can be manually delayed to set up a frame trap. |
| Line 381: |
Line 383: |
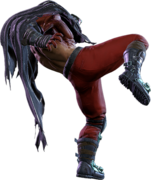
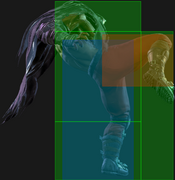
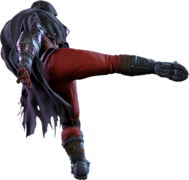
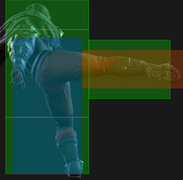
| | title = Hover Kick | | | title = Hover Kick |
| | subtitle = Slide | | | subtitle = Slide |
| | input = 3HK | | | input = {{classic_sf6}} 3HK<br>{{modern_sf6}} -- |
| | images = | | | images = |
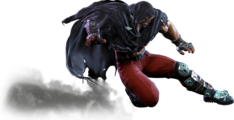
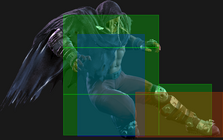
| {{MoveDataCargoImage|imageHeight=120px|m.bison_3hk|caption=}} | | {{MoveDataCargoImage|imageHeight=120px|m.bison_3hk|caption=}} |
| Line 460: |
Line 462: |
| | title = Forward Throw | | | title = Forward Throw |
| | subtitle = | | | subtitle = |
| | input = LPLK | | | input = {{classic_sf6}} LPLK<br>{{modern_sf6}} LM |
| | images = | | | images = |
| {{MoveDataCargoImage|imageHeight=140px|m.bison_lplk|caption=}} | | {{MoveDataCargoImage|imageHeight=140px|m.bison_lplk|caption=}} |
| Line 481: |
Line 483: |
| | title = Back Throw | | | title = Back Throw |
| | subtitle = | | | subtitle = |
| | input = 4LPLK | | | input = {{classic_sf6}} 4LPLK<br>{{modern_sf6}} 4LM |
| | images = | | | images = |
| {{MoveDataCargoImage|imageHeight=200px|m.bison_4lplk|caption=}} | | {{MoveDataCargoImage|imageHeight=200px|m.bison_4lplk|caption=}} |
| Line 509: |
Line 511: |
| | title = Drive Impact | | | title = Drive Impact |
| | subtitle = | | | subtitle = |
| | input = HPHK | | | input = {{classic_sf6}} HPHK<br>{{modern_sf6}} DI |
| | images = | | | images = |
| {{MoveDataCargoImage|imageHeight=150px|m.bison_hphk|caption=}} | | {{MoveDataCargoImage|imageHeight=150px|m.bison_hphk|caption=}} |
| Line 519: |
Line 521: |
| * On Hit/PC: Applies 20% damage scaling to next hit when beginning a combo | | * On Hit/PC: Applies 20% damage scaling to next hit when beginning a combo |
| * On Block: Applies 20% scaling multiplier to all follow-up hits after Wall Splat; the next attack can incur additional Starter Scaling | | * On Block: Applies 20% scaling multiplier to all follow-up hits after Wall Splat; the next attack can incur additional Starter Scaling |
| * Combos when canceled from {{clr|H|2HP}} or Punish Counter {{clr|H|4HK}}/{{clr|M|5MP}} (no corner wallsplat; useful for depleting Drive gauge, especially after Perfect Parry) | | * Combos when canceled from {{clr|H|2HP}} or {{clr|PC|Punish Counter}} {{clr|H|4HK}}/{{clr|M|5MP}} (no corner wallsplat; useful for depleting Drive gauge, especially after Perfect Parry) |
| * A blocked {{clr|4|DI}} can combo into another {{clr|4|DI}} if opponent is not fully cornered (Stuns if opponent has less than 1.5 Drive bars) | | * A blocked {{clr|DR|DI}} can combo into another {{clr|DR|DI}} if opponent is not fully cornered (Stuns if opponent has less than 1.5 Drive bars) |
| ** This happens because a blocked {{clr|4|DI}} is not considered a "hit" for combo purposes | | ** This happens because a blocked {{clr|DR|DI}} is not considered a "hit" for combo purposes |
| ** Causes both the 20% Starter and 20% Multiplier scaling to apply to the follow-up combo | | ** Causes both the 20% Starter and 20% Multiplier scaling to apply to the follow-up combo |
| See [[Street_Fighter_6/Gauges#Drive_Impact|Drive Impact]] on the Gauges page for more details. | | See [[Street_Fighter_6/Gauges#Drive_Impact|Drive Impact]] on the Gauges page for more details. |
| Line 535: |
Line 537: |
| * '''Marisa (214K)''', frame 3 armor | | * '''Marisa (214K)''', frame 3 armor |
| * '''Zangief ({{clr|H|5[HP]}})''', frame 4 armor | | * '''Zangief ({{clr|H|5[HP]}})''', frame 4 armor |
| It's important to use a blockstring that cannot be absorbed by their armor/counter moves. Ideally, the string should also not be a true combo, or it will cause a Lock and prevent Stun.<br>{{clr|10|*}} Denotes a move that causes Lock on Counter-hit, allowing the opponent to escape a Stun by mashing on wakeup. | | |
| * {{clr|H|4HK}}{{clr|10|*}} > {{clr|4|DI}}: 1f blockstring gap prevents opponent from absorbing the hit | | It's important to use a blockstring that cannot be absorbed by their armor/counter moves. Ideally, the string should also not be a true combo, or it will cause a Lock and prevent Stun.<br>{{clr|OD|*}} Denotes a move that causes Lock on {{clr|PC|Counter-Hit}}, allowing the opponent to escape a Stun by mashing on wakeup. |
| * {{clr|4|DR~}}{{clr|H|2HP}}{{clr|10|*}} > {{clr|4|DI}}: 1f blockstring gap prevents opponent from absorbing the hit | | * {{clr|H|4HK}}{{clr|OD|*}} > {{clr|DR|DI}}: 1f blockstring gap prevents opponent from absorbing the hit |
| * {{clr|4|DR~}}{{clr|M|5MP}}{{clr|10|*}} > {{clr|4|DI}}: 1f blockstring gap prevents opponent from absorbing the hit | | * {{clr|DR|DR~}}{{clr|H|2HP}}{{clr|OD|*}} > {{clr|DR|DI}}: 1f blockstring gap prevents opponent from absorbing the hit |
| * {{clr|4|DR~}}{{clr|M|2MP}}{{clr|10|*}} > {{clr|4|DI}}: 3f blockstring gap will work vs. Zangief {{clr|H|5[HP]}} | | * {{clr|DR|DR~}}{{clr|M|5MP}}{{clr|OD|*}} > {{clr|DR|DI}}: 1f blockstring gap prevents opponent from absorbing the hit |
| * {{clr|4|DR~}}{{clr|M|2MK}} > {{clr|4|DI}}: 3f blockstring gap will work vs. Zangief {{clr|H|5[HP]}} | | * {{clr|DR|DR~}}{{clr|M|2MP}}{{clr|OD|*}} > {{clr|DR|DI}}: 3f blockstring gap will work vs. Zangief {{clr|H|5[HP]}} |
| | * {{clr|DR|DR~}}{{clr|M|2MK}} > {{clr|DR|DI}}: 3f blockstring gap will work vs. Zangief {{clr|H|5[HP]}} |
| }} | | }} |
|
| |
|
| Line 554: |
Line 557: |
| | info = | | | info = |
| {{AttackDataCargo-SF6/Query|m.bison_6hphk}} | | {{AttackDataCargo-SF6/Query|m.bison_6hphk}} |
| * '''Full Invuln:''' 1-22f; Armor Break | | * '''Full Invuln:''' 1-22f; '''Range:''' 1.657; Armor Break |
| * 5f extra recovery on hit; 4f screen freeze during startup | | * 5f extra recovery on hit; 4f screen freeze during startup |
| {{AttackDataCargo-SF6/Query|m.bison_6hphk_recovery}} | | {{AttackDataCargo-SF6/Query|m.bison_6hphk_recovery}} |
| * '''Full Invuln:''' 1-20f; Armor Break | | * '''Full Invuln:''' 1-20f; '''Range:''' 1.657; Armor Break |
| * 5f extra recovery on hit; no screen freeze | | * 5f extra recovery on hit; no screen freeze |
| See [[Street_Fighter_6/Gauges#Drive_Reversal|Drive Reversal]] on the Gauges page for more details. | | See [[Street_Fighter_6/Gauges#Drive_Reversal|Drive Reversal]] on the Gauges page for more details. |
| Line 566: |
Line 569: |
| | title = Drive Parry | | | title = Drive Parry |
| | subtitle = | | | subtitle = |
| | input = MPMK | | | input = {{classic_sf6}} MPMK<br>{{modern_sf6}} DP |
| | images = | | | images = |
| {{MoveDataCargoImage|imageHeight=180px|m.bison_mpmk|caption=}} | | {{MoveDataCargoImage|imageHeight=180px|m.bison_mpmk|caption=}} |
| Line 596: |
Line 599: |
| * 3-bar version performed on hit/block from a cancelable normal | | * 3-bar version performed on hit/block from a cancelable normal |
| ** Can also be performed from whiffed cancelable light normals | | ** Can also be performed from whiffed cancelable light normals |
| | |
| See [[Street_Fighter_6/Gauges#Drive_Rush|Drive Rush]] on the Gauges page for more details. See Strategy page for [[Street_Fighter_6/M.Bison/Strategy#Drive_Rush|Blockstring Gaps and Combo Routes]] | | See [[Street_Fighter_6/Gauges#Drive_Rush|Drive Rush]] on the Gauges page for more details. See Strategy page for [[Street_Fighter_6/M.Bison/Strategy#Drive_Rush|Blockstring Gaps and Combo Routes]] |
| * Startup refers to minimum time before an attack can cancel the {{clr|4|Drive Rush}} animation | | * Startup refers to minimum time before an attack can cancel the {{clr|DR|Drive Rush}} animation |
| * The first 15 recovery frames are cancelable into any attack | | * The first 15 recovery frames are cancelable into any attack |
| * The final 22 recovery frames are cancelable into any attack or movement option or blocking (except Parry) | | * The final 22 recovery frames are cancelable into any attack or movement option or blocking (except Parry) |
| * Only Normal and Command Normal attacks are enhanced with '''+4''' frame advantage and improved juggle properties | | * Only Normal and Command Normal attacks are enhanced with '''+4''' frame advantage and improved juggle properties |
| * Applies 15% damage scaling multiplier to any follow-up hits when used mid-combo | | * Applies 15% damage scaling multiplier to any follow-up hits when used mid-combo |
| ** Only applies scaling once per combo; does not apply when a {{clr|4|Drive Rush}} enhanced attack starts the combo | | ** Only applies scaling once per combo; does not apply when a {{clr|DR|Drive Rush}} enhanced attack starts the combo |
|
| |
|
| Distance: | | Distance: |
| * 0.593 (min, cancel into immediate Throw) | | * 0.593 (min, cancel into immediate Throw) |
| * 2.650 (min, earliest blocking/movement frame) | | * 2.650 (min, earliest blocking/movement frame) |
| * 4.425 (max, final {{clr|4|DR}} frame) | | * 4.425 (max, final {{clr|DR|DR}} frame) |
| }} | | }} |
| <br> | | <br> |
| Line 623: |
Line 627: |
| | info = | | | info = |
| {{AttackDataCargo-SF6/Query|m.bison_psycho_mine}} | | {{AttackDataCargo-SF6/Query|m.bison_psycho_mine}} |
| | * Projectile hitbox; Mine dissipates if Bison is hit |
| | * Automatic explosion timer is 300f after being planted by the second hit of Backfist Combo |
| | * Can be manually triggered with Psycho Crusher / Backfist Combo / Devil Reverse |
| | ** Applies on hit/block/parry; only Backfist Combo triggers explosion on Perfect Parry |
| | * Puts opponents into {{sf6-jug|free juggle}} state (or maintains existing juggle state) |
| | ** Countdown explosion launches higher than special move detonation |
| | * Counts as 1 move for damage scaling only after timer expires |
| | ** No extra scaling applied when detonated with special moves |
| | * Supers remove the bomb upon connecting with the opponent |
| <br> | | <br> |
| After landing Backfist Combo, Bison attaches a Psycho Mine to the opponent. Following approximately six seconds (or 600 frames), the mine detonates, either launching the opponent or giving Bison frame advantage. If Bison hits the opponent with a special move that involves Psycho Power (aka Psycho Crusher, Devil's Reverse, or Backfist Combo), the mine will automatically detonate on hit and on block. On hit, Bison gains access to new combo routes, and on block he is left very plus.
| | [[#Backfist_Combo_(214P)|Backfist Combo]] (214P) plants a Psycho Mine onto the opponent on hit. After ~5 seconds, the mine automatically detonates, launching the opponent into a juggle state or locking them down with a hefty 30 frames of blockstun, allowing Bison to freely mount additional offense. This Psycho Mine is the core of Bison's offensive gameplan, and should almost always be prioritized over damage unless a kill is guaranteed. |
|
| |
|
| Psycho Mines are an essential part of Bison's gameplan, and his use of them is a huge part of him maintaining offensive momentum after a combo. As Bison's greatest strength is his offensive power, using Psycho Mines to maintain control of the match is crucial.
| | Bison's Psycho Power infused special moves ([[#Psycho_Crusher_Attack_([4]6P)|Psycho Crusher]], [[#Backfist_Combo_(214P)|Backfist Combo]], and [[#Devil_Reverse_([2]8K~P)|Devil Reverse]]) can trigger the Psycho Mine detonation when they connect with the opponent (though notably, only Backfist Combo triggers it on Perfect Parry). This gives him oppressive frame advantage and Drive gauge depletion on block with very little effort. On hit, Bison gains significant damage as well as improved juggle routes or oki. |
|
| |
|
| Generally, Bison can "spend" a Psycho Mine in one of two ways- either to reinforce mixups, or to maintain advantage. To enforce mixups, Bison can plant a Psycho Mine and then meaty with buttons like {{clr|MP|5MP}} or {{clr|HP|4HK}}, then look for an overhead or low opportunity and convert. To maintain advantage, Bison can immediately layer a detonator special after a mine plant and continue pressuring the opponent. For example, {{clr|LP|LP Backfist Combo}} > Meaty {{clr|LP|LP Psycho Crusher}} leaves Bison +6, has good corner carry, and strips 1 bar of Drive Gauge on hit.
| | While the special move detonation is generally used to extend combos or brute force his block pressure, the countdown detonation can be applied in more unique mixup scenarios. For example, keeping the opponent locked down with block pressure allows Bison to open up the opponent with an overhead or low normal, either of which will combo into the explosion. He can also time a Shadow Rise or Devil Reverse to create an ambiguous left/right mixup right as the timer expires. These types of mixups are weak against Parry, but become very effective if the opponent is in Burnout or low on Drive gauge. On a successful mixup, the most common way to pick up the juggle is {{clr|M|j.MP}}~{{clr|M|j.MP}} into any ender after landing (e.g. {{clr|H|HP Psycho Crusher}}, {{clr|H|HP Backfist Combo}}, or {{clr|H|5HP}} > {{clr|SA|Super}}). |
|
| |
|
| The timed detonation for Psycho Mine launches opponents much higher than the manually triggered versions from Backfist Combo or Psycho Crusher. Combo options are generally {{clr|M|j.MP~MP}} > {{clr|LP|LP Crusher}}.
| | Because the explosion is a projectile hitbox, some moves with projectile invincibility can be used to avoid it. This includes moves with upper-body projectile invincibility, like A.K.I.'s {{clr|L|LK Snake Step}}. Most projectile invuln moves can't be thrown out randomly, but some characters can take advantage of this even on block (e.g. Jamie's {{clr|OD|OD Bakkai}} > {{clr|SA|SA2}}). |
| }} | | }} |
|
| |
|
| Line 637: |
Line 650: |
| {{MoveDataCargo | | {{MoveDataCargo |
| | title = Psycho Crusher Attack | | | title = Psycho Crusher Attack |
| | subtitle = | | | subtitle = Crusher |
| | input = {{Classic_sf6}} [4]6P<br>{{Modern_sf6}} [4]6X | | | input = {{Classic_sf6}} [4]6P<br>{{Modern_sf6}} [4]6X or [4]S (L) |
| | images = | | | images = |
| {{MoveDataCargoImage|imageHeight=130px|m.bison_46lp|caption=}} | | {{MoveDataCargoImage|imageHeight=130px|m.bison_46lp|caption=}} |
| Line 650: |
Line 663: |
| | info = | | | info = |
| {{AttackDataCargo-SF6/Query|m.bison_46lp}} | | {{AttackDataCargo-SF6/Query|m.bison_46lp}} |
| * '''Anti-Air Invuln:''' 6-17f; '''Projectile Clash''' 16-31f (1-hit, meterless priority) | | * '''Anti-Air Invuln:''' 6-17f; '''Airborne''' 22-31f ({{FKD}} state) |
| ** Forward hurtbox is '''Projectile Invuln''' 17-31f
| | * '''Projectile Clash''' 16-31f (1-hit, meterless priority); forward hurtbox is '''Projectile Invuln''' 17-31f |
| | * 45f charge time; charge lasts up to 8f after releasing back direction; must be holding forward when {{clr|L|LP}} is input |
| * '''Cancel Hitconfirm Window:''' 17f (Super); 1f later active frame gives 1f less hitconfirm time | | * '''Cancel Hitconfirm Window:''' 17f (Super); 1f later active frame gives 1f less hitconfirm time |
| * Applies 30% damage scaling to next hit when beginning a combo (100/70/60...) | | * Applies 30% damage scaling to next hit when beginning a combo (100/70/60...) |
| {{AttackDataCargo-SF6/Query|m.bison_46mp}} | | {{AttackDataCargo-SF6/Query|m.bison_46mp}} |
| * '''Anti-Air Invuln:''' 6-21f; '''Projectile Clash''' 20-35f (1-hit, meterless priority) | | * '''Anti-Air Invuln:''' 6-21f; '''Airborne''' 26-35f ({{FKD}} state) |
| ** Forward hurtbox is '''Projectile Invuln''' 21-35f
| | * '''Projectile Clash''' 20-35f (1-hit, meterless priority); forward hurtbox is '''Projectile Invuln''' 21-35f |
| | * 45f charge time; charge lasts up to 8f after releasing back direction; must be holding forward when {{clr|M|MP}} is input |
| * '''Cancel Hitconfirm Window:''' 15f (Super); 1f later active frame gives 1f less hitconfirm time | | * '''Cancel Hitconfirm Window:''' 15f (Super); 1f later active frame gives 1f less hitconfirm time |
| * Applies 30% damage scaling to next hit when beginning a combo (100/70/60...) | | * Applies 30% damage scaling to next hit when beginning a combo (100/70/60...) |
| {{AttackDataCargo-SF6/Query|m.bison_46hp}} | | {{AttackDataCargo-SF6/Query|m.bison_46hp}} |
| * '''Anti-Air Invuln:''' 6-25f; '''Projectile Clash''' 24-49f (1-hit, meterless priority) | | * '''Anti-Air Invuln:''' 6-25f; '''Airborne''' 30-49f ({{FKD}} state) |
| ** Forward hurtbox is '''Projectile Invuln''' 23-49f
| | * '''Projectile Clash''' 24-49f (1-hit, meterless priority); forward hurtbox is '''Projectile Invuln''' 23-49f |
| | * 45f charge time; charge lasts up to 8f after releasing back direction; must be holding forward when {{clr|H|HP}} is input |
| * '''Cancel Hitconfirm Window:''' 15f (Super); 1f later active frame gives 1f less hitconfirm time | | * '''Cancel Hitconfirm Window:''' 15f (Super); 1f later active frame gives 1f less hitconfirm time |
| * Applies 30% damage scaling to next hit when beginning a combo (100/70/60...) | | * Applies 30% damage scaling to next hit when beginning a combo (100/70/60...) |
| {{AttackDataCargo-SF6/Query|m.bison_46pp}} | | {{AttackDataCargo-SF6/Query|m.bison_46pp}} |
| * '''Anti-Air Invuln:''' 6-17f; '''Projectile Invuln:''' 13-31f | | * '''Anti-Air Invuln:''' 6-17f; '''Projectile Invuln:''' 13-31f; '''Airborne''' 20-31f ({{FKD}} state) |
| | * 45f charge time; charge lasts up to 8f after releasing back direction; must be holding forward when {{clr|OD|PP}} is input |
| * '''Cancel Hitconfirm Window:''' 47f/35f/24f (Super); less hitconfirm time on later hits/active frames | | * '''Cancel Hitconfirm Window:''' 47f/35f/24f (Super); less hitconfirm time on later hits/active frames |
| | ** Cancel into {{clr|SA|SA2}} does not combo |
| * Applies 30% damage scaling to next hit when beginning a combo (100/70/60...) | | * Applies 30% damage scaling to next hit when beginning a combo (100/70/60...) |
| <br> | | <br> |
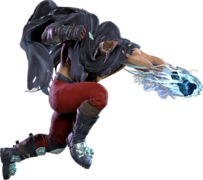
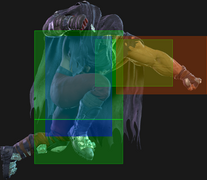
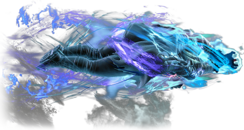
| Psycho Crusher is Bison's highest damage combo ender and a strong gap-closing tool. All normal versions will clash with normal projectiles, and the OD version will beat them clean. Without a bomb, no version of Psycho Crusher will be plus. The move has anti-air invuln starting from frame 6 and projectile invuln once the flames around Bison ignite, making it Bison's default anti-air special. | | Psycho Crusher is a high damage combo ender, anti-air, and anti-projectile special that can quickly close the gap from mid to long range. The meterless version is very unsafe on block without a planted Psycho Mine; only a deep meaty {{clr|H|HP Crusher}} can be advantageous on block, but even a fullscreen activation will connect too early. |
|
| |
|
| As Psycho Crusher requires charge, learning to hold charge while buffering other inputs is crucial. This is especially important for Crusher, as the move can cancel into SA3 for huge damage meterless. Look for places to store charge in combos, such as {{clr|MP|5MP}} > {{clr|MP|2MP}} instead being input as {{clr|MP|4MP}} > {{clr|MP|1MP}}.
| | Bison's strike hitbox is surrounded by a larger projectile clash hitbox as he flies forward, letting him tank 1 hit of a meterless projectile. This makes it an effective, albeit slow, answer to most fireballs. The slow startup speed, charge requirement, and travel time to reach long-range opponents all serve to limit Psycho Crusher's effectiveness against zoners. Consider using alternate approaches like Shadow Rise~Devil Reverse to keep the opponent on their toes. |
|
| |
|
| Crusher is Bison's major answer to fireballs, but using it as an anti-fireball tool can be tricky. Using it from fullscreen is a death sentence, and the back charge naturally forces you to hold down-back to avoid walking too far away. Consider using Shadow Rise alongside Crusher to maintain offensive threat. As Crusher is horribly minus on block, you really want to make sure you're going to connect with the opponent before going through with it. | | Psycho Crusher is one of Bison's primary anti-airs, gaining air invincibility on frame 6 that lasts well into the active frames. It must be input earlier than most anti-air specials, but the long range and high active frame count makes it effective at dealing with divekicks or air fireballs that can alter a character's jump trajectory. It can also cancel into {{clr|SA|SA3}} for solid damage even with its high damage scaling. Due to its charge requirement, it's important to have other anti-air options in mind like {{clr|H|2HP}} or {{clr|M|j.MP}}~{{clr|M|j.MP}}. |
|
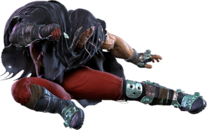
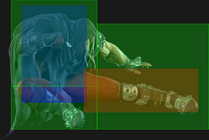
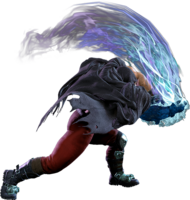
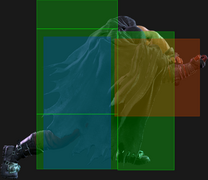
| |
|
| An important thing to know for Crusher is that Bison is counted as airborne for the duration of the animation. This means Crusher will lose to most anti-air specials on reaction, making it difficult for him to apply Psycho Mine oki in certain matchups. Make sure to punish Bison players for trying this if you play a character with such a special!
| | Bison is airborne throughout most of the attack's duration. This means that anti-air specials like Shoryuken can be used on reaction, making it much weaker as a meaty option when not canceled into. On the plus side, the airborne state can mess with the opponents Perfect Parry punish options (especially on the {{clr|OD|OD}} version, which requires the opponent to start their punish immediately). |
|
| |
|
| OD Crusher avoids a lot of these issues, beating most projectiles and keeping Bison safe. It can be a great way to force yourself in if you don't want to take the risk of navigating neutral, while also being a great deterrent for overly-aggressive or jumpy opponents.
| | Psycho Crusher takes 5f longer to charge compared to similar moves like Sumo Headbutt, and its input is a bit more strict; you have less time to input the button after letting go of back charge, and the button must be input while still holding forward. It's important to practice proper charge timing for Bison's main hitconfirm strings to ensure you aren't leaving damage on the table. A route like {{clr|H|5HK}}, {{clr|M|2MP}} requires you to start charging immediately after the {{clr|H|5HK}} input, since you can't link it after {{clr|H|4HK}}. Meanwhile {{clr|M|5MP}}, {{clr|M|2MP}} can start its charge before the first button is pressed (input as {{clr|M|4MP}}, {{clr|M|1MP}}). The easiest way to build charge is to use a {{clr|DR|Drive Rush}} route ending in {{clr|H|4HK}}, {{clr|M|5MP}}, {{clr|M|2MP}}, which allows you to hold back the entire time. |
| | |
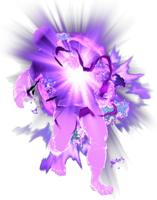
| | {{clr|OD|OD Psycho Crusher}} is safe on block and can cover ground more quickly, giving Bison a low-risk approach tool that can quickly force the opponent into the corner. The pushback on block keeps Bison just out of throw range (except vs. Marisa, Blanka, E. Honda, or Zangief). It blows right through projectiles rather than clashing with them, making it much more effective against zoners that can threaten with {{clr|OD|OD}} projectiles. It does a bit less damage than {{clr|M|MP Crusher}}, so unless the opponent has a Psycho Mine planted, {{clr|OD|OD Crusher}} should only be used in combos when the faster startup is required. |
| }} | | }} |
| |-| | | |-| |
| Line 683: |
Line 703: |
| {{MoveDataCargo | | {{MoveDataCargo |
| | title = Psycho Crusher (Mine) | | | title = Psycho Crusher (Mine) |
| | subtitle = | | | subtitle = Crusher |
| | input = {{Classic_sf6}} [4]6P<br>{{Modern_sf6}} [4]6X | | | input = {{Classic_sf6}} [4]6P<br>{{Modern_sf6}} [4]6X or [4]S (L) |
| | images = | | | images = |
| {{MoveDataCargoImage|imageHeight=130px|m.bison_46lp|caption=}} | | {{MoveDataCargoImage|imageHeight=130px|m.bison_46lp|caption=}} |
| Line 698: |
Line 718: |
| | info = | | | info = |
| {{AttackDataCargo-SF6/Query|m.bison_46lp_mine}} | | {{AttackDataCargo-SF6/Query|m.bison_46lp_mine}} |
| * Detonates Psycho Mine on hit/block | | * Detonates [[#Psycho_Mine_Detonation|Psycho Mine]] on hit/block (but not Perfect Parry or Armor) |
| * '''Anti-Air Invuln:''' 6-17f; '''Projectile Clash''' 16-31f (1-hit, meterless priority) | | * '''Anti-Air Invuln:''' 6-17f; '''Airborne''' 22-31f ({{FKD}} state) |
| ** Forward hurtbox is '''Projectile Invuln''' 17-31f
| | * '''Projectile Clash''' 16-31f (1-hit, meterless priority); forward hurtbox is '''Projectile Invuln''' 17-31f |
| | * 45f charge time; charge lasts up to 8f after releasing back direction; must be holding forward when {{clr|L|LP}} is input |
| | * Puts opponent into {{sf6-jug|limited juggle}} state ({{clr|SA|SA3}} cancel connects before Mine explodes) |
| * '''Cancel Hitconfirm Window:''' 17f (Super); 1f later active frame gives 1f less hitconfirm time | | * '''Cancel Hitconfirm Window:''' 17f (Super); 1f later active frame gives 1f less hitconfirm time |
| * Applies 30% damage scaling to next hit when beginning a combo (100/70/60...) | | * Applies 30% damage scaling to next hit when beginning a combo (100/70/60...) |
| {{AttackDataCargo-SF6/Query|m.bison_46mp_mine}} | | {{AttackDataCargo-SF6/Query|m.bison_46mp_mine}} |
| * Detonates Psycho Mine on hit/block | | * Detonates [[#Psycho_Mine_Detonation|Psycho Mine]] on hit/block (but not Perfect Parry or Armor) |
| * '''Anti-Air Invuln:''' 6-21f; '''Projectile Clash''' 20-35f (1-hit, meterless priority) | | * '''Anti-Air Invuln:''' 6-21f; '''Airborne''' 26-35f ({{FKD}} state) |
| ** Forward hurtbox is '''Projectile Invuln''' 21-35f
| | * '''Projectile Clash''' 20-35f (1-hit, meterless priority); forward hurtbox is '''Projectile Invuln''' 21-35f |
| | * 45f charge time; charge lasts up to 8f after releasing back direction; must be holding forward when {{clr|M|MP}} is input |
| | * Puts opponent into {{sf6-jug|limited juggle}} state ({{clr|SA|SA3}} cancel connects before Mine explodes) |
| * '''Cancel Hitconfirm Window:''' 15f (Super); 1f later active frame gives 1f less hitconfirm time | | * '''Cancel Hitconfirm Window:''' 15f (Super); 1f later active frame gives 1f less hitconfirm time |
| * Applies 30% damage scaling to next hit when beginning a combo (100/70/60...) | | * Applies 30% damage scaling to next hit when beginning a combo (100/70/60...) |
| {{AttackDataCargo-SF6/Query|m.bison_46hp_mine}} | | {{AttackDataCargo-SF6/Query|m.bison_46hp_mine}} |
| * Detonates Psycho Mine on hit/block | | * Detonates [[#Psycho_Mine_Detonation|Psycho Mine]] on hit/block (but not Perfect Parry or Armor) |
| * '''Anti-Air Invuln:''' 6-25f; '''Projectile Clash''' 24-49f (1-hit, meterless priority) | | * '''Anti-Air Invuln:''' 6-25f; '''Airborne''' 30-49f ({{FKD}} state) |
| ** Forward hurtbox is '''Projectile Invuln''' 23-49f
| | * '''Projectile Clash''' 24-49f (1-hit, meterless priority); forward hurtbox is '''Projectile Invuln''' 23-49f |
| | * 45f charge time; charge lasts up to 8f after releasing back direction; must be holding forward when {{clr|H|HP}} is input |
| | * Puts opponent into {{sf6-jug|limited juggle}} state (allows follow-up juggles) |
| * '''Cancel Hitconfirm Window:''' 15f (Super); 1f later active frame gives 1f less hitconfirm time | | * '''Cancel Hitconfirm Window:''' 15f (Super); 1f later active frame gives 1f less hitconfirm time |
| * Applies 30% damage scaling to next hit when beginning a combo (100/70/60...) | | * Applies 30% damage scaling to next hit when beginning a combo (100/70/60...) |
| {{AttackDataCargo-SF6/Query|m.bison_46pp_mine}} | | {{AttackDataCargo-SF6/Query|m.bison_46pp_mine}} |
| * Detonates Psycho Mine on hit/block | | * Detonates [[#Psycho_Mine_Detonation|Psycho Mine]] on hit/block (but not Perfect Parry or Armor) |
| * '''Anti-Air Invuln:''' 6-17f; '''Projectile Invuln:''' 13-31f | | * '''Anti-Air Invuln:''' 6-17f; '''Projectile Invuln:''' 13-31f; '''Airborne''' 20-31f ({{FKD}} state) |
| | * 45f charge time; charge lasts up to 8f after releasing back direction; must be holding forward when {{clr|OD|PP}} is input |
| | * Puts opponent into {{sf6-jug|limited juggle}} state, followed by OTG bounce |
| * Applies 30% damage scaling to next hit when beginning a combo (100/70/60...) | | * Applies 30% damage scaling to next hit when beginning a combo (100/70/60...) |
| ** After OTG bounce, a late follow-up juggle also has 10% immediate scaling applied | | ** After OTG bounce, a late follow-up juggle also has 10% immediate scaling applied |
| <br> | | <br> |
| With a mine on the opponent, Psycho Crusher goes from risky to advantageous. The mine explosion ensures it will be Bison's turn on block and turns the OD version into a terrifying juggle starter.
| | When a Psycho Mine is planted onto the opponent, Psycho Crusher automatically detonates it, becoming extremely advantageous on hit or block. After a Backfist Combo knockdown, Psycho Crusher can be used as a meaty pressure starter that decimates the opponent's Drive gauge. This can beat any wakeup attack without Full or Anti-Air invincibility, but loses to Perfect Parry. To remain safe against reversal {{clr|DR|Drive Impact}}, use {{clr|L|LP Crusher}} after {{clr|L|LP}}/{{clr|M|MP}}/{{clr|OD|OD}} Backfist, and {{clr|M|MP Crusher}} after {{clr|H|HP Backfist}}; also be aware that most characters can [[Street_Fighter_6/M.Bison/Strategy#Okizeme_and_Mixups|backdash this setup]] midscreen when using {{clr|L|LP Crusher}}. |
| | |
| | On hit, the Mine-enhanced Psycho Crusher gives Bison more damage and better frame advantage. The {{clr|L|LP}}/{{clr|M|MP}} versions give a +41 knockdown at point blank, or +42 at most other ranges; +41 sets up a safe jump vs. 6f reversals, while +42 works against 5f specials (like most anti-air {{clr|L|LP}}/{{clr|L|LK}} uppercuts). These safe jumps can work midscreen with {{clr|H|j.HK}}, though it can be inconsistent. The {{clr|H|HP Crusher}} detonation gives a higher launch on hit, sacrificing the safe jump but gaining a juggle into {{clr|SA|SA1}} anywhere, or {{clr|L|LP Backfist}}/{{clr|SA|SA3}} in the corner. |
|
| |
|
| Most versions of Psycho Crusher will leave Bison at +5 or 6 if timed correctly, giving him a perfect opportunity for whatever mixup he wants. Notably, Backfist Combo > Meaty Psycho Crusher is incontestable outside of invulnerable moves or Perfect Parry, allowing Bison meterless okizeme if he chooses it.
| | {{clr|OD|OD Crusher}} has the most to gain when combined with Psycho Mine. On block, it is a whopping {{sf6-adv|VP|+10}}, enough for a true blockstring into {{clr|H|4HK}}. On hit, Bison transitions to a cinematic launcher that ends with a ground bounce. This allows nearly anything to juggle afterward, most notably {{clr|H|HK Shadow Rise}}~{{clr|OD|OD Head Press}} for a second ground bounce. With a full meter dump, this can deal [https://www.youtube.com/watch?v=RliVpjLjim8 over 8000 damage] as an optimal punish combo, winning the round almost single-handedly. Even without this full meter dump, the damage and setup potential makes it worth going for. |
|
| |
|
| On hit, Psycho Crusher detonates the mine for better damage and frame advantage. Where the real carnage starts is with OD Crusher, which puts the opponent in a unique cinematic juggle on hit. This juggle has incredible scaling and leads into full meter dumps for Bison. When optimized, an OD Crusher meter dump can deal close to 8k damage, easily putting an opponent in their place and potentially winning you the round. Even without the full meter dump, the juggle state is so advantageous that Bison can follow up with whatever he wants, ensuring high damage returns no matter the amount of Drive or super meter invested.
| | ''Bug: {{clr|OD|OD Crusher + Mine}} on a high airborne connect can fail to trigger the cinematic follow-up, but the explosion still occurs. However, the opponent is still considered to be inflicted with a Psycho Mine, which can be detonated a second time.'' |
| }} | | }} |
| </tabber> | | </tabber> |
| Line 746: |
Line 776: |
| | info = | | | info = |
| {{AttackDataCargo-SF6/Query|m.bison_236lk}} | | {{AttackDataCargo-SF6/Query|m.bison_236lk}} |
| | * '''Low Crush''' 7-15f (not airborne) |
| | * 5f extra recovery on whiff; {{clr|PC|Counter-Hit/Punish Counter}} bonus advantage carries through both hits |
| * '''Cancel Hitconfirm Window:''' 16f (Super) | | * '''Cancel Hitconfirm Window:''' 16f (Super) |
| * Applies 30% damage scaling to next hit when beginning a combo (100/70/60...) | | * Applies 30% damage scaling to next hit when beginning a combo (100/70/60...) |
| {{AttackDataCargo-SF6/Query|m.bison_236mk}} | | {{AttackDataCargo-SF6/Query|m.bison_236mk}} |
| | * '''Low Crush''' 11-19f (not airborne) |
| | * 5f extra recovery on whiff; {{clr|PC|Counter-Hit/Punish Counter}} bonus advantage carries through both hits |
| * '''Cancel Hitconfirm Window:''' 16f (Super) | | * '''Cancel Hitconfirm Window:''' 16f (Super) |
| * Applies 20% damage scaling to next hit when beginning a combo (100/80/70...) | | * Applies 20% damage scaling to next hit when beginning a combo (100/80/70...) |
| {{AttackDataCargo-SF6/Query|m.bison_236hk}} | | {{AttackDataCargo-SF6/Query|m.bison_236hk}} |
| | * '''Low Crush''' 14-24f (not airborne) |
| | * 5f extra recovery on whiff; {{clr|PC|Counter-Hit/Punish Counter}} bonus advantage carries through both hits |
| * '''Cancel Hitconfirm Window:''' 16f (Super) | | * '''Cancel Hitconfirm Window:''' 16f (Super) |
| {{AttackDataCargo-SF6/Query|m.bison_236kk}} | | {{AttackDataCargo-SF6/Query|m.bison_236kk}} |
| * 3rd hit puts opponent into {{sf6-jug|limited juggle}} state | | * '''Low Crush''' 12-19f (not airborne) |
| * '''Cancel Hitconfirm Window:''' 31f (Super); cancel is only useful to counter {{clr|DR|Drive Impact}} | | * 3rd hit puts opponent into {{sf6-jug|limited juggle}} state (launches higher when juggled into) |
| | * '''Cancel Hitconfirm Window:''' 31f (Super); cancel is mainly used to counter {{clr|DR|Drive Impact}} |
| | * Counts as 2 hits for damage scaling when comboed into (applies to next hit) |
| <br> | | <br> |
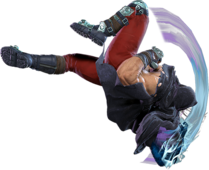
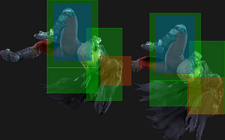
| Scissor Kicks are Bison's premier special move. On hit, Bison is left close to the opponent with frame advantage for an immediate strike/throw mixup. If spaced, he can use its low crush properties and relative safety to his advantage to demolish challenge attempts. Thanks to Scissor Kicks leaving the opponent standing, Bison can link out of Scissor Kicks on {{clr|PC|Counter-Hit/Punish Counter}} to further discourage challenge attempts. | | Scissor Kick is an advancing special that defines Bison's mid-range pressure. Its ability to beat low pokes like {{clr|M|2MK}} can single-handedly shut down much of the cast's strongest button in neutral. While unsafe at close range, the enormous pushback on block makes it easy to space Scissor Kick safely against most of the cast. If the opponent attempts a punish and it whiffs, Bison can immediately follow up with more Scissor Kick pressure or a whiff punish. Since it's not always easy to tell when the move is safe, some unsafe Scissor Kicks are likely to go unpunished. |
| | |
| | On hit, Bison is left much closer to the opponent with slight frame advantage, giving him an immediate strike/throw mixup. Because Scissor Kick leaves the opponent standing, he can get a follow-up combo on {{clr|PC|Counter-Hit/Punish Counter}}, which discourages the opponent from challenging this move. {{clr|H|HK Scissor Kick}} in particular is an excellent punish starter, since it doesn't inflict damage scaling on the follow-up; however, it must be spaced from very far away, making it the least likely to start a punish from a raw connect. |
| | |
| | While a powerful tool in neutral, Scissor Kick is not without counters. If your timing is too predictable, opponents can neutral jump in anticipation and come down with a full punish combo. {{clr|DR|Drive Impact}} can be an effective counter when predicted early enough, though Bison can recover if the opponent inputs it too late. Opponents can also react with Perfect Parry as soon as they see any forward movement, which is a low-risk counter unless the Scissor Kick happens to whiff next to them. |
| | |
| | {{clr|OD|OD Scissor Kick}} loses the neutral utility of the meterless versions, with an unsafe 3rd hit coming out even on block or whiff. In exchange, Bison gets a powerful launching starter that juggles into {{clr|H|HP Backfist Combo}} for great corner carry; an immediate {{clr|M|MP}}/{{clr|H|HP}} Psycho Crusher will then reach a midscreen opponent for follow-up block pressure. If juggled into on an airborne opponent (like after a {{clr|DR|Drive Impact}} crumple), other juggle options are enabled, such as walk forward into {{clr|H|6HP}} ground bounce. |
|
| |
|
| OD Scissors loses the utility on block in favor of better conversions on hit. The launch is high enough for Bison to juggle Backfist Combo afterwards to set a Psycho Mine and start his gameplan. Additional launch height before OD Scissors gives him better juggles afterwards. The corner carry off of OD Scissors > {{clr|HP|HP Backfist}} is nearly half of the screen by itself, and it also leads into a perfect {{clr|LP|LP Crusher}} for okizeme.
| | If you'd rather cash out on damage to secure the round, juggling {{clr|H|5HP}} > {{clr|SA|SA1}}/{{clr|SA|SA2}} or {{clr|M|MP Psycho Crusher}} > {{clr|SA|SA3}} are all solid options that work midscreen. In the corner, you can juggle {{clr|H|6HP}} for a ground bounce, which can lead to higher meterless damage when ending with {{clr|L|LP Backfist Combo}}. If you juggle into {{clr|OD|OD Scissor Kick}}, the opponent will be launched higher; this allows a juggle into {{clr|H|HP Psycho Crusher}} or a midscreen microwalk + {{clr|H|6HP}}. Note that in all these combo routes, it is never optimal to cancel the 2nd hit of {{clr|OD|OD Scissor Kick}} into a {{clr|SA|Super}}; the juggle follow-up is always stronger. |
| }} | | }} |
|
| |
|
| Line 781: |
Line 825: |
| | info = | | | info = |
| {{AttackDataCargo-SF6/Query|m.bison_214lp}} | | {{AttackDataCargo-SF6/Query|m.bison_214lp}} |
| * Plants a Psycho Mine on hit | | * Plants a [[#Psycho_Mine_Detonation|Psycho Mine]] on 2nd hit |
| * '''Cancel Hitconfirm Window:''' 49f (Super) | | * '''Cancel Hitconfirm Window:''' 49f (Super) |
| {{AttackDataCargo-SF6/Query|m.bison_214mp}} | | {{AttackDataCargo-SF6/Query|m.bison_214mp}} |
| * Plants a Psycho Mine on hit | | * Plants a [[#Psycho_Mine_Detonation|Psycho Mine]] on 2nd hit |
| * '''Cancel Hitconfirm Window:''' 49f (Super) | | * '''Cancel Hitconfirm Window:''' 49f (Super) |
| {{AttackDataCargo-SF6/Query|m.bison_214hp}} | | {{AttackDataCargo-SF6/Query|m.bison_214hp}} |
| * Plants a Psycho Mine on hit | | * Plants a [[#Psycho_Mine_Detonation|Psycho Mine]] on 2nd hit |
| * '''Cancel Hitconfirm Window:''' 50f (Super) | | * '''Cancel Hitconfirm Window:''' 50f (Super) |
| {{AttackDataCargo-SF6/Query|m.bison_214pp}} | | {{AttackDataCargo-SF6/Query|m.bison_214pp}} |
| * Plants a Psycho Mine on hit | | * Plants a [[#Psycho_Mine_Detonation|Psycho Mine]] on 2nd hit |
| | * Puts opponent into {{sf6-jug|limited juggle}} OTG state |
| * '''Cancel Hitconfirm Window:''' 86f (Super) | | * '''Cancel Hitconfirm Window:''' 86f (Super) |
| <br> | | <br> |
| Bison's new combo ender, and arguably his most important special. Does mediocre damage and sends the opponent midscreen after hit, but plants a Psycho Mine on them for later. More information on Psycho Mines and their use can be found under the respective special.
| | A 2-hit punch used as a combo/juggle ender to plant a Psycho Mine onto the opponent. Higher strength versions are slower to start up, but gain extra range and damage. While the damage and midscreen oki is mediocre, Psycho Mine is the core of Bison's offense, so it should be prioritized unless he can secure a kill with alternate combo routes. Backfist Combo is also a decent option for {{clr|SA|SA3}} cancels when you are unable to build charge for Psycho Crusher. |
|
| |
|
| Bison ultimately has a choice between either this special or Psycho Crusher when looking to end a combo. Psycho Crusher leaves Bison at better advantage and does more damage, while Backfist Combo does worse damage but plants a mine. Backfist Combo has no real use in neutral or pressure without a mine attached to the opponent, so Bison should keep this move strictly for combos only.
| | All versions lead to great oki in the corner. {{clr|L|LP}} and {{clr|M|MP}} Backfist set up an auto-timed dash into a strike/throw mixup, and {{clr|M|MP Backfist}} also allows for a perfectly meaty {{clr|H|6HP}} overhead that becomes {{sf6-adv|VP|+5 oH}} / {{sf6-adv|M|-1 oB}}. {{clr|H|HP Backfist}} can lead to dash + meaty {{clr|H|4HK}} ({{sf6-adv|VP|+7}}/{{sf6-adv|VP|+4}}), but a throw must be manually delayed. If Backfist Combo is juggled into, the knockdown advantage may be slightly higher depending on how high it connects. |
|
| |
|
| OD Backfist Combo hits three times, and notably takes an extra second for the Psycho Mine counter. This means the Psycho Mine will detonate after five seconds instead of six. Bison can use this to force Psycho Mine mixups faster than usual, such as Throw > {{clr|H|6HP}} for an immediate overhead that combos. OD Backfist also combos into Level 3, making it a good cancel point if you lack charge for a Psycho Crusher. | | {{clr|OD|OD Backfist}} gains an extra hit, increasing the damage and providing the same knockdown advantage as {{clr|L|LP Backfist}}. Bison recovers much closer to the opponent, vastly improving his midscreen oki. Because the Psycho Mine is planted on the 2nd hit, the 300-frame timer is actually counting down during this part of the animation; as a result, any mixups involving the timer-based explosion must be changed to account for this. For example, an immediate Throw into meaty {{clr|H|6HP}} will combo into the explosion; after meterless Backfist, Bison would have to use {{clr|M|5MP}}~{{clr|H|6HP}}, which is far more reactable. |
| | |
| | The small ground bounce at the end of {{clr|OD|OD Backfist}} allows a proper cancel into {{clr|SA|SA2}}; however, it is usually preferable to use {{clr|OD|OD Scissor Kick}}, {{clr|H|5HP}} > {{clr|SA|SA2}} instead for more damage and meter build. |
| }} | | }} |
| |-| | | |-| |
| Line 819: |
Line 866: |
| | info = | | | info = |
| {{AttackDataCargo-SF6/Query|m.bison_214lp_mine}} | | {{AttackDataCargo-SF6/Query|m.bison_214lp_mine}} |
| * Detonates Psycho Mine on hit/block | | * 2nd hit detonates [[#Psycho_Mine_Detonation|Psycho Mine]] on hit/block/parry/armor |
| | * Puts opponent into {{sf6-jug|limited juggle}} state (Mine explodes before {{clr|SA|SA3}} cancel hits) |
| * '''Cancel Hitconfirm Window:''' 51f (Super) | | * '''Cancel Hitconfirm Window:''' 51f (Super) |
| {{AttackDataCargo-SF6/Query|m.bison_214mp_mine}} | | {{AttackDataCargo-SF6/Query|m.bison_214mp_mine}} |
| * Detonates Psycho Mine on hit/block | | * 2nd hit detonates [[#Psycho_Mine_Detonation|Psycho Mine]] on hit/block/parry/armor |
| | * Puts opponent into {{sf6-jug|limited juggle}} state (Mine explodes before {{clr|SA|SA3}} cancel hits) |
| * '''Cancel Hitconfirm Window:''' 51f (Super) | | * '''Cancel Hitconfirm Window:''' 51f (Super) |
| {{AttackDataCargo-SF6/Query|m.bison_214hp_mine}} | | {{AttackDataCargo-SF6/Query|m.bison_214hp_mine}} |
| * Detonates Psycho Mine on hit/block | | * 2nd hit detonates [[#Psycho_Mine_Detonation|Psycho Mine]] on hit/block/parry/armor |
| | * Puts opponent into {{sf6-jug|limited juggle}} state (allows follow-up juggles) |
| * '''Cancel Hitconfirm Window:''' 52f (Super) | | * '''Cancel Hitconfirm Window:''' 52f (Super) |
| {{AttackDataCargo-SF6/Query|m.bison_214pp_mine}} | | {{AttackDataCargo-SF6/Query|m.bison_214pp_mine}} |
| * Detonates Psycho Mine on hit/block | | * 3rd hit detonates [[#Psycho_Mine_Detonation|Psycho Mine]] on hit/block/parry/armor |
| | * Puts opponent into {{sf6-jug|limited juggle}} OTG bounce (allows follow-up juggles) |
| * '''Cancel Hitconfirm Window:''' 103f (Super) | | * '''Cancel Hitconfirm Window:''' 103f (Super) |
| <br> | | <br> |
| With a Psycho Mine on the opponent, Backfist Combo is a great tool for stripping Drive Gauge as it does 1.5 bars by itself. Bison can use this to end pressure sequences while maintaining advantage, allowing him to set up frame traps or throws. | | With a Psycho Mine planted on the opponent, Bison gets improved block pressure, oki, and combo routes. All meterless versions leave him {{sf6-adv|VP|+6}} on block at close range and deal a significant chunk of Drive Gauge damage. He can follow this up with a slightly delayed throw, frame trap with {{clr|M|5MP}}, or end with {{clr|H|4HK}} which can set up trade combos. |
| | |
| | On hit, {{clr|L|LP}}/{{clr|M|MP}} Backfist set up a +42 safe jump as long as it connects on the ground or at a low juggle height. This safe jump will usually work midscreen with {{clr|H|j.HK}} except after a longer range connect like {{clr|L|2LK}}, {{clr|L|2LP}}, {{clr|L|5LK}} > {{clr|L|LP Backfist}}. If you'd rather maximize your damage, you can easily throw out this move and hitconfirm into a canceled {{clr|SA|SA3}} for no risk. |
| | |
| | {{clr|H|HP Backfist}} gives a higher juggle state, allowing Bison to juggle {{clr|H|3HK}}, {{clr|SA|SA1}}, or {{clr|SA|SA3}} midscreen; in the corner, he can also juggle {{clr|L|LP}}/{{clr|OD|OD}} Psycho Crusher and {{clr|L|LP}}/{{clr|OD|OD}} Backfist. Unlike the timer-based detonation, there is no additional damage scaling applied to this juggle. |
|
| |
|
| On hit, Backfist Combo will detonate the active mine. The {{clr|L|LP}} and {{clr|M|MP}} versions lead to a safe jump in the corner, while the {{clr|H|HP}} version leads into {{clr|LP|LP Psycho Crusher}} for a SA3 cancel. The OD version gives Bison a juggle with just enough frame advantage to land an {{clr|LP|LP Backfist Combo}}, allowing him to either resume pressure on wakeup or push another mixup. | | {{clr|OD|OD Backfist}} does not get advantage on block upon detonation, but it does keep Bison safe. On hit, the opponent is slammed into a ground bounce state with a reward similar to {{clr|H|HP Backfist}}; Bison can juggle {{clr|H|2HK}}, {{clr|SA|SA1}}, {{clr|SA|SA3}}, or a canceled {{clr|SA|SA2}} anywhere, or another {{clr|L|LP}}/{{clr|OD|OD}} Backfist in the corner for extended Mine pressure. |
|
| |
|
| | Normally, the first hit of Backfist will prevent the explosion timer from running out mid-animation, but there is a specific timing where it can explode during the attack; when this happens, it acts like the regular version of Backfist Combo and applies another Psycho Mine. Unlike Bison's other Mine-detonating specials, the last hit of each version will cause the explosion to occur even against armor or Perfect Parry. Against Perfect Parry, the opponent can interrupt with a 5f or faster attack before the explosion occurs. |
| }} | | }} |
| </tabber> | | </tabber> |
| Line 849: |
Line 905: |
| | info = | | | info = |
| {{AttackDataCargo-SF6/Query|m.bison_28k}} | | {{AttackDataCargo-SF6/Query|m.bison_28k}} |
| * Button strength determines trajectory ({{clr|L|LK}} short, {{clr|M|MK}} mid, {{clr|H|HK}} far) | | * '''Airborne''' 9-49f ({{FKD}} state) |
| * Can input {{clr|10|OD}} follow-ups with {{clr|10|PP}} or {{clr|10|KK}} | | * 40f charge time; charge lasts up to 10f after releasing down direction |
| | * Button strength determines trajectory and landing recovery time |
| | ** {{clr|L|LK}} short, 4f rec / {{clr|M|MK}} mid, 9f rec / {{clr|H|HK}} far, 14f rec |
| | ** Bison is in a crouching state on the final landing recovery frame |
| | * Can input {{clr|OD|OD}} follow-ups with {{clr|OD|PP}} or {{clr|OD|KK}} |
| {{AttackDataCargo-SF6/Query|m.bison_28kk}} | | {{AttackDataCargo-SF6/Query|m.bison_28kk}} |
| * Automatically tracks opponent's location; follow-ups automatically become the {{clr|10|OD}} version | | * '''Throw Invuln:''' 1-8f; '''Airborne''' 9-50f ({{FKD}} state) |
| | * 40f charge time; charge lasts up to 10f after releasing down direction |
| | * Automatically tracks opponent's location; follow-ups automatically become the {{clr|OD|OD}} version |
| | * Bison is in a crouching state on the final landing recovery frame |
| <br> | | <br> |
| A command jump with two different followups. Button strength determines how far forward Bison jumps. | | A command jump that can lead to the Head Press or Devil Reverse follow-ups. The button strength determines how far the jump travels, allowing Bison to approach quickly or hang back to bait the opponent's response. The longer range versions have more landing recovery if no follow-up is input, making it riskier to approach with an empty jump. The jump height and variable follow-up timings make it difficult for opponents to consistently anti-air Bison's aerial approach. |
|
| |
|
| Bison leaps really high into the air when performing this special, making it difficult for opponents to tag him with anti-airs on reaction. As well, the followups allow him to alter his descent trajectory dramatically.
| | The {{clr|OD|OD}} version automatically tracks the opponent's location. This makes it a better anti-zoning tool from long range where even the {{clr|H|HK}} version won't reach, but it doesn't allow Bison to cross behind the opponent. Head Press and Devil Reverse automatically become their respective {{clr|OD|OD}} version without spending additional Drive meter. |
|
| |
|
| The OD variant directly tracks to the opponent's location, making it the go-to for interrupting zoning. Shadow Rise is somewhat unique in that the OD followups can be tacked on to the move when performed normally, so you can do HK Shadow Rise > OD Devil's Reverse.
| | Meterless Shadow Rise can also transition to these {{clr|OD|OD}} follow-ups. This gives you time to react to the opponent's response before you commit to spending meter. It also helps in certain juggle routes into {{clr|OD|OD Head Press}}, as {{clr|HK|HK Shadow Rise}} covers horizontal ground more quickly. |
|
| |
|
| | There are a few advantages to starting with {{clr|OD|OD Shadow Rise}}, however. It has throw invincibility on startup, which can help to escape corner throw loops. However, the follow-ups won't punish a meaty throw, and he can't steer the jump to fly out of the corner, so there is still some risk involved. The other advantage is that follow-ups can be input 2 frames earlier. While this doesn't sound significant, it can make a huge difference in specific scenarios; for example, if you land a corner knockdown with Backfist Combo and you expect the opponent will {{clr|DR|Drive Reversal}} your meaty normal, a cancel into {{clr|OD|OD Shadow Rise}}~{{clr|OD|OD Devil Reverse}} will land as a {{clr|PC|Punish Counter}} for incredible damage. Attempting the same setup with meterless Shadow Rise allows the opponent to block (except for Chun-Li and Dhalsim). |
| }} | | }} |
|
| |
|
| Line 881: |
Line 945: |
| | info = | | | info = |
| {{AttackDataCargo-SF6/Query|m.bison_28k_p}} | | {{AttackDataCargo-SF6/Query|m.bison_28k_p}} |
| * Can be steered left/right | | * Can be steered left/right; cannot hit cross-up (but will turn around if input on opposite side) |
| | * Puts opponents into {{sf6-jug|limited juggle}} state; {{FKD}} state until landing |
| | ** Bison is in a crouching state on the final landing recovery frame |
| {{AttackDataCargo-SF6/Query|m.bison_28kk_p}} | | {{AttackDataCargo-SF6/Query|m.bison_28kk_p}} |
| * 2 hits; can be steered left/right | | * 2 hits; can be steered left/right; cannot hit cross-up (but will turn around if input on opposite side) |
| | * 5f extra landing recovery on whiff |
| | * Puts opponents into {{sf6-jug|limited juggle}} state; {{FKD}} state until landing |
| | ** On whiff: Bison is in a crouching state on the final landing recovery frame |
| | ** On hit/block: Bison is in a crouching state on all landing recovery frames |
| <br> | | <br> |
| Bison descends from Shadow Rise with his hand outstretched and imbued with Psycho Power. His hand counts as an active hitbox, and leaves Bison plus when blocked. | | Bison halts his vertical momentum from Shadow Rise and begins descending with outstretched arms. It can be steered forward or backward quite quickly, letting him hang back to bait an anti-air or suddenly approach from full screen. |
|
| |
|
| Devil's Reverse is both a weird move to use and a weird move to deal with. It's best to think of this like a slow divekick- it's air-to-ground, leaves him plus on block or knocks down on hit, and punishes people with poor anti-air reactions.
| | Only the arm in front can actually hit the opponent, and the direction he faces depends on which side he was on when the punch button was input. This makes it a bit less ambiguous as a mixup tool, since it can't hit cross-up like the animation suggests. If you are behind the opponent and try to move back in front right before it connects, the collision boxes will push Bison fully behind the opponent, causing Devil Reverse to whiff. |
|
| |
|
| You can steer Devil's Reverse upon hitting the input, allowing Bison to potentially dodge anti-air attempts if you're prescient. You can also use the move as an air-to-air callout, which has explosive results if a Psycho Mine is attached.
| | Devil Reverse is very plus on block, with better advantage against shorter characters or when spaced to hit on a later active frame. Think of it like a slow divekick that doesn't need to be spaced properly - its primary purpose is to use its variable timing and spacing to mess with the opponent's anti-air reactions. If the opponent isn't anti-airing consistently, Bison gets to freely enforce his block pressure while chipping away at their Drive gauge. Unfortunately, the massive hurtbox surrounding Bison makes it quite easy to anti-air, even with some well-timed standing light normals. |
|
| |
|
| OD Devil's Reverse leaves Bison more plus on block and does more damage on hit. The move doesn't gain many advanced properties unless a mine is planted on the opponent. | | On hit, Bison scores a knockdown that gives plenty of time for oki. If you happen to catch the opponent with an air-to-air connect, the knockdown advantage is improved; in rare cases, this can lead to a follow-up juggle like {{clr|H|2HK}} or {{clr|SA|SA1}}. |
| | |
| | {{clr|OD|OD Devil's Reverse}} is a much stronger approach option, as his hurtbox is much more retracted. Opponents who get too comfortable anti-airing the normal version may be taken by surprise when activating this from a meterless Shadow Rise. It is slightly better on block and deals a bit more damage on hit as well. |
| }} | | }} |
| |-| | | |-| |
| Line 913: |
Line 985: |
| | info = | | | info = |
| {{AttackDataCargo-SF6/Query|m.bison_28k_p_mine}} | | {{AttackDataCargo-SF6/Query|m.bison_28k_p_mine}} |
| * Detonates Psycho Mine on hit/block | | * Detonates [[#Psycho_Mine_Detonation|Psycho Mine]] on hit/block (but not Perfect Parry or Armor) |
| | * Can be steered left/right; cannot hit cross-up (but will turn around if input on opposite side) |
| | * Puts opponents into {{sf6-jug|limited juggle}} state (follow-ups possible in the corner) |
| | * {{FKD}} state until landing |
| | ** Bison is in a crouching state on all landing recovery frames |
| {{AttackDataCargo-SF6/Query|m.bison_28kk_p_mine}} | | {{AttackDataCargo-SF6/Query|m.bison_28kk_p_mine}} |
| * Detonates Psycho Mine on hit/block | | * Detonates [[#Psycho_Mine_Detonation|Psycho Mine]] on hit/block (but not Perfect Parry or Armor) |
| | * Can be steered left/right; cannot hit cross-up (but will turn around if input on opposite side) |
| | * Puts opponents into {{sf6-jug|limited juggle}} state (follow-ups possible in the corner) |
| | * {{FKD}} state until landing |
| | ** Bison is in a crouching state on all landing recovery frames |
| <br> | | <br> |
| With a Psycho Mine attached, Devil's Reverse becomes a terrifying, highly damaging anti-ground move. If blocked, Devil's Reverse gives Bison huge plus frames, and if it hits, the mine detonates for additional damage and a great knockdown.
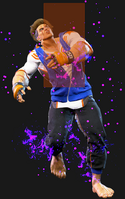
| | When connecting on a Psycho Mine-infused opponent, Devil Reverse gains terrifying new properties. It becomes massively plus on block, allowing Bison to continue his pressure even after bouncing away from the opponent. A forward dash will always leave Bison at least {{sf6-adv|P|+2}}, and he can set up strong {{clr|DR|Drive Rush}} normal pressure, such as an airtight blockstring to {{clr|DR|DR~}}{{clr|H|4HK}}. On hit, you can end with a corner juggle like {{clr|H|5HP}} > {{clr|SA|Super}} or {{clr|M|MP Backfist}} for another mine setup. Midscreen, juggles are rare outside of highly specific scenarios like a last-frame connect into {{clr|SA|SA2}}. |
|
| |
|
| OD Devil's Reverse gains an additional hit that can be followed up with a Drive Rush normal. Despite hitting three times, this is one of Bison's best starters, and a full meterdump can lead to 6k or more damage. | | {{clr|OD|OD Devil Reverse}} is similar to the meterless version on a Psycho Mine hit and block, but with a whopping 2600 damage and some extra juggle height. He is left a bit closer to the opponent, allowing him to juggle {{clr|H|3HK}} midscreen. |
| | |
| | Because it inflicts so much damage without additional scaling, {{clr|OD|OD Devil Reverse + Psycho Mine}} is one of the strongest and most meter-efficient punish starters in the entire game. Outside of baiting a whiffed anti-air or punishing certain reversals/Supers, the opportunity to land a {{clr|PC|Punish Counter}} is quite limited, however. |
| }} | | }} |
| </tabber> | | </tabber> |
| Line 926: |
Line 1,008: |
| {{MoveDataCargo | | {{MoveDataCargo |
| | title = Head Press | | | title = Head Press |
| | subtitle = | | | subtitle = Headstomp |
| | input = {{Classic_sf6}} [2]8K~K<br>{{Modern_sf6}} [2]8X~X or [2]S~X | | | input = {{Classic_sf6}} [2]8K~K<br>{{Modern_sf6}} [2]8X~X or [2]S~X |
| | images = | | | images = |
| Line 935: |
Line 1,017: |
| {{AttackDataCargo-SF6/Query|m.bison_28k_k}} | | {{AttackDataCargo-SF6/Query|m.bison_28k_k}} |
| * Bounces off opponent's head on hit/block (can steer left/right after bounce) | | * Bounces off opponent's head on hit/block (can steer left/right after bounce) |
| * Can be followed up with Somersault Skull Diver after bounce | | ** Can be followed up with [[#Somersault_Skull_Diver_([2]8K~K~P)|Somersault Skull Diver]] after bounce |
| | ** Drops straight to the ground on Perfect Parry (no follow-up possible) |
| | * Bison can auto-correct to face opponent before descending; can hit cross-up |
| | * {{clr|PC|Punish Counter}}: HKD +13~15 |
| | * {{FKD}} state until landing |
| | * Puts airborne opponents into {{sf6-jug|limited juggle}} OTG state, followed by HKD |
| | ** No follow-up, but prevents Bison from being punishable on hit |
| {{AttackDataCargo-SF6/Query|m.bison_28kk_k}} | | {{AttackDataCargo-SF6/Query|m.bison_28kk_k}} |
| * Transitions to cinematic follow-up on hit; does not bounce off opponent on block | | * Transitions to cinematic follow-up on grounded hit (causes a planted Psycho Mine to disappear) |
| | * Bison can auto-correct to face opponent before descending; can hit cross-up (but very rarely happens) |
| | * Lands near opponent on block (does not bounce away) |
| | * {{FKD}} state until landing |
| | * Puts airborne opponents into {{sf6-jug|limited juggle}} OTG state |
| <br> | | <br> |
| | Bison pauses mid-air, then quickly descends straight down with a stomp. This hesitation, combined with its solid hitbox, makes the move very difficult to anti-air; most AA normals and specials cannot hit cross-up and are likely to whiff underneath. |
| | |
| | Meterless Head Press leads to the same situation on hit or block - while technically very unsafe, Bison can control his landing trajectory and threaten a follow-up attack, meaning he is rarely punishable without a hard read. Head Press scores a Hard Knockdown if it hits an airborne opponent or lands as a {{clr|PC|Punish Counter}} (like after a whiffed anti-air attempt), which eliminates the Skull Diver mixup but guarantees a strong oki situation. |
|
| |
|
| | {{clr|OD|OD Head Press}} leads to great damage on its cinematic hit, and on block he lands right in front of the opponent to continue his pressure. If the move connects on an airborne opponent, it does 800 less damage but allows a follow-up juggle from the ground bounce. This can be used in certain juggle routes, like after {{clr|OD|OD Psycho Crusher}} with a Psycho Mine. Midscreen, it's often better to use a meterless Shadow Rise (particularly the {{clr|H|HK}} version) before inputting the {{clr|OD|OD Head Press}} with {{clr|OD|KK}}, as it lets Bison cover more distance. |
| }} | | }} |
|
| |
|
| Line 945: |
Line 1,041: |
| {{MoveDataCargo | | {{MoveDataCargo |
| | title = Somersault Skull Diver | | | title = Somersault Skull Diver |
| | subtitle = | | | subtitle = Headstomp Follow-up |
| | input = {{Classic_sf6}} [2]8K~K~P<br>{{Modern_sf6}} [2]8X~X~X or [2]S~X~X | | | input = {{Classic_sf6}} [2]8K~K~P<br>{{Modern_sf6}} [2]8X~X~X or [2]S~X~X |
| | images = | | | images = |
| Line 953: |
Line 1,049: |
| | info = | | | info = |
| {{AttackDataCargo-SF6/Query|m.bison_28k_k_p}} | | {{AttackDataCargo-SF6/Query|m.bison_28k_k_p}} |
| * Can be performed after meterless Head Press bounce on hit/block | | * Can be performed after meterless Head Press bounce on hit/block/armor |
| | ** Cannot be performed after Perfect Parry, or after connecting with counters like JP Amnesia or Marisa charged SA1 |
| * {{FKD}} state until landing | | * {{FKD}} state until landing |
| * Puts airborne opponents into {{sf6-jug|limited juggle}} state | | * Puts airborne opponents into {{sf6-jug|limited juggle}} state |
| Line 987: |
Line 1,084: |
| A forward-moving Super that reaches about half screen. From farther out, only the later hits connect, making the move considerably weaker and not worth using. It functions as Bison's primary reversal, only losing to projectiles or frame-perfect meaty safe jabs on some characters. However, the forward movement and hitbox position makes it a poor anti-air at most ranges. | | A forward-moving Super that reaches about half screen. From farther out, only the later hits connect, making the move considerably weaker and not worth using. It functions as Bison's primary reversal, only losing to projectiles or frame-perfect meaty safe jabs on some characters. However, the forward movement and hitbox position makes it a poor anti-air at most ranges. |
|
| |
|
| Knee Press Nightmare is a solid juggle ender for tacking on damage, notably after a Psycho Mine infused {{clr|H|HP Backfist}} or {{clr|H|HP Psycho Crusher}}. Bison almost always has stronger cancel options, but it's possible to hitconfirm on reaction from his far-reaching {{clr|H|5HP}} for damage and corner carry. The threat of a cancel to {{clr|SA|SA1}} also makes this poke viable against {{clr|4|Drive Impact}} in neutral. | | Knee Press Nightmare is a solid juggle ender for tacking on damage, notably after a Psycho Mine infused {{clr|H|HP Backfist}} or {{clr|H|HP Psycho Crusher}}. Bison almost always has stronger cancel options, but it's possible to hitconfirm on reaction from his far-reaching {{clr|H|5HP}} for damage and corner carry. The threat of a cancel to {{clr|SA|SA1}} also makes this poke viable against {{clr|DR|Drive Impact}} in neutral. |
|
| |
|
| Bison does not get any follow-up oki on hit; when used midscreen, he ends up a full screen apart afterwards, and is still left about a half screen away against a cornered opponent. It also depletes any planted Psycho Mine, so using this Super often comes at the cost of future damage and pressure. | | Bison does not get any follow-up oki on hit; when used midscreen, he ends up a full screen apart afterwards, and is still left about a half screen away against a cornered opponent. It also depletes any planted Psycho Mine, so using this Super often comes at the cost of future damage and pressure. |
| Line 1,026: |
Line 1,123: |
| | input = {{Classic_sf6}} 236236P<br>{{Modern_sf6}} 236236H or 2HS | | | input = {{Classic_sf6}} 236236P<br>{{Modern_sf6}} 236236H or 2HS |
| | images = | | | images = |
| {{MoveDataCargoImage|imageHeight=135px|m.bison_236236p|caption=}} | | {{MoveDataCargoImage|imageHeight=135px|m.bison_236236p|caption= '''"YOUR TIME ENDS HERE"'''}} |
| ---- | | ---- |
| {{MoveDataCargoImage|imageHeight=135px|m.bison_236236p(ca)|caption= Critical Art adds 500 more damage}} | | {{MoveDataCargoImage|imageHeight=135px|m.bison_236236p(ca)|caption= '''''"Word"''''' |
| | |
| | Critical Art adds 500 more damage}} |
| | hitboxes = | | | hitboxes = |
| {{MoveDataCargoImage|hitbox=yes|imageHeight=140px|m.bison_236236p|caption= Critical Art adds 500 more damage}} | | {{MoveDataCargoImage|hitbox=yes|imageHeight=140px|m.bison_236236p|caption= Critical Art adds 500 more damage}} |
| Line 1,061: |
Line 1,160: |
| | title = Neutral Taunt | | | title = Neutral Taunt |
| | subtitle = | | | subtitle = |
| | input = 5PPPKKK | | | input = {{classic_sf6}} 5PPPKKK<br>{{Modern_sf6}} 5LMHS+DP+A |
| | images = | | | images = |
| {{MoveDataCargoImage|imageHeight=160px|m.bison_5pppkkk|caption= '' "A gnat like you will be buried here." ''}} | | {{MoveDataCargoImage|imageHeight=160px|m.bison_5pppkkk|caption= '' "A gnat like you will be buried here." ''}} |
| Line 1,080: |
Line 1,179: |
| | title = Forward Taunt | | | title = Forward Taunt |
| | subtitle = | | | subtitle = |
| | input = 6PPPKKK | | | input = {{classic_sf6}} 6PPPKKK<br>{{Modern_sf6}} 6LMHS+DP+A |
| | images = | | | images = |
| {{MoveDataCargoImage|imageHeight=160px|m.bison_6pppkkk|caption= '' "Hmph. Do you fear me?" ''}} | | {{MoveDataCargoImage|imageHeight=160px|m.bison_6pppkkk|caption= '' "Hmph. Do you fear me?" ''}} |
| Line 1,090: |
Line 1,189: |
| * Detonates a planted Psycho Mine at the end of the countdown | | * Detonates a planted Psycho Mine at the end of the countdown |
| * Activating the taunt can overwrite the previous Psycho Mine timer, extending its total time | | * Activating the taunt can overwrite the previous Psycho Mine timer, extending its total time |
| | * After detonating a Psycho Mine, transforms into Shin Bison and gains new [[#Hidden_Arts|hidden boss techniques]] |
| }} | | }} |
|
| |
|
| Line 1,096: |
Line 1,196: |
| | title = Back Taunt | | | title = Back Taunt |
| | subtitle = | | | subtitle = |
| | input = 4PPPKKK | | | input = {{classic_sf6}} 4PPPKKK<br>{{Modern_sf6}} 4LMHS+DP+A |
| | images = | | | images = |
| {{MoveDataCargoImage|imageHeight=160px|m.bison_4pppkkk|caption= '' "My power howls. Face me!" ''}} | | {{MoveDataCargoImage|imageHeight=160px|m.bison_4pppkkk|caption= '' "My power howls. Face me!" ''}} |
| Line 1,111: |
Line 1,211: |
| <br> | | <br> |
|
| |
|
| {{Character Subnav SF6|chara={{SUBPAGENAME}}|discord={{{discord|}}}|tag=Mbison}} | | == Hidden Arts == |
| | =====<font style="visibility:hidden; float:right">Bison Warp (6 or 4 + PPP/KKK)</font>===== |
| | {{MoveDataCargo |
| | | title = Bison Warp |
| | | subtitle = Hidden Special Move |
| | | input = {{classic_sf6}} 6 or 4 + PPP/KKK<br>{{modern_sf6}} 6 or 4 + LMH (PPP ver.) |
| | | images = |
| | {{MoveDataCargoImage|imageHeight=180px|m.bison_4ppp|caption=}} |
| | | info = |
| | {{AttackDataCargo-SF6/Query|m.bison_4ppp}} |
| | * Only accessible as Shin Bison after [[#Forward_Taunt_(6PPPKKK)|Mine Taunt]] |
| | * '''Full Invuln:''' 1-16f; disappears frame 15 and reappears frame 17 |
| | * Forward versions: 6PPP appears behind opponent unless fully cornered; 6KKK appears in front of opponent |
| | ** Both recover near the edge of Bison's throw range, or close enough to confirm 2 light normals |
| | * Back versions: 4PPP is shorter (Distance 1.50), 4KKK is longer (Distance 2.50) |
| | <br> |
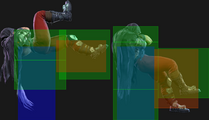
| | A fully invincible teleport that makes Shin Bison a slippery target at midscreen. It can also be used to prevent a {{clr|DR|Drive Impact}} stun while in Burnout (or cancel a normal to prevent being crumpled), though he is often left slightly punishable afterwards. It can also evade other less common situations, like an attempted chip-out with a fast invincible move. |
| | |
| | Shin Bison can bait out the opponent's {{clr|DR|Drive Reversal}} even from a heavy normal like {{clr|H|4HK}} to dodge it entirely instead of getting knocked back. Bison will be at worst {{sf6-adv|VP|+5}} in this scenario, but the distance will depend on the opponent. For example, Blanka's {{clr|DR|Drive Reversal}} has a ton of forward movement, so Bison will need to use the 4KKK version, since 6PPP leaves him too far. |
| | }} |
| | |
| | =====<font style="visibility:hidden; float:right">Psycho Burst (623PP)</font>===== |
| | {{MoveDataCargo |
| | | title = Psycho Burst |
| | | subtitle = Hidden Special Move |
| | | input = {{classic_sf6}} 623PP<br>{{modern_sf6}} 623XX |
| | | images = |
| | {{MoveDataCargoImage|imageHeight=180px|m.bison_623pp|caption=}} |
| | | hitboxes = |
| | {{MoveDataCargoImage|hitbox=yes|imageHeight=180px|m.bison_623pp|caption=}} |
| | | info = |
| | {{AttackDataCargo-SF6/Query|m.bison_623pp}} |
| | * Only accessible as Shin Bison after [[#Forward_Taunt_(6PPPKKK)|Mine Taunt]] |
| | * '''Full Invuln:''' 1-18f; cannot hit cross-up |
| | <br> |
| | A very slow but invincible reversal and anti-air. Although Shin Bison appears to hit in a sphere around his entire body, it will whiff entirely if the opponent gets behind him. This makes it a poor close range anti-air. As a reversal, opponents can easily bait it on wakeup with lights or even some mediums, leading to a huge punish on block. Its biggest advantage is that it requires no Drive meter, allowing Shin Bison to thwart Burnout pressure in unique ways. |
| | }} |
| | |
| | =====<font style="visibility:hidden; float:right">Level 2 Super (214214P)</font>===== |
| | {{MoveDataCargo |
| | | title = Final Psycho Crusher |
| | | subtitle = Hidden Super Art |
| | | input = {{classic_sf6}} 214214P<br>{{modern_sf6}} 22LMH |
| | | images = |
| | {{MoveDataCargoImage|imageHeight=165px|m.bison_214214p|caption=}} |
| | | hitboxes = |
| | {{MoveDataCargoImage|hitbox=yes|imageHeight=200px|m.bison_214214p|caption=}} |
| | | info = |
| | {{AttackDataCargo-SF6/Query|m.bison_214214p}} |
| | * 2-bar Super Art; Only accessible as Shin Bison after [[#Forward_Taunt_(6PPPKKK)|Mine Taunt]] |
| | * '''Full Invuln:''' 1-69f; '''Airborne''' 2-69f; Armor Break |
| | * Fullscreen anti-air and projectile punish; cannot hit cross-up |
| | * 1st active frame only connects if Bison is cornered (functional startup is usually 15f) |
| | * '''Drive Gauge Depletion:''' 1 bar (hit) / 0.8 bars (block) |
| | * 40% minimum damage scaling |
| | * Recovers on the opposite side of opponent (except on a fully cornered hit) |
| | <br> |
| | Shin Bison flies across the screen with a massive invincible hitbox. It can be baited with a preemptive jump before the Super freeze, but not after. Final Psycho Crusher acts like any other {{clr|SA|SA2}}, canceling from {{clr|OD|OD}} moves for solid damage. When Shin Bison has 2 Super bars stocked, it essentially becomes impossible to throw projectiles or jump outside cross-up range. |
| | |
| | Because of the way Shin Bison travels across the screen, it is a 9f reversal while cornered but a 15f reversal anywhere else. This makes it more useful in corner pressure situations than his much slower Psycho Burst. |
| | }} |
| | |
| | |
| | {{Character Subnav SF6|chara={{SUBPAGENAME}}|discord={{{discord|}}}|tag=Bison}} |
| {{Navbox-SF6}} | | {{Navbox-SF6}} |
| [[Category:Street Fighter 6]] | | [[Category:Street Fighter 6]] |
| [[Category:M.Bison]] | | [[Category:M.Bison]] |
