|
|
| Line 41: |
Line 41: |
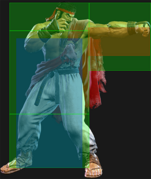
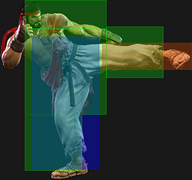
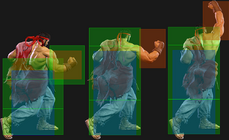
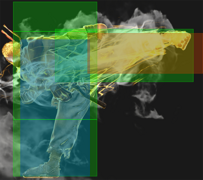
| Ryu's main combo starter, but the distance after a hit can make the follow-ups a bit finicky. The Fuwa Triple Strike target combo is the most consistent ender and is easier to hitconfirm, but does fairly low damage. | | Ryu's main combo starter, but the distance after a hit can make the follow-ups a bit finicky. The Fuwa Triple Strike target combo is the most consistent ender and is easier to hitconfirm, but does fairly low damage. |
|
| |
|
| The link into {{clr|H|4HP}} only works from absolute point blank, and even starting with a jumpin can prevent it from working. The link into {{clr|M|5MP}} or {{clr|M|2MP}} works from slightly farther out. On Counter-hit, {{clr|M|5MP}} can link into {{clr|H|2HP}} if close enough (for example, blocked {{clr|DR|DR~}}{{clr|L|5LP}}, {{clr|M|CH 5MP}} links into {{clr|H|2HP}}, but without the {{clr|DR|Drive Rush}} Ryu will be too far away). | | The link into {{clr|H|4HP}} only works from absolute point blank, and even starting with a jumpin can prevent it from working. The link into {{clr|M|5MP}} or {{clr|M|2MP}} works from slightly farther out. On {{clr|PC|Counter-hit}}, {{clr|M|5MP}} can link into {{clr|H|2HP}} if close enough (for example, blocked {{clr|DR|DR~}}{{clr|L|5LP}}, {{clr|M|CH 5MP}} links into {{clr|H|2HP}}, but without the {{clr|DR|Drive Rush}} Ryu will be too far away). |
| }} | | }} |
|
| |
|
| Line 85: |
Line 85: |
|
| |
|
| Optimal cancel routes from {{clr|L|5LK}} depend on spacing and how the move connects: | | Optimal cancel routes from {{clr|L|5LK}} depend on spacing and how the move connects: |
| * Combos naturally: Shoryuken (close range), {{clr|OD|Denjin/OD Hadoken}}, {{clr|L|LK High Blade Kick}}, {{clr|L|LK}}/{{clr|M|MK}}/{{clr|OD|OD}} Tatsu, {{clr|L|LP Hashogeki}}, any Super | | * Combos naturally: Shoryuken (close range), {{clr|OD|Denjin/OD Hadoken}}, {{clr|L|LK High Blade Kick}}, {{clr|L|LK}}/{{clr|M|MK}}/{{clr|OD|OD}} Tatsu, {{clr|L|LP Hashogeki}}, any {{clr|SA|Super}} |
| * Counter Hit only: {{clr|OD|OD}} High Blade Kick | | * {{clr|PC|Counter-hit}} only: {{clr|OD|OD High Blade Kick}} |
| * Punish Counter only: {{clr|H|HK Tatsu}}, {{clr|M|MK}} High Blade Kick, {{clr|M|MP}}/{{clr|OD|OD}} Hashogeki, {{clr|OD|OD Denjin Hashogeki}} | | * {{clr|PC|Punish Counter}} only: {{clr|H|HK Tatsu}}, {{clr|M|MK}} High Blade Kick, {{clr|M|MP}}/{{clr|OD|OD}} Hashogeki, {{clr|OD|OD Denjin Hashogeki}} |
|
| |
|
| The Punish Counter conversion into {{clr|OD|OD High Blade Kick}} or {{clr|OD|OD Denjin Hashogeki}} are particularly noteworthy due to the high damage potential afterwards. | | The {{clr|PC|Punish Counter}} conversion into {{clr|OD|OD High Blade Kick}} or {{clr|OD|OD Denjin Hashogeki}} are particularly noteworthy due to the high damage potential afterwards. |
| }} | | }} |
|
| |
|
| Line 188: |
Line 188: |
| * '''{{clr|DR|Drive Rush}} cancel advantage:''' {{sf6-adv|VP|+17}} oH / {{sf6-adv|VP|+9}} oB | | * '''{{clr|DR|Drive Rush}} cancel advantage:''' {{sf6-adv|VP|+17}} oH / {{sf6-adv|VP|+9}} oB |
| <br> | | <br> |
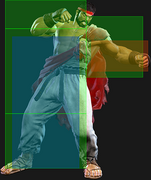
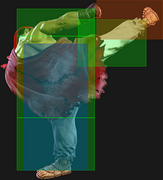
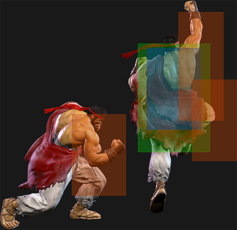
| Decent anti-air normal for situations where you don't have time to react with Shoryuken. Can be linked to after Counter-hit/Punish Counter {{clr|M|5MP}}, but the short range can make this a little inconsistent. Very unsafe on block. | | Decent anti-air normal for situations where you don't have time to react with Shoryuken. Can be linked to after {{clr|PC|Counter-hit/Punish Counter}} {{clr|M|5MP}}, but the short range can make this a little inconsistent. Very unsafe on block. |
| }} | | }} |
|
| |
|
| Line 249: |
Line 249: |
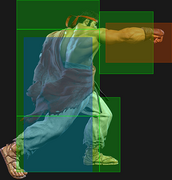
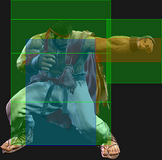
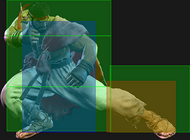
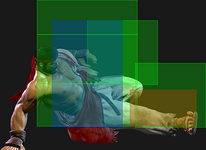
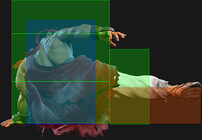
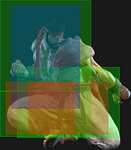
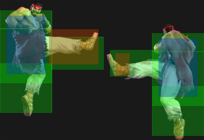
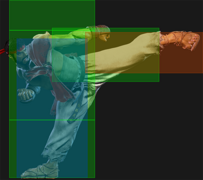
| A sweep with very good range but high punishability on block. It punishes other sweeps very well and compliments Ryu's mid-range playstyle. The range can still spare you from punishes if well spaced, but the pushback being low makes this all the more challenging. It can also be used on occasion to end Hashogeki juggles midscreen, where a Shoryuken would whiff. | | A sweep with very good range but high punishability on block. It punishes other sweeps very well and compliments Ryu's mid-range playstyle. The range can still spare you from punishes if well spaced, but the pushback being low makes this all the more challenging. It can also be used on occasion to end Hashogeki juggles midscreen, where a Shoryuken would whiff. |
|
| |
|
| Gives enough advantage on Punish counter to go for a Denjin charge and be only {{sf6-adv|VM|-5}}; whether this is useful depends on your positioning and the opponent's 5f attack range. | | Gives enough advantage on {{clr|PC|Punish Counter}} to go for a Denjin charge and be only {{sf6-adv|VM|-5}}; whether this is useful depends on your positioning and the opponent's 5f attack range. |
| }} | | }} |
| <br> | | <br> |
| Line 300: |
Line 300: |
| | info = | | | info = |
| {{AttackDataCargo-SF6/Query|ryu_jhp}} | | {{AttackDataCargo-SF6/Query|ryu_jhp}} |
| * Spike knockdown on Counter-hit/Punish Counter vs. airborne opponents | | * Spike knockdown on {{clr|PC|Counter-hit/Punish Counter}} vs. airborne opponents |
| <br> | | <br> |
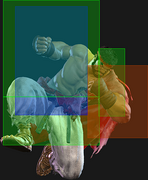
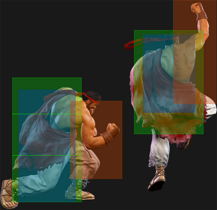
| Jump-in with a good downward reaching hitbox for closer range jumps and throw baits. | | Jump-in with a good downward reaching hitbox for closer range jumps and throw baits. |
| Line 369: |
Line 369: |
| * {{clr|PC|Counter-hit/Punish Counter}} bonus advantage applies to both hits | | * {{clr|PC|Counter-hit/Punish Counter}} bonus advantage applies to both hits |
| <br> | | <br> |
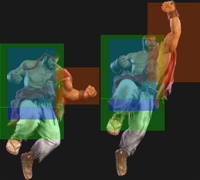
| A fast overhead that allows follow-up combos when used after {{clr|DR|Drive Rush}}. Ryu can also link into light normals after a Counter-hit or with perfect meaty timing, such as after {{clr|L|214LK}} + whiff {{clr|L|5LP}} in the corner. | | A fast overhead that allows follow-up combos when used after {{clr|DR|Drive Rush}}. Ryu can also link into light normals after a {{clr|PC|Counter-hit}} or with perfect meaty timing, such as after {{clr|L|214LK}} + whiff {{clr|L|5LP}} in the corner. |
|
| |
|
| While Ryu is {{sf6-adv|P|+3}} when the opponent blocks {{clr|DR|DR~}}{{clr|M|6MP}}, he is out of throw range making it hard to press a real mixup. When hitting a crouching opponent at point blank, he can link into {{clr|H|4HP}} for a powerful combo extension that forces the opponent to stand. However, if the opponent somehow gets hit while standing, {{clr|H|4HP}} will whiff; for a more guaranteed combo ender, you can instead use {{clr|M|2MP}} > {{clr|M|236MK}} or {{clr|M|5MP}}~{{clr|L|LK}}~{{clr|H|HK}} for a Denjin stock. | | While Ryu is {{sf6-adv|P|+3}} when the opponent blocks {{clr|DR|DR~}}{{clr|M|6MP}}, he is out of throw range making it hard to press a real mixup. When hitting a crouching opponent at point blank, he can link into {{clr|H|4HP}} for a powerful combo extension that forces the opponent to stand. However, if the opponent somehow gets hit while standing, {{clr|H|4HP}} will whiff; for a more guaranteed combo ender, you can instead use {{clr|M|2MP}} > {{clr|M|236MK}} or {{clr|M|5MP}}~{{clr|L|LK}}~{{clr|H|HK}} for a Denjin stock. |
| Line 395: |
Line 395: |
| The {{sf6-adv|P|+3}} block advantage is enough to continue your pressure with a {{clr|M|5MP}} or {{clr|M|2MP}} without being interrupted by an non invulnerable option, but the move leaves you too far away to initiate a throw mixup without walking. It can be up to {{sf6-adv|VP|+5}} on block if spaced out, but this also results in more pushback. After a {{clr|DR|DR~}}{{clr|H|6HP}} at point blank, Ryu can microwalk for a throw that beats 4f normals, but the timing is very strict. | | The {{sf6-adv|P|+3}} block advantage is enough to continue your pressure with a {{clr|M|5MP}} or {{clr|M|2MP}} without being interrupted by an non invulnerable option, but the move leaves you too far away to initiate a throw mixup without walking. It can be up to {{sf6-adv|VP|+5}} on block if spaced out, but this also results in more pushback. After a {{clr|DR|DR~}}{{clr|H|6HP}} at point blank, Ryu can microwalk for a throw that beats 4f normals, but the timing is very strict. |
|
| |
|
| Can combo into to {{clr|M|5MP}} or {{clr|M|2MP}} on hit, and on Counter-hit/Punish Counter you can easily react with a stronger combo route. It is very susceptible to {{clr|DR|Drive Impact}}, however, so it shouldn't be overly relied upon. | | Can combo into to {{clr|M|5MP}} or {{clr|M|2MP}} on hit, and on {{clr|PC|Counter-hit/Punish Counter}} you can easily react with a stronger combo route. It is very susceptible to {{clr|DR|Drive Impact}}, however, so it shouldn't be overly relied upon. |
| }} | | }} |
|
| |
|
| Line 435: |
Line 435: |
| * 1st hit forces stand, puts airborne opponents into {{sf6-jug|limited juggle}} state | | * 1st hit forces stand, puts airborne opponents into {{sf6-jug|limited juggle}} state |
| * 2nd hit puts airborne opponents into OTG Bounce state | | * 2nd hit puts airborne opponents into OTG Bounce state |
| * Counter-hit/Punish Counter bonus advantage applies to both hits | | * {{clr|PC|Counter-hit/Punish Counter}} bonus advantage applies to both hits |
| * '''Cancel Hitconfirm Window:''' 37f / 17f (2nd hit) | | * '''Cancel Hitconfirm Window:''' 37f / 17f (2nd hit) |
| * '''{{clr|DR|Drive Rush}} cancel advantage:''' 1st hit {{sf6-adv|VP|+10}} oH / {{sf6-adv|VP|+4}} oB, 2nd hit {{sf6-adv|VP|+14}} oH / {{sf6-adv|VP|+10}} oB | | * '''{{clr|DR|Drive Rush}} cancel advantage:''' 1st hit {{sf6-adv|VP|+10}} oH / {{sf6-adv|VP|+4}} oB, 2nd hit {{sf6-adv|VP|+14}} oH / {{sf6-adv|VP|+10}} oB |
| Line 459: |
Line 459: |
| * '''Cancel Hitconfirm Window:''' 19f (Air Tatsu only) | | * '''Cancel Hitconfirm Window:''' 19f (Air Tatsu only) |
| <br> | | <br> |
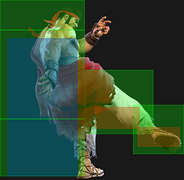
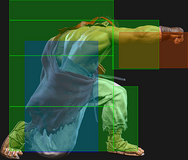
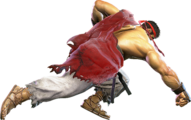
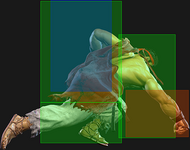
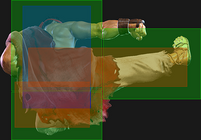
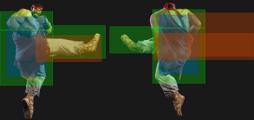
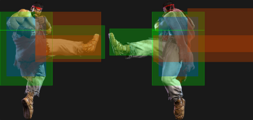
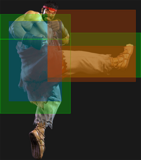
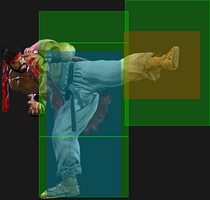
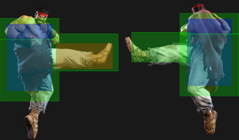
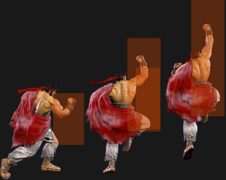
| Despite the animation, this attack is not considered airborne. It has good horizontal range and a lenient hitconfirm window for the cancel to Air Tatsu, making it a potent defensive poke and counterpoke. If you manage to beat the opponent's low poke and score a Punish Counter, Ryu becomes {{sf6-adv|VP|+6}} and gains a link to {{clr|M|5MP}} or {{clr|M|2MP}}. | | Despite the animation, this attack is not considered airborne. It has good horizontal range and a lenient hitconfirm window for the cancel to Air Tatsu, making it a potent defensive poke and counterpoke. If you manage to beat the opponent's low poke and score a {{clr|PC|Punish Counter}}, Ryu becomes {{sf6-adv|VP|+6}} and gains a link to {{clr|M|5MP}} or {{clr|M|2MP}}. |
|
| |
|
| The pushback generally keeps this move safe on block, and sets Ryu up to punish any attempts to contest his pressure. Be wary of some longer range light normals that can punish if not well spaced. | | The pushback generally keeps this move safe on block, and sets Ryu up to punish any attempts to contest his pressure. Be wary of some longer range light normals that can punish if not well spaced. |
| Line 598: |
Line 598: |
| * On Hit/PC: Applies 20% damage scaling to next hit when beginning a combo | | * On Hit/PC: Applies 20% damage scaling to next hit when beginning a combo |
| * On Block: Applies 20% scaling multiplier to all follow-up hits after Wall Splat; the next attack can incur additional Starter Scaling | | * On Block: Applies 20% scaling multiplier to all follow-up hits after Wall Splat; the next attack can incur additional Starter Scaling |
| * Combos when canceled from {{clr|H|5HP}}/{{clr|H|2HP}}/{{clr|H|4HP}} or Punish Counter {{clr|H|4HK (2nd)}} (no corner wallsplat; useful for depleting Drive gauge, especially after Perfect Parry) | | * Combos when canceled from {{clr|H|5HP}}/{{clr|H|2HP}}/{{clr|H|4HP}} or {{clr|PC|Punish Counter}} {{clr|H|4HK (2nd)}} (no corner wallsplat; useful for depleting Drive gauge, especially after Perfect Parry) |
| * A blocked {{clr|DR|DI}} can combo into another {{clr|DR|DI}} if opponent is not fully cornered (Stuns if opponent has less than 1.5 Drive bars) | | * A blocked {{clr|DR|DI}} can combo into another {{clr|DR|DI}} if opponent is not fully cornered (Stuns if opponent has less than 1.5 Drive bars) |
| ** This happens because a blocked {{clr|DR|DI}} is not considered a "hit" for combo purposes | | ** This happens because a blocked {{clr|DR|DI}} is not considered a "hit" for combo purposes |
| Line 618: |
Line 618: |
| * '''Zangief ({{clr|H|5[HP]}})''', frame 4 armor | | * '''Zangief ({{clr|H|5[HP]}})''', frame 4 armor |
|
| |
|
| It's important to use a blockstring that cannot be absorbed by their armor/counter moves. Ideally, the string should also not be a true combo, or it will cause a Lock and prevent Stun.<br>{{clr|OD|*}} Denotes a move that causes Lock on Counter-hit, allowing the opponent to escape a Stun by mashing on wakeup. | | It's important to use a blockstring that cannot be absorbed by their armor/counter moves. Ideally, the string should also not be a true combo, or it will cause a Lock and prevent Stun.<br>{{clr|OD|*}} Denotes a move that causes Lock on {{clr|PC|Counter-hit}}, allowing the opponent to escape a Stun by mashing on wakeup. |
| * {{clr|H|5HP}}{{clr|OD|*}} > {{clr|DR|DI}}: 2f blockstring gap prevents opponent from absorbing the hit | | * {{clr|H|5HP}}{{clr|OD|*}} > {{clr|DR|DI}}: 2f blockstring gap prevents opponent from absorbing the hit |
| * {{clr|H|4HK (2nd)}} > {{clr|DR|DI}}: 3f blockstring gap will work vs. Zangief {{clr|H|5[HP]}} | | * {{clr|H|4HK (2nd)}} > {{clr|DR|DI}}: 3f blockstring gap will work vs. Zangief {{clr|H|5[HP]}} |
| Line 849: |
Line 849: |
| {{clr|OD|OD Tatsu}} is a great juggle starter in the corner, and will always hit consistently due to its vacuum effect. Using this version against an already airborne opponent is less effective because it uses up a significant amount of juggle points, which severely limits Ryu's follow-up options. | | {{clr|OD|OD Tatsu}} is a great juggle starter in the corner, and will always hit consistently due to its vacuum effect. Using this version against an already airborne opponent is less effective because it uses up a significant amount of juggle points, which severely limits Ryu's follow-up options. |
|
| |
|
| Tatsu is pretty combo-friendly, but some strengths do not combo from all normal cancels. {{clr|L|5LP}} cannot naturally combo into {{clr|M|MK}}/{{clr|H|HK}} Tatsu, and {{clr|L|2LP}}/{{clr|L|5LK}} cannot naturally combo into {{clr|H|HK Tatsu}} outside of a Punish Counter scenario. | | Tatsu is pretty combo-friendly, but some strengths do not combo from all normal cancels. {{clr|L|5LP}} cannot naturally combo into {{clr|M|MK}}/{{clr|H|HK}} Tatsu, and {{clr|L|2LP}}/{{clr|L|5LK}} cannot naturally combo into {{clr|H|HK Tatsu}} outside of a {{clr|PC|Punish Counter}} scenario. |
| }} | | }} |
|
| |
|
| Line 914: |
Line 914: |
| The {{clr|L|LK}} version is a quick combo ender that sets up an auto-timed safe jump in the corner against grounded opponents. It combos naturally from both {{clr|L|2LP}} and {{clr|L|5LK}}, making it a great ender for light strings. It has fewer active frames than other versions, making it hard to space safely in neutral against most characters. | | The {{clr|L|LK}} version is a quick combo ender that sets up an auto-timed safe jump in the corner against grounded opponents. It combos naturally from both {{clr|L|2LP}} and {{clr|L|5LK}}, making it a great ender for light strings. It has fewer active frames than other versions, making it hard to space safely in neutral against most characters. |
|
| |
|
| The {{clr|M|MK}} version can be spaced relatively safely, and often can set up a safe Denjin Charge when used midscreen. It is great for harassing the opponent's Drive gauge unless they have an unusually fast and long-range punish option. It combos from all medium normals, as well as Punish Counter {{clr|L|5LK}}/{{clr|L|2LP}}. | | The {{clr|M|MK}} version can be spaced relatively safely, and often can set up a safe Denjin Charge when used midscreen. It is great for harassing the opponent's Drive gauge unless they have an unusually fast and long-range punish option. It combos from all medium normals, as well as {{clr|PC|Punish Counter}} {{clr|L|5LK}}/{{clr|L|2LP}}. |
|
| |
|
| The {{clr|H|HK}} version is very slow, but the high pushback makes it much safer than other versions. Only {{clr|H|4HP}} can naturally combo into it; other buttons require {{clr|DR|Drive Rush}}, Punish Counter, or juggle routes to combo successfully. Juggling into {{clr|H|236HK}} (e.g. {{clr|H|214HP}}, {{clr|DR|DR~}}{{clr|H|5HP}} > {{clr|H|236HK}}) usually leaves the opponent at +42, setting up an auto-timed corner safe jump. Be careful when throwing this out in neutral, as the opponent can react with {{clr|DR|Drive Impact}} unless you cancel into {{clr|SA|SA3}} on reaction. It is also a great punish starter if you know your routing. | | The {{clr|H|HK}} version is very slow, but the high pushback makes it much safer than other versions. Only {{clr|H|4HP}} can naturally combo into it; other buttons require {{clr|DR|Drive Rush}}, {{clr|PC|Punish Counter}}, or juggle routes to combo successfully. Juggling into {{clr|H|236HK}} (e.g. {{clr|H|214HP}}, {{clr|DR|DR~}}{{clr|H|5HP}} > {{clr|H|236HK}}) usually leaves the opponent at +42, setting up an auto-timed corner safe jump. Be careful when throwing this out in neutral, as the opponent can react with {{clr|DR|Drive Impact}} unless you cancel into {{clr|SA|SA3}} on reaction. It is also a great punish starter if you know your routing. |
|
| |
|
| {{clr|OD|OD High Blade Kick}} is the star of the show due to its Wall Bounce, which can lead to powerful juggles; it can even combo into fully charged {{clr|SA|SA2}} when canceled (although the release must be manually timed). The {{clr|OD|OD}} version can be comboed into from medium attacks or from a Punish Counter {{clr|L|5LK}}. If Ryu is too close to the corner, the opponent will bounce over his head, resulting in no follow-up juggle. In these situations, {{clr|OD|OD Tatsu}} is preferred. | | {{clr|OD|OD High Blade Kick}} is the star of the show due to its Wall Bounce, which can lead to powerful juggles; it can even combo into fully charged {{clr|SA|SA2}} when canceled (although the release must be manually timed). The {{clr|OD|OD}} version can be comboed into from medium attacks or from a {{clr|PC|Punish Counter}} {{clr|L|5LK}}. If Ryu is too close to the corner, the opponent will bounce over his head, resulting in no follow-up juggle. In these situations, {{clr|OD|OD Tatsu}} is preferred. |
| }} | | }} |
|
| |
|
| Line 927: |
Line 927: |
| | input = {{Classic_sf6}} 214P<br>{{Modern_sf6}} 214X | | | input = {{Classic_sf6}} 214P<br>{{Modern_sf6}} 214X |
| | images = | | | images = |
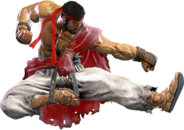
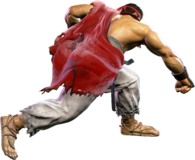
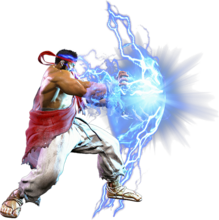
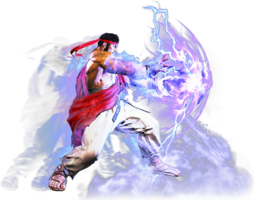
| {{MoveDataCargoImage|imageHeight=200px|ryu_214lp|caption=Frametrap or plusframes? Don't mind if I do...}} | | {{MoveDataCargoImage|imageHeight=200px|ryu_214lp|caption=Frame trap or plus frames? Don't mind if I do...}} |
| | hitboxes = | | | hitboxes = |
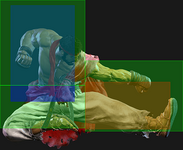
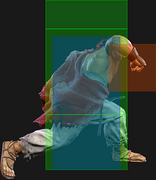
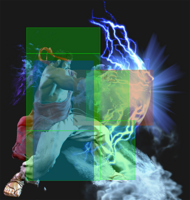
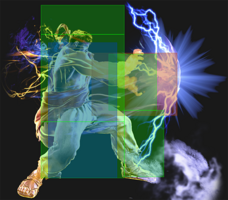
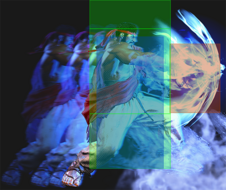
| {{MoveDataCargoImage|hitbox=yes|imageHeight=200px|ryu_214lp|caption=LP Version}} | | {{MoveDataCargoImage|hitbox=yes|imageHeight=200px|ryu_214lp|caption=LP Version}} |
| Line 957: |
Line 957: |
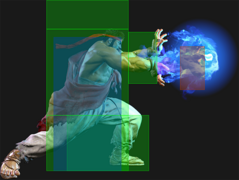
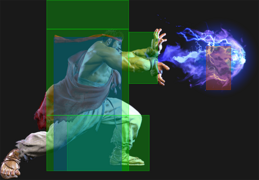
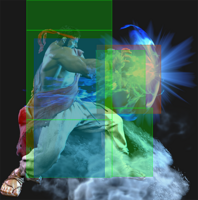
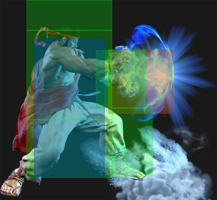
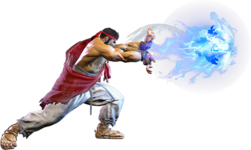
| {{clr|L|214LP}} has short range and low pushback but is safe; {{clr|M|214MP}} is technically unsafe but the spacing often makes it more difficult to punish. With specific setups, the {{clr|L|LP}}/{{clr|M|MP}} versions are useful as meaty tools on the opponent's wakeup. {{clr|L|214LP}} also has a secondary use as a fireball feint. Use it to get people to parry or jump at midrange with an AA or throw response respectively. | | {{clr|L|214LP}} has short range and low pushback but is safe; {{clr|M|214MP}} is technically unsafe but the spacing often makes it more difficult to punish. With specific setups, the {{clr|L|LP}}/{{clr|M|MP}} versions are useful as meaty tools on the opponent's wakeup. {{clr|L|214LP}} also has a secondary use as a fireball feint. Use it to get people to parry or jump at midrange with an AA or throw response respectively. |
|
| |
|
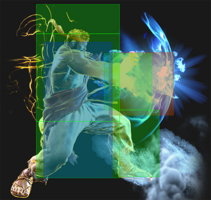
| {{clr|H|214HP}} gives Ryu frame advantage, but canceling into it leaves Ryu vulnerable during its long startup. If you condition the opponent to expect a {{clr|H|214HP}} cancel, you can punish their light normal mash by ending with the {{clr|L|LP}} or {{clr|M|MP}} versions instead, creating an intentional gap of 1-4 frames in the blockstring. Since a Counter-hit puts the opponent into a juggle state, Ryu can juggle even if he trades hits with the opponent. | | {{clr|H|214HP}} gives Ryu frame advantage, but canceling into it leaves Ryu vulnerable during its long startup. If you condition the opponent to expect a {{clr|H|214HP}} cancel, you can punish their light normal mash by ending with the {{clr|L|LP}} or {{clr|M|MP}} versions instead, creating an intentional gap of 1-4 frames in the blockstring. Since a {{clr|PC|Counter-hit}} puts the opponent into a juggle state, Ryu can juggle even if he trades hits with the opponent. |
|
| |
|
| {{clr|OD|214PP}} is also plus on block but has little to no reward on normal hit. Though due to it's high damage and ability to be linked out of, using it as a {{clr|PC|PC}} starter is great. It's serviceable as a round closer or to keep certain buttons safe for punishment. | | {{clr|OD|214PP}} is also plus on block but has little to no reward on normal hit. Though due to it's high damage and ability to be linked out of, using it as a {{clr|PC|PC}} starter is great. It's serviceable as a round closer or to keep certain buttons safe for punishment. |


