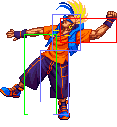
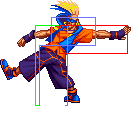
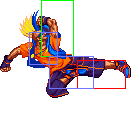
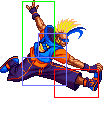
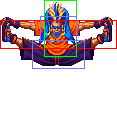
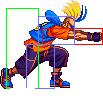
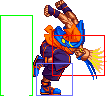
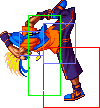
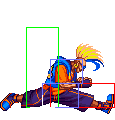
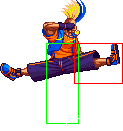
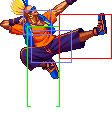
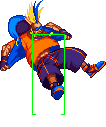
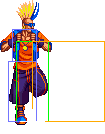
A dependable combo starter like most close Cs in the game.
m (→Ground Spin) |
Nodthenbow (talk | contribs) (→Break Spiral: added input requirement notes, removed incorrect note about needing to do it quick.) |
||
| (10 intermediate revisions by one other user not shown) | |||
| Line 2: | Line 2: | ||
==Introduction== | ==Introduction== | ||
Duck King is a wacky rushdown character with an array of strong but unorthodox tools. His normals are oddly effective for his archetype, sporting great priority and range, but he also has a bevy of surprise options for getting in, including a pesky rolling attack, a low profile slide and a skid which is fully invincible. Duck's true forte, however, is his mixup game. In most of his appearances, this means putting his excellent command grab S.Power to work; RBS, however, gives him a system he is primed to exploit. Line abuse, which entails swerving to the other line and fishing for crossups, is a central means of cracking opponents open; to achieve this for himself, Duck has a special line-switch attack which tracks the opponent's position and is impervious to getting checked. Duck then has a combo ender which lets him position himself reliably for more mixups, while his command grab is just the thing he needs to handle tech rolls. Duck isn't without his problems; he doesn't have the tools to play a solid pressure game, forcing him into gambles to keep his turn, while his normals — though good for what they are — will often lose against those designed to | Duck King is a wacky rushdown character with an array of strong but unorthodox tools. His normals are oddly effective for his archetype, sporting great priority and range, but he also has a bevy of surprise options for getting in, including a pesky rolling attack, a low profile slide and a skid which is fully invincible. Duck's true forte, however, is his mixup game. In most of his appearances, this means putting his excellent command grab S.Power to work; RBS, however, gives him a system he is primed to exploit. Line abuse, which entails swerving to the other line and fishing for crossups, is a central means of cracking opponents open; to achieve this for himself, Duck has a special line-switch attack which tracks the opponent's position and is impervious to getting checked. Duck then has a combo ender which lets him position himself reliably for more mixups, while his command grab is just the thing he needs to handle tech rolls. Duck isn't without his problems; he doesn't have the tools to play a solid pressure game, forcing him into gambles to keep his turn, while his normals — though good for what they are — will often lose against those designed to poke. His shortcomings in neutral, however, are far outweighed by the vortex he can keep up and the pressure he can apply thanks to his kit being so in-tune with the game's system. In conclusion, Duck deserves to be top tier because he wears JNCOs, which is probably the coolest article of clothing one can wear. | ||
| Line 56: | Line 56: | ||
{{qcf}}{{qcf}}[[File:Snkb.gif]][[File:Snkc.gif]] - Break Hurricane | {{qcf}}{{qcf}}[[File:Snkb.gif]][[File:Snkc.gif]] - Break Hurricane | ||
{{hcb}} | {{hcb}}[[File:Snkc.gif]] ~ [[File:Snka.gif]] ~ [[File:Snka.gif]] ~ [[File:Snkb.gif]] ~ [[File:Snka.gif]] ~ [[File:Snkb.gif]] ~ [[File:Snkb.gif]] ~ [[File:Snkc.gif]] ~ [[File:Snkc.gif]] ~ {{dp}}[[File:Snkc.gif]] - Beat Rush | ||
| Line 644: | Line 644: | ||
|Guard=Mid | |Guard=Mid | ||
|Meter=3 | |Meter=3 | ||
|Cancel= | |Cancel=Special | ||
|Startup= | |Startup= | ||
|Active= | |Active= | ||
| Line 872: | Line 872: | ||
}} | }} | ||
}} | }} | ||
===== <span class="invisible-header">(1) 5B | ===== <span class="invisible-header">(1) 5B 6C</span> ===== | ||
<font style="visibility:hidden" size="0"></font> | <font style="visibility:hidden" size="0"></font> | ||
{{MoveData | {{MoveData | ||
|image=RBS_Duck_chainbg6C.png | |image=RBS_Duck_chainbg6C.png | ||
|imageSize= | |imageSize= | ||
|subtitle= | |subtitle= | ||
|caption= | |caption= | ||
|name=(1)-(2)-{{f}}[[File:Snkc.gif]] | |name=(1)-(2)-{{f}}[[File:Snkc.gif]] | ||
| Line 886: | Line 886: | ||
|Meter=3 | |Meter=3 | ||
|Cancel=Special | |Cancel=Special | ||
|Startup=7 | |Startup=7/8 | ||
|Active=3 | |Active=3/10 | ||
|Recovery=20 | |Recovery=20/16 | ||
|Total=29 | |Total=29/35 | ||
|Hit Adv=+1 | |Hit Adv=+1/-2 | ||
|Block Adv=-1 | |Block Adv=-1/-4 | ||
|Properties= | |Properties= | ||
|Invulnerability= | |Invulnerability= | ||
|description=Pushes the opponent to the other line. Duck gets a combo into 214D for above-average damage, but the frame advantage after practically forces him to retreat. | |description=Pushes the opponent to the other line. Duck gets a combo into 214D for above-average damage, but the frame advantage after practically forces him to retreat. The foreground version uses st.C's hitboxes, giving it much nicer range, but the chain kinda sucks either way. | ||
|phases= | |||
<gallery mode=packed> | |||
File:RBS_Duck_chainbg6C.png | |||
File:RBS_Duck_stC.png | |||
</gallery> | |||
}} | }} | ||
}} | }} | ||
| Line 1,059: | Line 1,039: | ||
|Properties=SKD | |Properties=SKD | ||
|Invulnerability= | |Invulnerability= | ||
|description=Duck hates Terry's Rising Tackle, but | |description=Duck hates Terry's Rising Tackle, but his old Neo Break Storm clearly mirrors it. Deep, but there's a time and place for these things. Anyway, this chain builds a decent amount of meter, and unlike RB2's equivalent chain, Duck isn't stuck posing afterwards, so he has time to switch to the other line and go for mixups. A decent combo option if you ever get 2C to hit up close. | ||
|phases= | |phases= | ||
<gallery mode=packed> | <gallery mode=packed> | ||
| Line 1,371: | Line 1,351: | ||
|Properties=HKD | |Properties=HKD | ||
|Invulnerability= | |Invulnerability= | ||
|description=Duck's fun and good command grab is just as scary here as it is in the other Real Bouts, considering he gets it for free on half health. The range is great and it's instant, making it useful as a punish tool in a pinch, but being a command grab its main purpose lies in its mixup potential. This is exacerbated by RBS's line system; if an opponent cashes out meter to tech roll with 412D, they are invincible while rolling to everything except command grabs on the lane they recover in. If Duck does 214D after landing 214B and sees his opponent tech roll, he can buffer Break Spiral pretty easily and make them hurt. | |description=Duck's fun and good command grab is just as scary here as it is in the other Real Bouts, considering he gets it for free on half health. The range is great and it's instant, making it useful as a punish tool in a pinch, but being a command grab its main purpose lies in its mixup potential. This is exacerbated by RBS's line system; if an opponent cashes out meter to tech roll with 412D, they are invincible while rolling to everything except command grabs on the lane they recover in. If Duck does 214D after landing 214B and sees his opponent tech roll, he can buffer Break Spiral pretty easily and make them hurt. The input is strict on every direction except the last down input, and you can't skip any directions. A relatively large wait can be used after the 6 or 9 input. It is possible to do this without a buffer, but it requires doing 92+B+C in two frames total. | ||
}} | }} | ||
}} | }} | ||
===P.Power=== | ===P.Power=== | ||
| Line 1,568: | Line 1,547: | ||
'''(1)''' - cl.A, st.A, cr.A, cl.B, cr.B | '''(1)''' - cl.A, st.A, cr.A, cl.B, cr.B | ||
'''(2)''' - 5B, | '''(2)''' - 5B, 2B | ||
'''(3)''' - 5C, 6C, 2C, 3C | '''(3)''' - 5C, 6C, 2C, 3C | ||
| Line 1,577: | Line 1,556: | ||
Chain paths courtesy of ''Goh_Billy'': | Chain paths courtesy of ''Goh_Billy'': | ||
<pre> | <pre> | ||
cl.A -----> 5B -----> 5C | |||
st.A 6C | |||
cr.A 2C | cr.A 2C | ||
cl.B 3C | cl.B 3C | ||
cr.B | cr.B | ||
------> | ------> 2B -----> 2C | ||
3C | 3C | ||
| Line 1,620: | Line 1,599: | ||
Within midrange isn't a good spot for Duck, as most of his other normals have range problems or are otherwise not solid. Here, he will often lose to characters like Mai who not only have solid midrange tools, but who can segue them into lengthy bouts of pressure. Worth noting is that Duck's normals also mean he is not endowed with a great pressure game; he is designed around mixups, and his ways of forcing them inherently have holes. Duck is a comparatively less solid character for these reasons. On defense, his only special tool is 623B, which is angled to beat hops; however, its slow startup makes it flimsy at this, so Duck will either have to backdash away or hold it once caught. | Within midrange isn't a good spot for Duck, as most of his other normals have range problems or are otherwise not solid. Here, he will often lose to characters like Mai who not only have solid midrange tools, but who can segue them into lengthy bouts of pressure. Worth noting is that Duck's normals also mean he is not endowed with a great pressure game; he is designed around mixups, and his ways of forcing them inherently have holes. Duck is a comparatively less solid character for these reasons. On defense, his only special tool is 623B, which is angled to beat hops; however, its slow startup makes it flimsy at this, so Duck will either have to backdash away or hold it once caught. | ||
Regardless, Duck's mixups are a strength — a valuable one to have in RBS, where cracking someone open can seem tough at times. Duck can land 214B from basic confirms, line checks and even as a Break Shot, and its knockdown gives him enough time to use 214D to get himself on the other line and position himself for a crossup. He can then press line.C, confirm which side he hit it on (or if it was blocked) and then act accordingly — usually into another 214B to keep the vortex going. 214D also has utility in neutral, considering it lets Duck switch lines without being able to get checked. Once Duck reaches low health or has meter, he gains access to 4123692BC: an instant command grab. Not only is this great for strike/throw and even as a punish tool, but it works wonderfully with his line abuse as a way to catch tech rolls; a feat made reliable given how 214D will let Duck meet the opponent on the same line they recover. Duck's vortex is highly effective, but once blocked, he may have to bounce off with 236A to retreat, moving him back to square one. | Regardless, Duck's mixups are a strength — a valuable one to have in RBS, where cracking someone open can seem tough at times. Duck can land 214B from basic confirms, line checks and even as a Break Shot, and its knockdown gives him enough time to use 214D to get himself on the other line and position himself for a crossup. He can then press line.C, confirm which side he hit it on (or if it was blocked) and then act accordingly — usually into another 214B to keep the vortex going. 214D also has utility in neutral, considering it lets Duck switch lines without being able to get checked. Once Duck reaches low health or has meter, he gains access to 4123692BC: an instant command grab. Not only is this great for strike/throw and even as a punish tool, but it works wonderfully with his line abuse as a way to catch tech rolls; a feat made reliable given how 214D will let Duck meet the opponent on the same line they recover. You can also adjust yourself for a line crossup, but then go to the other line and grab them if they're focusing too much on which way to block. Duck's vortex is highly effective, but once blocked, he may have to bounce off with 236A to retreat, moving him back to square one. Cancelling into 214D again to keep the vortex going is an option, but you'll have to play with the timing so you don't just eat a line check. | ||
Duck isn't too solid in neutral, but his vortex more than makes up for it, so learn the loop and get your groove on. | Duck isn't too solid in neutral, but his vortex more than makes up for it, so learn the loop and get your groove on. | ||
Latest revision as of 14:39, 22 January 2025
Introduction
Duck King is a wacky rushdown character with an array of strong but unorthodox tools. His normals are oddly effective for his archetype, sporting great priority and range, but he also has a bevy of surprise options for getting in, including a pesky rolling attack, a low profile slide and a skid which is fully invincible. Duck's true forte, however, is his mixup game. In most of his appearances, this means putting his excellent command grab S.Power to work; RBS, however, gives him a system he is primed to exploit. Line abuse, which entails swerving to the other line and fishing for crossups, is a central means of cracking opponents open; to achieve this for himself, Duck has a special line-switch attack which tracks the opponent's position and is impervious to getting checked. Duck then has a combo ender which lets him position himself reliably for more mixups, while his command grab is just the thing he needs to handle tech rolls. Duck isn't without his problems; he doesn't have the tools to play a solid pressure game, forcing him into gambles to keep his turn, while his normals — though good for what they are — will often lose against those designed to poke. His shortcomings in neutral, however, are far outweighed by the vortex he can keep up and the pressure he can apply thanks to his kit being so in-tune with the game's system. In conclusion, Duck deserves to be top tier because he wears JNCOs, which is probably the coolest article of clothing one can wear.
Colors

|

|
Movelist
Command Normals
![]()
![]() on downed opponent - Ground Spin
on downed opponent - Ground Spin
Special Moves
![]()
![]() ~
~ ![]()
![]() - Rising Spin Attack ~ Kick Away
- Rising Spin Attack ~ Kick Away
(Air) ![]()
![]() ~ (Air)
~ (Air) ![]()
![]() - Aerial Duck Fake Out ~ Flying Spin Attack
- Aerial Duck Fake Out ~ Flying Spin Attack
S.Power
P.Power
Normals
Close Normals
cl.A
| Damage | Guard | Meter | Cancel | Startup | Active | Recovery | Total | Hit Adv | Block Adv | Properties | Invulnerability | |||
|---|---|---|---|---|---|---|---|---|---|---|---|---|---|---|
| 6 | Mid | 3 | Chain, Special | 4 | 2 | 10 | 15 | +6 | +4 | - | - | |||
|
Duck's fastest normal and an effective option in pressure due to its frame advantage and high hitbox. | ||||||||||||||
cl.B
| Damage | Guard | Meter | Cancel | Startup | Active | Recovery | Total | Hit Adv | Block Adv | Properties | Invulnerability | |||
|---|---|---|---|---|---|---|---|---|---|---|---|---|---|---|
| 8 | Mid | 3 | Chain, Special | 5 | 3 | 12 | 19 | -1 | -3 | - | - | |||
|
Filler. cr.B is typically the superior choice, given neither of them hit particularly high, while that move has better reach and hits low. | ||||||||||||||
cl.C
Standing Normals
st.A
| Damage | Guard | Meter | Cancel | Startup | Active | Recovery | Total | Hit Adv | Block Adv | Properties | Invulnerability | |||
|---|---|---|---|---|---|---|---|---|---|---|---|---|---|---|
| 6 | Mid | 3 | Chain, Special | 4 | 2 | 6 | 11 | +6 | +4 | - | - | |||
|
This has very good reach but hits at a weird angle, missing crouchers while checking jumps pre-emptively. | ||||||||||||||
st.B
| Damage | Guard | Meter | Cancel | Startup | Active | Recovery | Total | Hit Adv | Block Adv | Properties | Invulnerability | |||
|---|---|---|---|---|---|---|---|---|---|---|---|---|---|---|
| 8 | Mid | 3 | Chain, Special | 5 | 24 | 12 | 40 | -19 | -21 | - | Lower: 5-28 | |||
|
A moonjump which travels forward a good distance. This lets Duck endeavor his way back in after being pushed out by his own pressure. It has decent priority, has a tall hitbox and goes over lows, but it is a death sentence when performed up close. It's only safe on block — even plus — if you space it. The move isn't rewarding damage-wise, but the advantage and spacing afterwards can let Duck keep applying pressure. | ||||||||||||||
st.C
| Damage | Guard | Meter | Cancel | Startup | Active | Recovery | Total | Hit Adv | Block Adv | Properties | Invulnerability | |||
|---|---|---|---|---|---|---|---|---|---|---|---|---|---|---|
| 24 | Mid | 5 | - | 13 | 9 | 12 | 33 | +3 | +1 | - | - | |||
|
This move trails forward and has decent active frames and priority, making it a solid poke for Duck in particular who wants to get in. | ||||||||||||||
Crouching Normals
cr.A
| Damage | Guard | Meter | Cancel | Startup | Active | Recovery | Total | Hit Adv | Block Adv | Properties | Invulnerability | |||
|---|---|---|---|---|---|---|---|---|---|---|---|---|---|---|
| 6 | Mid | 3 | Chain, Special | 4 | 2 | 10 | 15 | +2 | 0 | - | - | |||
|
One of Duck's shorter normals, but it chains into itself. | ||||||||||||||
cr.B
| Damage | Guard | Meter | Cancel | Startup | Active | Recovery | Total | Hit Adv | Block Adv | Properties | Invulnerability | |||
|---|---|---|---|---|---|---|---|---|---|---|---|---|---|---|
| 8 | Low | 3 | Chain, Special | 5 | 3 | 12 | 19 | +1 | -1 | - | - | |||
|
A decent low starter which Duck uses for his BnBs. | ||||||||||||||
cr.C
| Damage | Guard | Meter | Cancel | Startup | Active | Recovery | Total | Hit Adv | Block Adv | Properties | Invulnerability | |||
|---|---|---|---|---|---|---|---|---|---|---|---|---|---|---|
| 24(13+11) | Low | 5 | Chain, Special | 8 | 3+(6)+3 | 20 | 39 | KD | -1 | SKD | - | |||
Line Attacks
line.A
line.B
line.C
| Damage | Guard | Meter | Cancel | Startup | Active | Recovery | Total | Hit Adv | Block Adv | Properties | Invulnerability | |||
|---|---|---|---|---|---|---|---|---|---|---|---|---|---|---|
| 16 | Mid | 5 | Special | 7/8 | 5/2 | 20/23 | 31/32 | -1 | -3 | - | - | |||
|
Duck is very good at positioning himself for line mixups, so his line checks being relatively short almost doesn't matter. The foreground version is active for only two frames, which also hurts a little. Needless to say, Duck isn't the type of character who bullies with line checks — he's no Billy. For him, it's all about the crossups. | ||||||||||||||
linecr.C
| Damage | Guard | Meter | Cancel | Startup | Active | Recovery | Total | Hit Adv | Block Adv | Properties | Invulnerability | |||
|---|---|---|---|---|---|---|---|---|---|---|---|---|---|---|
| 16 | Low | 5 | Special | 7/8 | 5 | 20 | 31/32 | KD | -3 | SKD | - | |||
Jumping Attacks
j.A
| Damage | Guard | Meter | Cancel | Startup | Active | Recovery | Total | Hit Adv | Block Adv | Properties | Invulnerability | |||
|---|---|---|---|---|---|---|---|---|---|---|---|---|---|---|
| 6 | High | 3 | Chain, Special | 4 | 10 | - | - | - | - | - | - | |||
|
A check in air clashes for when Duck has the height advantage. Duck can cancel this into j.214A for pressure; by jumping back and doing it instantly, he will have standing opponents blocking this sequence, and if it whiffs then all he's doing is jumping back. | ||||||||||||||
j.B
| Damage | Guard | Meter | Cancel | Startup | Active | Recovery | Total | Hit Adv | Block Adv | Properties | Invulnerability | |||
|---|---|---|---|---|---|---|---|---|---|---|---|---|---|---|
| 8 | High | 3 | Chain, Special | 5 | 8 | - | - | - | - | - | - | |||
|
An air-to-air and useful normal for advancing. Cancelling into j.214A is an option if you aren't too far out. | ||||||||||||||
j.C
| Damage | Guard | Meter | Cancel | Startup | Active | Recovery | Total | Hit Adv | Block Adv | Properties | Invulnerability | |||
|---|---|---|---|---|---|---|---|---|---|---|---|---|---|---|
| 24 | High | 5 | Special | 7 | 8 | - | - | - | - | - | - | |||
|
Duck's premier jump-in and bullying tool. You will need air turn to make this an effective crossup. | ||||||||||||||
nj.C
| Damage | Guard | Meter | Cancel | Startup | Active | Recovery | Total | Hit Adv | Block Adv | Properties | Invulnerability | |||
|---|---|---|---|---|---|---|---|---|---|---|---|---|---|---|
| 24 | High | 5 | Special | 7 | 6 | - | - | - | - | - | - | |||
|
A useful air-to-air. The fact it hits behind as well doesn't come into play much, but it does look pretty cool. | ||||||||||||||
h.A
| Damage | Guard | Meter | Cancel | Startup | Active | Recovery | Total | Hit Adv | Block Adv | Properties | Invulnerability |
|---|---|---|---|---|---|---|---|---|---|---|---|
| 6 | High | 3 | - | 4 | ∞ | - | - | - | - | - | - |
h.B
| Damage | Guard | Meter | Cancel | Startup | Active | Recovery | Total | Hit Adv | Block Adv | Properties | Invulnerability |
|---|---|---|---|---|---|---|---|---|---|---|---|
| 8 | High | 3 | - | 5 | ∞ | - | - | - | - | - | - |
h.C
| Damage | Guard | Meter | Cancel | Startup | Active | Recovery | Total | Hit Adv | Block Adv | Properties | Invulnerability |
|---|---|---|---|---|---|---|---|---|---|---|---|
| 24 | High | 5 | - | 7 | 8 | - | - | - | - | - | - |
nh.C
| Damage | Guard | Meter | Cancel | Startup | Active | Recovery | Total | Hit Adv | Block Adv | Properties | Invulnerability |
|---|---|---|---|---|---|---|---|---|---|---|---|
| 24 | High | 5 | - | 7 | 8 | - | - | - | - | - | - |
Command Normals
Slide Backfist
| Damage | Guard | Meter | Cancel | Startup | Active | Recovery | Total | Hit Adv | Block Adv | Properties | Invulnerability | |||
|---|---|---|---|---|---|---|---|---|---|---|---|---|---|---|
| 6 | Mid | 3 | Special | - | - | - | - | +1 | -1 | - | - | |||
|
A weirdly common thing some characters have. Has considerably worse frame advantage than st.A proper, but may be an option in pressure due to its high angle and forward movement. | ||||||||||||||
Terrestrial Duck Fake Out
| Damage | Guard | Meter | Cancel | Startup | Active | Recovery | Total | Hit Adv | Block Adv | Properties | Invulnerability | |||
|---|---|---|---|---|---|---|---|---|---|---|---|---|---|---|
| - | - | - | - | 8 | 21 | 6 | - | - | - | - | Strike: 8-29 | |||
|
An invincible slide which travels halfscreen, being vulnerable only to throws. Given its lack of collision box, Duck can even phase through an opponent if close enough. At midrange and beyond, this is a nifty tool for getting in, considering it also gives Duck plenty of time to buffer Break Spiral.
| ||||||||||||||
Overhead Axe Handle
| Damage | Guard | Meter | Cancel | Startup | Active | Recovery | Total | Hit Adv | Block Adv | Properties | Invulnerability | |||
|---|---|---|---|---|---|---|---|---|---|---|---|---|---|---|
| 24(13+13) | High | 3+3 | - | 16 | 1+5 | 19 | 40 | -1 | -3 | - | - | |||
Slide Kick
| Damage | Guard | Meter | Cancel | Startup | Active | Recovery | Total | Hit Adv | Block Adv | Properties | Invulnerability | |||
|---|---|---|---|---|---|---|---|---|---|---|---|---|---|---|
| 16 | Low | 5 | - | 7 | 15 | 13 | 34 | KD | -6 | SKD | - | |||
|
This slide has a reliable low profile and travels a decent distance, so it can serve as an anti-air if spaced right. Can be made safe with proper spacing. | ||||||||||||||
Ground Spin
| Damage | Guard | Meter | Cancel | Startup | Active | Recovery | Total | Hit Adv | Block Adv | Properties | Invulnerability | |||
|---|---|---|---|---|---|---|---|---|---|---|---|---|---|---|
| 16 | - | 5 | - | 8 | 31 | 20 | 58 | KD | - | HKD | - | |||
|
A pursuit which switches sides if there is room behind the opponent. As pursuits are typically designed, Duck loses advantage he could've used for positioning if he goes for this move. | ||||||||||||||
Defensive Attack
| Damage | Guard | Meter | Cancel | Startup | Active | Recovery | Total | Hit Adv | Block Adv | Properties | Invulnerability | |||
|---|---|---|---|---|---|---|---|---|---|---|---|---|---|---|
| 30(16+16) | Mid | 5 | Special | 7 | 10 | 16 | 32 | +4 | +2 | - | Upper: 1-16 | |||
|
Not the greatest range, but it's fast. | ||||||||||||||
Feint Duck Dance
| Damage | Guard | Meter | Cancel | Startup | Active | Recovery | Total | Hit Adv | Block Adv | Properties | Invulnerability | |||
|---|---|---|---|---|---|---|---|---|---|---|---|---|---|---|
| - | - | - | - | 1 | - | 65 | 65 | - | - | - | - | |||
|
You may get this on accident if you screw up Break Spiral, which is the absolute worst case scenario. Duck is stuck for over a second with no reward and there's nothing he can do. He's basically a sitting... you know. | ||||||||||||||
Chain Normals
(1) 5B
| Damage | Guard | Meter | Cancel | Startup | Active | Recovery | Total | Hit Adv | Block Adv | Properties | Invulnerability | |||
|---|---|---|---|---|---|---|---|---|---|---|---|---|---|---|
| 10 | Mid | 3 | Chain, Special | 5 | 3 | 12 | 19 | -1 | -3 | - | - | |||
|
This move serves as combo glue into your standing enders. It's basically st.B sans the properties which make it special yet situational. | ||||||||||||||
(1) 5B 5C
| Damage | Guard | Meter | Cancel | Startup | Active | Recovery | Total | Hit Adv | Block Adv | Properties | Invulnerability | |||
|---|---|---|---|---|---|---|---|---|---|---|---|---|---|---|
| 32 | Mid | 5 | - | 8 | 3+7 | - | - | KD | -1 | SKD | - | |||
(1) 5B 6C
| Damage | Guard | Meter | Cancel | Startup | Active | Recovery | Total | Hit Adv | Block Adv | Properties | Invulnerability | |||
|---|---|---|---|---|---|---|---|---|---|---|---|---|---|---|
| 22 | Mid | 3 | Special | 7/8 | 3/10 | 20/16 | 29/35 | +1/-2 | -1/-4 | - | - | |||
(1) (2) 2C
| Damage | Guard | Meter | Cancel | Startup | Active | Recovery | Total | Hit Adv | Block Adv | Properties | Invulnerability | |||
|---|---|---|---|---|---|---|---|---|---|---|---|---|---|---|
| 32 | Low | 5 | - | 7 | 3+(6)+3 | 20 | 38 | KD | -10 | SKD | - | |||
|
214B is a much better combo ender from two lows, but this won't get you killed as bad if you screw up the hit confirm. | ||||||||||||||
(1) (2) 3C
| Damage | Guard | Meter | Cancel | Startup | Active | Recovery | Total | Hit Adv | Block Adv | Properties | Invulnerability | |||
|---|---|---|---|---|---|---|---|---|---|---|---|---|---|---|
| 22 | Mid | 3 | Special | 5 | 2+6 | 20 | 32 | KD | -6 | SKD | - | |||
cr.C 2C
cr.C 2C 2C
cr.C 2C 2C 2369B
| Damage | Guard | Meter | Cancel | Startup | Active | Recovery | Total | Hit Adv | Block Adv | Properties | Invulnerability | |||
|---|---|---|---|---|---|---|---|---|---|---|---|---|---|---|
| 31(7+8*4) | Mid | 1+2+2+2+2 | - | 5 | 2+(12)+1+(2)+20 | 39 | 81 | KD | -32 | SKD | - | |||
|
Duck hates Terry's Rising Tackle, but his old Neo Break Storm clearly mirrors it. Deep, but there's a time and place for these things. Anyway, this chain builds a decent amount of meter, and unlike RB2's equivalent chain, Duck isn't stuck posing afterwards, so he has time to switch to the other line and go for mixups. A decent combo option if you ever get 2C to hit up close. | ||||||||||||||
Normal Throws
Slam Dunk
| Damage | Guard | Meter | Cancel | Startup | Active | Recovery | Total | Hit Adv | Block Adv | Properties | Invulnerability | |||
|---|---|---|---|---|---|---|---|---|---|---|---|---|---|---|
| 22 | - | - | - | 1 | 1 | - | 1 | KD | - | HKD | - | |||
|
An excellent throw due to the options Duck has after landing it. He is guaranteed a pursuit, but if he uses 214D instead, he will be positioned near-perfectly for a line mixup, and with plenty of wiggle room to spare. | ||||||||||||||
Neck Slam
| Damage | Guard | Meter | Cancel | Startup | Active | Recovery | Total | Hit Adv | Block Adv | Properties | Invulnerability | |||
|---|---|---|---|---|---|---|---|---|---|---|---|---|---|---|
| 20 | - | - | - | 1 | 1 | - | 1 | KD | - | HKD | - | |||
|
Can only be done from jumps. This is a decent option Duck has in air clashes, but he doesn't get advantage afterwards for any sort of mixup. | ||||||||||||||
Special Moves
Head Spin Attack
| Damage | Guard | Meter | Cancel | Startup | Active | Recovery | Total | Hit Adv | Block Adv | Properties | Invulnerability | |||
|---|---|---|---|---|---|---|---|---|---|---|---|---|---|---|
| 33 | Mid | 7 | - | 9 | 16 | 14 | 38 | 0 | -2 | - | - | |||
|
A Blanka Ball which shoots Duck halfscreen. Duck has a special recovery animation if he makes contact no matter when it hits, but as the frame data suggests it's always safe. This is a reliable pestering tool which Duck can afford to be unpredictable with, making it an essential part of his neutral and a low committal option overall. | ||||||||||||||
Rising Spin Attack
| Damage | Guard | Meter | Cancel | Startup | Active | Recovery | Total | Hit Adv | Block Adv | Properties | Invulnerability | |||
|---|---|---|---|---|---|---|---|---|---|---|---|---|---|---|
| 37(9+12+12+12) | Mid | 7 | - | 11 | 24 | 20 | 54 | -18 | -20 | - | - | |||
|
This roll goes fullscreen and leads to good damage, but once it hits — as the name suggests — Duck sails on an incline. This makes the move incredibly unsafe; however, there's a follow-up which saves it. | ||||||||||||||
Kick Away
| Damage | Guard | Meter | Cancel | Startup | Active | Recovery | Total | Hit Adv | Block Adv | Properties | Invulnerability | |||
|---|---|---|---|---|---|---|---|---|---|---|---|---|---|---|
| 7(9) | Mid | 0 | - | 4 | 6 | Landing+11 | Landing+20 | KD | -31 | SKD | - | |||
|
By pressing the C button twice in quick succession, Duck will tap off his enemy and fly away. The recovery afterwards is dreadful, but Duck is launched damn near fullscreen, which makes the move a little safer. It is safest to use this move ASAP, but you may want to delay it so you can get as many hits in with the roll as possible. Put together, this gives Duck his most damaging combo ender, but he isn't left with much advantage afterwards. | ||||||||||||||
Dancing Dive
Flying Spin Attack
| Damage | Guard | Meter | Cancel | Startup | Active | Recovery | Total | Hit Adv | Block Adv | Properties | Invulnerability | |||
|---|---|---|---|---|---|---|---|---|---|---|---|---|---|---|
| 33(13+13+13) | Mid | 7 | - | 7 | Up to 18 | 33 | Up to 57 | +2 | 0 | - | - | |||
|
A diveroll, if you can believe it. It isn't amazing, but has its uses in pressure and keeping Duck close, particularly when cancelled into from stray air normals. If Duck fails to make contact with the opponent and hits the floor, he will be stuck in a special (and very punishable) recovery animation, so you better make sure this hits! | ||||||||||||||
Neo Break Storm
| Damage | Guard | Meter | Cancel | Startup | Active | Recovery | Total | Hit Adv | Block Adv | Properties | Invulnerability | |||
|---|---|---|---|---|---|---|---|---|---|---|---|---|---|---|
| 35(7+7+8+8+14) | Low, Mid | 7 | - | 8 | 4+(1)+2+(5)+3+2+(3)+2+(5)+10 | 43 | 82 | KD | -51 | SKD, Juggle | - | |||
|
Duck's DP is geared for eating hops, but its range for other applications is flimsy. Like 214B, it also starts with a short kick which hits low, but at range this can sometimes push a grounded opponent out of the way for the rest of the move. Using this as an all-purpose reversal is not recommended by any means. | ||||||||||||||
Cross Head Spin
| Damage | Guard | Meter | Cancel | Startup | Active | Recovery | Total | Hit Adv | Block Adv | Properties | Invulnerability | |||
|---|---|---|---|---|---|---|---|---|---|---|---|---|---|---|
| 33(13+13+13) | Mid | 5 | - | 5 | 11 | 21/14 | 36/29 | -3 | -5 | - | - | |||
|
This move is lame when it actually hits, but when it comes to utility it's a gem. This is a line-switching move which tracks over to the opponent's current position and lands Duck close around there — a little further out the further he was to start, but close nonetheless. This movement serves to make Duck's vortex air-tight, but it can shine in neutral as well; despite being a line attack, the opponent's normals will not change to line normals while this move is active, meaning they have no means of punishing Duck while he's in the act. At best, he may have to block their plane check. Overall, the utility this move provides is a big factor in Duck's ability to play RBS well.
| ||||||||||||||
Aerial Duck Fake Out
| Damage | Guard | Meter | Cancel | Startup | Active | Recovery | Total | Hit Adv | Block Adv | Properties | Invulnerability | |||
|---|---|---|---|---|---|---|---|---|---|---|---|---|---|---|
| - | - | - | j.214A | 9 | 16 | Land+5 | Land+29 | - | - | - | Strike: 9-24 | |||
|
A nifty mobility option which halts Duck's air momentum completely for 24 frames, then lets him fall either forward, backward or straight down depending on which direction he's holding. The move has i-frames in the middle to facilitate it as a means of baiting anti-airs, although these sorts of moves in RBS tend not to be that stellar. For a means of counter-attack, he can cancel this into j.214A at any point during the active frames, which features the exact same properties as when performed raw. Duck cannot, however, use an air normal or other attack while falling. | ||||||||||||||
S.Power
Break Spiral
| Damage | Guard | Meter | Cancel | Startup | Active | Recovery | Total | Hit Adv | Block Adv | Properties | Invulnerability | |||
|---|---|---|---|---|---|---|---|---|---|---|---|---|---|---|
| 96 | - | - | - | 1 | 1 | - | 1 | KD | - | HKD | - | |||
|
Duck's fun and good command grab is just as scary here as it is in the other Real Bouts, considering he gets it for free on half health. The range is great and it's instant, making it useful as a punish tool in a pinch, but being a command grab its main purpose lies in its mixup potential. This is exacerbated by RBS's line system; if an opponent cashes out meter to tech roll with 412D, they are invincible while rolling to everything except command grabs on the lane they recover in. If Duck does 214D after landing 214B and sees his opponent tech roll, he can buffer Break Spiral pretty easily and make them hurt. The input is strict on every direction except the last down input, and you can't skip any directions. A relatively large wait can be used after the 6 or 9 input. It is possible to do this without a buffer, but it requires doing 92+B+C in two frames total. | ||||||||||||||
P.Power
Duck Dance
| Damage | Guard | Meter | Cancel | Startup | Active | Recovery | Total | Hit Adv | Block Adv | Properties | Invulnerability | |||
|---|---|---|---|---|---|---|---|---|---|---|---|---|---|---|
| - | - | 60 | - | 1 | 45/93/132/177 | 33/27/40/30 | 78/120/172/207 | - | - | - | Strike: Recovery | |||
|
Duck's S.Power is tubular, but his P.Power is wack. This is an install which requires Duck to stand still for upwards of a second to get extra moves. For successive levels, you need to keep holding ABC (i.e. never let go once you press them) past the thresholds listed in the Active section. Duck needs this animation to complete fully or else he doesn't get the install; the recovery frames (a different pose to indicate which level you have reached) are fully invincible to strikes to leverage this, but he is still vulnerable to throws. Suffice to say, this install is totally inappropriate for Duck as a rushdown character, but the waiting times being so long would bite him even if he was a zoner. The one upside to completing this P.Power (besides the new moves) is that, no matter which level you reach, your gauge will recover fully. The install will end if you either let the meter run out or use one of the new moves, which will also bring his meter down to zero. | ||||||||||||||
(Level 1) Diving Punisher
| Damage | Guard | Meter | Cancel | Startup | Active | Recovery | Total | Hit Adv | Block Adv | Properties | Invulnerability | |||
|---|---|---|---|---|---|---|---|---|---|---|---|---|---|---|
| 63(19+19+19+19) | Mid | - | - | 7 | Up to 18 | 20 | Up to 44 | -43 | +1 | - | Strike: 1-7 | |||
|
An enhanced version of air roll. The hit advantage seems dreadful, but Duck bounces off the opponent a great distance away if the move hits. On block, he doesn't rebound at all, and unlike the regular air roll there is no penalising animation if it hits the floor. | ||||||||||||||
(Level 1) Rolling Punisher
| Damage | Guard | Meter | Cancel | Startup | Active | Recovery | Total | Hit Adv | Block Adv | Properties | Invulnerability | |||
|---|---|---|---|---|---|---|---|---|---|---|---|---|---|---|
| 81(8*13) | Mid | - | - | 16 | 24 | 18 | 57 | -43 | +4 | - | - | |||
|
A huge burst of damage Duck can get from fullscreen. Like j.632BC, Duck is launched ways away on hit, making it much safer than the numbers suggest. | ||||||||||||||
(Level 2) Dancing Caliber
| Damage | Guard | Meter | Cancel | Startup | Active | Recovery | Total | Hit Adv | Block Adv | Properties | Invulnerability | |||
|---|---|---|---|---|---|---|---|---|---|---|---|---|---|---|
| 96(11*2+13*6+21) | Low, Mid | - | - | 7 | 5+(2)+2+(4)+2+2+(2)+2+(5)+2+2+(2)+2+(2)+9 | 41 | 92 | KD | -47 | HKD, Juggle | Strike: 1-18 | |||
(Level 3) Break Hurricane
| Damage | Guard | Meter | Cancel | Startup | Active | Recovery | Total | Hit Adv | Block Adv | Properties | Invulnerability | |||
|---|---|---|---|---|---|---|---|---|---|---|---|---|---|---|
| 108(14+17*2+18*5+13) | Low, Mid, Low, Mid | - | - | 3 | 3+(4)+11+(17)+4+(2)+2+(6)+3+3+(3)+3+(2)+8 | 49 | 122 | KD | -55 | HKD | Strike: 1-16 | |||
(Level 4) Beat Rush
| Damage | Guard | Meter | Cancel | Startup | Active | Recovery | Total | Hit Adv | Block Adv | Properties | Invulnerability | |||
|---|---|---|---|---|---|---|---|---|---|---|---|---|---|---|
| 112(10+11+13*7+30) | Mid | - | - | 19 | 24 | 41 | 83 | -39/+6/+8/-2/KD | -41 | HKD | - | |||
|
After wasting three and a half seconds charging your install and somehow not getting hit, you get... this. Beat Rush is way too slow to combo into it from anything, while its hitbox is just begging to be low profiled. You can link from most of the hits which is neat, but it's something you'll only ever see in training mode — and not because doing so is even that hard. Between hits 1 (63214C) and 10 (623C):
| ||||||||||||||
Chains
(0) - cl.A, st.A, cr.A
(1) - cl.A, st.A, cr.A, cl.B, cr.B
(2) - 5B, 2B
(3) - 5C, 6C, 2C, 3C
Special - cr.C 2C 2C 2369B, j.A j.B, j.A/j.B j.C
Chain paths courtesy of Goh_Billy:
cl.A -----> 5B -----> 5C
st.A                  6C
cr.A                  2C
cl.B                  3C
cr.B
    ------> 2B -----> 2C
                      3C

cr.C -----> 2C -----> 2C -----> 2369B

j.A ------> j.B

j.A/j.B --> j.C
Combos
NOTE: 214B can be substituted for 236236BC if Duck Dance Level 3 is unlocked.
cr.B cr.B 214B (47 damage) and cl.C 214B (55 damage) - Duck's BnBs. Go for pursuit if it will kill. On block, cancel into 236A instead for safety and a bit of space.
cr.C 2C 2C 2369B (56 damage) - You have enough time afterwards to 214D over to the other line and go fishing, but you can tack on extra damage with a pursuit in the corner.
(1) 5B 5C, p2C (50 damage) - Sideswitch combo. No mixup afterwards.
(1) 5B 6C 214D (59 damage) - Duck's most damaging chain combo. You can go for this if you want the damage, but it leaves you at -3 on hit!
(1) (2) 3C 623B (54 damage) - You're better off cancelling 3C into 214D to position yourself for line mixups. In the corner, you can land his pursuit for 12 extra damage. This will not cross over, but you will only be left at +1.
line.C 214B (48 damage) - Wait to see if your line crossup hits! You have a long time to hit confirm this move, which is crucial because 214B is death on block. Not only that, but if you wait, the first hit of 214B will connect if you're close enough, giving you more damage. After it hits, you have time to 214D over and try again.
j.C, j.C j.214A (72 damage) - A pressure sequence. The second j.C must be done ASAP, and it also must be a jump because hop normals cannot be special cancelled. Leaves you +2 on block.
(1) (2) 3C 21421BC (108 damage, corner) - Double the damage of the regular move, but 21421BC's vertical movement makes this corner-only.
63214C A A B A B, cl.C 236C CC (113 damage) - One point more damage than usual. Good luck ever landing this in a match.
Strategy
Although geared towards rushdown, Duck's neutral is most potent when he's at range; his 5C is a good poke, while 236A is great for constantly pelting the opponent with safe surprise attacks. The latter may provoke an opponent to switch lines, which lets them punish it or at least force Duck to block. Past midscreen, Duck also has room to perform 66 3C, which is fully invincible to strikes and is great for dealing with zoning; however, the way RBS's line system works generally discourages such a playstyle. Finally, Duck's air normals aren't great for zoning, but he can cancel them on contact into j.214A, letting him get in the opponent's face and go for mixups. Overall, Duck's neutral is limited but still troublesome.
Within midrange isn't a good spot for Duck, as most of his other normals have range problems or are otherwise not solid. Here, he will often lose to characters like Mai who not only have solid midrange tools, but who can segue them into lengthy bouts of pressure. Worth noting is that Duck's normals also mean he is not endowed with a great pressure game; he is designed around mixups, and his ways of forcing them inherently have holes. Duck is a comparatively less solid character for these reasons. On defense, his only special tool is 623B, which is angled to beat hops; however, its slow startup makes it flimsy at this, so Duck will either have to backdash away or hold it once caught.
Regardless, Duck's mixups are a strength — a valuable one to have in RBS, where cracking someone open can seem tough at times. Duck can land 214B from basic confirms, line checks and even as a Break Shot, and its knockdown gives him enough time to use 214D to get himself on the other line and position himself for a crossup. He can then press line.C, confirm which side he hit it on (or if it was blocked) and then act accordingly — usually into another 214B to keep the vortex going. 214D also has utility in neutral, considering it lets Duck switch lines without being able to get checked. Once Duck reaches low health or has meter, he gains access to 4123692BC: an instant command grab. Not only is this great for strike/throw and even as a punish tool, but it works wonderfully with his line abuse as a way to catch tech rolls; a feat made reliable given how 214D will let Duck meet the opponent on the same line they recover. You can also adjust yourself for a line crossup, but then go to the other line and grab them if they're focusing too much on which way to block. Duck's vortex is highly effective, but once blocked, he may have to bounce off with 236A to retreat, moving him back to square one. Cancelling into 214D again to keep the vortex going is an option, but you'll have to play with the timing so you don't just eat a line check.
Duck isn't too solid in neutral, but his vortex more than makes up for it, so learn the loop and get your groove on.


