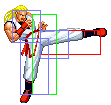
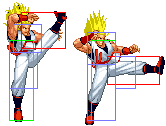
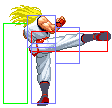
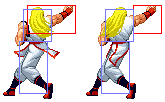
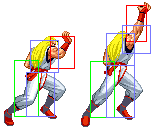
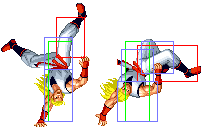
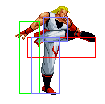
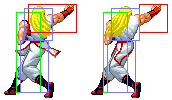
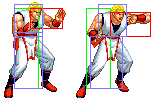
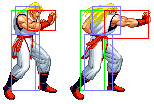
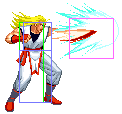
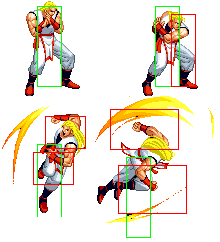
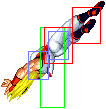
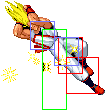
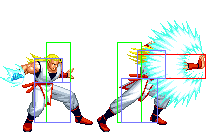
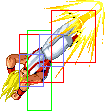
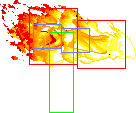
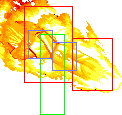
Andy's signature arc kick. This has utility on defense as an anti-air and his sole Break Shot, which it is quite effective at, but it can also be used to end combos.
Introduction
Andy is a shoto with a balance of neutral and offensive tools. He excels at midrange harassment, where he has a swift halfscreen fireball and a quick, safe rush move for closing in. For anti-airs, Andy has a DP with a generous hitbox, an arc kick and a dangerous S.Power. Though his normals have decent priority, they lack range, meaning Andy isn't especially geared towards pressure. Andy's game — like a ninja's — involves pestering the opponent outside their reach until an opportunity presents itself, wherein Andy has the tools and damage to zip in for his kill. If you enjoy an honest, solid game, then pick Andy and make the Shiranui clan proud.
Colors

|

|
Movelist
Command Normals
Special Moves
S.Power
P.Power
Normals
Close Normals
cl.A
| Damage | Guard | Meter | Cancel | Startup | Active | Recovery | Total | Hit Adv | Block Adv | Properties | Invulnerability | |||
|---|---|---|---|---|---|---|---|---|---|---|---|---|---|---|
| 7 | Mid | 6 | Chain, Special | 5 | 12 | 0 | 15 | +3 | -0 | - | - | |||
|
A chain stater which chains into itself, but whiffs on low crouchers. | ||||||||||||||
cl.B
| Damage | Guard | Meter | Cancel | Startup | Active | Recovery | Total | Hit Adv | Block Adv | Properties | Invulnerability | |||
|---|---|---|---|---|---|---|---|---|---|---|---|---|---|---|
| 9 | Mid | 3 | Chain, Special | 6 | 6 | 10 | 21 | -1 | -3 | - | - | |||
|
A decent poke which can pick up chains pretty easily. | ||||||||||||||
cl.C
| Damage | Guard | Meter | Cancel | Startup | Active | Recovery | Total | Hit Adv | Block Adv | Properties | Invulnerability | |||
|---|---|---|---|---|---|---|---|---|---|---|---|---|---|---|
| 26(14+14) | Mid | 3+3 | Special | 8 | 2+3 | 21 | 33 | +1 | -1 | - | - | |||
|
A heavy attack which hits twice. Fine for a burst of damage which can be cancelled into a special or DM. | ||||||||||||||
Standing Normals
st.A
| Damage | Guard | Meter | Cancel | Startup | Active | Recovery | Total | Hit Adv | Block Adv | Properties | Invulnerability | |||
|---|---|---|---|---|---|---|---|---|---|---|---|---|---|---|
| 7 | Mid | 3 | Chain, Special | 5 | 4 | 9 | 17 | +2 | -0 | - | - | |||
|
A quick jab with decent reach which can check hops. | ||||||||||||||
st.B
| Damage | Guard | Meter | Cancel | Startup | Active | Recovery | Total | Hit Adv | Block Adv | Properties | Invulnerability | |||
|---|---|---|---|---|---|---|---|---|---|---|---|---|---|---|
| 9 | Mid | 3 | Chain, Special | 6 | 5 | 11 | 21 | -1 | -3 | - | - | |||
|
A ranged poke which can also start chains and glue them together. | ||||||||||||||
st.C
| Damage | Guard | Meter | Cancel | Startup | Active | Recovery | Total | Hit Adv | Block Adv | Properties | Invulnerability | |||
|---|---|---|---|---|---|---|---|---|---|---|---|---|---|---|
| 26 | Mid | 5 | - | 8 | 6 | 21 | 34 | -2 | -4 | - | - | |||
|
Deals good damage and reaches a little further than st.A. | ||||||||||||||
Crouching Normals
cr.A
| Damage | Guard | Meter | Cancel | Startup | Active | Recovery | Total | Hit Adv | Block Adv | Properties | Invulnerability | |||
|---|---|---|---|---|---|---|---|---|---|---|---|---|---|---|
| 7 | Mid | 3 | Chain, Special | 5 | 5 | 8 | 17 | +2 | 0 | - | - | |||
|
A chain starter which goes into itself and hits crouchers. | ||||||||||||||
cr.B
| Damage | Guard | Meter | Cancel | Startup | Active | Recovery | Total | Hit Adv | Block Adv | Properties | Invulnerability | |||
|---|---|---|---|---|---|---|---|---|---|---|---|---|---|---|
| 9 | Low | 3 | Chain, Special | 6 | 6 | 10 | 21 | -1 | -3 | - | - | |||
|
A light low attack which also leads into chains. | ||||||||||||||
cr.C
| Damage | Guard | Meter | Cancel | Startup | Active | Recovery | Total | Hit Adv | Block Adv | Properties | Invulnerability | |||
|---|---|---|---|---|---|---|---|---|---|---|---|---|---|---|
| 26 | Low | 5 | Special | 8 | 6 | 21 | 34 | KD | -4 | - | - | |||
|
A sweep which reaches quite far for Andy. Cancel it into Zanei Ken to keep pressure going. | ||||||||||||||
Line Attacks
linebg.A
| Damage | Guard | Meter | Cancel | Startup | Active | Recovery | Total | Hit Adv | Block Adv | Properties | Invulnerability | |||
|---|---|---|---|---|---|---|---|---|---|---|---|---|---|---|
| 9 | Mid | 3 | - | 13 | 5 | 13 | 30 | -1 | -3 | - | - | |||
|
A light jab which targets the opposite line. Whiffs on crouching opponents. | ||||||||||||||
linefg.A
| Damage | Guard | Meter | Cancel | Startup | Active | Recovery | Total | Hit Adv | Block Adv | Properties | Invulnerability | |||
|---|---|---|---|---|---|---|---|---|---|---|---|---|---|---|
| 9 | Mid | 3 | - | 13 | 5 | 11 | 28 | -1 | -3 | - | - | |||
|
A light jab which targets the opposite line. Whiffs on crouching opponents. | ||||||||||||||
linebg.B
| Damage | Guard | Meter | Cancel | Startup | Active | Recovery | Total | Hit Adv | Block Adv | Properties | Invulnerability | |||
|---|---|---|---|---|---|---|---|---|---|---|---|---|---|---|
| 18 | High | 5 | - | 13 | 6 | 21 | 39 | -2 | -4 | - | - | |||
|
Targets the opposite line and hits overhead. | ||||||||||||||
linefg.B
| Damage | Guard | Meter | Cancel | Startup | Active | Recovery | Total | Hit Adv | Block Adv | Properties | Invulnerability | |||
|---|---|---|---|---|---|---|---|---|---|---|---|---|---|---|
| 18 | High | 5 | - | 13 | 6 | 21 | 39 | -2 | -4 | - | - | |||
|
Targets the opposite line and hits overhead. | ||||||||||||||
linebg.C
| Damage | Guard | Meter | Cancel | Startup | Active | Recovery | Total | Hit Adv | Block Adv | Properties | Invulnerability | |||
|---|---|---|---|---|---|---|---|---|---|---|---|---|---|---|
| 18 | Mid | 5 | Special | 8 | 5 | 21 | 33 | -1 | -3 | - | - | |||
|
Tool for punishing plane shifts. Cancel this into a special or P.Power to tack on extra damage. | ||||||||||||||
linefg.C
| Damage | Guard | Meter | Cancel | Startup | Active | Recovery | Total | Hit Adv | Block Adv | Properties | Invulnerability | |||
|---|---|---|---|---|---|---|---|---|---|---|---|---|---|---|
| 18 | Mid | 5 | Special | 6 | 2+5 | 21 | 33 | -3 | -5 | - | - | |||
|
Tool for punishing plane shifts. Cancel this into a special or P.Power to tack on extra damage. | ||||||||||||||
linebgcr.C
| Damage | Guard | Meter | Cancel | Startup | Active | Recovery | Total | Hit Adv | Block Adv | Properties | Invulnerability | |||
|---|---|---|---|---|---|---|---|---|---|---|---|---|---|---|
| 18 | Low | 5 | Special | 8 | 2+3 | 21 | 33 | KD | -3 | - | - | |||
|
A sweep that hits the opposite line. | ||||||||||||||
linefgcr.C
| Damage | Guard | Meter | Cancel | Startup | Active | Recovery | Total | Hit Adv | Block Adv | Properties | Invulnerability | |||
|---|---|---|---|---|---|---|---|---|---|---|---|---|---|---|
| 18 | Low | 5 | Special | 4 | 4+5 | 21 | 33 | KD | -7 | - | - | |||
|
A sweep that hits the opposite line. | ||||||||||||||
Jumping Attacks
j.A
| Damage | Guard | Meter | Cancel | Startup | Active | Recovery | Total | Hit Adv | Block Adv | Properties | Invulnerability | |||
|---|---|---|---|---|---|---|---|---|---|---|---|---|---|---|
| 7 | High | 3 | Chain | 5 | 8 | - | 12 | - | - | - | - | |||
|
A light jumping attack with a slight downward angle hitbox. It can be chained into 5B or 5C while in the air. | ||||||||||||||
j.B
| Damage | Guard | Meter | Cancel | Startup | Active | Recovery | Total | Hit Adv | Block Adv | Properties | Invulnerability | |||
|---|---|---|---|---|---|---|---|---|---|---|---|---|---|---|
| 9 | High | 3 | Chain | 6 | 6 | - | 11 | - | - | - | - | |||
|
Andy's deepest jumping attack. On tall crouchers such as Krauser, you can use this as an instant overhead, though at the health ranges you'd be fishing to kill with it this move will do peanuts. | ||||||||||||||
j.C
| Damage | Guard | Meter | Cancel | Startup | Active | Recovery | Total | Hit Adv | Block Adv | Properties | Invulnerability | |||
|---|---|---|---|---|---|---|---|---|---|---|---|---|---|---|
| 26 | High | 5 | - | 8 | 8 | - | 15 | - | - | - | - | |||
|
Designed chiefly as an air-to-air, given its jump-in hitbox is rather shallow but its horizontal range is good. | ||||||||||||||
nj.C
| Damage | Guard | Meter | Cancel | Startup | Active | Recovery | Total | Hit Adv | Block Adv | Properties | Invulnerability | |||
|---|---|---|---|---|---|---|---|---|---|---|---|---|---|---|
| 26 | High | 5 | - | 8 | 6 | - | 13 | - | - | - | - | |||
|
Solid air-to-air option but even more shallow than j.C. | ||||||||||||||
hop.A
| Damage | Guard | Meter | Cancel | Startup | Active | Recovery | Total | Hit Adv | Block Adv | Properties | Invulnerability | |||
|---|---|---|---|---|---|---|---|---|---|---|---|---|---|---|
| 7 | High | 3 | - | 5 | ∞ | - | ∞-4 | - | - | - | - | |||
|
| ||||||||||||||
hop.B
| Damage | Guard | Meter | Cancel | Startup | Active | Recovery | Total | Hit Adv | Block Adv | Properties | Invulnerability | |||
|---|---|---|---|---|---|---|---|---|---|---|---|---|---|---|
| 9 | High | 3 | - | 6 | ∞ | - | ∞-5 | - | - | - | - | |||
|
| ||||||||||||||
hop.C
| Damage | Guard | Meter | Cancel | Startup | Active | Recovery | Total | Hit Adv | Block Adv | Properties | Invulnerability | |||
|---|---|---|---|---|---|---|---|---|---|---|---|---|---|---|
| 26 | High | - | 5 | 8 | 8 | - | 15 | - | - | - | - | |||
|
| ||||||||||||||
nhop.C
| Damage | Guard | Meter | Cancel | Startup | Active | Recovery | Total | Hit Adv | Block Adv | Properties | Invulnerability | |||
|---|---|---|---|---|---|---|---|---|---|---|---|---|---|---|
| 26 | High | 5 | - | 8 | 8 | - | 15 | - | - | - | - | |||
|
| ||||||||||||||
Command Normals
Slide Palm
| Damage | Guard | Meter | Cancel | Startup | Active | Recovery | Total | Hit Adv | Block Adv | Properties | Invulnerability | |||
|---|---|---|---|---|---|---|---|---|---|---|---|---|---|---|
| 7 | Mid | 3 | Special | 5 | 4 | 9 | 17 | +2 | 0 | - | - | |||
|
A dashing high poke which can apply pressure. | ||||||||||||||
Rising Palm
| Damage | Guard | Meter | Cancel | Startup | Active | Recovery | Total | Hit Adv | Block Adv | Properties | Invulnerability | |||
|---|---|---|---|---|---|---|---|---|---|---|---|---|---|---|
| 18 | Mid | 5 | Chain, Special | 7 | 2+9 | 21 | 38 | -7 | -9 | - | - | |||
|
Angled as an anti-air and has decent priority on the second phase. It has additional utility on the ground in being able to lead into a special chain. | ||||||||||||||
Falling Roll Kick
| Damage | Guard | Meter | Cancel | Startup | Active | Recovery | Total | Hit Adv | Block Adv | Properties | Invulnerability | |||
|---|---|---|---|---|---|---|---|---|---|---|---|---|---|---|
| 18 | Mid | 5 | - | 12 | 2+3 | 21 | 37 | -1 | -3 | - | - | |||
|
An advancing attack with high priority. Decent for an anti-air and safe as a poke, but risky to miss. | ||||||||||||||
Defensive Attack
| Damage | Guard | Meter | Cancel | Startup | Active | Recovery | Total | Hit Adv | Block Adv | Properties | Invulnerability | |||
|---|---|---|---|---|---|---|---|---|---|---|---|---|---|---|
| 18 | Mid | 5 | Special | 8 | 6+3 | 18 | 34 | Reset | -4 | - | Upper | |||
|
Good against shallow jump-ins. Has long horizontal reach as well. | ||||||||||||||
Feint Zan Ei Ken
| Damage | Guard | Meter | Cancel | Startup | Active | Recovery | Total | Hit Adv | Block Adv | Properties | Invulnerability | |||
|---|---|---|---|---|---|---|---|---|---|---|---|---|---|---|
| - | - | - | - | 1 | - | 33 | 34 | - | - | - | - | |||
|
Fakes an elbow special. Try crouching to sell the fake. | ||||||||||||||
Feint Hi Sho Ken
| Damage | Guard | Meter | Cancel | Startup | Active | Recovery | Total | Hit Adv | Block Adv | Properties | Invulnerability | |||
|---|---|---|---|---|---|---|---|---|---|---|---|---|---|---|
| - | - | - | - | 1 | - | 16 | 17 | - | - | - | - | |||
|
A fireball fake. This one sells itself with the 2/ | ||||||||||||||
Feint Cho Reppa Dan
| Damage | Guard | Meter | Cancel | Startup | Active | Recovery | Total | Hit Adv | Block Adv | Properties | Invulnerability | |||
|---|---|---|---|---|---|---|---|---|---|---|---|---|---|---|
| - | - | - | - | 1 | - | 33 | 34 | - | - | - | - | |||
|
A DM fake. This one could be sold by holding down for less than a second, returning to neutral and then performing the command. Useful to remind your opponent you have infinite DMs under 50% life. | ||||||||||||||
Chain Normals
(1) (2) 2C
| Damage | Guard | Meter | Cancel | Startup | Active | Recovery | Total | Hit Adv | Block Adv | Properties | Invulnerability | |||
|---|---|---|---|---|---|---|---|---|---|---|---|---|---|---|
| 35 | Low | 3 | - | 8 | 6 | 20 | 33 | KD | -4 | - | - | |||
|
Uses cr.C's hitboxes and accomplishes much of the same, but is not cancellable. | ||||||||||||||
(1) (2) 3C
| Damage | Guard | Meter | Cancel | Startup | Active | Recovery | Total | Hit Adv | Block Adv | Properties | Invulnerability | |||
|---|---|---|---|---|---|---|---|---|---|---|---|---|---|---|
| 24 | Mid | 3 | Special | 6 | 2+3 | 21 | 31 | KD | -3 | - | - | |||
|
A launcher which combos out of crouching attacks. Follow up with DP or Kuhadan. | ||||||||||||||
(1) 5B 5C
| Damage | Guard | Meter | Cancel | Startup | Active | Recovery | Total | Hit Adv | Block Adv | Properties | Invulnerability | |||
|---|---|---|---|---|---|---|---|---|---|---|---|---|---|---|
| 35 | Mid | 5 | - | 8 | 6 | 21 | 34 | KD | -4 | SKD | - | |||
|
Chain finisher ending in a knockdown. Not ideal for damage, but it is fairly safe. | ||||||||||||||
bg.(1) 5B 6C
| Damage | Guard | Meter | Cancel | Startup | Active | Recovery | Total | Hit Adv | Block Adv | Properties | Invulnerability | |||
|---|---|---|---|---|---|---|---|---|---|---|---|---|---|---|
| 15 | Mid | 3 | Chain | 8 | 6 | 21 | 34 | -2 | -4 | - | - | |||
|
Sends the opponent to the opposite line, but only on hit. | ||||||||||||||
bg.(1) 5B 6C 4C
| Damage | Guard | Meter | Cancel | Startup | Active | Recovery | Total | Hit Adv | Block Adv | Properties | Invulnerability | |||
|---|---|---|---|---|---|---|---|---|---|---|---|---|---|---|
| 15 | Mid | 3 | Special | 9 | 5 | 21 | 34 | -1 | -3 | - | - | |||
|
Andy's cash cow when it comes to damage. | ||||||||||||||
fg.(1) 5B 6C
| Damage | Guard | Meter | Cancel | Startup | Active | Recovery | Total | Hit Adv | Block Adv | Properties | Invulnerability | |||
|---|---|---|---|---|---|---|---|---|---|---|---|---|---|---|
| 15 | Mid | 3 | Chain | 8 | 3 | 21 | 31 | +2 | -1 | - | - | |||
|
Sends the opponent to the opposite line, but only on hit. | ||||||||||||||
fg.(1) 5B 6C
| Damage | Guard | Meter | Cancel | Startup | Active | Recovery | Total | Hit Adv | Block Adv | Properties | Invulnerability | |||
|---|---|---|---|---|---|---|---|---|---|---|---|---|---|---|
| 15 | Mid | 3 | Special | 6 | 2+4 | 21 | 32 | -3 | -5 | - | - | |||
|
Andy's cash cow when it comes to damage. | ||||||||||||||
3A 5C
| Damage | Guard | Meter | Cancel | Startup | Active | Recovery | Total | Hit Adv | Block Adv | Properties | Invulnerability | |||
|---|---|---|---|---|---|---|---|---|---|---|---|---|---|---|
| 10 | Mid | 3 | Chain | 4 | 2+8 | 8 | 19 | -1 | -3 | - | - | |||
|
Andy's first rekka. | ||||||||||||||
3A 5C 5C
| Damage | Guard | Meter | Cancel | Startup | Active | Recovery | Total | Hit Adv | Block Adv | Properties | Invulnerability | |||
|---|---|---|---|---|---|---|---|---|---|---|---|---|---|---|
| 10 | Mid | 3 | Chain | 4 | 2+3 | 13 | 21 | 0 | -1 | - | - | |||
|
Andy's second rekka. | ||||||||||||||
3A 5C 5C 5C
| Damage | Guard | Meter | Cancel | Startup | Active | Recovery | Total | Hit Adv | Block Adv | Properties | Invulnerability | |||
|---|---|---|---|---|---|---|---|---|---|---|---|---|---|---|
| 10 | Mid | 3 | Chain | 4 | 2+8 | 8 | 21 | +1 | -3 | - | - | |||
|
Andy's third rekka with identical hitboxes to the first. | ||||||||||||||
3A 5C 5C 5C 6C
| Damage | Guard | Meter | Cancel | Startup | Active | Recovery | Total | Hit Adv | Block Adv | Properties | Invulnerability | |||
|---|---|---|---|---|---|---|---|---|---|---|---|---|---|---|
| 24 | Mid | 5 | - | 8 | 6 | 21 | 34 | KD | -4 | SKD | - | |||
|
Andy's rekka finisher. | ||||||||||||||
Normal Throws
Uchimata
| Damage | Guard | Meter | Cancel | Startup | Active | Recovery | Total | Hit Adv | Block Adv | Properties | Invulnerability | |||
|---|---|---|---|---|---|---|---|---|---|---|---|---|---|---|
| 24 | - | - | - | 1 | 1 | - | 1 | KD | - | HKD | - | |||
|
Throws the opponent behind Andy and gives him plenty of time to position himself. | ||||||||||||||
Special Moves
Hi Sho Ken
| Damage | Guard | Meter | Cancel | Startup | Active | Recovery | Total | Hit Adv | Block Adv | Properties | Invulnerability | |||
|---|---|---|---|---|---|---|---|---|---|---|---|---|---|---|
| 16 | Mid | 5 | - | 12 | - | - | - | -4 | -6 | Projectile | - | |||
|
A fireball which dissipates about three quarters of the screen away. This isn't for hard zoning by any means, but its brisk startup lets Andy pressure from his ideal range. | ||||||||||||||
Shoryudan
| Damage | Guard | Meter | Cancel | Startup | Active | Recovery | Total | Hit Adv | Block Adv | Properties | Invulnerability | |||
|---|---|---|---|---|---|---|---|---|---|---|---|---|---|---|
| 35(7+12+12+12) | Mid | 7 | - | 4 | 2+3+3+3+3+4 | 45 | 66 | KD | -30 | SKD, Juggle | Full: 1-16 | |||
|
Invincible DP ideal for anti-airs. Also has its uses in juggles. | ||||||||||||||
Zanei Ken
| Damage | Guard | Meter | Cancel | Startup | Active | Recovery | Total | Hit Adv | Block Adv | Properties | Invulnerability | |||
|---|---|---|---|---|---|---|---|---|---|---|---|---|---|---|
| 35/37 | Mid | 7 | -/Special | 10/11 | 11/17 | 5/20 | 25/47 | +1/-1 | -1/-3 | - | - | |||
|
Andy's signature elbow move. A version is good for pressure, while C is better for combos. | ||||||||||||||
Shippuu Uraken
| Damage | Guard | Meter | Cancel | Startup | Active | Recovery | Total | Hit Adv | Block Adv | Properties | Invulnerability | |||
|---|---|---|---|---|---|---|---|---|---|---|---|---|---|---|
| 7 | Mid | 0 | - | 6 | - | - | 47 | KD | -18 | SKD | - | |||
|
Only comes out if the strong version made contact. Very unsafe on block and will not work on an airborne opponent, so only use this if you've confirmed Zanei Ken from a combo. | ||||||||||||||
Kuhadan
Explosion Quake
| Damage | Guard | Meter | Cancel | Startup | Active | Recovery | Total | Hit Adv | Block Adv | Properties | Invulnerability | |||
|---|---|---|---|---|---|---|---|---|---|---|---|---|---|---|
| 41(22+21) | Mid | 7 | - | 19 | 15 | 17 | 50 | KD | -7 | SKD | - | |||
|
A halfscreen-advancing hitgrab which spaces Andy and his opponent a screen apart after the hit. Outclassed by Zan Ei Ken into Shippuu Uraken, which ends up dealing more damage in combos while giving more of an advantage, but it's only really useful for combos given the startup is poor. Unlike the other sequence, however, this move's follow-up will land even if the opponent was jumping. | ||||||||||||||
S.Power
Choreppa Dan
| Damage | Guard | Meter | Cancel | Startup | Active | Recovery | Total | Hit Adv | Block Adv | Properties | Invulnerability | |||
|---|---|---|---|---|---|---|---|---|---|---|---|---|---|---|
| 86(17+17+17+58) | Mid | 0 | - | 19 | 13+3+12 | 31 | 67 | KD | -9 | HKD | - | |||
P.Power
Zanei Reppa
| Damage | Guard | Meter | Cancel | Startup | Active | Recovery | Total | Hit Adv | Block Adv | Properties | Invulnerability | |||
|---|---|---|---|---|---|---|---|---|---|---|---|---|---|---|
| 100(20+11+11+11+11+11+52) | Mid | 0 | - | 10 | 11(15)9+5+7+16 | 32 | 104 | KD | -11 | HKD | - | |||
Chains
(0) - cl.A, st.A, cr.A
(1) - cl.A, st.A, cr.A, cl.B, st.B, cr.B
(2) - 5B, 2B
(3) - 5C, 6C 4C, 2C, 3C
Special - 3A 5C 5C 5C 6C, j.A j.B, j.A/j.B j.C
Chain paths courtesy of Goh_Billy:
cl.A -----> 5B -----> 6C -----> 4C
st.A |      2B        5C
cr.A |                2C
     |                3C
     |
     -----> 2B -----> 2C
                      3C

3A -------> 5C -----> 5C -----> 5C -----> 6C

j.A ------> 5B
            5C

cl.B -----> 5B -----> 6C -----> 4C
st.B |      2B        5C
cr.B |                2C
     |                3C
     |
     -----> 2B -----> 2C
                      3C

j.A ------> j.B

j.A/j.B --> j.C
Combos
3A 5C 5C 5C 6C (58 damage) - Andy's Rising Palm chain deals decent damage, but nothing special.
(1) (2) 3C 623C/41236B (63/51 damage) - 623C deals much more damage, but 41236B gives you much better advantage afterwards.
(1) 5B 6C 4C 16C 16C (73 damage) - Using 16C 16C deals more damage by a hair than 41236C while giving Andy a good knockdown afterwards for positioning.
(0) (0) (0) 5B 6C 4C 16C 16C (81 damage, corner) - cl.A and cr.A can chain into themselves, but the window is tight.
(1) 5B 6C 4C 41236C (134 damage) - Got P.Power? Use this combo and delete their health bar!
Strategy
Andy spends most of the game harassing with 214A. It is a fast fireball with very good frame data, but it reaches short of fullscreen; rather than for straight zoning, which isn't amazing in RBS anyway, Andy stands at midrange and uses it to poke, poke, poke. The range Andy pokes at is also great for letting him react to his opponent's counterplay. 623C, 41236B and [2]36BC are all excellent anti-airs, while j.C and nj.C both hit prime air-to-air angles. 3A and 6B can also deal with jump-ins, but their ranges are more specific. Andy's line checks are serviceable and can combo into 16C~16C for a knockdown, letting Andy position himself again to throw fireballs. Finally, Andy can punish his opponents' risks by punishing with 16A/C, which is fast and not terrible on block in case he fails the punish. To layer this gameplan, Andy can throw in numerous feints; either this will spark a reaction or the opponent will second guess themselves into not reacting, thus forcing them to hold more fireballs.
Andy isn't amazing up close. He has solid damage potential with his 6C~4C ender and reliable pickups from st.B, but his j.C is shallow and he can't really position himself well for line abuse. Sometimes he may have to go up close for his damage, but he is not built around playing up-close. If he is in the opponent's face, he more often than not needs to get back to fireball range, which is where he is most effective. He can do this with a backdash on its own, or he can get a knockdown from a reversal, Break Shot 41236B, a decent combo or a sweep. Getting a knockdown is obviously much trickier, but it invariably pushes his opponent forward, which is crucial. If Andy is cornered, there is no midrange for him to retreat to.
Andy's game is lame but competent. You better enjoy throwing fireballs, because that's what Andy does and he does it well.
