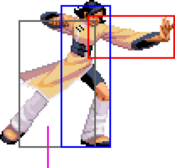
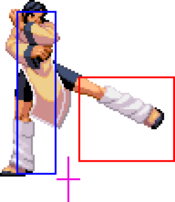
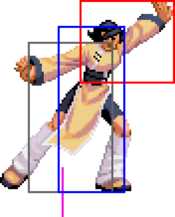
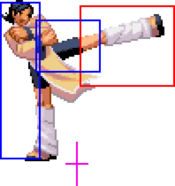
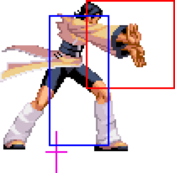
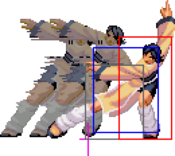
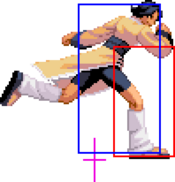
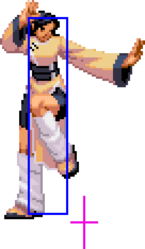
m (added video) |
mNo edit summary |
||
| (7 intermediate revisions by 2 users not shown) | |||
| Line 1: | Line 1: | ||
{{Character Subnav ROTD|name=Lynn}} | {{Character Subnav ROTD|name=Lynn}} | ||
<center>'''Move List Showcase''' <br> | <center>'''Move List Showcase''' <br> | ||
<youtube>GEV-guguZjA</youtube></center> | <youtube>GEV-guguZjA</youtube></center> | ||
===Impact=== | ==Movelist== | ||
====Impact==== | |||
[[File:Snka.gif]][[File:Snka.gif]][[File:Snka.gif]][[File:Snkc.gif]][[File:Snkc.gif]] | |||
''(Air)'' [[File:Snka.gif]][[File:Snka.gif]][[File:Snka.gif]][[File:Snkc.gif]][[File:Snkc.gif]] | |||
====Command Normals==== | |||
{{f}}[[File:Snka.gif]] | |||
''(Air)'' {{b}}[[File:Snkb.gif]] | |||
===Special Moves=== | ====Special Moves==== | ||
{{hcb}}[[File:Snka.gif]]/[[File:Snkc.gif]] - Enrenken | |||
{{qcf}}[[File:Snka.gif]]/[[File:Snkc.gif]] - Kouryuu Shouzan Ha | |||
{{dp}}[[File:Snka.gif]]/[[File:Snkc.gif]]~{{qcf}}[[File:Snkb.gif]]/[[File:Snkd.gif]]~[[File:Snkb.gif]]/[[File:Snkd.gif]] - Ryuuenhou | |||
: | |||
{{qcf}}[[File:Snkb.gif]]/[[File:Snkd.gif]] - Kouryuu Kyaku | |||
: | |||
====Super Moves==== | |||
: | {{qcb}}{{hcf}}[[File:Snkb.gif]]/[[File:Snkd.gif]] - Kouryuuken Ougi Hiryuu | ||
=== | |||
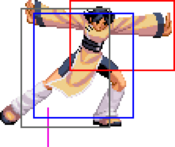
'''Kouryuu | ==Close Normals== | ||
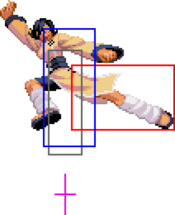
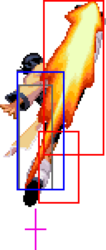
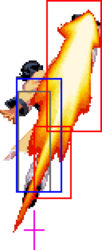
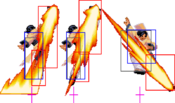
: Good anti-air, but can miss opponents above Lynn's head. The heavy version | {{MoveData | ||
|image=ROTD_Lynn_clA.png | |||
|caption= | |||
|name=cl.A | |||
|data= | |||
{{AttackData-ROTD | |||
|Damage=6 | |||
|Guard=Mid | |||
|Stun=2 | |||
|Cancel=Chain, Command, Special | |||
|Startup=4 | |||
|Active=2 | |||
|Recovery=7 | |||
|Adv. Hit=+2 | |||
|Adv. Guard=+1 | |||
|description= | |||
}} | |||
}} | |||
{{MoveData | |||
|image=ROTD_Lynn_clB.png | |||
|caption= | |||
|name=cl.B | |||
|data= | |||
{{AttackData-ROTD | |||
|Damage=8 | |||
|Guard=Mid | |||
|Stun=4 | |||
|Cancel=Command, Special | |||
|Startup=5 | |||
|Active=2 | |||
|Recovery=8 | |||
|Adv. Hit=+1 | |||
|Adv. Guard=0 | |||
|description= | |||
}} | |||
}} | |||
{{MoveData | |||
|image=ROTD_Lynn_clC.png | |||
|caption= | |||
|name=cl.C | |||
|data= | |||
{{AttackData-ROTD | |||
|Damage=16 | |||
|Guard=Mid | |||
|Stun=8 | |||
|Cancel=Command, Special | |||
|Startup=6 | |||
|Active=2 | |||
|Recovery=12 | |||
|Adv. Hit=+2/+5 | |||
|Adv. Guard=-1 | |||
|description= | |||
}} | |||
}} | |||
{{MoveData | |||
|image=ROTD_Lynn_clD.png | |||
|caption= | |||
|name=cl.D | |||
|data= | |||
{{AttackData-ROTD | |||
|Damage=18 | |||
|Guard=Mid | |||
|Stun=10 | |||
|Cancel=Command, Special | |||
|Startup=6 | |||
|Active=2 | |||
|Recovery=15 | |||
|Adv. Hit=-1/+2 | |||
|Adv. Guard=-4 | |||
|description= | |||
}} | |||
}} | |||
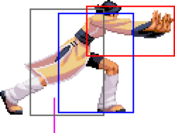
==Standing Normals== | |||
{{MoveData | |||
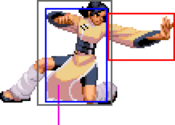
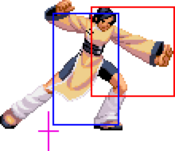
|image=ROTD_Lynn_stA.png | |||
|caption= | |||
|name=st.A | |||
|data= | |||
{{AttackData-ROTD | |||
|Damage=8 | |||
|Guard=Mid | |||
|Stun=2 | |||
|Cancel=Chain, Command, Special | |||
|Startup=4 | |||
|Active=2 | |||
|Recovery=10 | |||
|Adv. Hit=-1 | |||
|Adv. Guard=-2 | |||
|description= | |||
}} | |||
}} | |||
{{MoveData | |||
|image=ROTD_Lynn_stB.png | |||
|caption= | |||
|name=st.B | |||
|data= | |||
{{AttackData-ROTD | |||
|Damage=10 | |||
|Guard=Mid | |||
|Stun=5 | |||
|Cancel= | |||
|Startup=5 | |||
|Active=2 | |||
|Recovery=13 | |||
|Adv. Hit=-4 | |||
|Adv. Guard=-5 | |||
|description= | |||
}} | |||
}} | |||
{{MoveData | |||
|image=ROTD_Lynn_stC.png | |||
|caption= | |||
|name=st.C | |||
|data= | |||
{{AttackData-ROTD | |||
|Damage=18 | |||
|Guard=Mid | |||
|Stun=10 | |||
|Cancel= | |||
|Startup=11 | |||
|Active=3 | |||
|Recovery=19 | |||
|Adv. Hit=-3 | |||
|Adv. Guard=-9 | |||
|description= | |||
}} | |||
}} | |||
{{MoveData | |||
|image=ROTD_Lynn_stD.png | |||
|caption= | |||
|name=st.D | |||
|data= | |||
{{AttackData-ROTD | |||
|Damage=20 | |||
|Guard=Mid | |||
|Stun=12 | |||
|Cancel= | |||
|Startup=11 | |||
|Active=2 | |||
|Recovery=21 | |||
|Adv. Hit=-7/-4 | |||
|Adv. Guard=-10 | |||
|description= | |||
}} | |||
}} | |||
==Crouching Normals== | |||
{{MoveData | |||
|image=ROTD_Lynn_crA.png | |||
|caption= | |||
|name=cr.A | |||
|data= | |||
{{AttackData-ROTD | |||
|Damage=6 | |||
|Guard=Mid | |||
|Stun=2 | |||
|Cancel=Chain, Command, Special | |||
|Startup=4 | |||
|Active=2 | |||
|Recovery=9 | |||
|Adv. Hit=0 | |||
|Adv. Guard=-1 | |||
|description= | |||
}} | |||
}} | |||
{{MoveData | |||
|image=ROTD_Lynn_crB.png | |||
|caption= | |||
|name=cr.B | |||
|data= | |||
{{AttackData-ROTD | |||
|Damage=8 | |||
|Guard=Low | |||
|Stun=4 | |||
|Cancel=Command, Special | |||
|Startup=4 | |||
|Active=2 | |||
|Recovery=6 | |||
|Adv. Hit=+3 | |||
|Adv. Guard=+2 | |||
|description= | |||
}} | |||
}} | |||
{{MoveData | |||
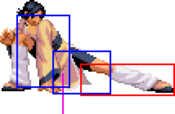
|image=ROTD_Lynn_crC.png | |||
|caption= | |||
|name=cr.C | |||
|data= | |||
{{AttackData-ROTD | |||
|Damage=16 | |||
|Guard=Mid | |||
|Stun=8 | |||
|Cancel=Command, Special | |||
|Startup=5 | |||
|Active=2 | |||
|Recovery=12 | |||
|Adv. Hit=+5 | |||
|Adv. Guard=-1 | |||
|description=Long-ranged cancel option essential to her fireball pressure. Also sports a decent hitbox to catch opponents jumping out. | |||
}} | |||
}} | |||
{{MoveData | |||
|image=ROTD_Lynn_crD.png | |||
|caption= | |||
|name=cr.D | |||
|data= | |||
{{AttackData-ROTD | |||
|Damage=20 | |||
|Guard=Low | |||
|Stun=15 | |||
|Cancel= | |||
|Startup=7 | |||
|Active=2 | |||
|Recovery=18 | |||
|Adv. Hit=KD | |||
|Adv. Guard=-3 | |||
|description=Serves additional utility as Lynn's meterless option when she links from fireball. | |||
}} | |||
}} | |||
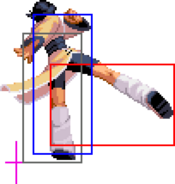
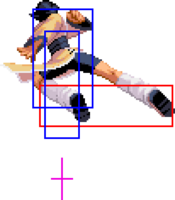
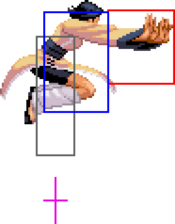
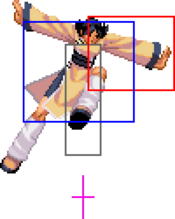
==Jumping Normals== | |||
{{MoveData | |||
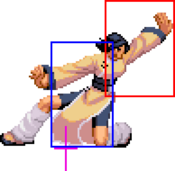
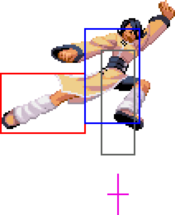
|image=ROTD_Lynn_jA.png | |||
|caption= | |||
|name=j.A | |||
|data= | |||
{{AttackData-ROTD | |||
|Damage=8 | |||
|Guard=High/Air | |||
|Stun=6 | |||
|Cancel= | |||
|Startup=3 | |||
|Active=10 | |||
|Recovery= | |||
|Adv. Hit= | |||
|Adv. Guard= | |||
|description= | |||
}} | |||
}} | |||
{{MoveData | |||
|image=ROTD_Lynn_jB.png | |||
|caption= | |||
|name=j.B | |||
|data= | |||
{{AttackData-ROTD | |||
|Damage=10 | |||
|Guard=High/Air | |||
|Stun=8 | |||
|Cancel= | |||
|Startup=4 | |||
|Active=8 | |||
|Recovery= | |||
|Adv. Hit= | |||
|Adv. Guard= | |||
|description= | |||
}} | |||
}} | |||
{{MoveData | |||
|image=ROTD_Lynn_njC.png | |||
|caption= | |||
|name=nj.C | |||
|data= | |||
{{AttackData-ROTD | |||
|Damage=14 | |||
|Guard=High/Air | |||
|Stun=12 | |||
|Cancel= | |||
|Startup=6 | |||
|Active=10 | |||
|Recovery= | |||
|Adv. Hit= | |||
|Adv. Guard= | |||
|description= | |||
}} | |||
}} | |||
{{MoveData | |||
|image=ROTD_Lynn_jC.png | |||
|caption= | |||
|name=j.C | |||
|data= | |||
{{AttackData-ROTD | |||
|Damage=14 | |||
|Guard=High/Air | |||
|Stun=12 | |||
|Cancel= | |||
|Startup=6 | |||
|Active=8 | |||
|Recovery= | |||
|Adv. Hit= | |||
|Adv. Guard= | |||
|description= | |||
}} | |||
}} | |||
{{MoveData | |||
|image=ROTD_Lynn_njD.png | |||
|caption= | |||
|name=nj.D | |||
|data= | |||
{{AttackData-ROTD | |||
|Damage=16 | |||
|Guard=High/Air | |||
|Stun=12 | |||
|Cancel= | |||
|Startup=6 | |||
|Active=10+3 | |||
|Recovery= | |||
|Adv. Hit= | |||
|Adv. Guard= | |||
|description= | |||
}} | |||
}} | |||
{{MoveData | |||
|image=ROTD_Lynn_jD.png | |||
|caption= | |||
|name=j.D | |||
|data= | |||
{{AttackData-ROTD | |||
|Damage=16 | |||
|Guard=High/Air | |||
|Stun=12 | |||
|Cancel= | |||
|Startup=6 | |||
|Active=3+7 | |||
|Recovery= | |||
|Adv. Hit= | |||
|Adv. Guard= | |||
|description= | |||
}} | |||
}} | |||
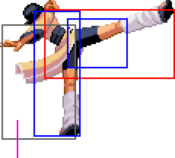
==Command Normals== | |||
{{MoveData | |||
|image=ROTD_Lynn_6A.png | |||
|caption= | |||
|name=6A | |||
|data= | |||
{{AttackData-ROTD | |||
|Damage=16 | |||
|Guard=High | |||
|Stun=12 | |||
|Cancel= | |||
|Startup=23 | |||
|Active=2 | |||
|Recovery=22 | |||
|Adv. Hit=+4 | |||
|Adv. Guard=-7 | |||
|description=A fast but short-ranged overhead. Can only be linked from. +4 doesn't seem like much, but with a rapid chain, Lynn can rack up respectable damage and stun. She and Billy hail from the same school. | |||
}} | |||
}} | |||
{{MoveData | |||
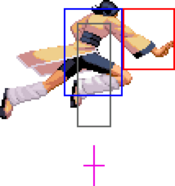
|image=ROTD_Lynn_j4B.png | |||
|caption= | |||
|name=j.4B | |||
|data= | |||
{{AttackData-ROTD | |||
|Damage=12 | |||
|Guard=High/Air | |||
|Stun=12 | |||
|Cancel= | |||
|Startup=7 | |||
|Active=8 | |||
|Recovery= | |||
|Adv. Hit= | |||
|Adv. Guard= | |||
|description=Crossup kick with a load of hitstun. Can confirm into First Impact. If you know KOF, this is similar to Iori's j.4B — just can't backdash taco. In the midst of fireball pressure, it's great to just throw in. Despite being a command normal, it does not behave like one at all, given it can't be cancelled into from other air normals or Air Impact. Think of it as just another normal. | |||
}} | |||
}} | |||
==Throws== | |||
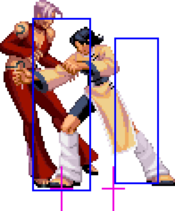
{{MoveData | |||
|image=ROTD_Lynn_throw.png | |||
|caption= | |||
|name=4/6C | |||
|data= | |||
{{AttackData-ROTD | |||
|Damage=20 | |||
|Guard= | |||
|Stun=0 | |||
|Cancel= | |||
|Startup=1 | |||
|Active=1 | |||
|Recovery= | |||
|Adv. Hit=KD | |||
|Adv. Guard= | |||
|description=Lynn heave-hos the opponent three quarters of the screen away. | |||
}} | |||
}} | |||
{{MoveData | |||
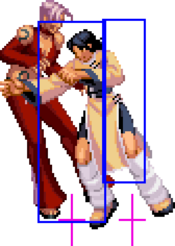
|image=ROTD_Lynn_airthrow.png | |||
|caption= | |||
|name=j.6C | |||
|data= | |||
{{AttackData-ROTD | |||
|Damage=20 | |||
|Guard= | |||
|Stun=0 | |||
|Cancel= | |||
|Startup=1 | |||
|Active=1 | |||
|Recovery= | |||
|Adv. Hit=KD | |||
|Adv. Guard= | |||
|description=A very strong option for air-to-air interactions. Very few characters have air throws, and Lynn's tosses them fullscreen away. Practically guaranteed to hit a wall if none are broken yet. | |||
}} | |||
}} | |||
==System== | |||
{{MoveData | |||
|image=ROTD_Lynn_stD.png | |||
|caption=BC | |||
|name=Tag-In | |||
|data= | |||
{{AttackData-ROTD | |||
|Damage=16 | |||
|Guard=Mid | |||
|Stun=0 | |||
|Cancel=Command, Special | |||
|Startup=6 (1-7 invuln) | |||
|Active=2 | |||
|Recovery=25 | |||
|Adv. Hit=KD | |||
|Adv. Guard=-10 | |||
|description= | |||
}} | |||
}} | |||
{{MoveData | |||
|image=ROTD_Lynn_GC.png | |||
|caption=gcCD | |||
|name=Guard Cancel | |||
|data= | |||
{{AttackData-ROTD | |||
|Damage=10 | |||
|Guard=Mid | |||
|Stun=10 | |||
|Cancel= | |||
|Startup=13 (1-16 invuln) | |||
|Active=8 | |||
|Recovery=17 | |||
|Adv. Hit=KD | |||
|Adv. Guard=-8 | |||
|description= | |||
}} | |||
}} | |||
{{MoveData | |||
|image=ROTD_Lynn_CD.png | |||
|caption=CD | |||
|name=First Impact | |||
|data= | |||
{{AttackData-ROTD | |||
|Damage=5+5×5 | |||
|Guard=Mid | |||
|Stun=0 | |||
|Cancel=Hit: Command, Special | |||
|Startup=14 | |||
|Active=5 | |||
|Recovery=32 | |||
|Adv. Hit=KD | |||
|Adv. Guard=-20 | |||
|description= | |||
}} | |||
}} | |||
{{MoveData | |||
|image=ROTD_Lynn_run.png | |||
|image2=ROTD_Lynn_236BC.png | |||
|caption=236CD | |||
|caption2=236CD~236CD | |||
|name=Duplex Attack | |||
|data= | |||
{{AttackData-ROTD | |||
|Damage=30 | |||
|Guard=Mid | |||
|Stun=0 | |||
|Cancel= | |||
|Startup=4 | |||
|Active=60 | |||
|Recovery=29 | |||
|Adv. Hit=KD | |||
|Adv. Guard=-13 | |||
|description=Your partner must be alive and able to tag in. | |||
}} | |||
{{AttackData-ROTD | |||
|Damage=27 (22 with Billy) | |||
|Guard= | |||
|Stun=0 | |||
|Cancel= | |||
|Startup= | |||
|Active= | |||
|Recovery= | |||
|Adv. Hit=KD | |||
|Adv. Guard= | |||
|description=Follow up with another 236BC for more damage. Costs an extra bar. | |||
}} | |||
}} | |||
==Special Moves== | |||
{{MoveData | |||
|image=ROTD_Lynn_63214P.png | |||
|caption=63214A/C | |||
|name=Enrenken | |||
|data= | |||
{{AttackData-ROTD | |||
|Damage=16 | |||
|Guard=Mid | |||
|Stun=6 | |||
|Cancel= | |||
|Startup=12 | |||
|Active=2 | |||
|Recovery=34 | |||
|Adv. Hit=KD | |||
|Adv. Guard=-19 | |||
|description=Has really good blowback/wall carry potential, but very poor damage in combos. Little utility outside of this. | |||
}} | |||
{{AttackData-ROTD | |||
|Damage=20 (8+12) | |||
|Guard=Mid | |||
|Stun=8 (4+4) | |||
|Cancel= | |||
|Startup=16 | |||
|Active=2+(6)+2 | |||
|Recovery=21 | |||
|Adv. Hit=KD | |||
|Adv. Guard=-6 | |||
|description=Hits twice, deals a bit more damage and is safer. | |||
}} | |||
}} | |||
{{MoveData | |||
|image=ROTD_Lynn_236P.png | |||
|caption=236A/C | |||
|name=Kouryuu Shouzan Ha | |||
|data= | |||
{{AttackData-ROTD | |||
|Damage=16 | |||
|Guard=Mid/Air | |||
|Stun=8 | |||
|Cancel= | |||
|Startup=18 | |||
|Active=∞ | |||
|Recovery=33 | |||
|Adv. Hit=+10/+14 | |||
|Adv. Guard=+3 | |||
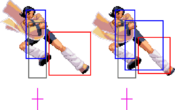
|description=Possibly the best fireball in the game. It's quick and can be linked from; typically a sweep is the choice, but a Duplex works or even super if close enough. Lynn's pressure more or less involves running in with cr.C, cancelling it into fireball and either repeating or switching it up until the opponent cracks. Note when shot at point blank, the fireball will spawn behind some characters. | |||
}} | |||
{{AttackData-ROTD | |||
|Damage=16 | |||
|Guard=Mid/Air | |||
|Stun=8 | |||
|Cancel= | |||
|Startup=18 | |||
|Active=∞ | |||
|Recovery=33 | |||
|Adv. Hit=+10/+14 | |||
|Adv. Guard=+3 | |||
|description=Travels faster than the light version, which can tighten gaps in pressure. | |||
}} | |||
}} | |||
{{MoveData | |||
|image=ROTD_Lynn_623P.png | |||
|image2=ROTD_Lynn_623P_236K.png | |||
|image3=ROTD_Lynn_623P_236K_K.png | |||
|caption=623A/C | |||
|caption2=623A/C~236B/D | |||
|caption3=623A/C~236B/D~B/D | |||
|name=Ryuuenhou | |||
|data= | |||
{{AttackData-ROTD | |||
|Damage=10 | |||
|Guard=Mid | |||
|Stun=2 | |||
|Cancel= | |||
|Startup=12/17 | |||
|Active=6 | |||
|Recovery=37 | |||
|Adv. Hit=KD | |||
|Adv. Guard=-26 | |||
|description=The first hit is a palm thrust, with the only difference between the light and heavy versions being the startup. Light is faster, so use light. The rekkas' cancel windows allow for flexibility. | |||
}} | |||
{{AttackData-ROTD | |||
|Damage=5 | |||
|Guard=Mid/Air | |||
|Stun=2 | |||
|Cancel= | |||
|Startup=8 | |||
|Active=9 | |||
|Recovery=45 | |||
|Adv. Hit=KD | |||
|Adv. Guard=-30 | |||
|description=Lynn takes to the skies. Like her actual upkicks, this can be airblocked, but the move before it can't. | |||
}} | |||
{{AttackData-ROTD | |||
|Damage=10 | |||
|Guard=Air | |||
|Stun=3 | |||
|Cancel= | |||
|Startup=5 | |||
|Active= | |||
|Recovery= | |||
|Adv. Hit=KD | |||
|Adv. Guard= | |||
|description=The only part of the rekka which activates a wall hit. | |||
}} | |||
}} | |||
{{MoveData | |||
|image=ROTD_Lynn_2,8K.png | |||
|image2=ROTD_Lynn_2,8D.png | |||
|caption=[2]8B/D | |||
|caption2=[2]8D | |||
|name=Kouryuu Kyaku | |||
|data= | |||
{{AttackData-ROTD | |||
|Damage=16 | |||
|Guard=Mid/Air | |||
|Stun=4 | |||
|Cancel= | |||
|Startup=9 (1-8 invuln) | |||
|Active=3 | |||
|Recovery=48 | |||
|Adv. Hit=KD | |||
|Adv. Guard=-28 | |||
|description=Billy has this move, too. Sort of. Upward flash kick, has a few invinciblity frames on startup. Not a true reversal, and there are no frames where it can't be airblocked. | |||
}} | |||
{{AttackData-ROTD | |||
|Damage=16 (6+10) | |||
|Guard=Mid/Air | |||
|Stun=8 (4+4) | |||
|Cancel= | |||
|Startup=7 (1-6 invuln) | |||
|Active=4+4 | |||
|Recovery=53 | |||
|Adv. Hit=KD | |||
|Adv. Guard=-34 | |||
|description=More prone to damage scaling, but adds a little more stun. Not a true reversal either, and not a great defensive option overall. Fun fact: only charge move in the game! | |||
}} | |||
}} | |||
==Super Moves== | |||
{{MoveData | |||
|image=ROTD_Lynn_2141236K.png | |||
|caption=2141236B/D | |||
|name=Kouryuuken Ougi Hiryuu | |||
|data= | |||
{{AttackData-ROTD | |||
|Damage=40 (20+20) | |||
|Guard=Mid | |||
|Stun=0 | |||
|Cancel= | |||
|Startup=6 (1-9 invuln) | |||
|Active=4+4+(34)+14 | |||
|Recovery=41 | |||
|Adv. Hit=KD | |||
|Adv. Guard=-28 | |||
|description=Good anti-air, but can miss opponents above Lynn's head. | |||
}} | |||
{{AttackData-ROTD | |||
|Damage=60 (20+10+30) | |||
|Guard=Mid | |||
|Stun=0 | |||
|Cancel= | |||
|Startup=6 (1-9 invuln) | |||
|Active=4+4+(34)+14 | |||
|Recovery=41 | |||
|Adv. Hit=KD | |||
|Adv. Guard=-28 | |||
|description=The heavy version deals extra damage with a body surf at the end. | |||
}} | |||
}} | |||
[[Category:Rage of the Dragons]] | [[Category:Rage of the Dragons]] | ||
{{Rage Of The Dragons}} | {{Rage Of The Dragons}} | ||
Latest revision as of 18:24, 15 November 2024
Movelist
Impact
Command Normals
Special Moves
Super Moves
Close Normals
| Damage | Guard | Stun | Cancel | |
|---|---|---|---|---|
| 6 | Mid | 2 | Chain, Command, Special | |
| Startup | Active | Recovery | Adv. Hit | Adv. Guard |
| 4 | 2 | 7 | +2 | +1 |
| Damage | Guard | Stun | Cancel | |
|---|---|---|---|---|
| 8 | Mid | 4 | Command, Special | |
| Startup | Active | Recovery | Adv. Hit | Adv. Guard |
| 5 | 2 | 8 | +1 | 0 |
| Damage | Guard | Stun | Cancel | |
|---|---|---|---|---|
| 16 | Mid | 8 | Command, Special | |
| Startup | Active | Recovery | Adv. Hit | Adv. Guard |
| 6 | 2 | 12 | +2/+5 | -1 |
| Damage | Guard | Stun | Cancel | |
|---|---|---|---|---|
| 18 | Mid | 10 | Command, Special | |
| Startup | Active | Recovery | Adv. Hit | Adv. Guard |
| 6 | 2 | 15 | -1/+2 | -4 |
Standing Normals
| Damage | Guard | Stun | Cancel | |
|---|---|---|---|---|
| 8 | Mid | 2 | Chain, Command, Special | |
| Startup | Active | Recovery | Adv. Hit | Adv. Guard |
| 4 | 2 | 10 | -1 | -2 |
| Damage | Guard | Stun | Cancel | |
|---|---|---|---|---|
| 10 | Mid | 5 | - | |
| Startup | Active | Recovery | Adv. Hit | Adv. Guard |
| 5 | 2 | 13 | -4 | -5 |
| Damage | Guard | Stun | Cancel | |
|---|---|---|---|---|
| 18 | Mid | 10 | - | |
| Startup | Active | Recovery | Adv. Hit | Adv. Guard |
| 11 | 3 | 19 | -3 | -9 |
| Damage | Guard | Stun | Cancel | |
|---|---|---|---|---|
| 20 | Mid | 12 | - | |
| Startup | Active | Recovery | Adv. Hit | Adv. Guard |
| 11 | 2 | 21 | -7/-4 | -10 |
Crouching Normals
| Damage | Guard | Stun | Cancel | |
|---|---|---|---|---|
| 6 | Mid | 2 | Chain, Command, Special | |
| Startup | Active | Recovery | Adv. Hit | Adv. Guard |
| 4 | 2 | 9 | 0 | -1 |
| Damage | Guard | Stun | Cancel | |
|---|---|---|---|---|
| 8 | Low | 4 | Command, Special | |
| Startup | Active | Recovery | Adv. Hit | Adv. Guard |
| 4 | 2 | 6 | +3 | +2 |
| Damage | Guard | Stun | Cancel | ||
|---|---|---|---|---|---|
| 16 | Mid | 8 | Command, Special | ||
| Startup | Active | Recovery | Adv. Hit | Adv. Guard | |
| 5 | 2 | 12 | +5 | -1 | |
|
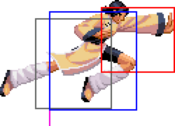
Long-ranged cancel option essential to her fireball pressure. Also sports a decent hitbox to catch opponents jumping out. | |||||
| Damage | Guard | Stun | Cancel | ||
|---|---|---|---|---|---|
| 20 | Low | 15 | - | ||
| Startup | Active | Recovery | Adv. Hit | Adv. Guard | |
| 7 | 2 | 18 | KD | -3 | |
|
Serves additional utility as Lynn's meterless option when she links from fireball. | |||||
Jumping Normals
| Damage | Guard | Stun | Cancel | |
|---|---|---|---|---|
| 8 | High/Air | 6 | - | |
| Startup | Active | Recovery | Adv. Hit | Adv. Guard |
| 3 | 10 | - | - | - |
| Damage | Guard | Stun | Cancel | |
|---|---|---|---|---|
| 10 | High/Air | 8 | - | |
| Startup | Active | Recovery | Adv. Hit | Adv. Guard |
| 4 | 8 | - | - | - |
| Damage | Guard | Stun | Cancel | |
|---|---|---|---|---|
| 14 | High/Air | 12 | - | |
| Startup | Active | Recovery | Adv. Hit | Adv. Guard |
| 6 | 10 | - | - | - |
| Damage | Guard | Stun | Cancel | |
|---|---|---|---|---|
| 14 | High/Air | 12 | - | |
| Startup | Active | Recovery | Adv. Hit | Adv. Guard |
| 6 | 8 | - | - | - |
| Damage | Guard | Stun | Cancel | |
|---|---|---|---|---|
| 16 | High/Air | 12 | - | |
| Startup | Active | Recovery | Adv. Hit | Adv. Guard |
| 6 | 10+3 | - | - | - |
| Damage | Guard | Stun | Cancel | |
|---|---|---|---|---|
| 16 | High/Air | 12 | - | |
| Startup | Active | Recovery | Adv. Hit | Adv. Guard |
| 6 | 3+7 | - | - | - |
Command Normals
| Damage | Guard | Stun | Cancel | ||
|---|---|---|---|---|---|
| 16 | High | 12 | - | ||
| Startup | Active | Recovery | Adv. Hit | Adv. Guard | |
| 23 | 2 | 22 | +4 | -7 | |
|
A fast but short-ranged overhead. Can only be linked from. +4 doesn't seem like much, but with a rapid chain, Lynn can rack up respectable damage and stun. She and Billy hail from the same school. | |||||
| Damage | Guard | Stun | Cancel | ||
|---|---|---|---|---|---|
| 12 | High/Air | 12 | - | ||
| Startup | Active | Recovery | Adv. Hit | Adv. Guard | |
| 7 | 8 | - | - | - | |
|
Crossup kick with a load of hitstun. Can confirm into First Impact. If you know KOF, this is similar to Iori's j.4B — just can't backdash taco. In the midst of fireball pressure, it's great to just throw in. Despite being a command normal, it does not behave like one at all, given it can't be cancelled into from other air normals or Air Impact. Think of it as just another normal. | |||||
Throws
| Damage | Guard | Stun | Cancel | ||
|---|---|---|---|---|---|
| 20 | - | 0 | - | ||
| Startup | Active | Recovery | Adv. Hit | Adv. Guard | |
| 1 | 1 | - | KD | - | |
|
Lynn heave-hos the opponent three quarters of the screen away. | |||||
| Damage | Guard | Stun | Cancel | ||
|---|---|---|---|---|---|
| 20 | - | 0 | - | ||
| Startup | Active | Recovery | Adv. Hit | Adv. Guard | |
| 1 | 1 | - | KD | - | |
|
A very strong option for air-to-air interactions. Very few characters have air throws, and Lynn's tosses them fullscreen away. Practically guaranteed to hit a wall if none are broken yet. | |||||
System
| Damage | Guard | Stun | Cancel | |
|---|---|---|---|---|
| 16 | Mid | 0 | Command, Special | |
| Startup | Active | Recovery | Adv. Hit | Adv. Guard |
| 6 (1-7 invuln) | 2 | 25 | KD | -10 |
| Damage | Guard | Stun | Cancel | |
|---|---|---|---|---|
| 10 | Mid | 10 | - | |
| Startup | Active | Recovery | Adv. Hit | Adv. Guard |
| 13 (1-16 invuln) | 8 | 17 | KD | -8 |
| Damage | Guard | Stun | Cancel | |
|---|---|---|---|---|
| 5+5×5 | Mid | 0 | Hit: Command, Special | |
| Startup | Active | Recovery | Adv. Hit | Adv. Guard |
| 14 | 5 | 32 | KD | -20 |
| Damage | Guard | Stun | Cancel | ||
|---|---|---|---|---|---|
| 30 | Mid | 0 | - | ||
| Startup | Active | Recovery | Adv. Hit | Adv. Guard | |
| 4 | 60 | 29 | KD | -13 | |
|
Your partner must be alive and able to tag in. | |||||
| Damage | Guard | Stun | Cancel | ||
| 27 (22 with Billy) | - | 0 | - | ||
| Startup | Active | Recovery | Adv. Hit | Adv. Guard | |
| - | - | - | KD | - | |
|
Follow up with another 236BC for more damage. Costs an extra bar. | |||||
Special Moves
| Damage | Guard | Stun | Cancel | ||
|---|---|---|---|---|---|
| 16 | Mid | 6 | - | ||
| Startup | Active | Recovery | Adv. Hit | Adv. Guard | |
| 12 | 2 | 34 | KD | -19 | |
|
Has really good blowback/wall carry potential, but very poor damage in combos. Little utility outside of this. | |||||
| Damage | Guard | Stun | Cancel | ||
| 20 (8+12) | Mid | 8 (4+4) | - | ||
| Startup | Active | Recovery | Adv. Hit | Adv. Guard | |
| 16 | 2+(6)+2 | 21 | KD | -6 | |
|
Hits twice, deals a bit more damage and is safer. | |||||
| Damage | Guard | Stun | Cancel | ||
|---|---|---|---|---|---|
| 16 | Mid/Air | 8 | - | ||
| Startup | Active | Recovery | Adv. Hit | Adv. Guard | |
| 18 | ∞ | 33 | +10/+14 | +3 | |
|
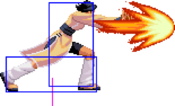
Possibly the best fireball in the game. It's quick and can be linked from; typically a sweep is the choice, but a Duplex works or even super if close enough. Lynn's pressure more or less involves running in with cr.C, cancelling it into fireball and either repeating or switching it up until the opponent cracks. Note when shot at point blank, the fireball will spawn behind some characters. | |||||
| Damage | Guard | Stun | Cancel | ||
| 16 | Mid/Air | 8 | - | ||
| Startup | Active | Recovery | Adv. Hit | Adv. Guard | |
| 18 | ∞ | 33 | +10/+14 | +3 | |
|
Travels faster than the light version, which can tighten gaps in pressure. | |||||
| Damage | Guard | Stun | Cancel | ||
|---|---|---|---|---|---|
| 10 | Mid | 2 | - | ||
| Startup | Active | Recovery | Adv. Hit | Adv. Guard | |
| 12/17 | 6 | 37 | KD | -26 | |
|
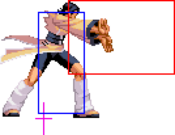
The first hit is a palm thrust, with the only difference between the light and heavy versions being the startup. Light is faster, so use light. The rekkas' cancel windows allow for flexibility. | |||||
| Damage | Guard | Stun | Cancel | ||
| 5 | Mid/Air | 2 | - | ||
| Startup | Active | Recovery | Adv. Hit | Adv. Guard | |
| 8 | 9 | 45 | KD | -30 | |
|
Lynn takes to the skies. Like her actual upkicks, this can be airblocked, but the move before it can't. | |||||
| Damage | Guard | Stun | Cancel | ||
| 10 | Air | 3 | - | ||
| Startup | Active | Recovery | Adv. Hit | Adv. Guard | |
| 5 | - | - | KD | - | |
|
The only part of the rekka which activates a wall hit. | |||||
| Damage | Guard | Stun | Cancel | ||
|---|---|---|---|---|---|
| 16 | Mid/Air | 4 | - | ||
| Startup | Active | Recovery | Adv. Hit | Adv. Guard | |
| 9 (1-8 invuln) | 3 | 48 | KD | -28 | |
|
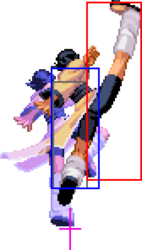
Billy has this move, too. Sort of. Upward flash kick, has a few invinciblity frames on startup. Not a true reversal, and there are no frames where it can't be airblocked. | |||||
| Damage | Guard | Stun | Cancel | ||
| 16 (6+10) | Mid/Air | 8 (4+4) | - | ||
| Startup | Active | Recovery | Adv. Hit | Adv. Guard | |
| 7 (1-6 invuln) | 4+4 | 53 | KD | -34 | |
|
More prone to damage scaling, but adds a little more stun. Not a true reversal either, and not a great defensive option overall. Fun fact: only charge move in the game! | |||||
Super Moves
| Damage | Guard | Stun | Cancel | ||
|---|---|---|---|---|---|
| 40 (20+20) | Mid | 0 | - | ||
| Startup | Active | Recovery | Adv. Hit | Adv. Guard | |
| 6 (1-9 invuln) | 4+4+(34)+14 | 41 | KD | -28 | |
|
Good anti-air, but can miss opponents above Lynn's head. | |||||
| Damage | Guard | Stun | Cancel | ||
| 60 (20+10+30) | Mid | 0 | - | ||
| Startup | Active | Recovery | Adv. Hit | Adv. Guard | |
| 6 (1-9 invuln) | 4+4+(34)+14 | 41 | KD | -28 | |
|
The heavy version deals extra damage with a body surf at the end. | |||||
