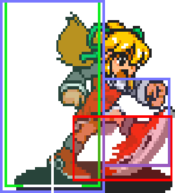
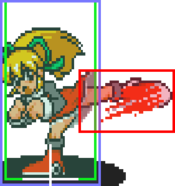
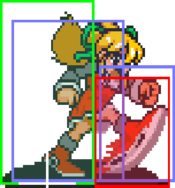
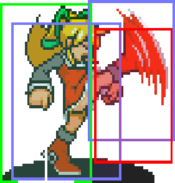
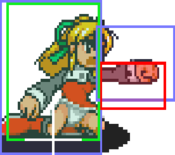
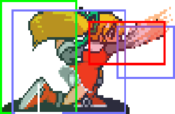
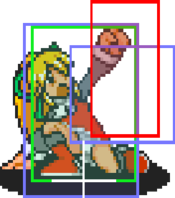
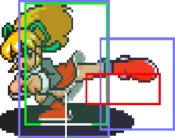
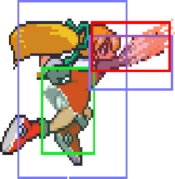
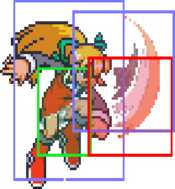
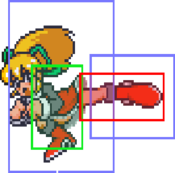
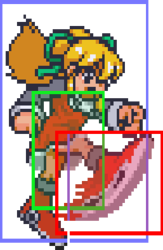
Lichmassacre (talk | contribs) m (→Normals: Images added.) |
Lichmassacre (talk | contribs) m (Subnav added.) |
||
| (6 intermediate revisions by the same user not shown) | |||
| Line 1: | Line 1: | ||
{{MVC1 Character Subnav|name=Roll}} | |||
[[File:mvc1roll.gif|right]] | [[File:mvc1roll.gif|right]] | ||
{{TOClimit|3}} | {{TOClimit|3}} | ||
=Introduction= | ==Introduction== | ||
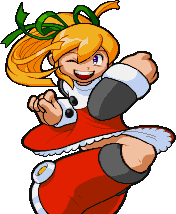
The one and only robot master and Mega Man's sister, Roll! Coming straight out of Mega Man 8, Roll invades the Marvel VS Capcom scene as a secret joke character, mirroring much of Mega Man's own moves. Cuteness, jokes and her rocking anime theme song aside, as you can probably guess from being a joke character, she sucks. While being small helps in her favor by making her more nimble, that also means her normals have abysmal range, her specials have lengthy recovery and startup, she deals less damage overall, and is unequivocally the weakest character in the game. You'll be fighting an uphill battle with her, regardless of your team composition. Although if it makes you feel better, she's not as bad as her MVC2 counterpart. Still, she can be pretty fun in her own right, and if you manage to win a match with her, you get to enjoy the glory of beating your opponent with her. | The one and only robot master and Mega Man's sister, Roll! Coming straight out of Mega Man 8, Roll invades the Marvel VS Capcom scene as a secret joke character, mirroring much of Mega Man's own moves. Cuteness, jokes and her rocking anime theme song aside, as you can probably guess from being a joke character, she sucks. While being small helps in her favor by making her more nimble, that also means her normals have abysmal range, her specials have lengthy recovery and startup, she deals less damage overall, and is unequivocally the weakest character in the game. You'll be fighting an uphill battle with her, regardless of your team composition. Although if it makes you feel better, she's not as bad as her MVC2 counterpart. Still, she can be pretty fun in her own right, and if you manage to win a match with her, you get to enjoy the glory of beating your opponent with her. | ||
Needs updated pros/cons. | |||
'''How To Select Roll''' | |||
Go to Zangief's box, then move the cursor like so: [[File:Left.gif]]×2, [[File:Down.gif]]×2, [[File:Right.gif]]×2, [[File:Down.gif]]×2, [[File:Left.gif]]×2, [[File:Up.gif]], [[File:Right.gif]], [[File:Up.gif]]×2, [[File:Right.gif]]×2. | Go to Zangief's box, then move the cursor like so: [[File:Left.gif]]×2, [[File:Down.gif]]×2, [[File:Right.gif]]×2, [[File:Down.gif]]×2, [[File:Left.gif]]×2, [[File:Up.gif]], [[File:Right.gif]], [[File:Up.gif]]×2, [[File:Right.gif]]×2. | ||
The last right (6) will move you to Roll's box on the right of Megaman's. Do note that if you attempt to select Roll as the second character, the game will prevent the code from working if the first character is not a secret character (such as Strider). The first character's selection box will overlap the cursor, causing it to skip the character and prevent the code from working. | The last right (6) will move you to Roll's box on the right of Megaman's. Do note that if you attempt to select Roll as the second character, the game will prevent the code from working if the first character is not a secret character (such as Strider). The first character's selection box will overlap the cursor, causing it to skip the character and prevent the code from working. Hold all three punches before the match starts to switch order if you wish her to be the second character. | ||
{{ ProConTable | |||
| pros = | |||
* '''Small hitbox:''' Roll is the smallest character in the game, making her a difficult target to hit and forcing opponents to change their gameplay slightly, especially changing their combo routes. | |||
* '''Easy to learn:''' Knowing what she can or can't do is black and white and is better off playing chicken and running away than actually fighting directly. If she does fight directly, that also takes next to no time to learn as it's just a matter of knowing how to use her normals and magic series combos. | |||
* '''Slide kick:''' Roll's cr.HK is a slide, making her already small size even smaller by letting her go under projectiles and poking the opponent with it. | |||
* '''She has her own theme song compared to the other hidden characters:''' Marvel and J-Pop, what more needs to be said? | |||
| cons = | |||
* '''Low health:''' Roll can't afford mistakes in neutral as any stray hit or combo will hurt a lot more against her. She fortunately does not have Red Venom levels of health, and her small size makes some combos drop against her resulting in less damage, but it's low enough to make a noticeable difference. | |||
* '''Awful normals:''' Extremely stubby normals with no priority that force Roll to get close to the opponent just to land them and makes doing magic series combos a lot harder, too. There's basically nothing good to say about them. | |||
* '''Miniscule damage:''' Roll does chicken scratch damage at best, even her best damage doesn't do as much as a simple combo on others can do without getting too close for comfort. | |||
* '''Weak zoning:''' Zoning with Roll, probably one of the safest ways to play her, is more annoying than it is threatening as her Roll Buster projectile is big, but weak, and comes out pretty slow on top of the slow recovery. Combined with needing to summon Eddie like Mega Man for some special moves, it's a hassle to set up. | |||
* '''Worse supers than Mega Man:''' Needs verifying for how much worse they are, but they tend to have longer startup, recovery, and less overall damage for the meter you spend. | |||
* '''Joke character:''' Roll is designed bad on purpose, she's not meant to be played seriously. Everything about her is awful, and she simply provides no value to any teams. | |||
* '''Extended version of her song is only available in the Japanese version''' | |||
}} | |||
=Move List= | ==Move List== | ||
==Normals== | ===Normals=== | ||
===Ground Normals=== | ====Ground Normals==== | ||
===== <span class="invisible-header"></span> ===== | ===== <span class="invisible-header"></span> ===== | ||
<font style="visibility:hidden" size="0">s.LP</font> | <font style="visibility:hidden" size="0">s.LP</font> | ||
| Line 295: | Line 300: | ||
}} | }} | ||
===Air Normals=== | ====Air Normals==== | ||
===== <span class="invisible-header"></span> ===== | ===== <span class="invisible-header"></span> ===== | ||
<font style="visibility:hidden" size="0">j.LP</font> | <font style="visibility:hidden" size="0">j.LP</font> | ||
| Line 429: | Line 434: | ||
}} | }} | ||
===Command Normals=== | ====Command Normals==== | ||
===== <span class="invisible-header"></span> ===== | ===== <span class="invisible-header"></span> ===== | ||
<font style="visibility:hidden" size="0"> | <font style="visibility:hidden" size="0"></font> | ||
{{MoveData | {{MoveData | ||
|image= | |image= | ||
|subtitle= | |subtitle= | ||
|caption= | |caption= | ||
|name= | |name=j8HK | ||
|data= | |data= | ||
{{AttackData-Marvel vs Capcom | {{AttackData-Marvel vs Capcom | ||
| Line 452: | Line 457: | ||
}} | }} | ||
===Throws=== | ====Throws==== | ||
===== <span class="invisible-header"></span> ===== | ===== <span class="invisible-header"></span> ===== | ||
<font style="visibility:hidden" size="0">Normal Throw</font> | <font style="visibility:hidden" size="0">Normal Throw</font> | ||
| Line 475: | Line 480: | ||
}} | }} | ||
==Specials== | ===Specials=== | ||
===== <span class="invisible-header"></span> ===== | ===== <span class="invisible-header"></span> ===== | ||
{{MoveData | {{MoveData | ||
| Line 700: | Line 705: | ||
}} | }} | ||
==Hyper Combos== | ===Hyper Combos=== | ||
===== <span class="invisible-header"></span> ===== | ===== <span class="invisible-header"></span> ===== | ||
<font style="visibility:hidden" size="0">Hyper Roll</font> | <font style="visibility:hidden" size="0">Hyper Roll</font> | ||
| Line 767: | Line 772: | ||
}} | }} | ||
= Strategy = | ==Strategy== | ||
==Basic Tips== | ===Basic Tips=== | ||
Magic Series: Hunter Series for all moves<br> | Magic Series: Hunter Series for all moves<br> | ||
AC Finisher: HP, HK<br> | AC Finisher: HP, HK<br> | ||
==Advanced== | ===Advanced=== | ||
==Team Setups== | ==Team Setups== | ||
= Combos = | ==Combos== | ||
{| border="1em" cellpadding="3" cellspacing="0" | {| border="1em" cellpadding="3" cellspacing="0" | ||
| align="center"|'''Combo''' | | align="center"|'''Combo''' | ||
Latest revision as of 01:40, 1 July 2024
Introduction
The one and only robot master and Mega Man's sister, Roll! Coming straight out of Mega Man 8, Roll invades the Marvel VS Capcom scene as a secret joke character, mirroring much of Mega Man's own moves. Cuteness, jokes and her rocking anime theme song aside, as you can probably guess from being a joke character, she sucks. While being small helps in her favor by making her more nimble, that also means her normals have abysmal range, her specials have lengthy recovery and startup, she deals less damage overall, and is unequivocally the weakest character in the game. You'll be fighting an uphill battle with her, regardless of your team composition. Although if it makes you feel better, she's not as bad as her MVC2 counterpart. Still, she can be pretty fun in her own right, and if you manage to win a match with her, you get to enjoy the glory of beating your opponent with her.
Needs updated pros/cons.
How To Select Roll
Go to Zangief's box, then move the cursor like so: ![]() ×2,
×2, ![]() ×2,
×2, ![]() ×2,
×2, ![]() ×2,
×2, ![]() ×2,
×2, ![]() ,
, ![]() ,
, ![]() ×2,
×2, ![]() ×2.
×2.
The last right (6) will move you to Roll's box on the right of Megaman's. Do note that if you attempt to select Roll as the second character, the game will prevent the code from working if the first character is not a secret character (such as Strider). The first character's selection box will overlap the cursor, causing it to skip the character and prevent the code from working. Hold all three punches before the match starts to switch order if you wish her to be the second character.
| Strengths | Weaknesses |
|---|---|
|
|
Move List
Normals
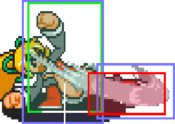
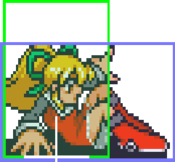
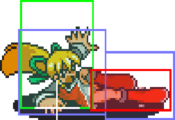
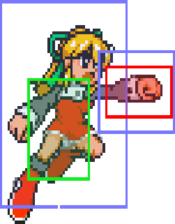
Ground Normals
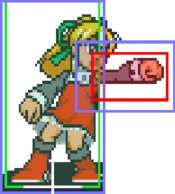
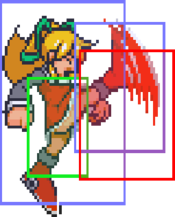
s.LP
| Damage | Guard | Startup | Active | Recovery | Total | Hit Adv | Block Adv | Meter Gain | Property |
|---|---|---|---|---|---|---|---|---|---|
| - | - | - | - | - | - | - | - | - | Ground |
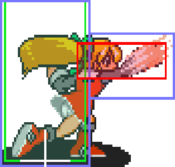
s.MP
| Damage | Guard | Startup | Active | Recovery | Total | Hit Adv | Block Adv | Meter Gain | Property |
|---|---|---|---|---|---|---|---|---|---|
| - | - | - | - | - | - | - | - | - | Ground |
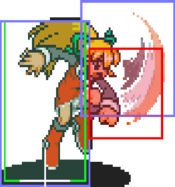
s.HP
| Damage | Guard | Startup | Active | Recovery | Total | Hit Adv | Block Adv | Meter Gain | Property |
|---|---|---|---|---|---|---|---|---|---|
| - | - | - | - | - | - | - | - | - | Ground |
s.LK
| Damage | Guard | Startup | Active | Recovery | Total | Hit Adv | Block Adv | Meter Gain | Property |
|---|---|---|---|---|---|---|---|---|---|
| - | - | - | - | - | - | - | - | - | Ground |
s.MK
| Damage | Guard | Startup | Active | Recovery | Total | Hit Adv | Block Adv | Meter Gain | Property |
|---|---|---|---|---|---|---|---|---|---|
| - | - | - | - | - | - | - | - | - | Ground |
s.HK
| Damage | Guard | Startup | Active | Recovery | Total | Hit Adv | Block Adv | Meter Gain | Property |
|---|---|---|---|---|---|---|---|---|---|
| - | - | - | - | - | - | - | - | - | Ground, Launcher |
c.LP
| Damage | Guard | Startup | Active | Recovery | Total | Hit Adv | Block Adv | Meter Gain | Property |
|---|---|---|---|---|---|---|---|---|---|
| - | - | - | - | - | - | - | - | - | Ground |
c.MP
| Damage | Guard | Startup | Active | Recovery | Total | Hit Adv | Block Adv | Meter Gain | Property |
|---|---|---|---|---|---|---|---|---|---|
| - | - | - | - | - | - | - | - | - | Ground |
c.HP
| Damage | Guard | Startup | Active | Recovery | Total | Hit Adv | Block Adv | Meter Gain | Property |
|---|---|---|---|---|---|---|---|---|---|
| - | - | - | - | - | - | - | - | - | Ground |
c.LK
| Damage | Guard | Startup | Active | Recovery | Total | Hit Adv | Block Adv | Meter Gain | Property |
|---|---|---|---|---|---|---|---|---|---|
| - | - | - | - | - | - | - | - | - | Ground |
c.MK
| Damage | Guard | Startup | Active | Recovery | Total | Hit Adv | Block Adv | Meter Gain | Property |
|---|---|---|---|---|---|---|---|---|---|
| - | - | - | - | - | - | - | - | - | Ground |
c.HK
| Damage | Guard | Startup | Active | Recovery | Total | Hit Adv | Block Adv | Meter Gain | Property |
|---|---|---|---|---|---|---|---|---|---|
| - | - | - | - | - | - | - | - | - | Ground |
Air Normals
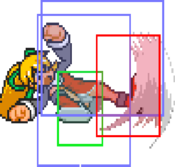
j.LP
| Damage | Guard | Startup | Active | Recovery | Total | Hit Adv | Block Adv | Meter Gain | Property |
|---|---|---|---|---|---|---|---|---|---|
| - | - | - | - | - | - | - | - | - | Ground |
j.MP
| Damage | Guard | Startup | Active | Recovery | Total | Hit Adv | Block Adv | Meter Gain | Property |
|---|---|---|---|---|---|---|---|---|---|
| - | - | - | - | - | - | - | - | - | Ground |
j.HP
| Damage | Guard | Startup | Active | Recovery | Total | Hit Adv | Block Adv | Meter Gain | Property |
|---|---|---|---|---|---|---|---|---|---|
| - | - | - | - | - | - | - | - | - | Ground |
j.LK
| Damage | Guard | Startup | Active | Recovery | Total | Hit Adv | Block Adv | Meter Gain | Property |
|---|---|---|---|---|---|---|---|---|---|
| - | - | - | - | - | - | - | - | - | Ground |
j.MK
| Damage | Guard | Startup | Active | Recovery | Total | Hit Adv | Block Adv | Meter Gain | Property |
|---|---|---|---|---|---|---|---|---|---|
| - | - | - | - | - | - | - | - | - | Ground |
j.HK
| Damage | Guard | Startup | Active | Recovery | Total | Hit Adv | Block Adv | Meter Gain | Property |
|---|---|---|---|---|---|---|---|---|---|
| - | - | - | - | - | - | - | - | - | Ground |
Command Normals
| Damage | Guard | Startup | Active | Recovery | Total | Hit Adv | Block Adv | Meter Gain | Property |
|---|---|---|---|---|---|---|---|---|---|
| - | - | - | - | - | - | - | - | - | Air |
Throws
Normal Throw
| Damage | Guard | Startup | Active | Recovery | Total | Hit Adv | Block Adv | Meter Gain | Property |
|---|---|---|---|---|---|---|---|---|---|
| - | - | - | - | - | - | - | - | - | Ground |
Specials
| Version | Damage | Guard | Startup | Active | Recovery | Total | Hit Adv | Block Adv | Meter Gain | Property | |
|---|---|---|---|---|---|---|---|---|---|---|---|
| QCF + LP LP Version |
- | - | - | - | - | - | - | - | - | Ground/air | |
|
Nope, you can't charge! Plus this has the longest recovery time of any fireball move, and it moves fairly slowly. Still an essential move for Roll, as it gives her a long ranged option to compensate for everything else lacking severely in range. It will buy Roll some time as an annoying poke for the opponent to deal with. Arguably easier to use than Mega Man's Mega Buster since it's just a normal fireball, otherwise. | |||||||||||
| QCF + MP MP Version |
- | - | - | - | - | - | - | - | - | Ground/air | |
| QCF + HP HP Version |
- | - | - | - | - | - | - | - | - | Ground/air | |
| Version | Damage | Guard | Startup | Active | Recovery | Total | Hit Adv | Block Adv | Meter Gain | Property | |
|---|---|---|---|---|---|---|---|---|---|---|---|
| QCB + LP LP Version |
- | - | - | - | - | - | - | - | - | Ground/air | |
|
Funny move. | |||||||||||
| QCB + MP MP Version |
- | - | - | - | - | - | - | - | - | Ground/air | |
| QCB + HP HP Version |
- | - | - | - | - | - | - | - | - | Ground/air | |
| Version | Damage | Guard | Startup | Active | Recovery | Total | Hit Adv | Block Adv | Meter Gain | Property | |
|---|---|---|---|---|---|---|---|---|---|---|---|
| QCB + LK Eddie Summon: Rock Ball |
- | - | - | - | - | - | - | - | - | Ground | |
|
Roll summons Eddie to give her the Rock Ball, the weapon Mega Man first receives in Mega Man 8. Just like in that game, kicking it allows the ball to bounce around the walls and screen. | |||||||||||
| QCB + MK Eddie Summon: Tornado Hold |
- | - | - | - | - | - | - | - | - | Ground | |
|
Roll summons Eddie to give her the Tornado Hold weapon. | |||||||||||
| QCB + HK Eddie Summon: Leaf Shield |
- | - | - | - | - | - | - | - | - | Ground | |
|
Roll summons Eddie to give her Wood Man's weapon, the Leaf Shield. | |||||||||||
| Version | Damage | Guard | Startup | Active | Recovery | Total | Hit Adv | Block Adv | Meter Gain | Property | |
|---|---|---|---|---|---|---|---|---|---|---|---|
| QCF + LK Rock Ball |
- | - | - | - | - | - | - | - | - | Ground | |
|
Roll summons the Rock Ball from Mega Man 8. Just like in that game, kicking it allows the ball to bounce around the walls and screen. | |||||||||||
| QCF + MK Tornado Hold |
- | - | - | - | - | - | - | - | - | Ground | |
|
Roll uses the Tornado Hold. | |||||||||||
| QCF + HK Leaf Shield |
- | - | - | - | - | - | - | - | - | Ground | |
|
Roll uses Wood Man's weapon, Leaf Shield. | |||||||||||
Hyper Combos
Hyper Roll
| Damage | Guard | Startup | Active | Recovery | Total | Hit Adv | Block Adv | Meter Gain | Property | |
|---|---|---|---|---|---|---|---|---|---|---|
| - | - | - | - | - | - | - | - | - | Ground/air super | |
|
Just like the Hyper Mega Man, except it's the Hyper Roll! Plus, you won't hit your opponent much with this super unless you nail them during activation because the missiles and bombs and stuff come out way too slow. The only thing that's instantaneous is a laser that shoots out from her head but it comes out too high to be of much use. Also, it seems to come out slower as I couldn't get it to combo in the air. | ||||||||||
Rush Drill
| Damage | Guard | Startup | Active | Recovery | Total | Hit Adv | Block Adv | Meter Gain | Property |
|---|---|---|---|---|---|---|---|---|---|
| - | - | - | - | - | - | - | - | - | Ground super |
Beat Plane
| Damage | Guard | Startup | Active | Recovery | Total | Hit Adv | Block Adv | Meter Gain | Property | |
|---|---|---|---|---|---|---|---|---|---|---|
| - | - | - | - | - | - | - | - | - | Ground/air super | |
|
Roll's slowest super. | ||||||||||
Strategy
Basic Tips
Magic Series: Hunter Series for all moves
AC Finisher: HP, HK
Advanced
Team Setups
Combos
| Combo | Damage | Notes |
| j.LP, d.c.LK, c.MK, c.HK, (LP) Tornado Hold (OTG) or Roll Buster | ||
| d.c.LK, c.MK, c.HK, Rush Drill (OTG) | ||
| Flower Bouquet, c.HK, Rush Drill (OTG) | ||
| d.c.LK, c.MK, s.HK, s.j.LP, s.j.LK, s.j.MP, s.j.MK, Roll Buster | ||
| Leaf Shield, d.s..LK, s.HK, s.j.LP, s.j.LK, s.j.MP, s.j.MK, Fire Leaf Shield | ||
| d.s.LK, s.HK, s.j.LP, s.j.MP, Hyper Roll | ||
| Tornado Hold, s.HK, s.j.LP, s.j.LK, s.j.MP, s.j.MK, Roll Buster | Corner only |
