IvanOozeDrip (talk | contribs) No edit summary |
IvanOozeDrip (talk | contribs) No edit summary |
||
| (22 intermediate revisions by 3 users not shown) | |||
| Line 1: | Line 1: | ||
{{Infobox Character XCOTA | |||
== | |name=Colossus | ||
|ttype=Counter-Thrower | |||
|wclass=Super-Heavy-Weight | |||
|image=XCOTA_Colossus_Portrait.png|center|200px | |||
}} | |||
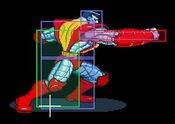
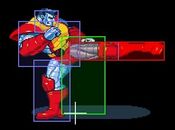
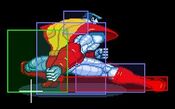
=== Standing Normals === | |||
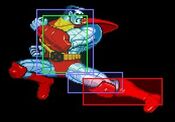
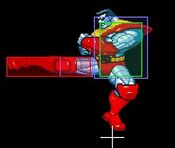
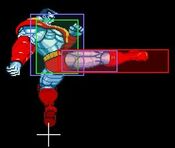
== | {{MoveData | ||
|image= COTA-Colossus-sLP.jpg | |||
|caption= Standing Light Punch | |||
|name= 5LP | |||
|linkname= | |||
|input= | |||
|data= | |||
{{AttackData-XCOTA | |||
|Damage= | |||
|Guard= Any | |||
|Startup= 4 | |||
|Active= | |||
|Recovery= | |||
|Adv. Hit= | |||
|Adv. Guard= | |||
|Adv. Dash= | |||
|description= Simple poke, mashable and chips. Great for pressuring defensive opponents. | |||
}} | |||
}} | |||
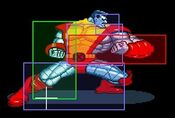
=== | {{MoveData | ||
|image= COTA-Colossus-sMP.jpg | |||
|caption= Standing Middle Punch | |||
|name= 5MP | |||
|linkname= | |||
|input= | |||
|data= | |||
{{AttackData-XCOTA | |||
|Damage= | |||
|Guard= Any | |||
|Startup= 8 | |||
|Active= | |||
|Recovery= | |||
|Adv. Hit= | |||
|Adv. Guard= | |||
|Adv. Dash= | |||
|description= Somewhat slow start up but remains very active and is great for stuffing out other normals. | |||
}} | |||
}} | |||
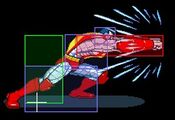
{{MoveData | |||
|image= COTA-Colossus-sHP.jpg | |||
|caption= Standing Hard Punch | |||
|name= 5HP | |||
|linkname= | |||
|input= | |||
|data= | |||
{{AttackData-XCOTA | |||
|Damage= | |||
|Guard= Any | |||
|Startup= 14 | |||
|Active= | |||
|Recovery= | |||
|Adv. Hit= | |||
|Adv. Guard= | |||
|Adv. Dash= | |||
|description= Slow long reaching normal, not much use outside of poking taller characters. | |||
}} | |||
}} | |||
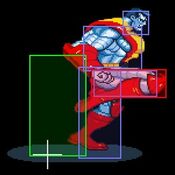
{{MoveData | |||
|image= COTA-Colossus-sLK.jpg | |||
|caption= Standing Light Kick | |||
|name= 5LK | |||
|linkname= | |||
|input= | |||
|data= | |||
{{AttackData-XCOTA | |||
|Damage= | |||
|Guard= Any | |||
|Startup= 4 | |||
|Active= | |||
|Recovery= | |||
|Adv. Hit= | |||
|Adv. Guard= | |||
|Adv. Dash= | |||
|description= Short knee used to catch falling medium/heavy opponents on corner infinites when dashed into, not a good neutral tool. | |||
}} | |||
}} | |||
{{MoveData | |||
|image= COTA-Colossus-sMK.jpg | |||
|caption= Standing Middle Kick | |||
|name= 5MK | |||
|linkname= | |||
|input= | |||
|data= | |||
{{AttackData-XCOTA | |||
|Damage= | |||
|Guard= Any | |||
|Startup= 6 | |||
|Active= | |||
|Recovery= | |||
|Adv. Hit= | |||
|Adv. Guard= | |||
|Adv. Dash= | |||
|description= Long kick with a nice hit box, good for poking on certain matchups but generally not central to Colossus gameplay. | |||
}} | |||
}} | |||
{{MoveData | |||
|image= COTA-Colossus-sHK.jpg | |||
|caption= Standing Hard Kick | |||
|name= 5HK | |||
|linkname= | |||
|input= | |||
|data= | |||
{{AttackData-XCOTA | |||
|Damage= | |||
|Guard= Any | |||
|Startup= 14 | |||
|Active= | |||
|Recovery= | |||
|Adv. Hit= | |||
|Adv. Guard= | |||
|Adv. Dash= | |||
|description= Launching attack used in most of Colossus grounded bread and butters, slow start up but is an invaluable anti-air when spaced properly | |||
}} | |||
}} | |||
=== Crouching Normals === | |||
{{MoveData | |||
|image= COTA-Colossus-cLP.jpg | |||
|caption= Crouching Light Punch | |||
|name= 2LP | |||
|linkname= | |||
|input= | |||
|data= | |||
{{AttackData-XCOTA | |||
|Damage= | |||
|Guard= Any | |||
|Startup= | |||
|Active= 4 | |||
|Recovery= | |||
|Adv. Hit= | |||
|Adv. Guard= | |||
|Adv. Dash= | |||
|description= Very similar use to 5LP, Simple poke, mashable and chips. Great for pressuring defensive opponents. | |||
}} | |||
}} | |||
{{MoveData | |||
|image= COTA-Colossus-cMP.jpg | |||
|caption= Crouching Middle Punch | |||
|name= 2MP | |||
|linkname= | |||
|input= | |||
|data= | |||
{{AttackData-XCOTA | |||
|Damage= | |||
|Guard= Any | |||
|Startup= 6 | |||
|Active= | |||
|Recovery= | |||
|Adv. Hit= | |||
|Adv. Guard= | |||
|Adv. Dash= | |||
|description= Soft launcher, can loop onto itself in the corner against medium and heavy charaters (to an extent). Good for a dashback AA. Can be used to throw loop middleweights. | |||
}} | |||
}} | |||
{{MoveData | |||
|image= COTA-Colossus-cHP.jpg | |||
|caption= Crouching Hard Punch | |||
|name= 2HP | |||
|linkname= | |||
|input= | |||
|data= | |||
{{AttackData-XCOTA | |||
|Damage= | |||
|Guard= Any | |||
|Startup= 12 | |||
|Active= | |||
|Recovery= | |||
|Adv. Hit= | |||
|Adv. Guard= | |||
|Adv. Dash= | |||
|description= Slower start up but not as slow as 5HP. Colossus' farthest reaching ground normal. Shrinks the back hitbox of Colossus, sometimes avoids crossups but not very practical. | |||
}} | |||
}} | |||
{{MoveData | |||
|image= COTA-Colossus-cLK.jpg | |||
|caption= Crouching Light Kick | |||
|name= 2LK | |||
|linkname= | |||
|input= | |||
|data= | |||
{{AttackData-XCOTA | |||
|Damage= | |||
|Guard= Low | |||
|Startup= 4 | |||
|Active= | |||
|Recovery= | |||
|Adv. Hit= | |||
|Adv. Guard= | |||
|Adv. Dash= | |||
|description= Basic low attack, not very fast but useful to stop/trade approaching characters that can low profile his 2LP. | |||
}} | |||
}} | |||
{{MoveData | |||
|image= COTA-Colossus-cMK.jpg | |||
|caption= Crouching Middle Kick | |||
|name= 2MK | |||
|linkname= | |||
|input= | |||
|data= | |||
{{AttackData-XCOTA | |||
|Damage= | |||
|Guard= Low | |||
|Startup= 5 | |||
|Active= | |||
|Recovery= | |||
|Adv. Hit= | |||
|Adv. Guard= | |||
|Adv. Dash= | |||
|description= Hits low. Useful for when you don't want to hard knockdown with sweep to keep corner position/pressure. | |||
}} | |||
}} | |||
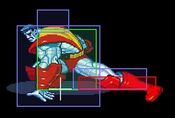
{{MoveData | |||
|image= COTA-Colossus-cHK.jpg | |||
|caption= Crouching Hard Kick | |||
|name= 2HK | |||
|linkname= | |||
|input= | |||
|data= | |||
{{AttackData-XCOTA | |||
|Damage= | |||
|Guard= Low | |||
|Startup= 8 | |||
|Active= | |||
|Recovery= | |||
|Adv. Hit= | |||
|Adv. Guard= | |||
|Adv. Dash= | |||
|description= Colossus' second longest ground normal. Has long active frames which makes it ideal for catching tech roll mashers. | |||
}} | |||
}} | |||
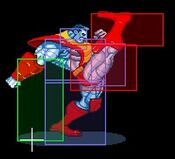
=== Jumping Normals === | |||
{{MoveData | |||
|image= COTA-Colossus-jLP.jpg | |||
|caption= Jumping Light Punch | |||
|name= jLP | |||
|linkname= | |||
|input= | |||
|data= | |||
{{AttackData-XCOTA | |||
|Damage= | |||
|Guard= High | |||
|Startup= 4 | |||
|Active= | |||
|Recovery= | |||
|Adv. Hit= | |||
|Adv. Guard= | |||
|Adv. Dash= | |||
|description= Fast aerial attack with a good hitbox. Great for stuffing out air to air or quick rising for a pseudo antiair. | |||
}} | |||
}} | |||
{{MoveData | |||
|image= COTA-Colossus-jMP.jpg | |||
|caption= Jumping Middle Punch | |||
|name= jMP | |||
|linkname= | |||
|input= | |||
|data= | |||
{{AttackData-XCOTA | |||
|Damage= | |||
|Guard= High | |||
|Startup= 7 | |||
|Active= | |||
|Recovery= | |||
|Adv. Hit= | |||
|Adv. Guard= | |||
|Adv. Dash= | |||
|description= Knocks the opponent downward so be careful when using this to air to air normal jump height opponents as they may recover before you do for a punish. Not used very often. | |||
}} | |||
}} | |||
{{MoveData | |||
|image= COTA-Colossus-jHP.jpg | |||
|caption= Jumping Hard Punch | |||
|name= jHP | |||
|linkname= | |||
|input= | |||
|data= | |||
{{AttackData-XCOTA | |||
|Damage= | |||
|Guard= High | |||
|Startup= 8 | |||
|Active= | |||
|Recovery= | |||
|Adv. Hit= | |||
|Adv. Guard= | |||
|Adv. Dash= | |||
|description= One of Colosuss' most important normals. Can beat a lot of moves if properly spaced as the hitbox is massive and in front of the hurtbox. This move is also useful for mobility as it propels Colosuss forward and slightly up, combine with a dash jump to reach near full screen. Timing this attack in an air combo affords Colossus a corner infinite on most characters. | |||
}} | |||
}} | |||
{{MoveData | |||
|image= Col-d-jhp.png | |||
|caption= Jumping Downward Hard Punch | |||
|name= j2HP | |||
|linkname= | |||
|input= | |||
|data= | |||
{{AttackData-XCOTA | |||
|Damage= | |||
|Guard= High | |||
|Startup= 11 | |||
|Active= | |||
|Recovery= | |||
|Adv. Hit= | |||
|Adv. Guard= | |||
|Adv. Dash= | |||
|description= A downward striking punch that's very hard to anti-air. Knocks the opponent downward so be careful when using this to air to air normal jump height opponents as they may recover before you do for a punish. | |||
}} | |||
}} | |||
{{MoveData | |||
|image= COTA-Colossus-jLK.jpg | |||
|caption= Jumping Light Kick | |||
|name= jLK | |||
|linkname= | |||
|input= | |||
|data= | |||
{{AttackData-XCOTA | |||
|Damage= | |||
|Guard= High | |||
|Startup= 4 | |||
|Active= | |||
|Recovery= | |||
|Adv. Hit= | |||
|Adv. Guard= | |||
|Adv. Dash= | |||
|description= Quick knee, not much use outside of combos. | |||
}} | |||
}} | |||
{{MoveData | |||
|image= COTA-Colossus-jMK.jpg | |||
|caption= Jumping Middle Kick | |||
|name= jMK | |||
|linkname= | |||
|input= | |||
|data= | |||
{{AttackData-XCOTA | |||
|Damage= | |||
|Guard= | |||
|Startup= 6 | |||
|Active= | |||
|Recovery= | |||
|Adv. Hit= | |||
|Adv. Guard= | |||
|Adv. Dash= | |||
|description= Solid air to ground button, goes lower than Colossus' other aerial kicks. | |||
}} | |||
}} | |||
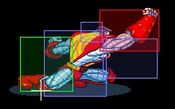
{{MoveData | |||
|image= COTA-Colossus-jHK-1.jpg | |||
|image2= COTA-Colossus-jHK-0.jpg | |||
|caption= Jumping Hard Kick (behind) | |||
|caption2= Jumping Hard Kick (in front) | |||
|name= jHK | |||
|linkname= | |||
|input= | |||
|data= | |||
{{AttackData-XCOTA | |||
|Damage= | |||
|Guard= | |||
|Startup= 8|11 | |||
|Active= | |||
|Recovery= | |||
|Adv. Hit= | |||
|Adv. Guard= | |||
|Adv. Dash= | |||
|description= Longest range aerial kick. Has an initial hit box behind Colossus so you can use this to crossup most standing opponents with good timing. Useful for combos as well as it knocks the opponent slightly upward. | |||
}} | |||
}} | |||
'''F+HP''' (toward + hard punch): A swinging punch with less range than his usual HP, but much more dizzy power. If it's the move that dizzies the opponent, they will be dizzy on their back (except Akuma) , and you can start off a combo by picking them up OTG for a throw.<br> | '''F+HP''' (toward + hard punch): A swinging punch with less range than his usual HP, but much more dizzy power. If it's the move that dizzies the opponent, they will be dizzy on their back (except Akuma) , and you can start off a combo by picking them up OTG for a throw.<br> | ||
| Line 230: | Line 491: | ||
Unless it kills, this super is not safe to use vs Sentinel, he recovers first. | Unless it kills, this super is not safe to use vs Sentinel, he recovers first. | ||
| Line 356: | Line 496: | ||
Latest revision as of 11:35, 22 June 2024
Introduction
Colossus is a slow, powerful character who emphasizes using his large buttons to control space and pressure his opponents into allowing him to start his potentially deadly throw combos. Colossus is easy to pick up and play with a simple game plan which is why he is considered strong but suffers when opponents can keep him away or out prioritize his normals. Colossus has one of the best supers in the game for guard cancelling and can sit on a life lead with full meter effectively walling out opponents who can not open him up without committing to a risky strategy.
| Strengths | Weaknesses |
|---|---|
|
|
Attack Chain
Ground Chain: Colossus can chain any light button into any button of greater strength. Colossus can not combo middle buttons into buttons of a greater strength.
Normal Jump Chain: Any kick to any punch.
Super Jump Chain: Any kick to any punch.
Standing Normals
| Damage | Guard | Startup | Active | ||
|---|---|---|---|---|---|
| - | Any | 4 | - | ||
| Recovery | Adv. Hit | Adv. Guard | Adv. Dash | ||
| - | - | - | - | ||
|
Simple poke, mashable and chips. Great for pressuring defensive opponents. | |||||
| Damage | Guard | Startup | Active | ||
|---|---|---|---|---|---|
| - | Any | 8 | - | ||
| Recovery | Adv. Hit | Adv. Guard | Adv. Dash | ||
| - | - | - | - | ||
|
Somewhat slow start up but remains very active and is great for stuffing out other normals. | |||||
| Damage | Guard | Startup | Active | ||
|---|---|---|---|---|---|
| - | Any | 14 | - | ||
| Recovery | Adv. Hit | Adv. Guard | Adv. Dash | ||
| - | - | - | - | ||
|
Slow long reaching normal, not much use outside of poking taller characters. | |||||
| Damage | Guard | Startup | Active | ||
|---|---|---|---|---|---|
| - | Any | 4 | - | ||
| Recovery | Adv. Hit | Adv. Guard | Adv. Dash | ||
| - | - | - | - | ||
|
Short knee used to catch falling medium/heavy opponents on corner infinites when dashed into, not a good neutral tool. | |||||
| Damage | Guard | Startup | Active | ||
|---|---|---|---|---|---|
| - | Any | 6 | - | ||
| Recovery | Adv. Hit | Adv. Guard | Adv. Dash | ||
| - | - | - | - | ||
|
Long kick with a nice hit box, good for poking on certain matchups but generally not central to Colossus gameplay. | |||||
| Damage | Guard | Startup | Active | ||
|---|---|---|---|---|---|
| - | Any | 14 | - | ||
| Recovery | Adv. Hit | Adv. Guard | Adv. Dash | ||
| - | - | - | - | ||
|
Launching attack used in most of Colossus grounded bread and butters, slow start up but is an invaluable anti-air when spaced properly | |||||
Crouching Normals
| Damage | Guard | Startup | Active | ||
|---|---|---|---|---|---|
| - | Any | - | 4 | ||
| Recovery | Adv. Hit | Adv. Guard | Adv. Dash | ||
| - | - | - | - | ||
|
Very similar use to 5LP, Simple poke, mashable and chips. Great for pressuring defensive opponents. | |||||
| Damage | Guard | Startup | Active | ||
|---|---|---|---|---|---|
| - | Any | 6 | - | ||
| Recovery | Adv. Hit | Adv. Guard | Adv. Dash | ||
| - | - | - | - | ||
|
Soft launcher, can loop onto itself in the corner against medium and heavy charaters (to an extent). Good for a dashback AA. Can be used to throw loop middleweights. | |||||
| Damage | Guard | Startup | Active | ||
|---|---|---|---|---|---|
| - | Any | 12 | - | ||
| Recovery | Adv. Hit | Adv. Guard | Adv. Dash | ||
| - | - | - | - | ||
|
Slower start up but not as slow as 5HP. Colossus' farthest reaching ground normal. Shrinks the back hitbox of Colossus, sometimes avoids crossups but not very practical. | |||||
| Damage | Guard | Startup | Active | ||
|---|---|---|---|---|---|
| - | Low | 4 | - | ||
| Recovery | Adv. Hit | Adv. Guard | Adv. Dash | ||
| - | - | - | - | ||
|
Basic low attack, not very fast but useful to stop/trade approaching characters that can low profile his 2LP. | |||||
| Damage | Guard | Startup | Active | ||
|---|---|---|---|---|---|
| - | Low | 5 | - | ||
| Recovery | Adv. Hit | Adv. Guard | Adv. Dash | ||
| - | - | - | - | ||
|
Hits low. Useful for when you don't want to hard knockdown with sweep to keep corner position/pressure. | |||||
| Damage | Guard | Startup | Active | ||
|---|---|---|---|---|---|
| - | Low | 8 | - | ||
| Recovery | Adv. Hit | Adv. Guard | Adv. Dash | ||
| - | - | - | - | ||
|
Colossus' second longest ground normal. Has long active frames which makes it ideal for catching tech roll mashers. | |||||
Jumping Normals
| Damage | Guard | Startup | Active | ||
|---|---|---|---|---|---|
| - | High | 4 | - | ||
| Recovery | Adv. Hit | Adv. Guard | Adv. Dash | ||
| - | - | - | - | ||
|
Fast aerial attack with a good hitbox. Great for stuffing out air to air or quick rising for a pseudo antiair. | |||||
| Damage | Guard | Startup | Active | ||
|---|---|---|---|---|---|
| - | High | 7 | - | ||
| Recovery | Adv. Hit | Adv. Guard | Adv. Dash | ||
| - | - | - | - | ||
|
Knocks the opponent downward so be careful when using this to air to air normal jump height opponents as they may recover before you do for a punish. Not used very often. | |||||
| Damage | Guard | Startup | Active | ||
|---|---|---|---|---|---|
| - | High | 8 | - | ||
| Recovery | Adv. Hit | Adv. Guard | Adv. Dash | ||
| - | - | - | - | ||
|
One of Colosuss' most important normals. Can beat a lot of moves if properly spaced as the hitbox is massive and in front of the hurtbox. This move is also useful for mobility as it propels Colosuss forward and slightly up, combine with a dash jump to reach near full screen. Timing this attack in an air combo affords Colossus a corner infinite on most characters. | |||||
| Damage | Guard | Startup | Active | ||
|---|---|---|---|---|---|
| - | High | 11 | - | ||
| Recovery | Adv. Hit | Adv. Guard | Adv. Dash | ||
| - | - | - | - | ||
|
A downward striking punch that's very hard to anti-air. Knocks the opponent downward so be careful when using this to air to air normal jump height opponents as they may recover before you do for a punish. | |||||
| Damage | Guard | Startup | Active | ||
|---|---|---|---|---|---|
| - | High | 4 | - | ||
| Recovery | Adv. Hit | Adv. Guard | Adv. Dash | ||
| - | - | - | - | ||
|
Quick knee, not much use outside of combos. | |||||
| Damage | Guard | Startup | Active | ||
|---|---|---|---|---|---|
| - | - | 6 | - | ||
| Recovery | Adv. Hit | Adv. Guard | Adv. Dash | ||
| - | - | - | - | ||
|
Solid air to ground button, goes lower than Colossus' other aerial kicks. | |||||
| Damage | Guard | Startup | Active | ||
|---|---|---|---|---|---|
| - | - | 8 | - | ||
| Recovery | Adv. Hit | Adv. Guard | Adv. Dash | ||
| - | - | - | - | ||
|
Longest range aerial kick. Has an initial hit box behind Colossus so you can use this to crossup most standing opponents with good timing. Useful for combos as well as it knocks the opponent slightly upward. | |||||
F+HP (toward + hard punch): A swinging punch with less range than his usual HP, but much more dizzy power. If it's the move that dizzies the opponent, they will be dizzy on their back (except Akuma) , and you can start off a combo by picking them up OTG for a throw.
Start: 16f
(see below.)
--Throws--
MP Piledriver - Toward or Back + MP, then toward or back for the direction to throw them:
A Piledriver in the direction you held. After the piledriver the opponent will bounce a little and allow for follow ups (weight depending). The bounce can change depending on the direction held (or not held).
Holding back/forward/up gets you a closer bounce, neutral a far one and down either a far or quicker fall depending on the weight.
HP Suplex Toss - Toward or Back + HP, then hold direction:
-Toward + HP and Toward or Neutral throws them in front of you
-Back + HP and Back or Neutral throws them behind
-Direction + HP and Opposite Direction or Up throws them above you
Tossing the opponent up is almost always the best option, but how high they go is weight dependent (so Sentinel/Colossus don't go very high at all, leaving fewer follow up options).
- The "Counter Throw" Tech Hit throws them similar to the Up + HP toss.
Air Throws - Toward/Back/Down + MP or HP:
Grab opponent then accelerate straight towards the ground in a piledriver (with a slightly further bounce, they bounce out from the direction you face). There's less of a window to combo after compared to his ground piledriver and no direction influence.
OTG Throw - Down + MP or HP to pickup an opponent off of the ground, options follow:
Once you have your opponent over your head, your allowed movements are:
-Walk forward or backwards
-Dash forward (double tap forward only, no 2P, you cannot jump while dashing, hold back to stop the dash early)
-Normal jump (any direction)
-Super Jump (you'll only go straight up)
Kick buttons do nothing, but any punch will result in a throw, such as:
-LP throws the opponent in the direction you're facing at a medium (less than normal jump) height and a far arc, vs superheavys the arc/height/distance (seem) lower, and the animation is different.
-MP is your MP piledriver in whatever direction you were holding.
-HP is your HP toss in whatever direction you were holding. To throw upwards and not get a jump by accident, dash then hold up and hit HP.
-All normal jumping punches toss the opponent in whatever direction your were holding, in the same way. If you land close to the opponent you should have enough time to combo hit OTG except maybe vs Sentinel. You also cannot toss upward, but you can toss straight down.
-Super jumping throws are similar to normal jumping, except if you throw the opponent early in your jump, you continue the rest of your super jump path up and down afterwards. Not a good idea, and neither is waiting till the top of your SJ, since the opponent can mash out.
Limitations - You can only have 2 throw types per combo in this game, so if you do throw, OTG throw (escapable as it doesn't combo), you can't do another OTG throw, or combo another throw. You also cannot OTG throw at all if you start a combo with a Tornado Grab.
-OTG pickup can be mashed out of (as well as Tech Hit), so throw ASAP.
"Command" Normals
-Elbow-Knee: LP, MK, HP
Start: 8f
--Causes a little elbow-knee move. The knee hit will knock the opponent up slightly and away. This move can cancel normals, but you can't cancel the move into a super. To get a super or anything else after it, the knee has to just barely knick them at the very end of it, and they have to be cornered. The Elbow won't even combo into the Knee if you're not close enough. The knee is extremely active and there's maybe 1 frame of landing after, although if it hits early you will be vulnerable until landing.
Special Moves
Tornado Grab (Giant Swing): D,DF,F + P -(ground only)
Start: 15f
A blockable throw special. Once the opponent is grabbed, spin the stick and mash the buttons to throw them higher. Strength determines the distance he goes forward and how long it's active. If blocked, he'll go in to a somewhat short recovery. Generally safer on block than whiffing entirely, especially for the harder versions. Usually, this move is used as a frame trap.
Limitations
-Tornado Grab can only grab an opponent with their feet on the ground. If they are considered airborne in any fashion, even if it *looks* like the grab should hit, it will pass right through them.
(example): Iceman jumps, and does an Ice Avalache right before he lands. Even though his feet appear to touch the ground, he's still considered airborne, and the Tornado Grab won't connect.
-You are not allowed to OTG Lift after the Tornado Grab. You're only allowed to OTG lift again after they've been reset by a dizzy or the combo stopped.
Shoulder Charge (Power Tackle): D,DF,F + K -(ground only)
Start: 12f (all)
--Back + Any Kick to cancel all versions, before or after they hit. Even if it hits, cancel right after, or it will go a little further and then into recovery.
--LK: Travels along the ground, knocks opponent very slightly up and away.
--MK: Travels at an angle up to a little above jump height, knocks opponent up and away. *Tiger kneeing this version lowers it's juggle trajectory.
--HK: Travels at a sharp angle up to (about) the top of the playfield, knocks opponent in a similar(?) arc to MK but higher
--Juggles are relative to the opponents current position, and as usual height varies by character weight.
Canceling the MK and HK versions immediately reduces the recovery significantly compared to the LK version, or letting the air versions go even slightly high. 13 frames compared to about 26~!
Best method it to do 2364(or 1) and keep tapping between MK and HK.
Shoulder Charge Armor
Normals will generally trade or can beat this move depending on the hitboxes, but projectile types will often "ping" off it and merely slow him down. This include normals classified as projectiles like Iceman's standing hard attacks and Storm's almost everything.
X-Special
Super Armor - D,DB,B + 3P
Meter usage: 71
Armor is immediately active, but you can't move for roughly 55 frames.
After a significant startup delay, you become shiny and don't go into hitstun, but can still be thrown. Throws don't cause the super armor to end by themselves, but the next comboed hit (that isn't a throw) will. Super Armor also doesn't stop Omega's Coils, they will hit and you will immediately lose the armor, effectively wasting you meter. Same with Colossus' Tornado Grab. You can still be dizzed, and if you are, Super Armor will end.
Regular damage will be slightly reduced, but stun damage has absolutely no reduction.
All of those setbacks make it's uses pretty limited. You will still need it when facing skilled zoners and runaways. Super Armor in conjunction with Shoulder Charge armor should make "getting in" less of a headache. Because you still need meter to Tech Hit, it's best not to use unless you are at full meter. You also don't build meter when powered up (wtf). Keep in mind this isn't a mode like Iron Body Zangief, you still can block.
Super Attack
Super Dive - D,DF,F + 2P, D+P to dive (ground and air)
Practically instant startup but huge recovery, even if it hits.
2,3,6,2+PP Will cause and instant dive without any upward animation at all.
This Super has no throwable box during startup or while traveling in the air. It returns upon the long ground recovery.
Uses:
Use as a Guard Cancel, anti-air or even to stuff many moves as they come out. Or to "hop" over an opponent's missed attack, and into the opponent.
Use as a Wakeup vs opponents trying to keep the pressure on.
Does alot of chip for a 1 (or 2) hit move, so it can chip-kill opponents with a few pixels of life left. (DOES NOT CHIP-KILL ON SUDDEN DEATH!)
Outside of that, it's easy to use in combos, but generally you'll want to use it early in the combo or the damage gets scaled down (eventually to nothing) the later it comes in.
Just don't get baited. Once your opponent sees you using it as a guard cancel/wakeup, they'll come to expect it.. and may run up and block, or jump in and do nothing, expecting you to super. Beware of Master Baiters.
Unless it kills, this super is not safe to use vs Sentinel, he recovers first.

