|
|
| Line 16: |
Line 16: |
| | info = | | | info = |
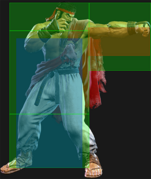
| {{AttackDataCargo-SF6/Query|ryu_5lp}} | | {{AttackDataCargo-SF6/Query|ryu_5lp}} |
| * Chains into 5LP/2LP/2LK | | * Chains into {{clr|L|5LP}}/{{clr|L|2LP}}/{{clr|L|2LK}} |
| * '''Cancel Hitconfirm Window:''' 13f | | * '''Cancel Hitconfirm Window:''' 13f |
| * '''Drive Rush cancel advantage:''' {{sf6-adv|VP|+4}} oH / {{sf6-adv|M|-1}} oB | | * '''{{clr|4|Drive Rush}} cancel advantage:''' {{sf6-adv|VP|+4}} oH / {{sf6-adv|M|-1}} oB |
| * Applies 10% damage scaling to next hit when beginning a combo (100/90/80...) | | * Applies 10% damage scaling to next hit when beginning a combo (100/90/80...) |
| <br> | | <br> |
| Line 36: |
Line 36: |
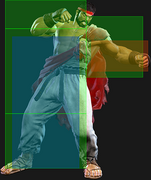
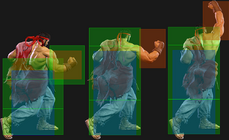
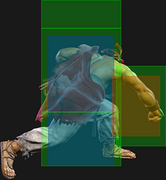
| {{AttackDataCargo-SF6/Query|ryu_5mp}} | | {{AttackDataCargo-SF6/Query|ryu_5mp}} |
| * '''Cancel Hitconfirm Window:''' 16f / 18f (TC) | | * '''Cancel Hitconfirm Window:''' 16f / 18f (TC) |
| * '''Drive Rush cancel advantage:''' {{sf6-adv|VP|+12}} oH / {{sf6-adv|VP|+4}} oB | | * '''{{clr|4|Drive Rush}} cancel advantage:''' {{sf6-adv|VP|+12}} oH / {{sf6-adv|VP|+4}} oB |
| <br> | | <br> |
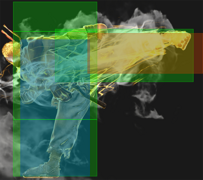
| Ryu's main combo starter, but the distance after a hit can make the follow-ups a bit finicky. The Fuwa Triple Strike target combo is the most consistent ender and is easier to hitconfirm, but does fairly low damage. | | Ryu's main combo starter, but the distance after a hit can make the follow-ups a bit finicky. The Fuwa Triple Strike target combo is the most consistent ender and is easier to hitconfirm, but does fairly low damage. |
|
| |
|
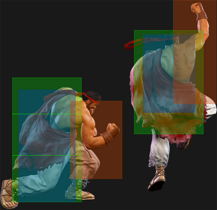
| The link into 4HP only works from absolute point blank, and even starting with a jumpin can prevent it from working. The link into 5MP or 2MP works from slightly farther out. On Counter-hit, 5MP can link into 2HP if close enough (for example, blocked Drive Rush 5LP > CH 5MP links into 2HP, but without the Drive Rush Ryu will be too far away). | | The link into 4HP only works from absolute point blank, and even starting with a jumpin can prevent it from working. The link into 5MP or 2MP works from slightly farther out. On Counter-hit, 5MP can link into 2HP if close enough (for example, blocked {{clr|4|DR~}}{{clr|L|5LP}}, CH 5MP links into 2HP, but without the {{clr|4|Drive Rush}} Ryu will be too far away). |
| }} | | }} |
|
| |
|
| Line 56: |
Line 56: |
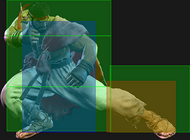
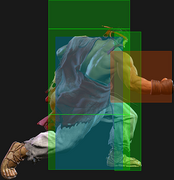
| * Forces stand on hit | | * Forces stand on hit |
| * '''Cancel Hitconfirm Window:''' 19f / 22f (TC) | | * '''Cancel Hitconfirm Window:''' 19f / 22f (TC) |
| * '''Drive Rush cancel advantage:''' {{sf6-adv|VP|+16}} oH / {{sf6-adv|VP|+11}} oB | | * '''{{clr|4|Drive Rush}} cancel advantage:''' {{sf6-adv|VP|+16}} oH / {{sf6-adv|VP|+11}} oB |
| <br> | | <br> |
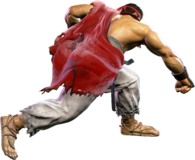
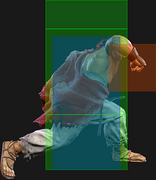
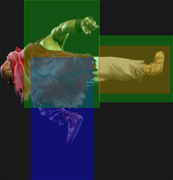
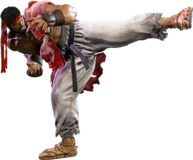
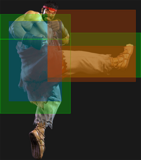
| A very aggressive heavy poke that has good advantage on block and a relatively generous cancel window, letting you run stagger pressure while confirming into big damage on hit. Has the same startup but even more range than Ken's 5HP, making it superior in a vacuum, but since Ryu's offense isn't exactly on the same level, it doesn't compliment his gameplan quite as well. Forces stand on hit, letting you either go into 5HK either with the 5HP~5HK target combo or link another normal if done out of a drive rush. Very important to his high damage combos. | | A very aggressive heavy poke that has good advantage on block and a relatively generous cancel window, letting you run stagger pressure while confirming into big damage on hit. Has the same startup but even more range than Ken's 5HP, making it superior in a vacuum, but since Ryu's offense isn't exactly on the same level, it doesn't compliment his gameplan quite as well. Forces stand on hit, letting you either go into 5HK either with the 5HP~5HK target combo or link another normal if done out of a {{clr|4|Drive Rush}}. Very important to his high damage combos. |
| }} | | }} |
|
| |
|
| Line 73: |
Line 73: |
| {{AttackDataCargo-SF6/Query|ryu_5lk}} | | {{AttackDataCargo-SF6/Query|ryu_5lk}} |
| * '''Cancel Hitconfirm Window:''' 13f | | * '''Cancel Hitconfirm Window:''' 13f |
| ** DR cancel is delayed until after 2nd active frame | | ** {{clr|4|DR}} cancel is delayed until after 2nd active frame |
| * '''Drive Rush cancel advantage:''' {{sf6-adv|VP|+5}} oH / {{sf6-adv|M|-1}} oB | | * '''{{clr|4|Drive Rush}} cancel advantage:''' {{sf6-adv|VP|+5}} oH / {{sf6-adv|M|-1}} oB |
| * Applies 10% damage scaling to next hit when beginning a combo (100/90/80...) | | * Applies 10% damage scaling to next hit when beginning a combo (100/90/80...) |
| <br> | | <br> |
| Line 132: |
Line 132: |
| | info = | | | info = |
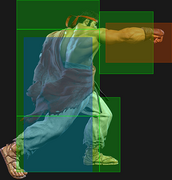
| {{AttackDataCargo-SF6/Query|ryu_2lp}} | | {{AttackDataCargo-SF6/Query|ryu_2lp}} |
| * Chains into 5LP/2LP/2LK | | * Chains into {{clr|L|5LP}}/{{clr|L|2LP}}/{{clr|L|2LK}} |
| * '''Cancel Hitconfirm Window:''' 11f | | * '''Cancel Hitconfirm Window:''' 11f |
| * '''Drive Rush cancel advantage:''' {{sf6-adv|VP|+5}} oH / {{sf6-adv|E|0}} oB | | * '''{{clr|4|Drive Rush}} cancel advantage:''' {{sf6-adv|VP|+5}} oH / {{sf6-adv|E|0}} oB |
| * Applies 10% damage scaling to next hit when beginning a combo (100/90/80...) | | * Applies 10% damage scaling to next hit when beginning a combo (100/90/80...) |
| <br> | | <br> |
| Line 152: |
Line 152: |
| {{AttackDataCargo-SF6/Query|ryu_2mp}} | | {{AttackDataCargo-SF6/Query|ryu_2mp}} |
| * '''Cancel Hitconfirm Window:''' 16f | | * '''Cancel Hitconfirm Window:''' 16f |
| * '''Drive Rush cancel advantage:''' {{sf6-adv|VP|+12}} oH / {{sf6-adv|VP|+7}} oB | | * '''{{clr|4|Drive Rush}} cancel advantage:''' {{sf6-adv|VP|+12}} oH / {{sf6-adv|VP|+7}} oB |
| <br> | | <br> |
| Decent button for applying pressure. Links into 5LK consistently, and is a great button to use after Drive Rush for frame advantage on block. | | Decent button for applying pressure. Links into 5LK consistently, and is a great button to use after {{clr|4|Drive Rush}} for frame advantage on block. |
| }} | | }} |
|
| |
|
| Line 170: |
Line 170: |
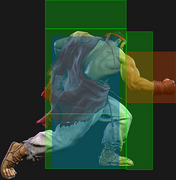
| * Forces stand on hit | | * Forces stand on hit |
| * '''Cancel Hitconfirm Window:''' 18f (only 1st active frame is cancelable) | | * '''Cancel Hitconfirm Window:''' 18f (only 1st active frame is cancelable) |
| * '''Drive Rush cancel advantage:''' {{sf6-adv|VP|+17}} oH / {{sf6-adv|VP|+9}} oB | | * '''{{clr|4|Drive Rush}} cancel advantage:''' {{sf6-adv|VP|+17}} oH / {{sf6-adv|VP|+9}} oB |
| <br> | | <br> |
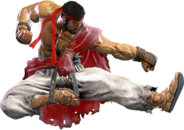
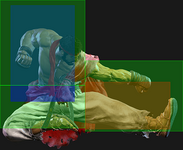
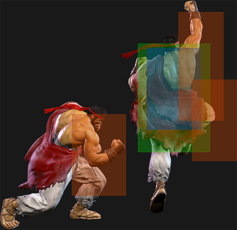
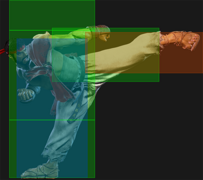
| Decent anti-air normal for situations where you don't have time to react with Shoryuken. Can be linked to after Counter-hit/Punish Counter 5MP, but the short range can make this a little inconsistent. Very unsafe on block. | | Decent anti-air normal for situations where you don't have time to react with Shoryuken. Can be linked to after Counter-hit/Punish Counter 5MP, but the short range can make this a little inconsistent. Very unsafe on block. |
| Line 186: |
Line 186: |
| | info = | | | info = |
| {{AttackDataCargo-SF6/Query|ryu_2lk}} | | {{AttackDataCargo-SF6/Query|ryu_2lk}} |
| * Chains into 5LP/2LP/2LK | | * Chains into {{clr|L|5LP}}/{{clr|L|2LP}}/{{clr|L|2LK}} |
| * Applies 10% damage scaling to next hit when beginning a combo (100/90/80...) | | * Applies 10% damage scaling to next hit when beginning a combo (100/90/80...) |
| <br> | | <br> |
| Line 204: |
Line 204: |
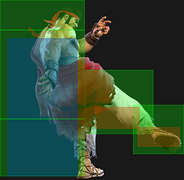
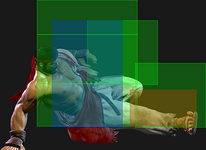
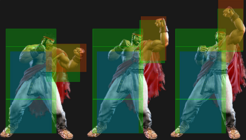
| {{AttackDataCargo-SF6/Query|ryu_2mk}} | | {{AttackDataCargo-SF6/Query|ryu_2mk}} |
| * '''Cancel Hitconfirm Window:''' 13f | | * '''Cancel Hitconfirm Window:''' 13f |
| ** Special/DR cancel is delayed until after active frames | | ** Special/{{clr|4|DR}} cancel is delayed until after active frames |
| * '''Drive Rush cancel advantage:''' {{sf6-adv|VP|+11}} oH / {{sf6-adv|VP|+4}} oB | | * '''{{clr|4|Drive Rush}} cancel advantage:''' {{sf6-adv|VP|+11}} oH / {{sf6-adv|VP|+4}} oB |
| * Applies 20% damage scaling to next hit when beginning a combo (100/80/70...) | | * Applies 20% damage scaling to next hit when beginning a combo (100/80/70...) |
| <br> | | <br> |
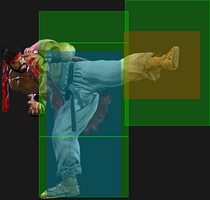
| The quintessential Shoto-style cancelable low poke, as versatile as the user wants it to be. Many characters share a nearly identical button with subtle differences, such as Ken's being 1 frame faster while having slightly less range or Cammy having 1 less frame of recovery. Overall, Ryu's has good range for keeping the opponent at bay while canceling into fireballs to safely maintain mid-range. Combos into most specials consistently, but requires Counter-hit, Punish Counter, or Drive Rush to combo into a meterless Denjin Hashogeki. | | The quintessential Shoto-style cancelable low poke, as versatile as the user wants it to be. Many characters share a nearly identical button with subtle differences, such as Ken's being 1 frame faster while having slightly less range or Cammy having 1 less frame of recovery. Overall, Ryu's has good range for keeping the opponent at bay while canceling into fireballs to safely maintain mid-range. Combos into most specials consistently, but requires Counter-hit, Punish Counter, or {{clr|4|Drive Rush}} to combo into a meterless Denjin Hashogeki. |
| }} | | }} |
|
| |
|


