EclipticEve (talk | contribs) (chun li has a page now) |
m (add subnav to bottom) |
||
| Line 731: | Line 731: | ||
{{AttackDataCargo-SF6/Query|chun-li_214214k}} | {{AttackDataCargo-SF6/Query|chun-li_214214k}} | ||
}} | }} | ||
{{Character Subnav SF6|chara={{SUBPAGENAME}}|discord={{{discord|}}} }} | |||
{{Navbox-SF6}} | {{Navbox-SF6}} | ||
Revision as of 09:27, 11 October 2022
| Pre-release information
This page is under construction based on pre-release data. Join the SF6 Resource Hub for info on editing. |
Introduction
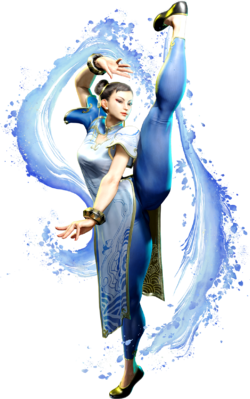
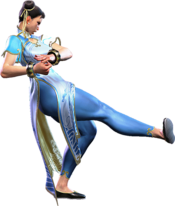
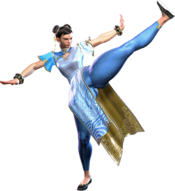
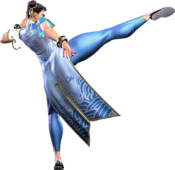
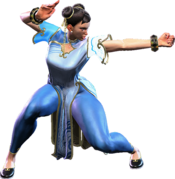
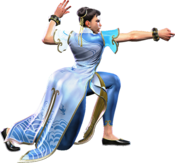
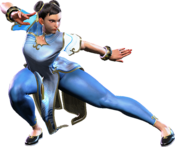
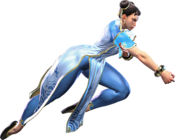
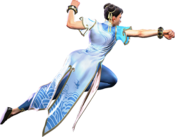
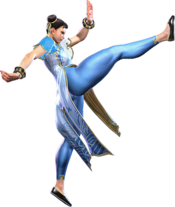
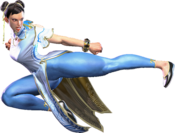
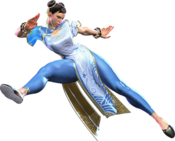
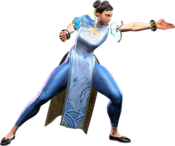
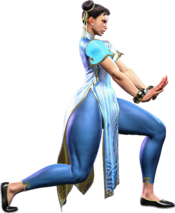
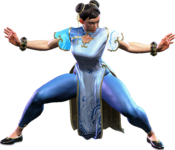
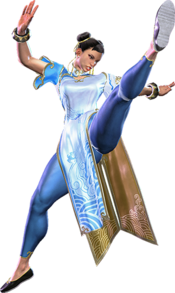
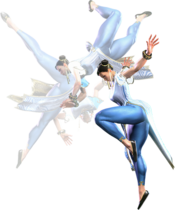
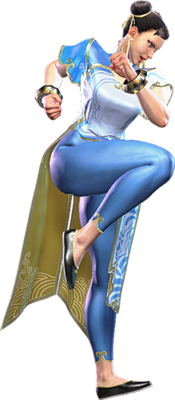
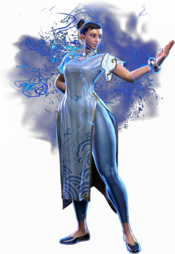
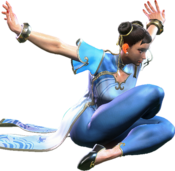
A former high-kicking ICPO agent, Chun-Li looks after Li-Fen, a victim of the Black Moon Incident. With Shadaloo sundered, she now runs Kung Fu classes and has become a well-loved member of the local community.
Chun-Li is a tried and true footsies character, with great emphasis on having many options to control space and punish her opponents in neutral. She has a little bit of everything when it comes to her general tools, but for the most part they're tailored toward whiff punishes and space control.
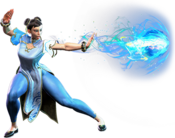
With one of the fastest forward and back walk speeds in the game, Chun is at a clear advantage when spacing out of an opponent's range ambiguously. Her poking normals compliment this grounded speed; with 2MK, 4/6MP, and 5HP being some standouts that can easily give a ton of mileage in neutral. To top it all off, she has Kikoken, a highly versatile fireball that can be used as an extended poke, confirm, or approach tool depending on the situation.
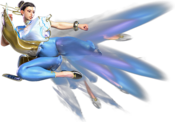
But when the opponent is tired of dealing with Chun's grounded footsie game, she is still in luck—as she has some of the most varied and rewarding anti-air tools in the entire game. She can keep it simple by anti-airing with Tensho Kicks, go for a Forced Knockdown or avoid being punished with 5MK, air-to-air with her many tools to convert air hits into combos; or go for 5HK, the slowest and riskiest option that gives absolutely devastating meterless anti-air reward. If you are jumping against Chun, she always has a very strong option to punish you, no matter the situation.
Thanks to her new Serenity Stance and Punish Counters, Chun gets great rewards off of whiff punishes in neutral without any meter required. It also can bolster her oki in the right scenarios, giving her high/low/throw mix that is very hard to see if she can manage to set it up properly. Drive Rush also helps to create stance frame traps that make an opponent unsure of when to press, while you can end in Kikoken to make the string safe. She also has a unique stance launcher that is a valuable combo tool, netting reliable safe jump setups, corner carry, and super confirms.
Perhaps the most glaring flaw with Chun is her offense, as her true mix tends to require an advantageous knockdown to be unmashable (which she can struggle to get resourceless) and she notably lacks the ability to throw loop. This removes a key layer of offense from her gameplan and can urge her to retreat back to mid-range poking once a throw is landed. She has some simple frame traps in the form of 5MP > 5LP, but this is far from her specialty compared to the rest of the cast. Another weak part of her offense is jump-ins: Chun's jump is floatier than other characters, and her air buttons are far more geared towards hitting air-to-air than air-to-ground. She has an anti-air baiting tool in the form of Air Lightning Legs, but this is a gimmicky option that whiffs on crouchers and is usually punishable. She may have to resort to using Hazanshu as a read on fireballs, which simply isn't as advantageous as a jump-in even if it gives good reward on a Punish Counter. If you like to jump in neutral a lot, Chun is probably not the pick.
There are some fairly difficult and unforgiving aspects of playing Chun. LK and MK Lightning Legs are her easiest cancel off of buttons, but they're -8 on block—she has to either have charge for Kikoken or use Drive on EX Legs to cancel into a safe special move. She relies on charge for resourceless knockdowns, as Spinning Bird Kick is her main way to accomplish this. A charge character that is meant to walk a lot can be a steep learning curve to begin with, as it's easy to accidentally input Kikoken or not charge long enough when attempting to move back and forth in neutral. The ranges of her special moves and the fact that each version of Kikoken dissipates after set distances may demand sharp knowledge of spacing. Her anti-airs all have unique ups and downs to them, and her main DP style anti-air being a 22 input can be very unwieldy and precise. Her optimal combos can be quite tricky, requiring situational awareness, stance cancels, and launcher combos with unusual button timings. Dropping some of her harder routes can also leave her in a highly punishable state. Lastly, the sheer amount of options she has in general can make her feel overwhelming and daunting to pick up.
All in all, Chun-Li is a rewarding character to master that can still be accessible simply by how strongly she rewards fundamentals. She doesn't sacrifice versatility for her strengths, and her many options let her both play unpredictably and have answers to any situation. If you want a character that can do a lot in the right hands and thrives on punishing opponents' habits, Chun-Li is a great pick.
| Pick if you like: | Avoid if you dislike: |
|---|---|
|
|
Classic & Modern Versions Comparison
| Missing Normals |
|
|---|---|
| Missing Command Normals |
|
| Shortcut-Only Specials |
|
| Assist Combos |
|
| Miscellaneous Changes |
|
| Chun-Li | |
|---|---|
| Vitals | |
| Life Points | 10000 |
| Ground Movement | |
| Forward Walk Speed | 0.050 |
| Backward Walk Speed | 0.035 |
| Forward Dash Speed | 19 |
| Backward Dash Speed | 25 |
| Forward Dash Distance | 1.508 |
| Backward Dash Distance | 1.211 |
| Drive Rush Min. Distance (Throw) | 1.044 |
| Drive Rush Min. Distance (Block) | 2.222 |
| Drive Rush Max Distance | 3.163 |
| Jumping | |
| Jump Speed | 4+42+3 |
| Jump Apex | 2.247 |
| Forward Jump Distance | 2.10 |
| Backward Jump Distance | 1.68 |
| Throws | |
| Throw Range | 0.8 |
| Throw Hurtbox | 0.33 |
Normals
Standing Normals
5LP
| Startup | Active | Recovery | Cancel | Damage | Guard | On Hit | On Block |
|---|---|---|---|---|---|---|---|
| 4 | 3 | 7 | SS Chn Sp SA | 300 | LH | +5 | -3 |
5MP
| Startup | Active | Recovery | Cancel | Damage | Guard | On Hit | On Block |
|---|---|---|---|---|---|---|---|
| 5 | 4 | 10 | SS Sp SA | 600 | LH | +6 | +1 |
5HP
| Startup | Active | Recovery | Cancel | Damage | Guard | On Hit | On Block |
|---|---|---|---|---|---|---|---|
| 13 | 3 | 20 | SS | 800 | LH | +2 | -3 |
5LK
| Startup | Active | Recovery | Cancel | Damage | Guard | On Hit | On Block |
|---|---|---|---|---|---|---|---|
| 5 | 3 | 10 | SS Sp SA | 300 | LH | +2 | -2 |
5MK
| Startup | Active | Recovery | Cancel | Damage | Guard | On Hit | On Block |
|---|---|---|---|---|---|---|---|
| 7 | 4 | 16 | SS Sp SA | 500 | LH | +4 | -2 |
5HK
| Startup | Active | Recovery | Cancel | Damage | Guard | On Hit | On Block |
|---|---|---|---|---|---|---|---|
| 14 | 3 | 18 | SS | 900 | LH | +4 | 0 |
Crouching Normals
2LP
| Startup | Active | Recovery | Cancel | Damage | Guard | On Hit | On Block |
|---|---|---|---|---|---|---|---|
| 4 | 3 | 7 | SS Chn Sp SA | 300 | LH | +4 | -2 |
2MP
| Startup | Active | Recovery | Cancel | Damage | Guard | On Hit | On Block |
|---|---|---|---|---|---|---|---|
| 6 | 4 | 13 | SS Sp SA | 600 | LH | +4 | -2 |
2HP
| Startup | Active | Recovery | Cancel | Damage | Guard | On Hit | On Block |
|---|---|---|---|---|---|---|---|
| 11 | 3(5)5 | 18 | SS Sp SA (2nd) | 450x2 | LH | +1 | -3 |
2LK
| Startup | Active | Recovery | Cancel | Damage | Guard | On Hit | On Block |
|---|---|---|---|---|---|---|---|
| 4 | 2 | 10 | SS Chn Sp SA | 200 | L | 0 | -2 |
2MK
| Startup | Active | Recovery | Cancel | Damage | Guard | On Hit | On Block |
|---|---|---|---|---|---|---|---|
| 7 | 3 | 19 | SS Sp SA | 500 | L | -2 | -6 |
2HK
| Startup | Active | Recovery | Cancel | Damage | Guard | On Hit | On Block |
|---|---|---|---|---|---|---|---|
| 9 | 6 | 19 | SS | 900 | L | HKD +33 | -7 |
Jumping Normals
j.LP
| Startup | Active | Recovery | Cancel | Damage | Guard | On Hit | On Block |
|---|---|---|---|---|---|---|---|
| 4 | 10 | 3 land | - | 300 | H | +4(+9) | +1(+6) |
j.MP
| Startup | Active | Recovery | Cancel | Damage | Guard | On Hit | On Block |
|---|---|---|---|---|---|---|---|
| 7 | 4(6)5 | 3 land | Sp SA1 | 300x2 | H | +8(+13) | +4(+9) |
j.HP
| Startup | Active | Recovery | Cancel | Damage | Guard | On Hit | On Block |
|---|---|---|---|---|---|---|---|
| 9 | 6 | 3 land | TC | 800(500) | H | +12(+16) | +7(+11) |
j.LK
| Startup | Active | Recovery | Cancel | Damage | Guard | On Hit | On Block |
|---|---|---|---|---|---|---|---|
| 4 | 8 | 3 land | - | 300 | H | +7(+9) | +4(+6) |
j.MK
| Startup | Active | Recovery | Cancel | Damage | Guard | On Hit | On Block |
|---|---|---|---|---|---|---|---|
| 6 | 5 | 3 land | - | 500 | H | +7(+13) | +3(+9) |
j.HK
Command Normals
4/6MP
| Startup | Active | Recovery | Cancel | Damage | Guard | On Hit | On Block |
|---|---|---|---|---|---|---|---|
| 7 | 3 | 15 | SS Sp SA | 600 | LH | +2 | -3 |
4HP
| Startup | Active | Recovery | Cancel | Damage | Guard | On Hit | On Block |
|---|---|---|---|---|---|---|---|
| 8 | 6 | 14 | SS Sp SA | 800 | LH | +5 | -1 |
3HP
| Startup | Active | Recovery | Cancel | Damage | Guard | On Hit | On Block |
|---|---|---|---|---|---|---|---|
| 21 | 4 | 14 | SS | 800 | H | +1 | -2 |
6HK
| Startup | Active | Recovery | Cancel | Damage | Guard | On Hit | On Block |
|---|---|---|---|---|---|---|---|
| 16 | 2 | 23 | SS | 800 | LH | -1 | -4 |
3HK
| Startup | Active | Recovery | Cancel | Damage | Guard | On Hit | On Block |
|---|---|---|---|---|---|---|---|
| 37 | 2 | 13 | - | 800 | H | +7 | +3 |
j.2MK
Target Combos
j.HP ~ HP
No results
Universal Mechanics
Throws
Throw
| Startup | Active | Recovery | Cancel | Damage | Guard | On Hit | On Block |
|---|---|---|---|---|---|---|---|
| 5 | 3 | 23 | - | 1200 (2040) | T | KD +11 | - |
Back Throw
| Startup | Active | Recovery | Cancel | Damage | Guard | On Hit | On Block |
|---|---|---|---|---|---|---|---|
| 5 | 3 | 23 | - | 1200 (2040) | T | KD +13 | - |
Drive Moves
Drive Parry
| Startup | Active | Recovery | Cancel | Damage | Guard | On Hit | On Block |
|---|---|---|---|---|---|---|---|
| 1 | 12 or until released | 33(1)(11) | - | - | - | - | - |
See Drive Parry. Perfect Parrying has only 1F of recovery and disables the opponent from canceling their attack. Perfect Parrying projectiles puts you into fixed 11 frames of recovery.
Drive Rush
No results
See Drive Rush. Framedata shown in parentheses refers to the Drive Rush version used from a Parry.
Drive Impact
| Startup | Active | Recovery | Cancel | Damage | Guard | On Hit | On Block |
|---|---|---|---|---|---|---|---|
| 26 | 2 | 35 | - | 800 | LH | KD +35 / Wall Splat KD +65 | -3 / Wall Splat HKD +72 |
See Drive Impact.
Drive Reversal
| Startup | Active | Recovery | Cancel | Damage | Guard | On Hit | On Block |
|---|---|---|---|---|---|---|---|
| 20 | 3(10)3 | 26(33) | - | 250x2 recoverable | LH | KD +23 | -6 |
See Drive Reversal.
Special Moves
Kikoken
[4]6LP
| Startup | Active | Recovery | Cancel | Damage | Guard | On Hit | On Block |
|---|---|---|---|---|---|---|---|
| 15 | [90] | 32 | SA3 | 600 | LH | -3 | -7 |
[4]6MP
| Startup | Active | Recovery | Cancel | Damage | Guard | On Hit | On Block |
|---|---|---|---|---|---|---|---|
| 12 | [55] | 33 | SA3 | 600 | LH | -3 | -7 |
[4]6HP
| Startup | Active | Recovery | Cancel | Damage | Guard | On Hit | On Block |
|---|---|---|---|---|---|---|---|
| 11 | [25] | 32 | SA3 | 600 | LH | -2 | -6 |
[4]6PP
| Startup | Active | Recovery | Cancel | Damage | Guard | On Hit | On Block |
|---|---|---|---|---|---|---|---|
| 11 | - | 28 | SA2 SA3 | 400x2 | LH | +5 | 0 |
Lightning Legs
236LK
| Startup | Active | Recovery | Cancel | Damage | Guard | On Hit | On Block |
|---|---|---|---|---|---|---|---|
| 8 | 2(5)2(5)2 | 20 | SA3 (2nd) | 250x2,300 (800) | LH | +3 | -8 |
236MK
| Startup | Active | Recovery | Cancel | Damage | Guard | On Hit | On Block |
|---|---|---|---|---|---|---|---|
| 14 | 2(4)2(4)2(5)2 | 22 | SA3 (3rd) | 225x4 (900) | LH | +3 | -8 |
236HK
| Startup | Active | Recovery | Cancel | Damage | Guard | On Hit | On Block |
|---|---|---|---|---|---|---|---|
| 23 | 2(3)2(2) 2(4)2(6)2 |
15 | SA3 (4th) | 200x5 (1000) | LH | KD +50 | -3 |
236KK
| Startup | Active | Recovery | Cancel | Damage | Guard | On Hit | On Block |
|---|---|---|---|---|---|---|---|
| 8 | 2(4)2(4) 2(4)2(4)2 |
21 | SA2 SA3 (5th) | 160x5 (800) | LH | +3 | -3 |
236KK ~ KK
No results
Air Lightning Legs
j.236LK
| Startup | Active | Recovery | Cancel | Damage | Guard | On Hit | On Block |
|---|---|---|---|---|---|---|---|
| 8 | 2(4)2(4)2 | 15(18) land | - | 300x3 (900) | LH | -4(+1) | -7(-2) |
j.236MK
| Startup | Active | Recovery | Cancel | Damage | Guard | On Hit | On Block |
|---|---|---|---|---|---|---|---|
| 10 | 2(4)2(4)2(5)2 | 15(18) land | - | 250x4 (1000) | LH | -4(+1) | -8(-3) |
j.236HK
| Startup | Active | Recovery | Cancel | Damage | Guard | On Hit | On Block |
|---|---|---|---|---|---|---|---|
| 12 | 2(4)2(3) 2(4)2(3)2 |
15(18) land | - | 220x5 (1100) | LH | -5(-2) | -9(-6) |
j.236KK
| Startup | Active | Recovery | Cancel | Damage | Guard | On Hit | On Block |
|---|---|---|---|---|---|---|---|
| 6 | 2(4)2(2)2(3) 2(2)2(3)2 |
5 land | - | 250x5,350 (1600) | LH | KD +38~39 | -32(-16) |
Hazanshu
214LK
| Startup | Active | Recovery | Cancel | Damage | Guard | On Hit | On Block |
|---|---|---|---|---|---|---|---|
| 23 | 2 | 21 | SA3 | 1000 | H | 0 | -9 |
214MK
| Startup | Active | Recovery | Cancel | Damage | Guard | On Hit | On Block |
|---|---|---|---|---|---|---|---|
| 27 | 3 | 16 | SA3 | 1000 | H | +2 | -3 |
214HK
| Startup | Active | Recovery | Cancel | Damage | Guard | On Hit | On Block |
|---|---|---|---|---|---|---|---|
| 32 | 3 | 16(18) | SA3 | 1200 | H | +6 | -1 |
214KK
| Startup | Active | Recovery | Cancel | Damage | Guard | On Hit | On Block |
|---|---|---|---|---|---|---|---|
| 26 | 3 | 16 | SA2 SA3 | 1200 | H | KD +52 OTG | -5 |
Spinning Bird Kick
[2]8LK
| Startup | Active | Recovery | Cancel | Damage | Guard | On Hit | On Block |
|---|---|---|---|---|---|---|---|
| 9 | 2(6)2(6)2 | 6+24 land | - | 333x2,334 (1000) | LH | KD +33 | -18 |
[2]8MK
| Startup | Active | Recovery | Cancel | Damage | Guard | On Hit | On Block |
|---|---|---|---|---|---|---|---|
| 16 | 2(6)2(6) 2(7)2(4)2 |
8+21 land | - | 200x4,400 (1200) | LH | KD +34 | -17 |
[2]8HK
| Startup | Active | Recovery | Cancel | Damage | Guard | On Hit | On Block |
|---|---|---|---|---|---|---|---|
| 20 | 2(4)2(8)2(6) 2(5)2(5)2(3)2 |
8+22 land | - | 180x6,320 (1400) | LH | KD +33 | -18 |
[2]8KK
| Startup | Active | Recovery | Cancel | Damage | Guard | On Hit | On Block |
|---|---|---|---|---|---|---|---|
| 16 | 2(4)2(4)2(5) 2(4)2(5)2(4)2 |
8+15 land | - | 100x6,200 (800) | LH | KD +55(+41) | -12 |
Tenshou Kyaku
2LK
| Startup | Active | Recovery | Cancel | Damage | Guard | On Hit | On Block |
|---|---|---|---|---|---|---|---|
| 5 | 2(10)2 | 27+12 land | - | 450x2 (900) | LH | KD +29 | -37 |
22MK
| Startup | Active | Recovery | Cancel | Damage | Guard | On Hit | On Block |
|---|---|---|---|---|---|---|---|
| 7 | 2(10)2 | 31+12 land | - | 450,550 (1000) | LH | KD +25 | -41 |
22HK
| Startup | Active | Recovery | Cancel | Damage | Guard | On Hit | On Block |
|---|---|---|---|---|---|---|---|
| 9 | 2(8)2(8)2(11)2 | 26+12 land | - | 200x3,600 (1200) | LH | KD +37 | -57 |
22KK
| Startup | Active | Recovery | Cancel | Damage | Guard | On Hit | On Block |
|---|---|---|---|---|---|---|---|
| 6 | 3(5)3 | 16+25 land | - | 180x5,500 (1400) | LH | KD +30 | -40 |
Stance
214P
| Startup | Active | Recovery | Cancel | Damage | Guard | On Hit | On Block |
|---|---|---|---|---|---|---|---|
| 14(~) | [57~] | - | - | - | - | - | - |
214P~LP
No results
214P~MP
No results
214P~HP
No results
214P~LK
No results
214P~MK
No results
214P~HK
No results
Super Arts
236236P
| Startup | Active | Recovery | Cancel | Damage | Guard | On Hit | On Block |
|---|---|---|---|---|---|---|---|
| 7 | 70 | 46 | - | 300x4,500 (1700) | LH | KD +22 | -22 |
| Startup | Active | Recovery | Cancel | Damage | Guard | On Hit | On Block |
|---|---|---|---|---|---|---|---|
| 7 | 50 | 16 land | - | 300x4,800 (2000) | LH | KD +14 | -20 |
| Startup | Active | Recovery | Cancel | Damage | Guard | On Hit | On Block |
|---|---|---|---|---|---|---|---|
| 11 | [2(1)x3],2(2), [2(1)x3],2(11), [2(2)x6],2(23)3 |
48 | Jmp | 2000(1000) | LH | KD +29 | -35 |
| Startup | Active | Recovery | Cancel | Damage | Guard | On Hit | On Block |
|---|---|---|---|---|---|---|---|
| 8 | 2(24)1(7)1 | 40 | - | 4000 (500x2) | LH | HKD +6 | -24 |
