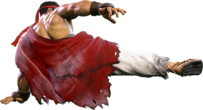
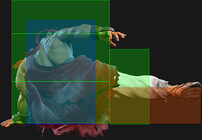
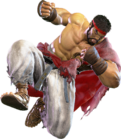
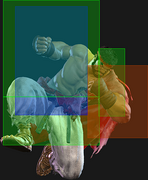
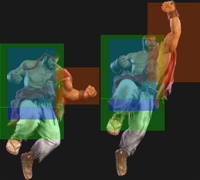
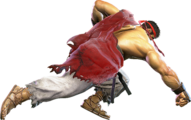
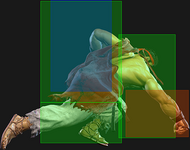
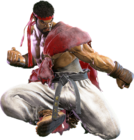
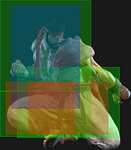
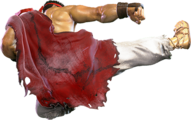
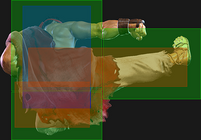
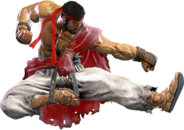
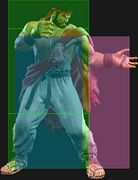
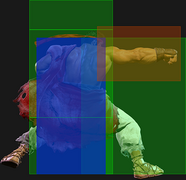
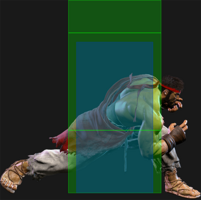
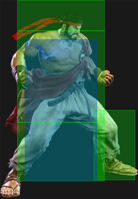
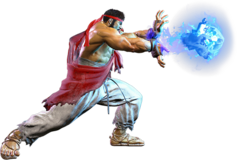
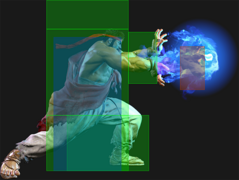
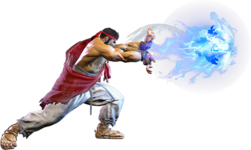
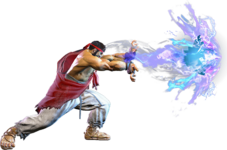
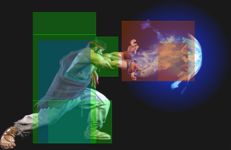
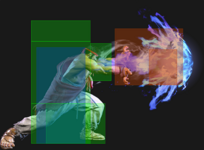
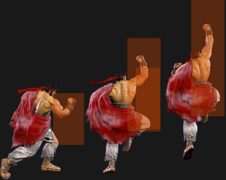
Street Fighter 6/Ryu: Difference between revisions

From SuperCombo Wiki
 
(19 intermediate revisions by 2 users not shown)
Line 21: Line 21:
* Applies 20% damage scaling to next hit when beginning a combo (100/80/70...)
<br>
<br>
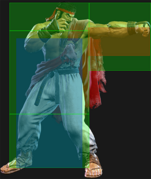
Frame data is mostly identical to {{clr|L|2LP}}, but {{clr|L|5LP}} is the preferred chain for countering {{clr|4|Drive Impact}} since it has lower recovery. Can get a 3-hit light confirm with {{clr|L|5LP}} x3.
Very similar to {{clr|L|2LP}} in terms of frame data, though {{clr|L|5LP}} has more range making it the ideal 4f punish starter. The extra active frame also makes it easier to land as a meaty, and it is slightly safer on Perfect Parry which can limit the opponent's punish options. Against {{clr|4|Drive Impact}}, {{clr|L|5LP}} recovers faster due to its lower recovery, making it the safer chain option.
 
Works in any 3-light confirm regardless of what order the buttons are chained; when starting with a {{clr|4|Drive Rush}} light, this chain can be up to 4 hits. {{clr|L|5LP}} does have slightly more pushback than {{clr|L|2LP}}, though this rarely matters in practice.
}}
}}


Line 101: Line 103:
| info    =
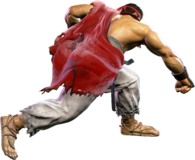
| info    =
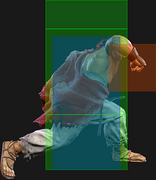
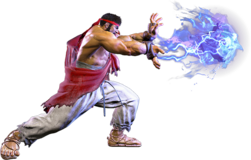
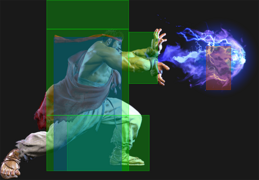
{{AttackDataCargo-SF6/Query|ryu_5mk}}
* Front leg hurtbox is raised on frames 4-11
<br>
<br>
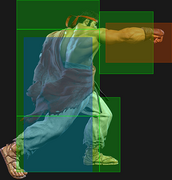
A solid mid-range poke that can go over some lows with its raised hurtbox. Generally mediocre reward, but can link into {{clr|10|SA1}} on a successful whiff punish.
Line 144: Line 147:
* Extends an upwards hurtbox on frames 1-6 that is vulnerable to air strikes
<br>
<br>
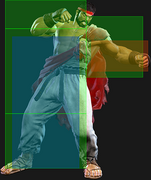
Fast but short range chainable light normal, mainly used for hitconfirms and punishing {{sf6-adv|VM|-4}} attacks. It is slightly worse than {{clr|L|5LP}} when chaining against {{clr|4|Drive Impact}} armor.
A fast light normal similar to {{clr|L|5LP}}; in comparison, {{clr|L|2LP}} has less range and fewer active frames. It is also slightly worse than {{clr|L|5LP}} when chaining against {{clr|4|Drive Impact}} armor. Its only real advantage is that it has slightly less pushback, which could affect Ryu's follow-ups at some specific ranges. Since Ryu is crouching during the animation, it could also cause certain attacks to whiff, such as Guile attempting a meaty {{clr|H|6HP}} on your wakeup.
 
Works in any 3-light confirm regardless of what order the buttons are chained; when starting with a {{clr|4|Drive Rush}} light, this chain can be up to 4 hits.
}}
}}


Line 219: Line 224:
* Applies 20% damage scaling to next hit when beginning a combo (100/80/70...)
<br>
<br>
The quintessential Shoto-style cancelable low poke, as versatile as the user wants it to be. Many characters share a nearly identical button with subtle differences, such as Ken's being 1 frame faster while having slightly less range or Cammy's having 1 less frame of recovery. Overall, Ryu's has good range for keeping the opponent at bay while canceling into fireballs to safely maintain mid-range. Combos into some version of all specials, and Denjin Hashogeki in particular gives good pressure on block, being a true string on {{clr|4|Drive Rush}}.
The quintessential Shoto-style cancelable low poke, as versatile as the user wants it to be. Many characters share a nearly identical button with subtle differences, such as Ken's being 1 frame faster while having slightly less range or Cammy's having 1 less frame of recovery. Overall, Ryu's has good range for keeping the opponent at bay while canceling into fireballs to safely maintain mid-range.  
 
Some particularly useful cancel routes are:
* 236P - low risk, low reward poking tool; vulnerable to {{clr|4|Drive Impact}} if too predictable
* {{clr|M|236MK}} - relatively safe at max range (depending on opponent's punish tools) and good knockdown ender
* {{clr|H|Denjin 214HP}} - rewarding on hit and great advantage on block; interruptible unless starting with {{clr|4|Drive Rush}}, but not on reaction
}}
}}


Line 239: Line 249:
A sweep with very good range but high punishability on block. It punishes other sweeps very well and compliments Ryu's mid-range playstyle. The range can still spare you from punishes if well spaced, but the pushback being low makes this all the more challenging. It can also be used on occasion to end Hashogeki juggles midscreen, where a Shoryuken would whiff.


Gives enough advantage on Punish counter to go for a Denjin charge and be only {{sf6-adv|VM|-5}} (safe if you are outside of 5 framer range).
Gives enough advantage on Punish counter to go for a Denjin charge and be only {{sf6-adv|VM|-5}}; whether this is useful depends on your positioning and the opponent's 5f attack range.
}}
}}
<br>
<br>
Line 358: Line 368:
* 2 hits; Counter-hit/Punish Counter bonus advantage applies to both hits
<br>
<br>
A fast overhead that can link into {{clr|M|5MP}} or {{clr|M|2MP}} when used after {{clr|4|Drive Rush}}. Ryu can also link into light normals after a Counter-hit or with perfect meaty timing, such as after {{clr|L|214LK}} + whiff {{clr|L|5LP}} in the corner.
A fast overhead that allows follow-up combos when used after {{clr|4|Drive Rush}}. Ryu can also link into light normals after a Counter-hit or with perfect meaty timing, such as after {{clr|L|214LK}} + whiff {{clr|L|5LP}} in the corner.
 
While Ryu is {{sf6-adv|P|+3}} when the opponent blocks {{clr|4|DR~}}{{clr|M|6MP}}, he is out of throw range making it hard to press a real mixup. When hitting a crouching opponent at point blank, he can link into {{clr|H|4HP}} for a powerful combo extension that forces the opponent to stand. However, if the opponent somehow gets hit while standing, {{clr|H|4HP}} will whiff; for a more guaranteed combo ender, you can instead use {{clr|M|2MP}} > {{clr|M|236MK}} or {{clr|M|5MP}}~{{clr|L|LK}}~{{clr|H|HK}} for a Denjin stock.
}}
}}


Line 374: Line 386:
{{AttackDataCargo-SF6/Query|ryu_6hp}}
* 2 hits; Counter-hit/Punish Counter bonus advantage applies to both hits
* 2nd hit can whiff at a specific range, becoming {{sf6-adv|VM|-5}} oH / {{sf6-adv|VM|-9}} oB
* If 1st hit connects on extended hurtbox and 2nd hit whiffs, becomes {{sf6-adv|VP|+6}} on CH / {{sf6-adv|VP|+8}} on PC
<br>
<br>
A powerful advancing strike with advantage on block, allowing Ryu to start pressure from mid-range. If the opponent is within this move's max range, they will be locked into a proximity guard animation when trying to walk back. The {{sf6-adv|P|+3}} block advantage is enough to continue your pressure with a {{clr|M|5MP}} or {{clr|M|2MP}} without being interrupted by an non invulnerable option, but the move now leave you too far away to initiate a throw mixup without walking. It can be up to {{sf6-adv|P|+5}} on block if spaced out, but this also results in more pushback.
A powerful advancing strike with advantage on block, allowing Ryu to start pressure from mid-range. If the opponent is within this move's max range, they will be locked into a proximity guard animation when trying to walk back.
 
The {{sf6-adv|P|+3}} block advantage is enough to continue your pressure with a {{clr|M|5MP}} or {{clr|M|2MP}} without being interrupted by an non invulnerable option, but the move leaves you too far away to initiate a throw mixup without walking. It can be up to {{sf6-adv|VP|+5}} on block if spaced out, but this also results in more pushback. After a {{clr|4|DR~}}{{clr|H|6HP}} at point blank, Ryu can microwalk for a throw that beats 4f normals, but the timing is very strict.


Can combo into to {{clr|M|5MP}} or {{clr|M|2MP}} on hit, and gets even stronger links on Counter-hit/Punish Counter. It is very susceptible to {{clr|4|Drive Impact}}, however, so it shouldn't be overly relied upon.  
Can combo into to {{clr|M|5MP}} or {{clr|M|2MP}} on hit, and on Counter-hit/Punish Counter you can easily react with a stronger combo route. It is very susceptible to {{clr|4|Drive Impact}}, however, so it shouldn't be overly relied upon.  
}}
}}


Line 417: Line 431:
* '''Cancel Hitconfirm Window:''' 19f ({{clr|10|OD Air Tatsu}} only)
<br>
<br>
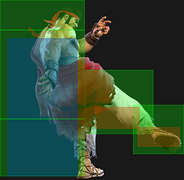
Despite the animation, this attack is not considered airborne. It has good horizontal range and a lenient hitconfirm window for the cancel if you want to spend the meter on {{clr|10|OD Air Tatsu}}. If you manage to beat the opponent's low poke and score a Punish Counter, Ryu becomes {{sf6-adv|VP|+6}} and gains a link to {{clr|M|5MP}} or {{clr|M|2MP}}. The pushback generally keeps this move safe on block, and sets Ryu up to punish any attempts to contest his pressure. Be wary of some longer range light normals that can punish if not well spaced.
Despite the animation, this attack is not considered airborne. It has good horizontal range and a lenient hitconfirm window for the cancel if you want to spend the meter on {{clr|10|OD Air Tatsu}}. If you manage to beat the opponent's low poke and score a Punish Counter, Ryu becomes {{sf6-adv|VP|+6}} and gains a link to {{clr|M|5MP}} or {{clr|M|2MP}}.
 
The pushback generally keeps this move safe on block, and sets Ryu up to punish any attempts to contest his pressure. Be wary of some longer range light normals that can punish if not well spaced.
}}
}}


Line 434: Line 450:
* 2 hits; () refers to startup of 2nd hit only
* 1st hit forces stand, puts airborne opponents into {{sf6-jug|limited juggle}} state
* 2nd hit causes ground bounce vs. airborne opponents
* 2nd hit puts airborne opponents into OTG Bounce state
* Counter-hit/Punish Counter bonus advantage applies to both hits
* '''Cancel Hitconfirm Window:''' 37f / 17f (2nd hit)
Line 441: Line 457:
Ryu's Axe Kick is cancelable on both hits, so it's easy to confirm an appropriate follow-up on hit or block. At {{sf6-adv|VM|-4}} it's fairly safe most of the time due to pushback. The first hit can whiff on crouch blockers at farther ranges. The move has a lot of active frames, making it easy to time on the opponent's wakeup.


Though risky, using it as an AA has decent reward as the first hit can be canceled to Tatsu and the second to a consistent Shoryu due to the ground bounce on airborne connect.
Though risky, using it as an AA has decent reward due to the 2nd hit's ground bounce, which can juggle into a move like {{clr|H|HP Shoryuken}} or {{clr|M|MK High Blade Kick}}. In some rare cases, a high connect only allows the 1st hit to juggle; in this case, an immediate cancel into Shoryuken or a Tatsu will also work.
}}
}}
<br>
<br>
Line 458: Line 474:
{{AttackDataCargo-SF6/Query|ryu_5hp_hk}}
* {{clr|H|HK}} whiffs on crouch blocking opponents ({{sf6-adv|VM|-18}})
* Cancelable into [[#Denjin_Charge_(22P)|Denjin Charge]] on hit by inputting 2P (KD Adv. +7)
<br>
<br>
Ryu generally gets better combo enders from {{clr|H|5HP}}, but the {{clr|H|HK}} is much easier to hitconfirm on reaction than a special move. The {{clr|H|HK}} will always connect on hit since {{clr|H|5HP}} forces stand. If the opponent stand blocks, this TC is always a true blockstring even if delayed.
The second hit can be cancelled into Denjin charge on reaction, leaving Ryu at +7.
 
On hit, the {{clr|H|HK}} ender can be canceled in order to stock a Denjin Charge; doing so sacrifices oki unless Ryu is in the corner. If blocked, the charge will not come out. If this Target Combo is juggled into, Ryu's KD advantage can be slightly better than the usual +7.
}}
}}


=====<font style="visibility:hidden; float:right">5MP~LK~HK</font>=====
Line 482: Line 499:
{{AttackDataCargo-SF6/Query|ryu_5mp_lk_hk}}
* () refers to scaled damage from {{clr|M|5MP}} combo starter
* Can come out even if {{clr|L|LK}} whiffs
* Leaves a 6f blockstring gap before final hit on block
* Cancelable into [[#Denjin_Charge_(22P)|Denjin Charge]] on hit by inputting 2P (KD Adv. +7)
<br>
<br>
A relatively weak target combo, but it's easier to confirm from {{clr|M|5MP}} than a special move. Also has some utility near max {{clr|M|5MP}} range where other follow-ups can whiff. However, the {{clr|L|LK}} can whiff if {{clr|M|5MP}} hits on an extended limb hurtbox.
The third hit can be cancelled into Denjin charge on reaction, leaving Ryu at +7.
}}


At close range, Ryu is punishable after {{clr|M|5MP}}~{{clr|L|LK}}, but it's fairly easy to space safely against most characters. For example, about half the cast cannot punish the blocked sequence {{clr|4|DR~}}{{clr|M|5MP}}, {{clr|M|5MP}}~{{clr|L|LK}} with their 4f normal, and the sequence {{clr|H|6HP}}, {{clr|M|5MP}}~{{clr|L|LK}} cannot be punished by anyone. Opponents unaware of this fact can be baited into a spacing trap as they whiff their attempted punish.


On hit, the {{clr|H|HK}} ender can be canceled in order to stock a Denjin Charge; doing so sacrifices oki unless Ryu is in the corner. If blocked, the charge will not come out.
}}
<br>
<br>


Line 637: Line 655:
| info    =
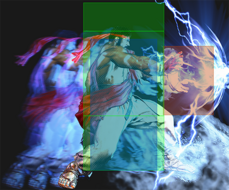
| info    =
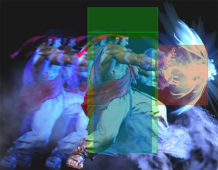
{{AttackDataCargo-SF6/Query|ryu_22p}}
* Charges up the next [[#Hadoken (Denjin 236HP)|Hadoken]], [[#Hashogeki (Denjin 214HP)|Hashogeki]], [[#Level 1 Super (236236P)|Shinku Hadoken]], or [[#Level 2 Super (214214P)|Shin Hashogeki]] into a more powerful Denjin version
* Charges up the next [[#Hadoken (Denjin 236HP)|{{clr|H|HP}}/{{clr|10|OD}} Hadoken]], [[#Hashogeki (Denjin 214HP)|{{clr|H|HP}}/{{clr|10|OD}} Hashogeki]], [[#Level 1 Super (236236P)|{{clr|10|SA1}}]], or [[#Level 2 Super (214214P)|{{clr|10|SA2}}]] into a more powerful Denjin version
* Increases damage, and may change frame advantage, knockdown advantage, or number of hits
* Can be performed after {{clr|H|5HK}}~{{clr|H|HP}} or {{clr|M|5MP}}~{{clr|L|LK}}~{{clr|H|HK}} by inputting 2P on hit only
* Can only store 1 Denjin stock at a time, and is depleted after use; does not persist between rounds
<br>
<br>
Ryu's Denjin install is an important part of his fireball game, but it's risky to charge it up in neutral unless you're at full screen. You can also make the opponent block a slow, long range fireball to get a semi-safe charge, but be weary of fast long range Supers that could punish this. There are also some knockdowns that make it easy to safely charge up, such as {{clr|10|OD Denjin Charge Hadoken}}, {{clr|10|OD Tatsu}}, or {{clr|H|HK High Blade Kick}}, after landing one of Ryu's Target Combo, and it's almost always safe after midscreen {{clr|M|MK High Blade Kick}} too.
Ryu's Denjin install is an important part of his fireball game, but it's risky to charge it up in neutral unless you're at full screen. You can also make the opponent block a slow, long range fireball to get a semi-safe charge, but be weary of fast long range Supers that could punish this. There are also some knockdowns that make it easy to safely charge up, such as {{clr|10|OD Denjin Charge Hadoken}}, {{clr|10|OD Tatsu}}, or {{clr|H|HK High Blade Kick}}. It's usually safe against midscreen {{clr|M|MK High Blade Kick}} too.
 
Both of Ryu's Target Combos give him the option to end in a Denjin Charge on hit with a different input (2P). This sacrifices any possible midscreen oki, but in the corner he can gain the Denjin stock while still maintaining his offense.
}}
}}


Line 669: Line 690:
* Applies 20% damage scaling to next hit when beginning a combo; counts as 2 hits for damage scaling when comboed into (applies to next hit)
<br>
<br>
Ryu's iconic fireball, used primarily for zoning. Compared to most projectile characters, Ryu's extended hurtbox is much shorter, making it difficult for opponents to counterpoke on startup.
Ryu's iconic fireball, used primarily for zoning. Mixing up between the varying projectile speeds makes it harder for the opponent to navigate through his fireball game. Compared to most projectile characters, Ryu's extended hurtbox is much shorter, making it difficult for opponents to counterpoke on startup.
 
{{clr|L|LP Hadoken}} is the safest, and when used at long range it gives Ryu much more freedom to set up optimal spacing while the opponent is stuck in blockstun. {{clr|M|MP Hadoken}} is slightly faster, and can throw off the opponent's parry timing because they most likely expect a slower or faster fireball. One big advantage to these two versions is that Ryu can use them even with a Denjin stock, making the opponent guess when the 2-hit fireball is coming.
 
{{clr|H|HP Hadoken}} is the fastest meterless version and the most unsafe on block if too close to the opponent. It is best used at longer ranges to prevent the opponent from walking forward, or to prevent an install move like Jamie's Drink or Kimberly's Spraycan reload. This version turns into {{clr|H|Denjin Hadoken}} when Ryu has a stock.


Mixing up between the varying projectile speeds makes it harder for the opponent to navigate through the fireball game. The {{clr|L|LP}} version is safest, and when used at long range it gives Ryu much more freedom to set up optimal spacing while the opponent is stuck in blockstun. The {{clr|10|OD}} version is fast and higher priority, making it an important tool against other zoners, and the knockdown time lets Ryu perform a Denjin Charge. If the opponent is cornered, {{clr|10|OD Hadoken}} can also juggle into {{clr|10|SA1}} on reaction. {{clr|10|OD Hadoken}} can also juggle in the corner with a {{clr|4|Drive Rush}} normal.
{{clr|10|OD Hadoken}} is fast and higher priority, making it an important tool against other zoners. The knockdown time lets Ryu perform a Denjin Charge, and in the corner he can juggle into {{clr|10|SA1}} on reaction. He can also {{clr|4|Drive Rush}} into a juggled normal against cornered opponents when starting from about 1/3 to 1/2 screen away. Unlike his other fireballs, Ryu is allowed to use {{clr|10|SA1}} when {{clr|10|OD Hadoken}} is still on the screen.
}}
}}


Line 695: Line 720:
* Applies 20% damage scaling to next hit when beginning a combo; counts as 2 hits for damage scaling when comboed into (applies to next hit)
<br>
<br>
With a Denjin charge stocked, Ryu can still use the {{clr|L|LP}} and {{clr|M|MP}} versions without expending the charge . However using the {{clr|H|HP}} version will expend the Denjin charge, while gaining an extra hit and becoming very fast, making it hard to react to in neutral. Meterless versions do not gain extra projectile priority, so an {{clr|10|OD}} or {{clr|10|Super}} projectile will beat it clean. Has enough knockdown advantage to charge up another Denjin stock, and if the opponent is in the corner Ryu can juggle into {{clr|10|SA1}} on reaction.
Hadoken gains an extra hit and becomes very fast when using {{clr|H|236HP}} or {{clr|10|236PP}} with a Denjin stock; using the {{clr|L|LP}} and {{clr|M|MP}} version lets Ryu preserve his stock while continuing to zone with projectiles. Denjin Hadoken is very hard to react to in neutral, and is great for winning fireball wars; however, the Denjin enhancement does not change how projectile priority works, so the meterless version loses to any {{clr|10|OD}} projectile and the {{clr|10|OD}} version loses to any {{clr|10|Super}} projectile.
 
On hit, Denjin Hadoken has enough knockdown advantage to charge up another Denjin stock, and in the corner Ryu can juggle into {{clr|10|SA1}} on reaction.
}}
}}


Line 704: Line 731:
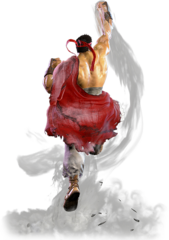
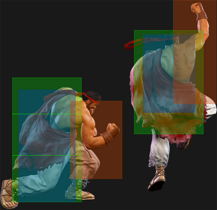
| input    = {{Classic_sf6}} 623P<br>{{Modern_sf6}} 623X or 6S (H)
| input    = {{Classic_sf6}} 623P<br>{{Modern_sf6}} 623X or 6S (H)
| images  =
| images  =
{{MoveDataCargoImage|imageHeight=220px|ryu_623lp|caption=}}
{{MoveDataCargoImage|imageHeight=240px|ryu_623lp|caption=}}
----
{{MoveDataCargoImage|imageHeight=240px|ryu_623pp|caption=}}
| hitboxes =
| hitboxes =
{{MoveDataCargoImage|hitbox=yes|imageHeight=210px|ryu_623lp|caption=}}
Line 739: Line 764:
{{MoveDataCargo
{{MoveDataCargo
| title    = Tatsumaki Senpu-kyaku
| title    = Tatsumaki Senpu-kyaku
| subtitle =
| subtitle = Tatsu
| input    = {{Classic_sf6}} 214K<br>{{Modern_sf6}} 4S (M)
| input    = {{Classic_sf6}} 214K<br>{{Modern_sf6}} 4S (M)
| images  =
| images  =
{{MoveDataCargoImage|imageHeight=200px|ryu_214lk|caption=}}
----
{{MoveDataCargoImage|imageHeight=220px|ryu_214kk|caption=}}
| hitboxes =
| hitboxes =
{{MoveDataCargoImage|hitbox=yes|imageHeight=140px|ryu_214lk|caption=}}
Line 766: Line 789:
* Puts opponent into {{sf6-jug|limited juggle}} state; later hits have more juggle potential
<br>
<br>
Tatsu is a good move for getting corner carry while still allowing oki afterward. The {{clr|L|LK}} version leaves opponents the closest to Ryu on any grounded combo, allowing Ryu to easily get either a meaty {{clr|L|LP Hashogeki}} or a basic strike throw mixup after one dash unless he canceled into it from medium and heavy buttons from longer ranges. The {{clr|M|MK}} version primarily sees usage as a combo ender in juggles where it gives Ryu some of his best corner carry, while the {{clr|H|HK}} version is Ryu's primary meterless option to switch sides in a combo. Both the {{clr|M|MK}} and {{clr|H|HK}} versions can be used predictively against most projectiles due to the lower body invincibility, and they also get better frame advantage when the later hits connect as opposed to the first hit. {{clr|10|OD Tatsu}} is a great juggle starter in the corner, and will always hit consistently due to its vacuum effect.
Tatsu is a good move for getting corner carry while still allowing oki afterward.
 
The {{clr|L|LK}} version leaves opponents the closest to Ryu on any grounded combo, allowing Ryu to easily get either a meaty {{clr|L|LP Hashogeki}} or a basic strike throw mixup after one dash unless he canceled into it from medium and heavy buttons from longer ranges. {{clr|M|MK Tatsu}} primarily sees usage as a combo ender in juggles where it gives Ryu some of his best corner carry, while the {{clr|H|HK}} version is Ryu's primary meterless option to switch sides in a combo.
 
Both the {{clr|M|MK}} and {{clr|H|HK}} versions can be used predictively against most projectiles due to the lower body invincibility, and they also get better frame advantage when the later hits connect as opposed to the first hit.
 
{{clr|10|OD Tatsu}} is a great juggle starter in the corner, and will always hit consistently due to its vacuum effect. Using this version against an already airborne opponent is less effective because it uses up a significant amount of juggle points, which severely limits Ryu's follow-up options.


Tatsu is pretty combo-friendly, but some strengths do not combo from all normal cancels. {{clr|L|5LP}} cannot naturally combo into {{clr|M|MK}}/{{clr|H|HK}} Tatsu, and {{clr|L|2LP}}/{{clr|L|5LK}} cannot naturally combo into {{clr|H|HK Tatsu}} (although they can after a Punish Counter).
Tatsu is pretty combo-friendly, but some strengths do not combo from all normal cancels. {{clr|L|5LP}} cannot naturally combo into {{clr|M|MK}}/{{clr|H|HK}} Tatsu, and {{clr|L|2LP}}/{{clr|L|5LK}} cannot naturally combo into {{clr|H|HK Tatsu}} outside of a Punish Counter scenario.
}}
}}


Line 778: Line 807:
| images  =
| images  =
{{MoveDataCargoImage|imageHeight=200px|ryu_214lk|caption=}}
----
{{MoveDataCargoImage|imageHeight=220px|ryu_214kk|caption=}}
| hitboxes =
| hitboxes =
{{MoveDataCargoImage|hitbox=yes|imageHeight=140px|ryu_j214k|caption=}}
Line 797: Line 824:
* Applies an extra 15% damage scaling to next attack when comboed into
<br>
<br>
The meterless versions of Air Tatsu are not affected by which button strength is used. The timing to connect it on a grounded opponent is a little strict and can whiff if mistimed; the frame advantage also varies significantly depending on the exact timing. If the opponent crouch blocks it will always be at least +3 on block, although most players will instinctively stand block when they see a jump. Cancels from air-to-air {{clr|M|j.MP}} if Ryu jumps forward, which is especially useful for {{clr|10|OD Air Tatsu}} since it can lead to a strong juggles near the corner.
The meterless versions of Air Tatsu are not affected by which button strength is used. The timing to connect it on a grounded opponent is a little strict and can whiff if mistimed; the frame advantage also varies significantly depending on the exact timing. If the opponent crouch blocks it will always be at least {{sf6-adv|P|+3}} on block, although most players will instinctively stand block when they see a jump.
 
Cancels from air-to-air {{clr|M|j.MP}} if Ryu jumps forward, which is especially useful for {{clr|10|OD Air Tatsu}} since it can lead to a strong juggles near the corner.
}}
}}


Line 806: Line 835:
| input    = {{Classic_sf6}} 236K<br>{{Modern_sf6}} 2S (M) or A[L~L] (L)
| input    = {{Classic_sf6}} 236K<br>{{Modern_sf6}} 2S (M) or A[L~L] (L)
| images  =
| images  =
{{MoveDataCargoImage|imageHeight=160px|ryu_236lk|caption=}}
{{MoveDataCargoImage|imageHeight=200px|ryu_236lk|caption=}}
----
{{MoveDataCargoImage|imageHeight=160px|ryu_236kk|caption=}}
| hitboxes =
| hitboxes =
{{MoveDataCargoImage|hitbox=yes|imageHeight=180px|ryu_236lk|caption=}}
Line 816: Line 843:
{{AttackDataCargo-SF6/Query|ryu_236lk}}
* Puts opponent into {{sf6-jug|limited juggle}} state
* '''Cancel Hitconfirm Window:''' 25f (Super)
* '''Cancel Hitconfirm Window:''' 22f (Super)
{{AttackDataCargo-SF6/Query|ryu_236mk}}
* Puts opponent into {{sf6-jug|limited juggle}} state
* 3f extra recovery on whiff
* '''Cancel Hitconfirm Window:''' 25f (Super)
{{AttackDataCargo-SF6/Query|ryu_236hk}}
Line 828: Line 856:
* Gives enough time to charge {{clr|10|SA2}} when canceled (depending on screen position)
* '''Cancel Hitconfirm Window:''' 27f (Super)
* Counts as 2 hits for damage scaling when comboed into (applies to next hit)
* Applies an extra 5% damage scaling to next attack when comboed into
<br>
<br>
High Blade Kick (more commonly known as "Donkey Kick") is used primarily as a juggle ender due to its high juggle potential, great oki, and consistent juggle into {{clr|10|SA3}}. LK is a quick combo ender leaving a guaranteed safe jump in the corner, The {{clr|M|MK}} version can be spaced relatively safely, and often can set up a safe Denjin Charge when used midscreen. {{clr|H|HK}} is very slow but usually safe on block due to its huge pushback. {{clr|L|2LP}} is the fastest normal that can combo into {{clr|L|236LK}}, and {{clr|H|4HP}} is the only normal which can combo into {{clr|H|HK}} without additional hit advantage.
High Blade Kick (more commonly known as "Donkey Kick") is used primarily as a combo and juggle ender due to its high juggle potential, great oki, and consistent cancel into {{clr|10|SA3}}.
 
The {{clr|L|LK}} version is a quick combo ender that sets up an auto-timed safe jump in the corner against grounded opponents. It combos naturally from both {{clr|L|2LP}} and {{clr|L|5LK}}, making it a great ender for light strings. It has fewer active frames than other versions, making it hard to space safely in neutral against most characters.
 
The {{clr|M|MK}} version can be spaced relatively safely, and often can set up a safe Denjin Charge when used midscreen. It is great for harassing the opponent's Drive gauge unless they have an unusually fast and long-range punish option. It combos from all medium normals, as well as Punish Counter {{clr|L|5LK}}/{{clr|L|2LP}}.
 
The {{clr|H|HK}} version is very slow, but the high pushback makes it much safer than other versions. Only {{clr|H|4HP}} can naturally combo into it; other buttons require {{clr|4|Drive Rush}}, Punish Counter, or juggle routes to combo successfully. Juggling into {{clr|H|236HK}} (e.g. {{clr|H|214HP}}, {{clr|4|DR~}}{{clr|H|5HP}} > {{clr|H|236HK}}) usually leaves the opponent at +42, setting up an auto-timed corner safe jump. Be careful when throwing this out in neutral, as the opponent can react with {{clr|4|Drive Impact}} unless you cancel into {{clr|10|SA3}} on reaction.


{{clr|10|OD High Blade Kick}} is the star of the show due to its Wall Bounce, which can lead to powerful juggles; it can even combo into fully charged {{clr|10|SA2}} when canceled (although the release must be manually timed). The {{clr|10|OD}} version can be comboed into from medium attacks or from a Punish Counter {{clr|L|5LK}}. If Ryu is too close to the corner, the opponent will bounce over his head, resulting in no follow-up juggle. In these situations, {{clr|10|OD Tatsu}} is preferred.
Line 841: Line 875:
| input    = {{Classic_sf6}} 214P<br>{{Modern_sf6}} 214X
| input    = {{Classic_sf6}} 214P<br>{{Modern_sf6}} 214X
| images  =
| images  =
{{MoveDataCargoImage|imageHeight=180px|ryu_214lp|caption=}}
{{MoveDataCargoImage|imageHeight=200px|ryu_214lp|caption=}}
----
{{MoveDataCargoImage|imageHeight=190px|ryu_214pp|caption=}}
| hitboxes =
| hitboxes =
{{MoveDataCargoImage|hitbox=yes|imageHeight=200px|ryu_214lp|caption=LP Version}}
Line 871: Line 903:
Hashogeki has juggle potential on all versions; the {{clr|L|LP}} and {{clr|M|MP}} versions allow for high damage juggle routes, especially in the corner. This is most commonly achieved by launching with {{clr|10|236KK}} or {{clr|10|214KK}}, then following up with a juggled {{clr|4|Drive Rush}} normal into 214P. On a grounded hit, the opponent is left standing after the {{clr|L|LP}}/{{clr|M|MP}}/{{clr|10|OD}} versions; Ryu is left too far away for an immediate throw mixup, but the opponent can still be punished for attempting to escape or hit a defensive button.


{{clr|L|214LP}} has short range and low pushback but is safe; {{clr|M|214MP}} is technically unsafe but the spacing often makes it more difficult to punish. {{clr|H|214HP}} gives Ryu frame advantage, but canceling into it leaves Ryu vulnerable during its long startup. If you condition the opponent to expect a {{clr|H|214HP}} cancel, you can punish their light normal mash by ending with the {{clr|L|LP}} or {{clr|M|MP}} versions instead, creating an intentional gap of 1-4 frames in the blockstring. Since a Counter-hit puts the opponent into a juggle state, Ryu can juggle even if he trades hits with the opponent.
{{clr|L|214LP}} has short range and low pushback but is safe; {{clr|M|214MP}} is technically unsafe but the spacing often makes it more difficult to punish. With specific setups, the {{clr|L|LP}}/{{clr|M|MP}} versions are useful as meaty tools on the opponent's wakeup.
 
{{clr|H|214HP}} gives Ryu frame advantage, but canceling into it leaves Ryu vulnerable during its long startup. If you condition the opponent to expect a {{clr|H|214HP}} cancel, you can punish their light normal mash by ending with the {{clr|L|LP}} or {{clr|M|MP}} versions instead, creating an intentional gap of 1-4 frames in the blockstring. Since a Counter-hit puts the opponent into a juggle state, Ryu can juggle even if he trades hits with the opponent.


Against opponents in Burnout, {{clr|L|214LP}} can be used for extended pressure sequences; however, Burnout increases the pushback on block, so Ryu must spend meter to force his way back in.
Line 878: Line 912:
* 1f gap: {{clr|H|2HP}} > {{clr|M|214MP}}
* 2f gap: {{clr|M|2MP}} > {{clr|10|214PP}}
* 3f gap: {{clr|L|5LK}}/{{clr|L|5LP}} > {{clr|L|214LP}}, {{clr|M|2MP}} > {{clr|M|214MP}}, {{clr|H|4HP}} > {{clr|10|214PP}}
* 3f gap: {{clr|L|5LK}}/{{clr|L|2LP}} > {{clr|L|214LP}}, {{clr|M|2MP}} > {{clr|M|214MP}}, {{clr|H|4HP}} > {{clr|10|214PP}}
* 4f gap: {{clr|L|5LP}} > {{clr|L|214LP}}, {{clr|H|4HP}} > {{clr|M|214MP}}
}}
}}
Line 888: Line 922:
| input    = {{Classic_sf6}} 214P<br>{{Modern_sf6}} 214X
| input    = {{Classic_sf6}} 214P<br>{{Modern_sf6}} 214X
| images  =
| images  =
{{MoveDataCargoImage|imageHeight=200px|ryu_214p(charged)|caption=}}
{{MoveDataCargoImage|imageHeight=220px|ryu_214p(charged)|caption=}}
----
{{MoveDataCargoImage|imageHeight=200px|ryu_214pp(charged)|caption=Get scattered lol}}
| hitboxes =
| hitboxes =
{{MoveDataCargoImage|hitbox=yes|imageHeight=200px|ryu_214p(charged)|caption=}}
Line 908: Line 940:


There are some blockstrings that can create frame traps on block:
* 1f gap: {{clr|H|4HK (2nd)}} > {{clr|10|Denjin 214P}}
* 1f gap: {{clr|4|DR~}}{{clr|M|5MP}}/{{clr|M|2MK}} > {{clr|10|Denjin 214PP}}, {{clr|H|4HK (2nd)}} > {{clr|H|Denjin 214HP}}
* 2f gap: {{clr|M|2MP}} > {{clr|10|Denjin 214PP}}, {{clr|H|2HP}} > {{clr|10|Denjin 214P}}
* 2f gap: {{clr|M|2MP}} > {{clr|10|Denjin 214PP}}, {{clr|H|2HP}} > {{clr|H|Denjin 214HP}}
* 3f gap: {{clr|H|4HP}} > {{clr|10|Denjin 214PP}}
* 3f gap: {{clr|H|4HP}} > {{clr|10|Denjin 214PP}}, {{clr|4|DR~}}{{clr|M|5MP}}/{{clr|M|2MK}} > {{clr|H|Denjin 214HP}}
}}
}}
<br>
<br>
Line 937: Line 969:
* 30% minimum damage scaling
<br>
<br>
Shinku Hadoken is Ryu's classic Super. Due to the fireball priority system, it will completely dissipate any non-Super projectile before connecting all 5 hits, although it can still be slowed down by the clash. The move has high juggle potential, making it fairly easy to land compared to many {{clr|10|Level 1 Supers}}.
Shinku Hadoken is Ryu's classic Super. Due to the fireball priority system, it will completely dissipate any non-Super projectile before connecting all 5 hits, although it can still be slowed down by the clash. The move has high juggle potential, making it fairly easy to land compared to many {{clr|10|Level 1 Supers}}. This Super can be performed even when an {{clr|10|OD Hadoken}} is on the screen, which improves Ryu's juggle routes and can also let him punish opponents jumping over fireballs at certain ranges.


If Ryu has a Denjin stock available, this Super does 400 extra damage and gains 1 additional frame of knockdown advantage on hit.
If Ryu has a Denjin stock available, this Super does 400 extra damage and gains 1 additional frame of knockdown advantage on hit. There is no way to preserve the Denjin stock while using this Super, unlike with regular Hadoken.


The button strength does not affect the travel speed. If the opponent is within ~1/2 screen, they will not be able to jump over the fireball after the Super freeze, though it's still easy to punish on block at this range.
Line 965: Line 997:
* 40% minimum damage scaling
<br>
<br>
A powered up version of Hashogeki that can be charged to a higher level by holding the Punch button. Like the original Hashogeki, it has a strike hitbox but can destroy projectile hits (up to 3). Higher level versions do more damage and drain more Drive gauge on block, but do not deal additional Chip damage against opponents in Burnout.
A powered up version of Hashogeki that can be charged to a higher level by holding the Punch button. Unlike the original Hashogeki, this Super cannot clash with projectiles. Higher level versions do more damage and drain more Drive gauge on block, but do not deal additional Chip damage against opponents in Burnout.


The Denjin Charge version of each level consumes 1 stock and deals 400 extra damage on hit (but again, no extra Chip).
The Denjin Charge version of each level consumes 1 stock and deals 400 extra damage on hit (but again, no extra Chip). There is no way to preserve the Denjin stock while using this Super, unlike with regular Hashogeki.


While this Super has some invincibility, the slower startup makes it a poor option compared to {{clr|10|SA1}} or {{clr|10|SA3}}. If attempting this, be aware that holding the button results in 3f less invincibility.
Line 993: Line 1,025:
* Button must be held for 6f after the Super freeze
<br>
<br>
A powered up version of Hashogeki that can be charged to a higher level by holding the Punch button. Like the original Hashogeki, it has a strike hitbox but can destroy projectile hits (up to 3). Higher level versions do more damage and drain more Drive gauge on block, but do not deal additional Chip damage against opponents in Burnout.
A powered up version of Hashogeki that can be charged to a higher level by holding the Punch button. Unlike the original Hashogeki, this Super cannot clash with projectiles. Higher level versions do more damage and drain more Drive gauge on block, but do not deal additional Chip damage against opponents in Burnout.


The Denjin Charge version of each level consumes 1 stock and deals 400 extra damage on hit (but again, no extra Chip).
The Denjin Charge version of each level consumes 1 stock and deals 400 extra damage on hit (but again, no extra Chip). There is no way to preserve the Denjin stock while using this Super, unlike with regular Hashogeki.


While this Super has some invincibility, the slower startup makes it a poor option compared to {{clr|10|SA1}} or {{clr|10|SA3}}. If attempting this, be aware that holding the button results in 3f less invincibility.
Line 1,024: Line 1,056:
* Gives a tumbling OTG knockdown that can be followed up with a raw {{clr|4|Drive Rush}} combo
<br>
<br>
A powered up version of Hashogeki that can be charged to a higher level by holding the Punch button. Like the original Hashogeki, it has a strike hitbox but can destroy projectile hits (up to 3). Higher level versions do more damage and drain more Drive gauge on block, but do not deal additional Chip damage against opponents in Burnout.
A powered up version of Hashogeki that can be charged to a higher level by holding the Punch button. Unlike the original Hashogeki, this Super cannot clash with projectiles. Higher level versions do more damage and drain more Drive gauge on block, but do not deal additional Chip damage against opponents in Burnout.


The Denjin Charge version of each level consumes 1 stock and deals 400 extra damage on hit (but again, no extra Chip).
The Denjin Charge version of each level consumes 1 stock and deals 400 extra damage on hit (but again, no extra Chip). There is no way to preserve the Denjin stock while using this Super, unlike with regular Hashogeki.


While this Super has some invincibility, the slower startup makes it a poor option compared to {{clr|10|SA1}} or {{clr|10|SA3}}. If attempting this, be aware that holding the button results in 3f less invincibility.


Some things that can combo into Level 3 charge are {{clr|10|OD High Blade Kick}} and {{clr|10|OD Denjin Hashogeki}}. The pushback on block is extremely high on this version, and may require the opponent to use a {{clr|4|Drive Rush}} punish starter if blocked.
Some things that can combo into Level 3 charge are {{clr|10|OD High Blade Kick}} and {{clr|10|OD Denjin Hashogeki}}. The pushback on block is extremely high on this version, and may require the opponent to hold Parry and use a {{clr|4|Drive Rush}} punish starter if blocked.
}}
}}
</tabber>
</tabber>
Line 1,048: Line 1,080:
{{AttackDataCargo-SF6/Query|ryu_236236k}}
* '''Full Invuln:''' 1-16f; '''Airborne''' 7-48f ({{FKD}} state); Armor Break
* 2f startup when canceled from {{clr|H|623HP}}
* Active frames 3-12 cause weaker non-cinematic hit; () refers to non-cinematic damage
* '''Drive Gauge Depletion:''' 1.5 bars (hit) / 0.75 bars (block)
** Cinematic time regenerates ~2.2 Drive bars for Ryu
* 50% minimum damage scaling; applies 10% immediate damage scaling when canceled from special moves
*2f startup when cancelled into from {{clr|H|623HP}}
{{AttackDataCargo-SF6/Query|ryu_236236k(ca)}}
* '''Full Invuln:''' 1-16f; '''Airborne''' 7-48f ({{FKD}} state); Armor Break
* Available at 25% HP or below
* Active frames 3-12 cause weaker non-cinematic hit; () refers to non-cinematic damage
* 2f startup when canceled from {{clr|H|623HP}}
* '''Drive Gauge Depletion:''' 2 bars (hit) / 1 bar (block)
** Cinematic time regenerates ~2.3 Drive bars for Ryu
* 50% minimum damage scaling; applies 10% immediate damage scaling when canceled from special moves
*2f startup when cancelled into from {{clr|H|623HP}}
<br>
<br>
A satisfyingly powerful and invincible uppercut Super that works well as a reversal, juggle ender, or anti-air. The range is quite short, so despite the incredibly fast 5f startup it has limited utility as a punish tool. This also causes it to whiff in some specific midscreen cancel routes.


{{clr|10|SA3}} cannot anti-air cross-ups, and the forward movement on startup can cause it to whiff under close jumps. Canceling a Shoryuken into {{clr|10|SA3}} as an anti-air causes Ryu to incur significant damage scaling, and may even lose out on the cinematic hit if the opponent is juggled high enough. This is much less of a problem for the {{clr|10|CA}} version, which retains most of its damage even without a cinematic connect.
{{clr|10|SA3}} cannot anti-air cross-ups, and the forward movement on startup can cause it to whiff under close jumps. Canceling a Shoryuken into {{clr|10|SA3}} as an anti-air causes Ryu to incur significant damage scaling, making it weaker than a raw {{clr|10|SA3}} (but generally more consistent to land). Ryu can lose a bit of damage if the opponent is juggled high enough to skip the cinematic; note that after {{clr|H|HP Shoryuken}}, the startup is faster to prevent this non-cinematic hit and to ensure it juggles properly midscreen.


If the opponent chooses to stand block this Super (especially for taller characters), they will take a little extra blockstun and Burnout chip damage as more hits connect on the way up. However, these hits do not deal additional Drive damage on block, so it's mostly irrelevant outside of Burnout. Because {{clr|10|SA3}} hits at least 3 times on block, the first hit can be used to put the opponent into Burnout before chipping out with the remaining hits. Opponents can Drive Reversal to prevent this if Ryu uses a blockstring into {{clr|10|SA3}}, but this requires them to be aware of the gimmick and to have full awareness of the health and Drive meter situation. Drive Reversal will give them a full punish as Ryu whiffs over them, so it's risky to attempt this chip-out gimmick.
If the opponent chooses to stand block this Super (especially with a tall characters), they will take a little extra blockstun and Burnout chip damage since more hits connect on the way up. However, these hits do not deal additional Drive damage on block, so it's mostly irrelevant outside of Burnout. Because {{clr|10|SA3}} hits at least 3 times on block, the first hit can be used to put the opponent into Burnout before chipping out with the remaining hits. Opponents can Drive Reversal to prevent this if Ryu uses a blockstring into {{clr|10|SA3}}, but this requires them to be aware of the gimmick and to have full awareness of the health and Drive meter situation. Drive Reversal will give them a full punish as Ryu whiffs over them, so it's risky to attempt this chip-out gimmick.
}}
}}
<br>
<br>

Latest revision as of 08:52, 19 June 2024


Introduction

Ever training, this martial artist seeks true strength. Well-mannered and sincere, Ryu travels the globe in search of worthy opponents. Having overcome the Satsui no Hado, he now seeks yet greater heights.

Ryu is the definitive Street Fighter character, and not just because he's been the protagonist for thirty years. As the original shoto character, Ryu embodies all the meaningful aspects of Street Fighter gameplay in one concise package. Ryu emphasizes a patient playstyle with strong defensive tools.

While they probably need no introduction, Ryu's signature moves are Hadoken and Shoryuken, the original fireball and DP combo. Hadoken is a good projectile with variable speeds and decent reward on hit or block, while Shoryuken is a very useful anti-air uppercut that has utility as a reversal with the OD version. From these two moves, a simple gameplan of "Hadoken or Shoryuken" emerges, informing the rest of Ryu's gameplan. Ryu pesters his opponents with his long reaching 2MK and 5HP alongside his jabs and Hadoken. When they jump in frustration, Ryu Shoryukens them back out and starts it all over again. While system mechanics have weakened this playstyle in SF6, it still retains effectiveness if Ryu can tap into system mechanics such as Drive Impact and Drive Parry.

New to Ryu's kit are Denjin Charge and Hashogeki. The former allows Ryu to stock a single charge of a resource called Denjin. When Ryu uses certain specials or supers, Denjin is spent to empower them greatly, giving them added utility on block or hit. This particularly makes his fireballs very formidable, as they become faster and beat out other fireballs of the same level. Hashogeki is a combo tool and pressure tool, giving Ryu a new way to end blockstrings or even reset pressure completely. Ryu also has Tatsumaki, an advancing spinning kick that provides corner carry and some projectile invulnerability. When combined with the Drive System, Ryu becomes a highly versatile character who can handle any situation.

Ryu's only weakness is, ironically, his greatest strength: in his commitment to fundamentals, Ryu completely lacks any major gimmicks outside of Denjin (and that is barely a gimmick unto itself). This can make it somewhat difficult for him to steal rounds and effectively demands that he play to said fundamentals at all times. That said, he is still consistent in almost every aspect, getting good return out of every successful play. He does great damage, has good okizeme off of most combo routes, and his versatile kit ensures he can handle any matchup. Ryu is a formidable character that can easily show you the ropes of Street Fighter while also holding his own beyond that. If you want a fundamentals-oriented character who rewards patient and considerate play, then walk the path of student to master with Ryu.


Pick if you like: Avoid if you dislike:
  • Playing the original Shoto that fighting games are designed around, built to teach and reward your fundamental skills
  • Good pokes and fireballs for controlling the midrange with high reward on landing them
  • A fleshed out and versatile kit that has good options regardless of the situation
  • Strong burst damage in combos with proper use of resources
  • Numerous way to get and capitalize on plus frames
  • Characters that don't excel at any particular thing
  • Lacking heavily in gimmicks or knowledge checks—it's all on you, all of the time
  • Having to choose between okizeme and charging Denjin


Classic & Modern Versions Comparison

List of differences with Modern Ryu
Missing Normals
  • Standing Medium Kick (5MK)
  • Standing Heavy Kick (5HK)
  • Jumping Light Punch (j.LP)
  • Jumping Medium Punch (j.MP)
  • Jumping Heavy Kick (j.HK)
Missing Command Normals
  • Short Uppercut (4HP)
Shortcut-Only Specials
  • High Blade Kick (2S)
    • Medium/OD Only
    • L Auto Combo uses the Light version
  • Tatsumaki Senpu-kyaku (4S)
    • Medium/OD Only
    • Aerial Tatsumaki Senpu-kyaku can be performed with 214X / 214XX
Assist Combos
  • A[L ~ L]: 5LK ~ LK High Blade Kick
    • LK High Blade Kick is unavailable outside of this Assist combo
    • LK High Blade Kick will execute even if 5LK is blocked, potentially leaving Ryu -11
  • A[M ~ M ~ M]: 2MP ~ OD Hashogeki ~ Level 2 Super (Charge Lv. 2)
    • Level 2 Super will not execute if OD Hashogeki is blocked
    • Level 2 Super can be charged to Charge Lv. 3 by holding M after the flash
    • In Burnout, this combo changes to 2MP ~ MP Hashogeki
  • A[H ~ H ~ H ~ H]: 6HP ~ 2MP ~ MP Hashogeki ~ Level 3 Super
    • MP Hashogeki will not execute if 2MP is blocked
Miscellaneous Changes
  • 2L is 2LK but switches to 2LP if chained into
    • 2LP is unavailable outside of chains
  • Fuwa Triple Strike (5MP~LK~HK) changed to 5M ~ M ~ M
  • High Double Strike (5HP~HK) changed to 5H ~ H


Ryu
SF6 Ryu Portrait.png
Vitals
Life Points 10000
Ground Movement
Forward Walk Speed 0.047
Backward Walk Speed 0.032
Forward Dash Speed 19
Backward Dash Speed 23
Forward Dash Distance 1.252
Backward Dash Distance 0.923
Drive Rush Min. Distance (Throw) 0.525
Drive Rush Min. Distance (Block) 1.878
Drive Rush Max Distance 3.628
Jumping
Jump Speed 4+38+3
Jump Apex 2.115
Forward Jump Distance 1.90
Backward Jump Distance 1.52
Throws
Throw Range 0.8
Throw Hurtbox 0.33
Frame Data Glossary - SF6
Hitbox Images

🟥 (Red): Attack hitbox

  • Appears pink for Throw hitboxes

🟩 (Green): Vulnerable hurtbox that can be hit by strikes/projectiles

  • If a move's hitbox and hurtbox overlap, the colors blend to appear orange

🟦 (Blue): Vulnerable throw hurtbox

  • Will be thrown if Pink throw hitbox touches Blue throw hurtbox


Active

How many frames a move remains active (can hurt opponents) for. For projectiles with a maximum active period, a value may be listed in [brackets], but this number is not factored into the move's total frame count.

  • For multi-hit moves with no gaps between the active hitboxes, active frames are listed as X,Y (or sometimes X*Y)
  • For multi-hit moves with gaps between hits, active frames are listed as X(n)Y where n = the frame gap between hitboxes.


Cancel

Available options for canceling one move into another move.

  • "Chn": Chain cancel (Light normals; specific chain options listed in Description)
  • "TC": Target Combo
  • "Sp": Special move
  • "SA": Super Art (if a number is listed, refers only to that specific Super; SA3 = Lv.3 Super Art)
  • "Jmp": Jump cancel (usually on hit only, if applicable)
  • "SS": Serenity Stream (Chun-Li's stance)
    • If one hit of a multi-hit attack is cancelable, this can be indicated with (1st), (2nd), etc.
    • Occasionally, a move can be canceled only into a specific follow-up (e.g. Dee Jay [4]6P > 22PP); this can be indicated by listing the move input in the Cancel field, or with an asterisk that is explained in the move notes (Sp*)


Cancel Hitconfirm Windows

Hitconfirm reaction windows into Special Moves, Target Combos, and Super Arts.

  • Refers to the amount of time (in frames) you have to cancel one attack into another attack on reaction
    • e.g. most cancelable 2MKs have a 13 frame window to cancel into a Special/Super on reaction, making them nearly impossible to hitconfirm
  • Counts from the first frame the attack connects until the final cancelable frame
    • Visual effects like hitsparks and HP drain do not actually occur until frame 2; the first frame is still counted to keep the numbers consistent with previous games, and because it is technically possible to start reacting to the character's reeling animation on frame 1
  • If a Target Combo is cancelable into another attack, the hitconfirm window will include the entire sequence starting from the first hit
    • If there is a frame gap on block between hits of the TC, the hitconfirm window may also be included for just the followup hit
    • Some sequences like Ken's 5MP~HP TC may have a range of values listed (43f~47f). In this example, inputting 5MP~HP at its usual timing gives a 43f hitconfirm into a Special/Super. Delaying the chain into HP gives more total time for the final hitconfirm.


Damage

Attack damage on hit. Multi-hit moves may have the damage listed for individual hits as X,Y (or sometimes X*Y). Sometimes a move's damage changes depending on which active frame connects, or on cinematic vs. non-cinematic hits; in this case, multiple values may be listed, and it will be clarified in the move description.

Damage Scaling

Some moves cause additional damage scaling in combos. Refer to Game Data page for a more detailed breakdown.

Scaling Types:

  • Starter: When a move begins the combo, the next attack is scaled by X percent
    • e.g. Ryu 2MK (20% Starter) > Hadoken: Hadoken is at 80% damage scaling
  • Combo: When a move is comboed into, the next attack is scaled by X percent or X number of hits
    • e.g. Ryu 2HP > OD High Blade Kick (2-Hit Combo Scaling) > Shoryuken: Shoryuken is at 70% damage scaling (100% > 100% > [skip 80%] > 70%)
    • e.g. Cammy 5HP > OD Spiral Arrow (5% Combo Scaling) > Cannon Spike: Cannon Spike is at 75% damage scaling (100% > 100% > [80-5 = 75%])
  • Immediate: When a move is comboed into, this attack is scaled by X percent
    • e.g. Drive Impact Crumple (20% Starter) > Throw (20% Immediate): Throw is at 60% damage scaling
  • Multiplier: A damage scaling multiplier applies after Perfect Parry (50%) and mid-combo Drive Rush (15%). Any hits in the combo continue their usual damage scaling, but reduced by these amounts. These can bring the minimum scaling below the usual 10%, and they stack with each other; as a result, the minimum scaling can reach 4% using a long Drive Rush combo after Perfect Parry.
  • Minimum Scaling: The lowest damage scaling that can be applied to an attack. Super Art Level 1/2/3 generally has 30%/40%/50% minimum scaling respectively. This ensures the attack will still do reasonable damage even at the end of a heavily scaled combo.


Drive Rush Cancel Advantage

Refers to the frame advantage when canceling a normal, command normal, or Target Combo into Drive Rush on hit or block (abbreviated as DRC for Drive Rush Cancel). This is calculated at the moment a follow-up attack can be input, not at the moment the character can block or perform movement options. An attack that with DRC +8 on Hit can link into an 8-frame attack, and DRC +4 on Block can create a true blockstring into a 4-frame attack.

Note that any DRC on Block worse than +4 cannot form a true blockstring, allowing the opponent to interrupt with an invincible reversal. Most light normals are slightly negative after a DRC on block, meaning the opponent can mash their fastest normal to guarantee a counter-hit (though this requires fast reactions). The attacking character could punish this with Light > DRC into an immediate invincible attack, but this would be an incredibly expensive and high-risk gambit.

Forced Knockdown

Most airborne command normals, special moves, and Super Arts put the user in a "Forced Knockdown" state. While in this state, an air knockdown will occur when being hit by any attack, even if it would otherwise cause an air reset.

As an example, Ryu's 2HP causes an air reset when used as an anti-air. Against a move like Cammy's Hooligan Combination, however, the 2HP puts her into an air knockdown state. This allows Ryu to successfully cancel 2HP into Shoryuken for a juggle, similar to how a Drive Impact wall splat works. Taking advantage of Forced Knockdown juggles is important for dealing with moves like Ken's Dragonlash, Dhalsim's Air Teleport, or Kimberly's 6HK~Hop sequence.

Moves that already cause an air knockdown, like most j.MP air-to-airs, will not display the "Forced Knockdown" message.

Guard

Refers to the direction an attack must be blocked. L is for Low attacks (must be blocked crouching), H is for High attacks/overheads (must be blocked standing), LH is for attacks that can be blocked crouching or standing. T is for Throw attacks which cannot be blocked.

Juggles

When a character is put into an Air Knockdown state, it is often possible to follow up with a Juggle attack before they hit the ground. In the simplest terms, there are 2 main juggle states:

  • Free Juggle: any attack can juggle, causing an Air Reset or an Air Knockdown
  • Limited Juggle: only specific attacks with juggle potential may juggle


The following is a more detailed overview of the SF6 juggle system:

Juggle Count (JC): The status of the character being juggled. A high JC limits which attacks can work in juggles.

  • JC0: free juggle state - any attack that can hit an airborne opponent will work
  • JC1+: limited juggle state - juggle only works if the attack's Juggle Limit ≥ defender's Juggle Count

Juggle Start (JS): When starting a juggle, the opponent's JC will be set to this value. May be different vs. standing and airborne opponents.

  • Attack with Juggle Start value of 3 will put opponent at JC3, so only attacks with Juggle Limit value ≥ 3 can follow up

Juggle Increase (JI): When opponent is already in a juggle state, attacks will increase the opponent's JC by this amount.

  • Airborne opponent at JC1 followed by attack with Juggle Increase value of 3 will set opponent to JC4

Juggle Limit (JL): Property of an attack hitbox that determines whether it connects on a juggled opponent. The JL must be ≥ the opponent's JC to hit successfully.

  • An uppercut with a JL value of 5 will connect on an opponent at JC5 or below, but will whiff on JC6 opponent
  • Most normals have a JL value of 0, meaning they only work in Free Juggle (JC0) states
  • Some multi-hit attacks have different JL values on each hit, so a 3-hit move may only hit twice in juggles

An example to tie everything together:

  • An attack (JS3) launches opponent into the air (Opponent now at JC3)
  • Followed up with an attack (JI2/JL4); it connects, because JL4 ≥ JC3 (Opponent now at JC5)
  • Attempts to juggle again with same attack (JL4), but whiffs because JL4 < JC5 (Opponent hits the ground)

Drive Rush notes:

  • DR normals have a Juggle Start/Increase value of 0
  • DR normals have +3 added to their usual Juggle Limit


On Hit/Block

These are frame advantage values when the attack hits or is blocked. If the number is positive, then the move will recover before the defender can act again. If the number is negative, the defender will be able to act before the attacker and maybe even punish. KD refers to knockdown on hit, and the listed KD Advantage refers to how many frames the attacker can act before the defender finishes their wakeup animation.

  • Note that generally, there is an extra +2 hit advantage on Counterhits and +4 hit advantage on Punish Counters (exceptions are noted in the description).


Recovery

How many frames it takes for a move to finish after the active frames have finished. For projectiles, recovery is considered to begin after the first active frame.

  • Moves with different recovery values on hit/block/whiff may have multiple values listed like X(Y), with specific details listed in the description.


Startup

How many frames it takes before the move becomes 'active' or have a hit box. The last startup frame and the first active frame are the same frame, meaning all values are written as Startup + 1.

  • Moves with multiple relevant startup values may be listed as X(Y); for example, a move that hits airborne first before hitting grounded opponents, or a 2-hit move where the first hit whiffs at some ranges.


Normals

Standing Normals

5LP
Standing Light Punch
SF6 Classic.png 5LP
SF6 Modern.png 5L
SF6 Ryu 5lp.png
SF6 Ryu 5lp hitbox.png
Hitboxes Off
Hitboxes On

5LP
Standing Light Punch
Startup Active Recovery Cancel Damage Guard On Hit On Block
4 3 7 Chn Sp SA 300 LH +4 -1
  • Chains into 5LP/2LP/2LK
  • Cancel Hitconfirm Window: 13f
  • Drive Rush cancel advantage: +4 oH / -1 oB
  • Applies 20% damage scaling to next hit when beginning a combo (100/80/70...)


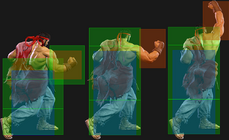
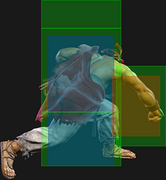
Very similar to 2LP in terms of frame data, though 5LP has more range making it the ideal 4f punish starter. The extra active frame also makes it easier to land as a meaty, and it is slightly safer on Perfect Parry which can limit the opponent's punish options. Against Drive Impact, 5LP recovers faster due to its lower recovery, making it the safer chain option.

Works in any 3-light confirm regardless of what order the buttons are chained; when starting with a Drive Rush light, this chain can be up to 4 hits. 5LP does have slightly more pushback than 2LP, though this rarely matters in practice.

5MP
Standing Medium Punch
SF6 Classic.png 5MP
SF6 Modern.png 5M
SF6 Ryu 5mp.png
SF6 Ryu 5mp hitbox.png
Hitboxes Off
Hitboxes On

5MP
Standing Medium Punch
Startup Active Recovery Cancel Damage Guard On Hit On Block
6 4 11 Sp SA TC 600 LH +7 -1
  • Cancel Hitconfirm Window: 16f / 18f (TC)
  • Drive Rush cancel advantage: +12 oH / +4 oB


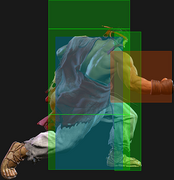
Ryu's main combo starter, but the distance after a hit can make the follow-ups a bit finicky. The Fuwa Triple Strike target combo is the most consistent ender and is easier to hitconfirm, but does fairly low damage.

The link into 4HP only works from absolute point blank, and even starting with a jumpin can prevent it from working. The link into 5MP or 2MP works from slightly farther out. On Counter-hit, 5MP can link into 2HP if close enough (for example, blocked DR~5LP, CH 5MP links into 2HP, but without the Drive Rush Ryu will be too far away).

5HP
Standing Heavy Punch
SF6 Classic.png 5HP
SF6 Modern.png 5H
SF6 Ryu 5hp.png
"Don't push a button, you won't get punished." -Pokchop
SF6 Ryu 5hp hitbox.png
Hitboxes Off
Hitboxes On

5HP
Standing Heavy Punch
Startup Active Recovery Cancel Damage Guard On Hit On Block
10 5 18 Sp SA TC 800 LH +4 -2
  • Forces stand on hit
  • Cancel Hitconfirm Window: 19f / 22f (TC)
  • Drive Rush cancel advantage: +16 oH / +11 oB


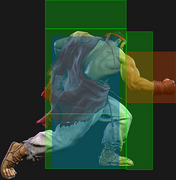
A very aggressive heavy poke that has good advantage on block and a relatively generous cancel window, letting you run stagger pressure while confirming into big damage on hit.

The move is +4 oH on hit, allowing you to link into either 5LP or 2LP on hit, and into 5MP or 2MP on Counter-hit. On Punish Counter you can get a Heavy Hashogeki (214HP) or a 2MK, both of which allow for great conversions.

Forces stand on hit, letting you either go into 5HK either with the 5HP~HK Target Combo or link another normal if done out of a Drive Rush. Very important to his high damage combos.

5LK
Standing Light Kick
SF6 Classic.png 5LK
SF6 Modern.png A[L]
SF6 Ryu 5lk.png
SF6 Ryu 5lk hitbox.png
Hitboxes Off
Hitboxes On

5LK
Standing Light Kick
Startup Active Recovery Cancel Damage Guard On Hit On Block
5 3 11 Sp SA 300 LH +2 -4
  • Cancel Hitconfirm Window: 13f
    • DR cancel is delayed until after 2nd active frame
  • Drive Rush cancel advantage: +5 oH / -1 oB
  • Applies 20% damage scaling to next hit when beginning a combo (100/80/70...)


A quick bufferable poke used for punishing and harassing the opponent at mid range. It can't be linked into from other light normals, but its range is useful for converting from buttons like 2MP when nothing else will reach.

Optimal cancel routes from 5LK depend on spacing and how the move connects:

  • Combos naturally: Shoryuken (close range), Denjin/OD Hadoken, LK High Blade Kick, LK/MK/OD Tatsu, LP Hashogeki, any Super
  • Punish Counter only: HK Tatsu, MK/OD High Blade Kick, MP/OD Hashogeki, OD Denjin Hashogeki

The Punish Counter conversion into OD High Blade Kick or OD Denjin Hashogeki are particularly noteworthy due to the high damage potential afterwards.

5MK
Standing Medium Kick
SF6 Classic.png 5MK
SF6 Modern.png --
SF6 Ryu 5mk.png
SF6 Ryu 5mk hitbox.png
Hitboxes Off
Hitboxes On

5MK
Standing Medium Kick
Startup Active Recovery Cancel Damage Guard On Hit On Block
9 3 18 - 700 LH +4 -4
  • Front leg hurtbox is raised on frames 4-11


A solid mid-range poke that can go over some lows with its raised hurtbox. Generally mediocre reward, but can link into SA1 on a successful whiff punish.

5HK
Standing Heavy Kick
SF6 Classic.png 5HK
SF6 Modern.png --
SF6 Ryu 5hk.png
Bring Lo' The Reversal Throw and Shoryken
SF6 Ryu 5hk hitbox.png
Hitboxes Off
Hitboxes On

5HK
Standing Heavy Kick
Startup Active Recovery Cancel Damage Guard On Hit On Block
12 4 20(22) - 900 LH +9 +1
  • Punish Counter: KD +84 Crumple (+11 before becoming airborne)
  • Puts airborne opponents into limited juggle state
  • Whiffs on crouching opponents (unless they extend an upwards hurtbox)
  • 2f extra recovery on block
  • Extends a hurtbox 1f before active that is vulnerable to projectiles


Fairly good anti-air from mid-long range due to its juggle properties. 5HK has good horizontal range and relatively low recovery for a heavy normal giving it some neutral utility as well, but it becomes risky to use at close range since the opponent can duck underneath the attack. Outstanding whiff punish and shimmy tool. A star blows up every time you Punish Counter with this button.


Crouching Normals

2LP
Crouching Light Punch
SF6 Classic.png 2LP
SF6 Modern.png 2L~L
SF6 Ryu 2lp.png
SF6 Ryu 2lp hitbox.png
Hitboxes Off
Hitboxes On

2LP
Crouching Light Punch
Startup Active Recovery Cancel Damage Guard On Hit On Block
4 2 9 Chn Sp SA 300 LH +4 -1
  • Chains into 5LP/2LP/2LK
  • Cancel Hitconfirm Window: 11f
  • Drive Rush cancel advantage: +5 oH / 0 oB
  • Applies 20% damage scaling to next hit when beginning a combo (100/80/70...)
  • Extends an upwards hurtbox on frames 1-6 that is vulnerable to air strikes


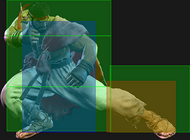
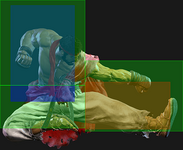
A fast light normal similar to 5LP; in comparison, 2LP has less range and fewer active frames. It is also slightly worse than 5LP when chaining against Drive Impact armor. Its only real advantage is that it has slightly less pushback, which could affect Ryu's follow-ups at some specific ranges. Since Ryu is crouching during the animation, it could also cause certain attacks to whiff, such as Guile attempting a meaty 6HP on your wakeup.

Works in any 3-light confirm regardless of what order the buttons are chained; when starting with a Drive Rush light, this chain can be up to 4 hits.

2MP
Crouching Medium Punch
SF6 Classic.png 5HP
SF6 Modern.png A[M]
SF6 Ryu 2mp.png
SF6 Ryu 2mp hitbox.png
Hitboxes Off
Hitboxes On

2MP
Crouching Medium Punch
Startup Active Recovery Cancel Damage Guard On Hit On Block
6 4 13 Sp SA 600 LH +5 0
  • Cancel Hitconfirm Window: 16f
  • Drive Rush cancel advantage: +12 oH / +7 oB
  • Extends an upwards hurtbox on frames 1-9 that is vulnerable to air strikes


Decent button for applying pressure. Links into 5LK consistently, and is a great button to use after Drive Rush for frame advantage on block. Due to its fast speed and disjoint, it's a useful button for checking an opponent's raw Drive Rush.

2HP
Crouching Heavy Punch
SF6 Classic.png 2HP
SF6 Modern.png 2H
SF6 Ryu 2hp.png
SF6 Ryu 2hp hitbox.png
Hitboxes Off
Hitboxes On

2HP
Crouching Heavy Punch
Startup Active Recovery Cancel Damage Guard On Hit On Block
9 6 21(22) Sp SA 800 LH +1 -7
  • Anti-Air Invuln: 9f (Fist), 10-14f (Head); cannot hit cross-up
  • Forces stand on hit
  • Only 1st active frame is cancelable; () refers to hit/block recovery on 1st active frame only
  • Active frames 2-5 have 5f less hitstun (can be punishable if used as a meaty)
  • Cancel Hitconfirm Window: 18f (only 1st active frame is cancelable)
  • Drive Rush cancel advantage: +17 oH / +9 oB


Decent anti-air normal for situations where you don't have time to react with Shoryuken. Can be linked to after Counter-hit/Punish Counter 5MP, but the short range can make this a little inconsistent. Very unsafe on block.

2LK
Crouching Light Kick
SF6 Classic.png 2LK
SF6 Modern.png 2L
SF6 Ryu 2lk.png
SF6 Ryu 2lk hitbox.png
Hitboxes Off
Hitboxes On

2LK
Crouching Light Kick
Startup Active Recovery Cancel Damage Guard On Hit On Block
5 2 10 Chn 200 L +3 -3
  • Chains into 5LP/2LP/2LK
  • Applies 20% damage scaling to next hit when beginning a combo (100/80/70...)


Ryu's main low combo starter when chained into either of his light punches. Can lead to a 3-hit light confirm into 5LP or 2LP.

2MK
Crouching Medium Kick
SF6 Classic.png 2MK
SF6 Modern.png 2M
SF6 Ryu 2mk.png
Distilled Footsies
SF6 Ryu 2mk hitbox.png
Hitboxes Off
Hitboxes On

2MK
Crouching Medium Kick
Startup Active Recovery Cancel Damage Guard On Hit On Block
8 3 19 Sp SA 500 L +1 -6
  • Cancel Hitconfirm Window: 13f
    • Special/DR cancel is delayed until after active frames
  • Drive Rush cancel advantage: +11 oH / +4 oB
  • Applies 20% damage scaling to next hit when beginning a combo (100/80/70...)


The quintessential Shoto-style cancelable low poke, as versatile as the user wants it to be. Many characters share a nearly identical button with subtle differences, such as Ken's being 1 frame faster while having slightly less range or Cammy's having 1 less frame of recovery. Overall, Ryu's has good range for keeping the opponent at bay while canceling into fireballs to safely maintain mid-range.

Some particularly useful cancel routes are:

  • 236P - low risk, low reward poking tool; vulnerable to Drive Impact if too predictable
  • 236MK - relatively safe at max range (depending on opponent's punish tools) and good knockdown ender
  • Denjin 214HP - rewarding on hit and great advantage on block; interruptible unless starting with Drive Rush, but not on reaction

2HK
Crouching Heavy Kick
SF6 Classic.png 2HK
SF6 Modern.png 3H
SF6 Ryu 2hk.png
SF6 Ryu 2hk hitbox.png
Hitboxes Off
Hitboxes On

2HK
Crouching Heavy Kick
Startup Active Recovery Cancel Damage Guard On Hit On Block
9 3 23(29) - 900 L HKD +32 -12
  • Counter-hit/Punish Counter: HKD +47
  • Has juggle potential; not a Hard Knockdown when juggled into
  • On block, plays out a fixed 29f recovery (cannot be made safer with meaty timing)


A sweep with very good range but high punishability on block. It punishes other sweeps very well and compliments Ryu's mid-range playstyle. The range can still spare you from punishes if well spaced, but the pushback being low makes this all the more challenging. It can also be used on occasion to end Hashogeki juggles midscreen, where a Shoryuken would whiff.

Gives enough advantage on Punish counter to go for a Denjin charge and be only -5; whether this is useful depends on your positioning and the opponent's 5f attack range.


Jumping Normals

j.LP
Jumping Light Punch
SF6 Classic.png j.LP
SF6 Modern.png --
SF6 Ryu jlp.png
SF6 Ryu jlp hitbox.png
Hitboxes Off
Hitboxes On

j.LP
Jumping Light Punch
Startup Active Recovery Cancel Damage Guard On Hit On Block
4 10 3 land - 300 H +9 +5
  • Can be used as a fuzzy instant overhead


A quick air-to-air, useful against close range jumps if you're not ready for a cross-cut Shoryuken.

The instant overhead property allows Ryu to close out a round by making the opponent block a deep jump-in; as they transition to a crouch block, they will be stuck in a standing state for a few frames, allowing the j.LP to connect. This is high risk and should only ever be attempted if it is certain to end the round.

j.MP
Jumping Medium Punch
SF6 Classic.png j.MP
SF6 Modern.png --
SF6 Ryu jmp.png
SF6 Ryu jmp hitbox.png
Hitboxes Off
Hitboxes On

j.MP
Jumping Medium Punch
Startup Active Recovery Cancel Damage Guard On Hit On Block
8 2,3 3 land Sp 350x2 H +11,+12 (≤ +13) +7,+8 (≤ +9)
  • Both hits are cancelable and put airborne opponents into limited juggle state
  • Shifts Ryu's hurtbox upward during startup


Ryu's most rewarding air-to-air since it causes a knockdown. The follow-up juggle possibilities depend on the height of each character at the time it connects. Only the forward jump version is cancelable.

j.HP
Jumping Heavy Punch
SF6 Classic.png j.HP
SF6 Modern.png j.H
SF6 Ryu jhp.png
SF6 Ryu jhp hitbox.png
Hitboxes Off
Hitboxes On

j.HP
Jumping Heavy Punch
Startup Active Recovery Cancel Damage Guard On Hit On Block
9 6 3 land - 800 H +15 +11
  • Spike knockdown on Counter-hit/Punish Counter vs. airborne opponents


Jump-in with a good downward reaching hitbox for closer range jumps and throw baits.

j.LK
Jumping Light Kick
SF6 Classic.png j.LK
SF6 Modern.png j.L
SF6 Ryu jlk.png
SF6 Ryu jlk hitbox.png
Hitboxes Off
Hitboxes On

j.LK
Jumping Light Kick
Startup Active Recovery Cancel Damage Guard On Hit On Block
6 10 3 land - 300 H +9 +6
  • Can hit cross-up


Has a fairly narrow cross-up hitbox and limited combo potential on hit. Due to its low blockstun, Ryu can land into an immediate throw/strike mixup while the opponent is expecting a stronger air normal.

j.MK
Jumping Medium Kick
SF6 Classic.png j.MK
SF6 Modern.png j.M
SF6 Ryu jmk.png
SF6 Ryu jmk hitbox.png
Hitboxes Off
Hitboxes On

j.MK
Jumping Medium Kick
Startup Active Recovery Cancel Damage Guard On Hit On Block
7 6 3 land - 500 H +13 +9
  • Can hit cross-up
  • Shifts Ryu's hurtbox upward during startup


The better of Ryu's cross-up buttons with a wider hitbox and more hitstun/blockstun allowing consistent combo follow-ups.

j.HK
Jumping Heavy Kick
SF6 Classic.png j.HK
SF6 Modern.png --
SF6 Ryu jhk.png
SF6 Ryu jhk hitbox.png
Hitboxes Off
Hitboxes On

j.HK
Jumping Heavy Kick
Startup Active Recovery Cancel Damage Guard On Hit On Block
12 8 3 land - 800 H +15 +11

Great hitbox makes it a threat at mid-long ranges, like when jumping over a fireball.


Command Normals

6MP
Collarbone Breaker
SF6 Classic.png 6MP
SF6 Modern.png 6M
SF6 Ryu 6mp.png
SF6 Ryu 6mp hitbox.png
SF6 Ryu 6mp2 hitbox.png
Hitboxes Off
Hitboxes On

6MP
Collarbone Breaker
Startup Active Recovery Cancel Damage Guard On Hit On Block
20 1,3 19 - 300x2 H +3 -1
  • 2 hits; Counter-hit/Punish Counter bonus advantage applies to both hits


A fast overhead that allows follow-up combos when used after Drive Rush. Ryu can also link into light normals after a Counter-hit or with perfect meaty timing, such as after 214LK + whiff 5LP in the corner.

While Ryu is +3 when the opponent blocks DR~6MP, he is out of throw range making it hard to press a real mixup. When hitting a crouching opponent at point blank, he can link into 4HP for a powerful combo extension that forces the opponent to stand. However, if the opponent somehow gets hit while standing, 4HP will whiff; for a more guaranteed combo ender, you can instead use 2MP > 236MK or 5MP~LK~HK for a Denjin stock.

6HP
Solar Plexus Strike
SF6 Classic.png 6HP
SF6 Modern.png A[H]
SF6 Ryu 6hp.png
SF6 Ryu 6hp hitbox.png
SF6 Ryu 6hp2 hitbox.png
Hitboxes Off
Hitboxes On

6HP
Solar Plexus Strike
Startup Active Recovery Cancel Damage Guard On Hit On Block
20 2,3 16 - 400x2 LH +6 +3
  • 2 hits; Counter-hit/Punish Counter bonus advantage applies to both hits
  • If 1st hit connects on extended hurtbox and 2nd hit whiffs, becomes +6 on CH / +8 on PC


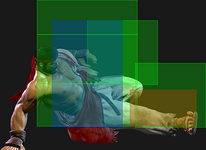
A powerful advancing strike with advantage on block, allowing Ryu to start pressure from mid-range. If the opponent is within this move's max range, they will be locked into a proximity guard animation when trying to walk back.

The +3 block advantage is enough to continue your pressure with a 5MP or 2MP without being interrupted by an non invulnerable option, but the move leaves you too far away to initiate a throw mixup without walking. It can be up to +5 on block if spaced out, but this also results in more pushback. After a DR~6HP at point blank, Ryu can microwalk for a throw that beats 4f normals, but the timing is very strict.

Can combo into to 5MP or 2MP on hit, and on Counter-hit/Punish Counter you can easily react with a stronger combo route. It is very susceptible to Drive Impact, however, so it shouldn't be overly relied upon.

4HP
Short Uppercut
SF6 Classic.png 4HP
SF6 Modern.png --
SF6 Ryu 4hp.png
SF6 Ryu 4hp hitbox.png
Hitboxes Off
Hitboxes On

4HP
Short Uppercut
Startup Active Recovery Cancel Damage Guard On Hit On Block
7 4 25(26) Sp SA 800 LH +1 -13
  • Forces stand on hit
  • 8f less hitstun on active frames 2-4 (can be unsafe with meaty timing)
  • () refers to hit/block recovery on 1st active frame only
  • Cancel Hitconfirm Window: 17f (1st active frame only)
  • Drive Rush cancel advantage: +20 oH / +6 oB


Ryu's fastest heavy normal, but has fairly short range making it finicky in combos without Drive Rush momentum. Very unsafe on block, so it should primarily be used in close range hitconfirms or canceled into a safe move like OD Hadoken/Hashogeki.

Can be used as an anti-air, but the hitbox makes it a little inconsistent against strong air normals; stick with 2HP for a more reliable normal.

6HK
Whirlwind Kick
SF6 Classic.png 6HK
SF6 Modern.png 6H
SF6 Ryu 6hk.png
Automated shimmy.
SF6 Ryu 6hk hitbox.png
Hitboxes Off
Hitboxes On

6HK
Whirlwind Kick
Startup Active Recovery Cancel Damage Guard On Hit On Block
16 4 20 Sp* 800 LH +2 -4
  • Low Crush 13-20f (not airborne)
  • Cancel Hitconfirm Window: 19f (OD Air Tatsu only)


Despite the animation, this attack is not considered airborne. It has good horizontal range and a lenient hitconfirm window for the cancel if you want to spend the meter on OD Air Tatsu. If you manage to beat the opponent's low poke and score a Punish Counter, Ryu becomes +6 and gains a link to 5MP or 2MP.

The pushback generally keeps this move safe on block, and sets Ryu up to punish any attempts to contest his pressure. Be wary of some longer range light normals that can punish if not well spaced.

4HK
Axe Kick
SF6 Classic.png 4HK
SF6 Modern.png 4H
SF6 Ryu 4hk 1.png
SF6 Ryu 4hk 1 hitbox.png
SF6 Ryu 4hk 2 hitbox.png
Hitboxes Off
Hitboxes On

4HK
Axe Kick
Startup Active Recovery Cancel Damage Guard On Hit On Block
10(20) 5(5)3 21 Sp SA 400x2 LH 0 -4
  • 2 hits; () refers to startup of 2nd hit only
  • 1st hit forces stand, puts airborne opponents into limited juggle state
  • 2nd hit puts airborne opponents into OTG Bounce state
  • Counter-hit/Punish Counter bonus advantage applies to both hits
  • Cancel Hitconfirm Window: 37f / 17f (2nd hit)
  • Drive Rush cancel advantage: 1st hit +10 oH / +4 oB, 2nd hit +14 oH / +10 oB


Ryu's Axe Kick is cancelable on both hits, so it's easy to confirm an appropriate follow-up on hit or block. At -4 it's fairly safe most of the time due to pushback. The first hit can whiff on crouch blockers at farther ranges. The move has a lot of active frames, making it easy to time on the opponent's wakeup.

Though risky, using it as an AA has decent reward due to the 2nd hit's ground bounce, which can juggle into a move like HP Shoryuken or MK High Blade Kick. In some rare cases, a high connect only allows the 1st hit to juggle; in this case, an immediate cancel into Shoryuken or a Tatsu will also work.


Target Combos

5HP~HK
High Double Strike
SF6 Classic.png 5HP~HK
SF6 Modern.png 5H~H
SF6 Ryu 5hk.png
SF6 Ryu 5hk hitbox.png
Hitboxes Off
Hitboxes On

5HP~HK
High Double Strike
Startup Active Recovery Cancel Damage Guard On Hit On Block
9 4 20 - 1000 LH KD +36 -8(-18)
  • HK whiffs on crouch blocking opponents (-18)
  • Cancelable into Denjin Charge on hit by inputting 2P (KD Adv. +7)


Ryu generally gets better combo enders from 5HP, but the HK is much easier to hitconfirm on reaction than a special move. The HK will always connect on hit since 5HP forces stand. If the opponent stand blocks, this TC is always a true blockstring even if delayed.

On hit, the HK ender can be canceled in order to stock a Denjin Charge; doing so sacrifices oki unless Ryu is in the corner. If blocked, the charge will not come out. If this Target Combo is juggled into, Ryu's KD advantage can be slightly better than the usual +7.

5MP~LK~HK
Fuwa Triple Strike
SF6 Classic.png 5MP~LK~HK
SF6 Modern.png 5M~M~M
SF6 Ryu 5lk.png

SF6 Ryu 5mp lk hk.png
SF6 Ryu 5lk hitbox.png

SF6 Ryu 5mp lk hk hitbox.png
Hitboxes Off
Hitboxes On

5MP~LK
Fuwa Double Strike
Startup Active Recovery Cancel Damage Guard On Hit On Block
5 3 16 TC 300 LH +1 -4
  • Cancel Hitconfirm Window: 35f (TC)
5MP~LK~HK
Fuwa Triple Strike
Startup Active Recovery Cancel Damage Guard On Hit On Block
17 4 20 - 900(720) LH KD +36 -8
  • () refers to scaled damage from 5MP combo starter
  • Leaves a 6f blockstring gap before final hit on block
  • Cancelable into Denjin Charge on hit by inputting 2P (KD Adv. +7)


A relatively weak target combo, but it's easier to confirm from 5MP than a special move. Also has some utility near max 5MP range where other follow-ups can whiff. However, the LK can whiff if 5MP hits on an extended limb hurtbox.

At close range, Ryu is punishable after 5MP~LK, but it's fairly easy to space safely against most characters. For example, about half the cast cannot punish the blocked sequence DR~5MP, 5MP~LK with their 4f normal, and the sequence 6HP, 5MP~LK cannot be punished by anyone. Opponents unaware of this fact can be baited into a spacing trap as they whiff their attempted punish.

On hit, the HK ender can be canceled in order to stock a Denjin Charge; doing so sacrifices oki unless Ryu is in the corner. If blocked, the charge will not come out.


Throws

Forward Throw (LPLK)
Forward Throw
SF6 Classic.png LPLK
SF6 Modern.png LM
SF6 Ryu lplk.png
SF6 Ryu lplk hitbox.png
Hitboxes Off
Hitboxes On

LPLK
Shoulder Throw
Startup Active Recovery Cancel Damage Guard On Hit On Block
5 3 23 - 1200 (2040) T KD +17 -
  • Punish Counter: HKD +17
  • Applies 20% immediate damage scaling when comboed into (e.g. after Crumple)


Ryu has a great corner throw loop that requires no additional movement. Whiffing 5LP will auto-time the next throw, or it can be manually timed to avoid giving the opponent something to react to. Manual timing also allows Ryu to walk back to threaten a shimmy.

Midscreen, Ryu can chase the opponent with an auto-timed Drive Rush into 5MP/2MP, leaving him +4~5 on block and allowing a link to 5HP on hit. He can also slightly delay a 5LP to set up a frame trap or tick throw. Opponents who respect these options or attempt to Perfect Parry can be conditioned to eat a follow-up throw instead.

Back Throw (4LPLK)
Back Throw
SF6 Classic.png 4LPLK
SF6 Modern.png 4LM
SF6 Ryu 4lplk.png
SF6 Ryu 4lplk hitbox.png
Hitboxes Off
Hitboxes On

4LPLK
Somersault Throw
Startup Active Recovery Cancel Damage Guard On Hit On Block
5 3 23 - 1200 (2040) T KD +11 -
  • Side switch
  • Punish Counter: HKD +11
  • Applies 20% immediate damage scaling when comboed into (e.g. after Crumple)


Ryu is left too far away for any follow-up oki after switching sides, even in the corner.


Drive System

Drive Impact (HPHK)
Drive Impact
SF6 Classic.png HPHK
SF6 Modern.png DI
SF6 Ryu hphk.png
SF6 Ryu hphk hitbox.png
Hitboxes Off
Hitboxes On

HPHK
Shingeki
Startup Active Recovery Cancel Damage Guard On Hit On Block
26 2 35 - 800 LH KD +35 / Wall Splat KD +65 -3 / Wall Splat HKD +72
  • Armor (2-hit): 1-27f
  • Applies 20% damage scaling to next hit when beginning a combo (including Wall Splat on block)
  • Combos when canceled from 2HP/4HP or Punish Counter 5HP/4HK (2nd) (no corner wallsplat)
    • Useful for draining opponent's Drive gauge, especially after Perfect Parry

See Drive Impact on the Gauges page for more details.

When canceled from a normal, these are the important blockstring gaps; a gap of N will trade with an N-frame startup attack; [] = Burnout

  • 5HP: 6[2]
  • 4HK (2nd): 7[3]
  • 2HP: 8[4]
  • 2MP: 10[6]
  • 4HP: 11[7]
  • 5MP, 2MK, 4HK (1st): 13[9]
  • Note: A gap ≥ 6f can be thrown, and a gap ≥ 9f can be jumped out of by most characters

Against the following characters in Burnout:

  • JP (22K), frame 3 counter
  • Marisa (214K), frame 3 armor
  • Zangief (5[HP]), frame 4 armor

It's important to use a blockstring that cannot be absorbed by their armor/counter moves. Ideally, the string should also not be a true combo, or it will cause a Lock and prevent Stun. Note that if the opponent mashes buttons on wakeup, the counter-hit will cause DI to Lock.

  • 5HP > DI: 2f blockstring gap prevents opponent from absorbing the hit
  • 4HK (2nd) > DI: 3f blockstring gap will work vs. Zangief 5[HP]
  • DR~2MP > DI: 2f blockstring gap prevents opponent from absorbing the hit
  • DR~4HP > DI: 3f blockstring gap will work vs. Zangief 5[HP]

Drive Reversal (6HPHK)
Drive Reversal
SF6 Classic.png 6HPHK
SF6 Modern.png 6DI
(in blockstun)
SF6 Ryu 6hphk.png
SF6 Ryu 6hphk hitbox.png
Hitboxes Off
Hitboxes On

6HPHK
Chest Strike
Startup Active Recovery Cancel Damage Guard On Hit On Block
20(18) 3 26(31) - 500 recoverable LH KD +23 -6
  • Full Invuln: 1-22f; Armor Break
  • 5f extra recovery on hit

See Drive Reversal on the Gauges page for more details.

Drive Parry (MPMK)
Drive Parry
SF6 Classic.png MPMK
SF6 Modern.png DP
SF6 Ryu mpmk.png
SF6 Ryu mpmk hitbox.png
Hitboxes Off
Hitboxes On

MPMK
Drive Parry
Startup Active Recovery Cancel Damage Guard On Hit On Block
1 12 or until released 33(1)(11) - - - - -

See Drive Parry on the Gauges page for more details.

  • Perfect Parry:
    • Applies a 50% damage scaling multiplier to any punish afterwards
    • vs. strikes, has only 1f recovery and prevents the opponent from canceling their attack
    • vs. projectiles, puts you into a fixed 11f recovery

Drive Rush (66)
Drive Rush
SF6 Classic.pngSF6 Modern.png 66
SF6 Ryu 66.png
SF6 Ryu 66 hitbox.png
Hitboxes Off
Hitboxes On

66
Drive Rush
Startup Active Recovery Cancel Damage Guard On Hit On Block
9(11) 45(46) 24(23) - - - - -
  • Applies 15% damage scaling multiplier to any follow-up hits when used mid-combo
    • Only applies scaling once per combo; does not apply when an enhanced Drive Rush attack starts the combo

See Drive Rush on the Gauges page for more details. Frame data shown in (parentheses) refers to Parry Drive Rush.

  • Distance:
    • 0.525 (min, cancel into immediate Throw)
    • 1.878 (min, earliest blocking/movement frame)
    • 3.628 (max, final DR frame)
  • See Strategy page for Blockstring Gaps and Combo Routes


Special Moves

Denjin Charge (22P)
Denjin Charge
SF6 Classic.png 22P
SF6 Modern.png 22X
SF6 Ryu 22p.png
SF6 Ryu 22p hitbox.png
Hitboxes Off
Hitboxes On

22P
Denjin Charge
Startup Active Recovery Cancel Damage Guard On Hit On Block
50 - 2 - - - - -
  • Charges up the next HP/OD Hadoken, HP/OD Hashogeki, SA1, or SA2 into a more powerful Denjin version
  • Increases damage, and may change frame advantage, knockdown advantage, or number of hits
  • Can be performed after 5HK~HP or 5MP~LK~HK by inputting 2P on hit only
  • Can only store 1 Denjin stock at a time, and is depleted after use; does not persist between rounds


Ryu's Denjin install is an important part of his fireball game, but it's risky to charge it up in neutral unless you're at full screen. You can also make the opponent block a slow, long range fireball to get a semi-safe charge, but be weary of fast long range Supers that could punish this. There are also some knockdowns that make it easy to safely charge up, such as OD Denjin Charge Hadoken, OD Tatsu, or HK High Blade Kick. It's usually safe against midscreen MK High Blade Kick too.

Both of Ryu's Target Combos give him the option to end in a Denjin Charge on hit with a different input (2P). This sacrifices any possible midscreen oki, but in the corner he can gain the Denjin stock while still maintaining his offense.

Hadoken (236P)
Hadoken
SF6 Classic.png 236P
SF6 Modern.png 236X or 5S (H)
SF6 Ryu 236lp.png
SF6 Ryu 236lp hitbox.png
Hitboxes Off
Hitboxes On

236LP
Hadoken
Startup Active Recovery Cancel Damage Guard On Hit On Block
16 - 31 SA3 600 LH +1 -5
  • Slow 1-hit projectile; Projectile Speed: 0.055
  • Cancel Hitconfirm Window: 4f (Super)
236MP
Hadoken
Startup Active Recovery Cancel Damage Guard On Hit On Block
14 - 33 SA3 600 LH -1 -7
  • Medium-speed 1-hit projectile; Projectile Speed: 0.070
  • Cancel Hitconfirm Window: 4f (Super)
236HP
Hadoken
Startup Active Recovery Cancel Damage Guard On Hit On Block
12 - 35 SA3 600 LH -3 -9
  • Fast 1-hit projectile; Projectile Speed: 0.085
  • Cancel Hitconfirm Window: 4f (Super)
236PP
Hadoken
Startup Active Recovery Cancel Damage Guard On Hit On Block
12 - 28 SA2 SA3 400x2 LH KD +54 -1
  • Fast 2-hit OD projectile; Projectile Speed: 0.095
  • Has juggle potential; puts opponent into limited juggle state on hit
  • Cancel Hitconfirm Window: 12f (Super)
  • Applies 20% damage scaling to next hit when beginning a combo; counts as 2 hits for damage scaling when comboed into (applies to next hit)


Ryu's iconic fireball, used primarily for zoning. Mixing up between the varying projectile speeds makes it harder for the opponent to navigate through his fireball game. Compared to most projectile characters, Ryu's extended hurtbox is much shorter, making it difficult for opponents to counterpoke on startup.

LP Hadoken is the safest, and when used at long range it gives Ryu much more freedom to set up optimal spacing while the opponent is stuck in blockstun. MP Hadoken is slightly faster, and can throw off the opponent's parry timing because they most likely expect a slower or faster fireball. One big advantage to these two versions is that Ryu can use them even with a Denjin stock, making the opponent guess when the 2-hit fireball is coming.

HP Hadoken is the fastest meterless version and the most unsafe on block if too close to the opponent. It is best used at longer ranges to prevent the opponent from walking forward, or to prevent an install move like Jamie's Drink or Kimberly's Spraycan reload. This version turns into Denjin Hadoken when Ryu has a stock.

OD Hadoken is fast and higher priority, making it an important tool against other zoners. The knockdown time lets Ryu perform a Denjin Charge, and in the corner he can juggle into SA1 on reaction. He can also Drive Rush into a juggled normal against cornered opponents when starting from about 1/3 to 1/2 screen away. Unlike his other fireballs, Ryu is allowed to use SA1 when OD Hadoken is still on the screen.

Hadoken (Denjin 236P)
Denjin Charge Hadoken
SF6 Classic.png 236P
SF6 Modern.png 236X or 5S
SF6 Ryu 236p charge.png
SF6 Ryu 236p charge hitbox.png
Hitboxes Off
Hitboxes On

236HP
Denjin Charge Hadoken
Startup Active Recovery Cancel Damage Guard On Hit On Block
12 - 30 SA3 400x2 LH KD +52 -3
  • Fast 2-hit projectile; Projectile Speed: 0.12
  • Has juggle potential; puts opponent into limited juggle state
  • Cancel Hitconfirm Window: 12f (Super)
  • Applies 20% damage scaling to next hit when beginning a combo; counts as 2 hits for damage scaling when comboed into (applies to next hit)
236PP
Denjin Charge Hadoken
Startup Active Recovery Cancel Damage Guard On Hit On Block
12 - 26 SA2 SA3 300x2,400 (1000) LH KD +57 +2
  • Fast 3-hit OD projectile; Projectile Speed: 0.145
  • Has juggle potential; puts opponent into limited juggle state
  • Cancel Hitconfirm Window: 13f (Super)
  • Applies 20% damage scaling to next hit when beginning a combo; counts as 2 hits for damage scaling when comboed into (applies to next hit)


Hadoken gains an extra hit and becomes very fast when using 236HP or 236PP with a Denjin stock; using the LP and MP version lets Ryu preserve his stock while continuing to zone with projectiles. Denjin Hadoken is very hard to react to in neutral, and is great for winning fireball wars; however, the Denjin enhancement does not change how projectile priority works, so the meterless version loses to any OD projectile and the OD version loses to any Super projectile.

On hit, Denjin Hadoken has enough knockdown advantage to charge up another Denjin stock, and in the corner Ryu can juggle into SA1 on reaction.

Shoryuken (623P)
Shoryuken
SF6 Classic.png 623P
SF6 Modern.png 623X or 6S (H)
SF6 Ryu 623p.png
SF6 Ryu 623p hitbox.png

SF6 Ryu 623pp hitbox.png
Hitboxes Off
Hitboxes On

623LP
Shoryuken
Startup Active Recovery Cancel Damage Guard On Hit On Block
5 10 21+12 land SA3 1100(800) LH KD +38 -23
  • Anti-Air Invuln: 1-14f; Airborne 7-35f (Forced Knockdown state)
  • Reduced damage on active frames 4-10 (high anti-air connect)
  • Cancel Hitconfirm Window: 17f (Super)
  • Applies 30% damage scaling to next hit when beginning a combo (Shoryuken > SA3 starter: 40% total scaling)
623MP
Shoryuken
Startup Active Recovery Cancel Damage Guard On Hit On Block
6 10 30+12 land SA3 1200(800) LH KD +34 -32
  • Anti-Air Invuln: 1-9f; Airborne 8-45f (Forced Knockdown state)
  • Reduced damage on active frames 4-10 (high anti-air connect)
  • Cancel Hitconfirm Window: 17f (Super)
  • Applies 30% damage scaling to next hit when beginning a combo (Shoryuken > SA3 starter: 40% total scaling)
623HP
Shoryuken
Startup Active Recovery Cancel Damage Guard On Hit On Block
7 10 34+15 land SA3 1400(800) LH KD +29 -39
  • Anti-Air Invuln: 1-8f; Airborne 9-50f (Forced Knockdown state)
  • Reduced damage on active frames 3-10 (high anti-air connect)
  • Cancel Hitconfirm Window: 22f (Super)
  • Applies 30% damage scaling to next hit when beginning a combo (Shoryuken > SA3 starter: 40% total scaling)
623PP
Shoryuken
Startup Active Recovery Cancel Damage Guard On Hit On Block
6 2,8 37+15 land - 800x2 LH KD +29 -40
  • Full Invuln: 1-8f; Airborne 8-52f (Forced Knockdown state)
  • Ryu's primary invincible reversal option


As always, Shoryuken is a great anti-air special and the OD version has a lot of invincibility to blow through the opponent's attacks. It's best to use as late as possible against jumping opponents, or else it will have its damage reduced and will no longer be cancelable into SA3. It cannot anti-air cross-ups, so if the opponent is too close Ryu will have to walk forward and input a cross-cut Shoryuken in the opposite direction (6321P input). All versions have good juggle potential, which helps squeeze out extra damage from Ryu's many corner juggle situations.

The extra damage scaling on Shoryuken severely weakens the anti-air damage when canceled directly into SA3. It does not affect any other combo route ending in Shoryuken > SA3, however.

Tatsumaki Senpu-kyaku (214K)
Tatsumaki Senpu-kyaku
Tatsu
SF6 Classic.png 214K
SF6 Modern.png 4S (M)
SF6 Ryu 214k.png
SF6 Ryu 214k hitbox.png

SF6 Ryu 214kk hitbox.png
SF6 Ryu 214kk2 hitbox.png
SF6 Ryu 214kk3 hitbox.png
Hitboxes Off
Hitboxes On

214LK
Tatsumaki Senpu-kyaku
Startup Active Recovery Cancel Damage Guard On Hit On Block
12 3 14+18 land - 900 LH KD +35 -15
214MK
Tatsumaki Senpu-kyaku
Startup Active Recovery Cancel Damage Guard On Hit On Block
14 2(13)2 11+20 land - 1000 LH KD +23(+38) -13(-28)
  • Lower Body Projectile Invuln: 10-41f; Airborne 8-41f (Forced Knockdown state)
  • 2nd hit whiffs on crouching (stand blocking 1st hit forces block on 2nd hit)
214HK
Tatsumaki Senpu-kyaku
Startup Active Recovery Cancel Damage Guard On Hit On Block
16 2(13)2(13)2 14+17 land - 1200 LH KD +20(+35)(+50) -13(-28)(-43)
  • Lower Body Projectile Invuln: 10-61f; Airborne 10-61f (Forced Knockdown state)
  • Puts opponent into limited juggle state; can juggle afterward if 3rd hit connects
  • 2nd and 3rd hits whiff on crouching (stand blocking any hit forces block on the following hit)
214KK
Tatsumaki Senpu-kyaku
Startup Active Recovery Cancel Damage Guard On Hit On Block
13 2(4)2(4)2(3)2(4)2 10+13 land - 200x5 LH KD +57 -14(-32)
  • Airborne 5-47f (Forced Knockdown state)
  • 1st hit has vacuum effect on hit; on max range block, some hits may whiff for worse advantage (-32 at worst)
  • Puts opponent into limited juggle state; later hits have more juggle potential


Tatsu is a good move for getting corner carry while still allowing oki afterward.

The LK version leaves opponents the closest to Ryu on any grounded combo, allowing Ryu to easily get either a meaty LP Hashogeki or a basic strike throw mixup after one dash unless he canceled into it from medium and heavy buttons from longer ranges. MK Tatsu primarily sees usage as a combo ender in juggles where it gives Ryu some of his best corner carry, while the HK version is Ryu's primary meterless option to switch sides in a combo.

Both the MK and HK versions can be used predictively against most projectiles due to the lower body invincibility, and they also get better frame advantage when the later hits connect as opposed to the first hit.

OD Tatsu is a great juggle starter in the corner, and will always hit consistently due to its vacuum effect. Using this version against an already airborne opponent is less effective because it uses up a significant amount of juggle points, which severely limits Ryu's follow-up options.

Tatsu is pretty combo-friendly, but some strengths do not combo from all normal cancels. 5LP cannot naturally combo into MK/HK Tatsu, and 2LP/5LK cannot naturally combo into HK Tatsu outside of a Punish Counter scenario.

Aerial Tatsumaki Senpu-kyaku (j.214K)
Aerial Tatsumaki Senpu-kyaku
SF6 Classic.png j.214K
SF6 Modern.png j.214X or j.S
SF6 Ryu 214k.png
SF6 Ryu j214k hitbox.png

SF6 Ryu 214kk hitbox.png
SF6 Ryu 214kk2 hitbox.png
SF6 Ryu 214kk3 hitbox.png
Hitboxes Off
Hitboxes On

j.214K
Aerial Tatsumaki Senpu-kyaku
Startup Active Recovery Cancel Damage Guard On Hit On Block
11 2(5)2(6)2 16 land - 900 LH KD +46(+52) -6(+3)
  • Forced Knockdown state until landing; the last 11f of landing recovery is in a crouching state
  • Can hit Cross-up
  • Puts opponent into limited juggle state (2HK and SA1 are most consistent follow-ups)
  • Applies 30% damage scaling to next hit when beginning a combo (100/70/60...)
j.214KK
Aerial Tatsumaki Senpu-kyaku
Startup Active Recovery Cancel Damage Guard On Hit On Block
11 2(1)3(1)3(1)3(2)2 16 land - 300,200x3,600 (1500) LH KD +45(+51) -29(-32)
  • Forced Knockdown state until landing; the last 11f of landing recovery is in a crouching state
  • Puts opponent into limited juggle state
  • Applies an extra 15% damage scaling to next attack when comboed into


The meterless versions of Air Tatsu are not affected by which button strength is used. The timing to connect it on a grounded opponent is a little strict and can whiff if mistimed; the frame advantage also varies significantly depending on the exact timing. If the opponent crouch blocks it will always be at least +3 on block, although most players will instinctively stand block when they see a jump.

Cancels from air-to-air j.MP if Ryu jumps forward, which is especially useful for OD Air Tatsu since it can lead to a strong juggles near the corner.

High Blade Kick (236K)
High Blade Kick
Donkey Kick
SF6 Classic.png 236K
SF6 Modern.png 2S (M) or A[L~L] (L)
SF6 Ryu 236k.png
SF6 Ryu 236k hitbox.png

SF6 Ryu 236kk hitbox.png
Hitboxes Off
Hitboxes On

236LK
High Blade Kick
Startup Active Recovery Cancel Damage Guard On Hit On Block
14 6 22 SA3 1100 LH KD +42 -11
  • Puts opponent into limited juggle state
  • Cancel Hitconfirm Window: 22f (Super)
236MK
High Blade Kick
Startup Active Recovery Cancel Damage Guard On Hit On Block
18 9 19(22) SA3 1200 LH KD +40 -8
  • Puts opponent into limited juggle state
  • 3f extra recovery on whiff
  • Cancel Hitconfirm Window: 25f (Super)
236HK
High Blade Kick
Startup Active Recovery Cancel Damage Guard On Hit On Block
29 9 16 SA3 1300 LH KD +45 -5
  • Puts opponent into limited juggle state; can juggle 623LP/SA3 in corner
  • Punish Counter: KD +95 (OTG Tumble state)
  • Cancel Hitconfirm Window: 30f (Super)
236KK
High Blade Kick
Startup Active Recovery Cancel Damage Guard On Hit On Block
17 5 33 SA2 SA3 800 LH Wall Bounce +49(65) -18
  • Wall Bounces opponent on hit for a limited juggle state
  • Gives enough time to charge SA2 when canceled (depending on screen position)
  • Cancel Hitconfirm Window: 27f (Super)
  • Applies an extra 5% damage scaling to next attack when comboed into


High Blade Kick (more commonly known as "Donkey Kick") is used primarily as a combo and juggle ender due to its high juggle potential, great oki, and consistent cancel into SA3.

The LK version is a quick combo ender that sets up an auto-timed safe jump in the corner against grounded opponents. It combos naturally from both 2LP and 5LK, making it a great ender for light strings. It has fewer active frames than other versions, making it hard to space safely in neutral against most characters.

The MK version can be spaced relatively safely, and often can set up a safe Denjin Charge when used midscreen. It is great for harassing the opponent's Drive gauge unless they have an unusually fast and long-range punish option. It combos from all medium normals, as well as Punish Counter 5LK/2LP.

The HK version is very slow, but the high pushback makes it much safer than other versions. Only 4HP can naturally combo into it; other buttons require Drive Rush, Punish Counter, or juggle routes to combo successfully. Juggling into 236HK (e.g. 214HP, DR~5HP > 236HK) usually leaves the opponent at +42, setting up an auto-timed corner safe jump. Be careful when throwing this out in neutral, as the opponent can react with Drive Impact unless you cancel into SA3 on reaction.

OD High Blade Kick is the star of the show due to its Wall Bounce, which can lead to powerful juggles; it can even combo into fully charged SA2 when canceled (although the release must be manually timed). The OD version can be comboed into from medium attacks or from a Punish Counter 5LK. If Ryu is too close to the corner, the opponent will bounce over his head, resulting in no follow-up juggle. In these situations, OD Tatsu is preferred.

Hashogeki (214P)
Hashogeki
SF6 Classic.png 214P
SF6 Modern.png 214X
SF6 Ryu 214p.png
SF6 Ryu 214lp hitbox.png
LP Version

SF6 Ryu 214mp hitbox.png
MP Version

SF6 Ryu 214hp hitbox.png
HP Version

SF6 Ryu 214pp hitbox.png
OD Version
Hitboxes Off
Hitboxes On

214LP
Hashogeki
Startup Active Recovery Cancel Damage Guard On Hit On Block
12 6 18 SA3 700 LH +2 -3
  • Counter-hit/Punish Counter: KD +59 (spinning limited juggle state)
  • Increased pushback on block vs. opponents in Burnout
  • Cancel Hitconfirm Window: 24f (Super)
214MP
Hashogeki
Startup Active Recovery Cancel Damage Guard On Hit On Block
19 6 17 SA3 800 LH +2 -6
  • Counter-hit/Punish Counter: KD +58 (spinning limited juggle state)
  • Cancel Hitconfirm Window: 23f (Super)
214HP
Hashogeki
Startup Active Recovery Cancel Damage Guard On Hit On Block
30 6 19 SA3 400x2 LH KD +61 Spin +2
  • 2 hits; puts opponent into Spinning juggle state (no CH/PC required)
  • Cancel Hitconfirm Window: 39f (Super)
214PP
Hashogeki
Startup Active Recovery Cancel Damage Guard On Hit On Block
18 6 20 SA2 SA3 900 LH +3 +3
  • Cancel Hitconfirm Window: 22f (Super)
  • Counts as 2 hits for damage scaling when comboed into (applies to next hit)


All versions of Hashogeki have a strike hitbox, but can also nullify a 1-hit projectile of equal priority; the OD version will completely destroy meterless fireballs just like any other OD projectile. Because it has a strike hitbox, it cannot be used to stuff Level 1 Supers; this is especially important to know when using it in a Burnout blockstring, as opponents will be looking for any gap to Super through.

Hashogeki has juggle potential on all versions; the LP and MP versions allow for high damage juggle routes, especially in the corner. This is most commonly achieved by launching with 236KK or 214KK, then following up with a juggled Drive Rush normal into 214P. On a grounded hit, the opponent is left standing after the LP/MP/OD versions; Ryu is left too far away for an immediate throw mixup, but the opponent can still be punished for attempting to escape or hit a defensive button.

214LP has short range and low pushback but is safe; 214MP is technically unsafe but the spacing often makes it more difficult to punish. With specific setups, the LP/MP versions are useful as meaty tools on the opponent's wakeup.

214HP gives Ryu frame advantage, but canceling into it leaves Ryu vulnerable during its long startup. If you condition the opponent to expect a 214HP cancel, you can punish their light normal mash by ending with the LP or MP versions instead, creating an intentional gap of 1-4 frames in the blockstring. Since a Counter-hit puts the opponent into a juggle state, Ryu can juggle even if he trades hits with the opponent.

Against opponents in Burnout, 214LP can be used for extended pressure sequences; however, Burnout increases the pushback on block, so Ryu must spend meter to force his way back in.

The following are some common blockstring gaps; all examples assume Ryu cancels at the fastest possible timing, though a longer gap can be created by delaying the cancel:

  • 1f gap: 2HP > 214MP
  • 2f gap: 2MP > 214PP
  • 3f gap: 5LK/2LP > 214LP, 2MP > 214MP, 4HP > 214PP
  • 4f gap: 5LP > 214LP, 4HP > 214MP

Hashogeki (Denjin 214P)
Denjin Charge Hashogeki
SF6 Classic.png 214P
SF6 Modern.png 214X
SF6 Ryu 214p charge.png
SF6 Ryu 214p charge hitbox.png

SF6 Ryu 214pp charge hitbox.png
Hitboxes Off
Hitboxes On

214HP
Denjin Charge Hashogeki
Startup Active Recovery Cancel Damage Guard On Hit On Block
20 6 19(31) SA3 400x2 LH KD +62 Spin +3
  • Puts opponent into Spinning juggle state on hit (can juggle even midscreen)
  • Cancel Hitconfirm Window: 38f (Super)
214PP
Denjin Charge Hashogeki
Startup Active Recovery Cancel Damage Guard On Hit On Block
18 6 19 SA2 SA3 800 LH KD +87 Crumple +4
  • Crumples opponent on hit (+14 before opponent becomes airborne)
  • Cancel Hitconfirm Window: 22f (Super)


The Denjin version of Hashogeki are much more rewarding on hit and have additional block advantage. The meterless version is only used when using the HP version of a regular Hashogeki while having Denjin, the LP and MP versions will be unchanged. Just like the standard version, it is a strike hitbox with projectile-nullifying properties, but now the meterless Hashogeki can dissipate 2-hit meterless projectiles like Denjin Hadoken or Sonic Cross. The OD version surprisingly does not gain an additional hit, but is still very rewarding to land due to its high damage and crumple state.

Despite usually forming a true blockstring, you can delay cancel 5HP to Denjin 214P on block creating a frametrap.

There are some blockstrings that can create frame traps on block:

  • 1f gap: DR~5MP/2MK > Denjin 214PP, 4HK (2nd) > Denjin 214HP
  • 2f gap: 2MP > Denjin 214PP, 2HP > Denjin 214HP
  • 3f gap: 4HP > Denjin 214PP, DR~5MP/2MK > Denjin 214HP


Super Arts

Level 1 Super (236236P)
Shinku Hadoken
Level 1 Super Art
SF6 Classic.png 236236P
SF6 Modern.png 236236L or 5HS or 6HS
SF6 Ryu 236236p.png

SF6 Ryu 236236p denjin.png
Denjin Charge
SF6 Ryu 236236p hitbox.png

SF6 Ryu 236236p denjin hitbox.png
Denjin Charge
Hitboxes Off
Hitboxes On

236236P
Shinku Hadoken
Startup Active Recovery Cancel Damage Guard On Hit On Block
7 - 79 - 400x5 (2000) LH KD +26 -24
236236P
Denjin Hadoken
Startup Active Recovery Cancel Damage Guard On Hit On Block
7 - 79 - 400x4,800 (2400) LH KD +27 -24
  • Strike/Throw Invuln: 1-8f; Armor Break
  • 5-hit Super-priority projectile; Denjin version consumes 1 stock
  • Projectile Speed: 0.12
  • Drive Gauge Depletion: 0.5 bars (hit) / 0.25 bars (block)
  • 30% minimum damage scaling


Shinku Hadoken is Ryu's classic Super. Due to the fireball priority system, it will completely dissipate any non-Super projectile before connecting all 5 hits, although it can still be slowed down by the clash. The move has high juggle potential, making it fairly easy to land compared to many Level 1 Supers. This Super can be performed even when an OD Hadoken is on the screen, which improves Ryu's juggle routes and can also let him punish opponents jumping over fireballs at certain ranges.

If Ryu has a Denjin stock available, this Super does 400 extra damage and gains 1 additional frame of knockdown advantage on hit. There is no way to preserve the Denjin stock while using this Super, unlike with regular Hadoken.

The button strength does not affect the travel speed. If the opponent is within ~1/2 screen, they will not be able to jump over the fireball after the Super freeze, though it's still easy to punish on block at this range.

Level 2 Super (214214P)
Shin Hashogeki (Lv.1)
Level 2 Super Art
SF6 Classic.png 214214P
SF6 Modern.png 214214M or 4HS
SF6 Ryu 214214p.png

SF6 Ryu 214214p denjin.png
Denjin Charge
SF6 Ryu 214214p hitbox.png

SF6 Ryu 214214p denjin hitbox.png
Denjin Charge
Hitboxes Off
Hitboxes On

214214P
Shin Hashogeki Lv.1
Startup Active Recovery Cancel Damage Guard On Hit On Block
12 6 39 - 2800 LH KD +20 -20
214214P
Denjin Hashogeki Lv.1
Startup Active Recovery Cancel Damage Guard On Hit On Block
12 6 39 - 3200 LH KD +20 -20
  • Full Invuln: 1-13f; Armor Break
  • Drive Gauge Depletion: 1 bar (hit) / 0.4 bars (block)
  • 40% minimum damage scaling


A powered up version of Hashogeki that can be charged to a higher level by holding the Punch button. Unlike the original Hashogeki, this Super cannot clash with projectiles. Higher level versions do more damage and drain more Drive gauge on block, but do not deal additional Chip damage against opponents in Burnout.

The Denjin Charge version of each level consumes 1 stock and deals 400 extra damage on hit (but again, no extra Chip). There is no way to preserve the Denjin stock while using this Super, unlike with regular Hashogeki.

While this Super has some invincibility, the slower startup makes it a poor option compared to SA1 or SA3. If attempting this, be aware that holding the button results in 3f less invincibility.

Shin Hashogeki (Lv.2)
Level 2 Super Art
SF6 Classic.png 214214P
SF6 Modern.png 214214M or 4HS
(hold)
SF6 Ryu 214214p.png

SF6 Ryu 214214p denjin.png
Denjin Charge
SF6 Ryu 214214p hold hitbox.png

SF6 Ryu 214214p hold denjin hitbox.png
Denjin Charge
Hitboxes Off
Hitboxes On

214214P (hold)
Shin Hashogeki Lv.2
Startup Active Recovery Cancel Damage Guard On Hit On Block
21 6 39 - 2900 LH KD +20 -20
214214P (hold)
Denjin Hashogeki Lv.2
Startup Active Recovery Cancel Damage Guard On Hit On Block
21 6 39 - 3300 LH KD +20 -20
  • Full Invuln: 1-10f; Armor Break
  • Drive Gauge Depletion: 1 bar (hit) / 0.6 bars (block)
  • 40% minimum damage scaling
  • Button must be held for 6f after the Super freeze


A powered up version of Hashogeki that can be charged to a higher level by holding the Punch button. Unlike the original Hashogeki, this Super cannot clash with projectiles. Higher level versions do more damage and drain more Drive gauge on block, but do not deal additional Chip damage against opponents in Burnout.

The Denjin Charge version of each level consumes 1 stock and deals 400 extra damage on hit (but again, no extra Chip). There is no way to preserve the Denjin stock while using this Super, unlike with regular Hashogeki.

While this Super has some invincibility, the slower startup makes it a poor option compared to SA1 or SA3. If attempting this, be aware that holding the button results in 3f less invincibility.

Some things that combo into Level 2 charge are 4HP and OD Hashogeki (non-Denjin).

Shin Hashogeki (Lv.3)
Level 2 Super Art
SF6 Classic.png 214214P
SF6 Modern.png 214214M or 4HS
(hold)
SF6 Ryu 214214p.png

SF6 Ryu 214214p denjin.png
Denjin Charge
SF6 Ryu 214214p hold hitbox.png

SF6 Ryu 214214p hold denjin hitbox.png
Denjin Charge
Hitboxes Off
Hitboxes On

214214P (hold)
Shin Hashogeki Lv.3
Startup Active Recovery Cancel Damage Guard On Hit On Block
50 6 39 - 3000 LH KD +78 Tumble -20
214214P (hold)
Denjin Hashogeki Lv.3
Startup Active Recovery Cancel Damage Guard On Hit On Block
50 6 39 - 3400 LH KD +78 Tumble -20
  • Full Invuln: 1-10f; Armor Break
  • Drive Gauge Depletion: 1 bar (hit) / 1 bar (block)
  • 40% minimum damage scaling
  • Button must be held for 36f after the Super freeze
  • Gives a tumbling OTG knockdown that can be followed up with a raw Drive Rush combo


A powered up version of Hashogeki that can be charged to a higher level by holding the Punch button. Unlike the original Hashogeki, this Super cannot clash with projectiles. Higher level versions do more damage and drain more Drive gauge on block, but do not deal additional Chip damage against opponents in Burnout.

The Denjin Charge version of each level consumes 1 stock and deals 400 extra damage on hit (but again, no extra Chip). There is no way to preserve the Denjin stock while using this Super, unlike with regular Hashogeki.

While this Super has some invincibility, the slower startup makes it a poor option compared to SA1 or SA3. If attempting this, be aware that holding the button results in 3f less invincibility.

Some things that can combo into Level 3 charge are OD High Blade Kick and OD Denjin Hashogeki. The pushback on block is extremely high on this version, and may require the opponent to hold Parry and use a Drive Rush punish starter if blocked.

Level 3 Super (236236K)
Shin Shoryuken
Level 3 Super Art
SF6 Classic.png 236236K
SF6 Modern.png 236236H or 2HS
SF6 Ryu 236236k.png

SF6 Ryu 236236k(ca).png
An ELECTRIC finish
(CA grants 500 extra damage)
SF6 Ryu 236236k hitbox.png
Hitboxes Off
Hitboxes On

236236K
Shin Shoryuken
Startup Active Recovery Cancel Damage Guard On Hit On Block
5(2) 12 32+39 land - 4000 (3600) LH HKD +8 -50(-54)
  • Full Invuln: 1-16f; Airborne 7-48f (Forced Knockdown state); Armor Break
  • 2f startup when canceled from 623HP
  • Active frames 3-12 cause weaker non-cinematic hit; () refers to non-cinematic damage
  • Drive Gauge Depletion: 1.5 bars (hit) / 0.75 bars (block)
    • Cinematic time regenerates ~2.2 Drive bars for Ryu
  • 50% minimum damage scaling; applies 10% immediate damage scaling when canceled from special moves
236236K
Shin Shoryuken (CA)
Startup Active Recovery Cancel Damage Guard On Hit On Block
5(2) 12 32+39 land - 4500 (4400) LH HKD +8 -50(-54)
  • Full Invuln: 1-16f; Airborne 7-48f (Forced Knockdown state); Armor Break
  • Available at 25% HP or below
  • Active frames 3-12 cause weaker non-cinematic hit; () refers to non-cinematic damage
  • 2f startup when canceled from 623HP
  • Drive Gauge Depletion: 2 bars (hit) / 1 bar (block)
    • Cinematic time regenerates ~2.3 Drive bars for Ryu
  • 50% minimum damage scaling; applies 10% immediate damage scaling when canceled from special moves


A satisfyingly powerful and invincible uppercut Super that works well as a reversal, juggle ender, or anti-air. The range is quite short, so despite the incredibly fast 5f startup it has limited utility as a punish tool. This also causes it to whiff in some specific midscreen cancel routes.

SA3 cannot anti-air cross-ups, and the forward movement on startup can cause it to whiff under close jumps. Canceling a Shoryuken into SA3 as an anti-air causes Ryu to incur significant damage scaling, making it weaker than a raw SA3 (but generally more consistent to land). Ryu can lose a bit of damage if the opponent is juggled high enough to skip the cinematic; note that after HP Shoryuken, the startup is faster to prevent this non-cinematic hit and to ensure it juggles properly midscreen.

If the opponent chooses to stand block this Super (especially with a tall characters), they will take a little extra blockstun and Burnout chip damage since more hits connect on the way up. However, these hits do not deal additional Drive damage on block, so it's mostly irrelevant outside of Burnout. Because SA3 hits at least 3 times on block, the first hit can be used to put the opponent into Burnout before chipping out with the remaining hits. Opponents can Drive Reversal to prevent this if Ryu uses a blockstring into SA3, but this requires them to be aware of the gimmick and to have full awareness of the health and Drive meter situation. Drive Reversal will give them a full punish as Ryu whiffs over them, so it's risky to attempt this chip-out gimmick.


Taunts

Neutral Taunt (5PPPKKK)
Neutral Taunt
SF6 Classic.png 5PPPKKK
SF6 Modern.png 5LMHS
SF6 Ryu 5pppkkk.png
"Come on!"

5PPPKKK
Neutral Taunt
Startup Active Recovery Cancel Damage Guard On Hit On Block
210 (total) - - - - - - -

Forward Taunt (6PPPKKK)
Forward Taunt
SF6 Classic.png 6PPPKKK
SF6 Modern.png 6LMHS
SF6 Ryu 6pppkkk.png
"..."

6PPPKKK
Forward Taunt
Startup Active Recovery Cancel Damage Guard On Hit On Block
124 (total) - - - - - - -

Back Taunt (4PPPKKK)
Back Taunt
SF6 Classic.png 4PPPKKK
SF6 Modern.png 4LMHS
SF6 Ryu 4pppkkk.png
"Your footwork's sloppy."

4PPPKKK
Back Taunt
Startup Active Recovery Cancel Damage Guard On Hit On Block
209 (total) - - - - - - -

Down Taunt (2PPPKKK)
Down Taunt
SF6 Classic.png 2PPPKKK
SF6 Modern.png 2LMHS
SF6 Ryu 2pppkkk.png
"Come!"

2PPPKKK
Down Taunt
Startup Active Recovery Cancel Damage Guard On Hit On Block
154 (total) - - - - - - -


SF6 Navigation

General
FAQ
HUD
Characters
A.K.I.
Akuma
Blanka
Cammy
Chun-Li
Dee Jay
Dhalsim
Ed
E. Honda
Guile
Jamie
JP
Juri
Ken
Kimberly
Lily
Luke
Manon
Marisa
Rashid
Ryu
Zangief
Data
Akuma
Cammy
Ed
Guile
Jamie
JP
Juri
Ken
Lily
Luke
Manon
Ryu