UMVC3/C. Viper

From SuperCombo Wiki


Introduction

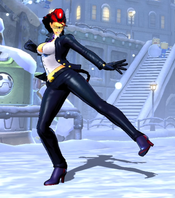
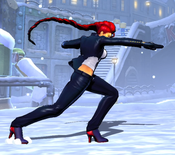
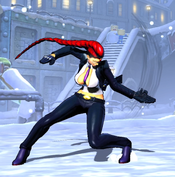
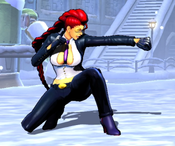
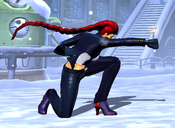
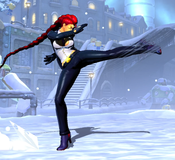
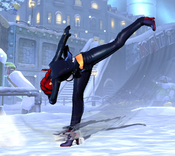
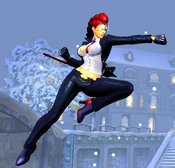
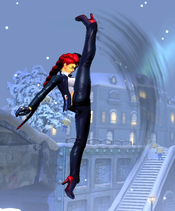
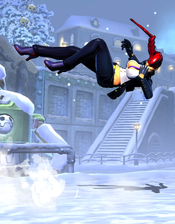
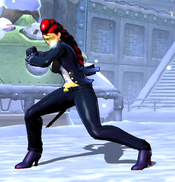
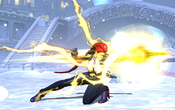
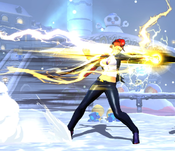
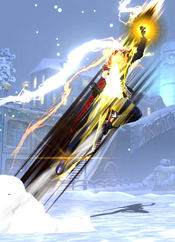
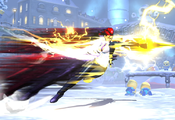
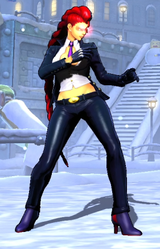
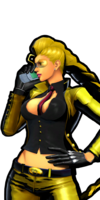
A special agent working for the CIA. Crimson Viper was a newcomer to Capcom's fighting lineup introduced in Street Fighter 4, where she is deployed to investigate the organization S.I.N. and its leader, Seth. She wears a special combat suit that enhances her fighting abilities with special gadgets, which can burn or electrify enemies.

In UMvC3, Viper is a fast-paced, technical character with an access to a variety of tools useful in rushdown, mixups, and zoning.


Strengths Weaknesses
  • Top Tier Setplay: One of only a few characters with practical unblockable options on incoming, and even lacking that her mixups are potent.
  • Combo Potential: High damage potential, played on the right teams with the correct execution she can put out very high damage off a variety of hits.
  • Strong Conversions: Very good at converting stray hits into full combos via tools like EX Burn Kick, and can use jump-cancel Seismo to pick up almost any hard knockdown as well.
  • Versatile Gameplan: Can seamlessly transition a keep away, zoning playstyle into threatening rushdown via strong movement, Optical Laser, and Seismos.
  • Meter Hoarder: Requires careful meter management as Viper needs bar for both hypers and EX moves, and is overall less meter-efficient than many other point characters.
  • High Execution: Demands very high execution in order to be played well and build team synergy.
  • Lackluster Support: Assists are mediocre and she lacks a safe DHC option.


Unique Mechanics

C.Viper's motion specials (Thunder Knuckle, Burning Kick, and Seismic Hammer) have EX variations, based on the "EX" moves found in SF4. These EX moves cost 1 bar of Hyper meter to perform, similar to a Hyper. However, they are still considered special attacks, not hypers. EX Special moves have additional damage and have extra properties to justify their meter cost. EX Specials are done by performing the regular special move motion, but with the S button instead of the regular attack buttons. For example, EX Thunder Knuckle is 236S.

These same three special moves detailed above are able to be Feint Canceled, a special mechanic only Viper can perform. Feint Cancels are performed by pressing the S button during these specials. The specific window for feint canceling a special depends on the attack. Thunder Knuckle can be Feint Canceled both before and after the hit, while Burn Kick and Seismo can only be canceled before the hit. Feint cancel immediately ends the special move and returns Viper to a neutral state with either 4 or 10 frames of recovery, allowing her to recover faster and opening new options. Feint Cancel does not cost any resources to perform.

UMVC3 C. Viper Nameplate.png
UMVC3 C. Viper Portrait.png
Health 900,000
Invulnerable Reversal(s) 236S, 623S, 236XX, 623XX
Grounded Magic Series Stronger+
X-Factor Damage Boost (1/2/3) 25% / 47.5% / 70%
X-Factor Speed Boost (1/2/3) 15% / 22.5% / 30%
Air Movement Options
Air Actions Air Jumps? Air Dash? Flight? WallJump?
2 Yes 8-Way No No
Minimum Attack Scaling
Normals Specials Hypers
20% 30% 60%

Move List

Hitspheres and Hurtspheres

Assists

Thunder Knuckle
Assist A
UMVC3 CViper AssistA.png
Damage Startup Active Recovery
80,000 29 7 130, 100
On Hit On Block Guard Properties
- - Mid Strk.png

Viper punches at an upwards angle, knocking opponents up as well. Functionally similar to 236H (H Thunder Knuckle). Not recommended as it has short range, low blockstun, and leaves the opponent high in the air which is difficult for most characters to combo. Can be feint canceled if used as a crossover counter, allowing for follow-up combos with Viper.

  • THC Hyper: 236XX (Emergency Combination)
Seismic Hammer
Assist B
UMVC3 CViper AssistB.png
Damage Startup Active Recovery
80,000 40 8 109, 79
On Hit On Block Guard Properties
- - Mid Otg.png, Priority: Low, Durability: 5

Punches downward and creates an explosion immediately in front of Viper, which hits OTG. Functionally similar to 623L (L Seismic Hammer). Not recommeded as it slower than more useful OTG assists and leaves the opponent fairly high in air, which is diffcult for most characters to combo. Can be feint canceled when used as a Crossover Counter, but only before the move becomes active making it mostly useless.

  • THC Hyper: 214XX (Burst Time)
Burning Kick
Assist Y
UMVC3 CViper AssistY.png
Damage Startup Active Recovery
90,000 49 5 111, 81
On Hit On Block Guard Properties
- - OH Softknockdown.png, Priority: Low, Durability: 5

Recommended assist. Viper leaps into the air with a kick that is both a projectile and an overhead. As an overhead assist, it can be used to set up dangerous high-low mixups or even unblockables when paired with any low attack from the point character. As it is Forced Soft Knockdown it can be used to extend even very late into combos. Can be feint-canceled if used as a crossover counter, but only before the move becomes active.

  • THC Hyper: 214XX (Burst Time)

Ground Normals

Stand Light
5L
UMVC3 CViper 5L.png
Damage Startup Active Recovery
40,000 5 3 10
On Hit On Block Guard Properties
0 -1 Low -

Vipers fastest low and one of only a few standing lows in the game. It is especially potent for mixups when range won't be an issue. It does have limited range and is not rapid fire so generally it is immediately cancelled into a Medium or used to tick throw.

Stand Medium
5M
UMVC3 CViper 5M.png
Damage Startup Active Recovery
63,000 7 3 19
On Hit On Block Guard Properties
-4 -5 Mid -

Unimpressive Medium normal. Mostly used as a confirm on ground-to-air hits or in combos. In neutral, pressure, and mixups 2M is preferred.

Stand Heavy
5H
UMVC3 CViper 5H.png
Damage Startup Active Recovery
75,000 9 3 22
On Hit On Block Guard Properties
-2 -3 Mid -

No notable uses outside of blockstring and combo filler.


Crouching Light
2L
UMVC3 CViper 2L.png
Damage Startup Active Recovery
38,000 4 2 11
On Hit On Block Guard Properties
0 -1 Mid -

Viper's fastest normal. While it is not a low the rapid fire property makes it useful as a defensive mash button and a stagger option to bait pushblocks.

Crouching Medium
2M
UMVC3 CViper 2M.png
Damage Startup Active Recovery
60,000 7 3 20
On Hit On Block Guard Properties
-5 -6 Low -

Viper's best normal. A low with great range that is useful in many applications but most notable in neutral and pressure. A dash 2M can catch opponents trying to jump as well as hit from suprising ranges. It is confirmable from max range on grounded opponents when cancelled into 236M~S and on block this sequence leaves Viper fairly plus.

Crouching Heavy
2H
UMVC3 CViper 2H.png
Damage Startup Active Recovery
72,000 9 4 19
On Hit On Block Guard Properties
0 -1 Mid -

No notable uses outside of blockstring and combo filler.


Launcher/Special
S
UMVC3 CViper 5S 1st.png
UMVC3 CViper 5S 2nd.png
Damage Startup Active Recovery
30,000 + 50,000 8 5(3)5 24
On Hit On Block Guard Properties
Launch -8 Mid Launch.png, Nocancel.png (only second hit)

Unique two-hitting launcher. The first hit acts as a regular normal, and thus can be canceled into specials or hypers normally. Viper uses this as free extra damage in certain combos. Should generally be cancelled into 236M~S on grounded opponents as the second hit will often whiff on short and/or crouching opponents.

The second hit acts as a standard launcher, with all of the regular properties of most characters 5S.

  • The first hit of S is not subject to hitstun deterioration, meaning the first hit will combo into the second regardless of Hitstun Decay.

Aerial Normals

Jumping Light
j.5L
UMVC3 CViper jL.png
Damage Startup Active Recovery
43,000 6 3 15
On Hit On Block Guard Properties
+11 +10 OH -

Exclusively used as a fast overhead for mixups. Will work as a rising overhead on most characters, most consistently out of a neutral jump. Can be converted with paired with an assist or an X-Factor cancel.

Also used as the normal of choice in Burn Kick Feint Instant Overhead setups, or out of a airdash mixup.

Jumping Medium
j.5M
UMVC3 CViper jM.png
Damage Startup Active Recovery
60,000 8 3 19
On Hit On Block Guard Properties
+16 +15 OH -

Does not see much usage outside of combos.

Jumping Heavy
j.5H
UMVC3 CViper jH.png
Damage Startup Active Recovery
73,000 7 3 24
On Hit On Block Guard Properties
+18 +17 OH -

Viper's most versatile air normal. Used as her primary air-to-ground, air-to-air normal, and throw OS option.

While it is notably fast for an H normal the range is somewhat limited and the hitbox moves upward during the later active frames, which can sometimes lead to j.H whiffing on grounded opponents. Typically you will press this normal somewhat later than other characters H normals to compensate.

Jumping Special
j.5S
UMVC3 CViper jS.png
Damage Startup Active Recovery
75,000 9 4 23
On Hit On Block Guard Properties
+15 +14 OH Aircombofinisher.png

Outside of combos and confirms this normal is most notable for being a somewhat more consistent air-to-ground normal than j.H with the downside of losing access to a throw OS. As such use case is mostly saved for smaller opponents.

Command Normals

Viper Elbow
6M
UMVC3 CViper 6M.png
Damage Startup Active Recovery
65,000 22 4 13
On Hit On Block Guard Properties
+1 0 OH -

Command overhead that cannot be chained into. As Viper has a plethora of other faster and/or longer range overheads this normal does not see much usage.

  • Can be canceled into special moves on contact or during the landing recovery including cancelling into 5S.


Focus Attack
X+S (can be charged)
UMVC3 CViper XS Lvl1.png
Viper's initial focus stance
UMVC3 CViper XS Lvl2.png
Viper enters level 2 focus.
UMVC3 CViper XS Lvl3.png
Viper automatically attacks upon fully charging
Lvl 1 Damage Startup Active Recovery
70,000 25 Minimum (12f after release) 3 23
On Hit On Block Guard Properties
-3 -4 Mid Hyper Armor starting from frame 6
  • Level 1 (default) Focus Attack is an unremarkable elbow strike with limited range and utility.


Lvl 2
Charged for 30-64 frames
Damage Startup Active Recovery
80,000 42 Minimum (12f after release) 3 23
On Hit On Block Guard Properties
- -4 Mid Hyper Armor starting from frame 6, Crumple.png on grounded hit / Forced Soft Knockdown on air hit
  • Level 2 Focus Attack is gained by charging for at least 30 frames, an inky aura will appear around Viper. Releasing the focus attack now will make the attack Crumple on hit against grounded opponents and cause a Forced Soft Knockdown on airborne opponents. Level 2 is most useful as a punish tool. Use the Hyper armor during the charge to absorb the hit of otherwise hard to deal with or normally unpunishable attacks and release the FA to punish.


Lvl 3
Charged for 65 frames
Damage Startup Active Recovery
90,000 77 3 23
On Hit On Block Guard Properties
- - Unblockable Hyper Armor starting from frame 6, Crumple.png on grounded hit / Forced Soft Knockdown on air hit, Unblockable.png
  • Level 3 Focus Attack is gained by allowing Viper to fully charge, and she will automatically attack upon reaching it. Not only does Level 3 Focus cause a Crumple hit, it is now Unblockable. Normally, it is impractical for Viper to keep an opponent in range of this attack long enough to fully charge it. This weakness can be circumvented by using assists / setups with large amount of lockdown, such as Dante's Jam Session or Amaterasu's Cold Star assist.


Special Moves

Thunder Knuckle
236X
UMVC3 CViper 236L.png
L Version
UMVC3 CViper 236M.png
M Version
UMVC3 CViper 236H.png
H Version
UMVC3 CViper 236S.png
S Version
L
Qcf.png + L.png
Damage Startup Active Recovery
90,000 15 7 14
On Hit On Block Guard Properties
+2/+11 +1/+10 Mid -

This version has inferior framedata all around to the the M version so it is generally only used against opponents where the M version will whiff above them, like Morrigan and Amaterasu.

  • Feint Windows: 6-14f (before contact), 15-16f (after contact)
M
Qcf.png + M.png
Damage Startup Active Recovery
90,000 13 7 16
On Hit On Block Guard Properties
0/+11 -1/+10 Mid -

A cornerstone of Viper's pressure, combo structure, and neutral, very much a move that does it all. Used after 2M to confirm the button or start pressure and can be paired with a an assist in neutral for screen coverage into pressure.

  • Feint Windows: 3-12f (before contact), 13-14f (after contact)
  • Some characters can crouch under M Thunder Knuckle and/or their hitstun animations will avoid the attack: M Thunder Knuckle Whiff Chart
H
Qcf.png + H.png
Damage Startup Active Recovery
100,000 5 7 44
On Hit On Block Guard Properties
-15/+24 -29/+10 Mid -

Used mainly for combos. This version allows Viper to knock opponents into the air and, if feint cancelled, combo afterwards. Importantly this leaves the opponent airborne but not in the Launch state, which enables Viper to juggle with j.S leading to her highest damage combos.

  • Feint Windows: 1-4f (before contact), 5-6f (after contact).
    • Note: the feint cancel window for the H is such that Viper can only cancel while she is still on the ground, although cancelling after the hit will put the opponent airborne, and she jump and combo afterwards.
S
Qcf.png + S.png (1 Bar)
Damage Startup Active Recovery
150,000 10 38 28
On Hit On Block Guard Properties
- -44 Mid Invuln frames 1-10, Crumple.png vs grounded, Forced Soft Knockdown vs Airborne, Projectile Nullification, Priority: Medium, Durability: 10

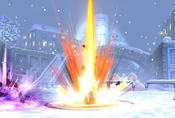
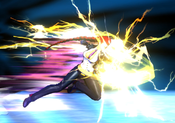
Metered version of Thunder Knuckle, where Viper advances across the entire screen before hitting the opponent. Is invincible on startup making it useful as a reversal. However, it is generally less reliable as one than EX Seismic Hammer or Emergency Combination. What really makes this move shine is the Medium Priority nullification hitbox it has for its entire active frames. This allows Viper to plow through almost any non-super projectile punishing some grounded projectiles on reaction and many more on a good read.

Additionally, as it Crumples on grounded hit it is can be used to setup Hard Tags, or allow Viper to combo when something might normally hit her for trying (Hidden Missiles). It is extremely unsafe on block but can be cancelled into other EX Specials, Hypers, and X-Factor which allows Viper to continue pressure at the cost of resources.

  • Feint Windows: 5-9f (don't do this)


Burning Kick
214X
UMVC3 CViper 214X FeintWindow.png
This flash indicates the window to feint-cancel by inputting S.
UMVC3 CViper 214X.png
L
Qcb.png + L.png
Damage Startup Active Recovery
90,000 23 10 26
On Hit On Block Guard Properties
- -14 OH Forced Soft Knockdown, Priority: Low, Durability: 5

This version is primarily used in order to feint cancel with 214L~S acting as an additional jump of sorts, but with very low upward momentum. This is the preferred version to use as the feint window is the earliest. This allows Viper to access very fast, comboable overheads: Burn Kick Feint Instant Overhead

  • Feint Window: 7-14f (before hit)
M
Qcb.png + M.png
Damage Startup Active Recovery
90,000 25 10 18
On Hit On Block Guard Properties
- -6 OH Forced Soft Knockdown, Priority: Low, Durability: 5

Not used as it does nothing that the L and H versions don't do better.

  • Feint Window: 9-16f (before hit)
H
Qcb.png + H.png
Damage Startup Active Recovery
90,000 27 10 13
On Hit On Block Guard Properties
- -1 OH Forced Soft Knockdown, Priority: Low, Durability: 5

This version is used as a grounded overhead because it is comboable normally into a linked 5M. While it is relatively slow, it can crossup at close range making it tricky to block in some scenarios. Additionally, as Viper has access to a variety of mixups options, opponents may not always be ready for a reactable overhead.

Sometimes used in combos as if it connects on an opponent that is low to the ground it can link into 5M.

  • Feint Window: 10-17f (before hit)
S
Qcb.png + S.png (1 Bar)
Damage Startup Active Recovery
20,000 x3 + 90,000 9 10(5)5 20
On Hit On Block Guard Properties
- -3 OH Forced Soft Knockdown, Priority: Low, Durability: 5

Enhanced version of grounded Burning Kick. Has an initial hitbox when jumping upwards, making it an extremely fast overhead. Due to having very low recovery and the Forced SKD property this move is almost always comboable on hit, even extremely late into combos. Despite it's speed the initial hit has very limited range, making it unreliable as an overhead. Additionally, Viper plenty of options to mix the opponent without spending a meter.

Most useful as a solo combo extender.

  • Feint Window: 10-14f (don't do this)


Air Burning Kick
j.214X
UMVC3 CViper j214X FeintWindow.png
This flash indicates the window to feint cancel by inputting S.
UMVC3 CViper j214X.png
L
(air)Qcb.png + L.png
Damage Startup Active Recovery
80,000 21 10 Until grounded +18
On Hit On Block Guard Properties
- -6 OH Forced Softknockdown.png, Priority: Low, Durability: 5

This version is useful as if it connects very low on the opponent Viper can recover in time to link a button afterwards, this makes it the most consistent meterless option for confirming airborne hits or extending combos.

M
(air)Qcb.png + M.png
Damage Startup Active Recovery
80,000 19 10 Until grounded +20
On Hit On Block Guard Properties
- -9 OH Forced Softknockdown.png, Priority: Low, Durability: 5

Not often used as it lacks any properties that would make it stand out from the other versions.

H
(air)Qcb.png + H.png
Damage Startup Active Recovery
80,000 17 10 Until grounded +22
On Hit On Block Guard Properties
- -11 OH Forced Softknockdown.png, Priority: Low, Durability: 5

The fastest meterless version, while retaining a large hitbox. Useful for confirming air hits before spending resource to convert further.

S
(air)Qcb.png + S.png
Damage Startup Active Recovery
20,000 x3 + 80,000 6 10(5)5 Until grounded + 16
On Hit On Block Guard Properties
- -4 OH Forced Softknockdown.png, Priority: Low, Durability: 5

Enhanced version of Air Burning Kick.

Very strong conversion tool for stray air hits and assists like Jam Session, as it recovers fast enough to give Viper a guaranteed follow-up combo.


Seismic Hammer
Seismo
623X
UMVC3 CViper 623L.png
L Version
UMVC3 CViper 623M.png
M Version
UMVC3 CViper 623H.png
H Version
UMVC3 CViper 623S.png
S Version
Damage Startup Active Recovery
80,000 16 8 35
On Hit On Block Guard Properties
-7 -18 Mid Otg.png, Jcancel.png, Priority: Low, Durability: 5

Viper punches the ground and creates a shockwave projectile a fixed distance in front of her. L Seismo creates a shockwave directly in front of her, M creates one at about 1/3 fullscreen distance, and H creates one at roughly 2/3 fullscreen distance. All three versions are identical other than the difference in distance. The shockwave hits OTG and can be useful in projectile battles since it appears underneath the opponent, avoiding their own fireballs.

Seismo is a very important part of Viper's kit due to its jump-cancel property. It can be canceled into jumps or superjumps after frame 19. Jump-cancel seismos are very advantageous on hit or block, and can even be used if the projectile whiffs entirely. Additionally, Viper can cancel the prejump frames of her jump-cancel Seismo into any grounded special/hyper, including another Seismo. Rapid jump-cancel Seismos allow Viper to quickly fill the screen with projectiles, in order to lock down opponents or their assists, while being very low commitment.

Seismo's projectile reaches slightly higher than jump height. If an airborne opponent blocks it, their aerial momentum will be halted and they will plummet towards the ground. Viper can use this to jail characters who try to chicken block her pressure.

Feint Window: 6-11f

Damage Startup Active Recovery
50,000 x3 14 8 19
On Hit On Block Guard Properties
- -5 Mid Invuln until frame 16, Otg.png, Forced Soft Knockdown, Jcancel.png, Priority: Low, Durability: 5

Enhanced version of Seismo. Viper creates a larger explosion that covers roughly the combined area of L and M seismos. It is faster than regular Seismo, has Forced Soft Knockdown, good invincibility, all while retaining all of the properties of a regular Seismo. Combined this makes S Seismo one of the most threatening reversals in the game. Even when blocked Viper can be plus with a jump or FADC cancel meaning she commits very little when trying to escape pressure with this option.

Can be used late in combos for extensions, similar to EX Burning Kick.

  • Feint Window: frames 5-11.


Optic Laser
[X]
UMVC3 CViper -X- Charge.png
After being held for 60 frames, Viper's glasses will begin to glow.
UMVC3 CViper -X- Release.png
Release the button to perform Optic Laser.
Damage Startup Active Recovery
35,000 x3 21 20 10
On Hit On Block Guard Properties
- -7 High Forced Soft Knockdown, Priority: Low, Beam Durability: 4 per frame for 3 frames

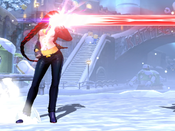
Negative Edge Projectile. If Viper holds a button for 60 frames, her sunglasses will gain a red glow. After that point, releasing all attack buttons while in a valid state (on the ground, and can cancel into a special) will cause Viper to perform Optic Laser. Releasing the held attack buttons in a state where she cannot perform the special will waste the charge.

Optic Laser is a fairly fast beam projectile with good durability, but most characters can duck underneath it. It can not be feint canceled. Despite this when mixed in with Seismos, Optical Laser is a powerful part of Viper's space control, it creates a good amount of distance from the opponent on both hit and block.

Button strength does not alter this move in any way, so it can be used by holding any button. Viper can also hold down a second button and then release the first button in order to maintain her charge, although she cannot store multiple charges by holding multiple buttons.

Hyper Combos

Emergency Combination
236XX (1 bar)
UMVC3 CViper 236XX 1st.png
UMVC3 CViper 236XX 2nd.png
Damage Startup Active Recovery
60,000 + 60,000 + 70,000 + 110,000 10+4 5(17)6(13)6(17)7 72
On Hit On Block Guard Properties
- -74 Mid Invuln until frame 36, Softknockdown.png, Projnull.png

Viper advances with a flurry of blows. In addition to being an advancing, invulnerable reversal it also nullifies projectiles for the first two hits. While not as safe or fast as her other reversals this one is much easier to use in a pinch and can beat even extremely active supers and projectiles. If it hits an airborne opponent it may sometimes juggle them too high and subsequent hits of the super will whiff, leaving Viper open to being punished.


Burst Time
214XX (1 bar)
UMVC3 CViper 214XX 1st.png
UMVC3 CViper 214XX 2nd.png
Damage Startup Active Recovery
70,000 + 30,000 x3 + 150,000 9+1 4(26)64 57
On Hit On Block Guard Properties
- -99 Low Invuln frames 6-13, Otg.png, forced Softknockdown.png, Priority: High, Durability: 100 (!!)

Standard combo ender Hyper. Can be done on its own as an OTG, or as a followup to OTG L Seismo. Does great damage, especially considering Viper's high minimum damage scaling on hypers.

This move juggles the opponent very high into the air and ends with a lengthy fall into a soft knockdown. The DHC window is very long even after the final hit, and so this hyper is excellent for setting up DHCs. Additionally, it is a low which can sometimes catch opponents off guard.


Viper Full Throttle
623XX (3 bars)
UMVC3 CViper 623XX.png
UMVC3 CViper 623XX Cinematic.png
Damage Startup Active Recovery
430,000 10+0 10 49
On Hit On Block Guard Properties
- -38 Mid Invuln until frame 14, Hardknockdown.png

Standard cinematic level 3 hyper, with Viper lunging forward about 3/4 of screen length. Not typically used as Viper has issues converting into this Hyper at the end of combos, and she has many reversals that are better reward for the meter.

This move is one of a few hypers that has 0 frames of startup after the Hyperflash. As a result, if this move is done point black, and the opponent is not already blocking when the hyperflash begins, it cannot be blocked. Effectively, it is already active during the super flash.

Universal Mechanics

Ground Throw
6H, 4H
UMVC3 CViper GroundThrow.png
Damage Startup Active Recovery
80,000 1 1 -
On Hit On Block Guard Properties
- - Throw Hardknockdown.png

Standard ground throw that results in the opponent knocked down next to Viper. Consistently comboable after with an L} Seismo.

Air Throw
j.6H, j.4H
UMVC3 CViper AirThrow.png
Damage Startup Active Recovery
80,000 1 1 -
On Hit On Block Guard Properties
- - Airthrow Hardknockdown.png

Standard air throw that results in the opponent knocked down a small distance away. Viper can pickup for a combo after regardless of the height of the air throw.


Snap Back
Qcf.png+A1.png/A2.png
UMVC3 CViper 5H.png
Damage Startup Active Recovery
50,000 2 3 22
On Hit On Block Guard Properties
- -3 Mid Snapback

Animation and hitbox based on 5H.


Hard Tag
Hold 14f A1.png/A2.png
UMVC3 CViper HardTag.png
Damage Startup Active Recovery
30,000 - 20 33
On Hit On Block Guard Properties
- -15 OH Softknockdown.png

Team Position

Viper is almost always played as a Point character. As her Assist and DHC options are mediocre. Viper tends to be at her best character on teams focusing on maximizing her strengths with a strong horizontal neutral assist and an assist to set up unblockables. Viper teams tend to be particularly momentum-focused, as she wants to secure an early hit and snowball with Unblockable setups using her fully charged Focus Attack. Additionally, Viper usually requires a damage engine mid behind her to enable her to kill off of scaled hits like throws and assists. This is can be done via DHCs which she sets up well due to having a Forced SKD Super and not using any bounces. She can also route into relaunches in order to TAC for the kill.


A few people have also had success running Viper as an Anchor character, on the grounds that her EX Specials are strong and can be threatening even when she isn't backed by an assist.

Notable Shells

Surprise, surprise but Doom is one of Viper's best partners. He has nearly everything she wants in a support. He can function as a damage engine via Ex Thunder Knuckle Hard Tags or via TAC infinites. He has access to safe DHCs to make her reversal super safe and get her out with little risk. Lastly, all of his assists are strong for her with Plasma Beam being particularly useful for her neutral and combos.

Dante can be played Mid or Anchor with Viper and is fantastic in either position. Which position you choose will be up to personal preference and what your third character provides to the team and needs to function.

Replay Theater Footage


Notable Players

Name Team Region Status Notes Matches
Full Schedule

UMVC3 C. Viper Color 2.png UMVC3 Doctor Doom Color 3.png UMVC3 Amaterasu Color 3.png

East Coast Inactive Easily the best example of the Shell. His use of Plasma beam to supplement Vipers neutral as well as ensure any hit kills is second to none. Particularly notable for his consistency with Doom TAC infinites. Replay Theater
vs Jan @ CEO 2015
vs RayRay @ CEO 2016


StaticAlpha

UMVC3 C. Viper Color 5.png UMVC3 Doctor Doom Color Alt.png UMVC3 Strider Hiryu Color 6.png

Midwest Inactive Plays a very clean space control playstyle, utilizing Viper Eye Laser, Seismos, and Doom beam (and Vajra) to zone and control the screen until choosing an opening to go in. Once in, his use of Thunder Knuckle and Plasma Beam makes for oppressive offense that is hard to escape even with pushblock. Replay Theater
vs JoeyD @ Chaos Dimension
vs CrazyJoe @ Combo Breaker 2019

A girl and her dog. Amaterasu has arguably the best lockdown assist in the game for Viper, not only does it enable Viper to setup incoming unblockables it also gives her plenty of time on block to run a more traditional high/low mixup. Furthermore Amaterasu's THC Super Okami Shuffle holds the opponent in place long enough to enable unblockables and is one of the most inescapable unblockable setups in the game.

Amaterasu is typically played Anchor with Viper as her support value is incredibly high but she does not gain a lot from having support herself. In addition she is a uniquely threatining anchor with X-Factor 3 and some meter to spare.

Replay Theater Footage

Once again no surprise that one of the best support characters in the game would pair well with Viper, but in this case Dante's assist is really what makes it shine. Jam Session is a great way to control the air versus characters that like to play at Superjump Height, which is one of Viper's biggest weaknesses. Additionally, it can be used to setup incoming unblockables which enables the strongest form of Viper's gameplan. In addition Dante has TAC infinites which can allow Viper to kill from scaled starters and build the meter necessary to push her gameplan as hard as possible.

Dante can be played Mid or Anchor with Viper and is fantastic in either position. Which position you choose will be up to personal preference and what your third character provides to the team and needs to function.

Replay Theater Footage

Notable Players

Name Team Region Status Notes Matches
FeedYourGreed

UMVC3 C. Viper Color 5.png UMVC3 Dante Color Alt.png UMVC3 Strider Color Alt.png

Inactive Has optimized his team to the absolute limit. Generally, plays a more aggressive playstyle and once he gets the first hit the opponent often doesn't get another chance to play. Is extremely consistent at setting up incoming unblockables with both Jam Session and Vajra and converting them regardless of how the situation plays out. Replay Theater
vs Acentric @ Parsec FT5
vs TJ_Puma @ Parsec FT10


A Secret Agent and a Ninja make an even better pairing in the game as they do thematically. Viper is one of the best character in the game at consistently converting Strider's Vajra assist and Seismic Hammer enables her to protect the assist better than most. So Viper enables Vajra to work effectively in neutral and likewise Vajra enables extremely potent left-right mixups, incoming unblockables, and coverage at Superjump Height which Viper struggles with. Lastly, Vajra provides very high damage extensions for Viper's combo, often resulting in kills without the need to use another assist to extend.

Strider is exclusively an Anchor due to the strength of his X-Factor 3 comeback gameplan as well as low overall damage. This doesn't change when played with Viper.

Replay Theater Footage


Alternate Colors

Color 1 Color 2 Color 3 Color 4 Color 5 Color 6 Alt Color
UMVC3 C. Viper Color 1.png UMVC3 C. Viper Color 2.png UMVC3 C. Viper Color 3.png UMVC3 C. Viper Color 4.png UMVC3 C. Viper Color 5.png UMVC3 C. Viper Color 6.png UMVC3 C. Viper Color Alt.png