Introduction
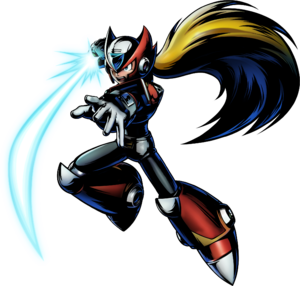
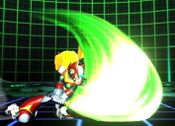
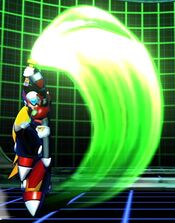
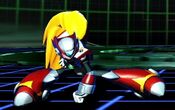
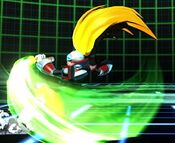
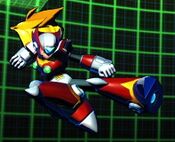
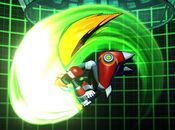
Zero is a robot warrior regularly appearing in the classic Capcom franchise Mega Man. In the Mega Man X series, he initially appears as a supporting character and fellow Maverick Hunter, but became playable in later games. Zero also eventually got his own series, Mega Man Zero in which he is the primary protagonist. Besides his Z-Buster (a counterpart to Mega Man X's 'X-Buster' arm cannon), Zero fights with his iconic energy sword, the Z-Saber.
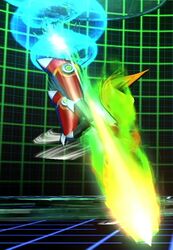
In UMvC3, Zero is a powerful all-rounder with tools to control neutral at most ranges and enormous damage. Although his standard mobility tools are not the best, Zero can use his command dash Hienkyaku (214X) in order to quickly zip around the screen. Using Zero's buster mechanic, he can store a powerful charged projectile until the moment he needs it, then instantly cancel any normal or special into Buster. This gives Zero unparalleled ability to convert stray hits into full combos, and makes him a threat from anywhere on the screen. Zero is also infamous for his ability to OTG relaunch with just about any assist in the game, and for his "Lightning Loops" combos, which allow him to kill any character with very good meter efficiency.
| Strengths | Weaknesses |
|---|---|
|
|
Unique Movement
Zero's universal movement options are mostly sub-par. Luckily he has a variety of very potent unique movement options. Raikousen (j.623X), Sentsuizan (j.236X), and Hienkyaku (214X) allow Zero to move in nearly any direction on command and either come paired with a hitbox or can be cancelled into Buster. This makes Zero's movement uniquely powerful and dangerous.
Move List
Assists
| Damage | Startup | Active | Recovery |
|---|---|---|---|
| 25,000 x5 | 29 | 25 | 116, 86 |
| On Hit | On Block | Guard | Properties |
| - | - | Mid | Invuln (as Crossover Counter) frames 1 - ??? |
|
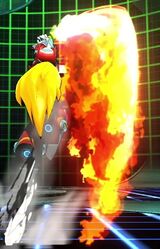
THC Hyper: Rekkoha. Zero swipes upwards with his sword, carrying himself and the opponent into the air. Like other DP-style assists, it lacks any invincibility, has limited horizontal reach, and tends to knock opponents too high into the air to be practical for combos. Ryuenjin is notable for being an exceptional Crossover/Alpha Counter assist. When brought in this way, Ryuenjin does have a good amount of invincibility, and Zero can cancel the first hit into Sougenmu (214XX) before he becomes airborne. When canceled into Sougenmu, Zero is advantageous on block and gets a full combo on it, which can easily snowball into a dead opponent and a dangerous corner mixup for the incoming character. | |||
| Damage | Startup | Active | Recovery |
|---|---|---|---|
| 70,000 | 32 | - | 126, 96 |
| On Hit | On Block | Guard | Properties |
| - | - | Mid | Priority: Low, Durability: 3 |
|
THC Hyper: Rekkoha. Zero fires a standard projectile, which travels directly forwards. It is a competent neutral assist that can reach across the entire screen, but has poor durability and quickly gets smothered by projectiles from the opponent's own assists. Hadangeki becomes better if Zero is benefiting from his Sougenmu install in the backline, as he will fire two projectiles in quick succession. However, even the combined durability of both Hadangekis will lose to standard projectile assists, such as Plasma Beam and Sentinel Drones. | |||
| Damage | Startup | Active | Recovery |
|---|---|---|---|
| 30,000 x3 | 37 | 7 | 109, 79 |
| On Hit | On Block | Guard | Properties |
| - | - | Mid | |
|
THC Hyper: Rekkoha. Zero lunges forward while attacking up to three times. Unlike the point character version of this move (6H), the assist deals chip damage when blocked. As a Cross-over Counter Shippuga can be special cancelled just like the normal version of the move. | |||
Ground Normals
| Damage | Startup | Active | Recovery |
|---|---|---|---|
| 35,000 | 5 | 3 | 12 |
| On Hit | On Block | Guard | Properties |
| -1 | -3 | Mid | - |
|
Zero does a quick swipe with his saber. | |||
| Damage | Startup | Active | Recovery |
|---|---|---|---|
| 53,000 | 7 | 3 | 19 |
| On Hit | On Block | Guard | Properties |
| -4 | -5 | Mid | - |
|
Zero does a horizontal slice. Moves him forward very slightly, less than half a character length. | |||
| Damage | Startup | Active | Recovery |
|---|---|---|---|
| 25,000 x3 | 11 | 10 | 16 |
| On Hit | On Block | Guard | Properties |
| +1 | 0 | Mid | - |
|
Zero grabs his saber with both hands and slashes down. During the startup, Zero steps forward slightly, advancing about half a character length. 5H hits three times, and the combined hitstop of all three hits gives this attack a very long duration on hit or block. Besides helping to hitconfirm, this hitstop is useful to stall for time while Zero builds up a Buster charge, or possibly to wait for his assists to come off cooldown. | |||
| Damage | Startup | Active | Recovery |
|---|---|---|---|
| 80,000 | 9 | 5 | 22 |
| On Hit | On Block | Guard | Properties |
| - | -5 | Mid | |
|
Zero slashes upward. Fairly standard launcher. | |||
| Damage | Startup | Active | Recovery |
|---|---|---|---|
| 30,000 | 4 | 2 | 11 |
| On Hit | On Block | Guard | Properties |
| 0 | -1 | Low | - |
|
Zero does a low kick. | |||
| Damage | Startup | Active | Recovery |
|---|---|---|---|
| 56,000 | 8 | 3 | 20 |
| On Hit | On Block | Guard | Properties |
| -5 | -6 | Low | - |
|
Zero slashes low to the ground. | |||
| Damage | Startup | Active | Recovery |
|---|---|---|---|
| 70,000 | 13 | 5 | 18 |
| On Hit | On Block | Guard | Properties |
| - | -1 | Mid | |
|
Note: Not a low. Zero spins forward with his saber. Advances him forward approximately one character length. | |||
Jumping Normals
| Damage | Startup | Active | Recovery |
|---|---|---|---|
| 33,000 | 5 | 3 | 12 |
| On Hit | On Block | Guard | Properties |
| - | - | OH | - |
|
Zero kicks out into the air. | |||
| Damage | Startup | Active | Recovery |
|---|---|---|---|
| 55,000 | 8 | 3 | 19 |
| On Hit | On Block | Guard | Properties |
| - | - | OH | - |
|
Zero slashes diagonally downwards in front of him. | |||
| Damage | Startup | Active | Recovery |
|---|---|---|---|
| 25,000 x3 | 10 | 18 | 15 |
| On Hit | On Block | Guard | Properties |
| - | - | OH | |
|
Zero spins clockwise with his saber. Works as a great jump-in with a deep cross-up hitbox. j.5H can not be special-cancled, except by chaining it into j.5S. This includes canceling into Lvl3 Buster, and so j.5H is one of the only moves that Zero can not Buster Cancel, making it relatively dangerous to whiff. | |||
| Damage | Startup | Active | Recovery |
|---|---|---|---|
| 75,000 | 13 | 9 | 17 |
| On Hit | On Block | Guard | Properties |
| - | - | OH | |
|
Zero slashes forward in air. Standard air combo finisher. | |||
Command Normals
| Damage | Startup | Active | Recovery |
|---|---|---|---|
| 30,000 x3 | 14 | 7 | 17 |
| On Hit | On Block | Guard | Properties |
| +5 | +4 | Mid | - |
|
Zero dashes forward while swinging his saber. Like 5H, it hits three times, with a large amount of hitstop that is useful for hitconfirming and building a Buster Charge. Primarily used as combo and blockstring filler. | |||
| Damage | Startup | Active | Recovery |
|---|---|---|---|
| 25,000 x3 | 9 | 18 | 9 |
| On Hit | On Block | Guard | Properties |
| - | - | OH | |
|
Zero spins counterclockwise with his saber. Functions basically the same as j.5H, but spinning the opposite direction. You cannot chain into this normal from other air normals, you'll just get j.H instead. Like with j.5H, it cannot be special-canceled, except by chaining into j.5S. | |||
Special Moves
| L |
Damage | Startup | Active | Recovery |
|---|---|---|---|---|
| 70,000 | 17 | - | 25 | |
| On Hit | On Block | Guard | Properties | |
| -2 | -2 | Mid | Priority: Low, Durability: 3 | |
| M |
Damage | Startup | Active | Recovery |
| 70,000 | 8 | - | 34 | |
| On Hit | On Block | Guard | Properties | |
| -7 | -8 | Mid | Priority: Low, Durability: 3 | |
| H |
Damage | Startup | Active | Recovery |
| 55,000 x 2 | 13 | - | 34 | |
| On Hit | On Block | Guard | Properties | |
| -7 | -8 | Mid | Priority: Low, Durability: 3 | |
|
Standard projectile special. Zero creates a slashing projectile that travels across the stage. L and M versions are single-hit projectiles, with the L version having slow startup and traveling slowly across the screen, while the M version starts up very quickly and has a fast travel speed. If Zero performs 236L and then 236M in quick succession, they will both reach fullscreen distance at the same time. H version startup and travel speed are somewhere inbetween the L and M versions, and notably hits twice for higher total damage. Hadangeki becomes a very powerful zoning tool while enhanced by Sougenmu, as the afterimage's projectile will neatly cover the real Zero's recovery. The gap between these projectiles is very small, and X-Factor Zero can keep an opponent trapped in blockstun while dealing very heavy chip damage. | ||||
| L |
Damage | Startup | Active | Recovery |
|---|---|---|---|---|
| 70,000 | 5 | 9 | 24 | |
| On Hit | On Block | Guard | Properties | |
| -10 | -11 | Mid | ||
| M |
Damage | Startup | Active | Recovery |
| 30,000 X 3 (81,200) | 5 | 25 | 21 | |
| On Hit | On Block | Guard | Properties | |
| -7 | -6 | Mid | ||
| H |
Damage | Startup | Active | Recovery |
| 25,000 X 5 (102,300) | 5 | 25 | 21 | |
| On Hit | On Block | Guard | Properties | |
| -7 | -16 | Mid | ||
|
Zero rises into the air with an uppercut special. Has no invincibility and very limited utility. Outside of its ability to be Buster-canceled, it also lacks combo utility. The H version is sometimes useful as a relatively high-damage way to end Lightning Loops without spending meter. All versions of Ryuenjin are not subject to hitstun deterioration. | ||||
| L In air, |
Damage | Startup | Active | Recovery |
|---|---|---|---|---|
| - | 1 | - | 15 | |
| On Hit | On Block | Guard | Properties | |
| - | - | - | - | |
| M In air, |
Damage | Startup | Active | Recovery |
| 60,000 | 13 | until grounded | 10 | |
| On Hit | On Block | Guard | Properties | |
| +9 | +8 | Mid | ||
| H In air, |
Damage | Startup | Active | Recovery |
| 80,000 | 18 | until grounded | 10 | |
| On Hit | On Block | Guard | Properties | |
| +9 | +8 | Mid | ||
|
Zero's divekick. The L version is just a fake out, and the M and H versions make for a fairly standard divekick, with M going at a steeper angle, while H has a wider angle and is a bit slower. This is Zero's primary OTG tool. Zero can relaunch from just about any Hard Knockdown by using j.236X OTG and pairing it with either a Level 3 Buster-cancel or an assist call. | ||||
| L |
Damage | Startup | Active | Recovery |
|---|---|---|---|---|
| - | 5 | - | 25 | |
| On Hit | On Block | Guard | Properties | |
| - | - | - | - | |
| M |
Damage | Startup | Active | Recovery |
| - | 5 | - | 35 | |
| On Hit | On Block | Guard | Properties | |
| - | - | - | - | |
| H |
Damage | Startup | Active | Recovery |
| - | 5 | - | 22 | |
| On Hit | On Block | Guard | Properties | |
| - | - | - | - | |
|
The grounded version of Zero's pseudo teleport dash. Zero dashes in a specified direction at high speed, and phases through the opponent if they're in his way. All versions can steal the corner from the opponent, but no version has any invulnerability.
Hienkyaku is Zero's primary mobility tool, as his regular dashes are not particularly fast. It is also useful for Zero's offense, as he can use it in response to an opponent's pushblock in order to quickly re-close the distance between them. Calling an assist and then canceling into Hienkyaku to dash behing the opponent is a simple way to set up an ambiguous crossup. | ||||
| L In air, |
Damage | Startup | Active | Recovery |
|---|---|---|---|---|
| - | - | - | - | |
| On Hit | On Block | Guard | Properties | |
| - | - | - | - | |
| M In air, |
Damage | Startup | Active | Recovery |
| - | 6 | - | 20 | |
| On Hit | On Block | Guard | Properties | |
| - | - | - | - | |
| H In air, |
Damage | Startup | Active | Recovery |
| - | 6 | - | 21 | |
| On Hit | On Block | Guard | Properties | |
| - | - | - | - | |
|
The aerial version of Zero's pseudo teleport dash. The M and H versions can steal the corner from the opponent. Like the grounded version, these dashes also have no invulnerability.
| ||||
| Level 1 | Damage | Startup | Active | Recovery |
|---|---|---|---|---|
| 40,000 | 5 | - | 23 | |
| On Hit | On Block | Guard | Properties | |
| -6 | -7 | - | ||
| Level 2 | Damage | Startup | Active | Recovery |
| 70,000 | 5 | - | 23, air 15 | |
| On Hit | On Block | Guard | Properties | |
| -4 | -5 | - | ||
| Level 3 | Damage | Startup | Active | Recovery |
| 40,000 x3 | 5 | - | 23, air 15 | |
| On Hit | On Block | Guard | Properties | |
| - | +2 | - | ||
|
Zero's Buster shot. Holding down any button (except S) will start charging the Buster. To use it, release all held buttons. You can switch the button being held and keep your charge - for example, if you start your charge by holding L, but switch to holding H, Zero won't fire the Buster. Zero is free to act while charging, but he loses his charge if he is hit by an attack. Level 1 Buster requires at least 30 frames of charge. It is a small projectile with no notable properties, low damage, and limited durability. Level 2 Buster requires at least 70 frames of charge. It has improved damage and durability, but is still fairly standard. By charging Buster for at least 150 frames (2.5 seconds), Zero gains access to Level 3 Buster, an extremely powerful move and the defining point of his moveset. Besides having greatly improved damage and durability, it now gains two notable special properties. First, Zero can cancel his other special moves into Level 3 Buster. This greatly improves Zero's combos, mixup game, zoning, and basically every aspect of his gameplay by giving him a very quick cancel option. Second, Level 3 Buster forces a Soft Knockdown on hit, regardless of height or hitstun deterioration. Zero can use this to consistently convert even very stray, awkward hits into a standard BnB combo by Buster-Canceling the hit, then catching the opponent before they reach the ground. Glitch: Normally, the strength of maintaining a stored Buster charge is tempered by losing access to the button being held for the charge. Using an attack that is input using the button held for Buster requires either first releasing the button or switching to another held button in advance, which can be awkward to perform quickly. A glitch allows Zero to perform specials using his held Buster input without losing the charge: Zero can release the input for Buster during the hitstop caused by a normal on hit or block, input a special using that button, then re-hold the button before hitstop concludes. If done fast enough and with proper timing, Zero will perform the special but not forfeit his Buster charge. This is functionally similar to Vergil's much more well-known Round Trip Glitch. Video Guide on implementing the Buster Glitch | ||||
Hyper Combos
| Damage | Startup | Active | Recovery |
|---|---|---|---|
| 15,000 X 30 (269,300) | 16+10 | 80 | 29 |
| On Hit | On Block | Guard | Properties |
| +1 | -14 | - | |
|
After the super flash, Zero plants his Buster arm on the ground, then rainbow colored lasers shoot down directly in front of Zero after a short delay. The lasers have infinite vertical reach. Can technically OTG, but has a noticeable delay before becoming active enough, which can cause it to drop after more awkward Hard Knockdowns. | |||
| Damage | Startup | Active | Recovery |
|---|---|---|---|
| - | 10+1 | - | - |
| On Hit | On Block | Guard | Properties |
| - | - | - | - |
|
Install hyper. For 300 frames (5 seconds), Zero has a shadow clone that imitates all of his actions with a 16 frame delay. This hyper is extremely powerful and is Zero's primary way to spend meter, thanks to numerous ways to take advantage of the clone's attacks. Attacks during Sougenmu effectively have greatly improved frame data due to the additional delayed hit from the clone, allowing combos and blockstrings that are not normally possible. Projectiles used in Sougenmu will fire twice, improving their coverage, total durability, and damage potential. This also applies to Level 3 Buster, and combining Zero's improved pressure under Sougenmu with his ability to freely buster-cancel almost anything means it is guaranteed to be Zero's turn for the duration of this hyper. Zero can create very dangerous solo High/Low mixups, or even unblockables, while in Sougenmu. If he quickly follows up an Overhead attack with a Low, or visa-versa, the opponent will simultaneously have to block the clones High/Low and the real Zero's, which may be impossible if timed correctly. Zero does not build meter for the duration. Using any other hyper from Zero (Rekkoha and Genmu Zero) will end Sougenmu, no matter how much duration remained when activated. | |||
| Damage | Startup | Active | Recovery |
|---|---|---|---|
| 350,000 | 10+1 | - | 57 |
| On Hit | On Block | Guard | Properties |
| - | - | Mid | Invuln until frame 24, |
|
Zero's level 3 Hyper. Unlike most level 3 hypers, it is not a cinematic, allowing it to deal full damage to assists in a happy birthday situation. Zero produces a giant slash, which covers most of the screen and quickly travels forward as a projectile. It is a solid combo ender to secure a kill without having to perform Lightning Loops, which carry a risk of messing up. Its large amount of invuln frames mean it can also be used on reaction to many other hypers to blow through them. | |||
Universal Mechanics
| Damage | Startup | Active | Recovery |
|---|---|---|---|
| 80,000 | 1 | 1 | - |
| On Hit | On Block | Guard | Properties |
| - | - | ||
|
Throwing an opponent (even if the throw is teched) resets Zero's Buster charge, if he has one. | |||
| Damage | Startup | Active | Recovery |
|---|---|---|---|
| 80,000 | 1 | 1 | - |
| On Hit | On Block | Guard | Properties |
| - | - | ||
|
Throwing an opponent (even if the throw is teched) resets Zero's Buster charge, if he has one. | |||
| Damage | Startup | Active | Recovery |
|---|---|---|---|
| 50,000 | 2 | 7 | 17 |
| On Hit | On Block | Guard | Properties |
| - | -2 | Mid | Snapback |
|
Animation and hitbox based on 6H. | |||
| Damage | Startup | Active | Recovery |
|---|---|---|---|
| 30,000 | - | 20 | 33 |
| On Hit | On Block | Guard | Properties |
| - | -15 | OH | |
|
- | |||
Team Position
Zero is most commonly chosen as a Point character. Zero has a strong neutral game that becomes even more oppressive when assists are smartly utilized to cover holes in his gameplan. Assists are also important for Zero to carry opponents to the corner mid-combo, so that he can activate Sougenmu (214XX) and begin his Lightning Loops for a kill. Zero is a very meter-efficient point character who excels at building meter for his teammates to spend, making him a good choice to pair with meter-hungry anchor characters.
Notable Synergies
Dante: Jam Session is one of the game's best neutral assists. It provides a sheer vertical wall of coverage, preventing opponents from moving freely even at superjump height. Superjump height is otherwise one of Zero's biggest weak points in neutral, so this nicely closes that gap. The huge amount of blockstun caused by Jam Session can also be used to set up multi-layered Oncoming Mixups, something Zero is particularly good at doing. Jam Session's weakness is usually that its odd hitstun makes the assist difficult to convert into a combo. However, Zero can convert this easily using Level 3 Buster Shot.
Players to Watch: Megaman Steve (Zero/Dante/Akuma), Cloud805 (Zero/Dante/Vergil), Flux (Zero/Dante/Vergil), Jibrill (Zero/Dante/Vergil), Nolife (Zero/Dante/Vergil), Spica (Zero/Dante/Vergil),
Vergil: Rapid Slash provides Zero with a powerful horizontal assist (which pairs nicely with the vertical coverage from Dante's Jam session, above). In the case of Zero, it is particularly notable because of the huge amount of corner carry it provides. Zero can use Rapid Slash to drag nearly any confirm to the corner, where he can start his Lightning Loops and kill for very little meter. Because Zero is so meter-efficient in terms of damage, he can be counted on to build several bars of hyper meter for Vergil, who is a famously meter-hungry character. This gives Vergil plenty of access to Spiral Swords and Devil Trigger, drastically increasing his effectiveness.
Players to Watch: Flocker (Zero/Vergil/Hawkeye), Joey D (Zero/Doom/Vergil), Cloud805 (Zero/Dante/Vergil), Flux (Zero/Dante/Vergil), Killer Kai (Zero/Vergil/Strider), Jibrill (Zero/Dante/Vergil), Nolife (Zero/Dante/Vergil), Romora (Zero/Doom/Vergil), Marn (Zero/Vergil/Strider), Spica (Zero/Dante/Vergil)
Phoenix: Zero excels at being a battery for meter-hungry anchor characters, and no anchor is more meter-dependent than Phoenix. Although Zero doesn't really have the capacity to build several meters in a single combo (barring a TAC Infinite), he is constantly building bar through his oppressive neutral and meter-positive combos. Zero's excellent neutral game means he can do without calling Phoenix except as a combo extension, reducing the risk of her being sniped early.
Players to Watch: PZPoy (Zero/Doom/Phoenix)
Other Players to Watch: WindZero (Jill/Zero/Chris)
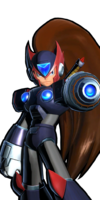
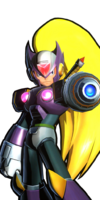
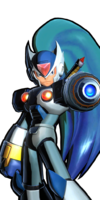
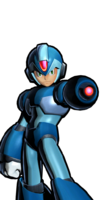
Alternate Colors
| Color 1 | Color 2 | Color 3 | Color 4 | Color 5 | Color 6 | Alt Color |
|---|---|---|---|---|---|---|

|

|
|

|
|
|
|

