Movement and Neutral Options
Air Normals
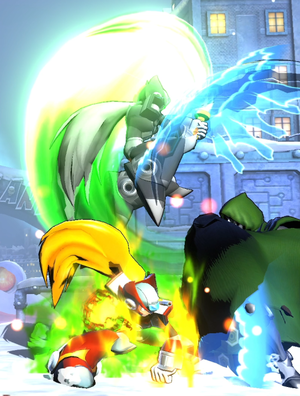
j.2H (and its cousin, j.5H) are very oppressive air normals. The attack has a powerfully disjointed hitbox that protects Zero from all sides, and it is very fast in both startup and recovery. Contesting either of Zero's "pizza cutter" attacks with a normal or other physical hit is very challenging for most of the cast. Input the move as j.1H to get a Throw (or Throw Tech) OS for free. Pizza Cutter's primary weakness is that it can not be special-canceled (be careful not to release your Buster Charge while it is ongoing), although it recovers fast enough for Zero to link other attacks afterward.
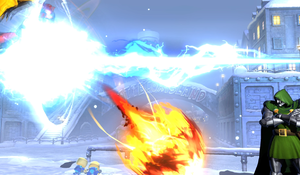
Raikousen
All versions of Raikousen (j.623X) can act as powerful neutral tools when paired with Zero's Level 3 Buster. Jumping and performing j.623M to dash across the screen, then canceling the recovery into a Buster Release is a powerful approach tool. It is faster than using Zero's ground- or airdashes and can be used to bully your way into close range, especially when paired with assist coverage. Similarly, Zero can do Jump -> j.623H -> Buster to very quickly ascend to superjump height. Compared to just superjumping, this allows Zero to retain access to his assist calls. From there, Zero can call a ground-based assist like Rapid Slash to harass a grounded opponent while approaching above, or call an anti-air assist like Vajra or Jam Session to lock down an opponent at superjump height who won't be able to contest it.
Instead of using Raikousen to move, Zero can early-cancel j.623X with Buster, and the lightning will still come out while Zero remains in place. Something like j.623M~]L[ very quickly covers a large amount of screen space with projectile options. The Buster Shot will cover most of the space below Zero, while either j.623M or j.623H will cover airspace in front of him, depending on whether the opponent wants to approach from regular jump or superjump height. Both Zero's Lightning and his Buster cause True Soft Knockdowns on hit, and Zero can potentially confirm either of these hits into a full combo, so opponents always have to respect Zero's screen coverage unless they want to die and eat an oncoming mixup. Keep in mind that Zero can buster-cancel Raikousen at any point in the travel arc, so feel free to space yourself wherever you think will be most advantageous.
Once Zero has used Lightning -> Buster to either approach the opponent or zone them out, he has a few key options for what to do next.
- j.623L - Everyone will tell you that "Buster Lightning" is fake and punishable, but people do get hit by it. An opponent who blocks Level 3 Buster will recover fast enough to mash a button and stuff Zero before the next lightning appears, but if they don't press a button, then L Lightning can score a free cross-up and get Zero to very close range where he can run some of his mixup game.
- Falling j.2H, j.236M or j.236H - If an opponent does not respect blocking Level 3 Buster - and either tries to mash buttons or go for an airthrow - then they will almost certainly lose to one of Zero's great air attacks. All of these options also have great on-block frame advantage, so it is a good choice even if you do not expect the opponent to mash.
- j.214L - Fast Fall after a blocked Buster Shot can technically be punished if the opponent is both close and expecting it, but is usually very low-commitment. If either Raikousen or the Buster Shot actually hits the opponent, following up with j.214L then dashing up gives Zero a great chance at hit-confirming. Otherwise, you can maintain pressure on the opponent once you have landed.
- Airdash - If you aren't happy with your positioning after a Raikousen approach, just airdash back and reset the situation until you can try again. If you are happy with your positioning, airdashing over the opponent before falling with j.2H can lead to a cross-up.
While Buster-cancled Raikousen can be very oppressive, the inverse is that attempting to use Lightning without a Buster charged is very risky. All versions of j.623X have "Until Grounded" recovery, so Zero is completely vulnerable after the attack while falling if he does not have a Level 3 Buster to cancel it with. Even a TK j.6239M Lightning done very low to the ground is neutral-to-minus on block, and Lightning attacks done higher up become increasingly unsafe. If you do not have a Buster charged or almost-charged, it is usually better to rely on other zoning or mobility options while you wait for it to build.
Hadangeki
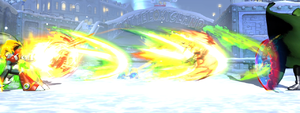
It is not particularly flashy, but simply using Hadangeki (236X) on the ground repeatedly is an effective long-range option. 236M is very fast to come out and can be spammed a fullscreen distance, either to stall while Zero's Buster or assist-calls come back online, or to try to force the opponent to commit to an action and deal with the chip damage. Like most of Zero's other options, having access to Level 3 Buster cancels makes Hadangeki even more threatening. If Zero is on the ground, he can almost always react to an opponent's assist call by releasing his charged Buster at any point to snipe the assist from full screen. Any version of 236X combined with Level 3 Buster is enough total durability that the opponent's point character will have a difficult time protecting their assist, so it is essentially a free snipe. If you can consistently shut down their Hidden Missiles or beam assist, even dedicated keepaway chracters can struggle to fight against Zero's projectile game.
Besides canceling into Buster, Zero can also cancel his projectile options into Sougenmu. Zero's install hyper has only 12 total frames of duration, and so it can be used as a generic free-cancel for either Hadangeki or Buster, being faster than letting any of them recover normally. If you throw out a Buster on reaction to your opponent's attack and think it is likely to hit, canceling into Sougenmu can let Zero confirm into a combo from full screen. Even if you can not get a hit-confirm this way, simply activating Sougenmu at long range is still fairly effective; it effectively doubles the total durability and chip damage of Zero's projectile barrage.
If you activate Sougenmu full-screen, the basic projectile sequence you will want to throw out is [L], 236M, 236M, 236H > ]L[~[L], 236M, 236M,. Here is a video example. With Sougenmu active, M Hadangeki into itself is a blockstring, so the opponent is stuck after ground-blocking anything unless they pushblock with a specific timing to avoid some of the blockstun. You can also sneak in some H Hadangekis for extra chip if you mix in Buster-cancels to keep pressure up. The chip damage from sequences like this adds up fast, and Zero has no problems building back meter he spends, so don't feel bad about taking advantage of this. If X-Factor is active, it becomes even easier for Zero to jail the opponent with Sougenmu'd projectiles, and the chip damage becomes threatening very fast.
By layering the faster 236M projectiles with the slower L and H ones, and using Buster Shots to both cancel recovery and add extra projectiles, Zero can stack a low of projectile durability on screen at once, more than most characters are able to deal with outside of using a hyper.
Mixup Theory
Keep in mind that many of Zero's strongest mixup tools require use of the L button. Having access to j.214L Fastfall improves his High/Low Game, 2L is a very fast Low attack, and 214L is a faster Cross-up than 214M. Usually, Zero defaults to holding [L] to charge Buster, which locks him out of these powerful mixup tools. You can either Buster Switch, by holding down another button whenever you need to release and re-press L, or take advantage of the Buster Glitch. The Buster Glitch lets Zero release and re-press a button he is holding without losing the Buster charge stored on that button if it occurs during the Hitstop of a blocked (or hit) attack.
Video Guide to using the Buster Glitch.
High/Low Game
Zero has multiple ways to manipulate his aerial trajectory, which also means he has several ways to quickly access jumping Overhead attacks, or to land and catch the opponent with a fast Low attack.
A basic way to set up a fast Overhead is to use a Box-Dash Heavy: Superjump then do a forward airdash as soon as you reach the minimum height requirement, then quickly cancel that airdash into either j.5H or j.2H. It is not quite as fast as a proper Instant Overhead, but can still be very difficult to react against. j.2H will connect appreciably faster than j.5H, so it makes far a more difficult mix. However, j.5H is more likely to hit multiple times on the way down, which can help make the confirm easier and also sometimes add to the difficulty of blocking correctly.
You can also set up a fast Overhead from the ground by using TK j.2369L. The feint divekick halts Zero's momentum and causes him to float for a moment before falling. Good OH attacks to use after this include j.2H and j.S. j.5H is not recommended because TK L Sentsuizan often leaves Zero so low to the ground that he will land-cancel before the attack can connect.
To make it harder for opponents to just react to Zero's jump by standblocking or holding Up-Back, Zero can use his j.214L Fastfall to fakeout an Overhead attack and go Low instead. Superjump j.214L, 2L can be set up to hit Low at basically the same timing that a Box Dash j.2H would hit Overhead from the same jump, making the mixup very difficult to react against. A TK L Hienkyaku into either a Low or Throw is a very strong fakeout option once your opponent understands to be afraid of fast Overhead pressure.
Zero's 5H and 6H normals have an interesting quirk. They are both 3-hitting, advancing attacks, and the first two hits of each are very resistant to being pushblocked. Only pushblocking the third hit will meaningfully send Zero away from the opponent. Zero can cancel either of these attacks on block into Sougenmu, giving himself large amounts of frame advantage without the risk of being pushblocked back to fullscreen. In fact, if the opponent does pushblock when Zero Sougenmu's, they can become trapped in Advancing Guard Delay while Zero gets a free close-range mixup. For many characters, actually keeping an opponent locked down long enough to set a High/Low mixup without them being able to Mash/Airthrow/Pushblock/Backdash out of it with something like a Defensive Pope Select is very difficult, but Zero can take advantage of these lockdown normals to set something up even without assist coverage.
If you ever have Sougenmu active and attack with a falling normal like j.2H, try to mash either 2L or 2M upon landing. Zero's afterimage will still be performing the falling attack after the real Zero lands. By layering a Low attack on top of the afterimage's Overhead, Zero can create very scary Hard-to-Blockable situations or even true Unblockables. Here is an in-match example of Jibrill using a Sougenmu setup in-match.
Against Big-Body characters like Sentinel, j.M j.5H, j.2H and j.S will connect as Instant Overheads on the way up, making for even faster High/Low mixups.
Left/Right Game
Zero has two main ways to cross-up the opponent and set up Left/Right mixups: His Hienkyaku (214X) command dash, and Raikousen (j.623X). All versions of both of these moves can side-switch the opponent, and all versions can also steal the corner. Zero's ability to quickly switch up what he is doing and throw out one of these cross-up moves is a large part of what makes his neutral so scary. Typically, Zero can throw out a normal (not j.H, though) then cancel it into M Hienkyaku to dash behind the opponent when it whiffs or is blocked. From there Zero, can release a charged Buster to hit from the opposite side, or use an assist called before the dash as a cross-up hit instead. This kind of mixup is quite difficult to contest and usually lets Zero keep momentum even if it gets blocked correctly. Here is an example of Flocker using a similar Cross-up setup at round start.
Sample Cross-up Setups using Hienkyaku
Oncoming Mixups
Zero's standard Oncoming Mix is based on using j.623L Lightning to ambiguously steal the corner against an incoming opponent while remaining at plus frames due to land-canceling the recovery. You can see an example mixup here. Depending on the timing of when exactly j.623L was activated, it can either hit cross-up or same-side. If the opponent blocks the initial Lightning Mix, Zero will end up in the corner underneath them, and can usually layer an additional mixup option afterwards. If the opponent pushblocked Zero's lightning, or if they are being held in place by an assist call, Zero can either neutral jump or forward jump j.M to mix up Left/Right again before they land. Otherwise, the opponent will likely fall into Zero's strong grounded normals, and from there you can set up any standard Left/Right or High/Low mixup as they reach the ground.
Examples
Counterplay
Video Guide: Zero Matchup Notes by Rambam
Key Points:
- j.H and j.2H are difficult to contest directly but are unable to be special-canceled. This makes these moves vulnerable to being whiff punished. You can back away from these attacks' limited horizontal range and use either a fast Low or disjointed normal to clip Zero out of the recovery.
- Zero can play passively with long-range options and wait to snipe your assist calls with a Level 3 Buster cancel. If you see Zero doing this, you can move out of the way of a potential Buster and call your assist as bait, hopefully tricking Zero into wasting his cancel on a shot that your point character can evade and punish.
- Raikousen (Lightning) is scary to fight against, but actually takes a fairly long time for the hitbox to appear (and it will not appear at all if Zero gets hit first). If a Zero player is trying to bully their way in with regular jump j.623M Lightning (for example), you can stuff the approach with a fast air normal.
- Zero can bait this by Buster-Canceling early, but if you force a Zero player to do this often, at least they can no longer approach for free.
- Level 3 Buster does not actually cause very much blockstun, and if Zero tries to follow up a Buster Shot with j.623L to attack (aka "Buster Lightning") you can always mash a fast normal to stuff the Lightning before it comes out.
- Again, Zero can bait this by using a faster button of his own after Buster, so do not autopilot mash here. Try to react to the Raikousen startup.
- The main element to Zero's j.623L cross-up on incoming is the timing at which he activates it. An early Lightning will never cross-up, a late one always will. Zero can time Raikousen very ambiguously, but your best bet is to pay attention to when the Lightning animation begins relative to when your character appears on-screen.


