Introduction
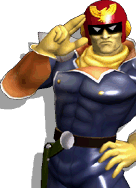
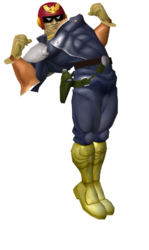
Douglas Jay Falcon, or Captain Falcon, is everything defining about melee turned up to 12. Fast as lightning, nigh impossible to control at first, almost always jumping around, and incomparably flashy. There's a reason he's a fan favorite. He has a simple, strong toolset with some of the best moves in the game along with being able to tank a lot of hits due to his weight. His noticeable flaws include a lack of powerful grounded moves, slower than average start up on his otherwise incredible aerial attacks, along with the weakest defensive options of the top tiers. In other words, he’s Melee's gorilla. A character of extreme strengths and weaknesses.
Given his relatively linear moveset, he has to creatively use his movement to dance around his opponent and position his moves appropriately. This is made all the more difficult by how unwieldy his excessive speed, both in the air and on the ground, make him. However, no character is able to take a little momentum in a match and run with it quite like Falcon. Once he gets a solid hit or grab, he can feel truly unstoppable. And, like all melee characters, he has limitless depth with new tech and strategies being discovered to this day.
Make no mistake however, when zoomed out far enough Falcon's plan is quite simple. You run around spacing his gigantic aerials or try to grab the other guy. Then hit them really, really hard. Like a wise man once said, everyone has a plan until they’re kneed in the face.
| Strengths | Weaknesses |
|---|---|
|
|
| Physics | |
|---|---|
| Weight | 104 (6th) |
| Fall Speed | 2.9/Fast 3.5 (2nd) |
| Gravity | 0.13 (3rd) |
| Ground Movement | |
| Walk Speed | 0.85 (19th) |
| Initial Dash Speed | 2 (1st) |
| Initial Dash Length | 15f (2nd) |
| Run Speed | 2.3 (1st) |
| Traction | 0.08 (7th) |
| Jumping | |
| Jumpsquat | 4f (8th) |
| Jump Height | Full 38.52/Short 14.85/Air 28.56 (3rd/8th/10th) |
| Air Speed | 1.12 (4th) |
| Air Acceleration | 0.06 (5th) |
Ground Moves
Jab
| Jab 1 | First Active | Active | Recovery | IASA | Landing Lag | Autocancel | |
|---|---|---|---|---|---|---|---|
| 3 | 3 | 16 | 16 | - | - | ||
| Damage | Base Knockback | Knockback Growth | Angle | Effect | On Shield | ||
| 2% | 20 | 0 | 80 | Normal | -10 | ||
|
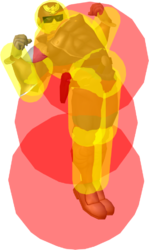
Falcon's main rebuttal to opponent's attempting to abuse his lack of quick moves, his jab is heavily used by Falcon's despite its flaws. | |||||||
| Jab 2 | First Active | Active | Recovery | IASA | Landing Lag | Autocancel | |
| 5 | 3 | 13 | 19 | - | - | ||
| Damage | Base Knockback | Knockback Growth | Angle | Effect | On Shield | ||
| 3% | 20 | 0 | 80 | Normal | -12 | ||
|
| |||||||
| Jab 3 | First Active | Active | Recovery | IASA | Landing Lag | Autocancel | |
| 6 | 7 | 10 | 22 | - | - | ||
| Damage | Base Knockback | Knockback Growth | Angle | Effect | On Shield | ||
| Clean: 8% / Late: 6% | Clean: 20 / Late: 0 | 100 | 361 | Normal | -11 | ||
|
Gentleman "Press A three times and clench" | |||||||
| Rapid Jab | First Active | Active | Recovery | IASA | Landing Lag | Autocancel | |
| 5 | 2 per hit | 9 (finisher) | - | - | - | ||
| Damage | Base Knockback | Knockback Growth | Angle | Effect | On Shield | ||
| 1% | 0 | 70 | 361 | Normal | -8 | ||
|
Don't use this on purpose | |||||||
Dash Attack
| First Active | Active | Recovery | IASA | Landing Lag | Autocancel | |
|---|---|---|---|---|---|---|
| 7 | 10 | 24 | 38 | - | - | |
| Damage | Base Knockback | Knockback Growth | Angle | Effect | On Shield | |
| Clean: 10% / Late: 7% | Clean: 22 / Late: 10 | Clean: 90 / Late: 50 | 361 | Normal | -24 | |
|
A fairly weak move with niche use cases at best. It is the fastest hitbox out of dash of any of Falcon's moves which can make it useful in very niche spots. For that reason dash attack can also serve as a tech trap. It additionally covers Falcon/Ganon's 8B "sweetspot". If performed early enough, it'll be a weak hit, impossible to wall tech until a much higher %. | ||||||
Forward Tilt
| Side Angle | First Active | Active | Recovery | IASA | Landing Lag | Autocancel | |
|---|---|---|---|---|---|---|---|
| 9 | 3 | 18 | - | - | - | ||
| Damage | Base Knockback | Knockback Growth | Angle | Effect | On Shield | ||
| 11% | 10 | 100 | 361 | Normal | -14 | ||
|
Forward tilt gives Falcon a reasonable balance of range and frame data among otherwise middling grounded tools. A regular forward tilt provides a passable poke tool, but the move can also be angled upward and downward. | |||||||
| Up Angle | First Active | Active | Recovery | IASA | Landing Lag | Autocancel | |
| 9 | 3 | 18 | - | - | - | ||
| Damage | Base Knockback | Knockback Growth | Angle | Effect | On Shield | ||
| 12%, 12%, 11% | 10 | 100 | 361 | Normal | -13 | ||
|
Good to combo because it hits high. | |||||||
| Down Angle | First Active | Active | Recovery | IASA | Landing Lag | Autocancel | |
| 9 | 3 | 18 | - | - | - | ||
| Damage | Base Knockback | Knockback Growth | Angle | Effect | On Shield | ||
| 10%, 10%, 11% | 0, 0, 10 | 100 | 361 | Normal | -14 | ||
|
Good at the ledge because it hits low. | |||||||
Up Tilt
| First Active | Active | Recovery | IASA | Landing Lag | Autocancel | |
|---|---|---|---|---|---|---|
| 17 | 5 | 18 | 38 | - | - | |
| Damage | Base Knockback | Knockback Growth | Angle | Effect | On Shield | |
| 13% | 50 | 80 | 361 | Normal | -13 | |
|
Up tilt is generally useless in neutral due to its abhorrent startup. However, it can be a powerful edgeguarding tool, covering a swath in front of Falcon, even covering poor recoveries to ledge. | ||||||
Down Tilt
| First Active | Active | Recovery | IASA | Landing Lag | Autocancel | |
|---|---|---|---|---|---|---|
| 10 | 6 | 20 | 34 | - | - | |
| Damage | Base Knockback | Knockback Growth | Angle | Effect | On Shield | |
| 12% | 25 | 75 | 80, 70, 60 | Normal | -17 | |
|
As with most of Falcon's grounded moves, down tilt is niche at best in neutral. Can be used after an empty jump as a timing mixup. | ||||||
Forward Smash
| Side Angle | First Active | Active | Recovery | IASA | Landing Lag | Autocancel | |
|---|---|---|---|---|---|---|---|
| 18 | 4 | 43 | 60 | - | - | ||
| Damage | Base Knockback | Knockback Growth | Angle | Effect | On Shield | ||
| 20% | 24 | 100 | 361 | Flame |
-31 | ||
|
Falcon's strongest move by pure knockback. Falcon pulls backward during the startup, potentially dodging an opponent's move. However, the move has significant startup and end lag, making it impractical without a setup. The move can be angled upward and downward. | |||||||
| Up Angle | First Active | Active | Recovery | IASA | Landing Lag | Autocancel | |
| 18 | 4 | 43 | 60 | - | - | ||
| Damage | Base Knockback | Knockback Growth | Angle | Effect | On Shield | ||
| 21% | 24 | 100 | 361 | Flame |
-30 | ||
|
A fully charged up angled forward smash transcends even Falcon Punch. | |||||||
| Down Angle | First Active | Active | Recovery | IASA | Landing Lag | Autocancel | |
| 18 | 4 | 43 | 60 | - | - | ||
| Damage | Base Knockback | Knockback Growth | Angle | Effect | On Shield | ||
| 19% | 24 | 100 | 361 | Flame |
-31 | ||
Up Smash
| First Active | Active | Recovery | IASA | Landing Lag | Autocancel | |
|---|---|---|---|---|---|---|
| 21 | 2, 2 | 26 | 40 | - | - | |
| Damage | Base Knockback | Knockback Growth | Angle | Effect | On Shield | |
| Hit1: 8%, 8%, 14%, 14% Hit2: 13%, 13%, 12% |
Hit1: 80, 100, 30, 30 Hit2: 30 |
Hit1: 0, 0, 105, 105 Hit2: 128, 126, 110 |
Hit1: 90, 100, 80, 90 Hit2: 90, 90, 80 |
Normal | -5 | |
|
Surprisingly difficult to punish due to the relatively quick IASA frame, but with so much start up it is generally not a great neutral tool. | ||||||
Down Smash
| First Active | Active | Recovery | IASA | Landing Lag | Autocancel | |
|---|---|---|---|---|---|---|
| 19 | 4, 4 | 17 | 45 | - | - | |
| Damage | Base Knockback | Knockback Growth | Angle | Effect | On Shield | |
| Hit1: 18% Hit2: 16% |
Hit1: 30 Hit2: 20 |
100 | 361 | Normal | -15/-6 | |
|
Useful for covering multiple tech options in the corner when the opponent's tech away is stopped by the ledge. | ||||||
Aerial Moves
Neutral Air
| First Active | Active | Recovery | IASA | Landing Lag | Autocancel | |
|---|---|---|---|---|---|---|
| 7 | Hit1: 6 Hit2: 10 |
16 | 44 | 7 | <3, >34 | |
| Damage | Base Knockback | Knockback Growth | Angle | Effect | On Shield | |
| Hit1: 6%, 5%, 6% Hit2: 7% |
Hit1: 40 Hit2: 40 |
Hit1: 0 Hit2: 100 |
Hit1: 82, 78, 74 Hit 2: 361 |
Normal | -2 | |
|
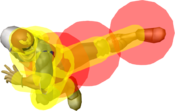
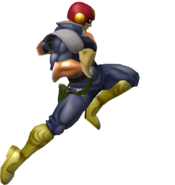
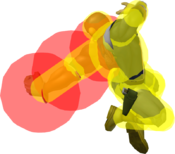
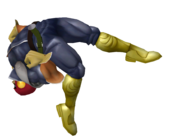
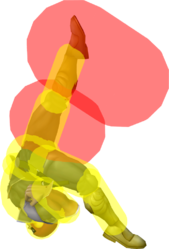
Falcon's god button. It is a swiss army knife of a move and helps form the foundation of his neutral and combo game. Generally, a character's ability to make Falcon hesitate when using this move is what makes them win or lose the match up and is a defining interaction for the characters. This is a solid, go-to option in neutral in many matchups as it's often low risk, medium reward.
| ||||||
Foward Air
| First Active | Active | Recovery | IASA | Landing Lag | Autocancel | |
|---|---|---|---|---|---|---|
| 14 | 17 | 9 | 36 | 9 | <6, >35 | |
| Damage | Base Knockback | Knockback Growth | Angle | Effect | On Shield | |
| Clean: 18% / Late: 6% | Clean: 24 / Late: 35 | Clean: 100 / Late: 80 | Clean: 32 / Late: 361 | Clean: Electric / Late: Normal | +1 | |
|
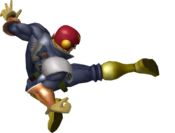
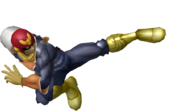
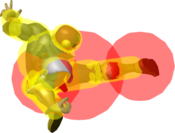
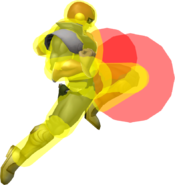
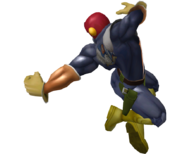
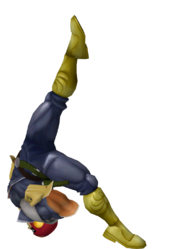
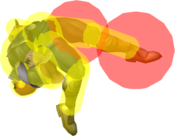
One of the best moves in the entire game, this is Falcon's defining move as a character. A combo starter that combos into itself to death while still being a devastating combo ender, being plus on block, and massive active frames to be used for edge guarding. This move is a problem for Falcon's opponents and is only limited by its start up and limited active frames of its strongest hitbox
| ||||||
Back Air
| First Active | Active | Recovery | IASA | Landing Lag | Autocancel | |
|---|---|---|---|---|---|---|
| 10 | 8 | 23 | 29 | 9 | <7, >20 | |
| Damage | Base Knockback | Knockback Growth | Angle | Effect | On Shield | |
| Clean: 14% / Late: 8% | Clean: 20, 0, 0 / Late: 20, 0, 0 | Clean: 100 / Late: 100 | 361 | Normal | -1 | |
|
Falcon's back air has rather slow startup but is otherwise an oppressive move that is extremely hard to deal with once the opponent is past knockdown %. Its massive range means that very few characters can directly challenge the move if it is not preemptively challenged.
| ||||||
Up Air
| First Active | Active | Recovery | IASA | Landing Lag | Autocancel | |
|---|---|---|---|---|---|---|
| 6 | 8 | 21 | 30 | 7 | >21 | |
| Damage | Base Knockback | Knockback Growth | Angle | Effect | On Shield | |
| Clean: 13%, 12% / Mid: 12%, 10% | Clean: 10 / Mid: 8 | Clean: 100 / Mid: 80 | 361 | Normal | +0 | |
|
The size of this move along with Falcon's impressive dash jump means that situations that are challenging to deal with for other characters, such as a character being above and in front of you, are trivial to deal with for Falcon. This combined with it often being a guaranteed follow up after a throw in many situations, and being among the best combo extensions in the game, make it the move you are likely to use most often in Falcon combos as well as vs opponents who are a bit too jump happy.
| ||||||
Down Air
| First Active | Active | Recovery | IASA | Landing Lag | Autocancel | |
|---|---|---|---|---|---|---|
| 16 | 5 | 25 | 38 | 12 | <4, >35 | |
| Damage | Base Knockback | Knockback Growth | Angle | Effect | On Shield | |
| 16% | 40 | 100 | 270, 270, 290 | Normal | -3 | |
|
An infamously ignorant move. Getting hit by this move, even at 0%, can lead into touch of death combos in as little as 1-2 combo resets or mix ups for much of the cast. As one of the strongest meteor smashes in the game, this is truly Doug's party starter
| ||||||
Special Moves
Neutral B
| First Active | Active | Recovery | IASA | Landing Lag | Autocancel | |
|---|---|---|---|---|---|---|
| 52 | 5 | 43 | - | - | - | |
| Damage | Base Knockback | Knockback Growth | Angle | Effect | On Shield | |
| 27%, 25%, 23% | Ground: 30 / Air: 40 | 102 | 361 | Flame | -33 | |
|
Falcon's most famous move and also likely his least useful. It is nevertheless not entirely without use. When an opponent is in a substantial amount of recovery, such as after breaking their shield or after Puff uses rest, Falcon punch is often a good option. It can also be used as an edgeguard vs opponents with linear recoveries such as Captain Falcon or Ganon when forced to use their up-b/8b, but ultimately its high recovery makes it niche at best. While you can find other niche usages, such as Falcon punch being able to cover the entirety of a side platform in specific spots as a tech chase, or rolling to the ledge and FH up angled falcon punching a recovering Sheik, in general this is likely Falcon's least commonly used move. And yes, it can be angled! | ||||||
Side B
| First Active | Active | Recovery | IASA | Landing Lag | Autocancel | |
|---|---|---|---|---|---|---|
| 0 | 0 | 0 | 0 | 0 | <0 0> | |
| Damage | Base Knockback | Knockback Growth | Angle | Effect | On Shield | |
| Clean: 0 / Late: 0 | Clean: 0 / Late: 0 | 0 | 0 | Normal | 0 | |
|
Please use this move less in neutral | ||||||
Up B
| First Active | Active | Recovery | IASA | Landing Lag | Autocancel | |
|---|---|---|---|---|---|---|
| 13 | 21 | 31 | - | 30 | - | |
| Damage | Base Knockback | Knockback Growth | Angle | Effect | On Shield | |
| 15% | Clean: 0 / Late: 0 | 0 | 0 | Normal | - | |
|
"If only it turned them around before throwing them, now that'd be a recovery" This is Falcon's primary recovery tool when double jump won't get you far enough. While not a great recovery, it has quite a high skill cap and room for creativity. Using it well is often the difference between dying at 80% or living to 160% and mastery of it is a major difference maker between good and great Falcons.
| ||||||
Down B
| First Active | Active | Recovery | IASA | Landing Lag | Autocancel | |
|---|---|---|---|---|---|---|
| 0 | 0 | 0 | 0 | 0 | <0 0> | |
| Damage | Base Knockback | Knockback Growth | Angle | Effect | On Shield | |
| Clean: 0 / Late: 0 | Clean: 0 / Late: 0 | 0 | 0 | Normal | 0 | |
|
Falcon's down-b, or 2b, is a relatively niche move besides on recovery. When hit high and far enough offstage, DJ falcon kick will give Douglas his DJ back, allowing for more recovery mix ups than would otherwise be possible. Just be careful not to use it too close to stage as the recovery can be easily punished!
| ||||||
Grabs & Throws
Put a character's grab, zair, and throws here.
Grab
| First Active | Active | Recovery | IASA | Landing Lag | Autocancel |
|---|---|---|---|---|---|
| 6 | 2 | 22 | 0 | 0 | <0 0> |
| Damage | Base Knockback | Knockback Growth | Angle | Effect | On Shield |
| Clean: 0 / Late: 0 | Clean: 0 / Late: 0 | 0 | 0 | Normal | 0 |
Dash Grab
| First Active | Active | Recovery | IASA | Landing Lag | Autocancel |
|---|---|---|---|---|---|
| 10 | 2 | 29 | 0 | 0 | <0 0> |
| Damage | Base Knockback | Knockback Growth | Angle | Effect | On Shield |
| Clean: 0 / Late: 0 | Clean: 0 / Late: 0 | 0 | 0 | Normal | 0 |
Pummel
| First Active | Active | Recovery | IASA | Landing Lag | Autocancel |
|---|---|---|---|---|---|
| 4 | 4 | 17 | 0 | 0 | <0 0> |
| Damage | Base Knockback | Knockback Growth | Angle | Effect | On Shield |
| Clean: 3 / Late: 0 | Clean: 0 / Late: 0 | 0 | 0 | Normal | 0 |
Forward Throw
| First Active | Active | Recovery | IASA | Landing Lag | Autocancel |
|---|---|---|---|---|---|
| 0 | 0 | 0 | 0 | 0 | <0 0> |
| Damage | Base Knockback | Knockback Growth | Angle | Effect | On Shield |
| Clean: 0 / Late: 0 | Clean: 0 / Late: 0 | 0 | 0 | Normal | 0 |
Back Throw
| First Active | Active | Recovery | IASA | Landing Lag | Autocancel |
|---|---|---|---|---|---|
| 0 | 0 | 0 | 0 | 0 | <0 0> |
| Damage | Base Knockback | Knockback Growth | Angle | Effect | On Shield |
| Clean: 0 / Late: 0 | Clean: 0 / Late: 0 | 0 | 0 | Normal | 0 |
Up Throw
| First Active | Active | Recovery | IASA | Landing Lag | Autocancel |
|---|---|---|---|---|---|
| 0 | 0 | 0 | 0 | 0 | <0 0> |
| Damage | Base Knockback | Knockback Growth | Angle | Effect | On Shield |
| Clean: 0 / Late: 0 | Clean: 0 / Late: 0 | 0 | 0 | Normal | 0 |
Down Throw
| First Active | Active | Recovery | IASA | Landing Lag | Autocancel | |
|---|---|---|---|---|---|---|
| 0 | 0 | 40* | 0 | 0 | <0 0> | |
| Damage | Base Knockback | Knockback Growth | Angle | Effect | On Shield | |
| Clean: 7 / Late: 0 | Clean: 0 / Late: 0 | 0 | 0 | Normal | 0 | |
|
NOTE: This throw's animation length varies by thrown character's weight. Very light characters will incur a faster animation than very heavy ones. | ||||||
Universal Mechanics
Advanced Frame Data
This table shows the frame data for all of Captain Falcon's non-special moves. Including shield advantage at different timings and cancels.
| move | start | end | lcancelledLandingLag | autoCancelAfter | iasa | missedLcancelLandingLag | totalFrames | damage | shieldstun | bestShieldAdvantage | lcancelledShieldAdvantage | missedLcancelShieldAdvantage | earlyHitAutoCancelledShieldAdvantage | lateHitAutoCancelledShieldAdvantage | earlyHitIASACancelledShieldAdvantage | lateHitIASACancelledShieldAdvantage | earlyHitTotalFramesShieldAdvantage | lateHitTotalFramesShieldAdvantage |
|---|---|---|---|---|---|---|---|---|---|---|---|---|---|---|---|---|---|---|
| ftilt_mh | 9 | 11 | N\A | N\A | N\A | N\A | 29 | 12 | 7 | -11 | N\A | N\A | N\A | N\A | N\A | N\A | -13 | -11 |
| ftilt_mh | 9 | 11 | N\A | N\A | N\A | N\A | 29 | 12 | 7 | -11 | N\A | N\A | N\A | N\A | N\A | N\A | -13 | -11 |
| ftilt_mh | 9 | 11 | N\A | N\A | N\A | N\A | 29 | 11 | 6 | -12 | N\A | N\A | N\A | N\A | N\A | N\A | -14 | -12 |
| dtilt | 10 | 15 | N\A | N\A | 35 | N\A | 35 | 12 | 7 | -12 | N\A | N\A | N\A | N\A | -17 | -12 | -18 | -13 |
| dtilt | 10 | 15 | N\A | N\A | 35 | N\A | 35 | 12 | 7 | -12 | N\A | N\A | N\A | N\A | -17 | -12 | -18 | -13 |
| dtilt | 10 | 15 | N\A | N\A | 35 | N\A | 35 | 12 | 7 | -12 | N\A | N\A | N\A | N\A | -17 | -12 | -18 | -13 |
| uair | 6 | 10 | 7 | 21 | 30 | 15 | 33 | 13 | 7 | 0 | 0 | -8 | -12 | -8 | -16 | -12 | -20 | -16 |
| uair | 6 | 10 | 7 | 21 | 30 | 15 | 33 | 12 | 7 | 0 | 0 | -8 | -12 | -8 | -16 | -12 | -20 | -16 |
| uair | 11 | 13 | 7 | 21 | 30 | 15 | 33 | 12 | 7 | 0 | 0 | -8 | -7 | -5 | -11 | -9 | -15 | -13 |
| uair | 11 | 13 | 7 | 21 | 30 | 15 | 33 | 10 | 6 | -1 | -1 | -9 | -8 | -6 | -12 | -10 | -16 | -14 |
| uair | 14 | 14 | 7 | 21 | 30 | 15 | 33 | 8 | 5 | -2 | -2 | -10 | -6 | -6 | -10 | -10 | -14 | -14 |
| uair | 14 | 14 | 7 | 21 | 30 | 15 | 33 | 6 | 4 | -3 | -3 | -11 | -7 | -7 | -11 | -11 | -15 | -15 |
| fsmash_h | 18 | 21 | N\A | N\A | 60 | N\A | 64 | 21 | 11 | -27 | N\A | N\A | N\A | N\A | -30 | -27 | -35 | -32 |
| fsmash_h | 18 | 21 | N\A | N\A | 60 | N\A | 64 | 21 | 11 | -27 | N\A | N\A | N\A | N\A | -30 | -27 | -35 | -32 |
| fsmash_l | 18 | 21 | N\A | N\A | 60 | N\A | 64 | 19 | 10 | -28 | N\A | N\A | N\A | N\A | -31 | -28 | -36 | -33 |
| fsmash_l | 18 | 21 | N\A | N\A | 60 | N\A | 64 | 19 | 10 | -28 | N\A | N\A | N\A | N\A | -31 | -28 | -36 | -33 |
| fsmash_l | 63 | 63 | N\A | N\A | 60 | N\A | 64 | 8 | 5 | 9 | N\A | N\A | N\A | N\A | 9 | 9 | 4 | 4 |
| fsmash_l | 63 | 63 | N\A | N\A | 60 | N\A | 64 | 8 | 5 | 9 | N\A | N\A | N\A | N\A | 9 | 9 | 4 | 4 |
| fsmash_l | 63 | 63 | N\A | N\A | 60 | N\A | 64 | 14 | 8 | 12 | N\A | N\A | N\A | N\A | 12 | 12 | 7 | 7 |
| fsmash_l | 63 | 63 | N\A | N\A | 60 | N\A | 64 | 14 | 8 | 12 | N\A | N\A | N\A | N\A | 12 | 12 | 7 | 7 |
| jab3 | 5 | 8 | N\A | N\A | 22 | N\A | 31 | 8 | 5 | -8 | N\A | N\A | N\A | N\A | -11 | -8 | -21 | -18 |
| jab3 | 5 | 8 | N\A | N\A | 22 | N\A | 31 | 8 | 5 | -8 | N\A | N\A | N\A | N\A | -11 | -8 | -21 | -18 |
| jab3 | 9 | 11 | N\A | N\A | 22 | N\A | 31 | 6 | 4 | -6 | N\A | N\A | N\A | N\A | -8 | -6 | -18 | -16 |
| jab3 | 9 | 11 | N\A | N\A | 22 | N\A | 31 | 6 | 4 | -6 | N\A | N\A | N\A | N\A | -8 | -6 | -18 | -16 |
| ftilt_l | 9 | 11 | N\A | N\A | N\A | N\A | 29 | 10 | 6 | -12 | N\A | N\A | N\A | N\A | N\A | N\A | -14 | -12 |
| ftilt_l | 9 | 11 | N\A | N\A | N\A | N\A | 29 | 10 | 6 | -12 | N\A | N\A | N\A | N\A | N\A | N\A | -14 | -12 |
| ftilt_l | 9 | 11 | N\A | N\A | N\A | N\A | 29 | 11 | 6 | -12 | N\A | N\A | N\A | N\A | N\A | N\A | -14 | -12 |
| ftilt_h | 9 | 11 | N\A | N\A | N\A | N\A | 29 | 12 | 7 | -11 | N\A | N\A | N\A | N\A | N\A | N\A | -13 | -11 |
| ftilt_h | 9 | 11 | N\A | N\A | N\A | N\A | 29 | 12 | 7 | -11 | N\A | N\A | N\A | N\A | N\A | N\A | -13 | -11 |
| ftilt_h | 9 | 11 | N\A | N\A | N\A | N\A | 29 | 11 | 6 | -12 | N\A | N\A | N\A | N\A | N\A | N\A | -14 | -12 |
| dashattack | 7 | 9 | N\A | N\A | 38 | N\A | 39 | 10 | 6 | -22 | N\A | N\A | N\A | N\A | -24 | -22 | -26 | -24 |
| dashattack | 10 | 16 | N\A | N\A | 38 | N\A | 39 | 7 | 5 | -16 | N\A | N\A | N\A | N\A | -22 | -16 | -24 | -18 |
| dair | 16 | 20 | 12 | 35 | 38 | 24 | 44 | 16 | 9 | -3 | -3 | -15 | -14 | -10 | -12 | -8 | -19 | -15 |
| dair | 16 | 20 | 12 | 35 | 38 | 24 | 44 | 16 | 9 | -3 | -3 | -15 | -14 | -10 | -12 | -8 | -19 | -15 |
| dair | 16 | 20 | 12 | 35 | 38 | 24 | 44 | 16 | 9 | -3 | -3 | -15 | -14 | -10 | -12 | -8 | -19 | -15 |
| bair | 10 | 13 | 9 | 20 | 29 | 18 | 35 | 14 | 8 | -1 | -1 | -10 | -6 | -3 | -10 | -7 | -17 | -14 |
| bair | 10 | 13 | 9 | 20 | 29 | 18 | 35 | 14 | 8 | -1 | -1 | -10 | -6 | -3 | -10 | -7 | -17 | -14 |
| bair | 10 | 13 | 9 | 20 | 29 | 18 | 35 | 14 | 8 | -1 | -1 | -10 | -6 | -3 | -10 | -7 | -17 | -14 |
| bair | 14 | 17 | 9 | 20 | 29 | 18 | 35 | 8 | 5 | -2 | -4 | -13 | -5 | -2 | -9 | -6 | -16 | -13 |
| bair | 14 | 17 | 9 | 20 | 29 | 18 | 35 | 8 | 5 | -2 | -4 | -13 | -5 | -2 | -9 | -6 | -16 | -13 |
| bair | 14 | 17 | 9 | 20 | 29 | 18 | 35 | 8 | 5 | -2 | -4 | -13 | -5 | -2 | -9 | -6 | -16 | -13 |
| usmash | 21 | 22 | N\A | N\A | 40 | N\A | 54 | 8 | 5 | -12 | N\A | N\A | N\A | N\A | -13 | -12 | -28 | -27 |
| usmash | 21 | 22 | N\A | N\A | 40 | N\A | 54 | 8 | 5 | -12 | N\A | N\A | N\A | N\A | -13 | -12 | -28 | -27 |
| usmash | 21 | 22 | N\A | N\A | 40 | N\A | 54 | 14 | 8 | -9 | N\A | N\A | N\A | N\A | -10 | -9 | -25 | -24 |
| usmash | 21 | 22 | N\A | N\A | 40 | N\A | 54 | 14 | 8 | -9 | N\A | N\A | N\A | N\A | -10 | -9 | -25 | -24 |
| usmash | 27 | 28 | N\A | N\A | 40 | N\A | 54 | 13 | 7 | -4 | N\A | N\A | N\A | N\A | -5 | -4 | -20 | -19 |
| usmash | 27 | 28 | N\A | N\A | 40 | N\A | 54 | 13 | 7 | -4 | N\A | N\A | N\A | N\A | -5 | -4 | -20 | -19 |
| usmash | 27 | 28 | N\A | N\A | 40 | N\A | 54 | 12 | 7 | -4 | N\A | N\A | N\A | N\A | -5 | -4 | -20 | -19 |
| jab2 | 4 | 6 | N\A | N\A | 18 | N\A | 19 | 3 | 3 | -8 | N\A | N\A | N\A | N\A | -10 | -8 | -12 | -10 |
| jab2 | 4 | 6 | N\A | N\A | 18 | N\A | 19 | 3 | 3 | -8 | N\A | N\A | N\A | N\A | -10 | -8 | -12 | -10 |
| jab2 | 4 | 6 | N\A | N\A | 18 | N\A | 19 | 3 | 3 | -8 | N\A | N\A | N\A | N\A | -10 | -8 | -12 | -10 |
| jab1 | 3 | 5 | N\A | N\A | 16 | N\A | 21 | 2 | 2 | -8 | N\A | N\A | N\A | N\A | -10 | -8 | -16 | -14 |
| jab1 | 3 | 5 | N\A | N\A | 16 | N\A | 21 | 2 | 2 | -8 | N\A | N\A | N\A | N\A | -10 | -8 | -16 | -14 |
| jab1 | 3 | 5 | N\A | N\A | 16 | N\A | 21 | 2 | 2 | -8 | N\A | N\A | N\A | N\A | -10 | -8 | -16 | -14 |
| ftilt_m | 9 | 11 | N\A | N\A | N\A | N\A | 29 | 11 | 6 | -12 | N\A | N\A | N\A | N\A | N\A | N\A | -14 | -12 |
| ftilt_m | 9 | 11 | N\A | N\A | N\A | N\A | 29 | 11 | 6 | -12 | N\A | N\A | N\A | N\A | N\A | N\A | -14 | -12 |
| ftilt_m | 9 | 11 | N\A | N\A | N\A | N\A | 29 | 11 | 6 | -12 | N\A | N\A | N\A | N\A | N\A | N\A | -14 | -12 |
| nair | 7 | 12 | 7 | 33 | N\A | 15 | 44 | 6 | 4 | -3 | -3 | -11 | -26 | -21 | N\A | N\A | -33 | -28 |
| nair | 7 | 12 | 7 | 33 | N\A | 15 | 44 | 5 | 4 | -3 | -3 | -11 | -26 | -21 | N\A | N\A | -33 | -28 |
| nair | 7 | 12 | 7 | 33 | N\A | 15 | 44 | 6 | 4 | -3 | -3 | -11 | -26 | -21 | N\A | N\A | -33 | -28 |
| nair | 20 | 29 | 7 | 33 | N\A | 15 | 44 | 7 | 5 | -2 | -2 | -10 | -12 | -3 | N\A | N\A | -19 | -10 |
| nair | 20 | 29 | 7 | 33 | N\A | 15 | 44 | 7 | 5 | -2 | -2 | -10 | -12 | -3 | N\A | N\A | -19 | -10 |
| nair | 20 | 29 | 7 | 33 | N\A | 15 | 44 | 7 | 5 | -2 | -2 | -10 | -12 | -3 | N\A | N\A | -19 | -10 |
| dsmash | 19 | 22 | N\A | N\A | 45 | N\A | 49 | 18 | 10 | -12 | N\A | N\A | N\A | N\A | -15 | -12 | -20 | -17 |
| dsmash | 19 | 22 | N\A | N\A | 45 | N\A | 49 | 18 | 10 | -12 | N\A | N\A | N\A | N\A | -15 | -12 | -20 | -17 |
| dsmash | 29 | 32 | N\A | N\A | 45 | N\A | 49 | 16 | 9 | -3 | N\A | N\A | N\A | N\A | -6 | -3 | -11 | -8 |
| dsmash | 29 | 32 | N\A | N\A | 45 | N\A | 49 | 16 | 9 | -3 | N\A | N\A | N\A | N\A | -6 | -3 | -11 | -8 |
| ftilt_ml | 9 | 11 | N\A | N\A | N\A | N\A | 29 | 10 | 6 | -12 | N\A | N\A | N\A | N\A | N\A | N\A | -14 | -12 |
| ftilt_ml | 9 | 11 | N\A | N\A | N\A | N\A | 29 | 10 | 6 | -12 | N\A | N\A | N\A | N\A | N\A | N\A | -14 | -12 |
| ftilt_ml | 9 | 11 | N\A | N\A | N\A | N\A | 29 | 11 | 6 | -12 | N\A | N\A | N\A | N\A | N\A | N\A | -14 | -12 |
| fair | 14 | 16 | 9 | 34 | 36 | 19 | 39 | 18 | 10 | 1 | 1 | -9 | -14 | -12 | -11 | -9 | -15 | -13 |
| fair | 14 | 16 | 9 | 34 | 36 | 19 | 39 | 18 | 10 | 1 | 1 | -9 | -14 | -12 | -11 | -9 | -15 | -13 |
| fair | 17 | 30 | 9 | 34 | 36 | 19 | 39 | 6 | 4 | -1 | -5 | -15 | -17 | -4 | -14 | -1 | -18 | -5 |
| fair | 17 | 30 | 9 | 34 | 36 | 19 | 39 | 6 | 4 | -1 | -5 | -15 | -17 | -4 | -14 | -1 | -18 | -5 |
| fsmash_m | 18 | 21 | N\A | N\A | 60 | N\A | 64 | 20 | 10 | -28 | N\A | N\A | N\A | N\A | -31 | -28 | -36 | -33 |
| fsmash_m | 18 | 21 | N\A | N\A | 60 | N\A | 64 | 20 | 10 | -28 | N\A | N\A | N\A | N\A | -31 | -28 | -36 | -33 |
| utilt | 17 | 21 | N\A | N\A | 38 | N\A | 39 | 13 | 7 | -9 | N\A | N\A | N\A | N\A | -13 | -9 | -15 | -11 |
| utilt | 17 | 21 | N\A | N\A | 38 | N\A | 39 | 13 | 7 | -9 | N\A | N\A | N\A | N\A | -13 | -9 | -15 | -11 |
